Tiki Central / Other Crafts
IKEA Backlit Ki'i Photo Box
Pages: 1 8 replies
|
ROTR

rum on the rideau
Posted
posted
on
Mon, Apr 24, 2017 1:59 PM
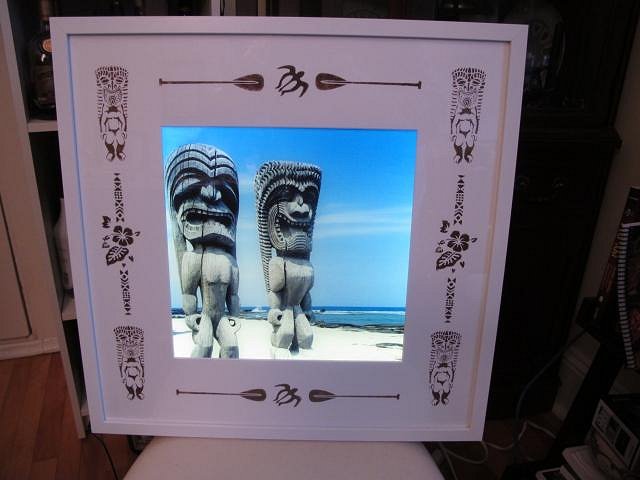
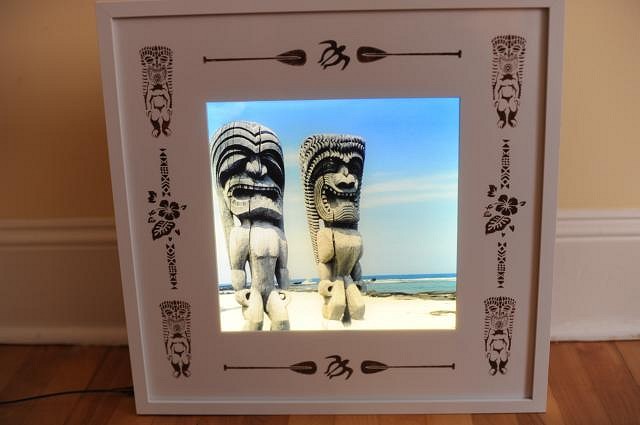
First real post here, only replies before this. Be gentle :) Couldn't find any other similar topic for this sort of thing. If someone knows a thread where it should be instead, I can place it there. Just finished this little photo project/IKEA hack. Photo was taken during our family trip to Hawaii and Pu'uhonua O Honaunau National Historical Park in April 2005.
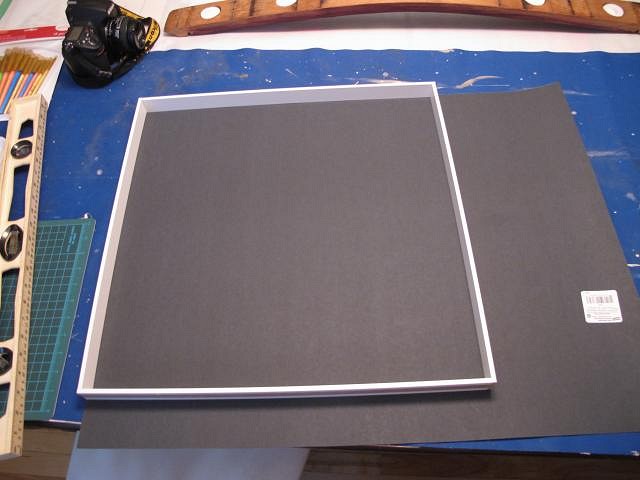
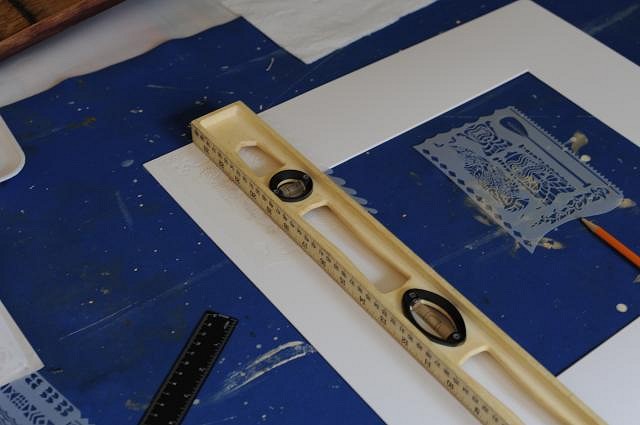
Project uses the Ribba 19 ¾” x 19 ¾ “ frame from IKEA. The frame is designed so the mat can either be at the front or the back of the frame and has a spacer frame around the inside, making this the ideal item for this project. It’s an inexpensive frame as well. Why white you ask? It’s going on a white wall in a white room and the black version of the frame also has a white mat.
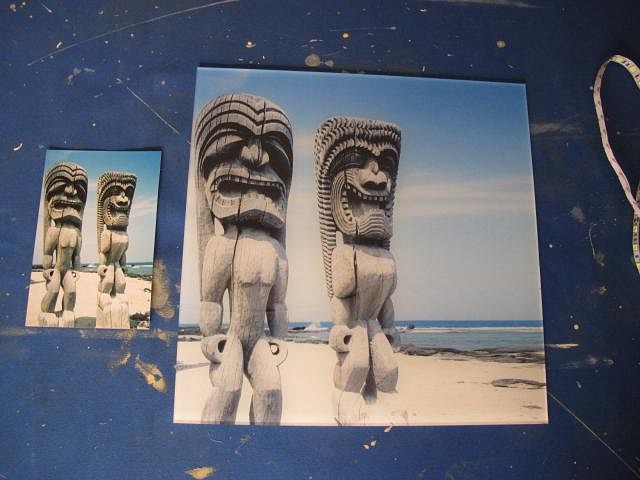
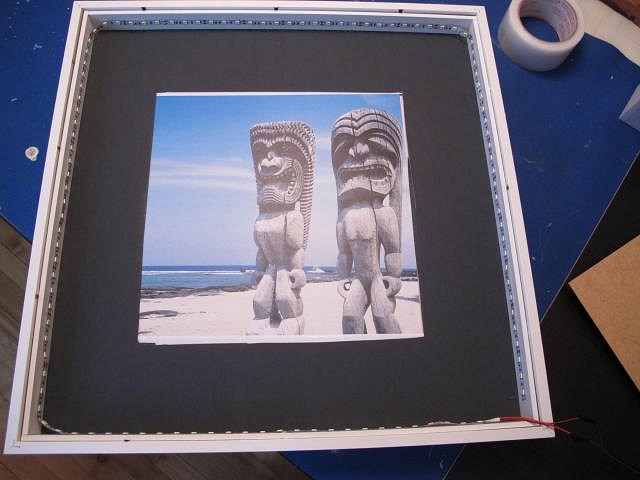
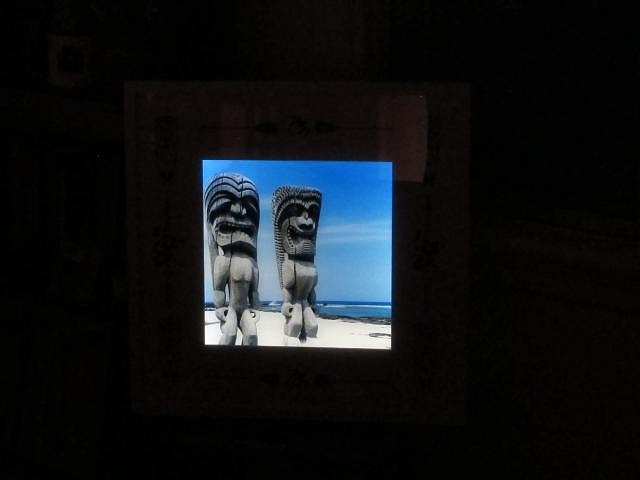
Photo was scanned and altered to fit the square format of the mat (I really wish they had a non-square edition of this frame). A backlit no-backing acrylic transparency was ordered to fit over the 12”x 12” opening in the mat.
As you can see this is thick acrylic and can be used in a number of applications.
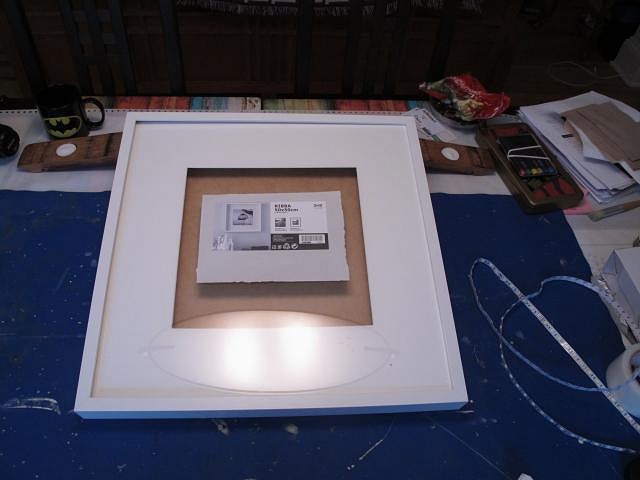
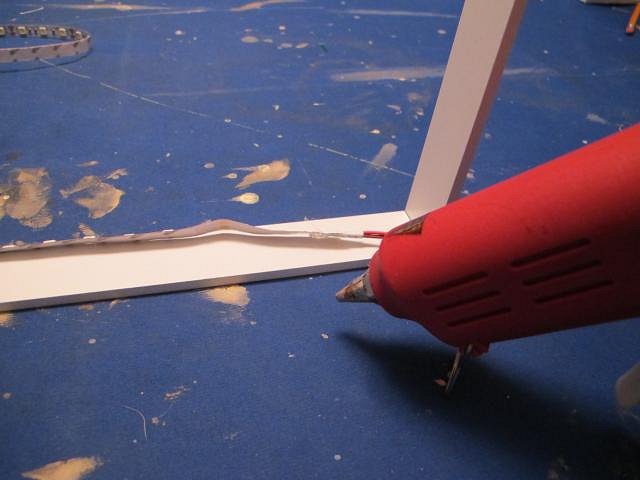
Remove backing and inner frame. As each individual LED light can be seen through the white mat, a simple piece of black project paper can be measured and cut out (using the frame and mat as guides) to place over the white mat so that it’s between it and the led lights.
Next step is attaching the non-waterproof (no coating) white LED strip to the removable frame. LED strips are described as self-adhesive. Well maybe. Use a few drops of hot glue as well on every side to secure (I was told to wait a few hours to ensure glue was really dry).
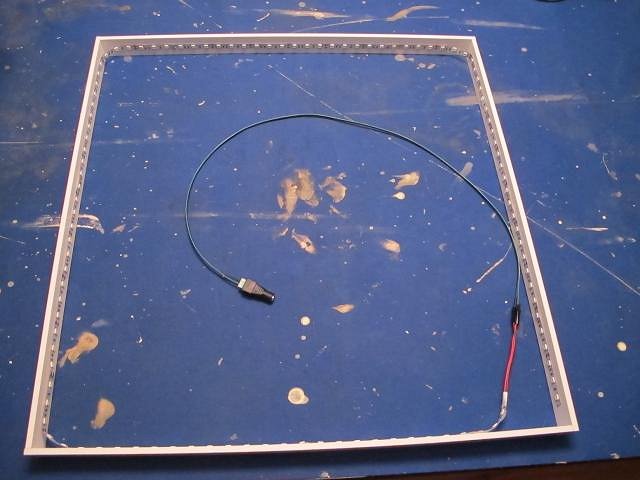
LED strip added all around. Note extra length of wire added to adaptor for easier connection to wall socket. I did this at the end to avoid long dangly wire while moving around inner frame.
Yay!
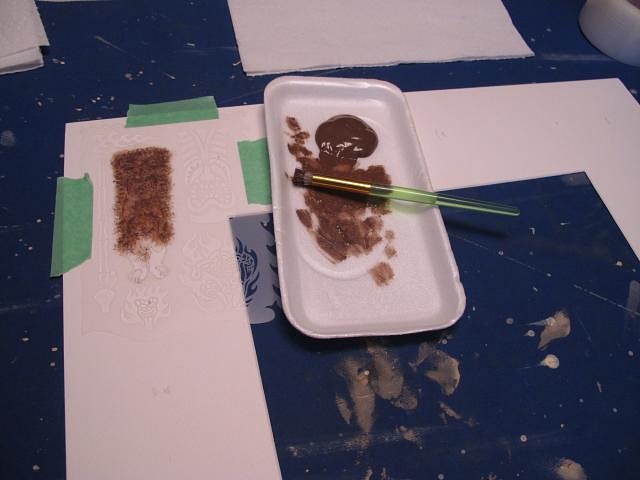
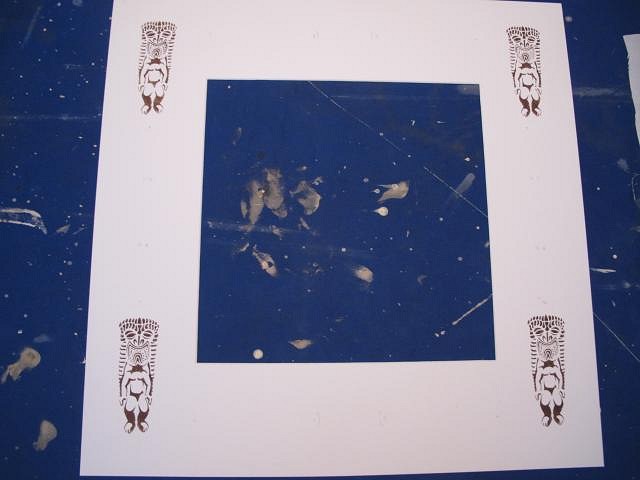
As my ability to draw is actually worse than my ability to type, it’s time to stencil.
For those who have never stenciled, use a very dry brush, with only a little paint and tapping so as not to blotch.
The House at Ku Corner
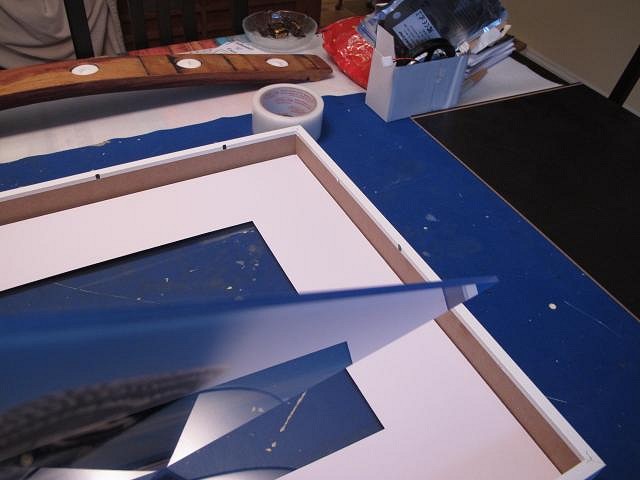
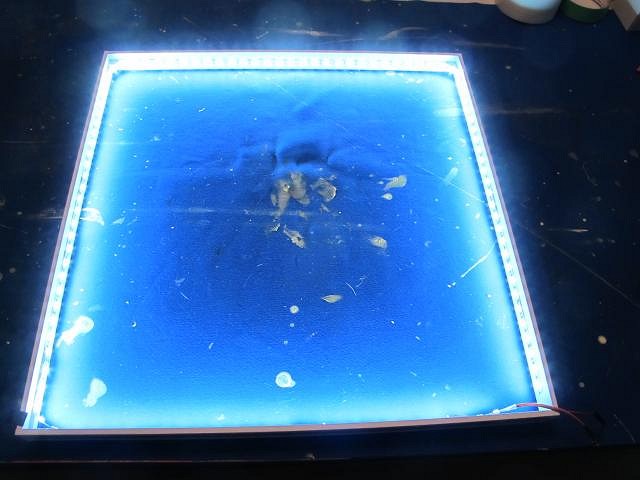
As light is able get though the sides of this thick transparency, black electricians tape was added on the edges to keep light from going in from the sides. White duct tape used to secure picture to mat. Pre-cut black project paper added. Inner frame added (note wire still short here). Bottom corner of backing cut off with scissors to allow cord exit.
Finished project regular light..
..and then lit up.
My new night light
|
|
C

croe67
Posted
posted
on
Mon, Apr 24, 2017 2:28 PM
THAT is AWESOME!!!! I am entirely impressed! |
|
H

hang10tiki
Posted
posted
on
Mon, Apr 24, 2017 2:59 PM
R on the R- Way kool |
|
M

MaukaHale
Posted
posted
on
Mon, Apr 24, 2017 4:17 PM
Thank you for your creative idea! |
|
EJ

El Jefe
Posted
posted
on
Mon, Apr 24, 2017 4:32 PM
Nice job. Where did you get the stencils? |
|
ROTR
rum on the rideau
Posted
posted
on
Mon, Apr 24, 2017 4:51 PM
I got them on Amazon. They are Artool Tiki Master Mini Series. There are 6 5x7 sheets in the package. They are made for model cars etc. Here is a good look at them : https://www.rexart.com/product12318.html Hope this helps |
|
M

MadDogMike
Posted
posted
on
Mon, Apr 24, 2017 5:14 PM
"The house at Ku corner" I see what you did there :lol: Great project RotR. And a perfect place to post it. You can add your next project on this thread and keep all your Tiki creativity together in one place. (You can edit the title of your thread by editing your first post) |
|
T

TikiAno
Posted
posted
on
Mon, Apr 24, 2017 7:44 PM
Very cool, Mike. Always a fan of groovy Ikea hacks. |
|
R

rbeyer68
Posted
posted
on
Tue, Apr 25, 2017 7:18 AM
Great work and write-up. Thanks for sharing. Rick in Texas |

Pages: 1 8 replies