Tiki Central / Home Tiki Bars
Home bar in a surf shop...Now open
Pages: 1 26 replies
|
K

kahalakruzer
Posted
posted
on
Thu, Feb 15, 2018 4:17 PM
I figured after almost 8 years, it was time to check back in with Tiki Central. Since then, a few home bars have been built and demolished, thousands of miles have been traveled in pursuit of far-off tiki bars, many successful luau's have been had, thousands of cocktails have been consumed, and dozens of friends have been turned onto the life of sophisticated savagery. Now that that's out of the way, here I go. A few weeks back, my boss had expressed his interest in having me build a tiki bar in one of our retail stores that was undergoing a remodel. Basically something for people to look at and take pictures of. He had seen a small bar I had built in our warehouse with some stuff that I had had laying around (literally. After tearing the bar out of my apartment years ago, all of my stuff had been sitting in a back room at my house.) Of course I bit at the chance. Between planning, prep, searching all of the antique stores I could find, letgo/offerup/craigslist, and a few trips to Oceanic Arts, I have 15 days in (excluding Sundays) from start to finish. Since I'm short on time, I figure I'll post a photo of the little temporary bar that was built in the hallway of our warehouse that inspired it all, and a couple before shots of the open space that the bar now resides in.
I wish I had uploaded some better photos earlier, but here's the bar that was built to store some of my stuff at work. It's about as basic as it gets as far as a good tiki bar goes, but that's for a purpose. Almost all of the stuff in it has to come down for a big luau that a group of friends and I throw each year (plus a ton of other pieces that are still stored at my house.) I think I may throw some palm panels up on the ceiling to cover the awful acoustic tiles, and accent the trim with some bamboo, but for the most part, I don't plan on spending too much more time on it.
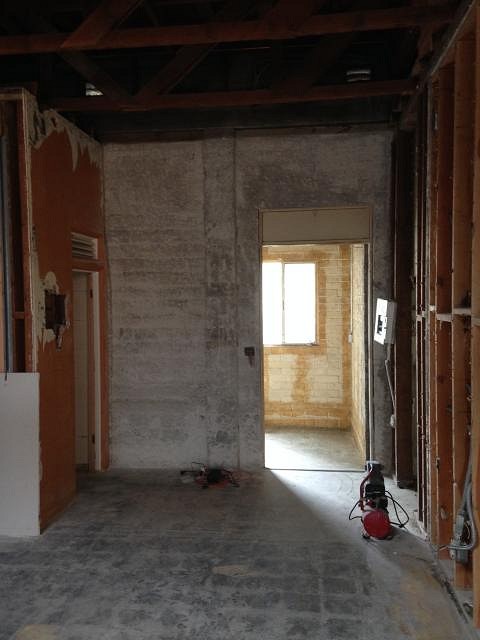
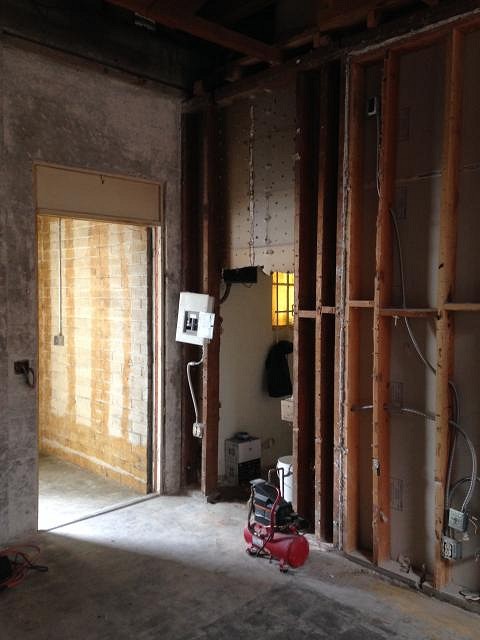
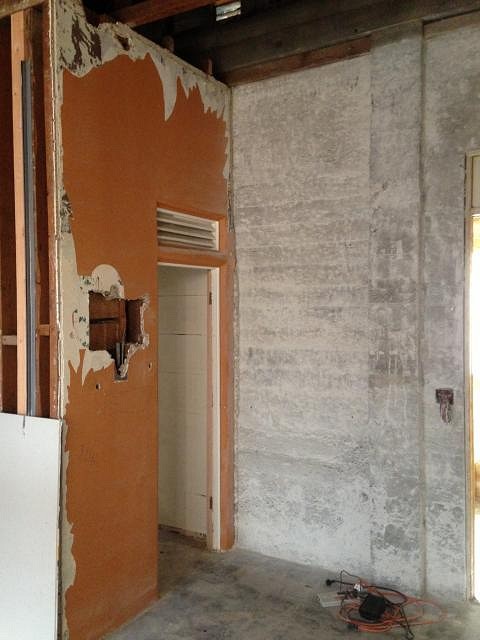
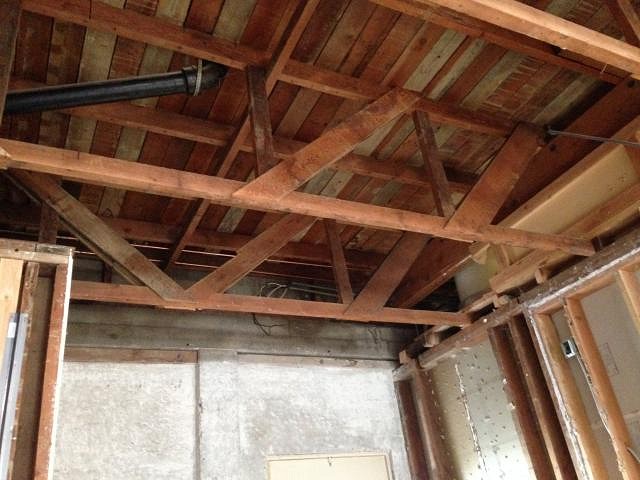
And here's the space I had to work with. It's a back corner of an expanded building that we were remodeling. It's 11' wide by 6' deep by 14' tall. Not exactly the dream space I would have imagined, but beggars can't be choosers. I'll get some progress shots going in the next couple of days. [ Edited by: kahalakruzer 2018-02-26 15:02 ] |
|
M

MaukaHale
Posted
posted
on
Thu, Feb 15, 2018 4:21 PM
Looking forward to seeing your progress. |
|
M

MadDogMike
Posted
posted
on
Thu, Feb 15, 2018 4:40 PM
SOunds like a fun project! |
|
H

howlinowl
Posted
posted
on
Thu, Feb 15, 2018 5:23 PM
Your boss lets you build a bar at work.....sounds like my dream job! Taking applications? howlinowl |
|
H

hang10tiki
Posted
posted
on
Thu, Feb 15, 2018 5:37 PM
OJT |
|
PP

Prikli Pear
Posted
posted
on
Thu, Feb 15, 2018 8:24 PM
Very cool. Sounds like a lot fo fun! Thanks for coming back to share this with us! |
|
K
kahalakruzer
Posted
posted
on
Fri, Feb 16, 2018 7:54 AM
I found a few more photos of the bar in the warehouse at various stages. Nothing too spectacular, but you'll get the idea.
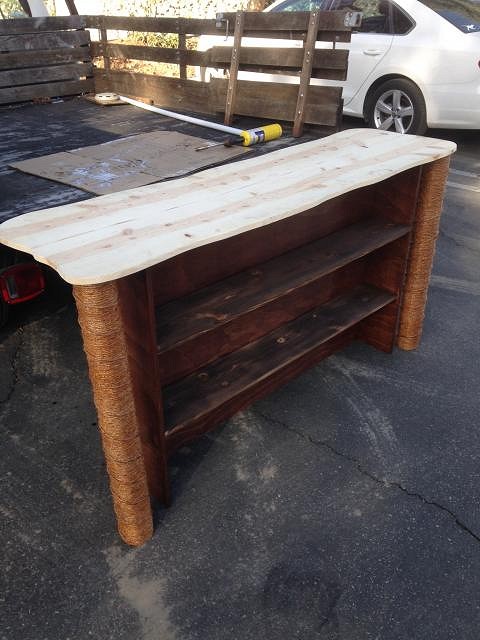
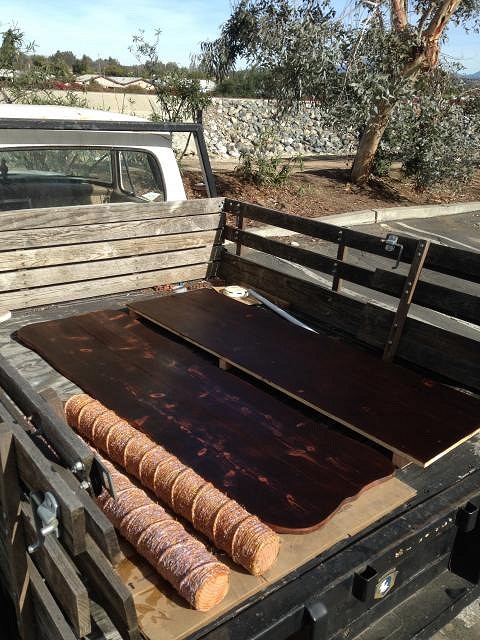
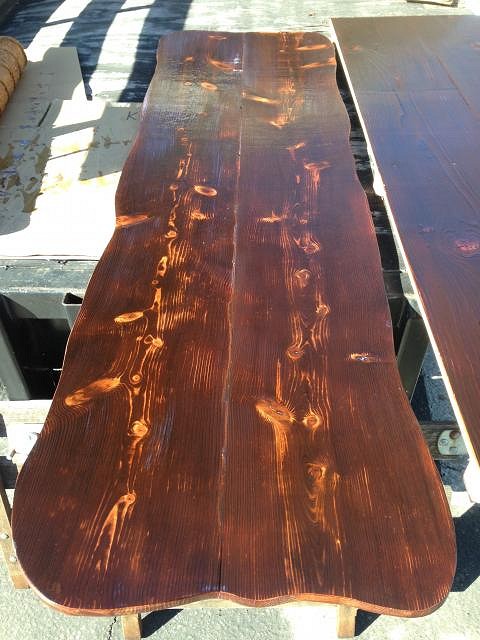
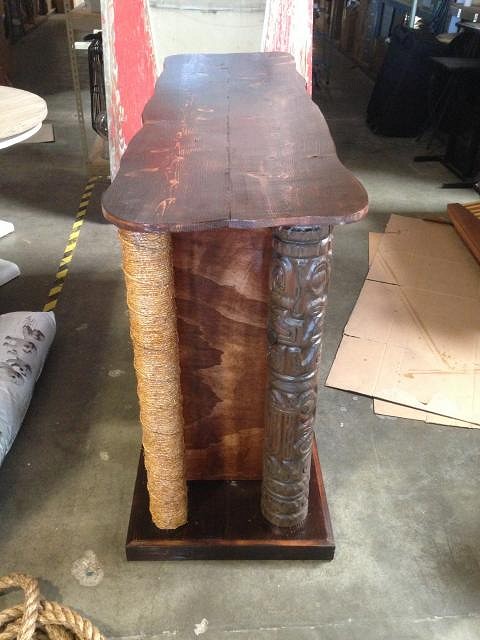
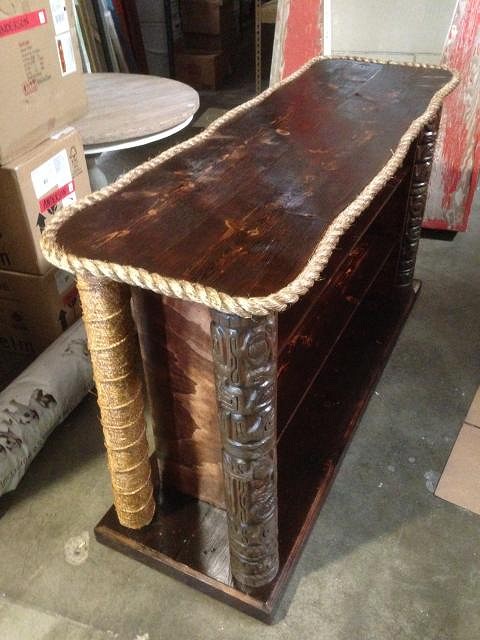
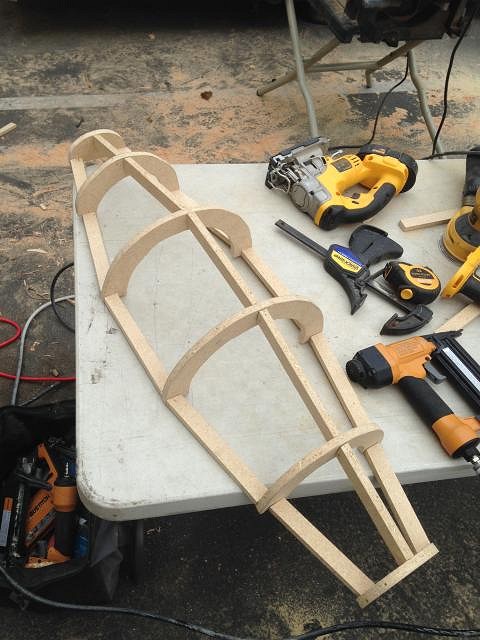
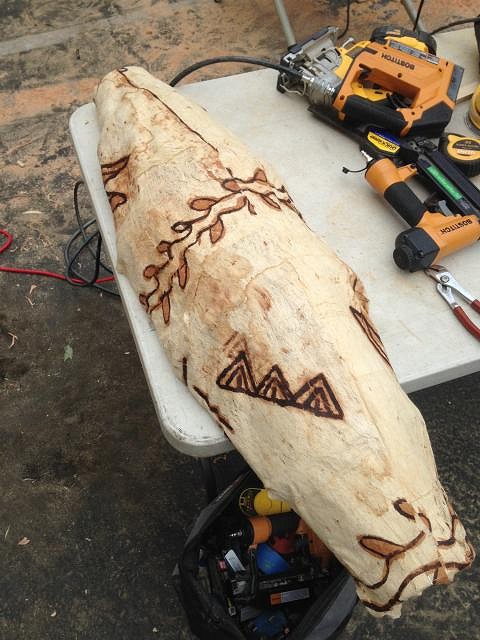
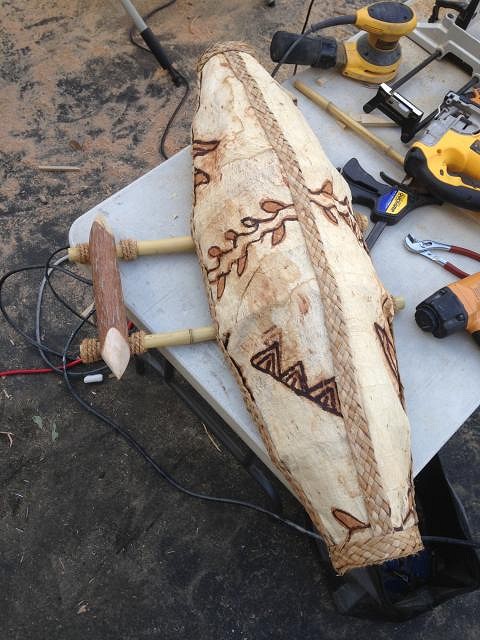
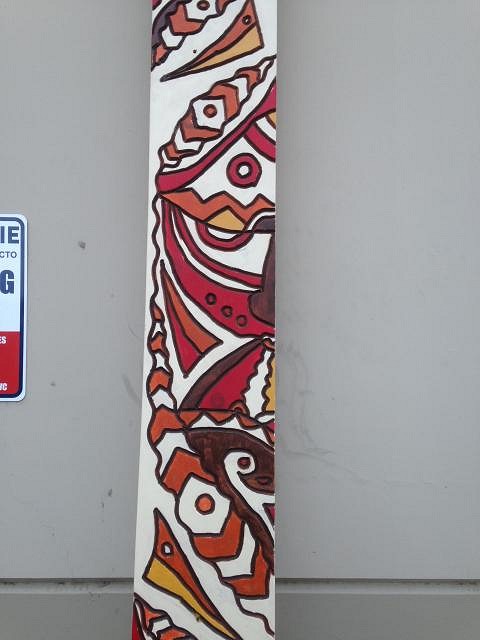
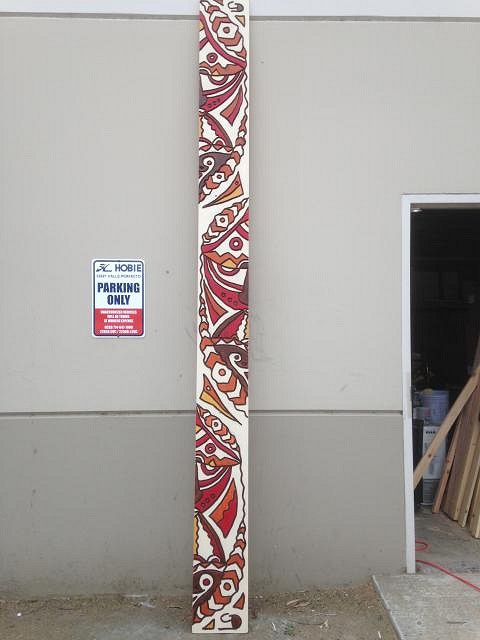
And here's the start of the actual bar. I wanted to go with kind of a nautical theme on this one. The top and base of the bar are made of glued up pine boards, burned, brushed and varnished, and the center structure is just a nice finish plywood that I stained and varnished. I wanted to make the bar able to be free floating if needed, so it's actually more of a double sided bookshelf. That way we're able to showcase items/merchandise things that we've got for sale. The front posts are the standard railing posts from Oceanic Arts, and the back are 4x4's that I wrapped with about 500' of line and then shellac'd the hell out of.
I realized I don't have any finished photos of the actual bar, so we'll have to wait for the final reveal in situ. [ Edited by: kahalakruzer 2018-02-16 10:14 ] |
|
PP
Prikli Pear
Posted
posted
on
Fri, Feb 16, 2018 8:08 PM
That's looking mighty fine. The OA tiki posts on the front are cool, and the rope/photos/epoxy bartop turned out really nice. If it's any consolation, the matches look fine to me! |
|
T

TabooDan
Posted
posted
on
Sat, Feb 17, 2018 9:12 AM
Hey Kahalakruzer, welcome back!! Mahalo |
|
V

VampiressRN
Posted
posted
on
Sun, Feb 18, 2018 6:55 PM
That is a great little space to work in and what a cool boss!!! I love the storage room photos. Looking forward to your progress photos. |
|
K
kahalakruzer
Posted
posted
on
Mon, Feb 19, 2018 9:37 AM
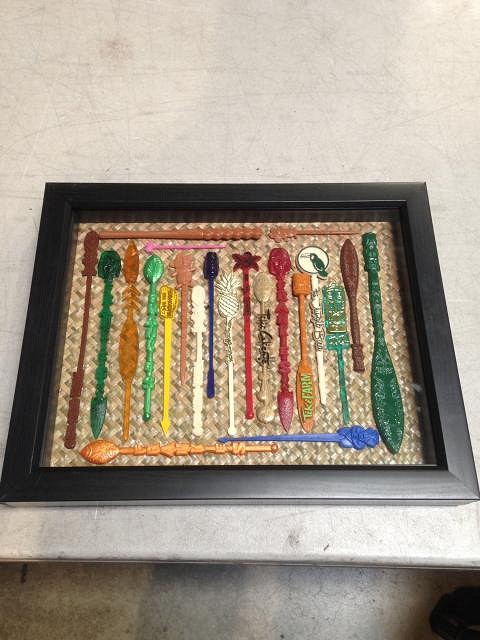
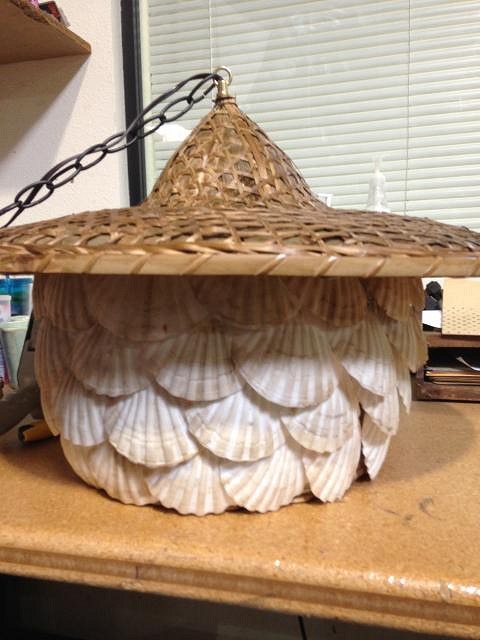
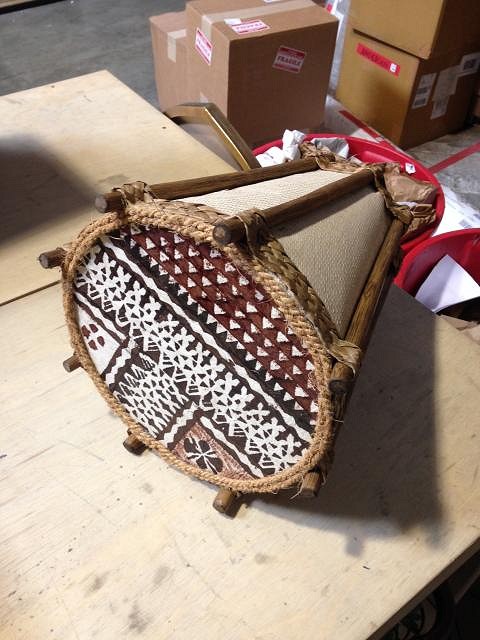
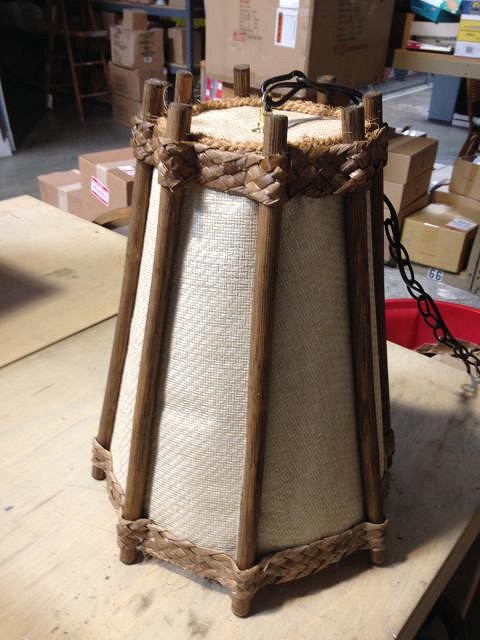
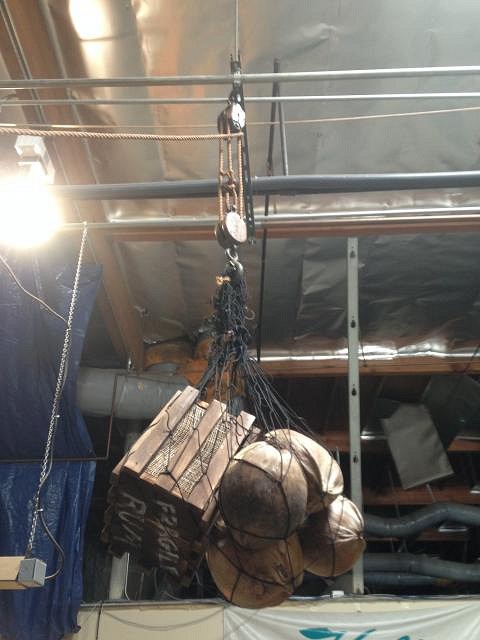
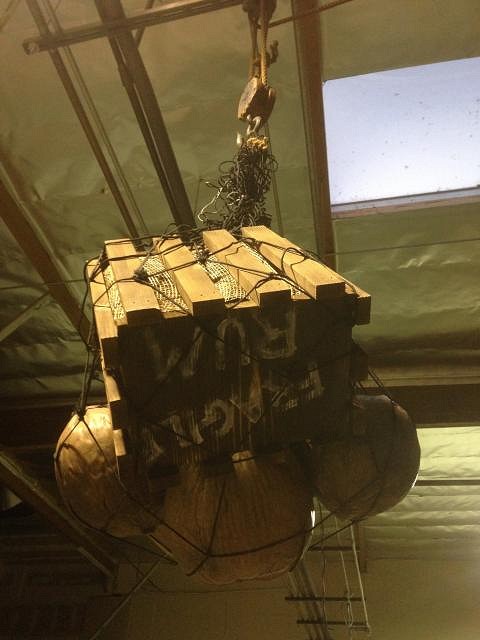
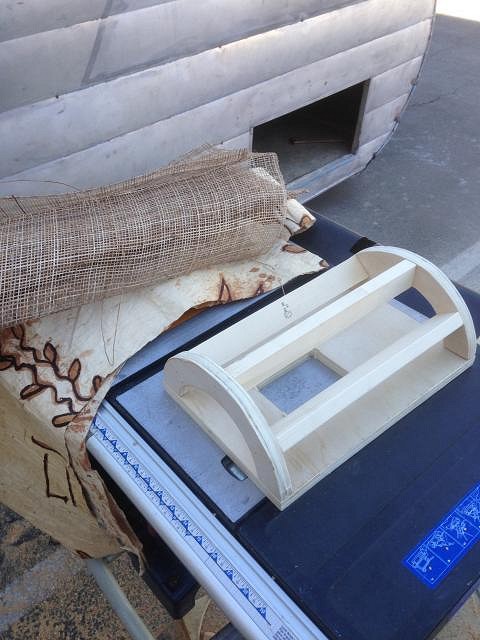
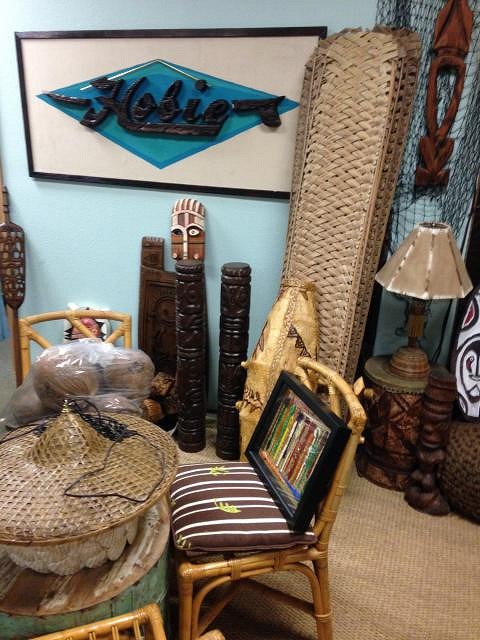
So I figured I'll try and post all of the prep shots before I post the actual installation of the bar. Spent most of the 15 days building lamps and accessories and cutting trim. I am horrible at stopping while working to document anything, so bear with me on this one. I find myself taking a progress shot and then realize later that I never took a picture of the finished product. If you couldn't tell by the amount of pictures with our company logo in the background, I'll make it even easier for you. Here's a Witco World Map inspired piece that was poached from our warehouse and ended up being used in the shop. |
|
PP
Prikli Pear
Posted
posted
on
Mon, Feb 19, 2018 1:26 PM
Holy moly! You don't go in for half-measures, do you? Those pieces look amazing and you haven't even put the damn thing together yet! I have to admit to a small degree of envy--what takes you a few a few hours to complete would take me a few days, at best! Seriously, fantastic work on the lamps, the decor, the carvings, all of it! |
|
C

CosmoReverb
Posted
posted
on
Mon, Feb 19, 2018 1:54 PM
Wow, hella cool!! Love how much work you are putting into getting all those personal touches in. Definitely can't wait to see the final result. |
|
H
hang10tiki
Posted
posted
on
Mon, Feb 19, 2018 7:05 PM
Dang |
|
K
kahalakruzer
Posted
posted
on
Tue, Feb 20, 2018 7:24 AM
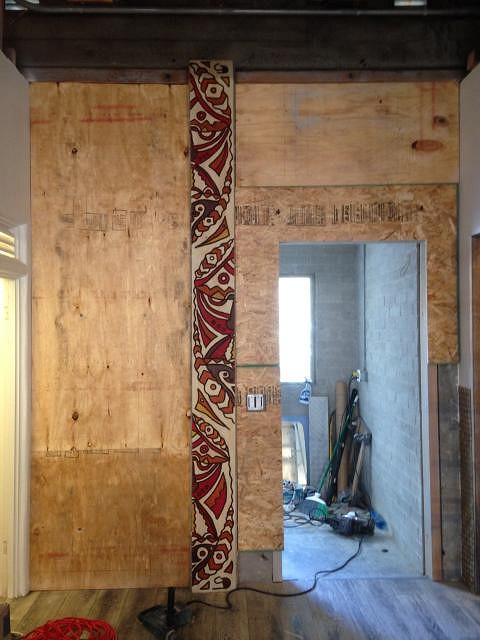
Thanks guys for all of the compliments. This whole project couldn't have been done without the wealth of knowledge everyone's freely bestowed for all of these years on Tiki Central. So, finally came the day where I was actually able to start installing the bar. I had 3 days to get it done before the store opening, and when I showed up, there was still half a wall of wood missing. Needless to say, the construction crew helped out by furring out some plywood on the back wall so I had a giant mounting surface instead of trying to get everything attached to the concrete. With the amount of stuff going up on the back wall, that turned out to be one of my best ideas yet. Sometimes, even the sun shines on a dog's ass I guess. |
|
H
hang10tiki
Posted
posted
on
Wed, Feb 21, 2018 8:59 PM
Making me thirsty |
|
K
kahalakruzer
Posted
posted
on
Thu, Feb 22, 2018 8:02 AM
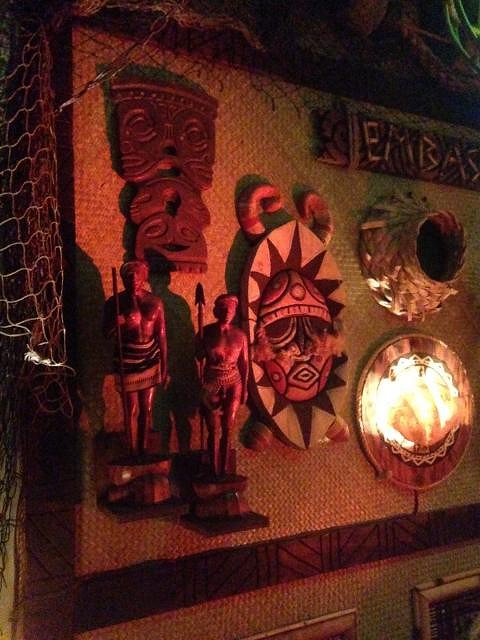
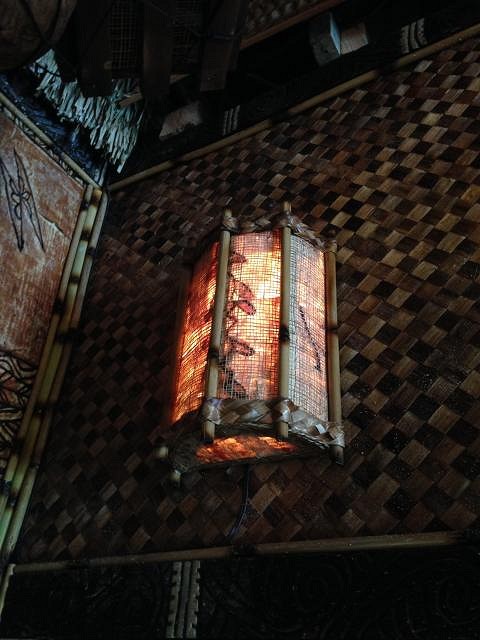
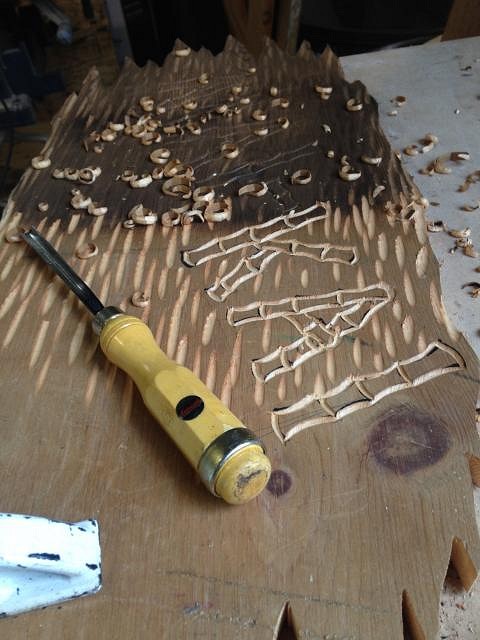
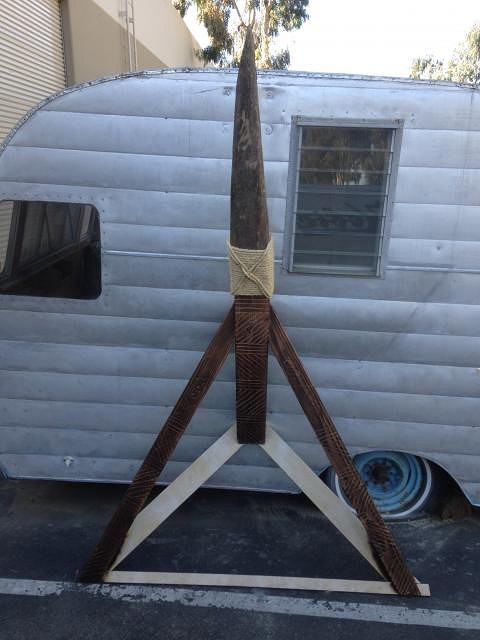
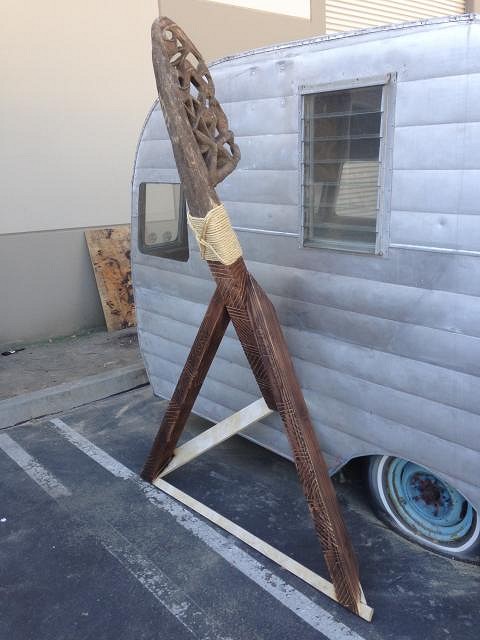
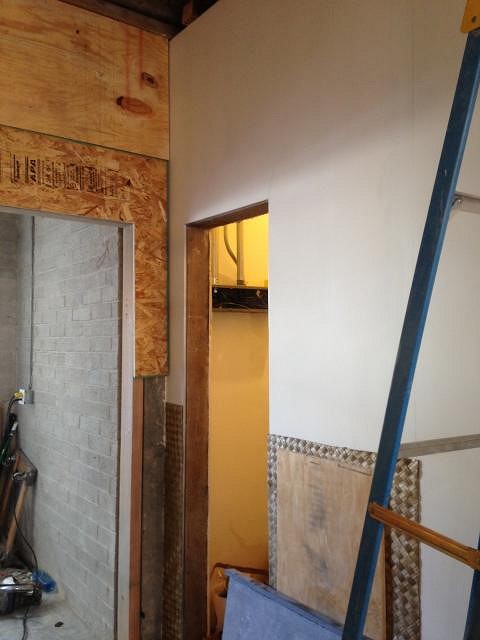
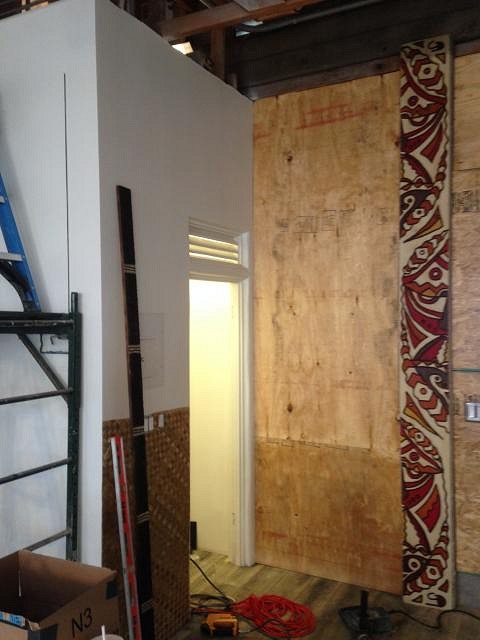
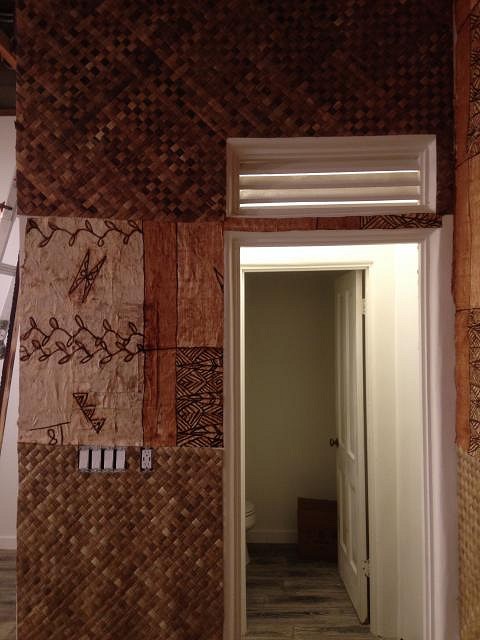
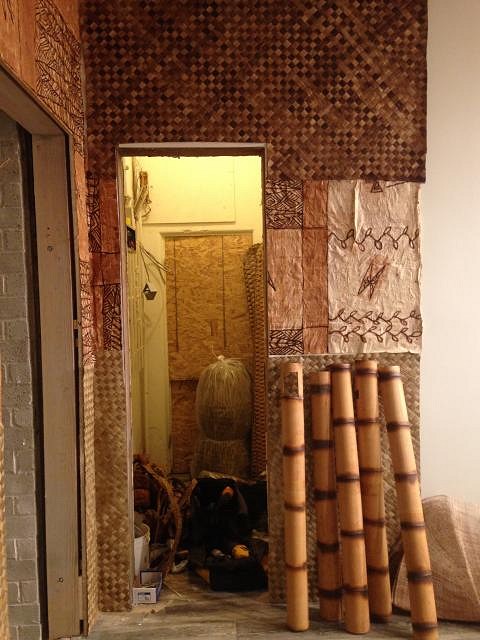
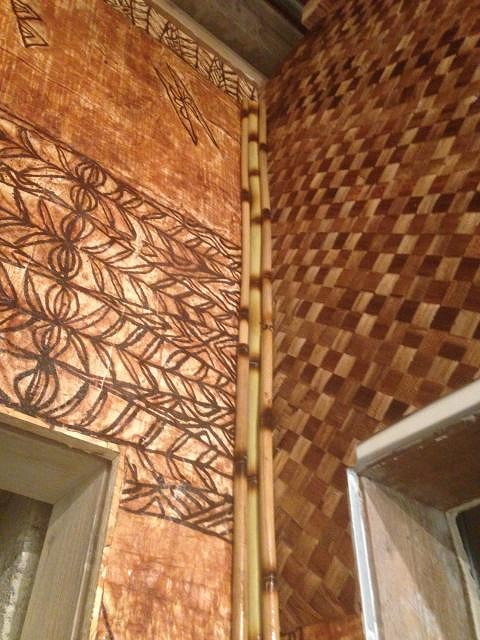
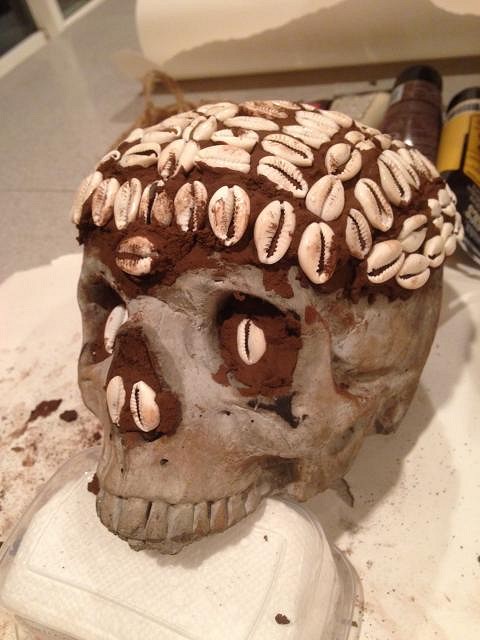
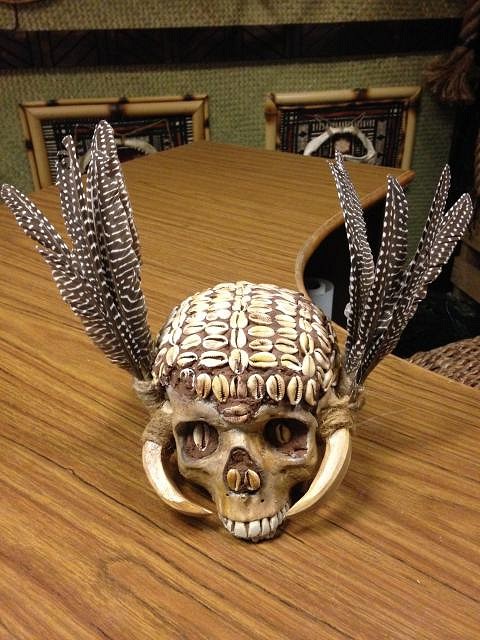
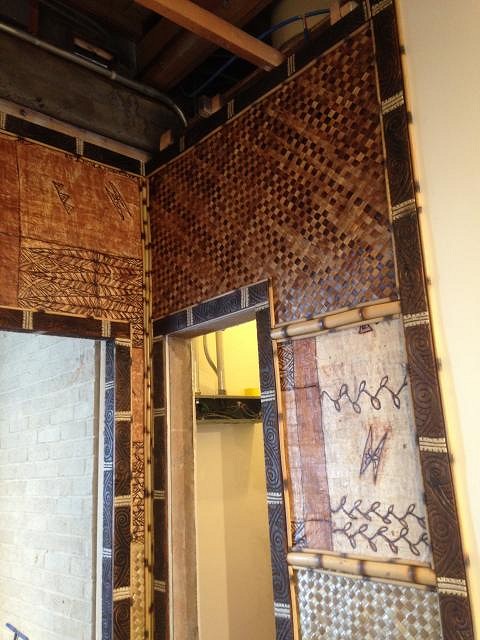
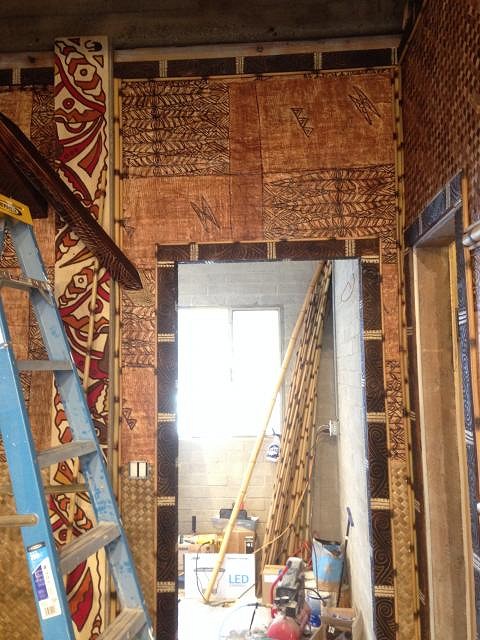
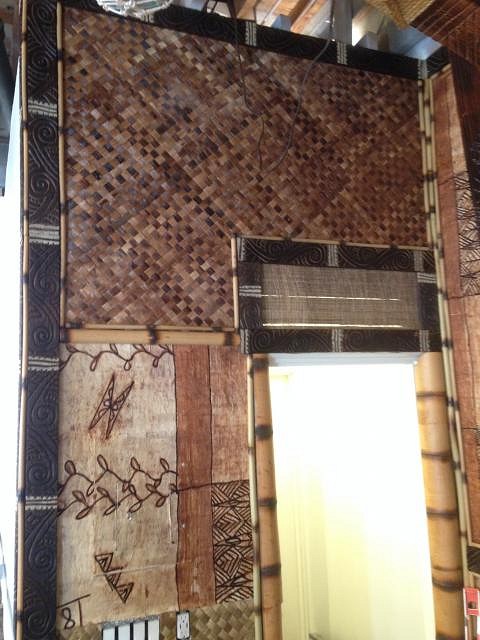
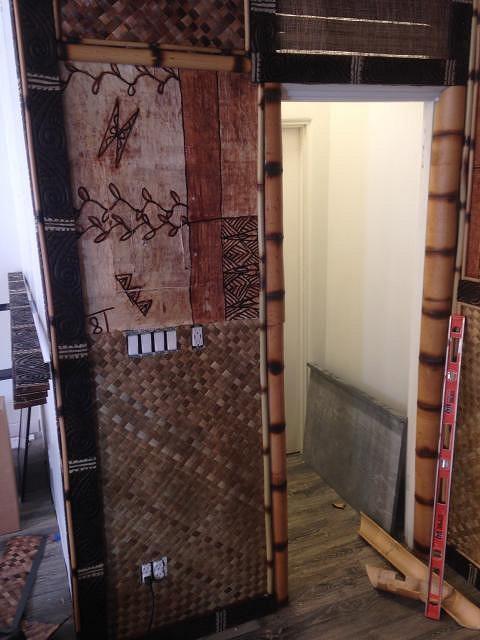
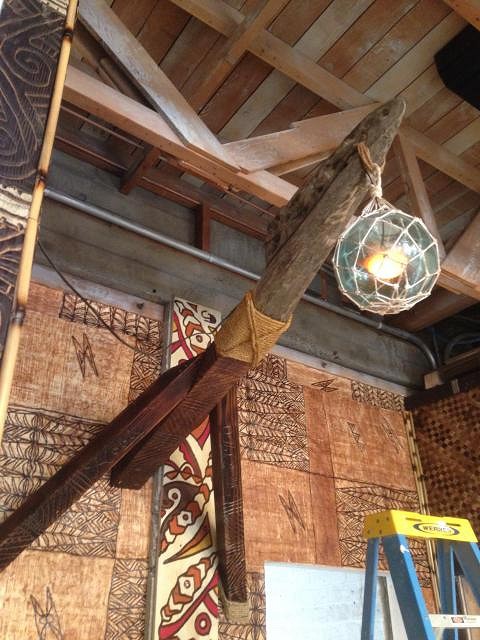
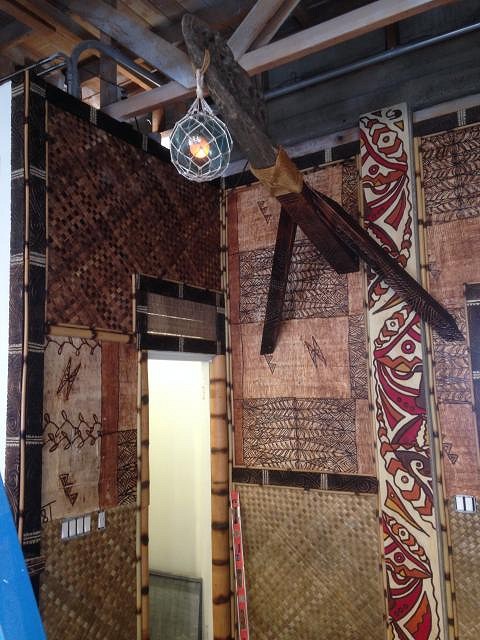
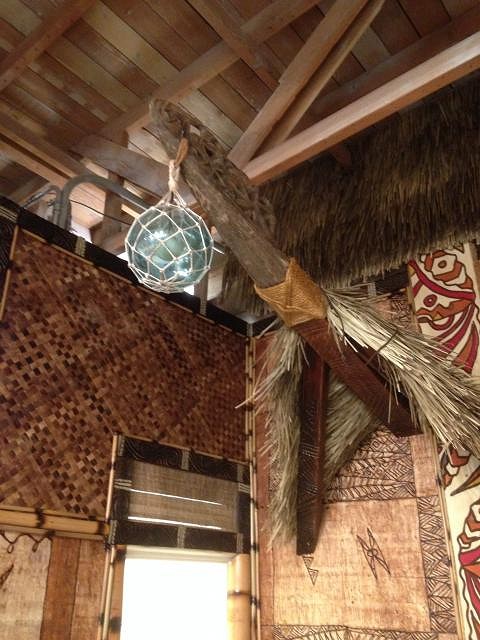
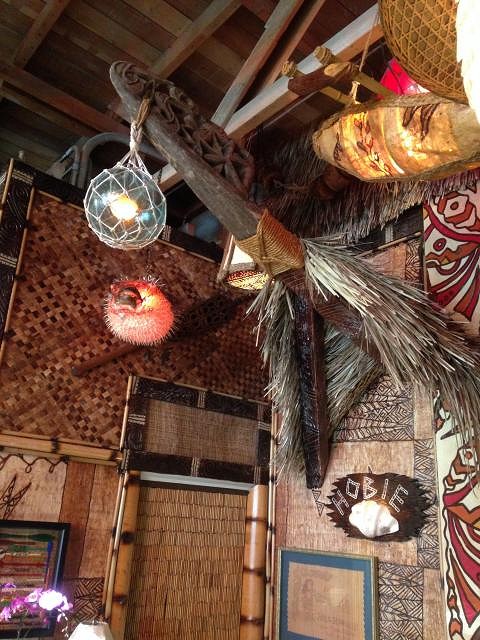
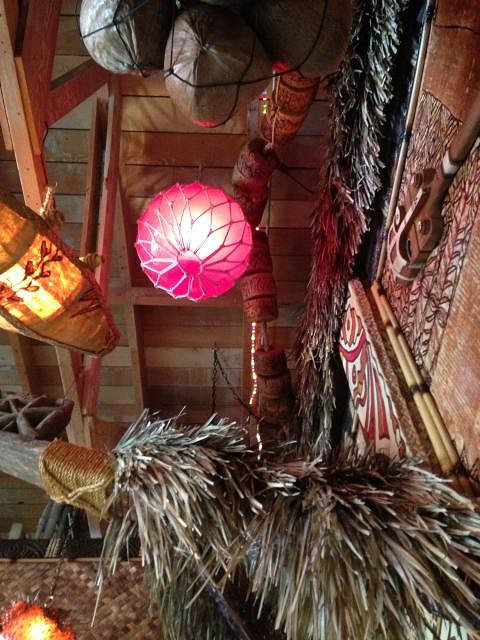
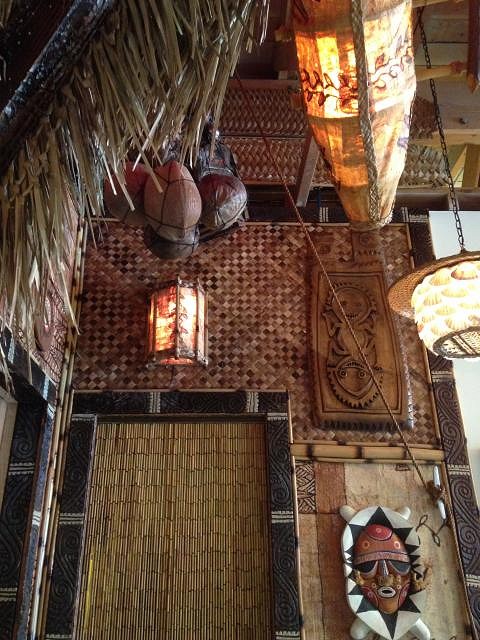
On one of the nights after work, I had the idea to make my own version of an Asmat ancestor skull. I have a wheelbarrow full of concrete skulls on the side yard that I cast for a flaming-skull-lava-rock-fire-pit thing we do at our yearly luau, so I grabbed one of those, some craft concrete and dye, and some cowry shells and went to work. As tempting as it was to go out back and cut the actual tusks from my pet pig in the back yard, I made the boar tusks out of scrap wood. And here's the day two installation. I got all of the trim up, all of the bamboo up, a coat of varnish over everything, and as you can see, the A-frame installed. I forgot to get pictures before, but I made the puffer in fish float lamp with a cool hand made glass float that I found with a perfect hole cut in the top already. I had to remember how to tie up the netting, but got it all worked out eventually. Bringing back my early tiki days. As you can see, none of the doorways had actual doors in them. I found out on day two that neither of the side doorways were going to have doors installed. That became a bit of a conundrum. The back wall was going to have a door, but it just had to be designed...and built...and installed...and decorated...and it all had to be done by the end of the next day. Needless to say, I wasn't getting much sleep that night. |
|
H

hiltiki
Posted
posted
on
Thu, Feb 22, 2018 9:29 AM
Love your skull creation, I might just use the idea on my skulls in the backyard. |
|
PP
Prikli Pear
Posted
posted
on
Thu, Feb 22, 2018 11:24 AM
Wait, you put a puffer lamp inside a glass float? Dude, that's hard core! |
|
L

LoriLovesTiki
Posted
posted
on
Thu, Feb 22, 2018 2:38 PM
WOW! All I can say is wow.... |
|
D

danlovestikis
Posted
posted
on
Thu, Feb 22, 2018 3:56 PM
Super cool. The skull look authentic. Wendy |
|
T

tikitube
Posted
posted
on
Fri, Feb 23, 2018 12:41 PM
Wow, really incredible work. Can't wait to see more progress pix as it comes together. :) Cheers, Jeff |
|
K
kahalakruzer
Posted
posted
on
Mon, Feb 26, 2018 3:00 PM
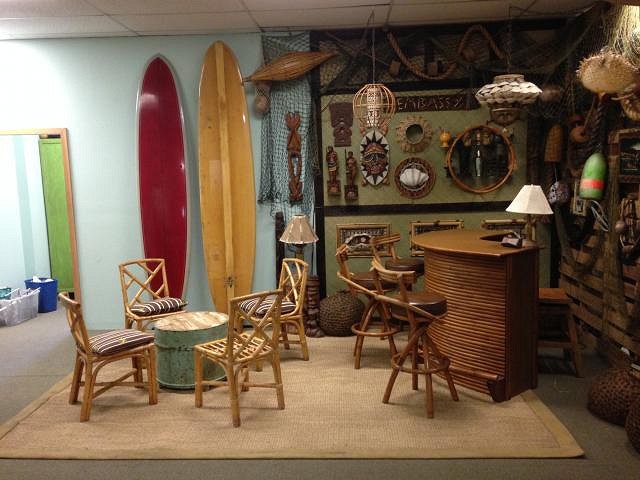
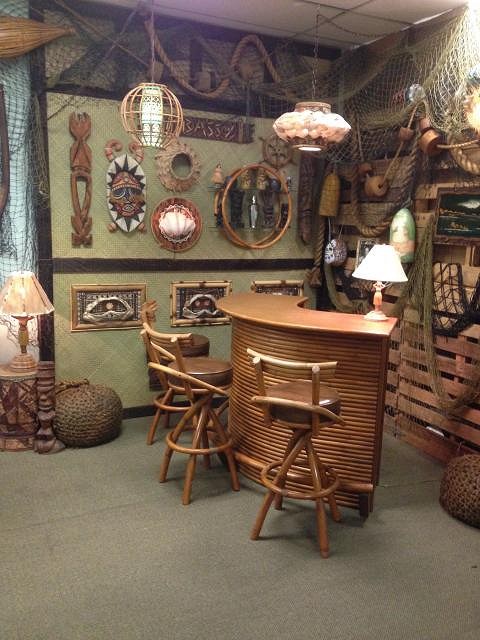
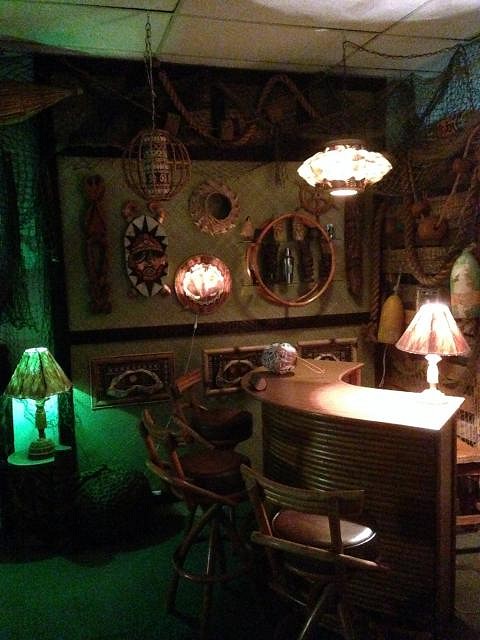
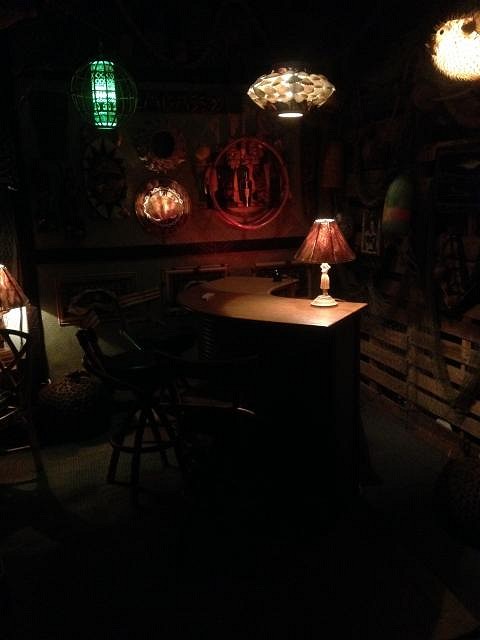
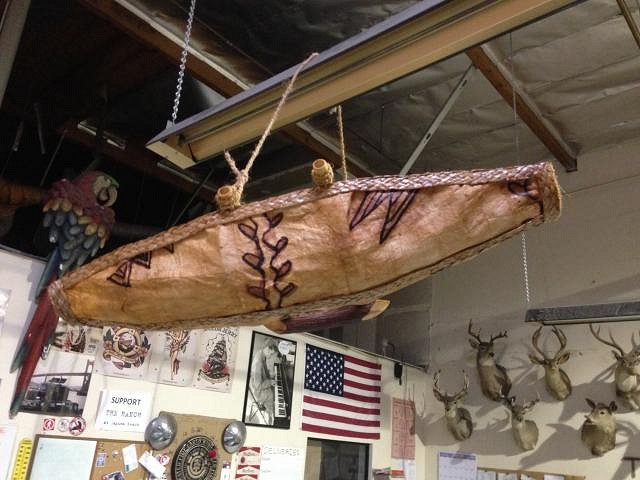
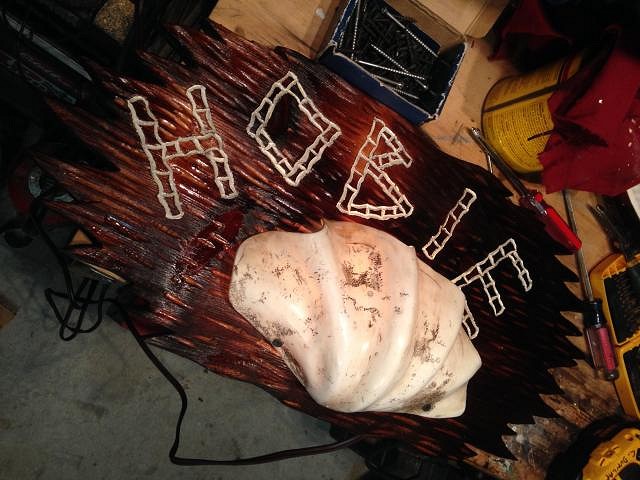
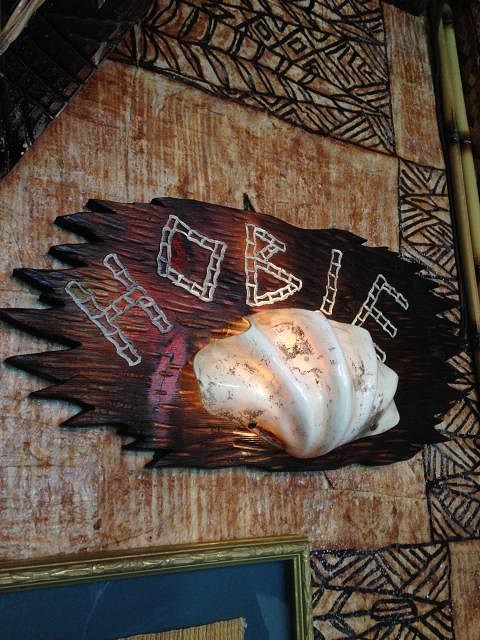
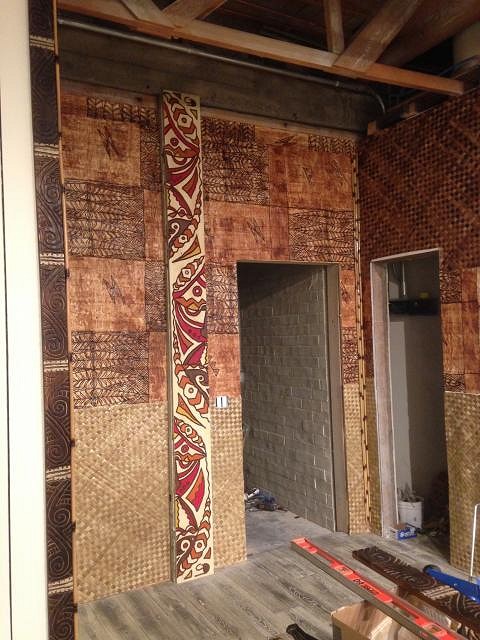
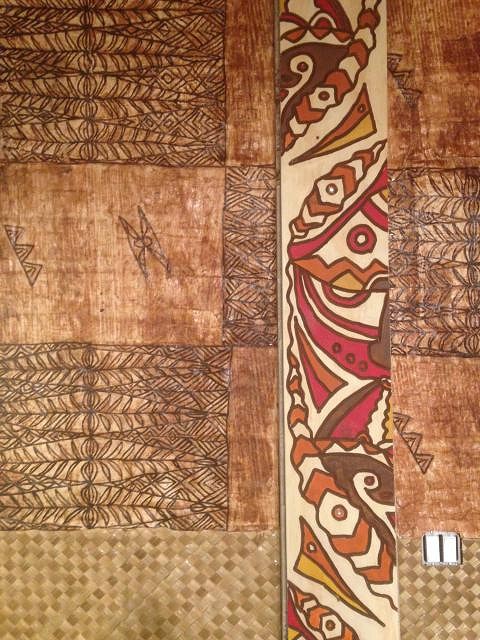
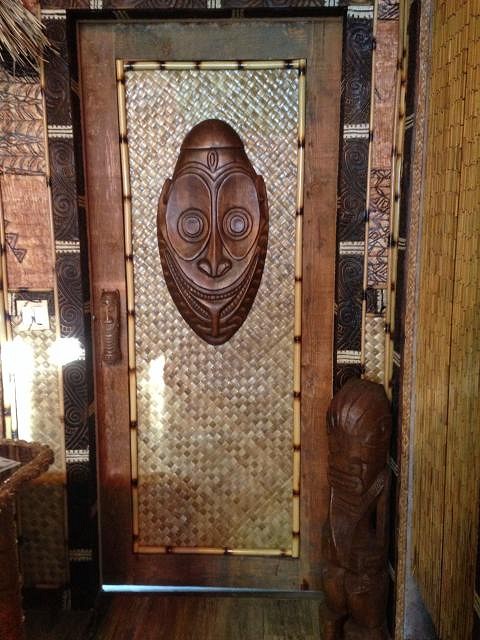
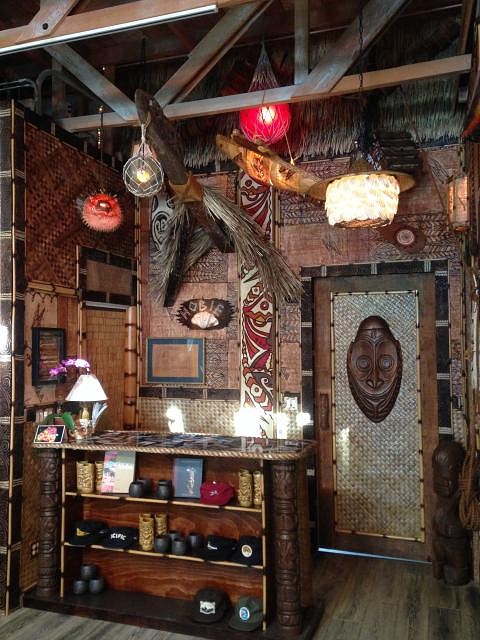
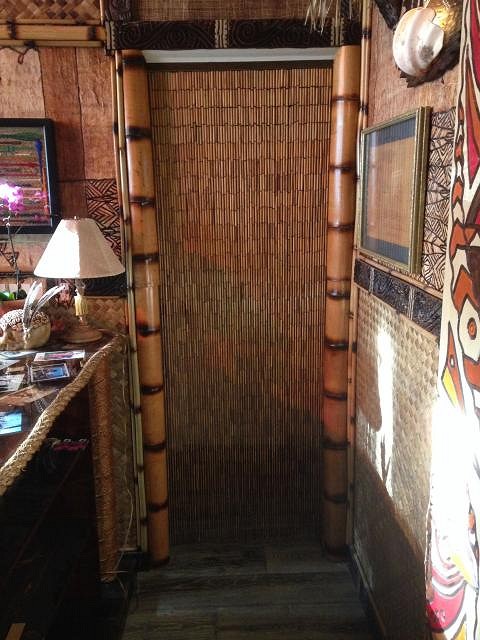
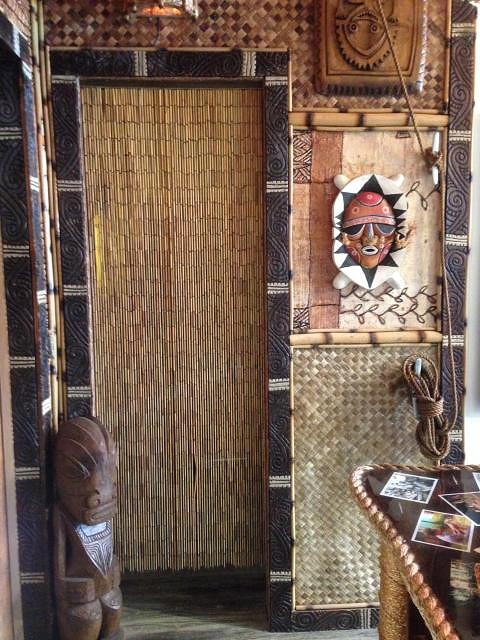
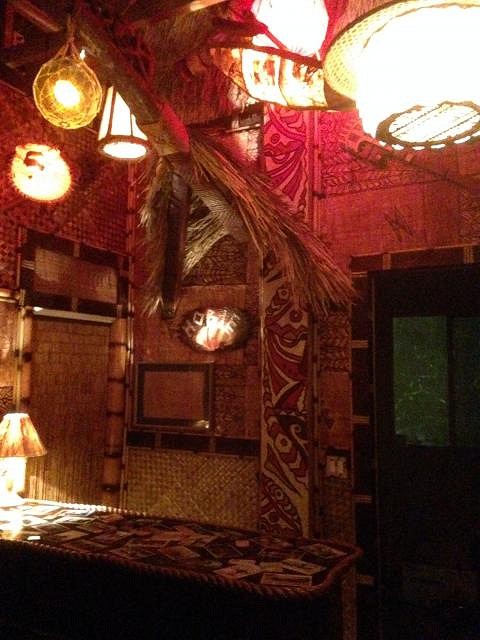
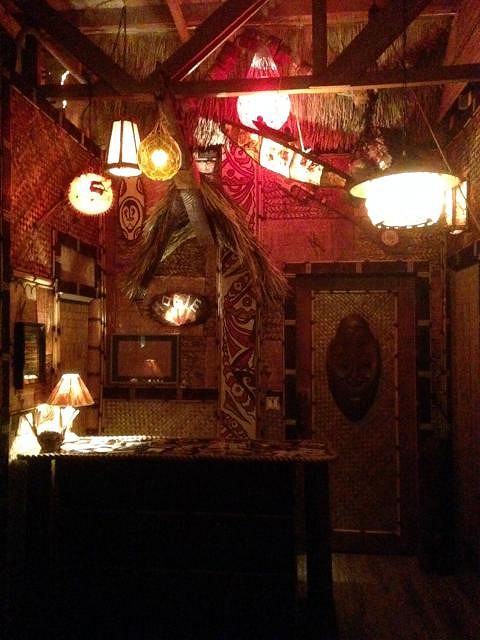
So here's the finished product. I knew I only had 3 days to finish the whole build, so this was gonna be the long day. I had coated everything with a water based spar varnish on night two, so all I had to do on day three was button up some loose ends with the trim, get all of the light switches and outlets covered in tapa, get a door built/installed/decorated, hang all of the thatch, fireproof everything and decorate. Obviously it took longer than expected, but after a 16 hour day, it all came together. Well that's it. Unlike most home bars, you don't need an invitation to check this one out. It's in our Hobie store in downtown Laguna Beach, and can be seen any time the store is open. And for the surf history nerds, there's also a cool little museum exhibit in the store that was done in conjunction with the Surfing Heritage and Cultural Center out of San Clemente. It delves into local Laguna Surf History, the story of our founder Hobie Alter and all of his innovations in surfing and sailing, and a forefather of the retail surf shop, Dick Metz who was basically the first guy to ever think of selling merchandise besides surfboards in surf shops. If you come by to see it all in person, he's the guy who graces the top of the bar with his world travels and exploits. As always, a tiki bar is never finished, so I'll post updates when I inevitably start tweaking things. I've already planned on adding a mug shelf somewhere at the insistence of my boss. Hey, working for a family run company definitely has it's benefits... [ Edited by: kahalakruzer 2018-02-26 15:04 ] |
|
BB

Bam Bam
Posted
posted
on
Mon, Feb 26, 2018 3:54 PM
That turned out great - and in just three days!? Amazing. |
|
PP
Prikli Pear
Posted
posted
on
Mon, Feb 26, 2018 8:05 PM
I applaud your efforts. To go from zero to 60 in such a short amount of time, you must've been channeling the ghost of Bamboo Ben! And he's not even dead yet! |
|
H
hang10tiki
Posted
posted
on
Mon, Feb 26, 2018 8:19 PM
Strong and fast work |
|
T
tikitube
Posted
posted
on
Mon, Feb 26, 2018 10:14 PM
Wow, that turned out fantastic!! Regarding the fireproofing spots, I've noticed some spots on some lampac that I hung on the ceiling, but they're almost greasy and I think I could wipe them off if I tried. But they're more clear than white...I think it's the fireproofing beading up over the stain I had applied. Sounds like yours reacted to another treatment. |


Pages: 1 26 replies