Tiki Central / Other Crafts
Tiki Ano Mugsville: "I made it out of clay."
Pages: 1 2 3 4 5 6 7 8 337 replies
|
G
GROG
Posted
posted
on
Mon, Jul 29, 2013 4:55 PM
Damned double post. [ Edited by: grog 2013-07-29 17:43 ] |
|
BT
Badd Tiki
Posted
posted
on
Mon, Jul 29, 2013 5:15 PM
I like him, he's got personality. Though he looks a bit thirsty, gonna have to hurry and fill him up :) That's a great bowl too. I dragged my feet so I think I'm gonna miss the swap :( so I guess some other lucky taffer will end up with it. |
|
D
danlovestikis
Posted
posted
on
Mon, Jul 29, 2013 5:32 PM
Good job on the Moai design. It's fun watching you work, Wendy |
|
L

LoriLovesTiki
Posted
posted
on
Mon, Jul 29, 2013 5:38 PM
I really like your moai! |
|
T
TikiAno
Posted
posted
on
Tue, Jul 30, 2013 8:32 AM
Grog, the Moai's pretty dry. The photo was taken at a bit of an angle, it's not really as skewed as it looks (in the photo). I am happy with the progress of shaping/ carving a Moai's face, though, each one seems to evolving (no, that's not a dig at cavepeople, Grog). Badd, thanks a lot. I've been enjoying your posts, your clay work is out of control. Gorgeous stuff. The cigar store indian and the pineapple vase on your Deviant art page are killer (too). Wendy, thanks (once again). I'm hoping it's improving. The wheel has slightly distracted me recently, need to get back into carving and hand building. New project is planned, a bit different but definitely tiki. Lori, thanks so much! [ Edited by: TikiAno 2013-07-30 08:36 ] |
|
H

hang10tiki
Posted
posted
on
Tue, Jul 30, 2013 8:52 AM
Dig the leaning MOAI (reminds me of Grog) :) Jon |
|
T
TikiAno
Posted
posted
on
Wed, Jul 31, 2013 11:44 AM
Jon/ Hang10, ha! Thanks very much. I try to keep moving forward, hoping things are looking better.... |
|
T
TikiAno
Posted
posted
on
Thu, Aug 1, 2013 4:42 PM
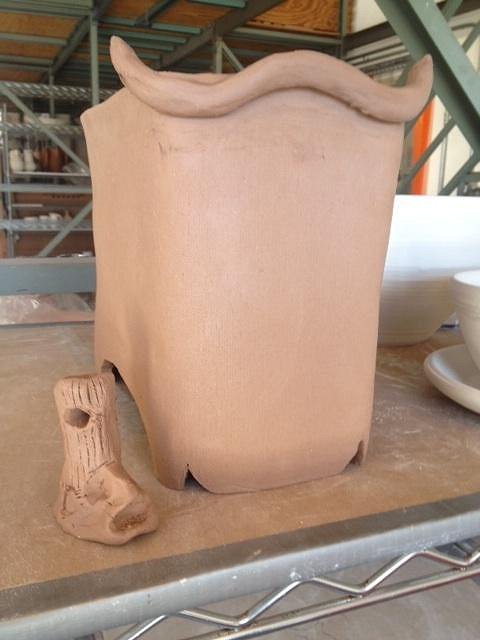
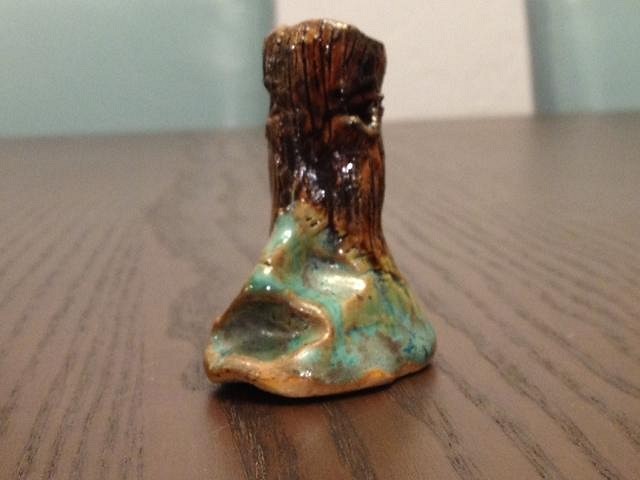
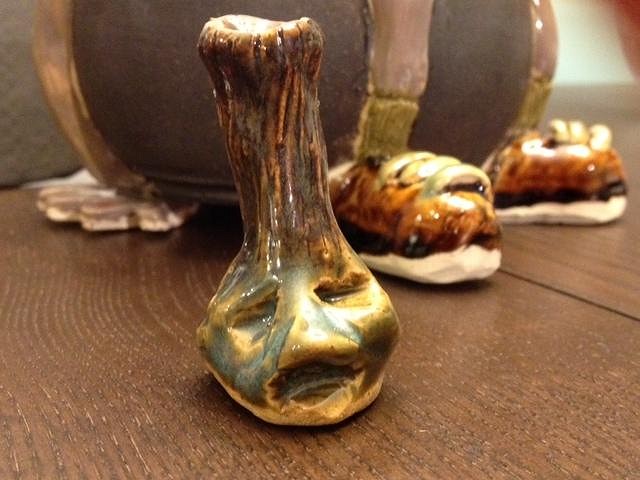
I know, Water Buffalo no.2 isn't quite tiki, but there's a very shrunken head drying out next to him. This will be one of a few little items for friends at Tiki Oasis.... This form-making style (thin slab rolled around rectangular foam) will be used for some other more tiki-oriented projects, including a few new square mugs. |
|
T
TikiAno
Posted
posted
on
Fri, Aug 9, 2013 9:39 PM
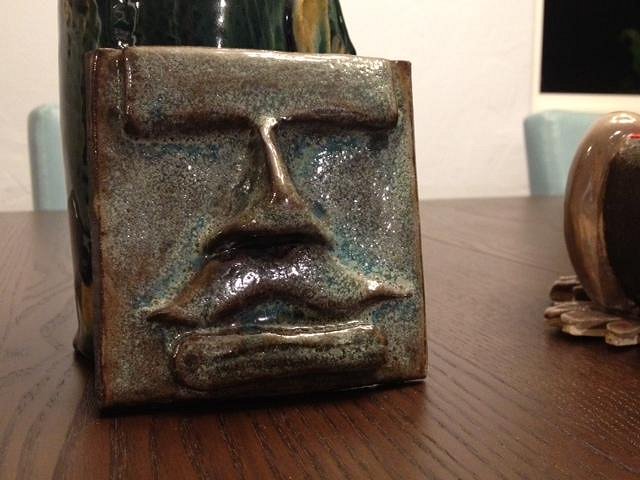
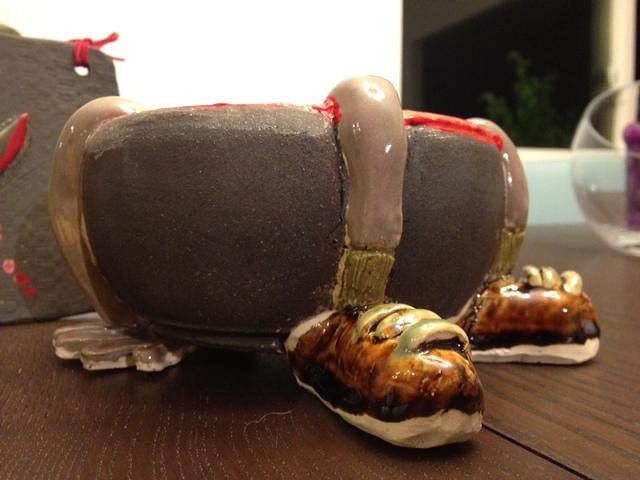
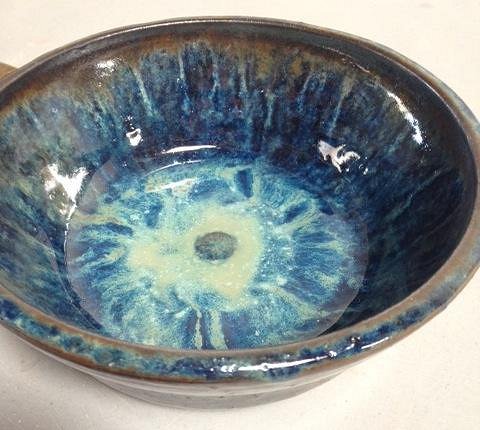
A few things came out of the kiln today- I have to wait til daytime to get a better shot of the leaning Moai. I really like how the glaze job turned out on the latest Stachetiki tlie (all six layers of glaze): Finished "Anthropologist Stew" Bowl for the Cannibal Art Swap: I have another 'Stachetiki to glaze, was waiting to see how the first one turned out w/ the excessive glaze layers (which is necessary for this black clay). Feedback always appreciated. Thanks for lookin'. |
|
H

hang10tiki
Posted
posted
on
Fri, Aug 9, 2013 10:23 PM
U kicked ars brother, hope I get it. Jon |
|
M
MadDogMike
Posted
posted
on
Sat, Aug 10, 2013 8:25 AM
I like the Leaning Moai, he's got character. The glaze on the StachTiki is very cool. Water Buffalo? :lol: The cannibal projects came out awesome, see ya in a week. (Sorry about the hole in the roof!) |
|
T
TikiRootsRocka
Posted
posted
on
Sat, Aug 10, 2013 8:52 AM
Awesome shrunken head! Really like the glaze. Keep 'em comin'! |
|
D
danlovestikis
Posted
posted
on
Sat, Aug 10, 2013 9:49 AM
The swap is tonight. I may get to own a Tiki Ano! You dinner time cannibal is adorable. The shrunken head abstract makes me think of Bosko. You are on a roll. See you next week, Wendy |
|
T
TikiAno
Posted
posted
on
Sun, Aug 11, 2013 3:32 PM
Mike, thanks a lot. The Leaning Moai came out of the kiln looking interesting, will post a pic soon. Lesson learned, though: runny glaze under not so runny glaze not the best combination. I will try to remember to bring a little bit of that black clay for you at Oasis. The worst part of the ceiling was surprising my wife when she came back home from a business trip ( it wasn't my fault, though). :) Well, that and the drywall dust everywhere. This was water buffalo no. 2, not tiki but ceramic related. Just gave it as a bday gift, never got a chance to take a pic after it came out of the kiln. (there are a few pics on the last one earlier in this thread). TRR, thanks a lot. Glad you like the shrunken heads. I guess the Cannibal Art Swap inspired me. Wendy, thanks so much. Look forward to seeing you this week! I should bring a box of my wares for you to choose one??? :) |
|
D
danlovestikis
Posted
posted
on
Sat, Sep 7, 2013 10:14 AM
45 minutes to Marketplace. I hope you make it. Wendy |
|
T
TikiAno
Posted
posted
on
Sat, Sep 7, 2013 6:15 PM
Hi Wendy, Unfortunately I wasn't able to make it- which is probably better for my wallet. It would have been fun to see everyone but I wasnt able to leave work until 12, which didn't leave a lot of time to make it up there.... Hope to see you at a future marketplace! David / Tiki Ano |
|
D
danlovestikis
Posted
posted
on
Sat, Sep 7, 2013 6:21 PM
It was fun but a super hot day. We were all melting and doing imaginary hugs due to sweat. I'm sure I'll see you somewhere in the future, we try to get around. Wendy |
|
T
TikiAno
Posted
posted
on
Tue, Sep 10, 2013 7:09 AM
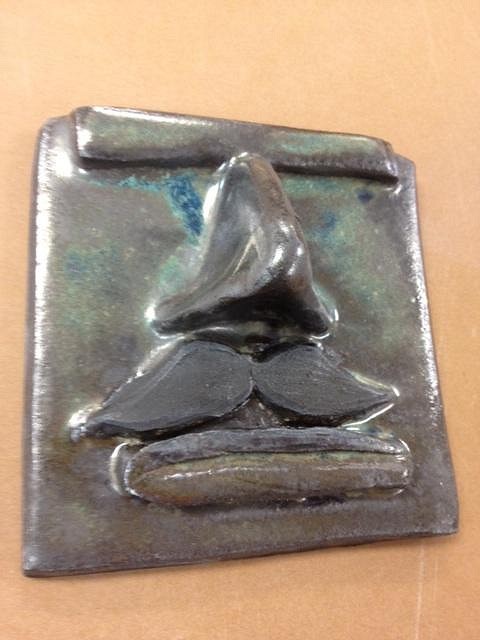
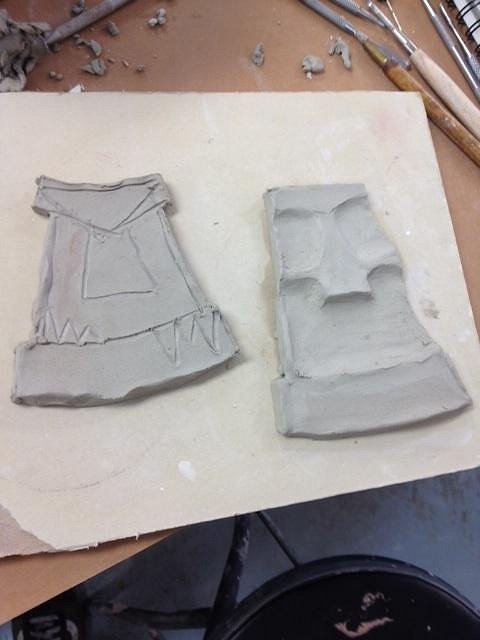
It's been a while since posting any recent work- work, etc getting in the way- been throwing more pieces, not tiki per se, on a wheel, so not posting those pics here. Second Mustache Moai tile came out of the kiln- made with that black clay, it has six coats of glaze (necessary for that crazy clay body). I left the 'stache unglazed, which leaves it rough and a great charcoal black color: Also started cutting and carving two smallish tiles (work in progress): |
|
H

hang10tiki
Posted
posted
on
Tue, Sep 10, 2013 7:51 AM
Kool color |
|
B
Bowana
Posted
posted
on
Wed, Sep 11, 2013 7:40 PM
Hmm..I am seeing interesting possibilities.... |
|
BT
Badd Tiki
Posted
posted
on
Wed, Sep 11, 2013 8:47 PM
Diggin the look of the wild moai :) |
|
T
TikiAno
Posted
posted
on
Thu, Sep 12, 2013 10:13 AM
Thanks Dave & Badd. I've had the Wild Things Tiki in my sketchbook a while, just trying a new process. The clay body (1/2 & 1/2) was pretty wet, not great for carving. I admit, I'm more of an "additive" than "subtractive" clay guy, so now trying multiple directions at once. Been throwing too much, slightly off on my hand building. Ha. Dave, still look forward to meeting up one of these days and clay jamming. |
|
H

hang10tiki
Posted
posted
on
Sat, Sep 14, 2013 5:31 AM
Made me think of a drink coaster .... |
|
T
TikiAno
Posted
posted
on
Mon, Sep 16, 2013 3:34 PM
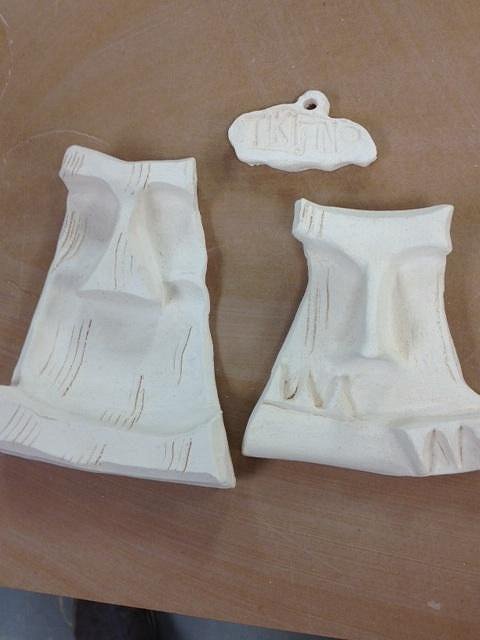
Jon, funny- they look slightly less like coasters now... (though not a bad idea for a future project). These will both be hanging tiles, slightly larger than the 'Stachetiki ones I've made in the past. They will most likely be used in decorating the new bar I'm planning to build at home. They have holes for lanyards built into their backs. I added more clay to add dimensions (from my earlier post), let that dry a bit, then shaped and trimmed the forms. (Jon, the space below the nose on the Moai-ish tile is not quite large enough for a glass- or tiki mug):
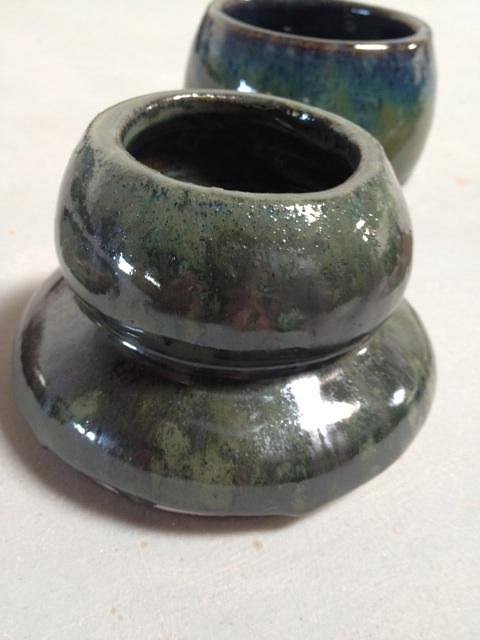
The Maurice Sendak inspired tile seems a little less "Where the Wild Things Are" right now and a little more mod... Though not quite tiki, here are a few photos of some thrown pieces (shapes inspired by some midcentury designs, which is kinda sorta related to tiki....?).
The first is made of black clay- finally figured out the technique for getting bolder colors to set onto this interesting clay body. The others are on white/ b-mix clay.
(going for a slightly atomic look....)
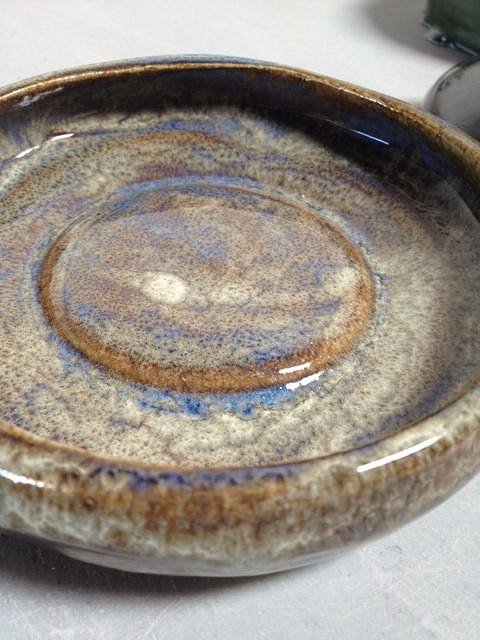
Low bowl/ plate, used as a glaze test- dig how this came out, plan to use same glaze combo on future tiki pieces.... |
|
T
TikiAno
Posted
posted
on
Wed, Sep 25, 2013 7:40 AM
Working on a couple other projects (including a tiki bar garage plan/ build-out), but here's a very out of focus shot of the two hanging tiles that were bisque fired. Sorry it's a bit blurry, you can decide whether the photo was taken: a) with a phone
|
|
BT
Badd Tiki
Posted
posted
on
Wed, Sep 25, 2013 8:36 AM
Was it taken /: with a phone after too many mia tias? |
|
D
danlovestikis
Posted
posted
on
Thu, Sep 26, 2013 8:14 AM
Did you throw the bowls? |
|
T
TikiAno
Posted
posted
on
Thu, Sep 26, 2013 2:49 PM
Badd, always a good slash correct option. Wendy, yes, I threw those bowls, finally getting slightly better on the wheel- and enjoying it, which is (almost) more important. Wind chimes are not a bad idea, but the two pieces are hanging wall tiles- they have a different ways to mount on the wall on the other side. Next up will be a similar design suggested by Hang10, and THEN starting work on the Art Swap piece. I have two very different concepts in mind, not sure which one will be the final version. So glad 'Stachetiki makes you smile, too- I keep making them, they will eventually be used as tiles on the new home bar.... |
|
T
TikiAno
Posted
posted
on
Mon, Sep 30, 2013 9:38 PM
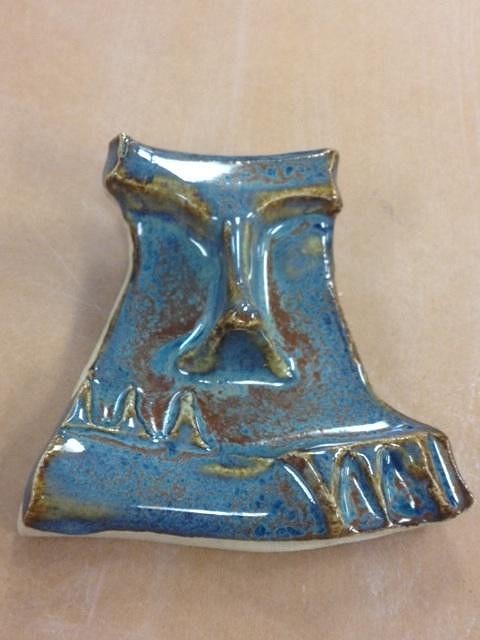
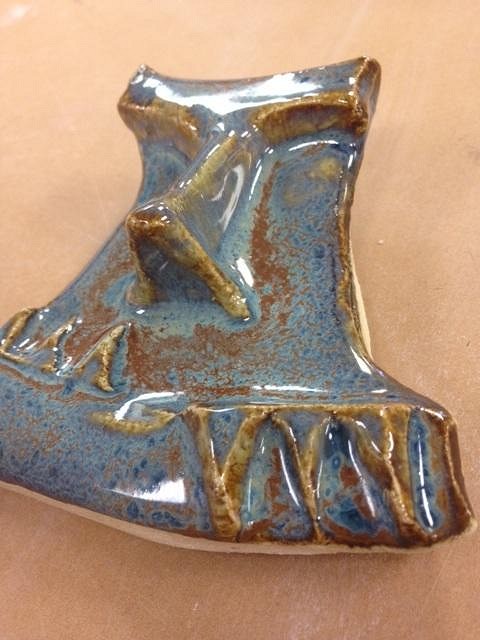
Got a few things out of the kiln today- I can't post some until next week (to be explained later), but the "Where the Wild Tikis Are" hanging wall tile came out- might be renamed "Sendakatiki." The two glaze combo worked out- (digging that blue rutile). Colors are a bit different in person (w/o the overhead fluorescent lights in the clay studio). Here's a couple of angles:
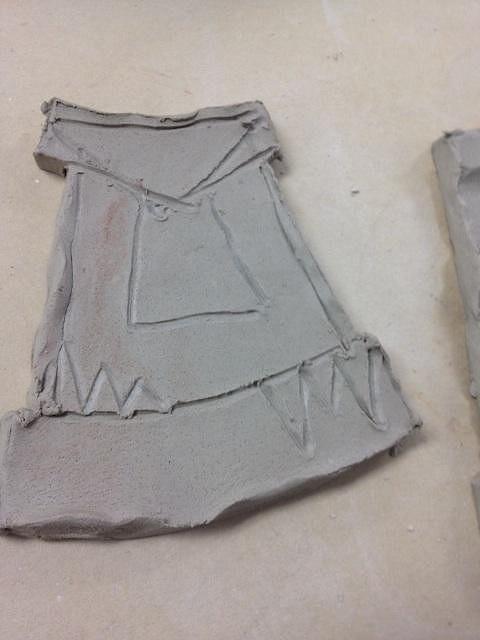
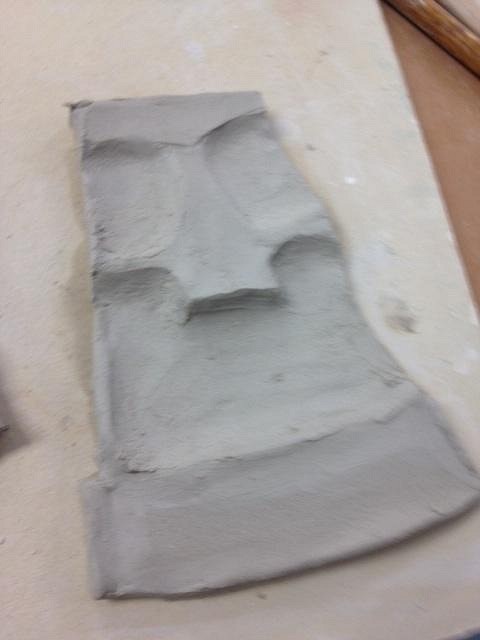
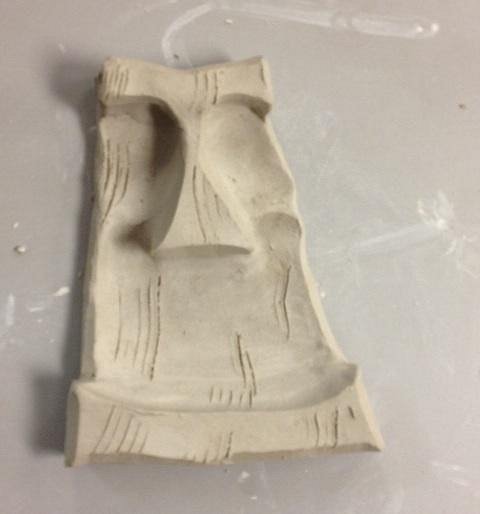
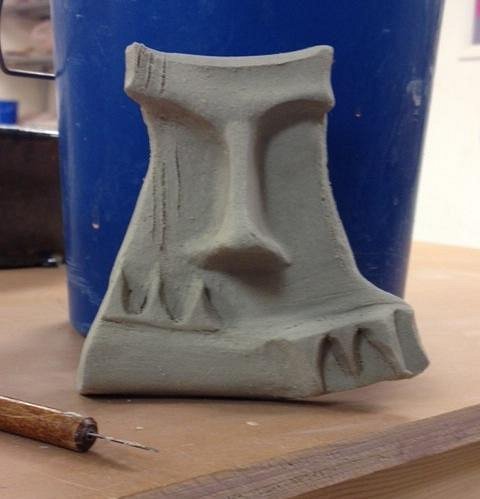
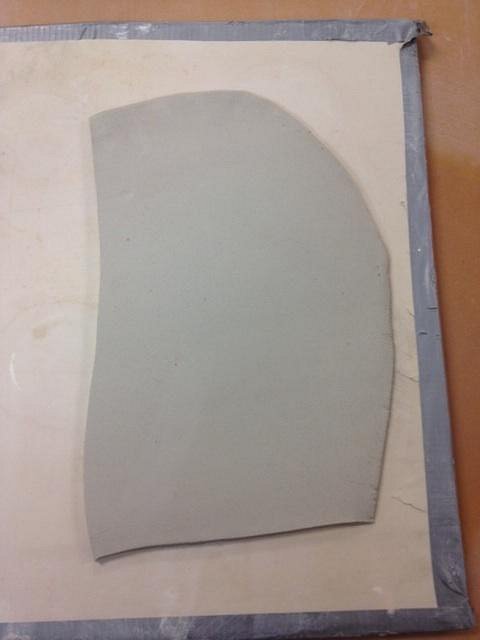
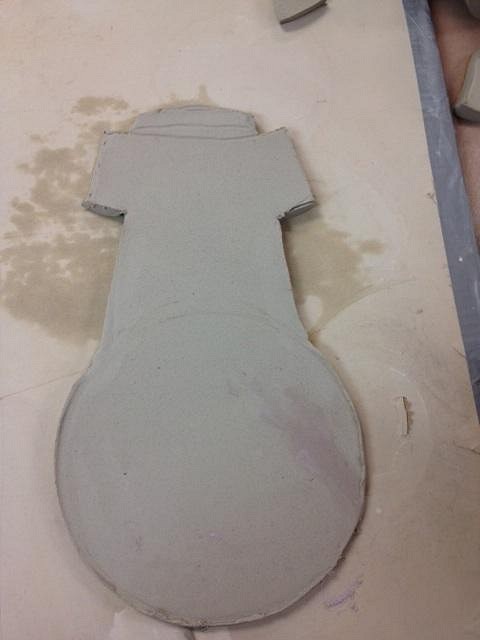
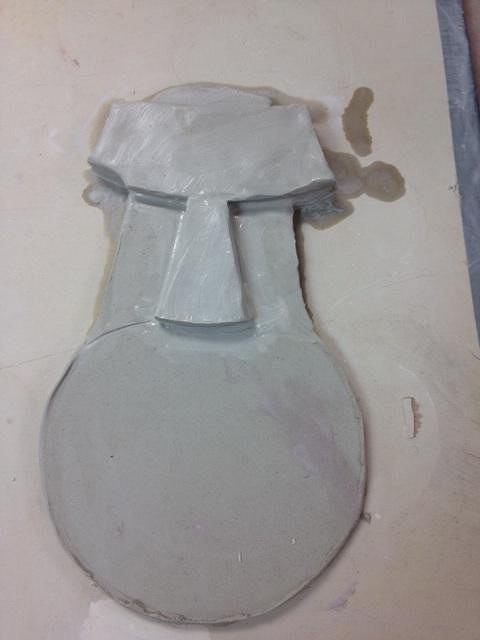
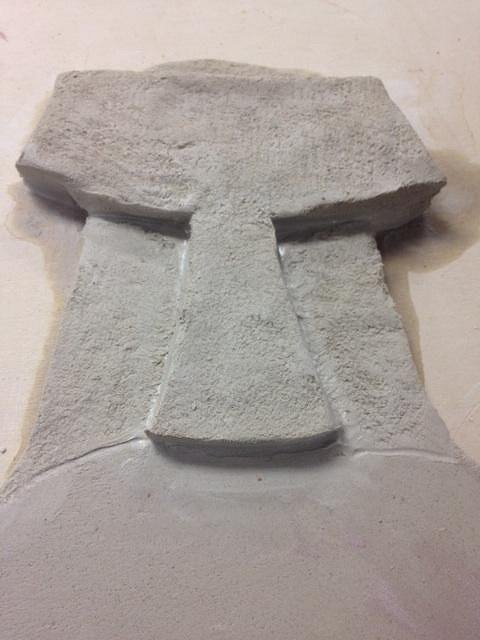
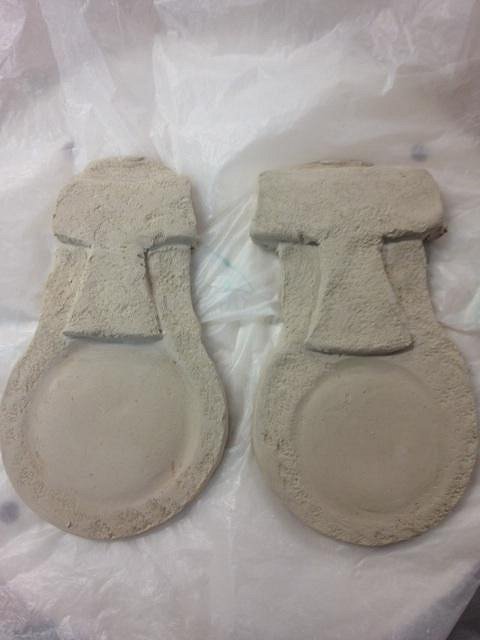
Jon/ Hang10 commented that he thought my last set of cut-out wall tiles looked like a coaster. I thought it was a great idea, so started working on a Moai coaster. First I rolled out (or, threw out) a slab: I then traced out a circle large enough for a medium sized tiki mug (with extra room, since the clay will shrink ~10% as it dries), then drew and trimmed out my version of a Moai's head: Added some facial features: brow & nose: Smoothed out some edges and added stone texture: I used another cup to press out a small circle to "mark" where the glass and/or tiki mug will go. I was feeling ambitious, and made two more. I made these a bit smaller (the first one was admittedly pretty large and would take up a good amount of space on the top of the bar). These have a much smaller diameter for the coaster part, might be good for a zombie/ collins or mai tai glass.
Next up is starting on the Art Swap piece (v.1)! Jon, thanks for the inspiration! Look forward to hearing any feedback.... |
|
M
MadDogMike
Posted
posted
on
Tue, Oct 1, 2013 6:06 AM
Nice coasters. If you leave the "mouth" unglazed the mug/glass won't slide around and the unglazed stoneware will absorb the condensation from the drink. |
|
H

hang10tiki
Posted
posted
on
Tue, Oct 1, 2013 7:47 AM
Great color The Moai coasters look cool Jon |
|
D
danlovestikis
Posted
posted
on
Tue, Oct 1, 2013 7:53 AM
Those colors were perfect for your art. The coasters are a wonderful idea and would be really fun to use. Wendy |
|
T
TikiAno
Posted
posted
on
Wed, Oct 2, 2013 9:44 AM
Mike, thanks- great idea- may have to try this on at least one of these. Originally I thought about attaching some cork to that area. Slightly concerned about the high fired stoneware staining from something spilled on it- do you think I should worry? Jon/ Hang10- I wouldn't have thought of this until you brought it up! Once I figure out the proper sizing (after firing these test ones) I'll have to make you one for the inspiration... Wendy, thank you. I originally thought about building up the nose for a more traditional Moai "look," then realized it needed to be more coaster-like- and I think I've realized I really like working with this style Moai. For now, at least... :) |
|
M
MadDogMike
Posted
posted
on
Wed, Oct 2, 2013 12:30 PM
If the coasters are for personal use you don't have to worry about stains. Since you have access to a kiln, you just re-fire and it burns out the stains :D |
|
H

hang10tiki
Posted
posted
on
Wed, Oct 2, 2013 7:33 PM
ANO- :) Jon |
|
L

LoriLovesTiki
Posted
posted
on
Thu, Oct 3, 2013 6:59 PM
I'd love myself a Moai coaster if you ever make a bunch and want to sell them! Great idea. I wish I was as creative as everyone on TC! |
|
T
TikiAno
Posted
posted
on
Fri, Oct 4, 2013 11:40 AM
Mike, that seems like a fairly intense form of coaster maintenance... :wink: Jon, hey, I just went with your idea... ha! Lori, thanks, for now they're for personal use, and this is the first round of 'em. Let me see where this road takes me... Cool to hear, though! |
|
T
TikiAno
Posted
posted
on
Sun, Oct 6, 2013 10:10 PM
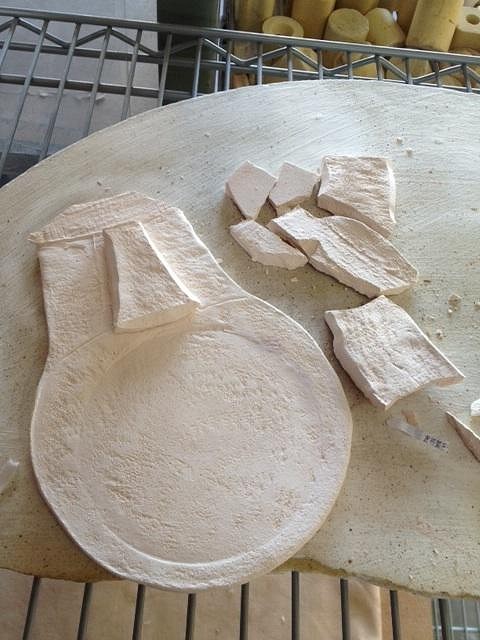
Ker-blam! Another peril of not owning my own kiln- this greenware piece was loaded into the kiln before it was fully dry, and reacted to the bisque fire by blowing up. As it should have. The kiln loader apologized, looks like I will start working on a new larger Moai Coaster.
Stay tuned for some other stuff, hopefully later this week.... |
|
D
danlovestikis
Posted
posted
on
Mon, Oct 7, 2013 7:38 AM
OH NO ): A tiny air pocket will do that too. I add so much clay to my pieces that I always fear this will happen. |
|
M
MadDogMike
Posted
posted
on
Mon, Oct 7, 2013 9:55 AM
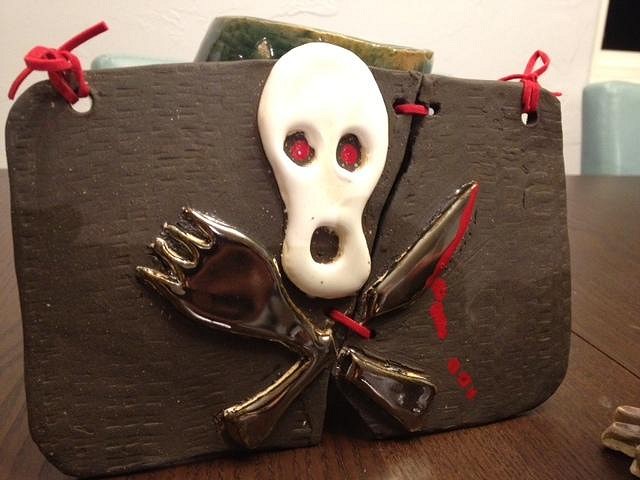
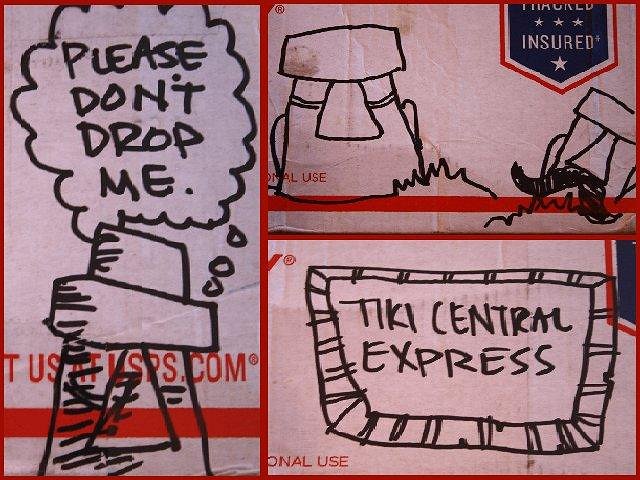
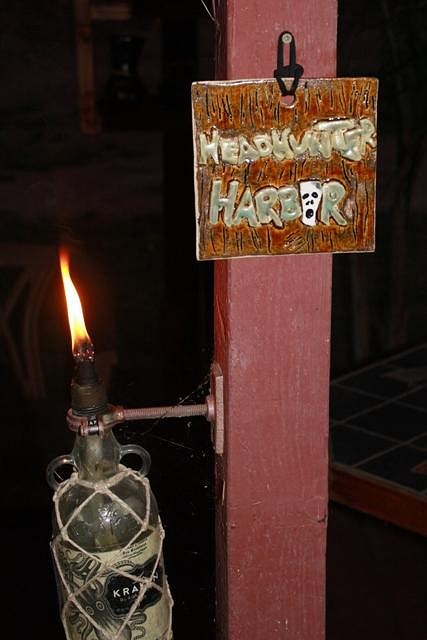
Got a surprise package in the mail the Saturday. It even had art on the outside so that the postal workers could enjoy it too. As soon as I saw the Mustachio'd Moai, I knew who it was from :D I opened it to find an awesome tile/plaque for the Headhunter Harbor! Very cool, looks great hanging there and I always enjoy your high fire glazes. Thank you TikiAno :) Mike |
|
T
TikiAno
Posted
posted
on
Mon, Oct 7, 2013 3:13 PM
Wendy, I'm pretty confident that the piece was loaded into the kiln before it had dried out- the extra moisture in the piece made it "go boom." I might use the leftover pieces to use in another piece, we'll see. I have two more (smaller) coasters that are waiting to bisque fire, too. Mike, glad you like it, and glad it survived shipping. I'll post up some photos of the step by steps later this week. I hope it looks okay next to your more refined Headhunter Harbor pieces. [ Edited by: TikiAno 2013-10-07 23:05 ] |
|
T
TikiAno
Posted
posted
on
Mon, Oct 7, 2013 11:04 PM
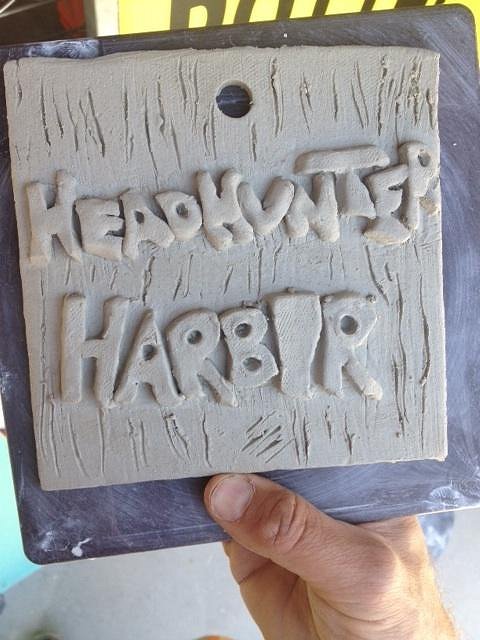
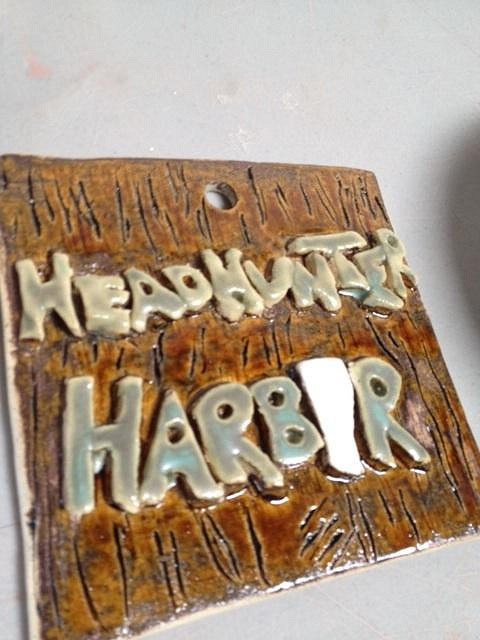
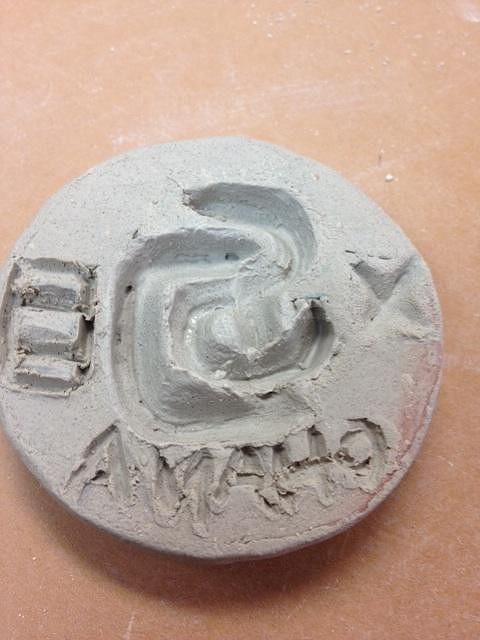
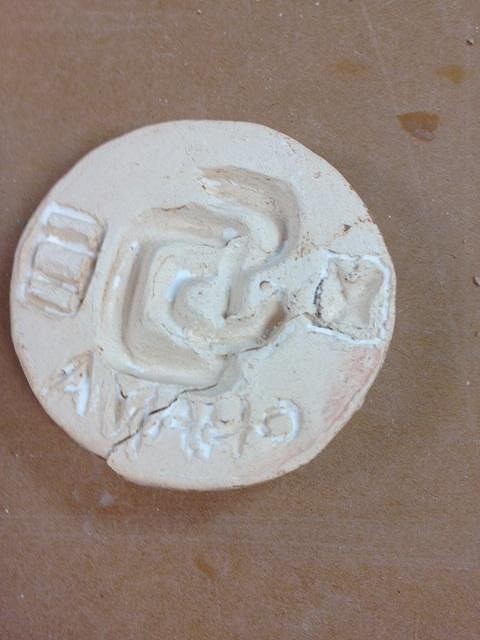
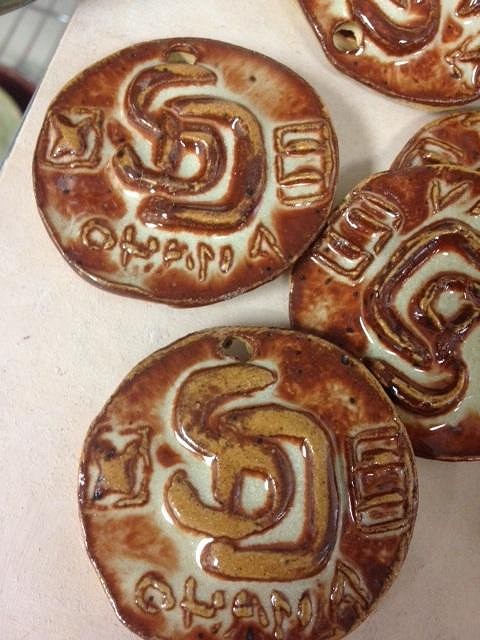
Since I never posted photos, here's MDM's Headhunter Harbor hanging tile as greenware (before it was fired): Glazing. First I painted black over the cracks and wiped off the excess, then added a brown glaze on top of that. I used another glaze for the letters, hoping for an interesting look (this glaze can be unpredicatble), then some white for the skull. I later painted facial features on the skull (modeled after Mike's original HH Harbor face): Here's also a quick catch-up of a pendant I made for the San Diego Ohana meet-up, organized by John/ TikiSlinger. The group meets the first Monday of every month at the Bali Hai. I was hurrying up to get them finished for tonight's meet-up. Now that they've been handed out to those in attendance I can post these photos. They are my first press mold, and came out looking particularly rustic. Thanks to Dave (Bowana) for seeing them midway through and giving me great advice for future pendants. I was a royal pain in the rear to attach rings onto the pendants so they'd hang straight on the rope, but did help its presentation. Hopefully someone will post some pics in that thread on the California events page for this group since I didn't take any photos of folks wearing these things. Anyway.... First I carved out a design in negative form (I had traced out the Padres logo to get close (but not an exact replica) to represent our home town... It should be noted that carving "in negative" is something that I probably don't want to repeat... I made a few different designs, waiting to see how the pressed stamp would look after they were bisque fired. I broke an earlier version when I tried to press it when it was too dry. Oops. Eventually the final press mold felt left out, and made me accidentally knock it off the table, cracking it- though it might be able to be epoxied back together (just don't tell IT that).
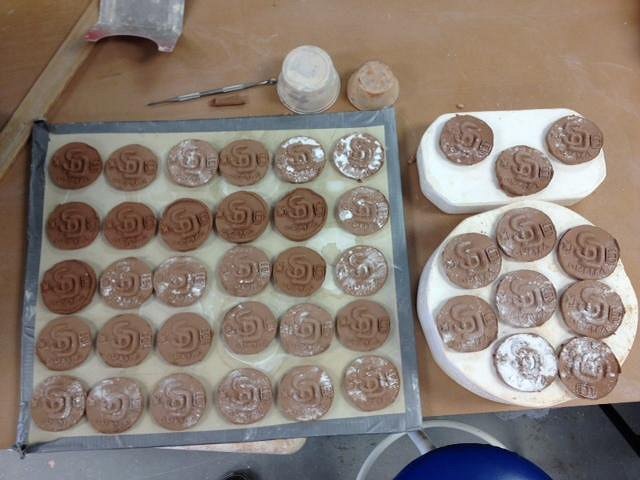
I then threw a slab and started pressing stamps. The white powder on some of the ones in the photo is corn starch, it helped keep the clay from not sticking onto the stamp: Eventually I had a good amount and put them on plaster and drywall to dry out: My pressing technique improved as I went on- but at least the variance adds a slight air of mystery to all of the finished pieces (as in "why does this look so bad?")
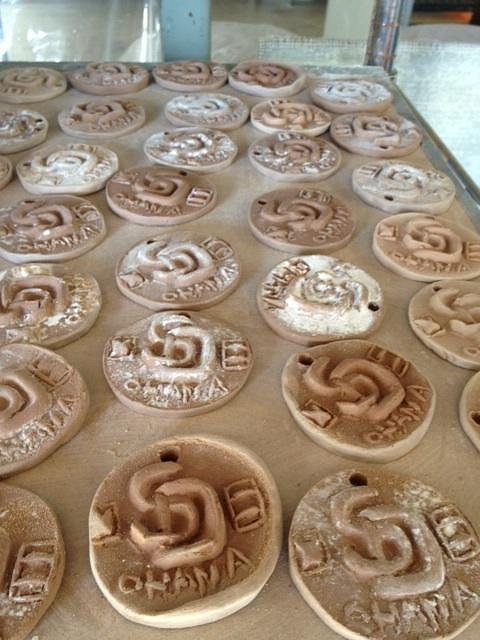
These were then bisque fired and glazed. I scrubbed off some of the glaze off of the top layer- the glaze i chose (multiple coats) comes out lighter in thicker applications, and darker in thinner ones. I wanted the raised logo and "Ohana" to stand out from the rest of the stamp. Each one looks a little different since all the pieces were scrubbed/ sanded by hand. Here are a few:
Time to get going on the Art Swap piece, as well as a few other ideas.... |
|
H

hang10tiki
Posted
posted
on
Wed, Oct 9, 2013 1:33 PM
Dude- great stuff, u be a busy mo fo..... Jon :) [ Edited by: hang10tiki 2013-10-09 13:34 ] |
|
M
MadDogMike
Posted
posted
on
Wed, Oct 9, 2013 8:00 PM
David, I never can get tiles to dry and fire without warping. I have placed them between weighted wallboard to dry, etc but nothing seems to work. The coins pendants turned out cool too. |
|
D
danlovestikis
Posted
posted
on
Thu, Oct 10, 2013 9:47 AM
Looks like pirate money. I've never tried a press mold, maybe one day. Wendy |
|
T
TikiAno
Posted
posted
on
Thu, Oct 10, 2013 11:21 AM
Jon, glazing these little pendants took the longest. Pressing is pretty fast. My first attempt at these, so there was a slight learning curve. Mike, a few tiles have curved. I think I laid yours out on a piece on drywall, or may have been a flat surface on a plaster mold. By placing it on top of a surface like this, water will be pulled out towards the bottom, keeping it flat. I believe if you have it sandwiched the clay will be pulled two directions at one time, which would make (possibly) it more coved/ unflat. Your tile was a slab that I only moved once- the more clay is moved around/ handled, the more "memory" it will retain, so best to handle your base piece less so that it can succumb to its inner flatness. At least, that's what folks have told me in the clay studio. Wendy, it was fun though a learning experience. Henrik (Van Tiki) is the press mold master. For a small pendant, I should have attached a small "push handle" on the back. The trick is keeping the mold dry enough (I used cornstarch) to keep on pressin'. A few got lost initially since the bisqued stamp was too wet from stamping, and "held on" to a bit of clay. Fun experience, hope the SD Ohana will enjoy them. Art Swap project work begins today... |
|
L
lunavideogames
Posted
posted
on
Thu, Oct 10, 2013 12:41 PM
Very cool that I received the SD Ohana pendant. Thanks TikiAno! |
|
H

hang10tiki
Posted
posted
on
Fri, Oct 11, 2013 8:04 PM
I'll have to make a road trip on a first Monday to get in the "Pendant Club" :) |

