Tiki Central / Other Crafts
Tiki Ano Mugsville: "I made it out of clay."
Pages: 1 2 3 4 5 6 7 8 337 replies
|
T

TikiAno
Posted
posted
on
Sat, Oct 12, 2013 12:44 PM
Luna/ Treg, my pleasure- glad you guys got one. Jon, I think you should... maybe you'll get a coaster, too.... :) |
|
H

hang10tiki
Posted
posted
on
Sat, Oct 19, 2013 12:59 PM
:) Workin on it |
|
T
TikiAno
Posted
posted
on
Sat, Oct 19, 2013 5:50 PM
Jon if you make it out here even not during a Monday meet up, lemme know, can cruise down & meet for a Mai Tai... |
|
H
hang10tiki
Posted
posted
on
Sat, Oct 19, 2013 6:16 PM
Unofficial quote from Yoda Soon drinking Mai-Tai we shall be :) |
|
T
TikiAno
Posted
posted
on
Tue, Oct 22, 2013 11:06 AM
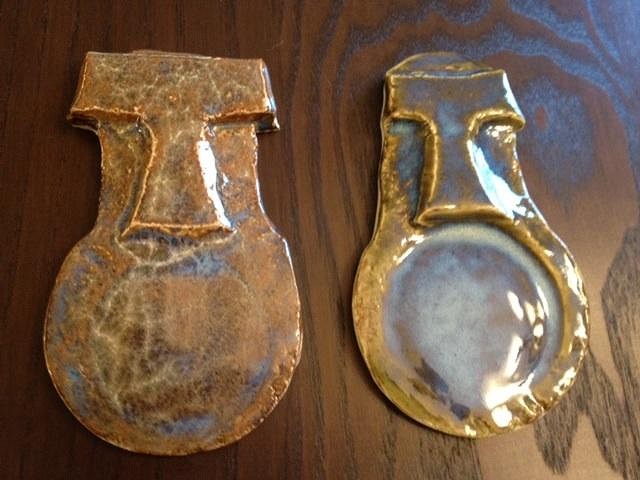
Sounds good Hang3 (not sure how many toes Yoda has?) A little more progress- the Moai coasters that survived came out of the bisque load, ready for glazing. I admit, they're a good size for a Zombie glass, probably a bit small for a mug or a rocks/ Mai Tai glass...
I got into the spirit of these, and decided to make a set of two "Kahiki" style coasters (there are also fairly small), if the end result is great I'll make them in a few different sizes. They also can be used as hanging wall tiles. These need to dry out a bit so they can be trimmed/ carved some more.
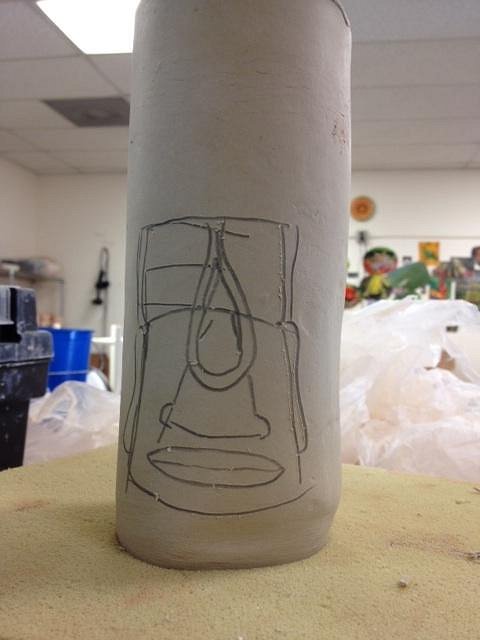
More progress on the Art Swap piece. I decided to use my first version as a test one (Making a thinner mug form, this test one is almost thermos sized). First I drew out the design w/ a pencil then started carving away:
More to come this week.... |
|
H
hang10tiki
Posted
posted
on
Tue, Oct 22, 2013 9:08 PM
It seems as if he has between 3-5 toes Good updates here You are on fire... Jon |
|
D

danlovestikis
Posted
posted
on
Tue, Oct 22, 2013 9:46 PM
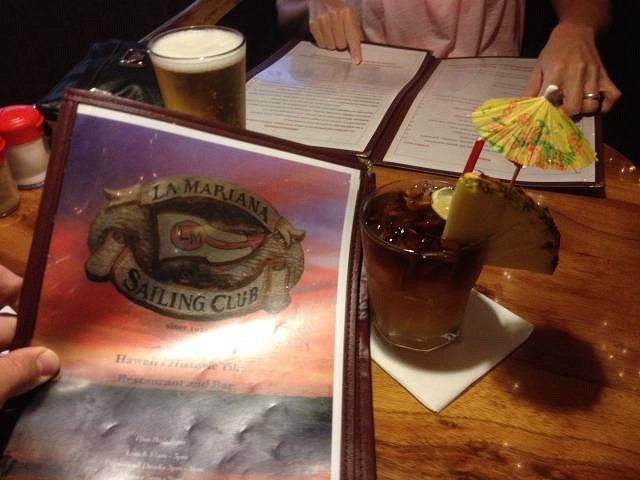
The Kahiki pieces are inspired. Are you going to use the colors from the menu or fireplace? Wendy |
|
T
TikiAno
Posted
posted
on
Wed, Oct 23, 2013 8:53 AM
Thanks! Wendy, I'm thinking using the fireplace colors- though probably not going into "full" detail w/ the tilework around the fireplace section- so, a slightly "less detailed" copy of the Kahiki's tiki. I like the idea of using some different glazes, but the first round of these I'll try to pay homage to the original as best I can. |
|
T
TikiAno
Posted
posted
on
Fri, Oct 25, 2013 7:59 AM
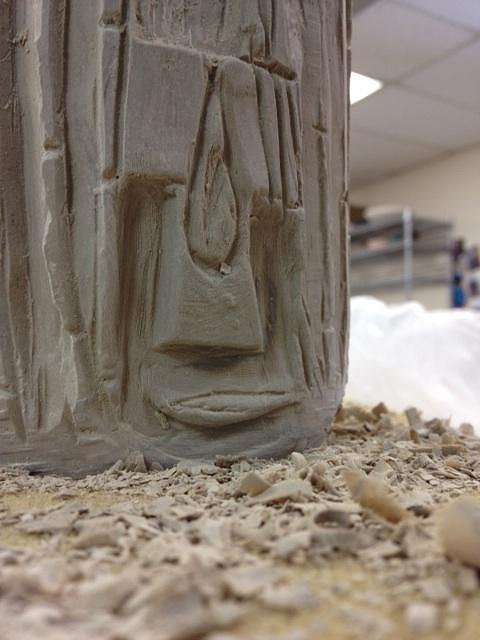
A little more carving to the Art Swap piece (on the "test" mug), should be able to start on the taller, thinner mug late next week.
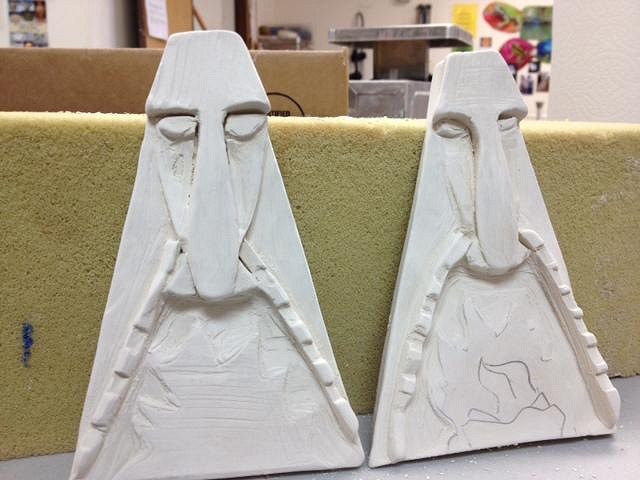
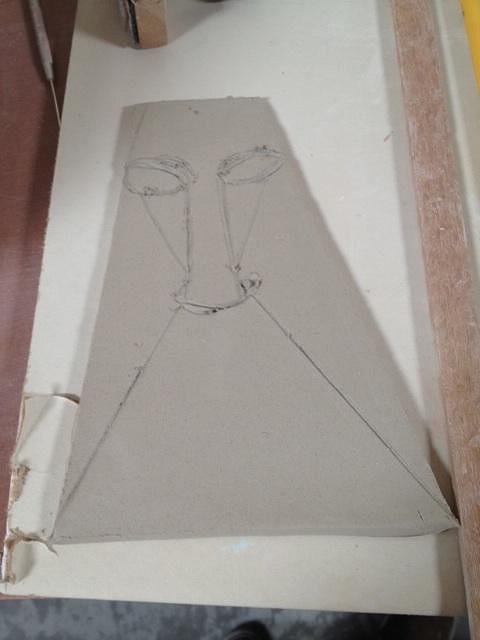
Trimmed the Kahiki tiles a bit more, including eyes, details where the original tiles were set into the side of the fireplace (won't get into THAT much detail with them, so took a few liberties). The nose will have to dry a bit more before I trim out the nostrils. Drew in a fire in pencil, might do one test one with fire, and one without. The high fire glazes should make this look really great- though completely unreliable.
Any thoughts are appreciated, and thanks for looking. |
|
H
hang10tiki
Posted
posted
on
Fri, Oct 25, 2013 1:04 PM
Lookin good bruddah |
|
T
TikiAno
Posted
posted
on
Fri, Nov 1, 2013 9:52 AM
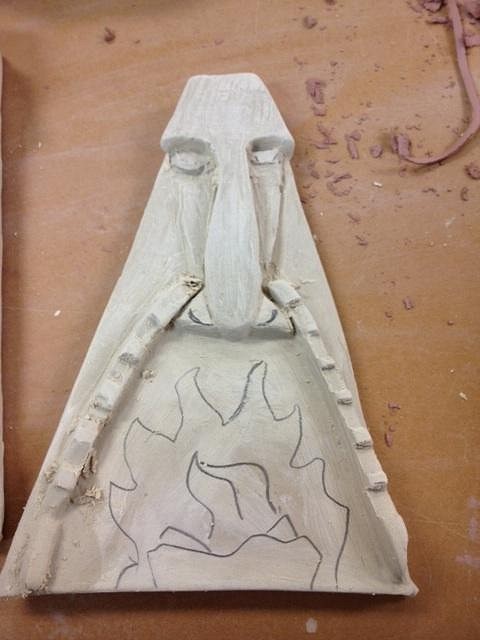
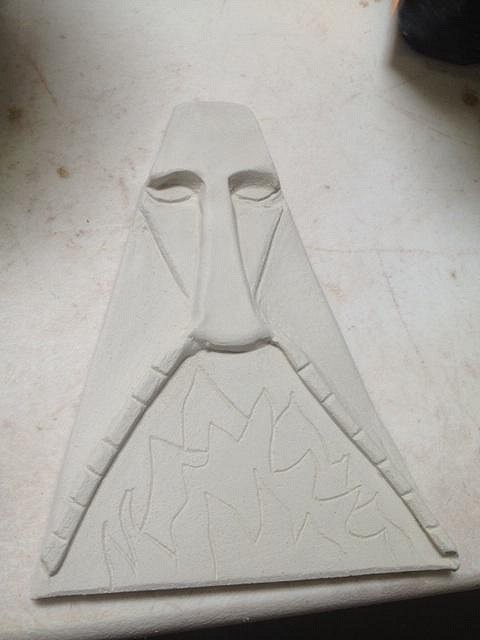
Work on v.2.0 on the Art Swap mug- forgot to take more photos, here's how I started. A few hours later it looked a lot different: I also trimmed out the nostrils on the Kahiki tiles, as well as adding texture and roughed out the fireplace flames. I plan on using a variety of "fiery" glazes which should (SHOULD) look cool when high fired.
|
|
D
danlovestikis
Posted
posted
on
Fri, Nov 1, 2013 10:56 AM
I think I'll copy hang10tiki. Sweeeeeeeet! |
|
T
TikiAno
Posted
posted
on
Mon, Nov 4, 2013 4:40 PM
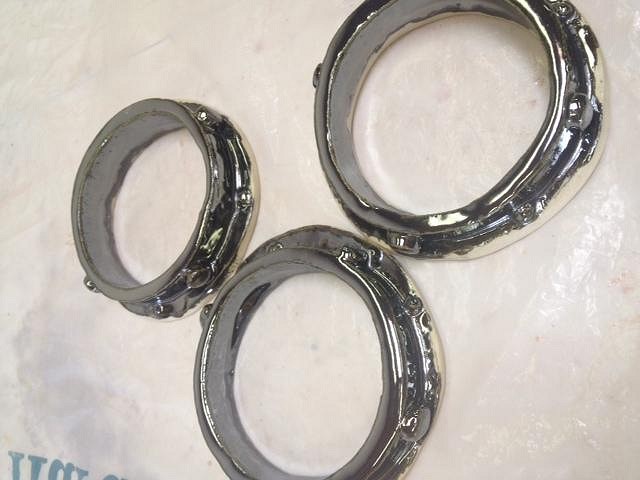
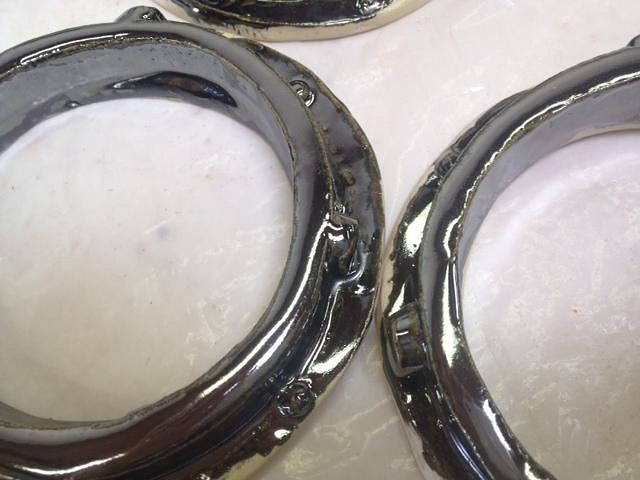
Thanks, Wendy! I glazed a whole lotta pieces today, hoping we can squeeze in a glaze firing by the end of the week. We'll see. The original Moai coaster tiles, a few smaller pieces, as well as some portholes I made for my home bar:
These were glazed with Palladium, a metallic high gloss silver glaze. I left parts of it unglazed as I plan to use some black and grey acrylic paint to "age" it a little bit. Sure, portholes are usually brass colored but I don't have any glazes like that. I just posted photos on the Art Swap thread, but I'll repost here. Carved more into the "Exotica" inspired tiki mug:
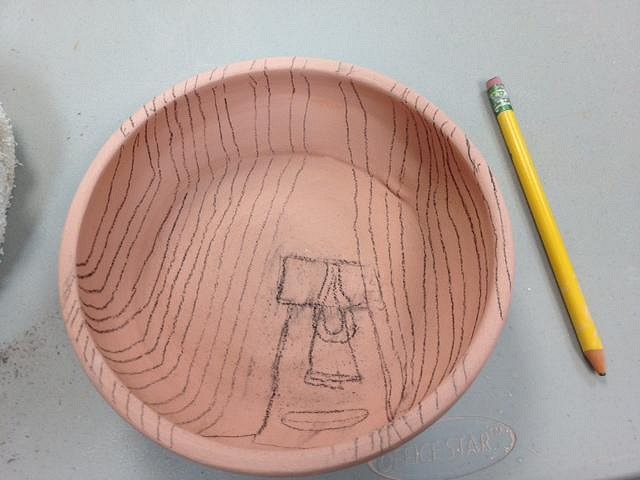
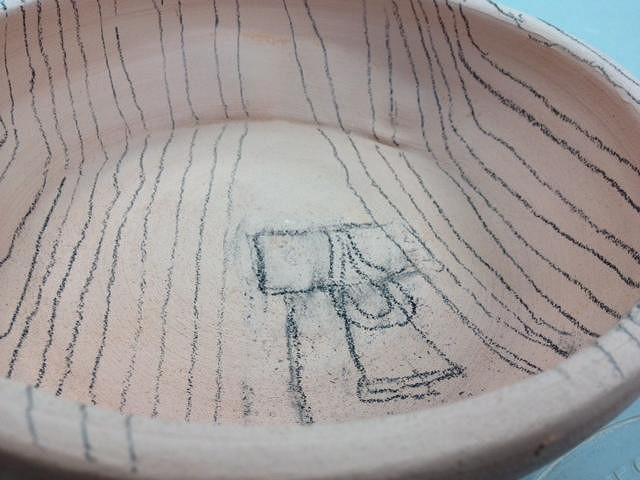
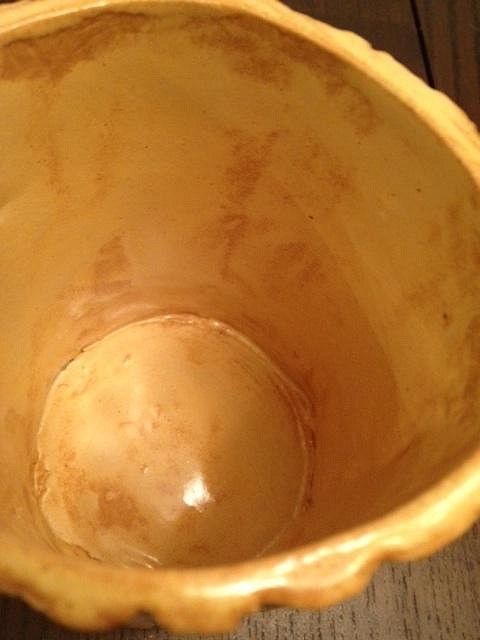
I also drew in a design on a bisque fired bowl I threw (it ain't the best, I admit). It's a different clay body (speckled buff), thus the different color. I'm going to "color it in" with glaze and tinted wax resist...
This bowl will be good practice for the glazing of the Kahiki Coasters. :wink: |
|
M

MadDogMike
Posted
posted
on
Mon, Nov 4, 2013 4:58 PM
Great work David. I hadn't seen the Kahiki tiles and the portholes. I know you usually do high fire but there is a nice low fire that looks like antique brass; Western Aztec Gold, also check out Jon's Bronze glaze on that page. |
|
T
TikiAno
Posted
posted
on
Tue, Nov 5, 2013 3:05 PM
Mike, thanks for the link. There is a "Gold Lustre" by Amaco that's similar (a matte gold). I've already used Palladium, a high gloss chrome glaze (high fire)- that I already had :) I might highlight it with some gold acrylic paint, too.- which I suppose I could've used instead of glaze (it's decorative only). I do like the high shine/ gloss of the Palladium, glaze- though it can wreak havoc with other stuff in the kiln.... |
|
H
hang10tiki
Posted
posted
on
Fri, Nov 8, 2013 7:38 PM
Lookin good bro |
|
T
TikiAno
Posted
posted
on
Fri, Nov 15, 2013 7:56 PM
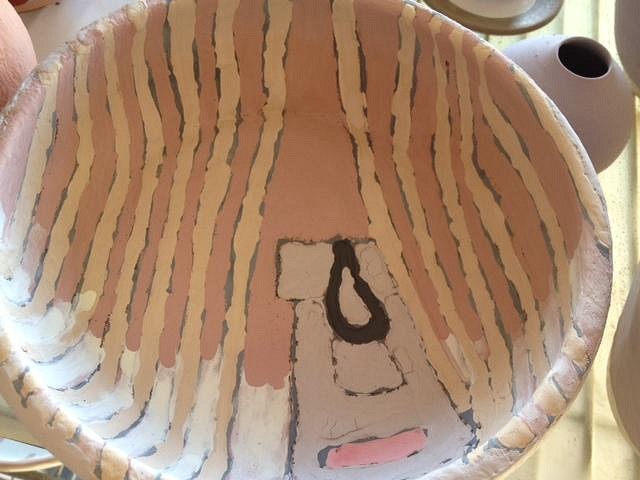
Repost of glazed version of Exotica Bowl for the Art Swap. This piece is currently in the kiln, along with V1.0 of the Exotica Mug for the Swap. While waiting for a test tile of a Grey Shino I plan on using for the Kahiki coaster, started glazing the fireplace. I used a few different glazes that will (hopefully) pop when they're high fired. I'll use either one or two glazes for the stonework around the fireplace. The Shino glaze I'm testing can look different depending on the thickness of the application (lighter or darker), so should know by early next week. Still waiting on the Moai coasters that have yet to be loaded into the kiln.
Unfortunately I missed a piece by another artist come out of the kiln yesterday. It was a bisque load that had the prototype for Ballast Point Brewery's new mug. I missed seeing it- the local artist, Paul Elder, is a painter but also hand carves the mugs for the Brewery/ Distillery. If you haven't had a chance to try their beers, they're awesome- and one of the owners is a big tiki fan (and was at Oasis). All of their labels are nautical themed, pretty fun and cool to check out. (Okay, no more advertising, except for this link: http://www.ballastpoint.com/) |
|
H
hang10tiki
Posted
posted
on
Fri, Nov 15, 2013 11:46 PM
Can't wait to see the post kiln Jon |
|
D
danlovestikis
Posted
posted
on
Sat, Nov 16, 2013 8:23 PM
Instantly recognizable. Those are such a fun idea. Wendy |
|
T
TikiAno
Posted
posted
on
Mon, Nov 18, 2013 7:59 PM
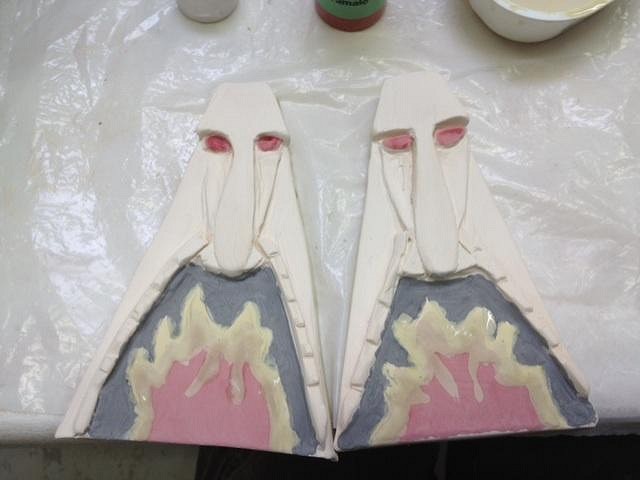
Wendy, thanks. Finished glazing the Kahiki tiles, hope to see these fired (relatively) soon. Here they are pre-firing:
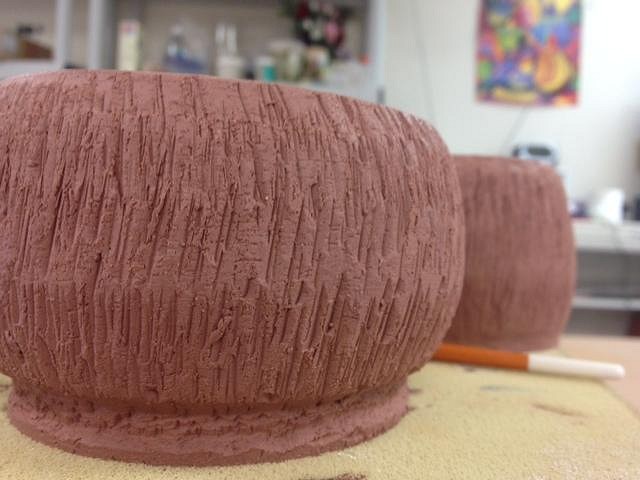
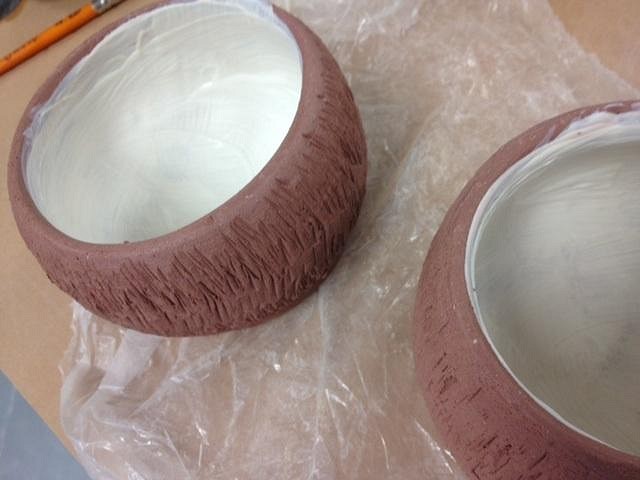
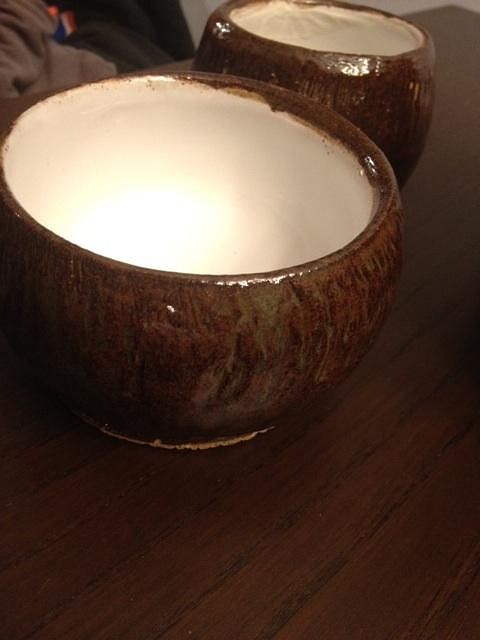
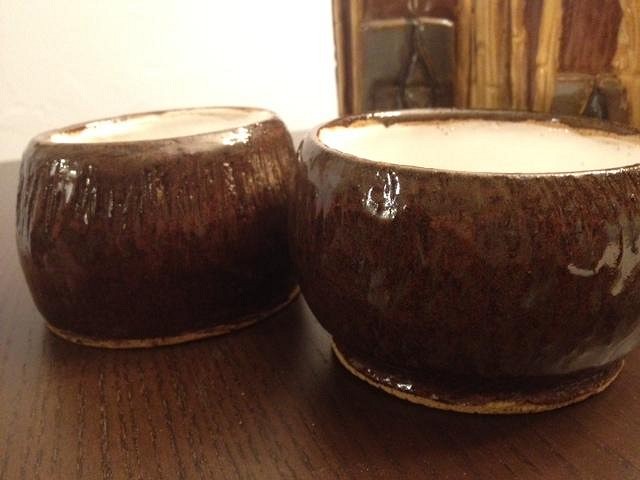
Started working on some coconut mugs. These were going to be coffee mugs for a few of my employees but realized they were a little too big- perfect size for drinking things other than coffee, though :). I threw these, then used a chatter tool to add texture to the outside: (A chatter tool is basically a straight piece of metal w/ a rt angle- you hold the long handle and the opposite edge bounces off the piece as it spins on the wheel, randomly bouncing (chattering) and adding texture. Seemed to be the ideal choice for a coconut's exterior). This is speckled buff clay, so will reveal black specks when it's high fired. I wanted a solid white interior (w/ no specks), so painted the interior with porcelain slip. This should create a nice base which will get a clear coat later on.
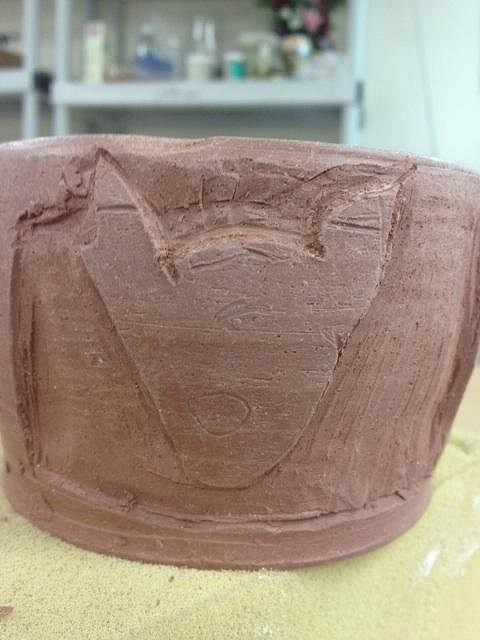
Started carving into another rounded mug for a specific drink mug for my home bar. The drink is "Paco's Pupu Punch," named after my wife's 14 year old chihuahua (named Paco). He is 14, so the drink name alludes to his geriatric tendencies to not make it outside in time. Our other dog bit off part of Paco's ear one day in a struggle for some peanut butter (I got blamed somehow), thus the cut out. This is the initial carve, will get more detail as it dries more:
Out of the kiln:
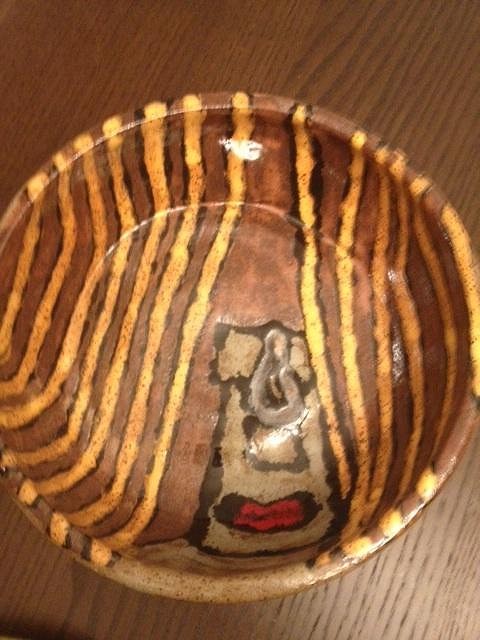
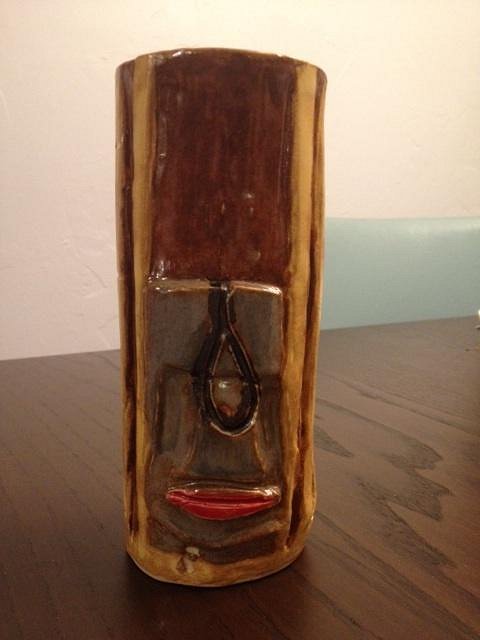
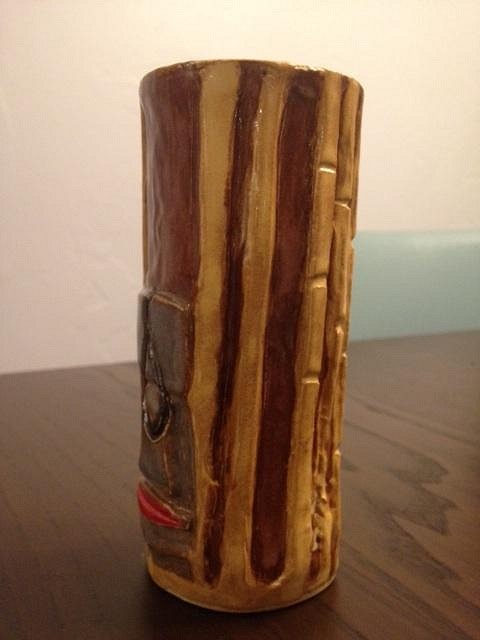
Art Swap Bowl, inspired by Martin Denny's "Exotica" album. I used a pretty Moai instead of the pretty model on the LP: A test version of an "Exotica" inspired tiki mug came out of the kiln, too. The next version will be quite a bit nicer: Thanks for looking! |
|
H
hang10tiki
Posted
posted
on
Tue, Nov 19, 2013 6:57 PM
Man U been busy |
|
T
TikiAno
Posted
posted
on
Tue, Nov 19, 2013 7:01 PM
Forgot to post this yesterday, but here's a little tiny pinch pot mug/ cup with some little tiny oddball Moais on it (three total). It's less than 4" tall, but the Saturated Gold glaze came out pretty nice.
Jon, ha! Hope to start glazing version 2 of the Art Swap Mug ASAP so I can relax before the holidays.... |
|
T

TikiRootsRocka
Posted
posted
on
Tue, Nov 19, 2013 8:49 PM
Nice coconuts. I like the texture your tool is making. I use a wire brush with different length wires for mine and it's much quicker than the scoring tool I was using before. It looks like you're going for a darker clay body, which is a great idea. I've run into trouble trying to get glaze in the deep grooves, when I've carved the coconut texture, too deep. I like Black Mountain for this as it turns a nice dark brown. That way, you don't have to worry about missing glaze, you save time because you don't have to glaze, or worry about glaze chips, once they're finished. I've also been using Coleman Porcelain slip, to eliminate the iron bits from popping through the glaze on the inside. I tested 2 vs. 3 layers of slip and found that 2 doesn't cover up all the spots, even with two poured layers of glaze over it. It looks like you're using a different clay, so that'll make a difference. That gold glaze is also pretty cool. Keep up the great work! |
|
T
TikiAno
Posted
posted
on
Sat, Nov 23, 2013 5:31 AM
Thanks- the chatter tool is pretty handy. I've watched others use it and borrowed someone's to give it a go. Would like to use it on other (non tiki) thrown pieces for some cool effects. TRR, the clay body will turn a bit lighter once it's high fired. It's Speckled Buff, which is similar (I think) to Rod's Bod, which you use. The clay becomes an oatmeal like color, and little specks come out when it's glaze fired (cone 5-6). I haven't used the porcelain slip before but used three layers just in case. I haven't used Black Mountain clay body (I have easier access to and mostly use Laguna Clay), though they do have an "Electric Brown" that (sounds) pretty similar. Note on the Amaco gold (high fire) glaze- it seems it only gets "really gold" when it's in the middle of the kiln when it's fired. The pinch pot Moai piece turned out when, though two Art Swap pieces had one section w/ that same glaze that turned out differently. I know Amaco's Palladium (another metallic glaze, though not food safe) relies on the right positioning in the kiln for the right effect. TRR, look forward to seeing more of your work- it's amazing. |
|
H
hang10tiki
Posted
posted
on
Sun, Nov 24, 2013 11:32 PM
Cheers bruddah
|
|
T
TikiAno
Posted
posted
on
Mon, Nov 25, 2013 10:45 AM
Jon, thanks! Have fun out there! |
|
T
TikiAno
Posted
posted
on
Mon, Nov 25, 2013 5:04 PM
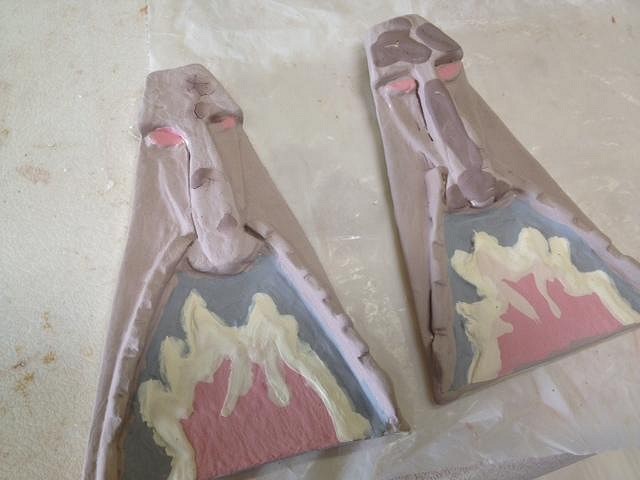
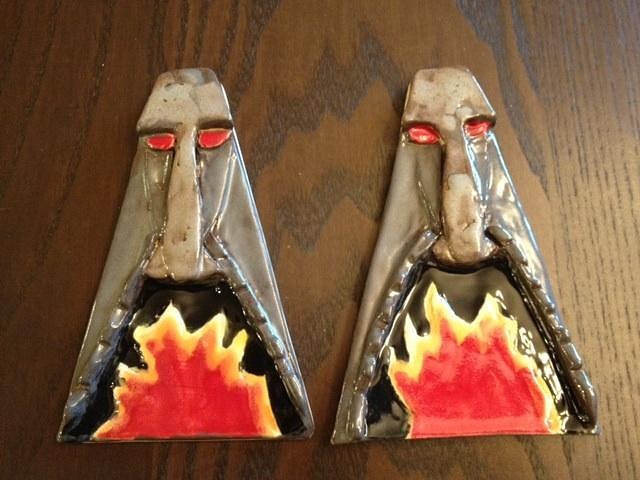
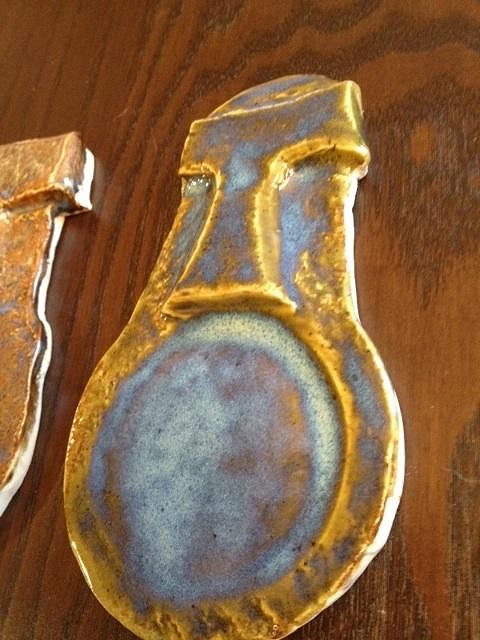
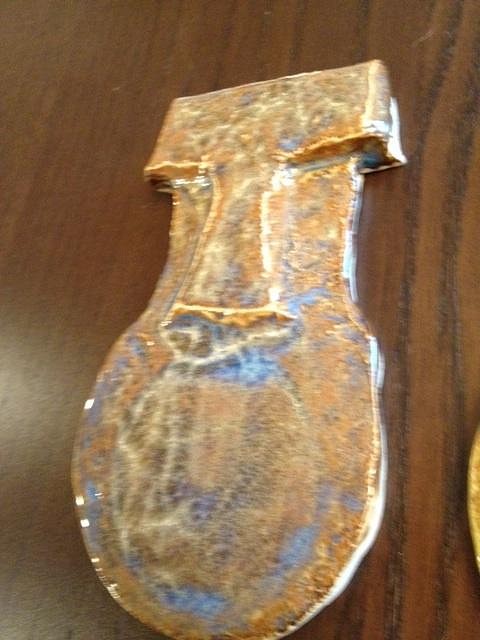
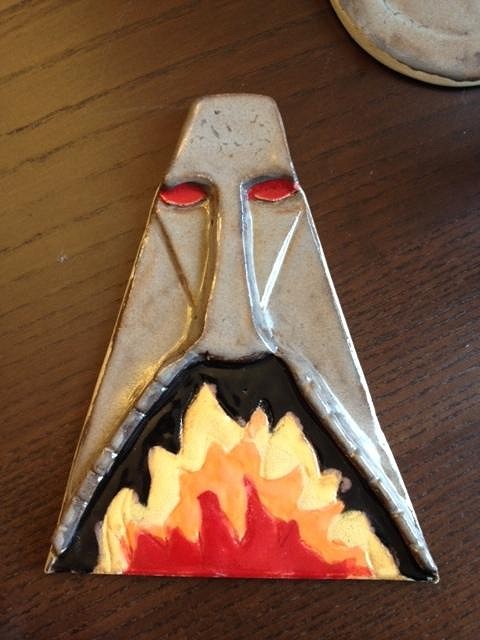
The first round of coasters are out of the kiln. Admittedly, they're slightly too small for any glass except a Zombie/ Collins glass, but I will enlarge the base for future coasters. These will work great as hanging tiles or bar decor. The Kahiki Fireplace tiles: A combination of shino glazes made the stone work look realistic. The fire is textured and "raised" from the back of the fireplace. Maybe not the best for glasses (since it's slightly uneven/ unlevel), but feels cool if you touch it.
The Moai coasters, group shot:
One glaze combo close up: The other Moai Coaster, crazy glaze combo 2:
[ Edited by: TikiAno 2013-11-25 21:12 ] |
|
T
TikiAno
Posted
posted
on
Tue, Dec 3, 2013 8:41 AM
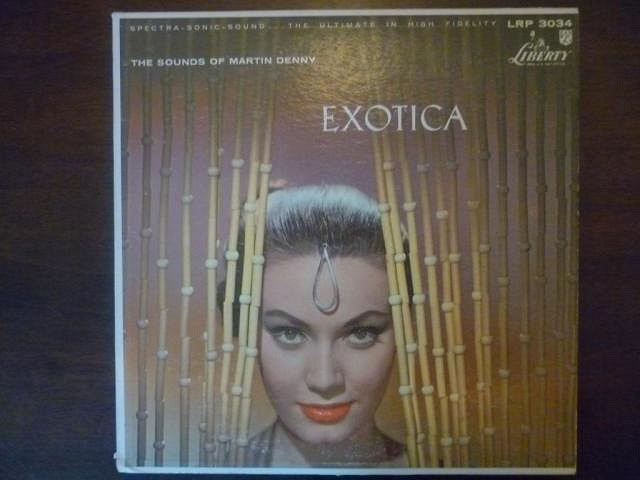
Art Swap mug is finished, inspired by Martin Denny's Exotica! LP:
Original record: The small coconut bowls came out of the kiln as well. The chatter tool left a great texture on the sides of the mug. I have some other versions that have not yet been bisque fired that I used another carving approach on the outside.
Thanks for lookin'! |
|
H
hang10tiki
Posted
posted
on
Tue, Dec 3, 2013 11:03 AM
Dude how did I miss the "coasters" post Album art swap piece is way cool And coconut bowls done too? U on fire, like a coaster Jon Worst sound ever, slurp of an empty tiki mug through my straw!!! [ Edited by: hang10tiki 2013-12-03 11:05 ] |
|
T
TikiAno
Posted
posted
on
Wed, Jan 22, 2014 5:54 PM
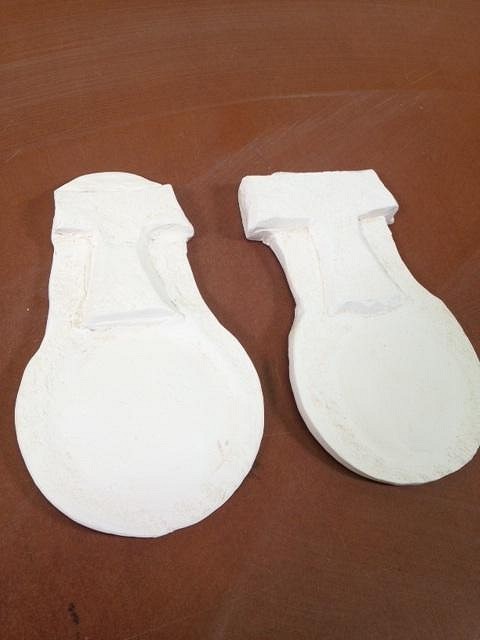
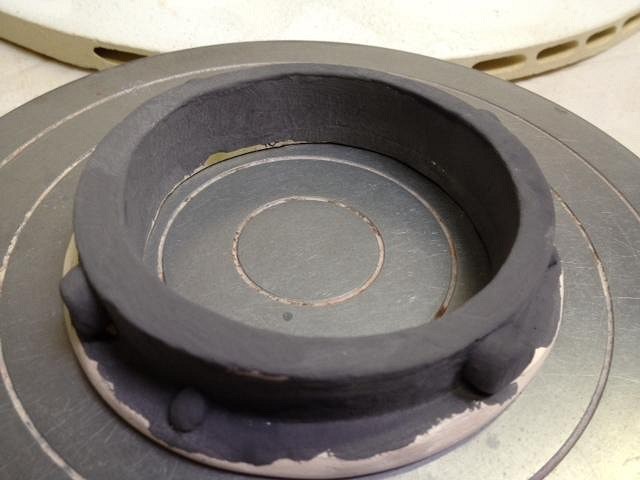
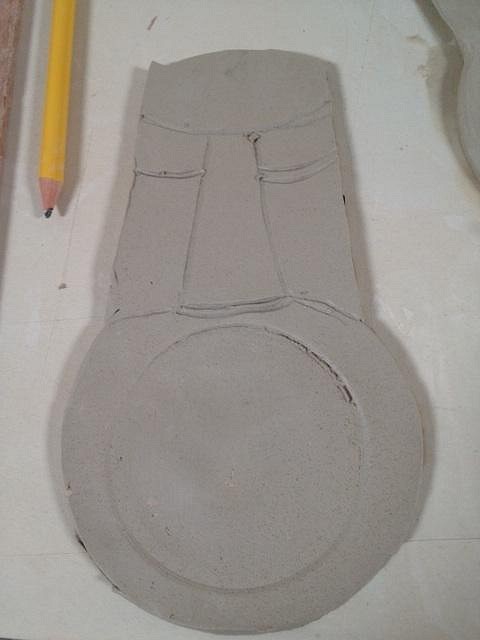
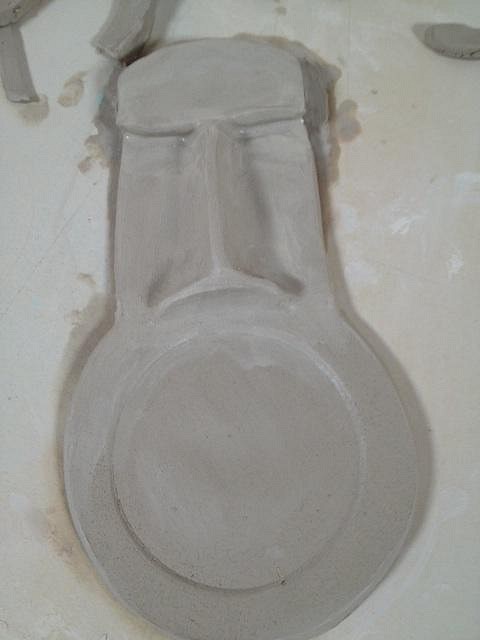
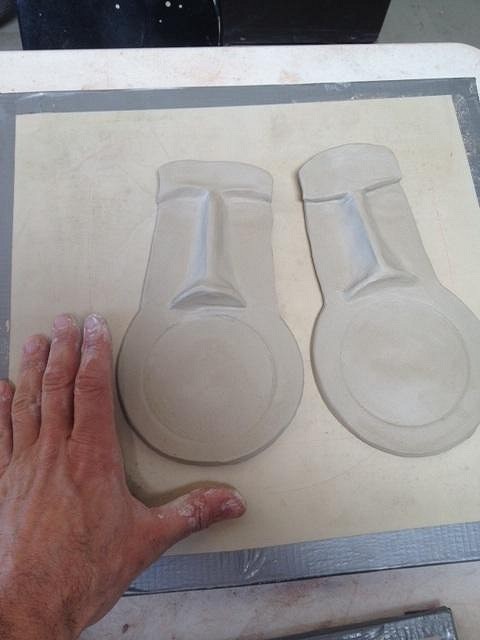
Finally got back to some tiki-centered work. First up: improved version of Moai coasters- w/ a larger coaster section (that will hold a real-sized mai tai glass). First I threw a slab, trimmed out the shape, drew in the basics, then used a jar of glaze to imprint a circle for the glassware (please note: that is an oversized pencil in the photo): I made another one- here's a photo w/ a hand to show scale. They're now covered in plastic to firm up. They're sitting on a piece of drywall so they stay flat. I also wanted another go at the Kahiki Coaster. The first two I made were a little too small for a glass. First I trimmed out a basic shape: Now wait a bit to get these to firm up a bit, then trim a big more. Thanks for lookin'. |
|
H
hang10tiki
Posted
posted
on
Wed, Jan 22, 2014 11:58 PM
Off to a great start Jon |
|
H
hang10tiki
Posted
posted
on
Sun, Feb 2, 2014 9:13 AM
Updates? :) |
|
D
danlovestikis
Posted
posted
on
Sun, Feb 2, 2014 9:15 AM
Hey, I love those Kahiki fireplaces. You are making some fun art, Wendy |
|
T
TikiAno
Posted
posted
on
Tue, Feb 4, 2014 8:26 AM
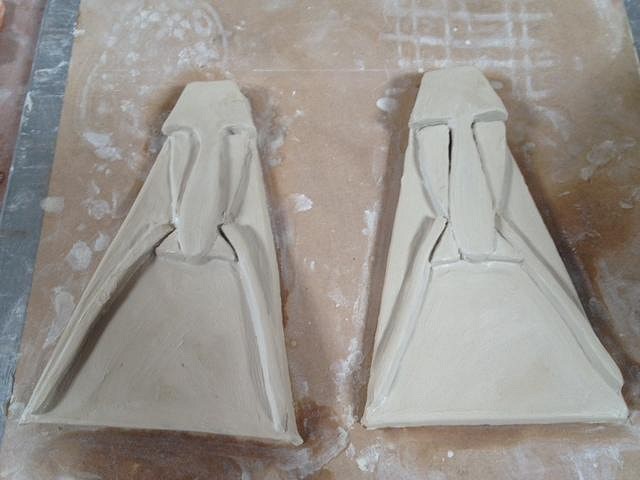
Jon, haven't been to the studio in a few weeks- dang work getting in the way. I went back on Monday to trim away at a few (very dry) pieces. The Kahiki coaster is now ready to be bisqued:
So are the Moai coasters. I sanded them down, fixed all edges, and fine tuned more details.
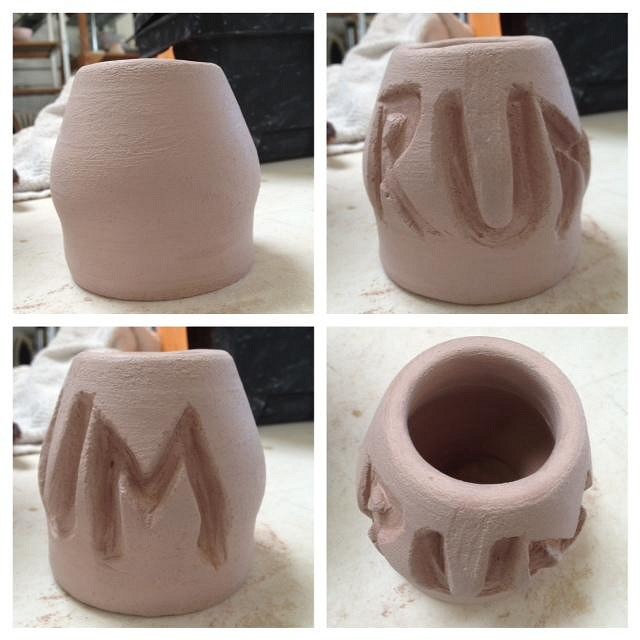
I trimmed a little odd shaped vessel I threw, to be used for swizzles at the home bar- the walls are very thick, so I was able for it to have lots of depth in the words "RUM" on the side. This is speckled buff clay, so when it's high fired will have little specks showing through.
|
|
H
hang10tiki
Posted
posted
on
Tue, Feb 4, 2014 10:40 AM
Wow, awesome |
|
T
TikiAno
Posted
posted
on
Mon, Feb 17, 2014 4:22 PM
Been a while since I've updated (been working on the home bar, and working to pay for the home bar), not enough clay time. The latest coasters have come out of the kiln. The larger Kahiki coaster: The two new Moai coasters- I prefer this glaze... and they're larger than the previous version: More importantly, a mai tai glass fits perfectly in the Moai's mouth: Also started hand building a set of tiki mugs to be used for work- though not quite tiki (it's for a coffee business), they're rewards for finishing the "Latte Log," not unlike the Tonga Hut's Grog Log- customers have a year to drink the entire coffee business's menu (41 drinks). We started in November, and a few people are almost done. I have to hurry up, since the first finishers were promised a mug. It'll be shaped like a log with some tapa design and more. Thanks for lookin'. |
|
H
hang10tiki
Posted
posted
on
Mon, Feb 17, 2014 9:24 PM
Sweet |
|
M
MadDogMike
Posted
posted
on
Mon, Feb 17, 2014 10:03 PM
Dave, you're doing some cool stuff. I really like those coasters |
|
D
danlovestikis
Posted
posted
on
Tue, Feb 18, 2014 8:00 AM
That's a wonderful reward for drinking coffee. I'm looking forward to seeing what they look like. Logo on the side or bottom? |
|
T
TikiAno
Posted
posted
on
Tue, Feb 18, 2014 9:11 AM
Thanks- Mike, actually Jon/ Hang10 was the one who first suggested (thought of?) the coasters- they're fun to make, and I'm happy to have figured out a better/ more appropriate glaze. Mike, I will try one with an unglazed circle for cups, just for you... Wendy, I'm figuring out the design now. My initial plan was to use a woodgrain stamp to press into the slab (before forming it into a mug), but now I think I'll carve the grain into it. My plan is to keep it looking log-like, with "Latte Log" carved into the side. It'll have a few other images etched in as well. The business name will be on the bottom of the mug. I'll probably work on two or three at the same time, to see which one I like the best. If only you were closer, I'd pay you with hot chocolate to help me carve these properly.... :) Thanks for the support! [ Edited by: TikiAno 2014-02-18 09:13 ] |
|
T
TikiAno
Posted
posted
on
Wed, Feb 19, 2014 9:25 PM
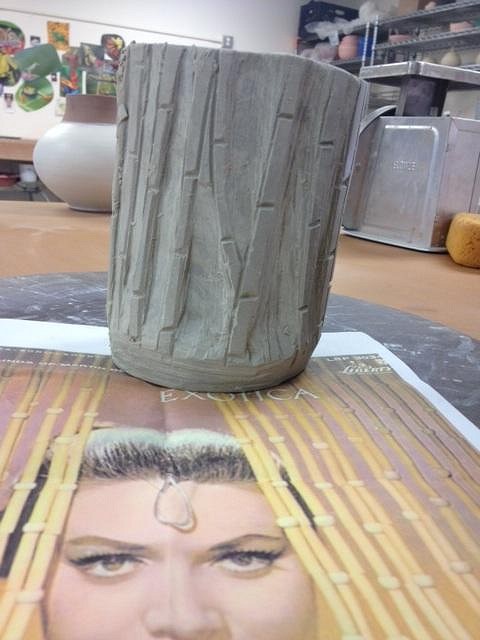
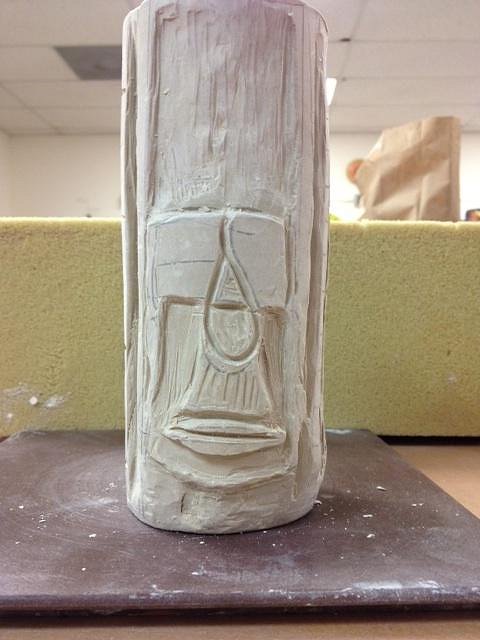
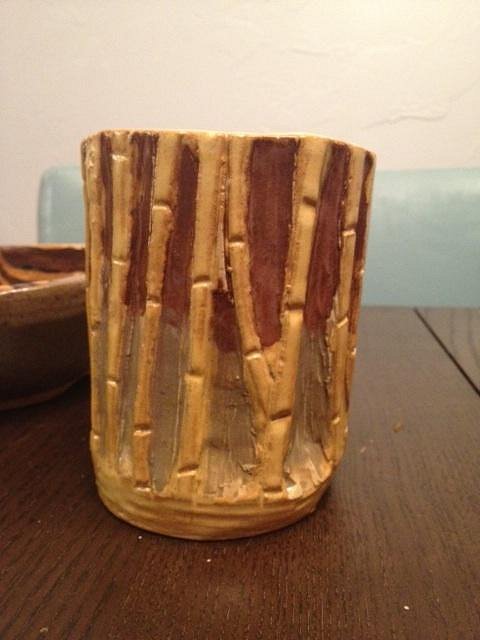
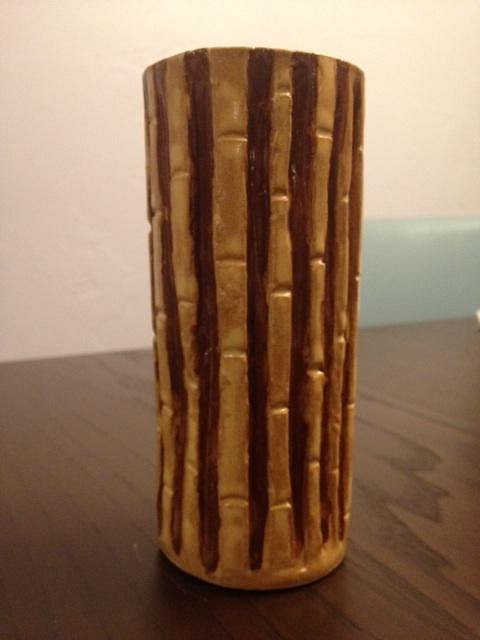
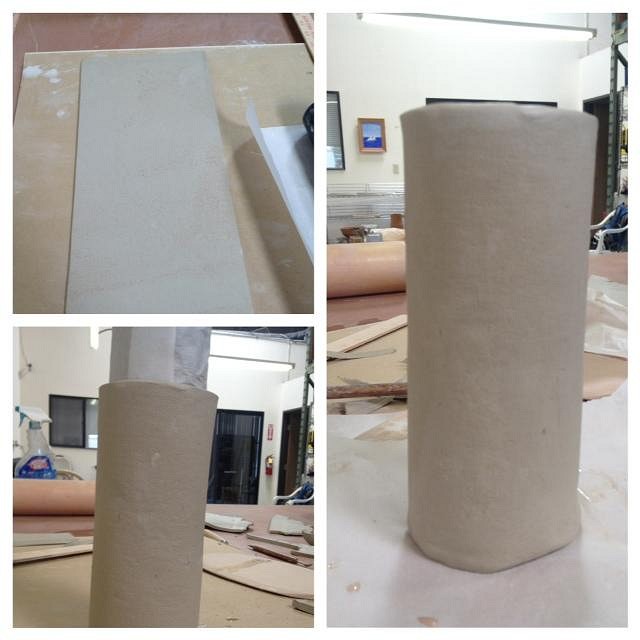
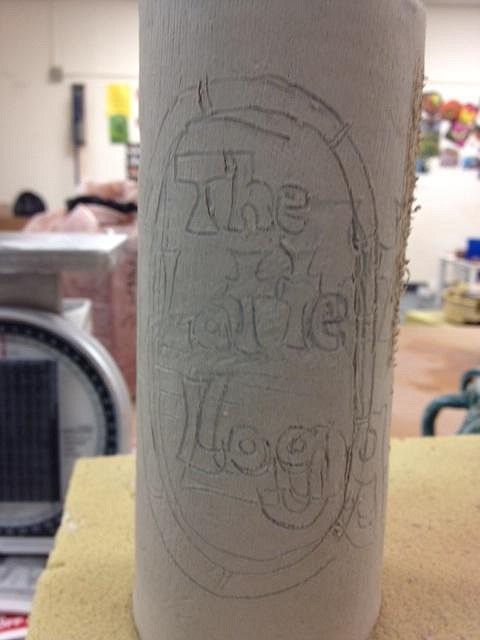
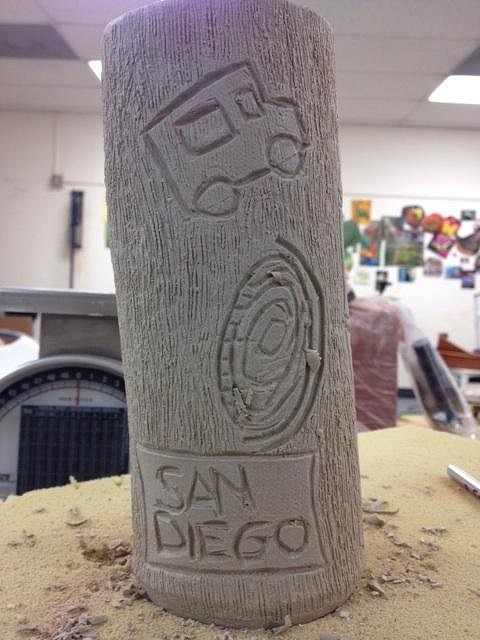
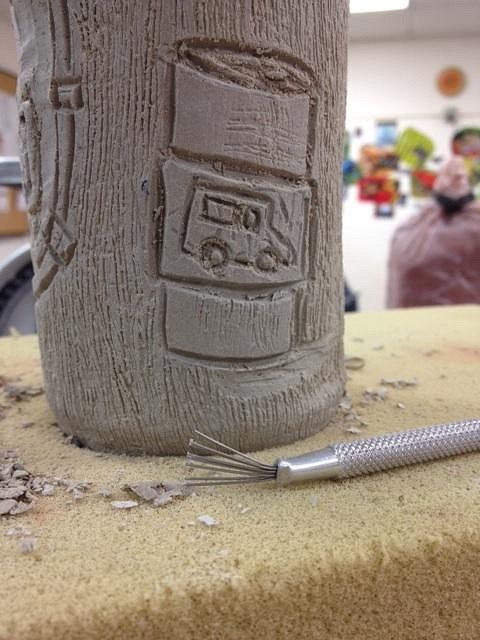
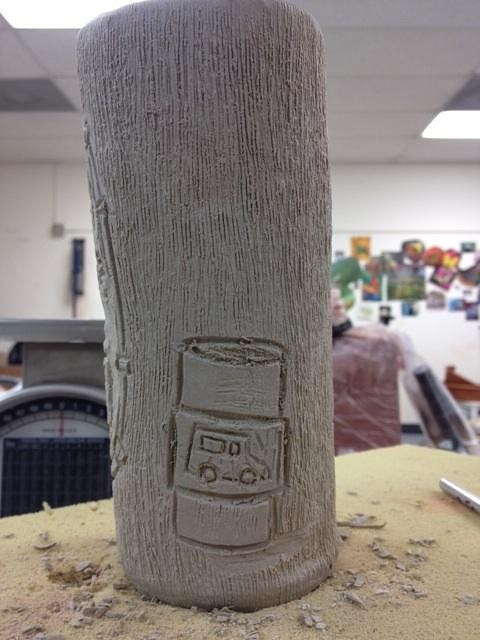
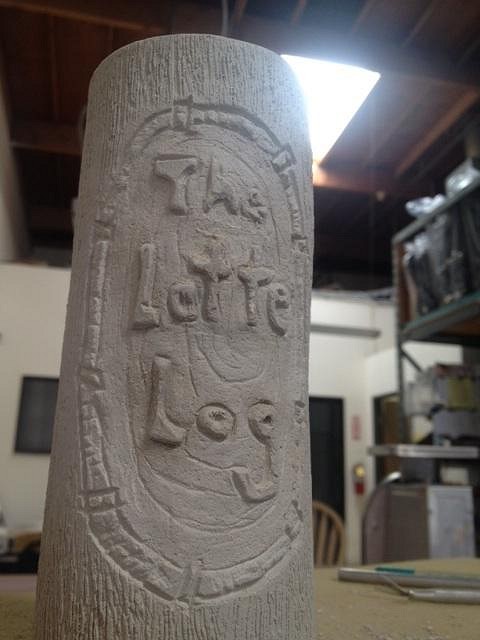
Update on the (non-tiki) Coffee Biz Tiki Mug. First I drew out the design with a pencil (it's the mug for the first person to finish the "Latte Log"). Using an eraser pushed into the clay, so just drew on top of the initial drawing. The pencil marks will burn away when it's bisque fired.
Then I carved into it with one tool that Wendy once recommended...
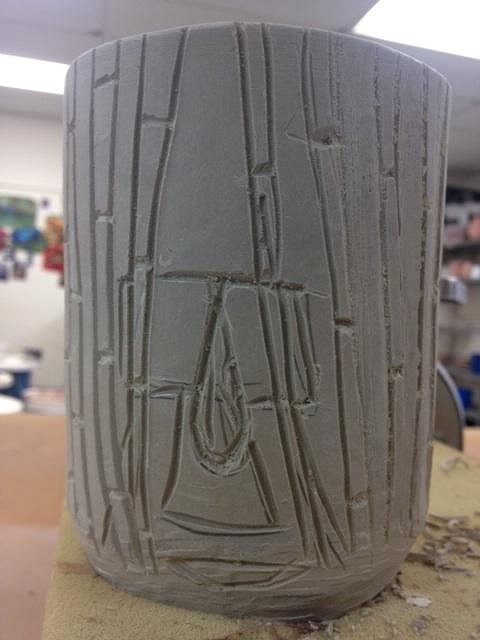
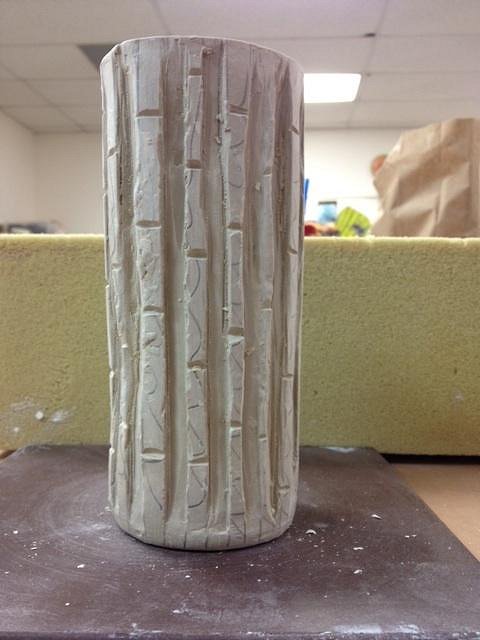
Since the clay was not as dry as I liked, I had to go ahead and recarve some of the lines for a cleaner look. Side, showing a paper coffee mug (w/ our business' logo on the cup sleeve): Front, w/ texture. Will add more detail- but will be a bamboo-like frame around the "Latte Log" sign. Didn't get to any tapa designs on this one, but plan on making one more of these mugs (for another customer). Thanks for lookin'. |
|
H
hang10tiki
Posted
posted
on
Fri, Feb 21, 2014 9:57 AM
Now I want COFFEE...... |
|
T
TikiAno
Posted
posted
on
Fri, Feb 21, 2014 6:26 PM
Hahahahaha! First rum, then coffee. Or coffee, then rum? Hmmm.... |
|
H
hang10tiki
Posted
posted
on
Sat, Feb 22, 2014 6:40 PM
:) |
|
D
danlovestikis
Posted
posted
on
Sat, Feb 22, 2014 8:47 PM
That's really cute. What are you putting on the bottom? Wendy |
|
T
TikiAno
Posted
posted
on
Mon, Feb 24, 2014 12:02 AM
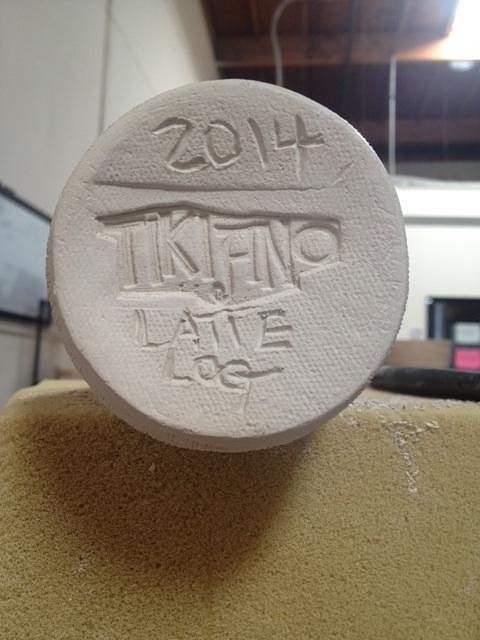
Wendy, since it's slab built I pressed my stamp into the bottom before I attached it to the form. I'll take a photo of it soon, just waiting for it to dry out a bit more to carve a few more details, and then get it bisque fired. I plan on making one more version w/ a slightly different design.... |
|
D
danlovestikis
Posted
posted
on
Mon, Feb 24, 2014 8:28 AM
I look forward to seeing every step. Wendy |
|
T
TikiAno
Posted
posted
on
Mon, Feb 24, 2014 1:57 PM
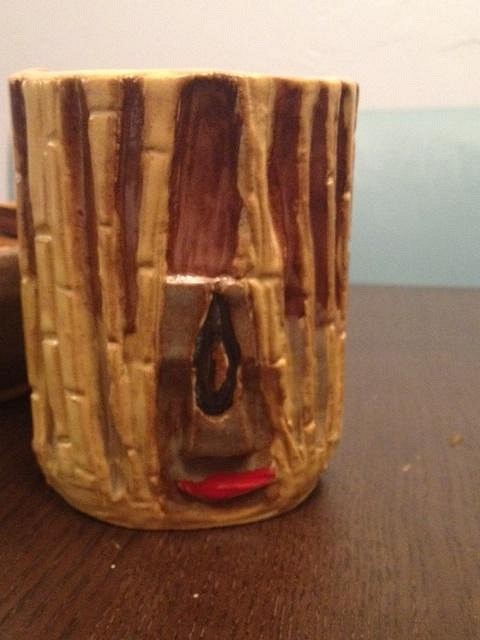
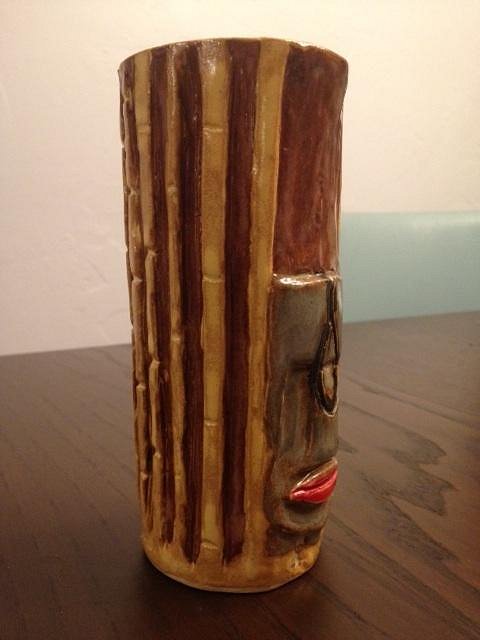
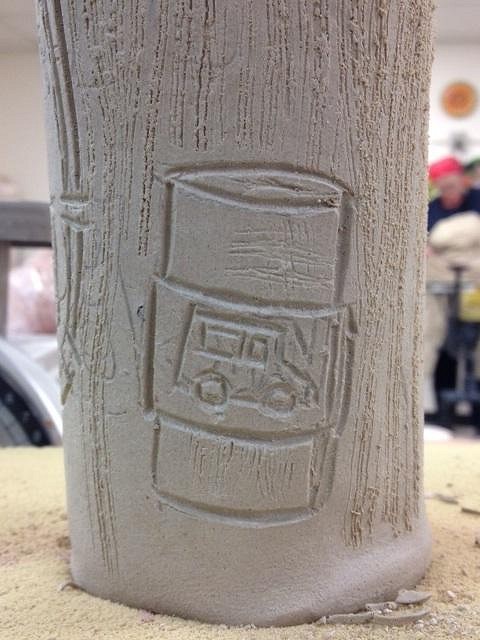
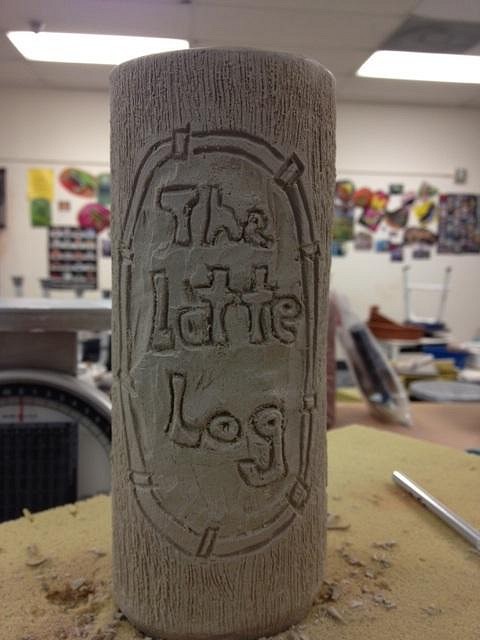
As the clay dries it becomes easier to sand down certain areas. I trimmed the areas between the letters to "raise" the letters. I also added texture to the bamboo frame, as well as adding some wood grain behind and around the "Latte Log" letters:
And, for Wendy, here's a look at the bottom of the mug: Now it waits to get bisque fired- which may take a while (after looking at the firing schedule at the clay studio). Dang it. I'll have to start working on the next Log mug now. Thanks for lookin'. |