Tiki Central / Home Tiki Bars
The Kona Luanii, Denver, CO
|
A

arriano
Posted
posted
on
Mon, Jun 29, 2009 8:23 AM
Wow, that's a great booth! And congrats on the very good price as well. Are you going to rehab the table that came with it, or use something else? |
|
UB

Unga Bunga
Posted
posted
on
Mon, Jun 29, 2009 2:34 PM
Zulu, |
|
G

Gremmie
Posted
posted
on
Mon, Jun 29, 2009 3:16 PM
Wow! This has been a fantastic looking project - WOW! [ Edited by: Gremmie 2009-06-29 15:16 ] |
|
M

Murph
Posted
posted
on
Mon, Jun 29, 2009 4:44 PM
The place is looking fantastic! That booth is rad. Keep the pics coming. thanks |
|
H

hiltiki
Posted
posted
on
Mon, Jun 29, 2009 6:08 PM
I love how your place is coming together. The progression pictures are so fun. Best of luck with the rest, you are doing a great job. |
|
T

TorchGuy
Posted
posted
on
Fri, Jul 3, 2009 3:45 AM
My vote: In the last photo, rotate it a quarter turn and put it in that rear left corner, facing the camera. That low beam (duct?) won't matter much there, and can be hidden weith hanging thatch and maybe a cluster of lighted glass floats in netting? And of course, a tall, thin tiki in the back left corner would be cool. Maybe some vertical bamboo poles on the right side where that sloped wall splits off and back, on which something could be hung on each side? Love the booth but, all around, love the bar. Looks wonderfully cozy and comfy, a place I'd be happy with a drink in my hand and some Exotica on the stereo. I take it there are speakers poking around in there? And what sort of treatment is planned for that window? Me being a fountain nut, I would jump at the chance to build a little tank outside it with "rain" splashing down. Even better if it's in one of those sunken wells due to basement being below ground level - put a removable cover over the top, add "rain" and deep blue lights and some plantings to flank the window, and it's always a rainy tropical night in the safety and comfort of the Kona Luanii, recalling the nights spent at sea! |
|
MR

Matt Reese
Posted
posted
on
Fri, Jul 3, 2009 10:28 AM
I'd like to add a big WOW here as well. |
|
SS

Surf Seal
Posted
posted
on
Fri, Jul 3, 2009 2:25 PM
Fantastic! Denver was where I grew up on Tiki dreams. You are doing a great job! |
|
S

Swanky
Posted
posted
on
Sun, Jul 5, 2009 7:04 AM
Okay, the booth does it! I'm coming to visit! :wink: Actually, we may have plans for the Denver area... |
|
TK

Tiki Kupcake
Posted
posted
on
Sun, Jul 5, 2009 9:18 AM
This is looking great! |
|
SF

Slacks Ferret
Posted
posted
on
Wed, Jul 15, 2009 6:30 PM
I've said it before, I'll say it again: This is one fantastic home tiki bar. I love the booth. That's something I had always hoped I'd run into while thrifting...but it hasn't happened yet. Anyway...keep up the good work! |
|
Z

ZuluMagoo
Posted
posted
on
Sat, Aug 1, 2009 7:37 AM
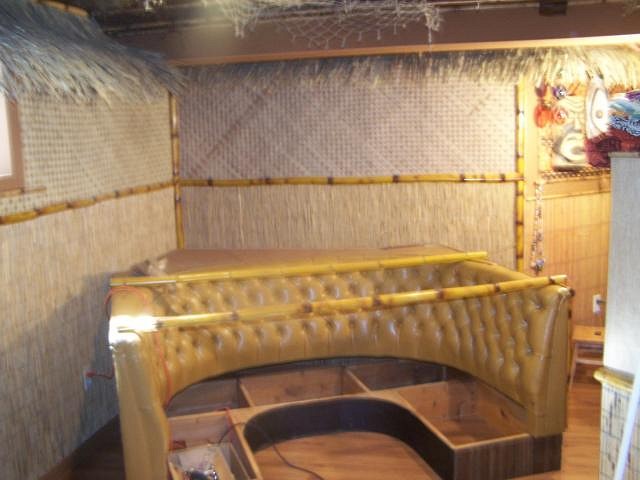
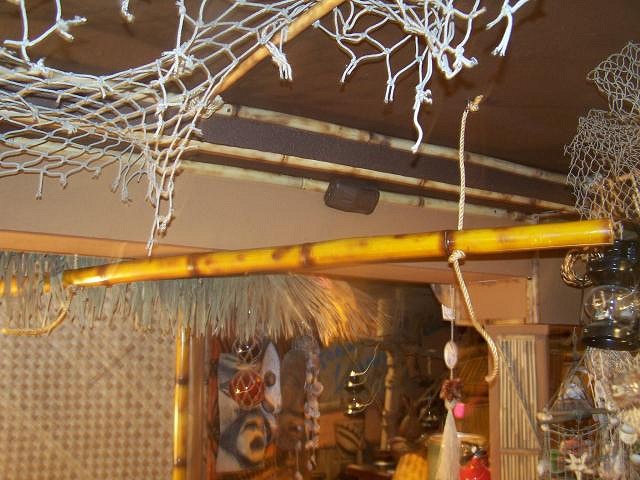
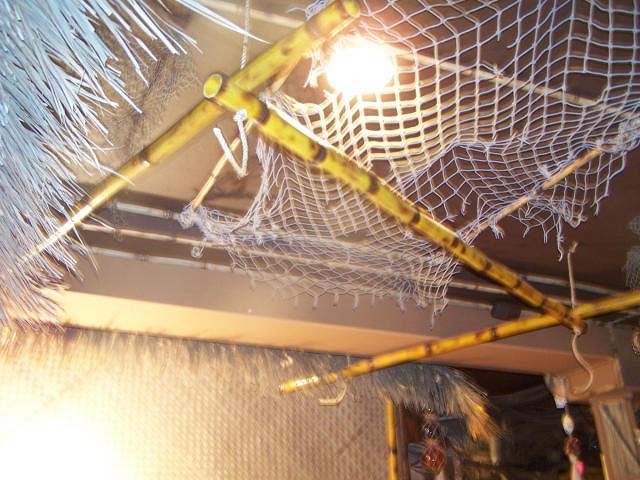
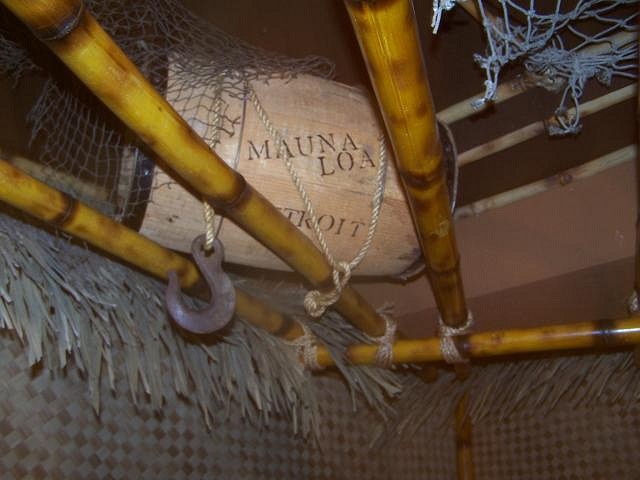
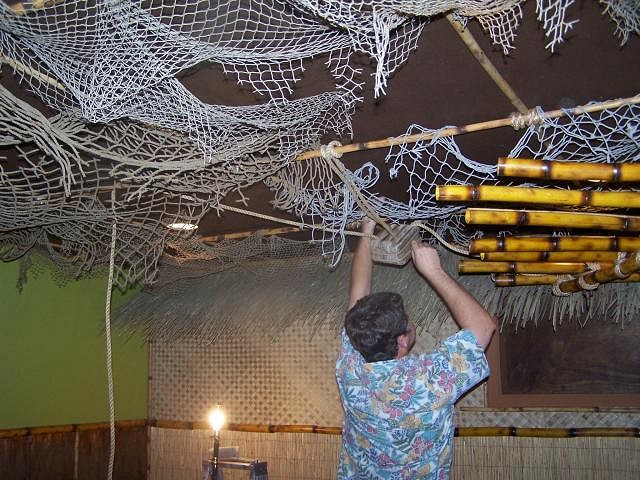
Things are moving along...... Finished the roof thaching along the walls. I used the same technique that I showed way back on page 1 of the thread when I stared Phase I. I put the booth into a corner at an angle. One idea I had with the booth was to create a hut around it. So I started playing around with some larger diameter bamboo poles for walls. After I had a few of them up temporarily, I immediately did not like the look. It felt too closed in. So instead, I opted to build the illusion of a hut by just building a suspended roof over the booth. It was really easy. I just hung the frame poles directly from the ceiling using a toggle bolt thru the drywall and an eye bolt to put the rope thru.
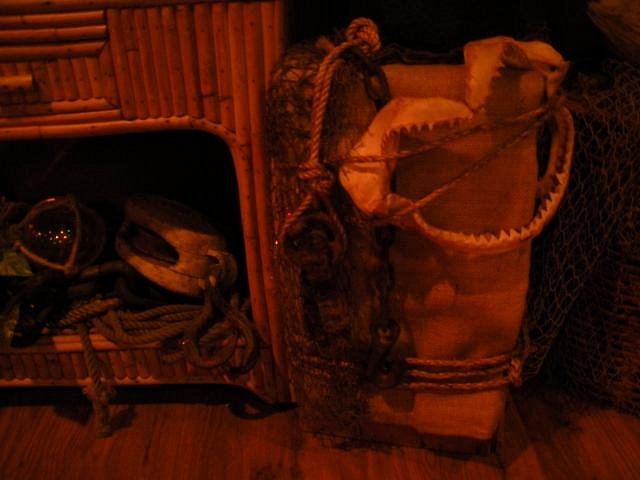
The roof turned out very nice. It is also a great place to hide details, etc. A few empty crates that will be filled with decor later. Started putting some of the ceiling decor into place (nets, floats, ropes, etc.)
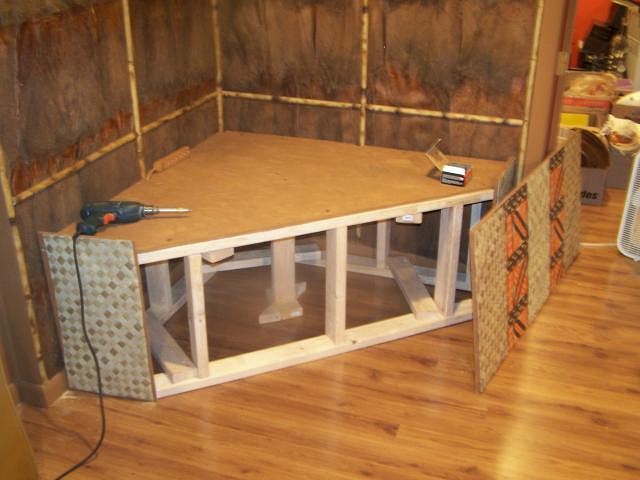
At the opposite corner of the room, directly facing the booth, I want to build a large foam moai inspired by Kahona, one of the free standing tikis at the old Tiki Gardens in St. Petersburg, Florida. I started by building a small working model. I threw this together in 15 mins. with cardboard, tape and some paint to use when I work large scale.
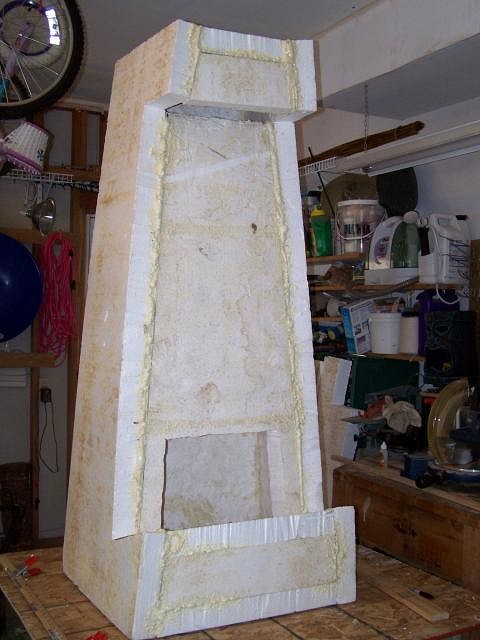
But I didn't want to put the big guy directly on the floor, so I built a stand into the corner. Put the top on and the facing. Finish with some bamboo trim, and it is complete. Now I start working on the foam moai...... [ Edited by: ZuluMagoo 2009-08-01 07:44 ] |
|
S
Swanky
Posted
posted
on
Mon, Aug 3, 2009 8:36 AM
Look into the vintage fake fireplaces. They make a crackling noise and would maybe give you the look you want. Some have heaters built in too to adda hot breeze. Maybe $100 on Ebay. |
|
Z
ZuluMagoo
Posted
posted
on
Mon, Aug 3, 2009 9:40 PM
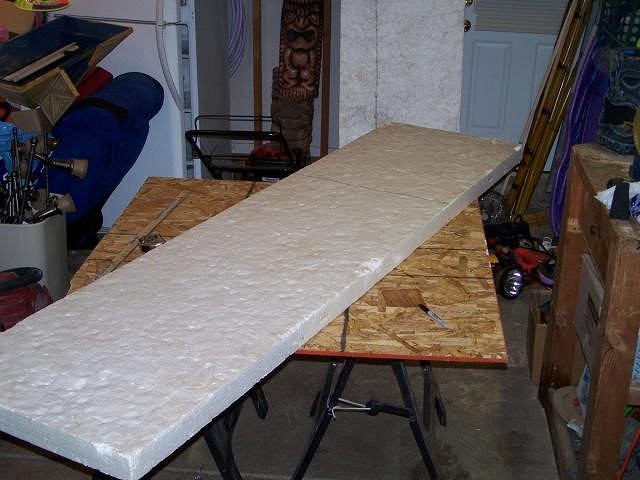
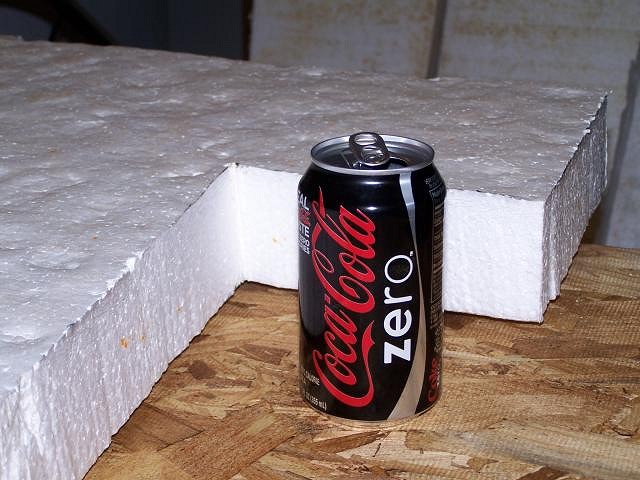
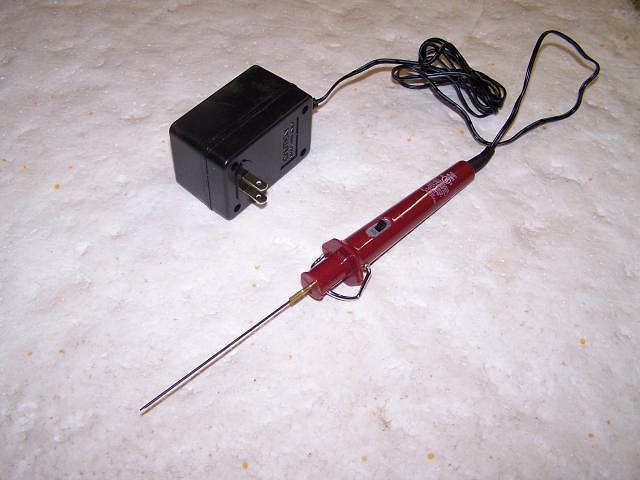
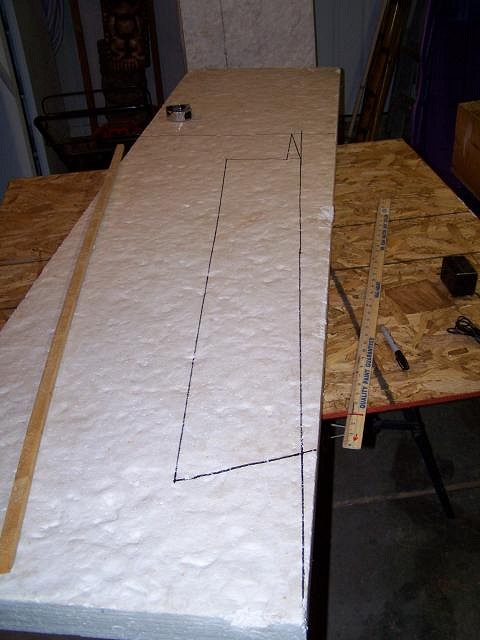
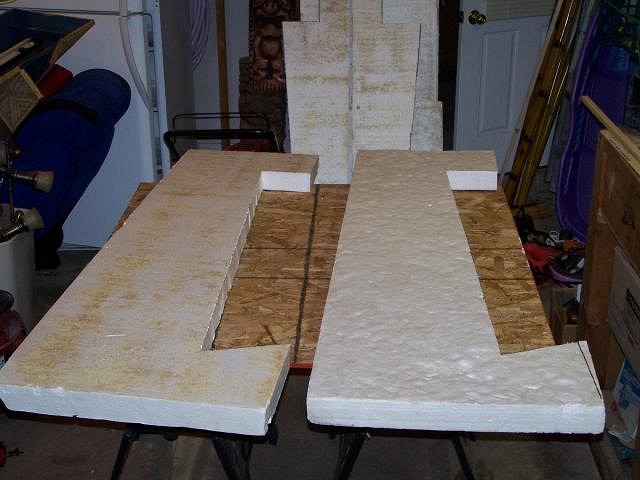
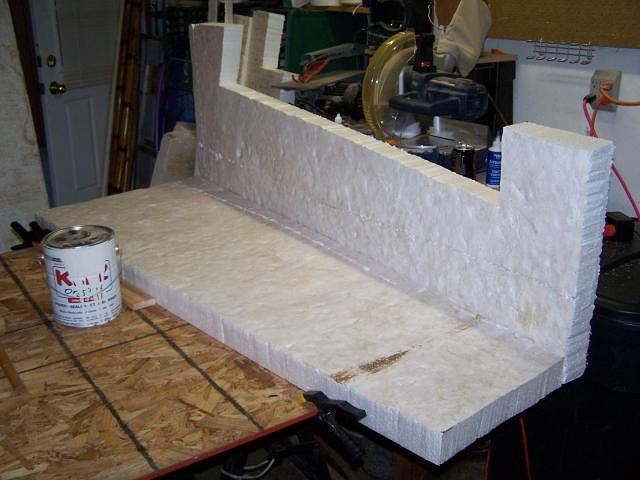
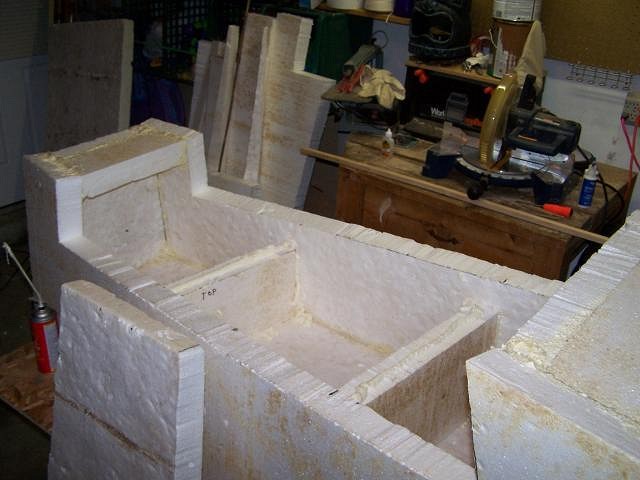
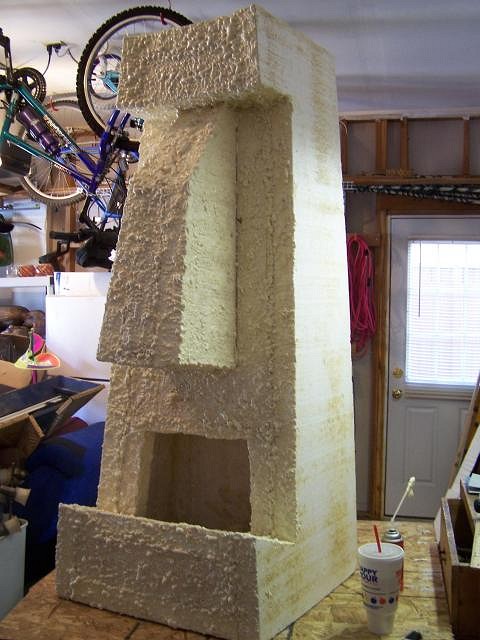
I looked around town to find various styrofoam sources and lucked out with the local Habitat for Humanity store. They had a stock of 2' by 8' foam sheets and were selling them for $2.50 per sheet. They have been used and were salvaged, so they are a little banged up and nicked, but will serve my purpose. These are the sheets. The sheets are 2.5 inches thick and very sturdy. Picked up this little guy at the local craft store for $20 and worth every penny. It is a 'hot knife' and cuts thru the styrofoam like butter. Absolutely no mess, I was really woried about the little white stryo balls getting everywhere and have not found one yet. Draw out the pattern with a Sharpie. Start cutting out pieces. |
|
Z
ZuluMagoo
Posted
posted
on
Sat, Aug 8, 2009 3:37 PM
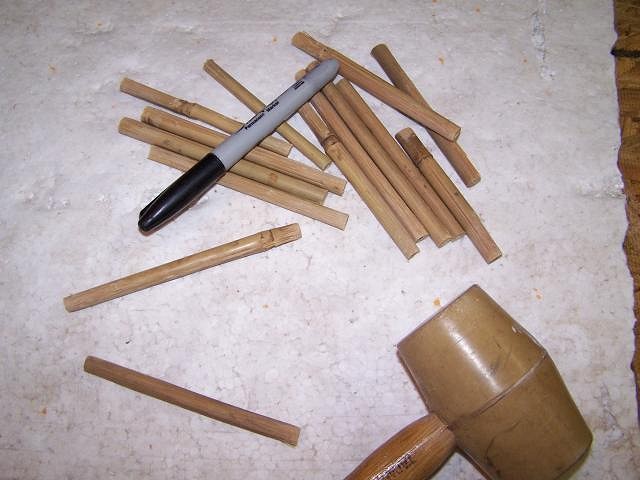
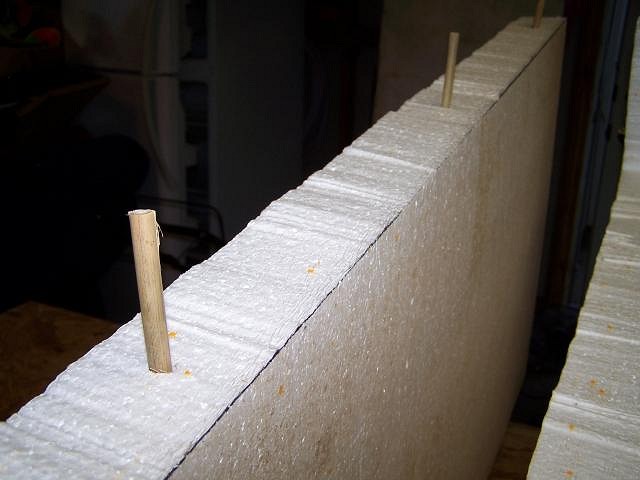
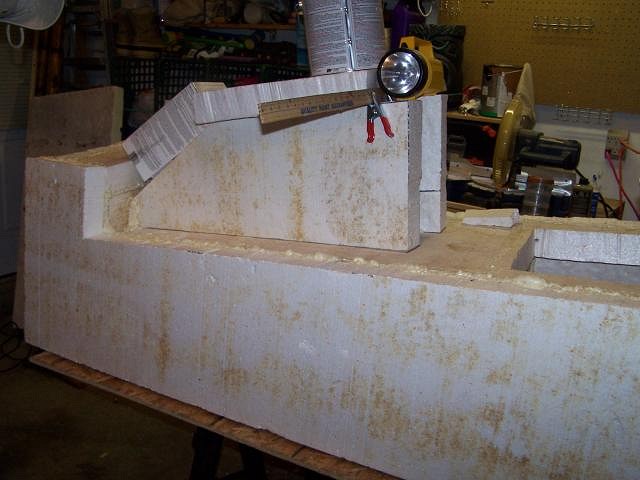
Have started putting the puzzle together. Started out cutting a small bamboo pole and using the pieces as nails to hold it together.
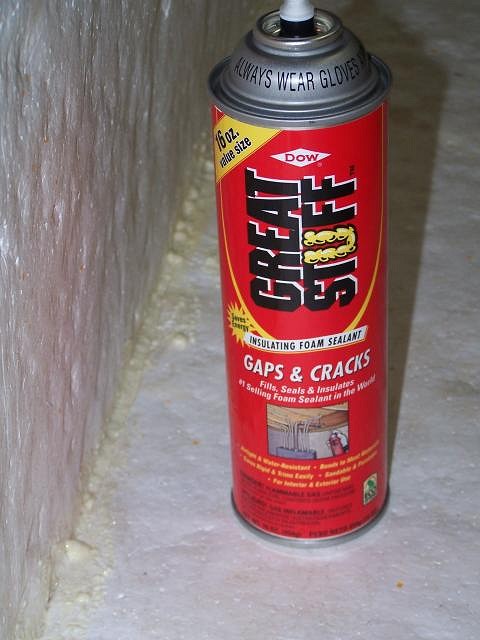
You can't use regular gule or adhesives with polystyrene styrofoam, they will not bond and will melt the styro. So I tried several different glues including Gorilla glue and a special styrofoam glue from the hobby store. They didn't work that well, and they were going to get very expensive for the amount I needed. So I ended up using 'Great Stuff'. This stuff is REALLY EASY to use. You can get a can for less than $4 at Home Depot. Notice the warning right on top of the can? Pay attention and wear gloves!! I did not for the first several days and this stuff is a serious bitch to clean off your hands! Goo Gone, nail polish remover, lava soap, none of it works. Just spray it on and use like a mortar between the pieces. As it sets it expands and bubbles. After a little experimenting, you will get used to how much to use.
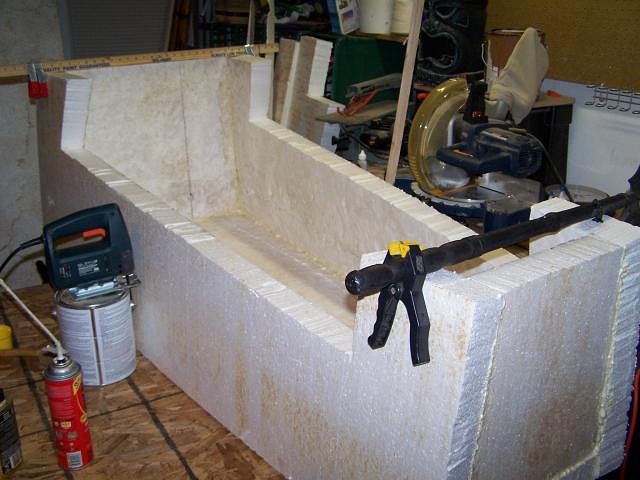
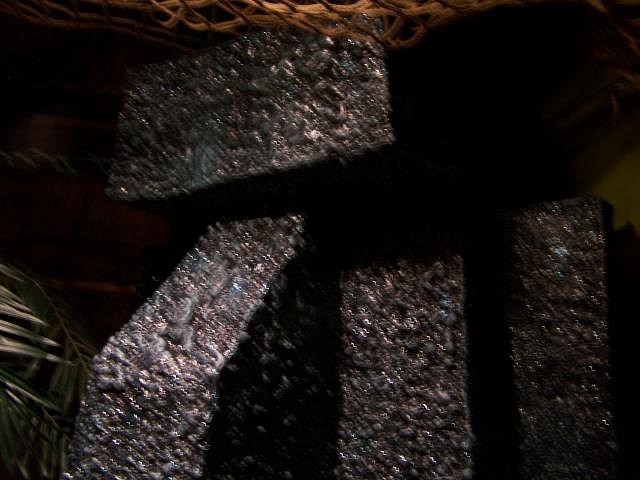
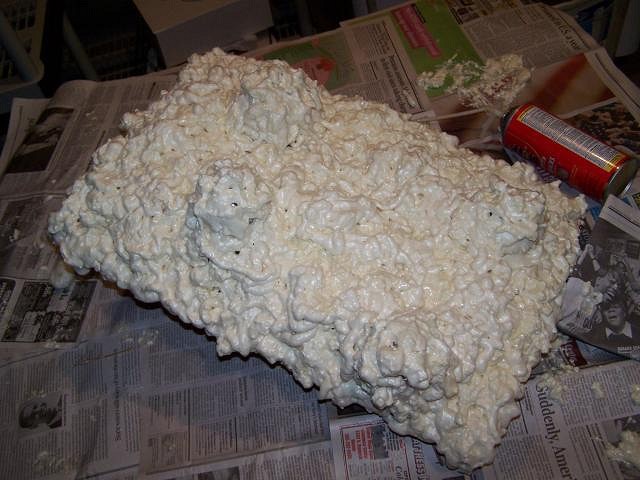
After I have the frame assembeled, I needed to cover the surface with something to give it some texture before painting. Originally, I planned to cover with a skim coat of stucco (with sand in the mix) to give a rock texture like finish. However, after working with the Great Stuff, and making some mess, I discovered it also works great as a surface texture. When you spray it, it comes out of the can as a light airy foam. Put I just took a scrap piece of styrofoam and started spreading it around like icing a cake. When the Great Stuuf dries, it gets rigid like a hard shell over the styrofoam but is still incredibly lightweight. The texture starts to look pretty cool, like rock or lava.
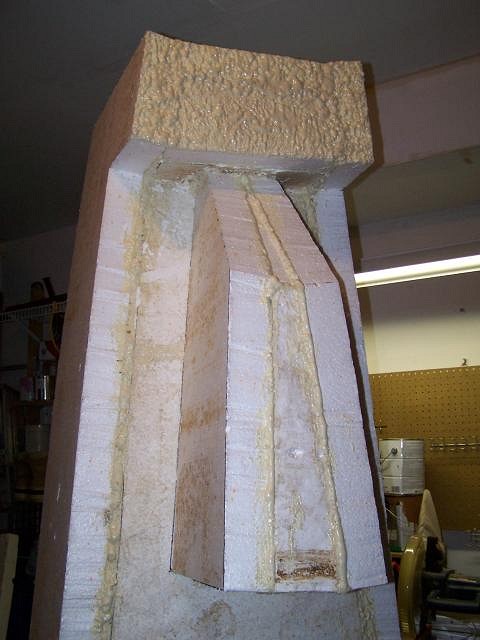
The great thing working with styro is the weight. Right now he only weighs in at about 12 pounds. Still need to attach the ears and then start the painting. |
|
Z
ZuluMagoo
Posted
posted
on
Sun, Aug 9, 2009 6:07 PM
Before painting the big guy and working on his fire effects, I took him back downstairs to double check to make sure he was really going to fit into the space I made for him. He has about 2 inch clearance from the ceiling. I'll take him back up to the garage to paint and finish. |
|
BB

Bora Boris
Posted
posted
on
Sun, Aug 9, 2009 6:18 PM
Nice work Mr. Magoo! Your progress is record setting. |
|
G

GatorRob
Posted
posted
on
Sat, Sep 12, 2009 7:39 PM
EDIT: oops... sorry (wrong thread) [ Edited by: GatorRob 2009-09-12 19:40 ] |
|
M

moneycll
Posted
posted
on
Tue, Sep 15, 2009 6:02 AM
Thanks for the inspiration! I made some tiki birds for my Disney room. http://wrestlecrap.com/disroom/Disney_Room/The_Happiest_Place_on...err,_in...Indianapolis!.html |
|
T
TorchGuy
Posted
posted
on
Mon, Sep 28, 2009 4:29 AM
Loving it, every bit. An opinion/some ideas I'd like to toss out: One: the silk flames, excepting the tall, and large-scale (not to mention expensive) models are (1) overused these days, (2) sound like a noisy PC tower fan and (3) don't look very realistic at all. Now, the old 70s-style wooden logs with a "burned" molded plastic center and revolving colored drum don't look realistic, either, but they've got a very classic look about them. But pretty much without exception, any silk flame from Spencer Gifts or the party store will look a bad sort of fake. http://denver.craigslist.org/fuo/1361270344.html Here's a modern one with a hyper-realistic electric fire effect. Grab it quick if you like these, it's twenty bucks, these sell new for over a hundred. These are realistic, but that might not be the look you're after. Has a fan-forced heater in the top, too. If you're going to do a silk flame, you might consider building one. Had I the time and money, here's what I'd do for this cool Moai head's gaping maw: Hope I'm not rambling too much - I tend to do that - but I also still think a deep-blue, nighttime rainstorm outside the window, or at least, deep blue lights, foliage and maybe wind from a fan, would be very cool. The one glimpse outside could really be an important, if subtle, mood-setter that lets visitors know they've not only gone downstairs, but stepped into another place and time. What will go in that back room with the door? Storage, or another private space? [ Edited by: TorchGuy 2009-09-28 04:32 ] |
|
T
TorchGuy
Posted
posted
on
Tue, Sep 29, 2009 6:24 AM
Also... I can see adding some black or gray sand to the paint, so Mr. Moai ends up with a rough texture you can feel...? Again, I'm hoping he'll get something nicer than a store-bought silk flame. This monumental moai needs something nicer, to really draw the eye and make him a focal point. If nothing else, one of those wooden 70s logs would be fake in a classic vintage way. They may not be realistic but they do look neat. The ones that claim to crackle like a real fire don't have the revolving drum for the traditional moving fire effect - instead, a really phony fire look is given by a rotating bar covered in silver tinsel, which rubs against a textured plastic sheet, making a soft rustling noise that's actually kind of creepy in an interesting way. |
|
Z
ZuluMagoo
Posted
posted
on
Sat, Oct 10, 2009 10:03 PM
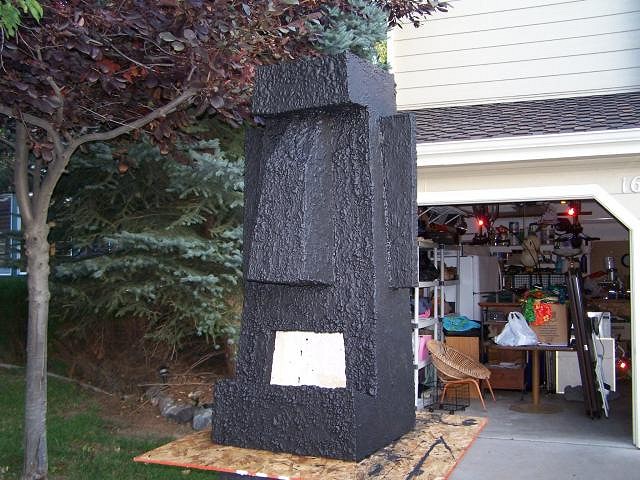
Thanks for the comments TorchGuy. I was leaning away from the silk fire flames myself, trying to come up with something a little different. So I have finished painting him with some black latex interior house paint.
I have named him (quite unoriginal) 'Kahuna' and he is the God of Surf. The name came from Cliff Robertson's beachcomber character in the 1959 classic surf film 'Gidget'. Because he is the God of Surf, I painted a blue highlight color over black and added a hint of blue glitter to simulate shimmering waves. It came out very nice.
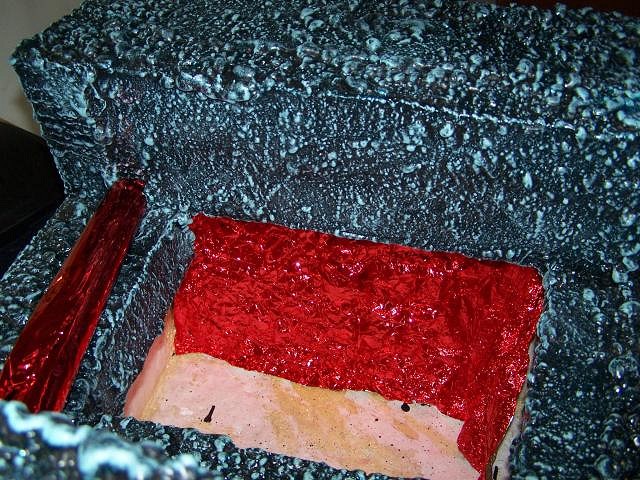
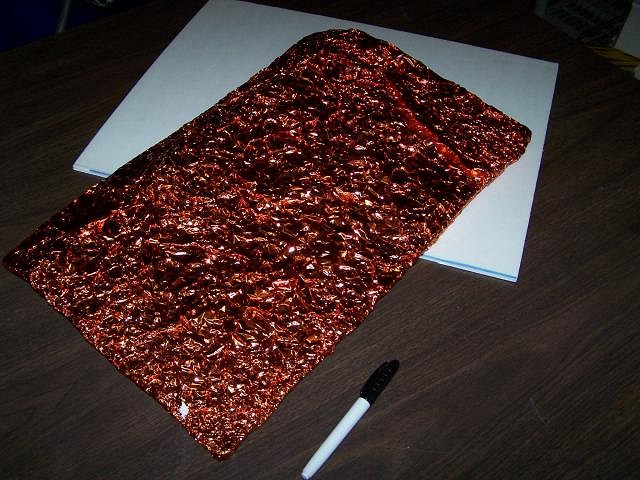
Then I added some orange and red colored foil gift wrap inside the mouth to add to the reflection.
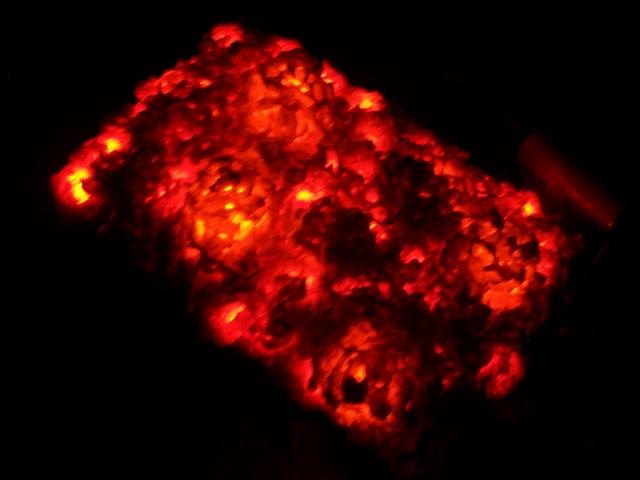
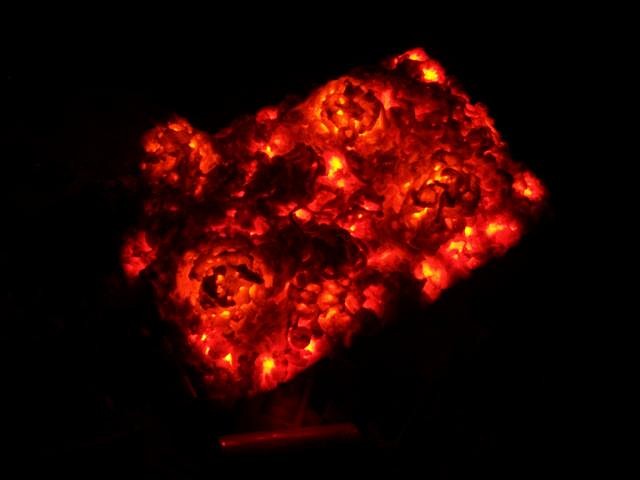
So..............Now for the fire effect. I decided to try to come up with a realistic looking lava effect to put into the mouth. Something smoldering, without flames. So I started with a piece of white foamboard covered with the same colored foil gift wrap.
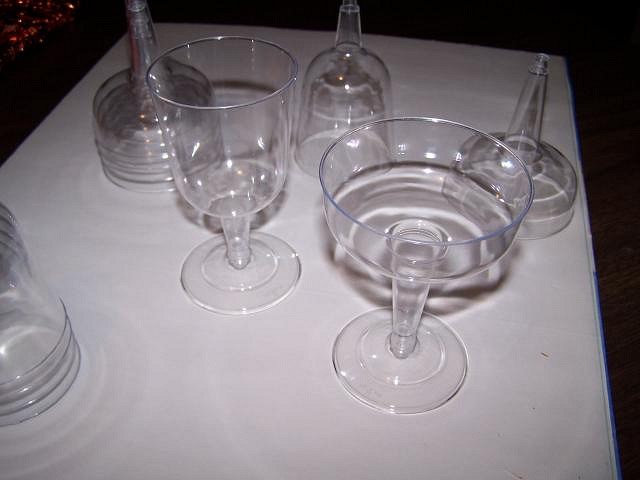
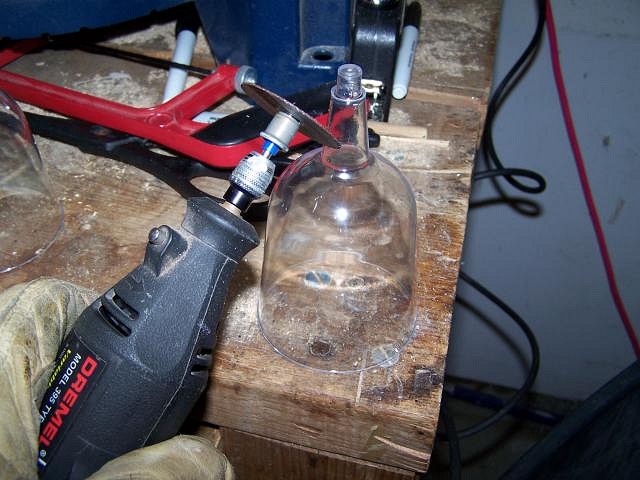
Then I bought some plastic wine and champagne (needed different sizes)from the dollar store. Cut the bottom stems off with my Dremel tool.
Got some orange colored lights from Big Lots. Two types. One small string of 50 constant orange and one string of flickering bulbs to add some movement to the display.
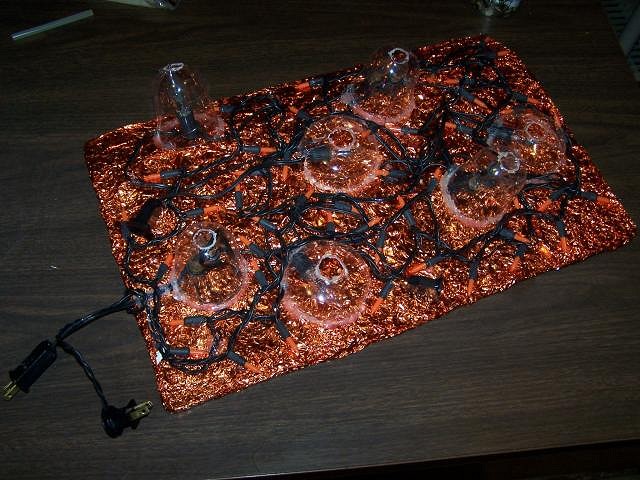
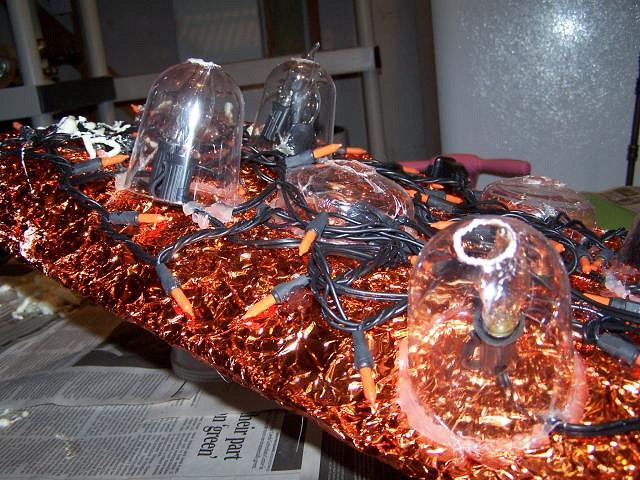
Then started attaching the lights to the foamboard using a hot glue gun. I put the flicker bulbs under the glasses (upside down). The glasses are intended to be bubbles. The other lights are just glued directly to the surface.
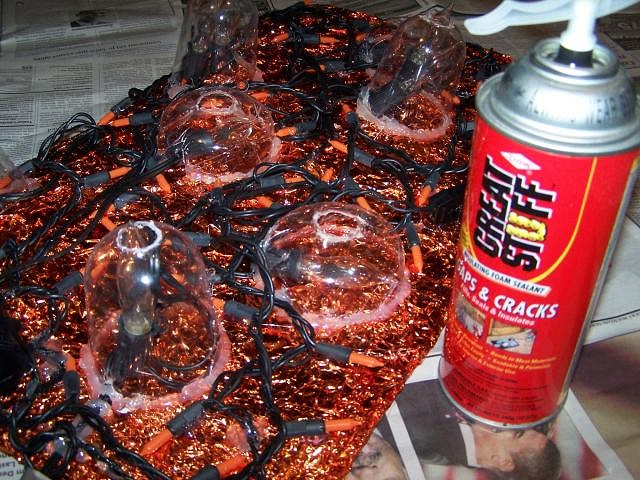
Then get out old reliable 'Good Stuff' (now my favorite crafting material) and cover the entire surface.
Plug in the colored lights and turn down the room lights....
|
|
B

bigbrotiki
Posted
posted
on
Sun, Oct 11, 2009 6:32 AM
Jeez Mike, that is awesome. You should patent that lava thing alone...not to mention franchising the whole Kona Luanii as a package! One can really tell the imagineer that has been slumbering in you. |
|
OGR

Or Got Rum?
Posted
posted
on
Sun, Oct 11, 2009 9:36 AM
Truly Freakin' SWEET! Would there be any safety issues w/ the lava/lights? Because I love it. Great Job! |
|
B

bigtikidude
Posted
posted
on
Sun, Oct 11, 2009 7:35 PM
video of the lava pleez? Jeff(btd) |
|
T
TorchGuy
Posted
posted
on
Wed, Oct 14, 2009 12:02 AM
Your lava is absolutely awesome! I second the request for a video. |
|
P

Polynesiac
Posted
posted
on
Thu, Oct 15, 2009 1:44 PM
Seriously awesome thread. The moai looks fantastic and that lava effect is worthy of disneyland. I've seen people use the foam to represent dried lava before, but I had no idea that it's translucent! Great ideas here! and great looking tiki bar too! You are on FIRE!!!! |
|
T
TorchGuy
Posted
posted
on
Thu, Oct 15, 2009 7:54 PM
It just occurred to me... ...I hope the Good Stuff foam isn't right on the lights? When any of the mini orange lights goes out, you'll have a time gettin' the top off to change the bulb. Unless the foam lava bed can be pried off, plastic cups and all, for access. Now, the flicker bulbs are neon "glow lights" and will last for decades, but they may need replacing after a few years if the flickering dies down, which it can. |
|
TF

Tiki Fink
Posted
posted
on
Sun, Oct 25, 2009 8:52 AM
My god what have you done????? It's it's i.........Amazing! |
|
BBS

Beach Bum Scott
Posted
posted
on
Sat, Oct 31, 2009 10:50 AM
Holy Cow...... |
|
Z
ZuluMagoo
Posted
posted
on
Sun, Nov 15, 2009 8:39 PM
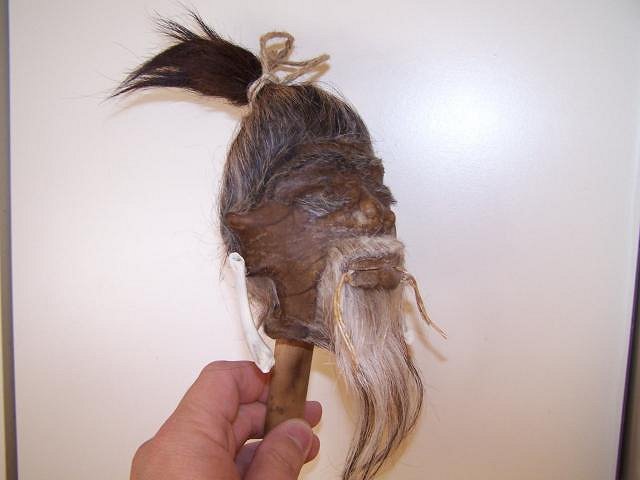
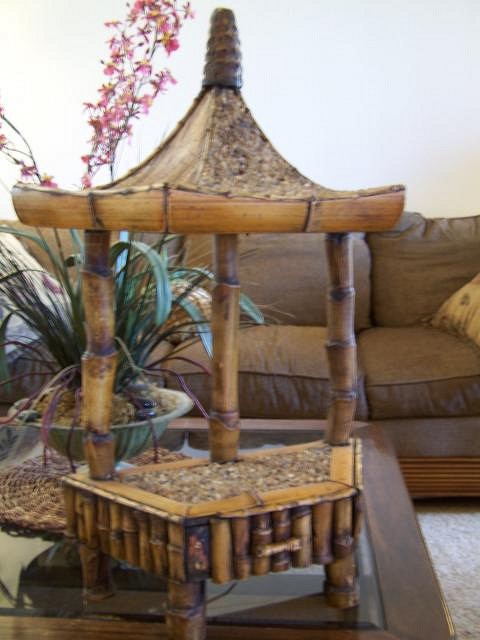
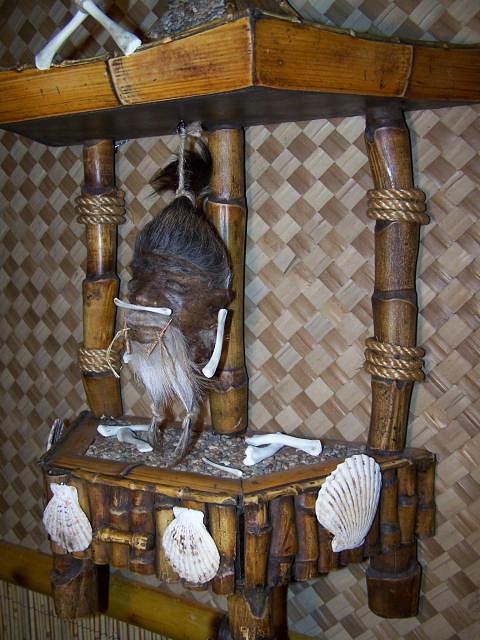
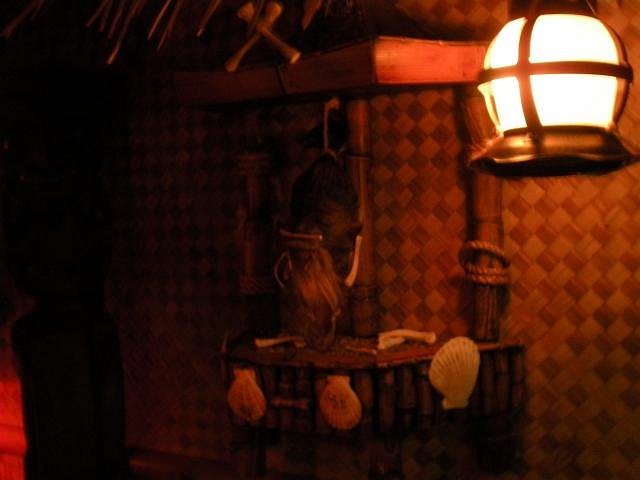
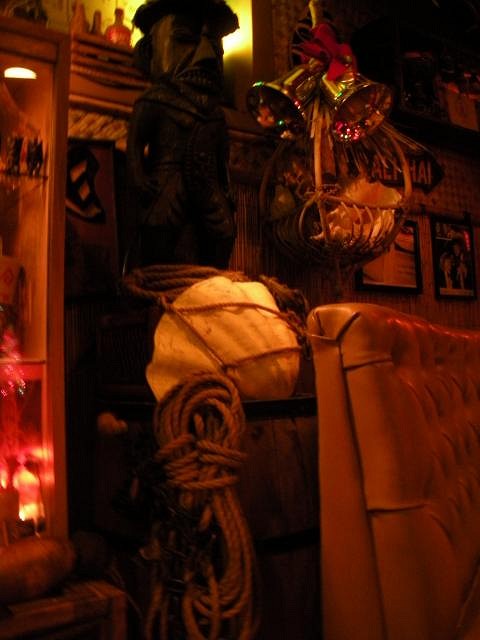
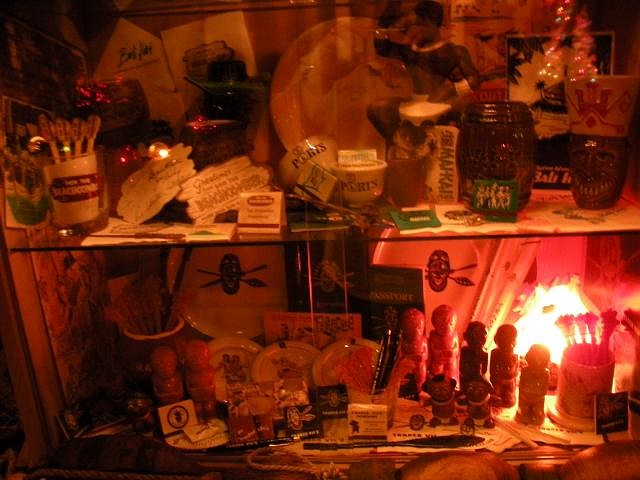
Phase II is wrapping up nicely, lots of finished pics coming soon. In the meantime, a few quick shots of one of the decor items I recently made. Inspired by the shrunken head display at the Mai Kai, I created a shrunken head shrine mounted on the wall behind the booth. I got this shrunken head on eBay. They come from the Jivaro tribe in Ecuador. They strech goat skin over a head mold and ley it dry and then add animal hair. They look really great and come in various sizes. This is a 5" head.
I found this exotic display at an antique store a year or so ago, I think it was about $10, but perfect for the shrine.
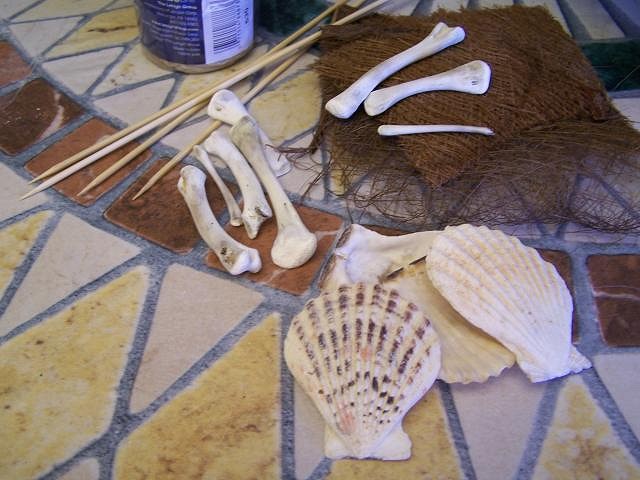
A few misc supplies (including chicken bones soaked in bleach overnight)
Some hot glue....and done. My 7 year old has named him Fred the Shrunken Head.
|
|
H

Humuhumu
Posted
posted
on
Sun, Nov 15, 2009 9:00 PM
Man, you have such a great eye. You do a great job getting the overall perspective and balance in the room just right, not to mention really inventive and graphically pleasing individual elements. Kudos! |
|
Z
ZuluMagoo
Posted
posted
on
Tue, Dec 29, 2009 10:27 PM
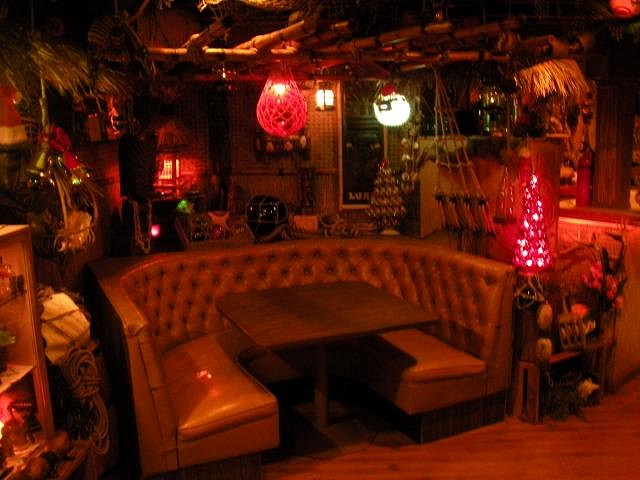
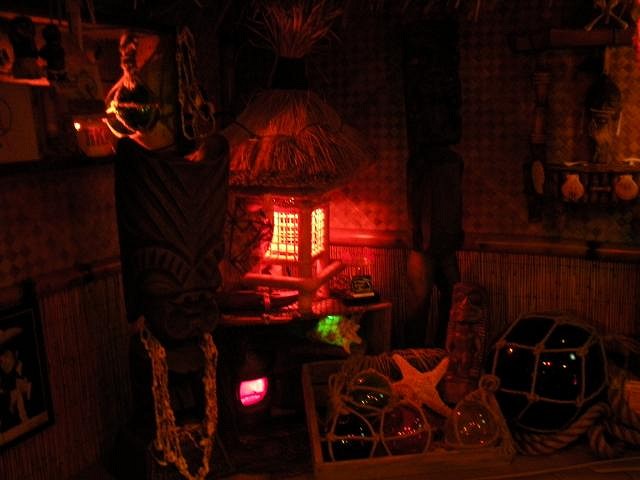
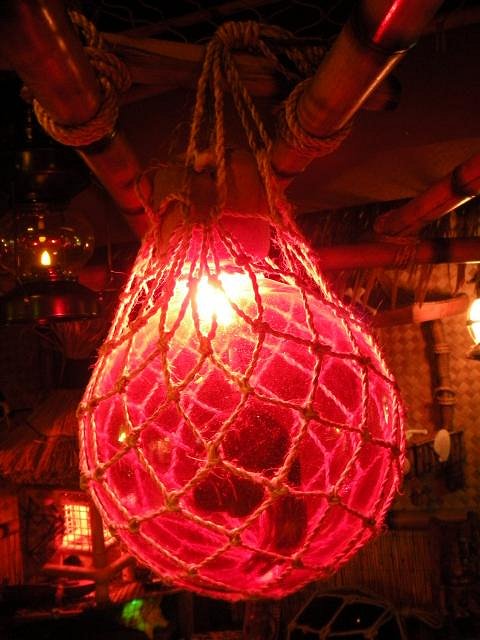
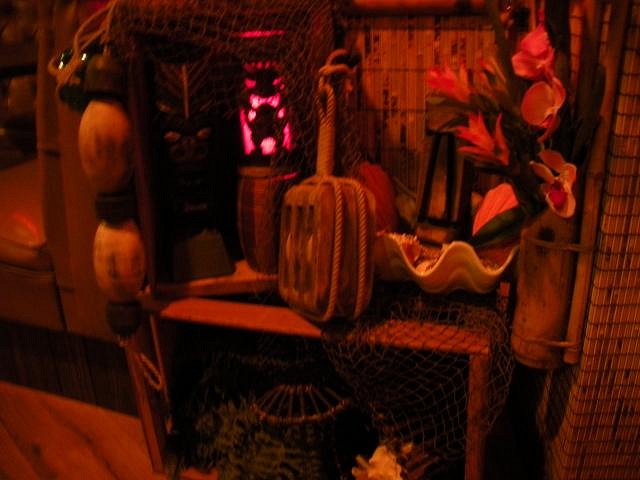
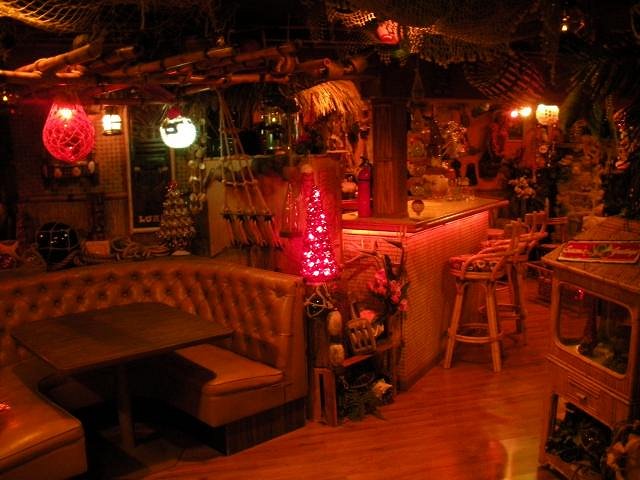
Phase II is finally done. I finished it up a couple of weeks ago, just in time for our annual Christmas party (hence the Christmas decor in a few of the pics). The booth area. Detail of the decor behind the booth. An old wooden ammuniation box mounted as a shelf has more Disney Enchanted Tiki Room items. This hanging glass float lamp is centered over the table. It was made by Bongo Fury, I picked it up at Tiki Oasis. But this one is a little different, it has a shrunken head inside. I love this float lamp, excellent work Ron! Which is why the 'Fred the Shrunken Head' shrine is mounted in the wall directly behind. Misc. decor.
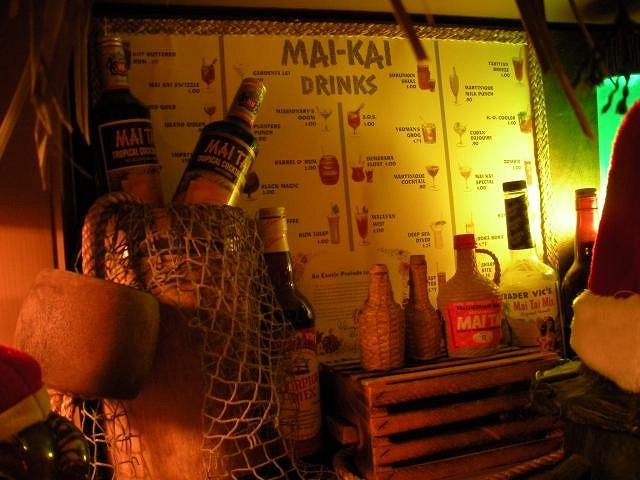
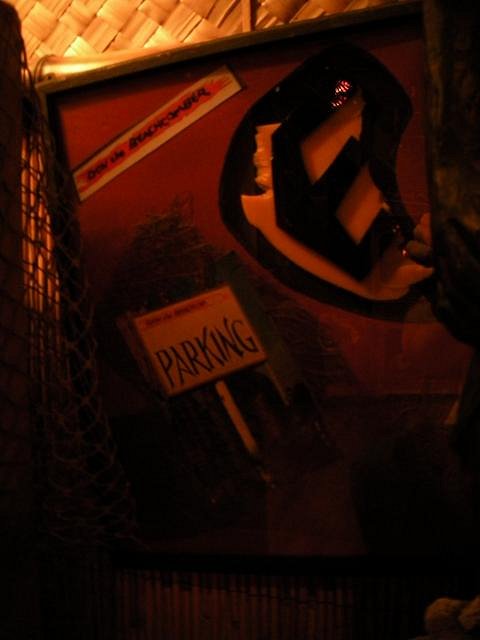
A collection of bottles and mixes from back in the day that I have picked up at various estate sales. This is a piece of the Don the Beachcomber (Hollywood locale) sign, which stood for many many years after the resaturant closed before the sign was finally taken down. |
|
Z
ZuluMagoo
Posted
posted
on
Tue, Dec 29, 2009 10:39 PM
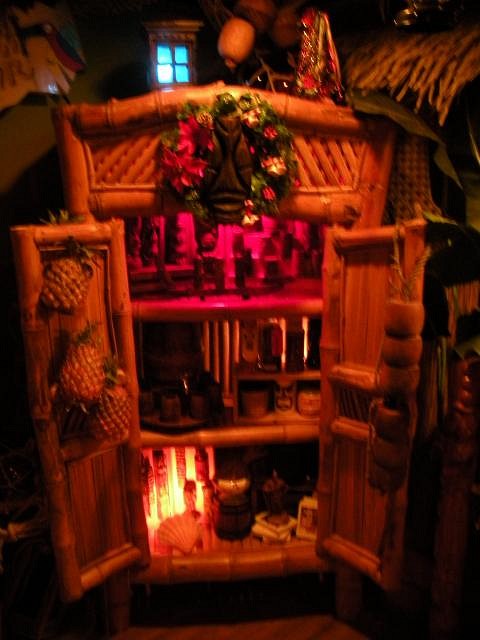
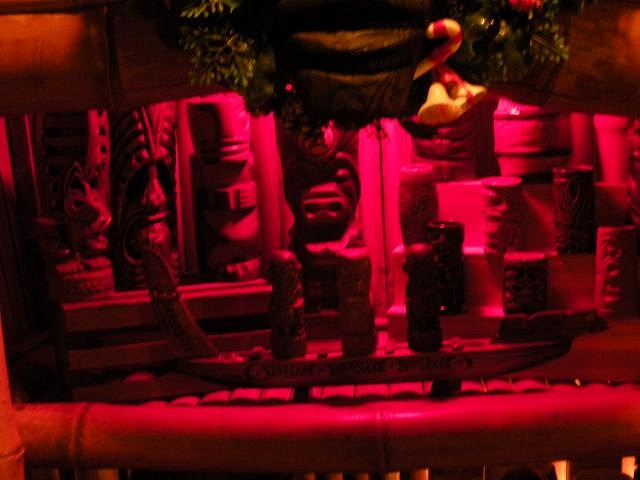
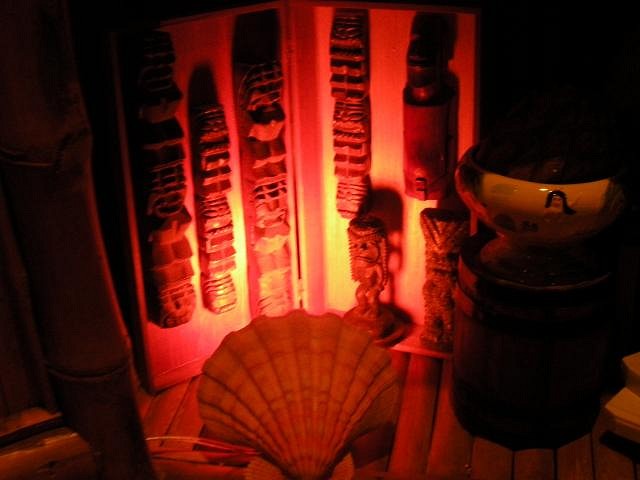
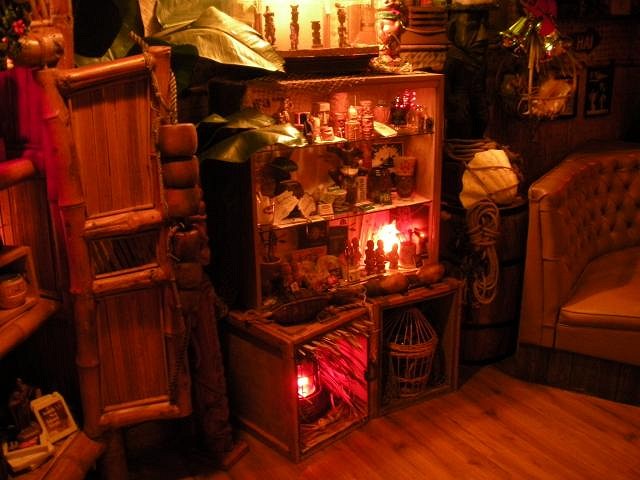
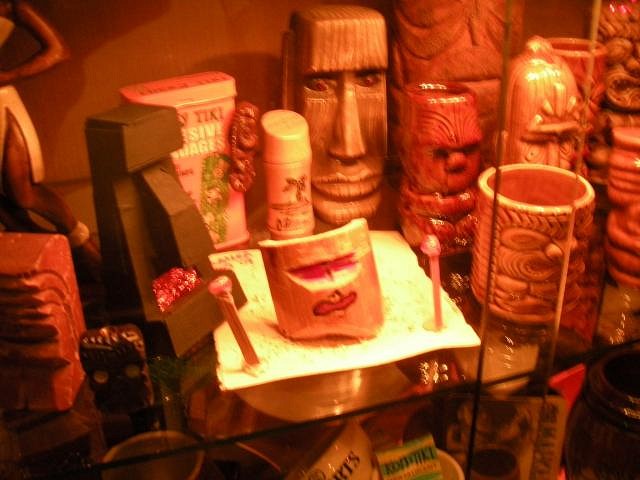
Across the the room in the other corner is this large bamboo hutch. The top shelf of the hutch. The bottom shelf. I found a good use for all of those wooden tiki fork/spoon sets you find at the thrift store. Just cut off the tikis and mount in a lighted display box. On the bottom shelf Coco Joe's King Kam guards the collection of exotica 8 tracks. Between the bamboo hutch and the booth is the restaurant item display case. The bottom shelf is all Trader Vic's items. Middle shelf is Don the Beachcomber, Kon Tiki, Mai Kai and the Bali Hai. The top shelf has misc. tikis. Front and center is the bamboo tiki my 7 yr. old daughter made for me this summer. |
|
Z
ZuluMagoo
Posted
posted
on
Tue, Dec 29, 2009 10:47 PM
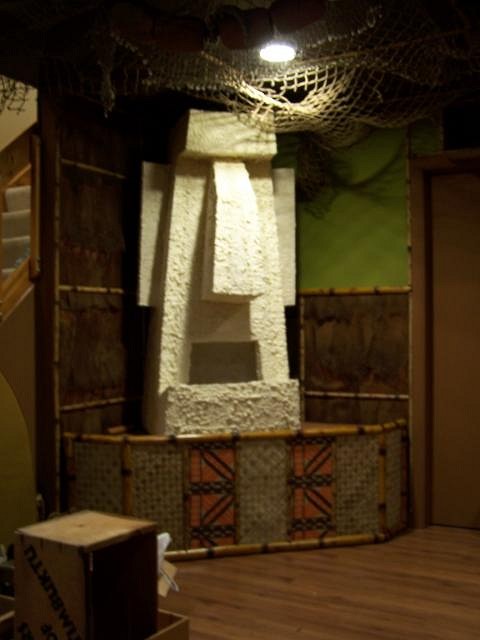
Kahuna, the God of Surf, with a mouthfull of lava, sits opposite the booth in the other corner of the room. The Kona Luanii. All that is left to do is redo the bar top and the booth table. After that, Phase III, the guest bedroom adjacent to Kahuna. Except Phase III will be very different. It will have a 60's bowling theme, but of course they will all be tiki bowling alleys! I need a break, maybe I'll start next summer. [ Edited by: ZuluMagoo 2009-12-29 22:59 ] |
|
A

abstractiki
Posted
posted
on
Wed, Dec 30, 2009 5:56 AM
WOW! this Home Tiki Bar is absolutely positively totally awesome!!!! Great work Zulu! |
|
T

TIKIVILLE
Posted
posted
on
Wed, Dec 30, 2009 11:07 AM
HOLY MOLEY! |
|
BK

Big Kahuna
Posted
posted
on
Wed, Dec 30, 2009 2:51 PM
I can't match that. I'm just gonna throw my stuff out & convert it to a NASCAR bar!! Great work! |
|
B
bigbrotiki
Posted
posted
on
Wed, Dec 30, 2009 5:37 PM
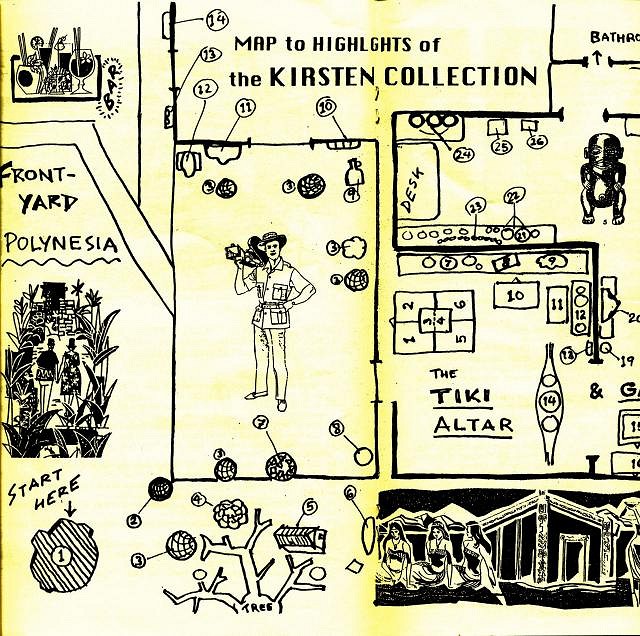
Mike, that's amazing. What you need now is a guide for the guests:
...which also included a floor plan of my front yard/porch and my living room, with the artefacts being ID-ed by numbers:
...which corresponded to their descriptions on the next page-and-a-half:
I cannot say how many guests really followed the guide, but there always are a few odd ones who care. :wink: |
|
G

GROG
Posted
posted
on
Wed, Dec 30, 2009 5:54 PM
Very nice home bar. GROG like. |
|
S
Swanky
Posted
posted
on
Thu, Dec 31, 2009 8:14 AM
Excellent! I love the "clutter." That's the next "phase" for the Hideaway. |
|
BBS
Beach Bum Scott
Posted
posted
on
Sat, Jan 9, 2010 8:28 AM
The pictures don't do this Tiki Room justice... What an inspiration... |
|
A

ashman_atl
Posted
posted
on
Mon, Mar 8, 2010 7:00 AM
Zulu- what a space! Sometimes, I think I'm better off not looking at others' bars especially when they look like this! Lots of great ideas and very cool effects, so thanks for sharing. You put a lot of work (and probably $$) into this lounge and it shows. |
|
F

freddiefreelance
Posted
posted
on
Thu, Mar 25, 2010 2:31 PM
That looks really good! What if you did the same thing around the outside of a large Coffee Can, and then mount that behind the Mouth with a small, quiet DC motor to make it slowly rotate? Hopefully it'd look like slowly running Lava; kind of like the lava effect in the "Primeval World" Dinosaur Diorama at Disneyland. |
|
T
TorchGuy
Posted
posted
on
Thu, Mar 25, 2010 9:37 PM
Were you to do as described above, you'd need a way to get power to the lights that rotate on the drum. Weird custom homebrew lighting effects are my bag - one of 'em, anyway. If you ever try this, here's my idea: Start with a coffee can or other cylinder, and build your motor using an old rotisserie motor and spit shaft. Should be easy to grab one off eBay or at a thrift store. On each end of the drum, cover the surface with something nonconductive. A coffee can lid works. Need this on both ends. Now, run one of the two power wires down onto each end, glue in place, and get yourself a wide metal ring. Glue the ring to the end cover, and attach the each wire to the rings. For the power itself, split the power cord and, at each end of the drum, affix the wire to some sort of solidly-attached terminal on the support base, add a strip of springy metal, and bend these until they rest firmly against the metal rings. This keeps current flowing to the onboard lights as the drum revolves. Given the chance, I'd love to try to build this unit. Sounds fun. |
|
MR
Matt Reese
Posted
posted
on
Mon, Mar 29, 2010 7:26 PM
This is one of the greatest home bars ever! |
|
H

harro
Posted
posted
on
Thu, May 31, 2012 5:02 AM
Can't believe I missed this thread until now. Unbelievable home bar! So much creativity, thanks for the how-tos. Any progress on the tiki bowling area? And did you ever post a vid of that lava? |
|
MAD

moki and duke
Posted
posted
on
Tue, Jun 5, 2012 11:32 PM
Wow! VERY inspiring! Definitely need to bump this one to the top of the thread once in a while :wink: |