Tiki Central / Home Tiki Bars
Hapa Haole Hideaway Rebuild Again! - Open
|
S

Swanky
Posted
posted
on
Sun, Jun 8, 2008 4:27 PM
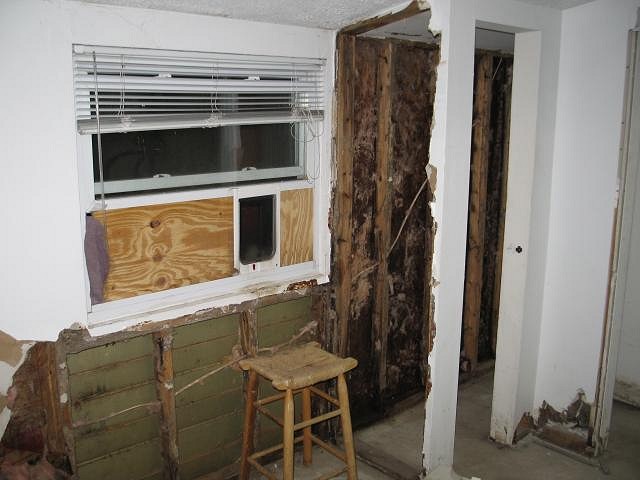
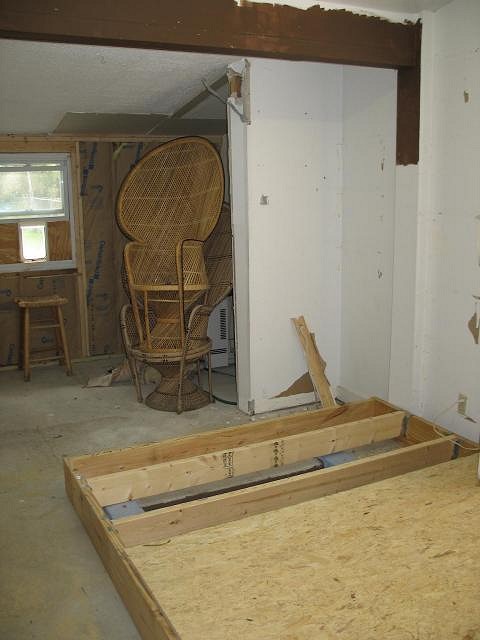
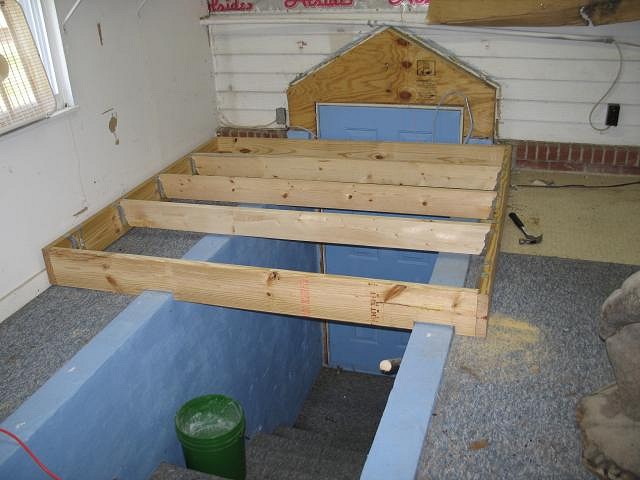
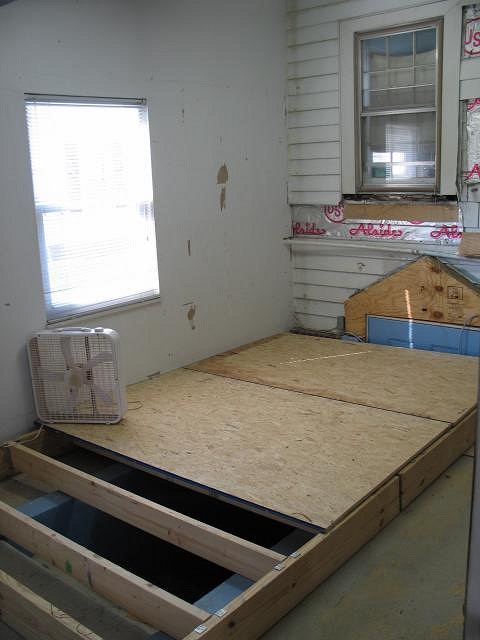
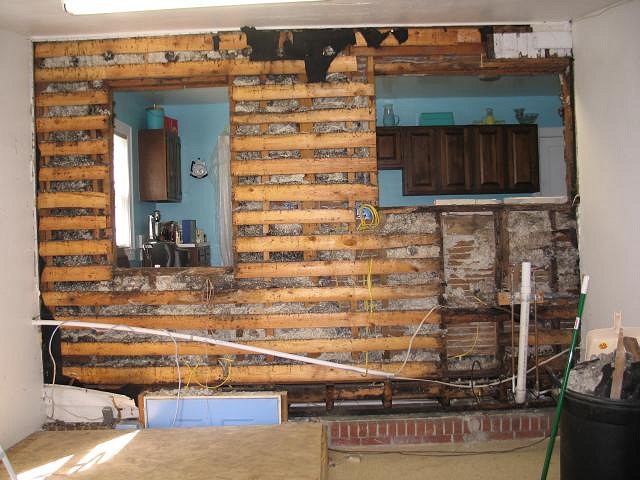
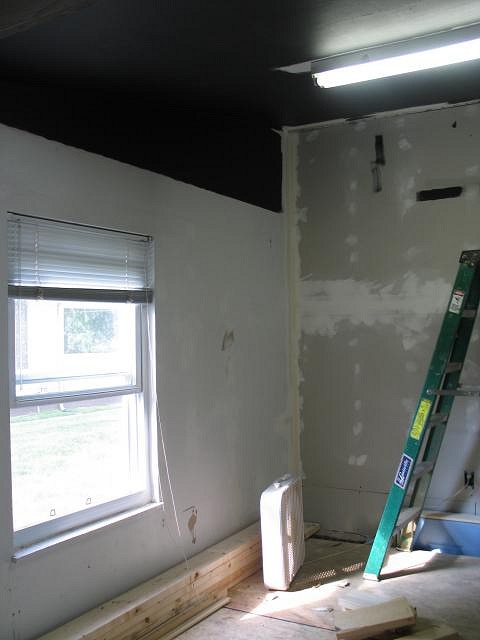
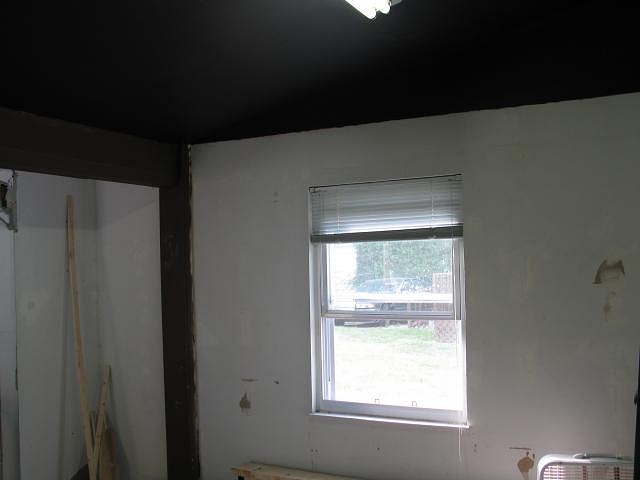
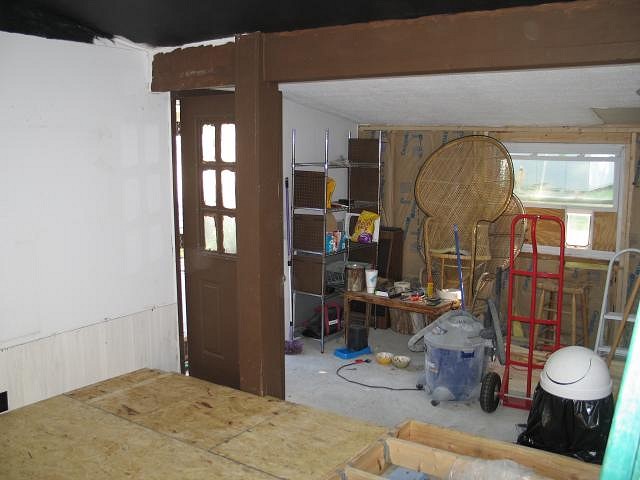
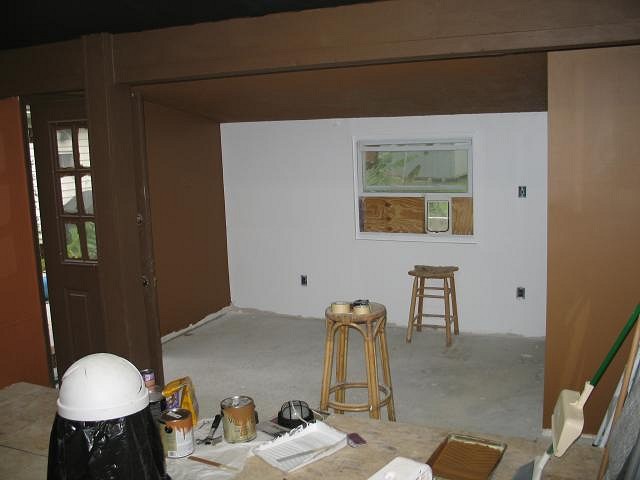
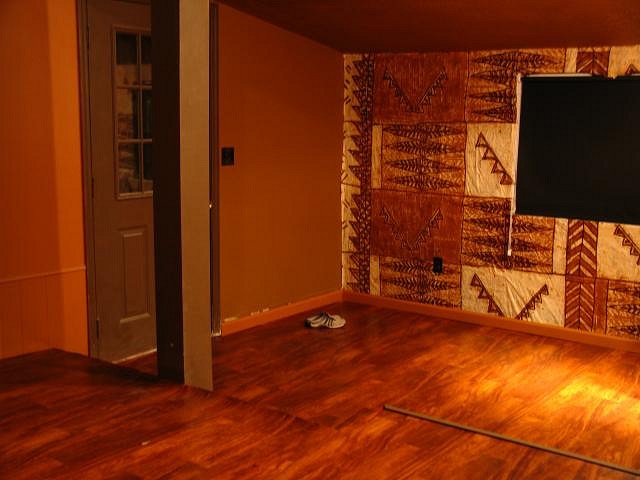
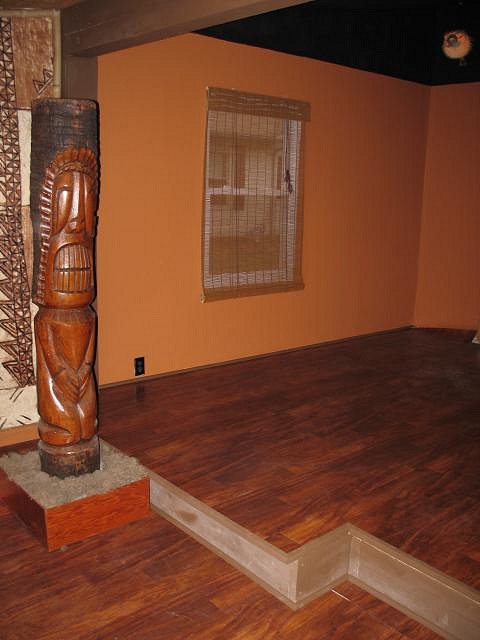
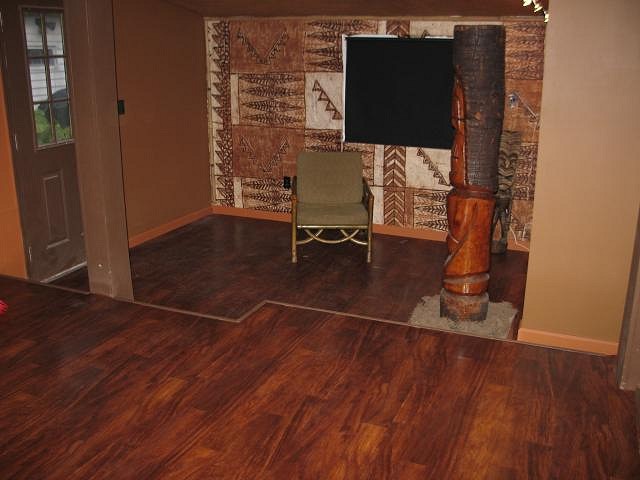
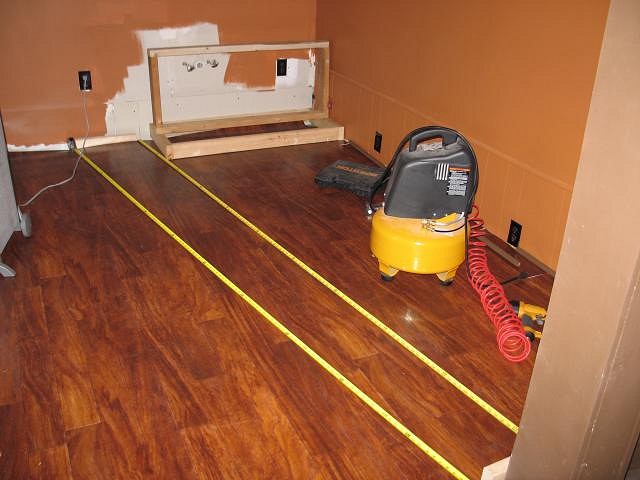
Getting settled into the new house and this summer we are working towards getting the Hideaway back open for our little vacation spot in the next room. Phase one is lots of construction. The room is about 12 X 19 and the ceiling slopes from 6 to 9 feet. It was a laundry room with stairs to the basement. Pack for Hukilau? Nah, let's put a floor in the bar honey! June 19th - 2008 June 21, 2008 June 24, 2008 July 4th weekend
Man, this was a lot of work! If you have ever mudded drywall, you know it's just a pain. The corners in the room were a mess since there was aluminum siding under there! Big nasty gaps to fill and fix. The corner at the ceiling too. Stuff you don't see, but is a lot of work. We also got Jatoba flooring for the bar this weekend, but we'll have to get a bit further along before we put it in. We don't want to ruin it in the construction. August 1st
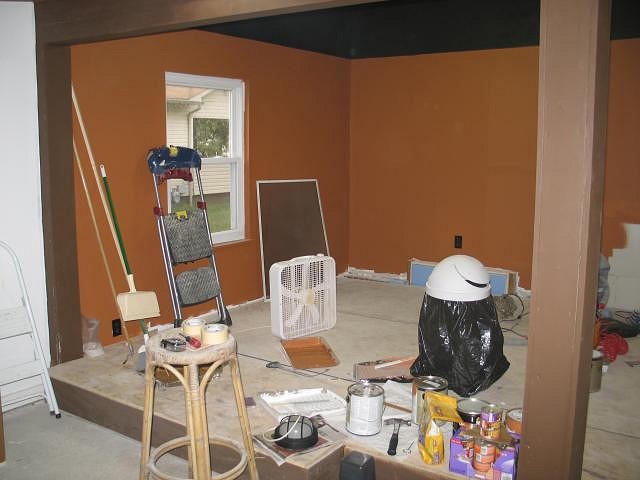
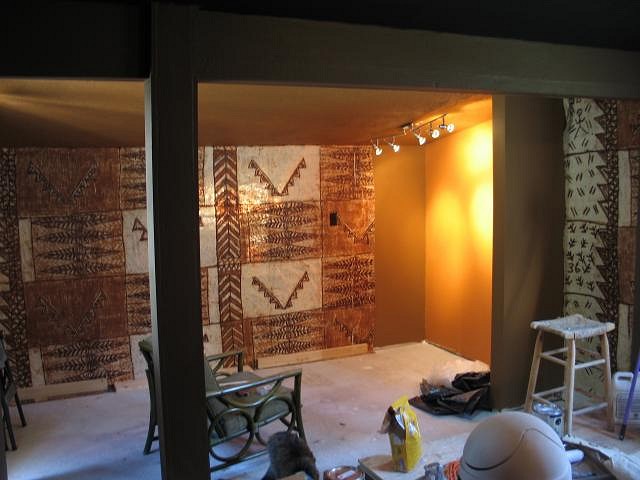
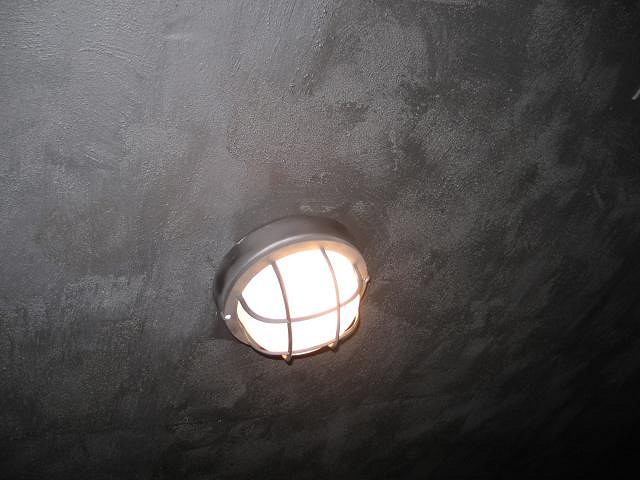
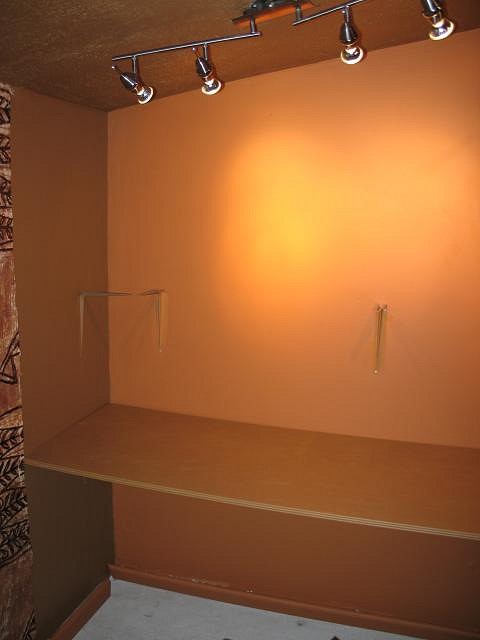
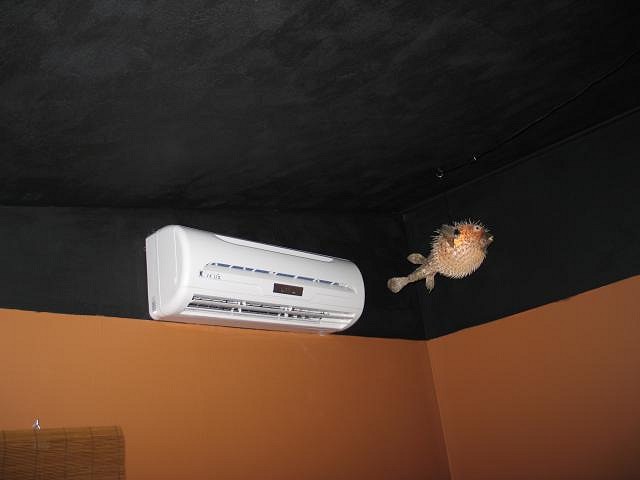
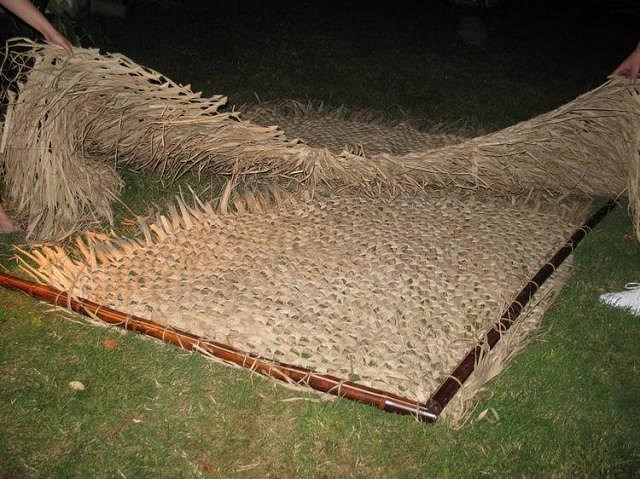
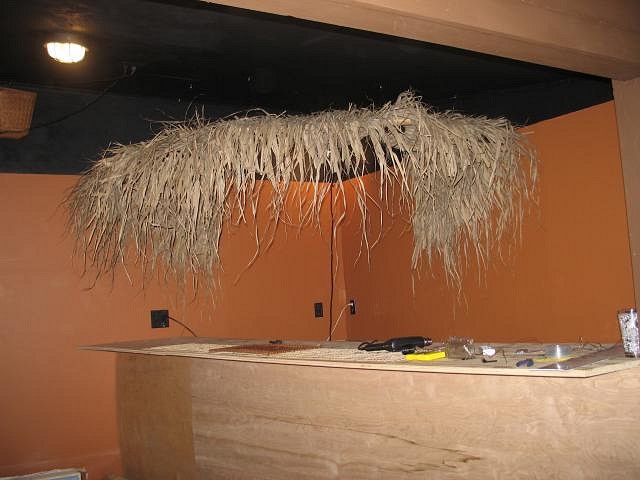
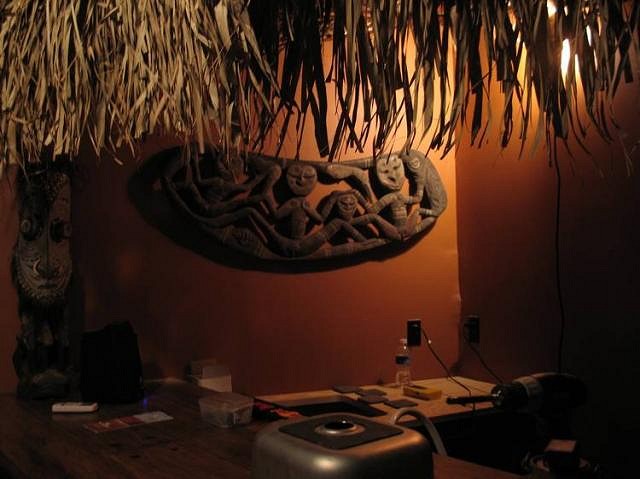
August 27th, 2008 After painting the ceiling flat black, it was still a bit shiney. Any flat surface would be I guess. So, we have gotten some sand texture to add to the paint to reduce that reflection. It is a pain to apply, but it made a big difference when put on heavy enough. The black parts will need to be textured now before the floor goes in. Labor Day Weekend September 1st September 21, 09 Inching our way towards laying down the flooring and starting on the actual bar. October 20th, 2008 We replaced the big flourescent lights in the bar with these from Home Depot. They have a nautical look. These are just the clean up lights and will be off when we are using the bar. Not really bright, but should do the job. The larger round one only came in white, so we had to spray paint it. Moved the small light to the ceiling instead of the rafter so we can add carved trim to the rafter. Here is the first shelf in the display area. It's about 2 X 6 feet. The top shelf will have lighting built into it for this shelf. Should have them done maybe by the end of the day. Lots of waiting for paint to dry. Later... October 25th, 2008 October 26th October 27th Next. we start on the bar! November 1st Need to brace it more, and screw it into the post and the wall studs and start covering everything in plywood. Also screw it to the floor. November 2nd November 9th November 16th I also screwed the display shelf to the brackets and put the Guanko in it's cubby hole. We think we picked out a cheap but decent looking bar top material. We'll see. July 3rd 2009: Adding a thatch "hut" over the bar area. Tiki 65 came over and we whipped this into shape in a few hours. I had a 9 foot thatch umbrella cover and a 6 foot area to cover. Had a bunch of stained bamboo poles we got at Pier 1 cheap. Started by cutting 1/4 of the thatch umbrella and attaching it to the 2 poles to make 90 degrees. Then took the remaining 3/4 of the thatch and added if overlapping the first piece. It is near invisible where they meet. Tied it to the poles and the thatch together with jute. Took 3 more poles and tied them together for the inner ribs.
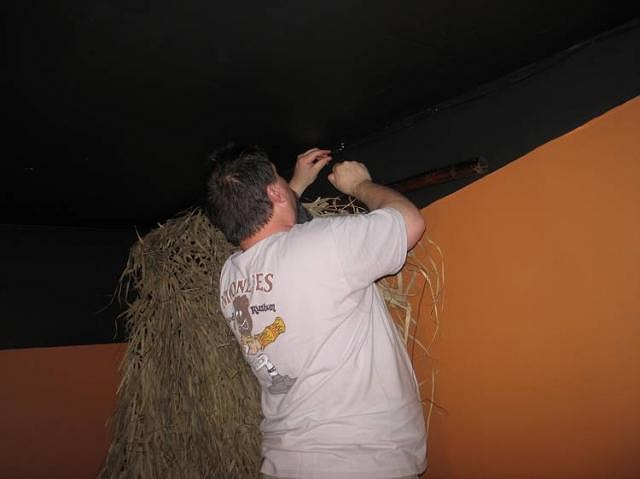
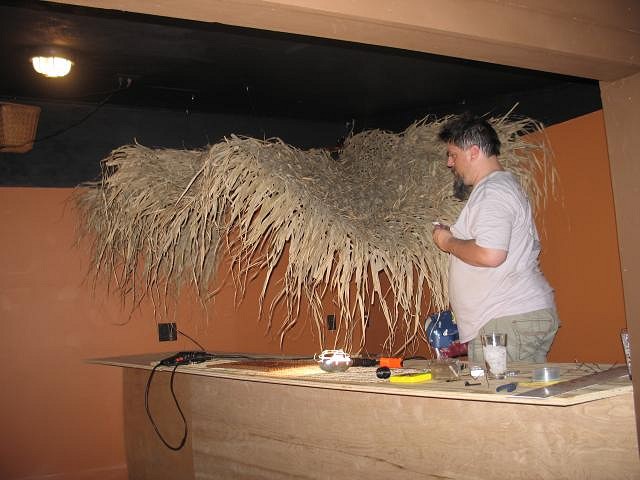
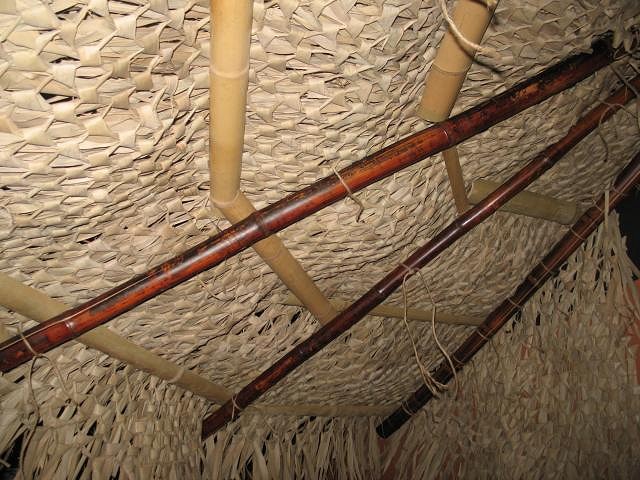
Chris attached the hub of the umbrella to a hook in the corner with wires run through the poles. Each end of the pole is connected to the ceiling by way of black galvanized wire and eye hooks. We put the holes a bit back from the end to make them more hidden. We attached the central poles to the corner hub and then began wiring them up to get the structure.
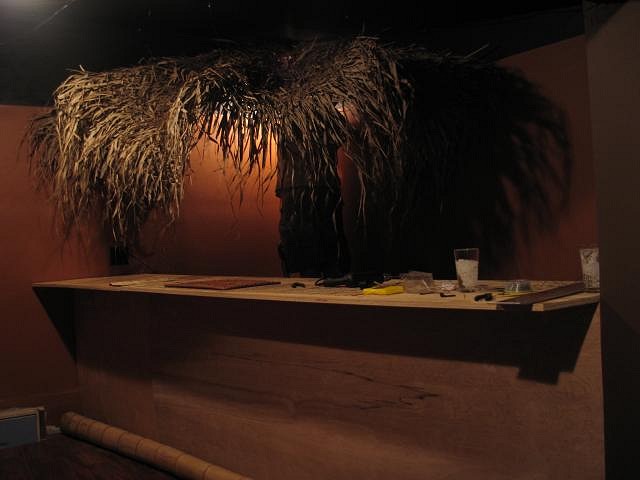
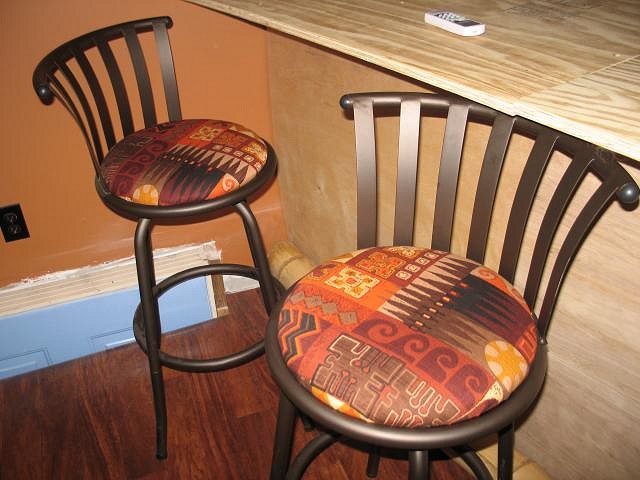
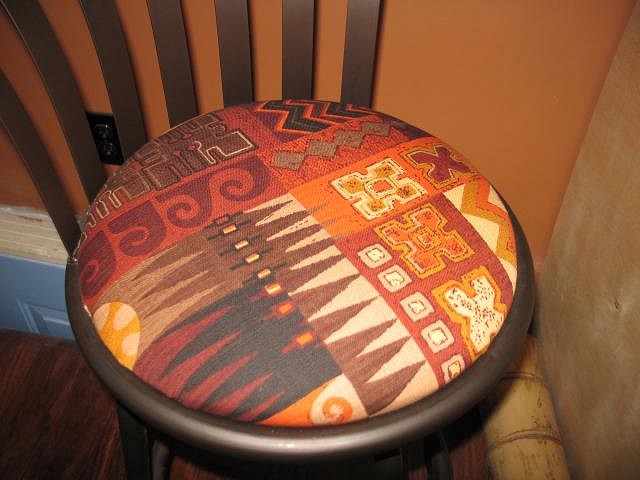
Very floppy looking. Once cross supports are added inside, it looks more right. Still needs trimmed and "finished. May overlap extar thatch on the end to make it thicker where it hangs off. Here is the underside. Those pieces of bamboo will be replaced with more of the stained and everything cut to fit and tied in place with jute. But there is still more to do above the thatch to wire in lamps, etc. so we are waiting. Just a few hours to kill on a vacation night. Making some progress. Hope to have to all open in September for a party. July 19th, 2008 Did some finishing under the thatch. Where I had painted the ceiling black had to be painted back to match the wall. The new white door had to be fixed. Painted the inner edges the burnt orange from the walls. Ms. Swanky found a bunch of this fabric on Ebay and covered all the stools and we put it up as curtains over the back window in the Tapa Room. July 25, 2009
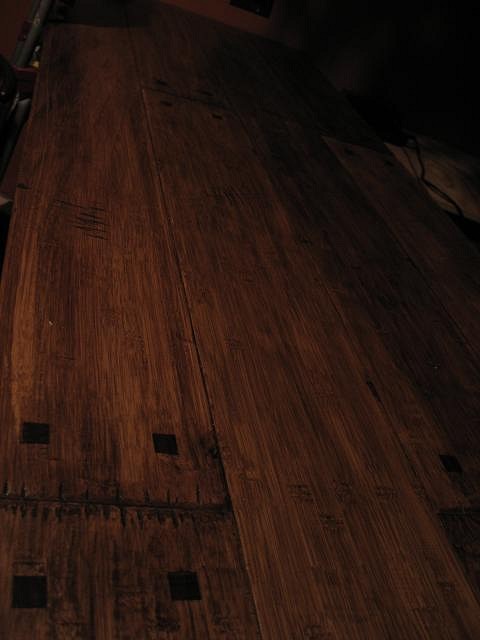
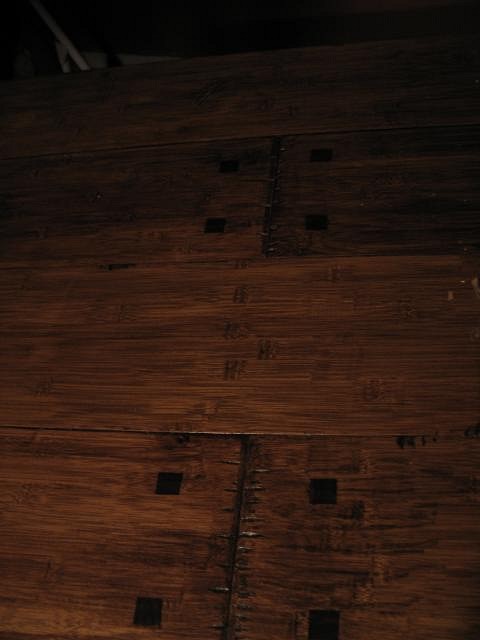
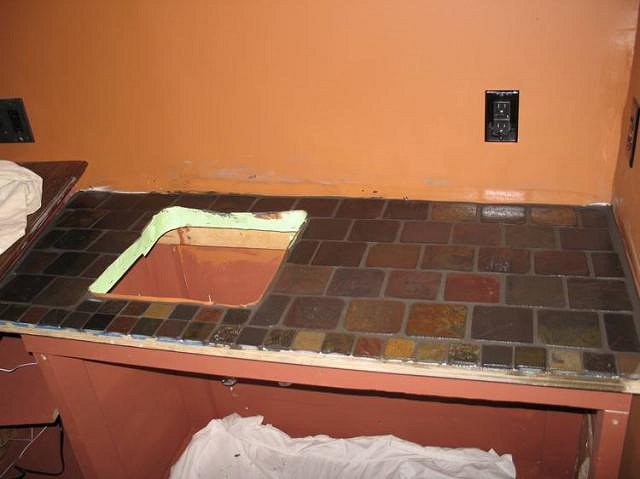
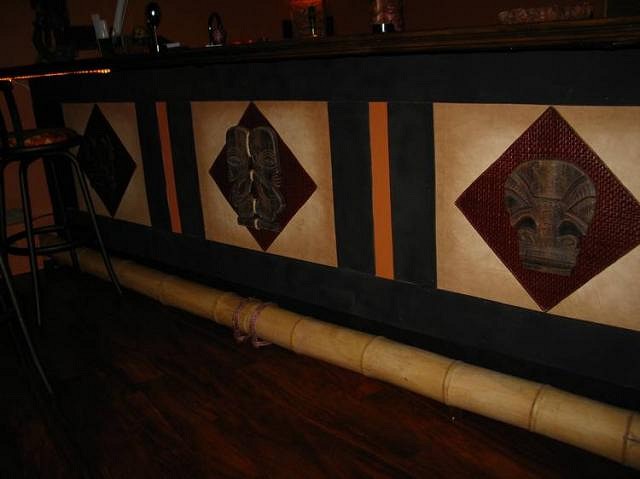
11 foot bar, that's near 3 feet deep, meant a lot of looking at flooring. We found what we wanted, and it turned out that one box would cover the whole bar. That was a very lucky break on this special order. We could not have bought another piece. Sahara is the color and it is very close to the look of the bar and tables at the Mai Kai. Ours has square pegs in it.
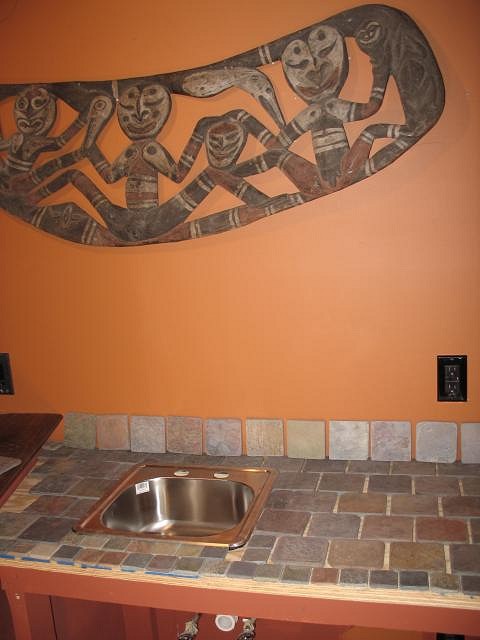
I also reworked the foot rest. Picked to good straight pieces of 5 inch bamboo and cut them to match. We'll do a little decoraing on them and screw them in when we do the bar front later. The bar moulding is cut and ready to go. Maybe stain it today. Looking to start the back bar now and tile it and install the sink, etc. **August 8th, 2009 **
Installed the surround sound speakers and ran cable to the bar.
August 22nd, 2009
August 23rd Ms Swanky wired the ceramic tiles to the rails. Lots of flash here to show details. When we get done, there will be lots of appropriate lighting shots. Really down to details. Decor. Painting. Touch-up. Should be shaking and serving for Labor Day! September 6th, 09
2010 [ Edited by: swanky 2011-02-09 09:55 ] |
|
P

pappythesailor
Posted
posted
on
Sun, Jun 8, 2008 5:14 PM
Great pics, Swanky! Keep us updated. |
|
H

Howland
Posted
posted
on
Mon, Jun 9, 2008 6:45 AM
Nice start-looks like a nice space to work with-plenty of lounging room. But how you gonna get in the basement now? |
|
S

Sophista-tiki
Posted
posted
on
Mon, Jun 9, 2008 7:06 AM
yea basement? will it be like the secret lair. |
|
S
Swanky
Posted
posted
on
Mon, Jun 9, 2008 7:14 AM
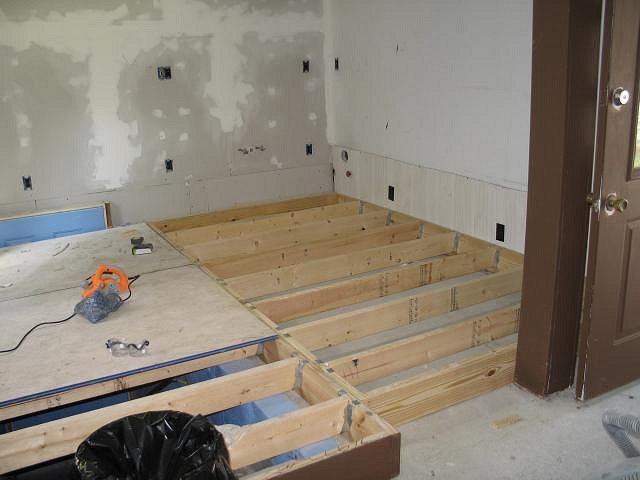
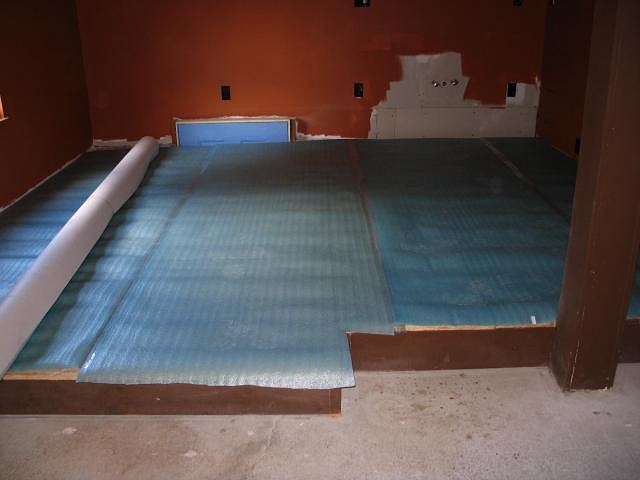
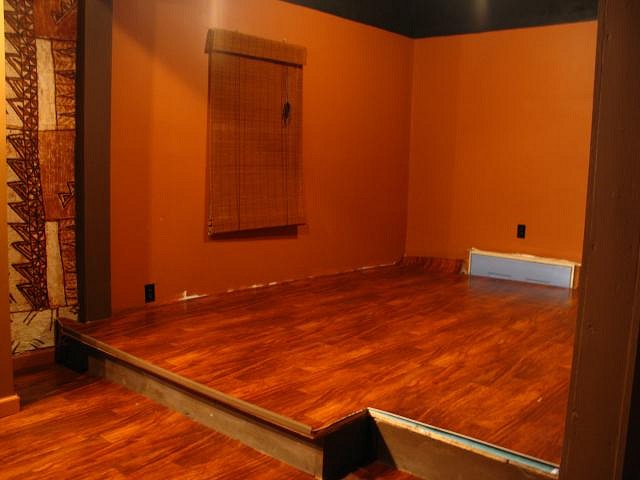
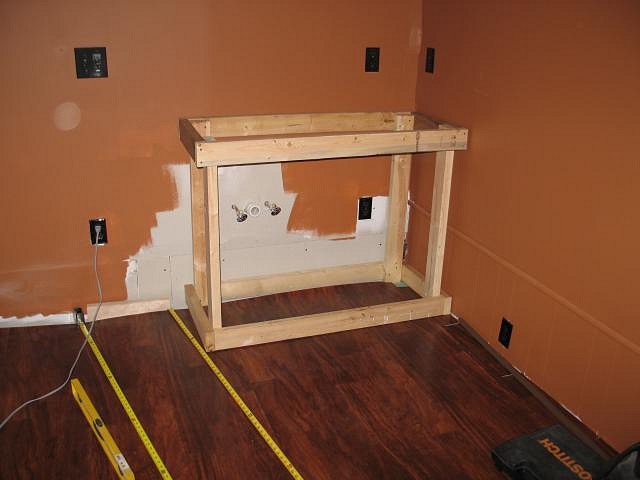
The cats already think it's a secret lair. We built the floor in sections rather than all the way across. This side is in a 6 foot and 5 foot section. Take the OSB off, pull the cross beams out and you can remove the floor and get access to the basement. There is an inside stairway of course. But if you need to get big furniture items down there, we'll still be able to get to these stairs. The other side of the room will get a permanent floor that the bar will be build on. We have to tear out the inside of that wall there, remove those windows and do the electrical and plumbing work. Patch the kitchen side where the windows were, etc. Also running a duct from the HVAC in here. So, this part of the floor is here to make it easier to work on that, but not prevent working on all that, if that makes sense. Contractors coming after Hukilau. Once this hard stuff is done, we get to the fun part. Building the actual wet bar and then decorating. And then of course, breaking it in... |
|
JD

Johnny Dollar
Posted
posted
on
Mon, Jun 9, 2008 7:52 AM
when you get a bit more budget, you can turn that platform into a secret trap door to dispose of unruly guests. or shanghai drunk sailors :D thanks for the process pix, i always find them fascinating... :D |
|
T

tikiskip
Posted
posted
on
Mon, Jun 9, 2008 3:06 PM
Hey Swanky looks great so far. |
|
S
Swanky
Posted
posted
on
Tue, Jun 10, 2008 5:27 AM
skip. Ms Swanky was wanting to put rope lights around the perimeter of the floor supports on the outside and have nice glow around the floor. We have a layout to build on, but th ereal end deal is evolving as we build. |
|
V

VampiressRN
Posted
posted
on
Tue, Jun 10, 2008 6:33 AM
I enjoy the progress pics too. Brilliant about the floor (aka "cat hide-a-way"). :D |
|
BK

Big Kahuna
Posted
posted
on
Tue, Jun 10, 2008 7:31 PM
Hey, Swanky. Looks good so far. Do us all a favor & post good pics of the wet bar build, please. I, for one, am right behind you in the building department & if I get to see your screw-ups it'll give me the inspiration to come up with my own screw-ups! Good Luck! Keep us posted! |
|
S
Swanky
Posted
posted
on
Thu, Jun 19, 2008 2:35 PM
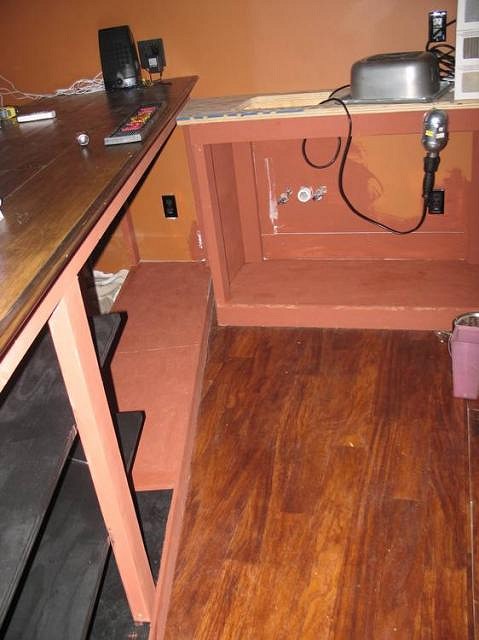
Contractors started right after we returned from Hukilau. Did a lot of electrical work putting in outlets around the bar and new lighting wiring etc. |
|
T

TikiRick
Posted
posted
on
Fri, Jun 20, 2008 6:36 PM
Was it six conductor wire? My speakers don't work on less. |
|
S
Swanky
Posted
posted
on
Sat, Jun 21, 2008 7:38 AM
Not sure. It was "in-wall" guage. Looked like lamp cord. It was already run out to speakers, we just had it put in the walls, out of site. Those wires go out to the lanai, which is another project in the making.
[ Edited by: swanky 2008-06-21 07:59 ] |
|
RH

Robb Hamel
Posted
posted
on
Sun, Jun 22, 2008 5:21 AM
You are doing some amazingly extensive work. Courage you are not short of. |
|
S
Swanky
Posted
posted
on
Tue, Jun 24, 2008 6:37 PM
[ Edited by: Swanky 2008-06-24 18:39 ] |
|
T
tikiskip
Posted
posted
on
Tue, Jun 24, 2008 7:26 PM
Looks like your tiki is in time out. |
|
S
Swanky
Posted
posted
on
Sun, Jul 6, 2008 5:10 PM
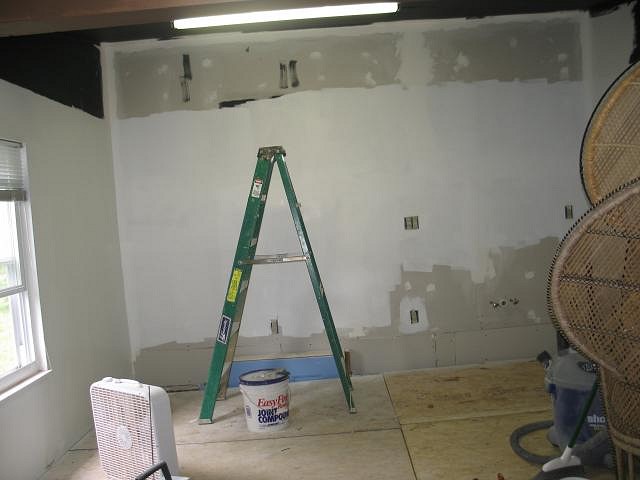
Man, this was a lot of work! If you have ever mudded drywall, you know it's just a pain. The corners in the room were a mess since there was aluminum siding under there! Big nasty gaps to fill and fix. The corner at the ceiling too. Stuff you don't see, but is a lot of work. We also got Jatoba flooring for the bar this weekend, but we'll have to get a bit further along before we put it in. We don't want to ruin it in the construction. [ Edited by: Swanky 2008-07-06 17:13 ] |
|
T

tikifreak1
Posted
posted
on
Sun, Jul 6, 2008 5:44 PM
Man, I thought I had a lot of prepping to do when I did my basement but I think you got me beat. Looking good so far, can't wait to see more!!! |
|
S
Swanky
Posted
posted
on
Sun, Jul 6, 2008 5:58 PM
|
|
K

Kahu
Posted
posted
on
Tue, Jul 8, 2008 3:46 AM
Great progress so far! I am sure it is going to be as stunning as before. |
|
S
Swanky
Posted
posted
on
Sun, Jul 13, 2008 11:23 AM
|
|
S
Swanky
Posted
posted
on
Fri, Aug 1, 2008 5:54 PM
|
|
S
Swanky
Posted
posted
on
Wed, Aug 27, 2008 6:12 AM
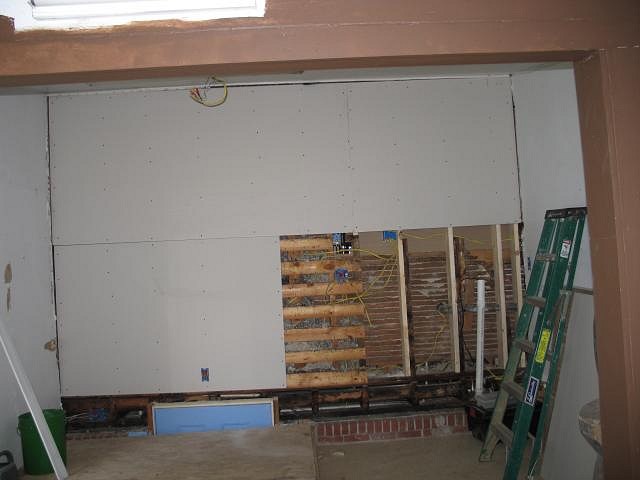
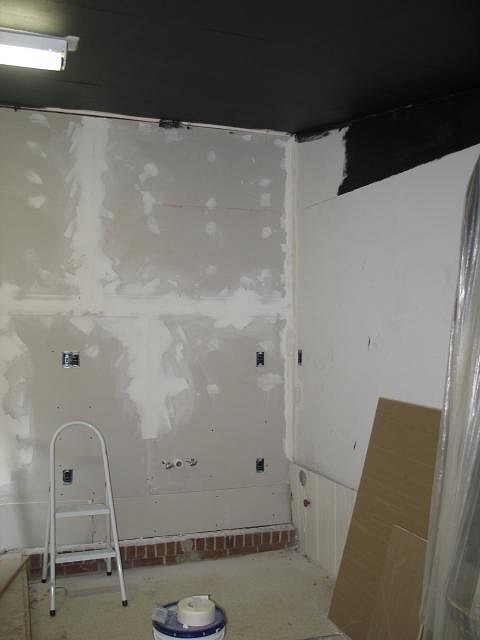
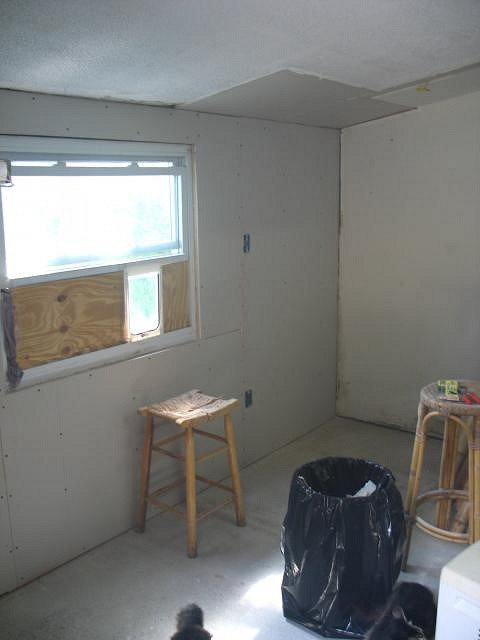
Not a lot to report. Still doing the basic work. We're hoping the drywall and other things will be finished over the long weekend and we'll be able to put down the floor soon and start the actual bar building and not just get the walls repaired, etc. We want to get to the fun stuff! After painting the ceiling flat black, it was still a bit shiney. Any flat surface would be I guess. So, we have gotten some sand texture to add to the paint to reduce that reflection. It is a pain to apply, but it made a big difference when put on heavy enough. The black parts will need to be textured now before the floor goes in. |
|
P
pappythesailor
Posted
posted
on
Wed, Aug 27, 2008 8:06 AM
Looking good, Swanky. It sure is hard doing the grunt work when you want to skip ahead to the drinking and enjoying phase. Keep it up! |
|
B

boutiki
Posted
posted
on
Wed, Aug 27, 2008 9:37 AM
Love the burnt orange color! Be sure to leave some exposed. |
|
BK
Big Kahuna
Posted
posted
on
Wed, Aug 27, 2008 4:10 PM
Hang in there,Swanky! You'll be lying on the floor in a rum-induced stupor before you know it! |
|
S
Swanky
Posted
posted
on
Mon, Sep 1, 2008 4:45 PM
[ Edited by: Swanky 2008-09-01 16:47 ] |
|
S
Swanky
Posted
posted
on
Sun, Sep 21, 2008 4:55 PM
Inching our way towards laying down the flooring and starting on the actual bar. |
|
T
tikiskip
Posted
posted
on
Sun, Sep 21, 2008 7:32 PM
Very nice Tim!! |
|
S
Swanky
Posted
posted
on
Mon, Sep 22, 2008 6:45 AM
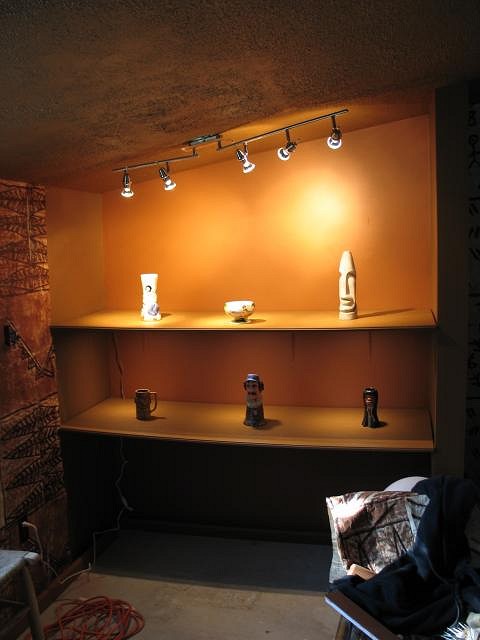
We picked some very cool "Sputnik" style track lights that bring in a little Space Age style. So we intended for them to be seen. Looked at others that were more enclosed and "invisible" but liked this stlye. We'll be putting them on a dimmer too. That will be one of the brighter areas of the bar. It'll change when we have the shelves in there and all the stuff displayed museum style. |
|
V

virani
Posted
posted
on
Tue, Sep 23, 2008 12:30 AM
what's on the ceiling in the tapa room ? Is that brown paint ? |
|
V
virani
Posted
posted
on
Tue, Sep 23, 2008 3:45 AM
Oops, sorry, I got my answer |
|
T

TikiLaLe
Posted
posted
on
Tue, Sep 23, 2008 12:02 PM
Track Lighting ??? |
|
SF

Slacks Ferret
Posted
posted
on
Sat, Sep 27, 2008 7:36 PM
I trust your vision Swanky. It's looking very nice so far, and I'm sure the track lighting will work well too. |
|
SF
Slacks Ferret
Posted
posted
on
Thu, Oct 16, 2008 1:54 PM
Any update? I'm curious to see how this one progresses. |
|
S
Swanky
Posted
posted
on
Mon, Oct 20, 2008 11:37 AM
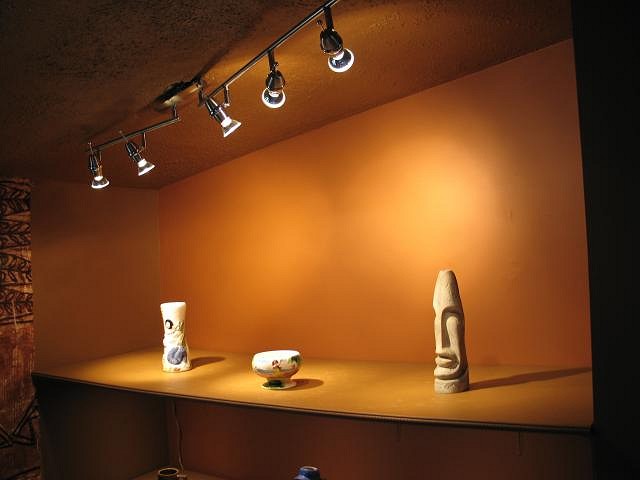
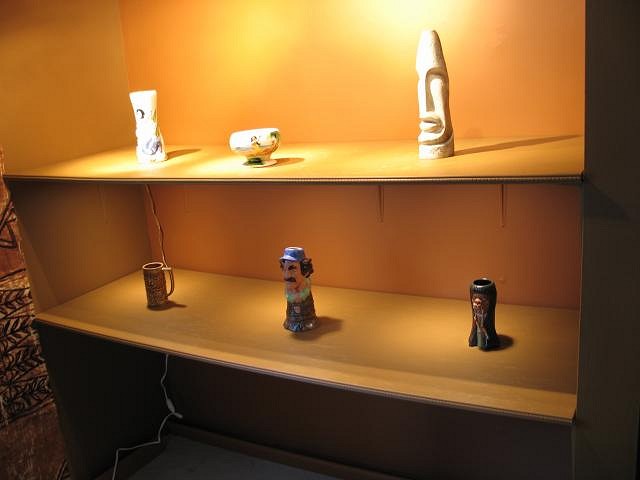
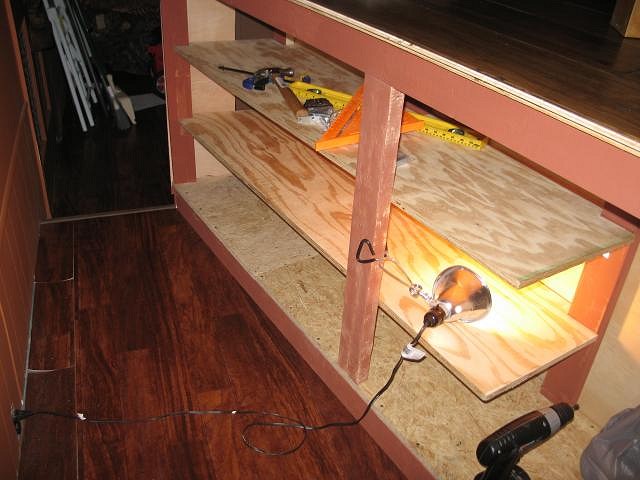
Been doing other projects and stuff that isn't really visible. Here is a little update. We replaced the big flourescent lights in the bar with these from Home Depot. They have a nautical look. These are just the clean up lights and will be off when we are using the bar. Not really bright, but should do the job. The larger round one only came in white, so we had to spray paint it. Moved the small light to the ceiling instead of the rafter so we can add carved trim to the rafter. Here is the first shelf in the display area. It's about 2 X 6 feet. The top shelf will have lighting built into it for this shelf. Should have them done maybe by the end of the day. Lots of waiting for paint to dry. Later...
[ Edited by: Swanky 2008-10-20 13:25 ] [ Edited by: Swanky 2008-10-20 13:27 ] |
|
H
Howland
Posted
posted
on
Thu, Oct 23, 2008 7:35 PM
You're killin' me! Quit your job, work on it all day and all night, drink lotsa coffee! I'm ready to see some bar work and ceiling work and bamboo and...and....and....so on. Joking aside, take your time and get it right. I wish I'd have taken the time to really consider outlet placement, etc. Lookin' good. |
|
BK
Big Kahuna
Posted
posted
on
Thu, Oct 23, 2008 10:39 PM
YEAH,YEAH! What he said! Sleep is for sissies! |
|
S
Swanky
Posted
posted
on
Fri, Oct 24, 2008 4:44 PM
Lord. Had the day off today and you know what all I got done? I hung one freakin black out blind from IKEA. I nearly killed my cats. Unimabinable troubles... May get the floor in this weekend. That will be dramatic. Can't wait. After that, the bar! YEAH! Oh. We got the mini split heat pump this week too. That goes in soon. We may yet be on track to serve the first drinks in November... Maybe... |
|
S
Swanky
Posted
posted
on
Sat, Oct 25, 2008 2:58 PM
So much work to get to this point. |
|
S
Swanky
Posted
posted
on
Sun, Oct 26, 2008 5:45 PM
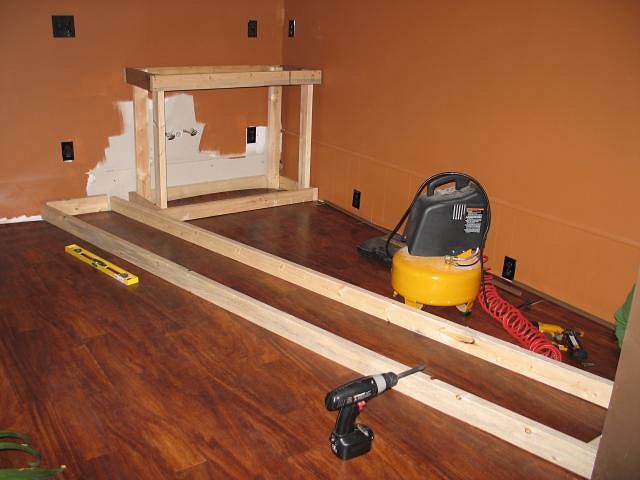
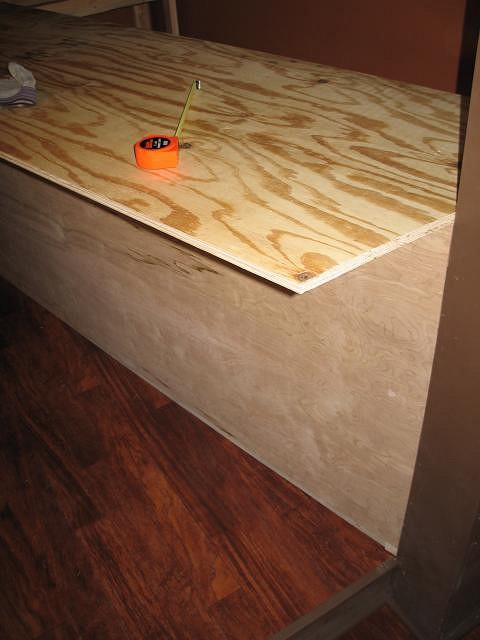
Floor is in. Trimmed up. Tomorrow I will get the baseboards and trim in place and it will be done. |
|
TD

Tiki Diablo
Posted
posted
on
Sun, Oct 26, 2008 9:37 PM
Coming together nicely Tim. Call me when it's done! |
|
S
Swanky
Posted
posted
on
Mon, Oct 27, 2008 4:55 PM
Yeah! Floor is done! Next. we start on the bar!
[ Edited by: Swanky 2008-10-27 16:58 ] |
|
F

Fugu
Posted
posted
on
Mon, Oct 27, 2008 6:47 PM
Everything looks great so far! I can't wait to see all of the decor added in. I've always thought the pictures of the previous incarnations of your hideaway were fantastic, so it's really fun (and educational) to see this version being built from the ground up. Edited for terrible spelling. I guess that is what the handy spell check button is for. [ Edited by: Fugu 2008-10-27 18:48 ] |
|
BK
Big Kahuna
Posted
posted
on
Mon, Oct 27, 2008 6:48 PM
Looks great! Keep us updated! |
|
S
Swanky
Posted
posted
on
Sat, Nov 1, 2008 6:31 PM
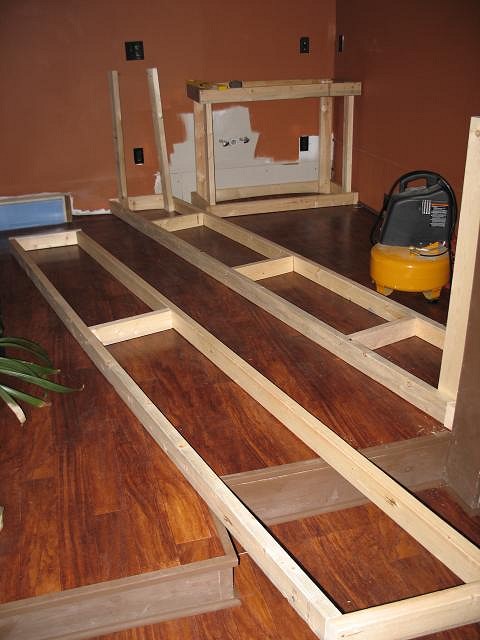
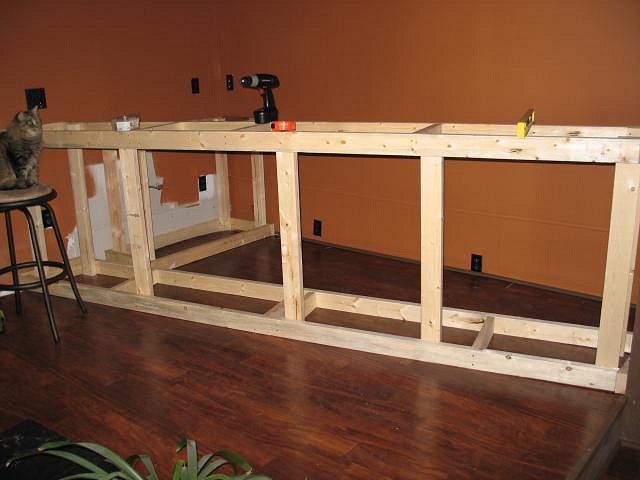
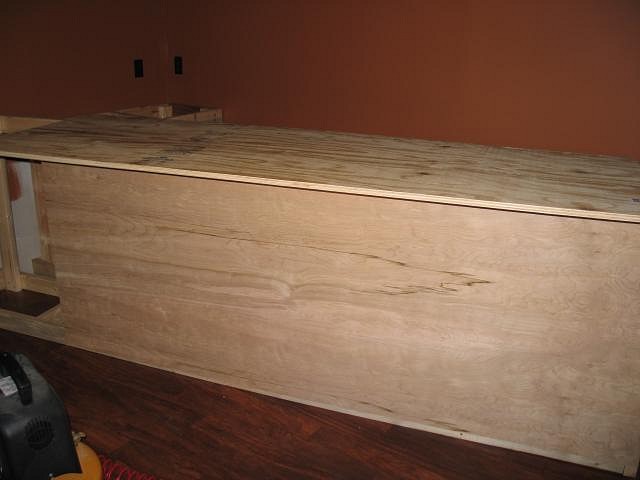
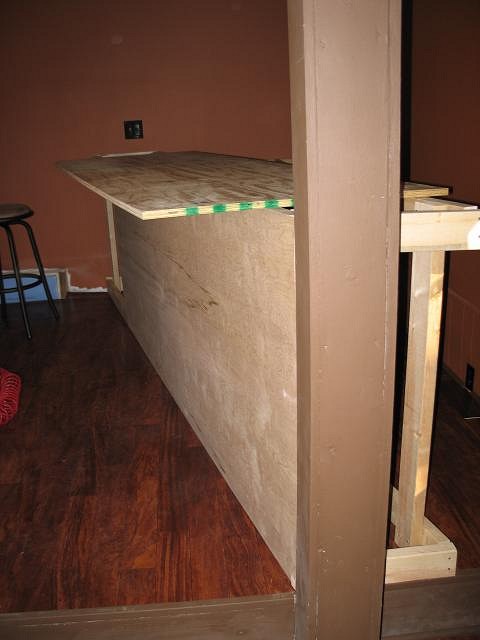
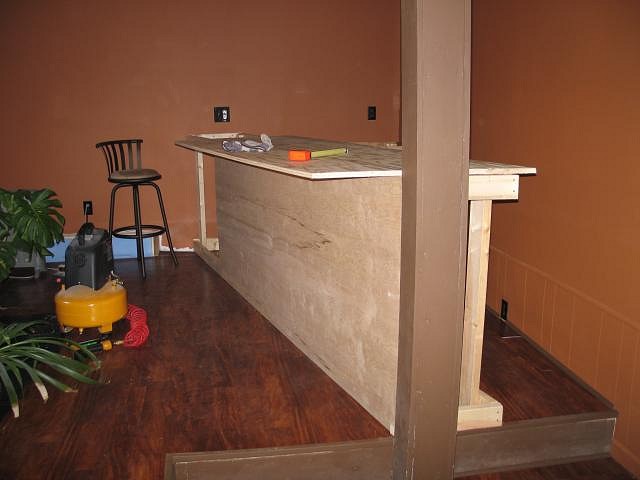
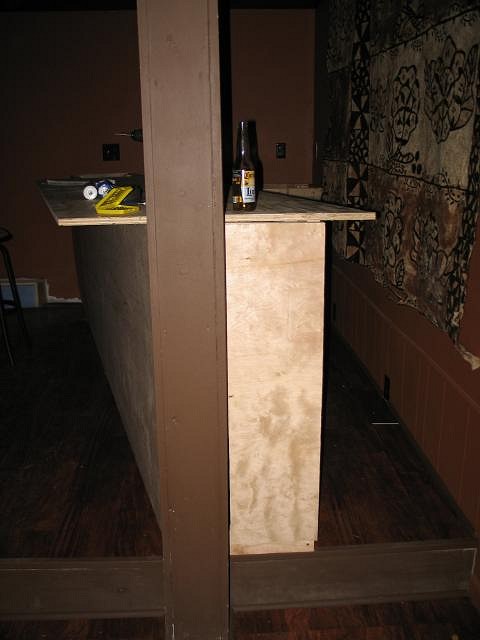
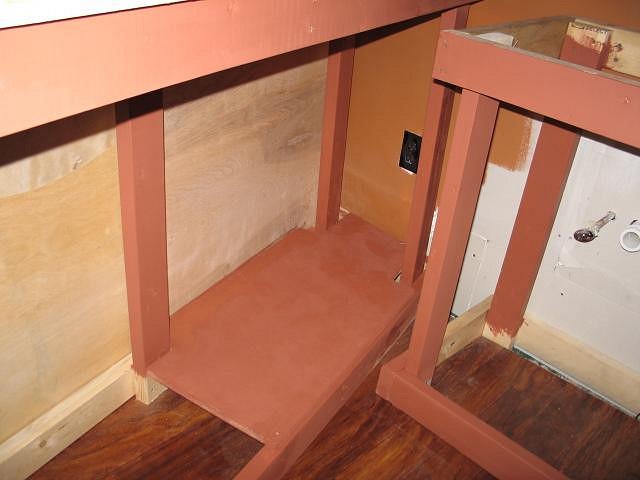
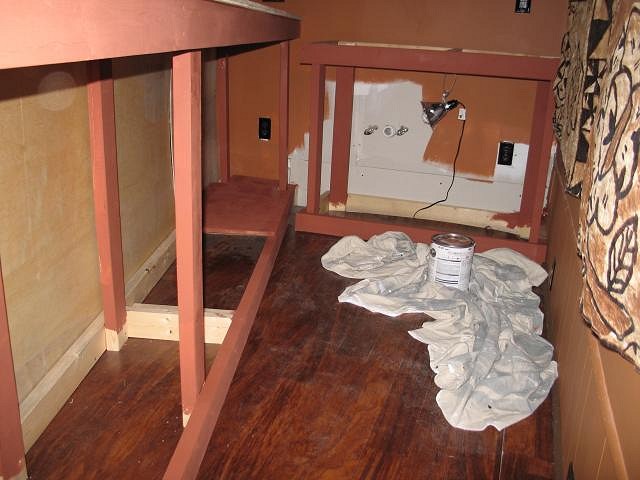
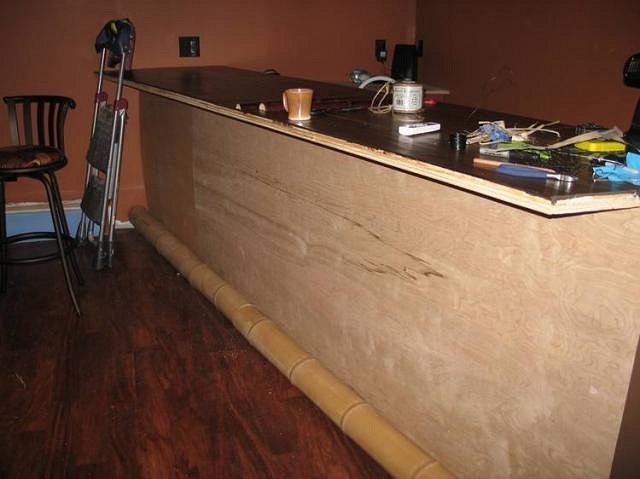
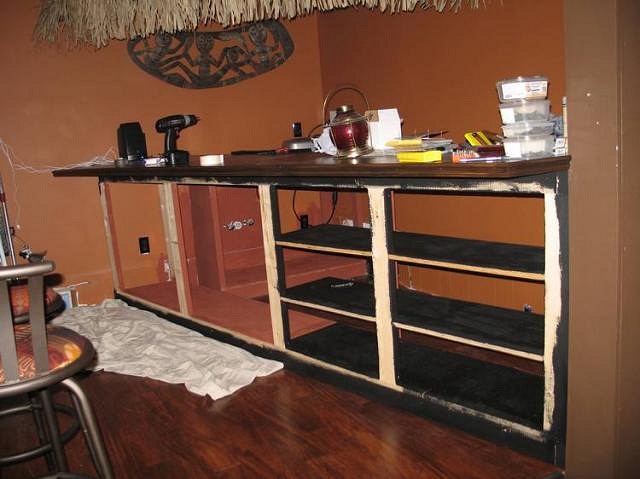
Building the bar now. We have a wet bar with a sink in the back and that needs to be built first. Need to brace it more, and screw it into the post and the wall studs and start covering everything in plywood. Also screw it to the floor. |
|
S
Swanky
Posted
posted
on
Sun, Nov 2, 2008 5:20 AM
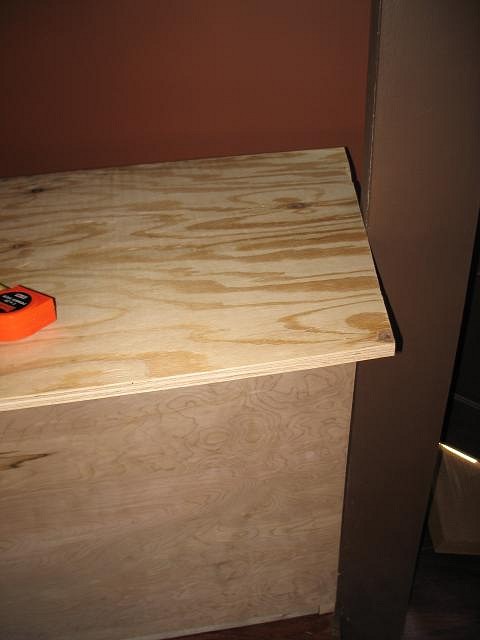
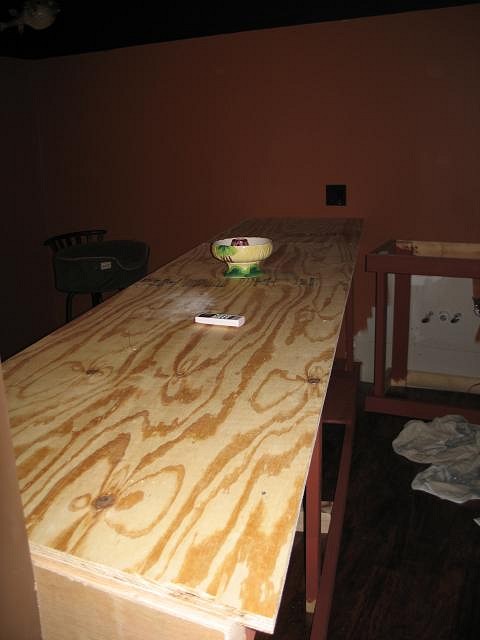
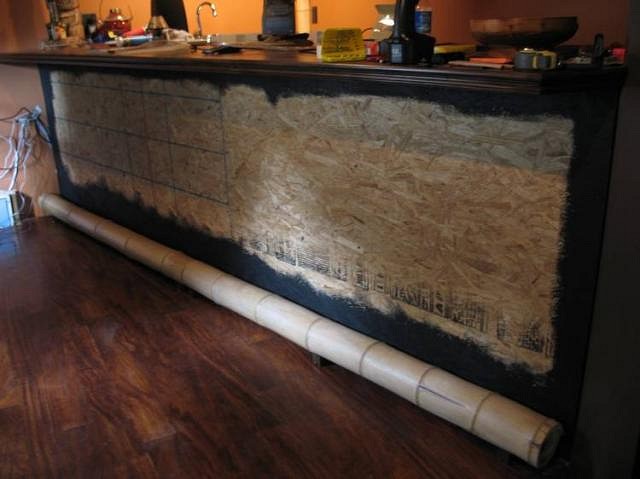
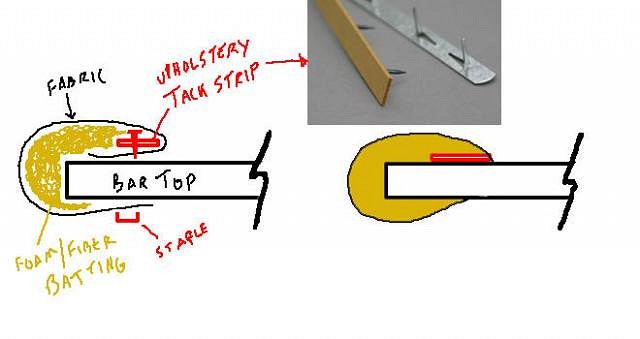
So I am looking for a little advice here. I am trying to figure out how to construct the bar top. Not sure what I am going to use to cover it. I am thinking of doint something simple like some remnant vinyl flooring in black. But also, we need to do the padded arm rest. I am told to do the top in two pieces. Bottom layer of 3/4 inch plywood, which is screwed to the framing. I figure I'll use a router and roundover bit to make the front edge more "friendly". And then you screw up into the top piece so no screws or holes are visible. But, should I attach the padding and all to the top piece and hide the staples bewteen the two, or wrap it around both? To do the padded arm rest, do you staple your material across the bar top maybe 4 inches in, lay the padding across, and then pull down tight and staple underneath? Is it that simple? I have built this bar 50 times in my head. Laid awake at night doing over and over so I can do things in the right order. Woke up early today pondering it too. So, who has done a padded arm rest on their bar top? Call me! PM and I'll give you my number. I want to hear from you today! |
|
H
Howland
Posted
posted
on
Sun, Nov 2, 2008 6:35 AM
YAY! Let the fun stuff begin--Lookin' good. I like the dual-level floor plan. It's like it adds a new 'layer' of roomyness (sp?) and defines the area as 2 different 'zones'. You're on the right track with the bar top construction (at least that's how I did mine and it worked out perfect). I used 3/4 inch ply screwed to the frame and then used 3/4 inch MDF on top of the ply (screwed from underneath AND glued). As far as the padded arm rest goes--I have never made a padded arm rest before but have used the 'tack-strip' method of upholstery on furniture pieces and the best way I can explain it is.....to draw it out for you. Something like this: |