Tiki Central / Home Tiki Bars
Pao Pao Hut
|
A

ashman_atl
Posted
posted
on
Sun, Feb 28, 2010 9:44 PM
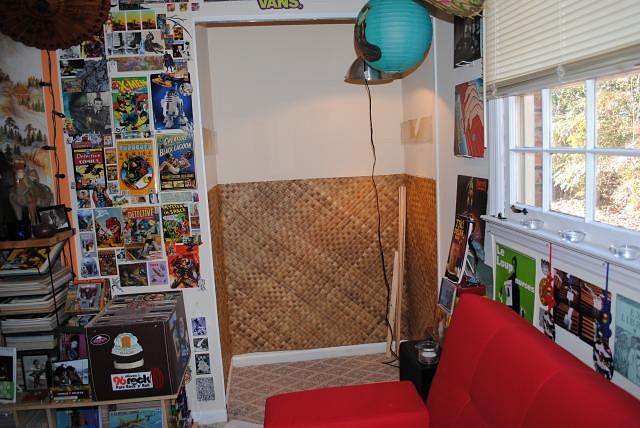
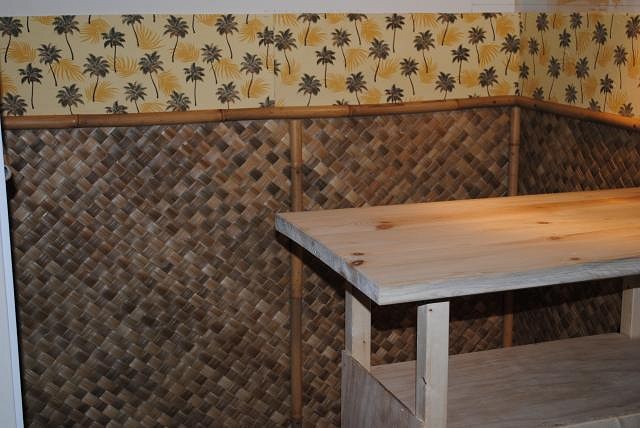
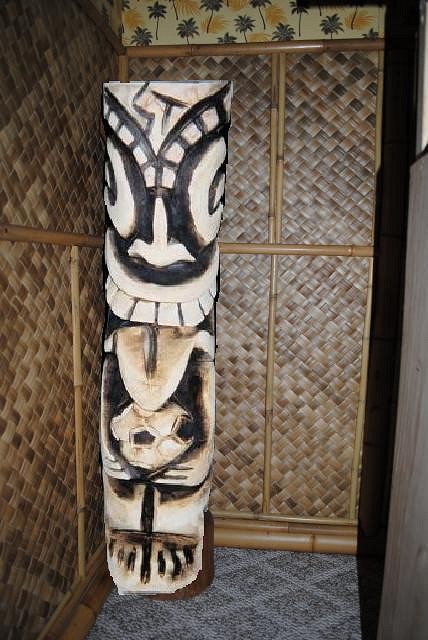
After watching the projects here on TC for several years, I finally broke ground on my home bar. Having a very small budget and even less space to work with, I decided to convert a small utility closet in my library. The area is nearly microscopic at 47" x 37", nonetheless, I'm determined to make something of it. Following a week of cleaning out all of the stuff and making a bunch of measurements and sketches, I was able to get started this weekend... Here are a few photos of the progress-
This week, hopefully will get some tapa done then over the weekend can finish up basic wall coverings and bar top. Any ideas for getting more out of small spaces, please advise! Cheers! |
|
BB

Bongo Bungalow
Posted
posted
on
Mon, Mar 1, 2010 2:00 AM
Ashman, that's a hell of a tiki spirit to make something out of your little alcove! Good for you! There's no reason it can't be great. Since this tiki home bar area of TC has been started, I'm picking up lots of ideas and I'll bet you are too. |
|
A
ashman_atl
Posted
posted
on
Mon, Mar 1, 2010 6:52 AM
Thanks for the kind words Bongo. Definitely getting some inspiration from the "masters of the build" here at TC and this home bar forum. Someday I hope to go for the full out lounge, but at the moment we're renting so it keeps my ambitions humble. Still fun, though... |
|
J

JackLord
Posted
posted
on
Tue, Mar 2, 2010 11:27 AM
You are off to a good start. Just wondering though- Atlanta is more or less subtropical. Do you have any space outside that could be Tikified? |
|
A
ashman_atl
Posted
posted
on
Tue, Mar 2, 2010 6:00 PM
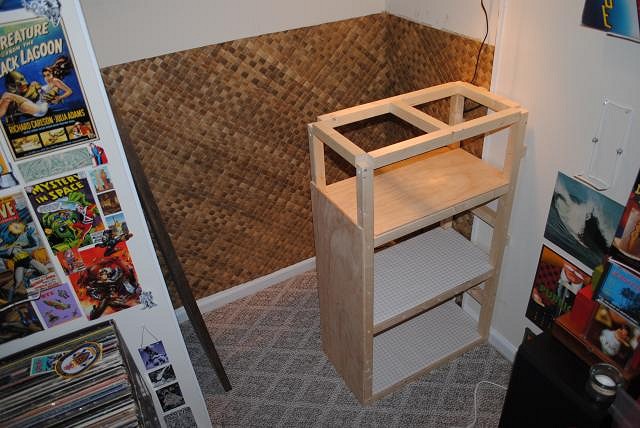
Atlanta certainly is in a fairly warm zone though this winter's been kind of crazy with the snow... I am renting a duplex without much available in the way of outside space, but since you mention it, I may try to put my imagination to work for something outdoors once we thaw out. The progress is painfully slow and not helped by the fact that I'm guessing as I go with the bar, but here's a pic with the shelves in and top rails leveled (not real exciting stuff, but we'll get there)...
|
|
A8

Agent 86
Posted
posted
on
Tue, Mar 2, 2010 10:04 PM
Tiki is as much a state of mind as it is a place and you are going for it and utilizing what you have where you're at...good for you and keep up the good job! |
|
MPP

Mr. Pupu Pants
Posted
posted
on
Fri, Mar 5, 2010 8:57 PM
Off to a great start ashman :) I hope you have a lot of fun with it. Limitations like room size, etc. can sometimes be the best force for creativity Some random ideas to possibly make it feel bigger: Or you could make the closet ceiling look like a tropical night sky with some stars and a black light to make them pop. In my basement, I built a fake awning with a hole in it where you'll eventually be able to see the 'night sky' above.
Or you could build an 'exterior' facade and awning of a hut on the walls surrounding the outside of the closet and make it feel like you're bellying up to an outdoor bar. You could even paint the whole room ceiling dark blue and add stars, a moon, etc to open it all up. You can find kits with phosphorescent paint that work great for this (we did something similar in our kids rooms to surprise them on our first night in, what was then, our new house -- the stars were painted onto the ceiling as they appeared in the actual night sky of the calendar day and year they were born). Or you can tell me to keep my pupu to myself :) Again, hope you have a great time with whatever you do in there! [ Edited by: mr. pupu pants 2010-03-06 23:00 ] |
|
A
ashman_atl
Posted
posted
on
Sat, Mar 6, 2010 9:50 PM
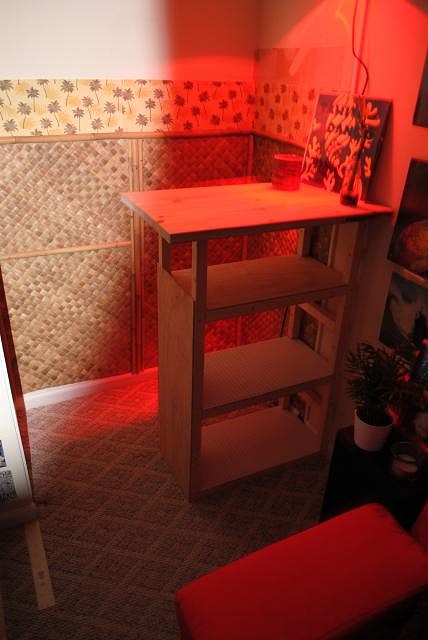
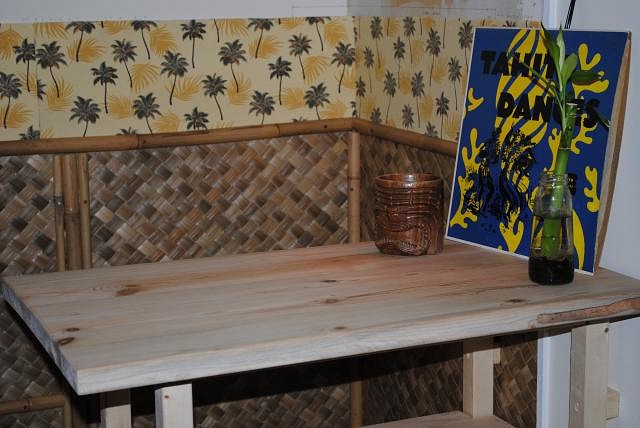
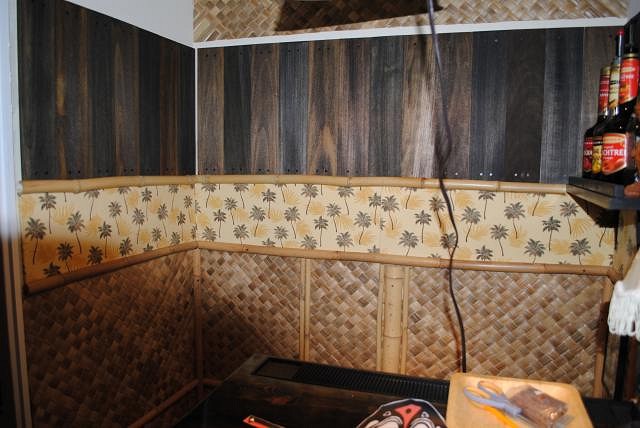
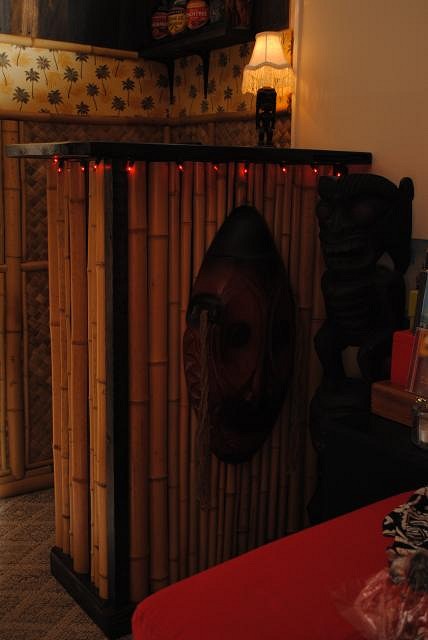
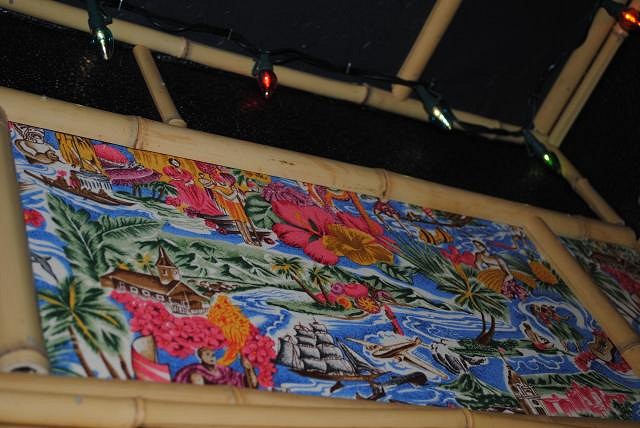
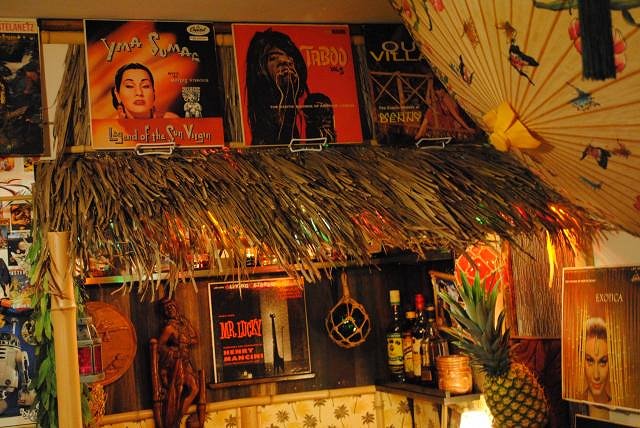
Well, after a week of nothing much happening and this week's spending cash blown on tools, total accomplishment has been next to unnoticeable. It seems I had everything planned out until I actually started working... Almost embarrassing to post this update, but did want to say thanks for the encouragement as well as the great suggestions. John, I will definitely take you up on the suggestion for the ceiling and yes, I do plan to add a thatch awning, but will likely go up last. Here is a shot with the unfinished bar top attached and some detail of bamboo trim and decorative panels (which I opted for in place of tapa which I convinced myself I was too lazy to produce and too cheap to buy, but I guess looks OK...)
Close up of the fabric panels (taken from a dress my wife bought in Hawaii and had scheduled for donation to Goodwill...). I glued a couple of pieces onto foam core and a few on 1/4" plywood...
Another pic to give an idea of the space (or lack thereof)
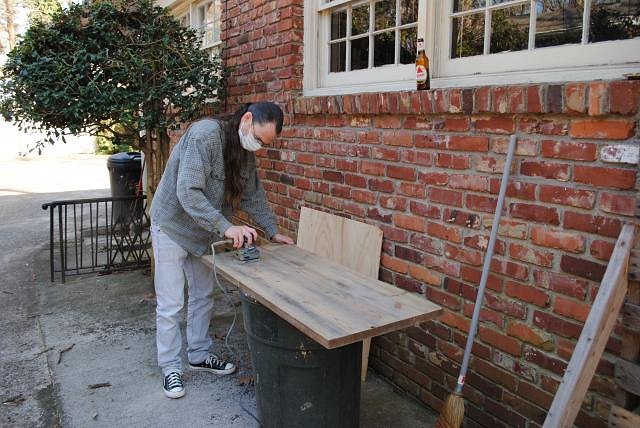
Detail of the bar top which, as mentioned, is a piece of lumber that's trailed around with me for several decades and spent at least one of those outdoors becoming the weathered hunk of board that it is (notice what looks like a router accident on the right corner- actually a cavity created and occupied over some seasons by carpenter bees...). Fairly cupped on the left side, so before staining and waterproofing, will have planed square.
Long day- time for a libation.... |
|
K

Kon-Hemsby
Posted
posted
on
Sun, Mar 7, 2010 7:42 AM
It's looking good and a great use of limited space. |
|
GK

Grand Kahu
Posted
posted
on
Sun, Mar 7, 2010 5:43 PM
Great work! I really like seeing what one can do with a small space to make it something special. One does not necessarily need an entire basement to get the tiki bar vibe going... I turned a dining room closet into a 1960s space age bar and that worked pretty well too, so if anyone else has a tiki corner/nook rather than a full bar, that would be cool to see. GK |
|
A
ashman_atl
Posted
posted
on
Sat, Mar 27, 2010 10:04 PM
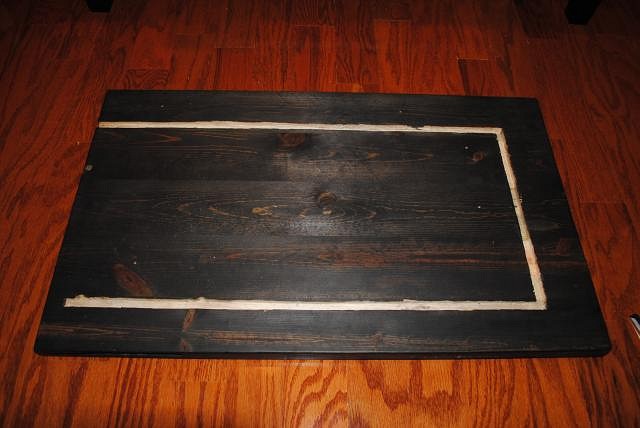
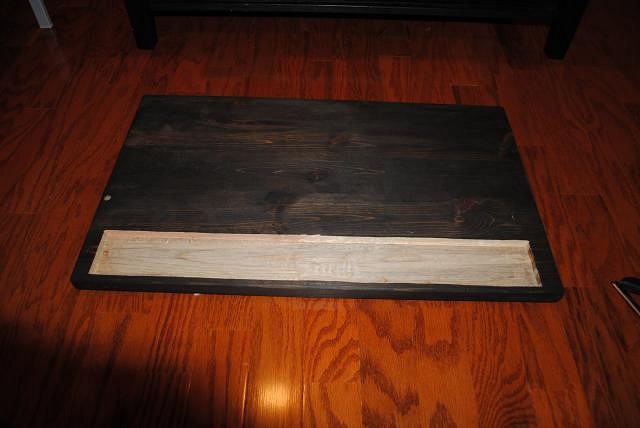
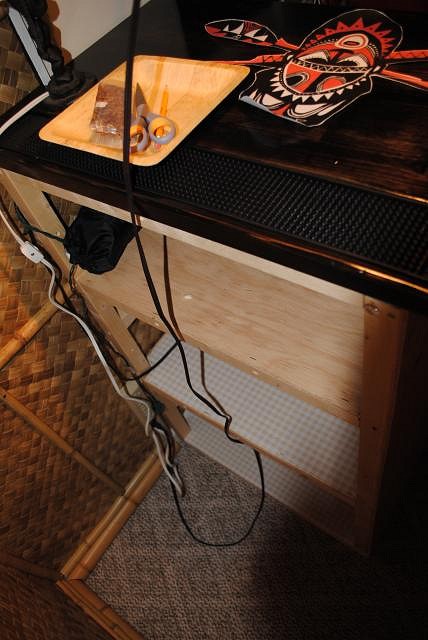
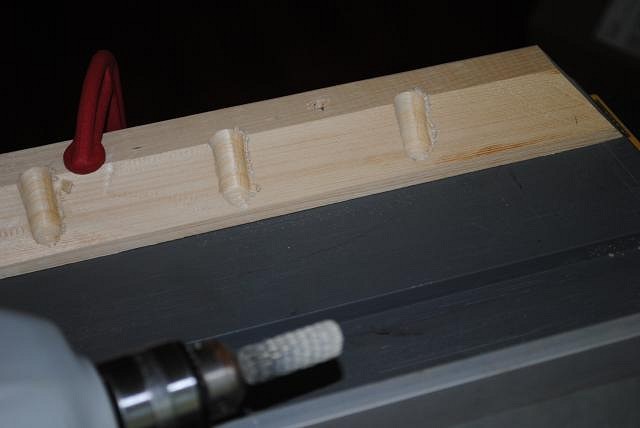
Finally found someone with a router and was able to get the project moving slightly this week... Everything basically hinges on the bar top and I wanted to install a spill mat on top and have lighting on the underside. Nothing happening until my friend JB showed up with a router and started removing some wood. Ended up looking like this- Track on the bottom for string lights
Recess on top for spill mat
Living room has become the shop space (totally irritating the wife!)
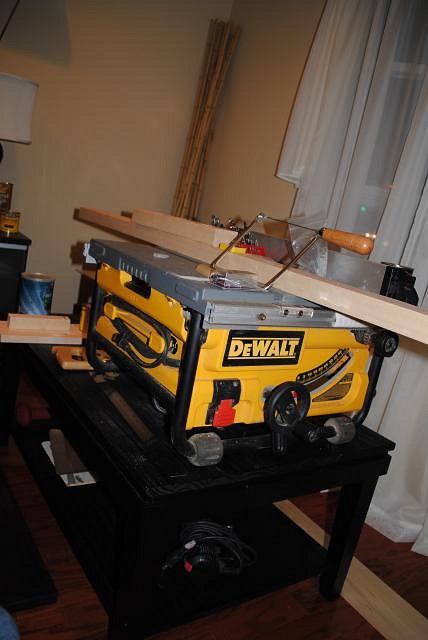
(Extra special thanks to Gary M for letting me borrow the awesome DeWalt portable table saw) This bar is being built from scratch, including decor, so I've had to be busy collecting some stuff... Found this at thrift store
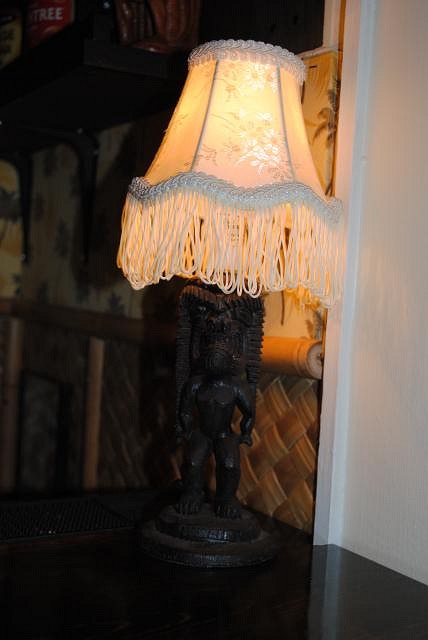
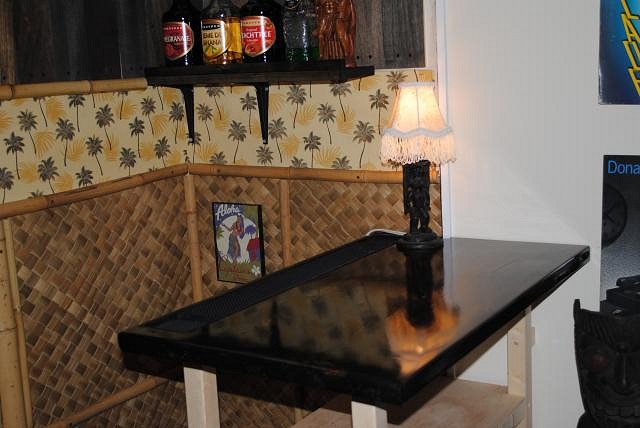
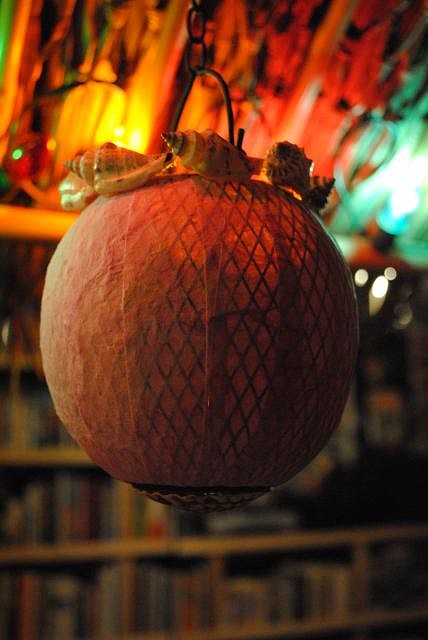
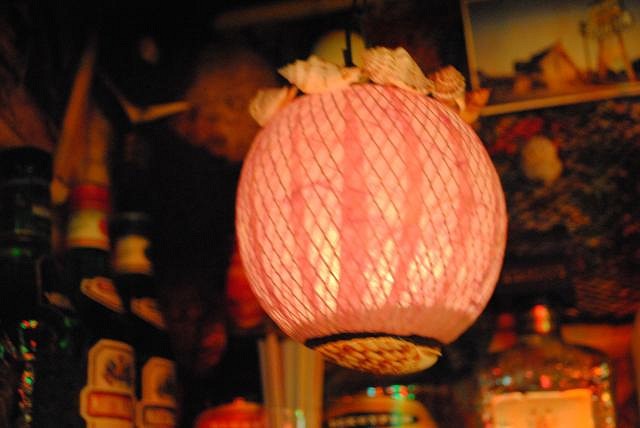
Flea market lamp
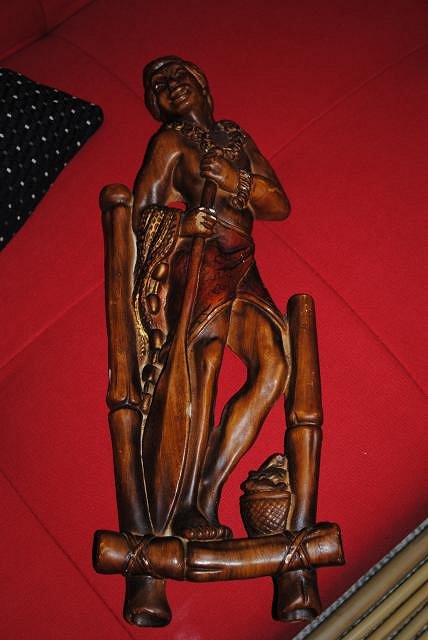
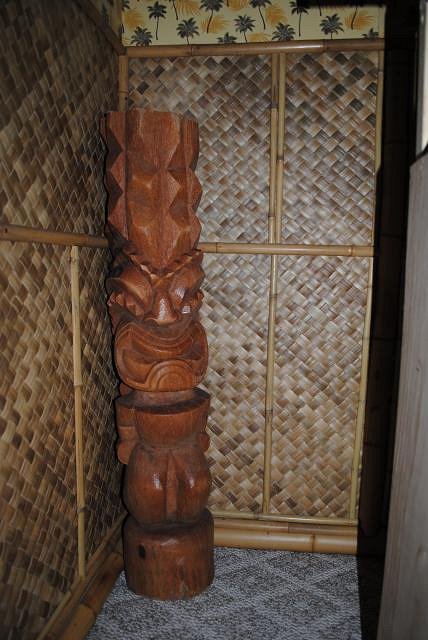
Yard sale King K
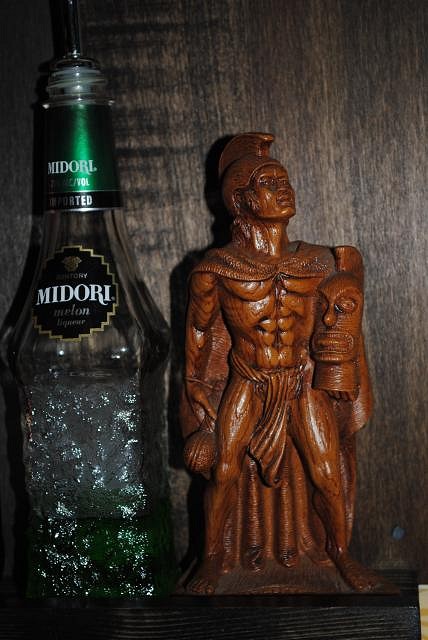
Benson's Imports Ku and Kanaloa
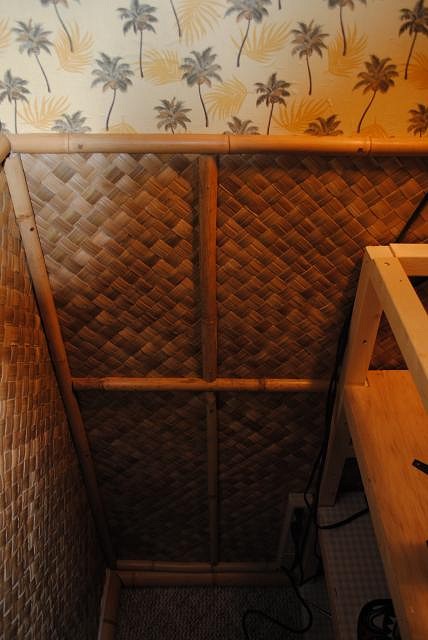
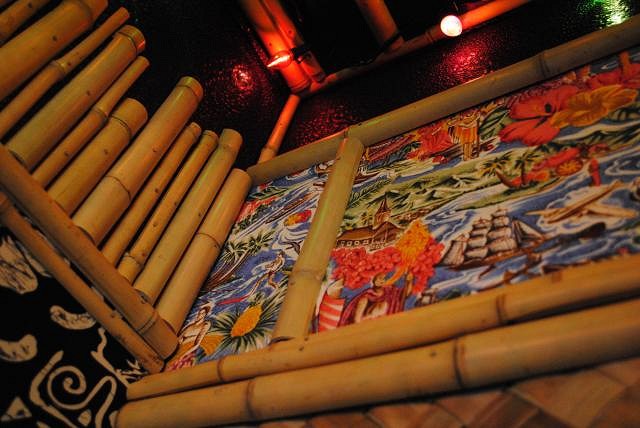
Moving along with the bamboo trim and wood paneling
More or mostly less tying it all together
Next up- split bamboo around the base of the bar, three more shelves for bottles and mugs, and then install the awning. And then..... |
|
T

teaKEY
Posted
posted
on
Sun, Mar 28, 2010 4:37 AM
Looking real good. I really like the hawaiian fabic. It added texture and color and breaks up the browns with a punch. And the coolest part is the you reused and then recycled it. Being tiki and saving the world at the same time, I aplaud you for that. ps the soccertiki is in here just to get the word out :wink: |
|
A
ashman_atl
Posted
posted
on
Thu, Apr 1, 2010 9:09 PM
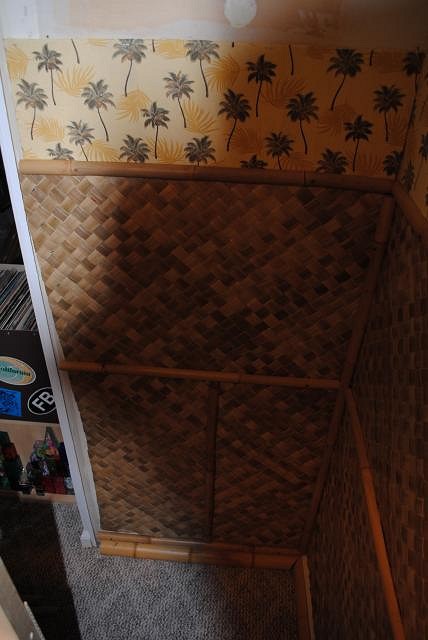
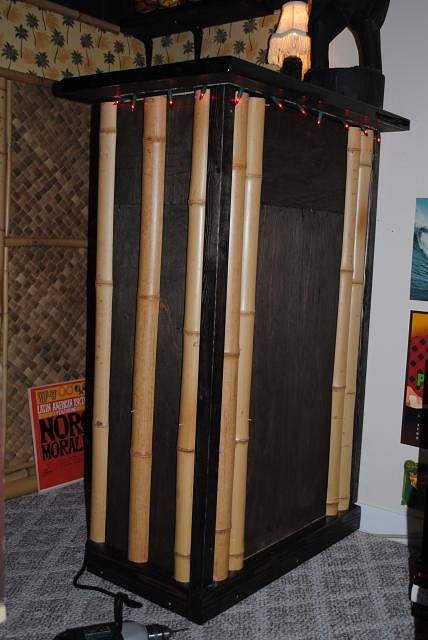
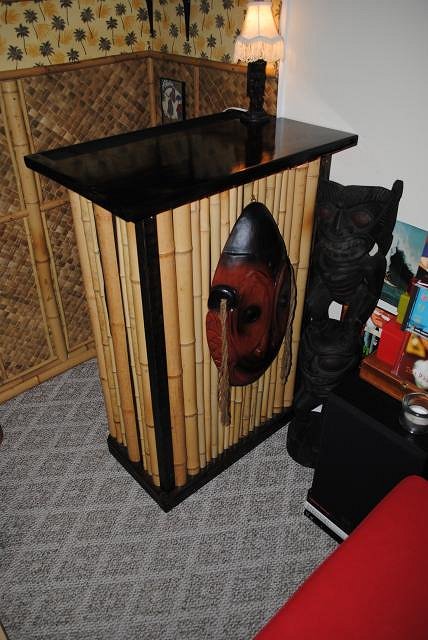
Just a few progress pics (moving at the speed of evolution, I tell ya!)... Finished the paneling wrap around (filled in the corner gap after this photo; shelves will go up above the paneling next)
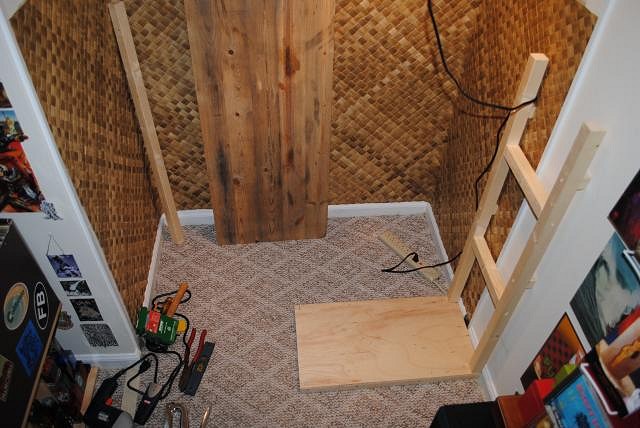
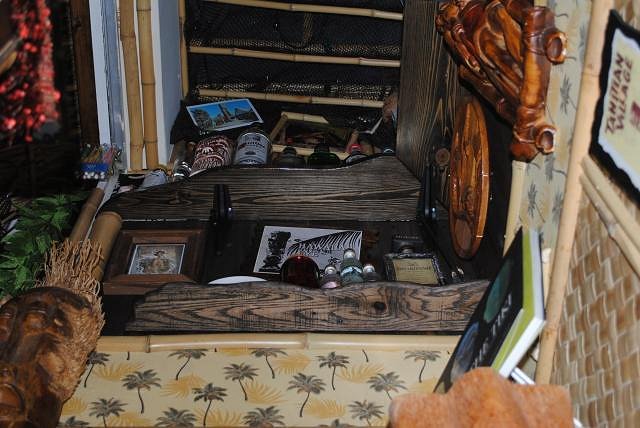
Looking down into the back of the bar
Got the plywood skin on and stained, corners and base trimmed in, and started putting up some split bamboo
One of these days, I'll get this thing finished, but it is a lot of fun and don't mind taking my time. Hope to have another update in about a week... |
|
M

Monkeyman
Posted
posted
on
Fri, Apr 2, 2010 9:10 AM
pretty amazing what you are doing with such an intimate space proof that tiki can fit anywhere regardless of your space or budget. |
|
L

LiddleLola
Posted
posted
on
Fri, Apr 2, 2010 8:10 PM
Looking great! Is that Bac Bac matting on the bottom. I'm still trying to decide which to use. Darilyn |
|
A
ashman_atl
Posted
posted
on
Fri, Apr 2, 2010 8:37 PM
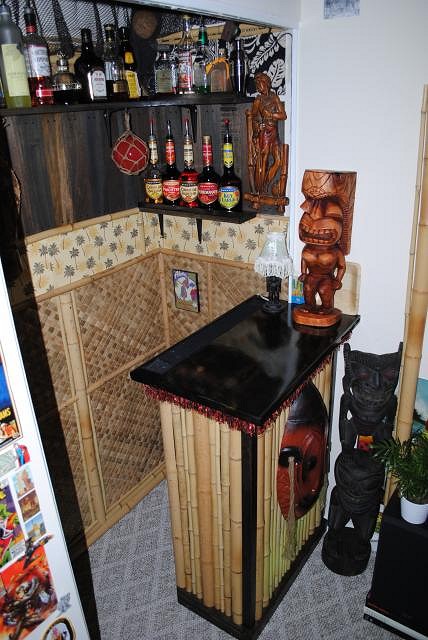
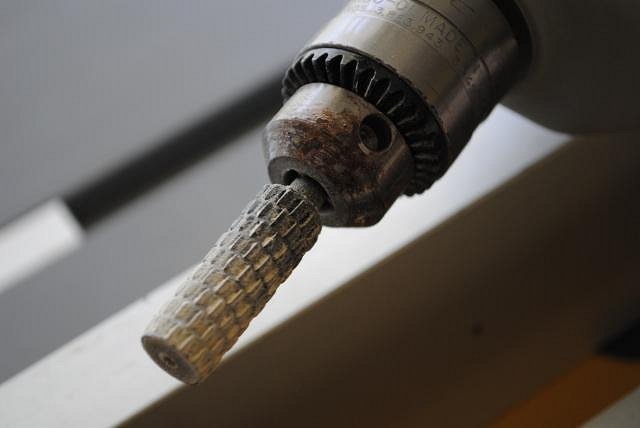
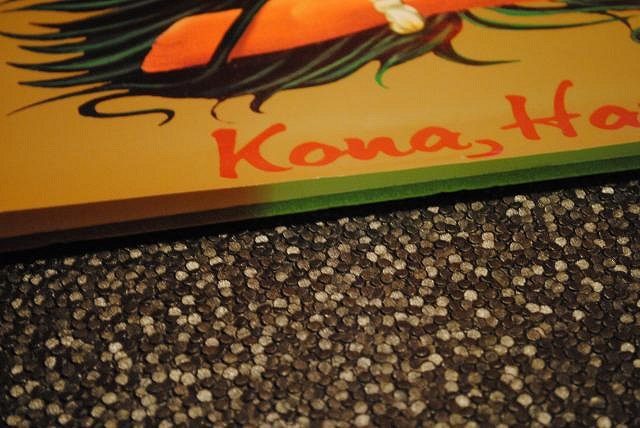
Monkeyman- thanks for taking time out from your KILLER project to drop by. The South Pacific Room is looking excellent. I'm getting ready to put my new grinder bit to work after seeing your results on those ceiling beams. Liddlelola- just the basic lauhala mat. I thought it looked a bit checkered when I first unrolled it and was rather pleased. I like the bac bac look, but it's a bit more expensive. Got a little bit of work done, so a few pics, same shot, too dark and/or bright...
Still a lot to do, but it's starting to look like it may have potential. |
|
A
ashman_atl
Posted
posted
on
Thu, Apr 8, 2010 11:38 PM
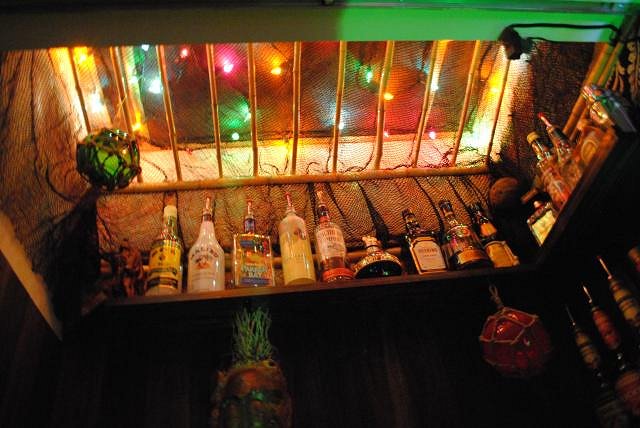
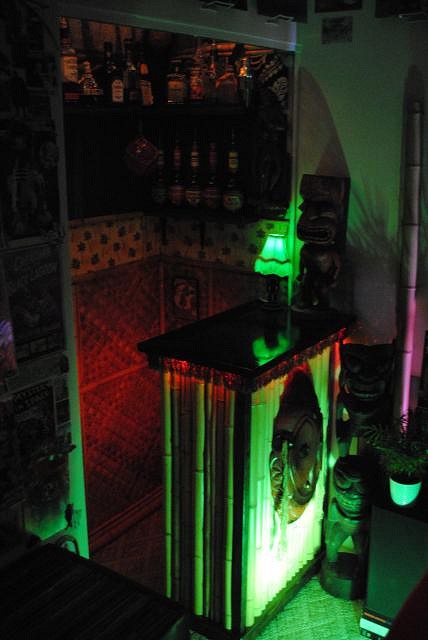
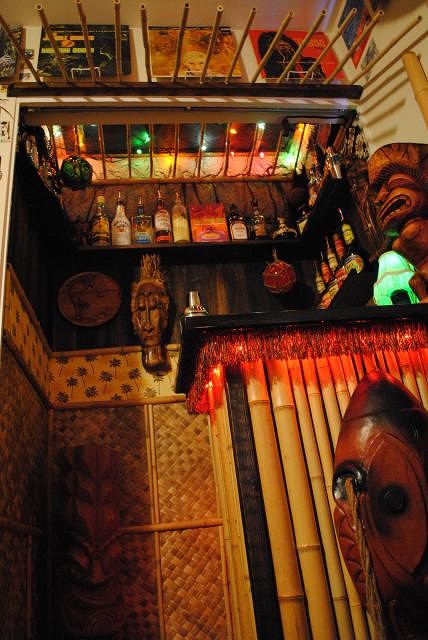
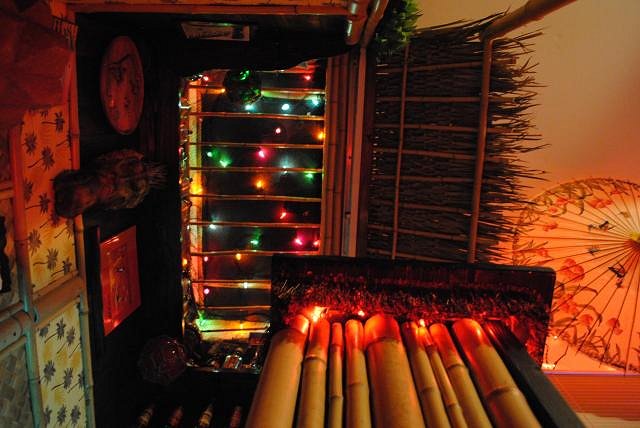
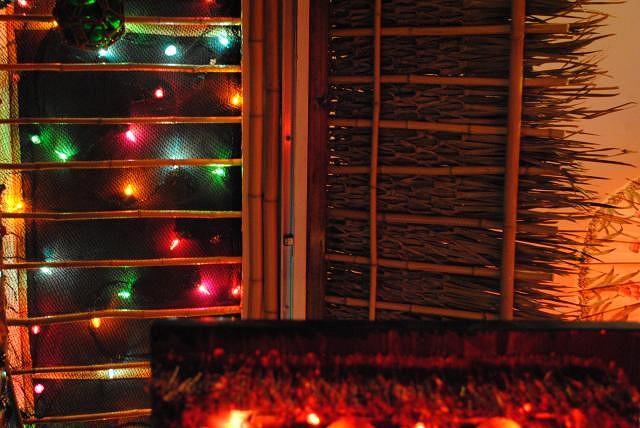
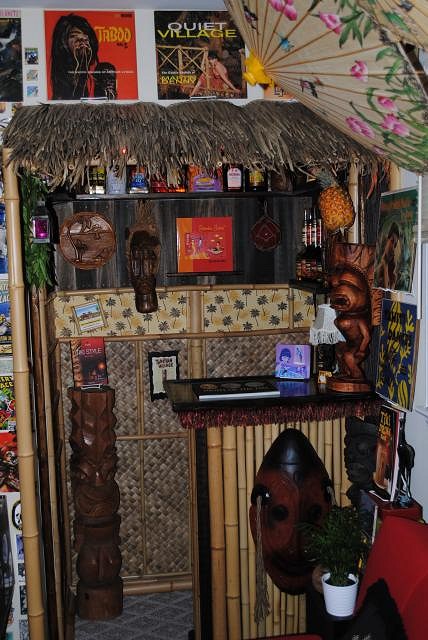
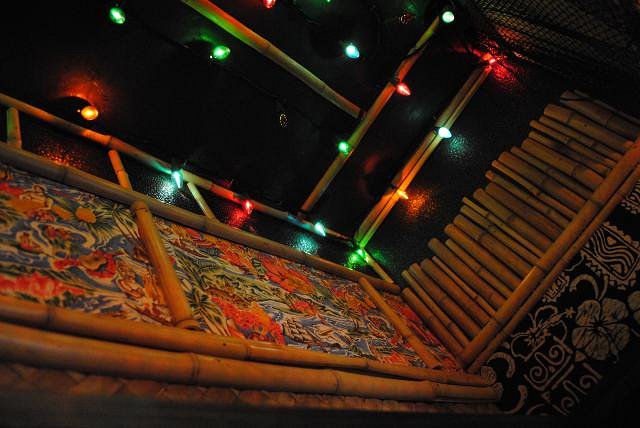
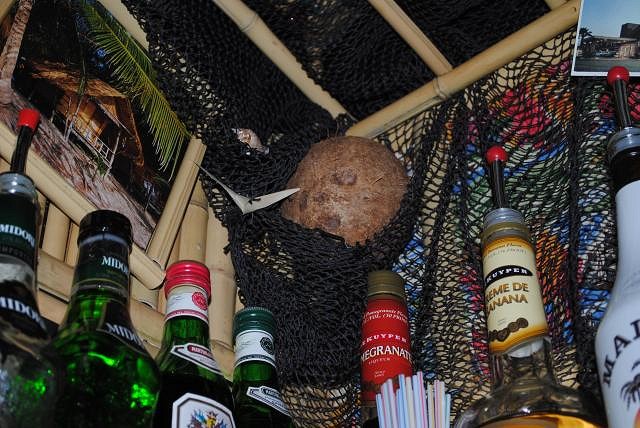
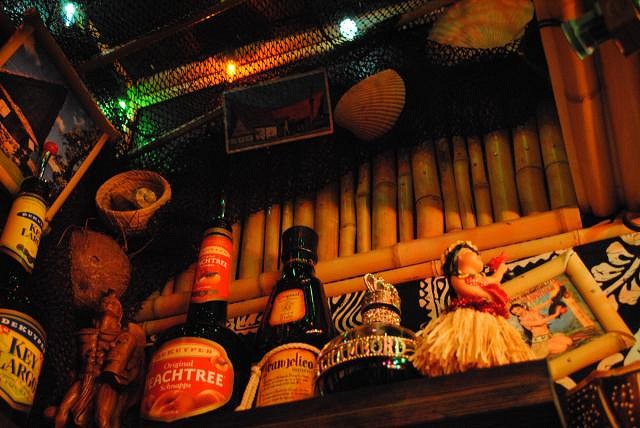
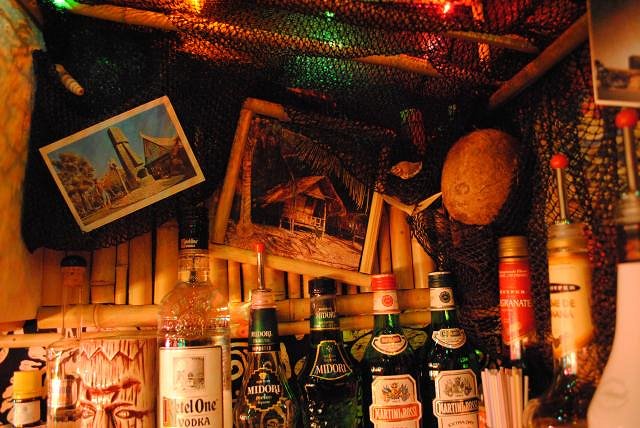
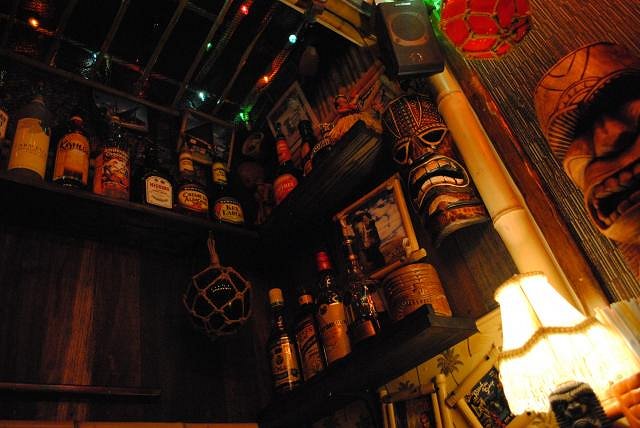
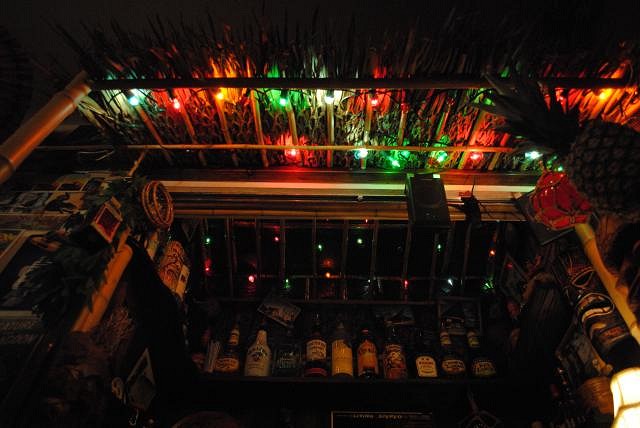
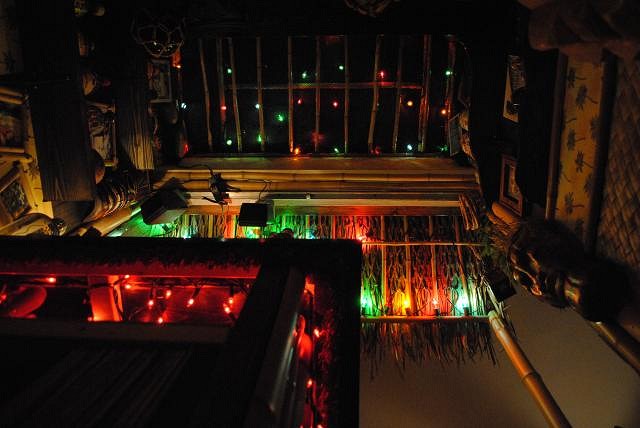
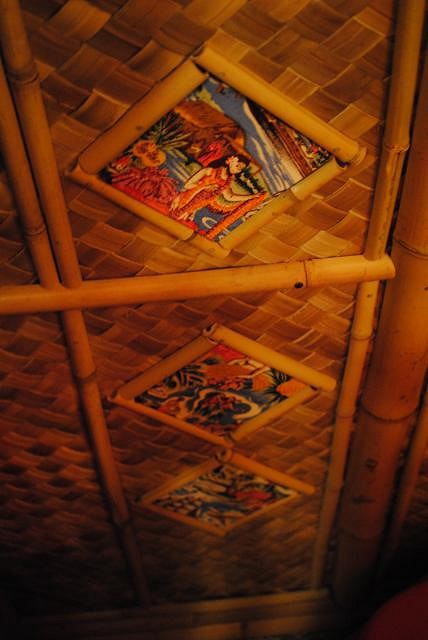
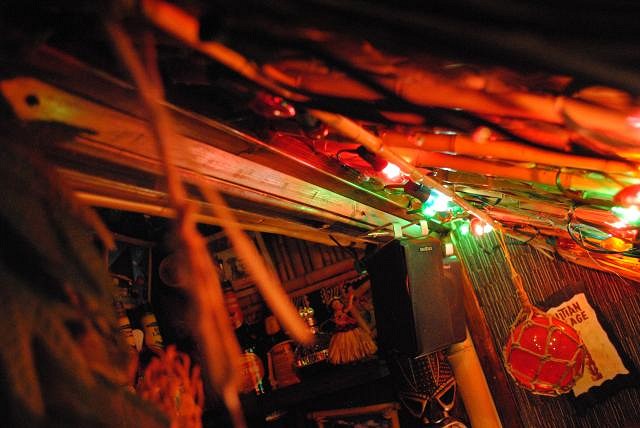
Some minor progress this week. Got two more shelves installed, found some fringe to skirt the bar top, received the Snidely Ku, did some work on the ceiling with lighting effect and fish netting. Still have lots of bamboo trim to put up, another shelf to install, and, of course, the thatch awning... Here are a few pics... The ceiling... The shelf that will go up in the empty spot on the left in above photo... Three slightly different angles of the same shot...
One with flash... yikes!
It's gettin' there! |
|
M

Murph
Posted
posted
on
Thu, Apr 8, 2010 11:41 PM
lookin' real good! |
|
V

VampiressRN
Posted
posted
on
Fri, Apr 9, 2010 10:49 PM
Wow...nice job for that small space. Very kewl!!! |
|
A
ashman_atl
Posted
posted
on
Sat, Apr 10, 2010 5:06 AM
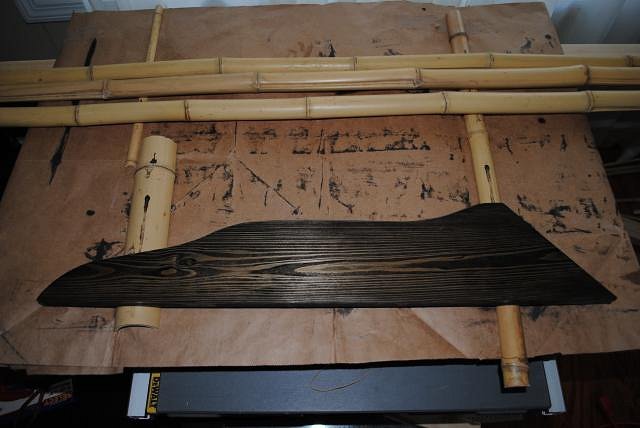
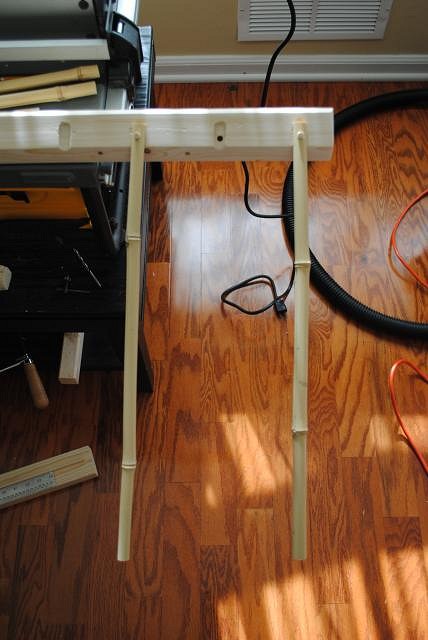
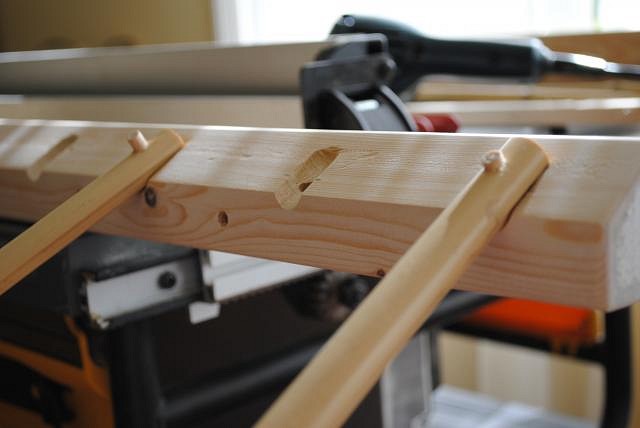
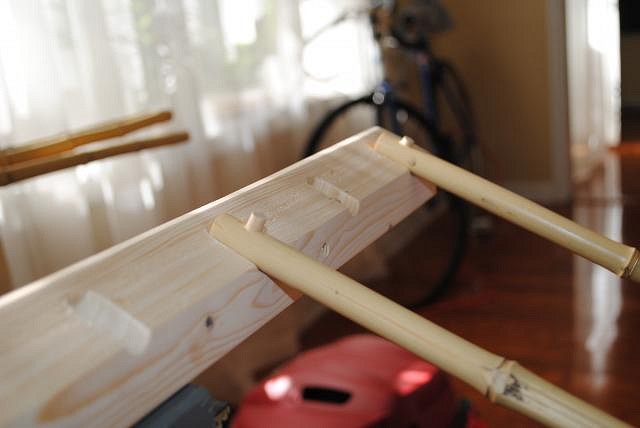
Finally started work on the awning yesterday. I knew it would be the most challenging element and it is... Cut down a 2 x 4 and beveled the face and 1 end. Next, used a rotary file to burrow channels for the bamboo ribs...
Cut and fit each rib and attached with a dowel through a 1/4" hole which had to be drilled and, of course, every other piece of bamboo would split, but pretty good result...
Hope to have this thing sanded, stained, sealed and glued together and maybe hung up this weekend. We'll see..... Much thanks for the kind words and encouragement! [ Edited by: ashman_atl 2010-04-10 18:04 ] |
|
A
ashman_atl
Posted
posted
on
Sun, Apr 11, 2010 10:54 PM
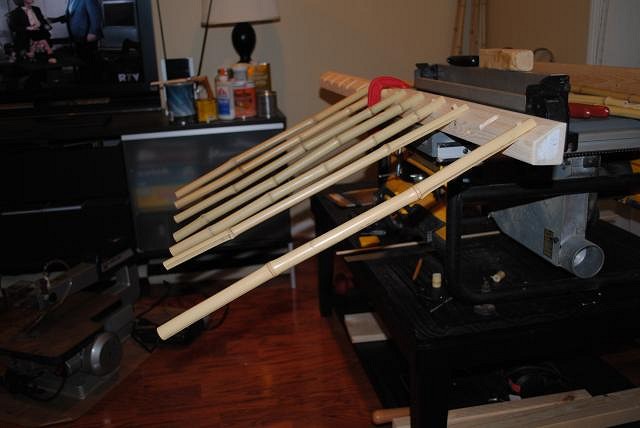
Beautiful tiki bar building weather in Atlanta this weekend, so that's how I spent part of it anyway... Continue to be humbled by a lot of the bars in this forum, but inspired as well. Doing one of these projects for the first time is certainly a learning experience, but it helps when others share their knowledge and techniques and I appreciate TC'ers for the updates/pics. Got the head beam for the awning done. Used Gorilla glue and dowels to attach the bamboo ribs and it turned out not too badly. Still to do: side and front support poles and thatch; more measuring, cutting and whatnot. Some pics of the skeletal piece from different angles...
Longer shot along the wall of the room from the entrance into the corner...
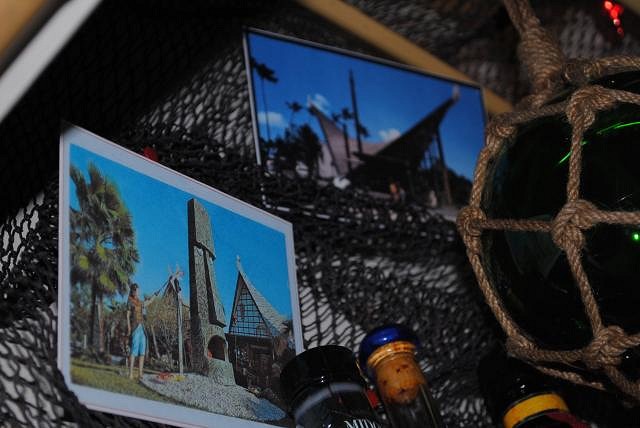
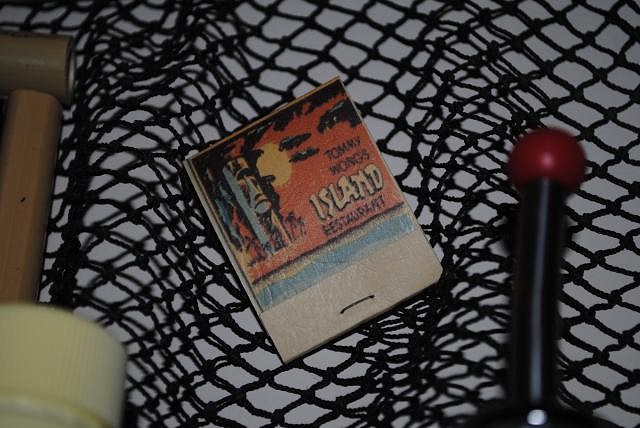
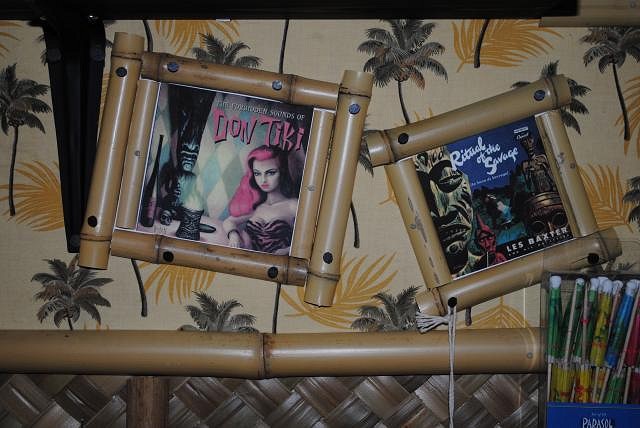
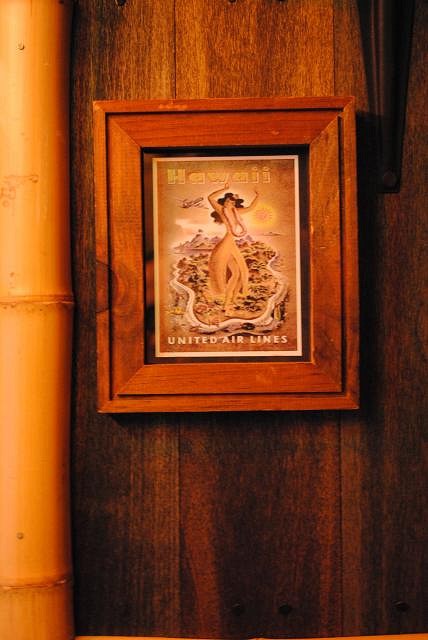
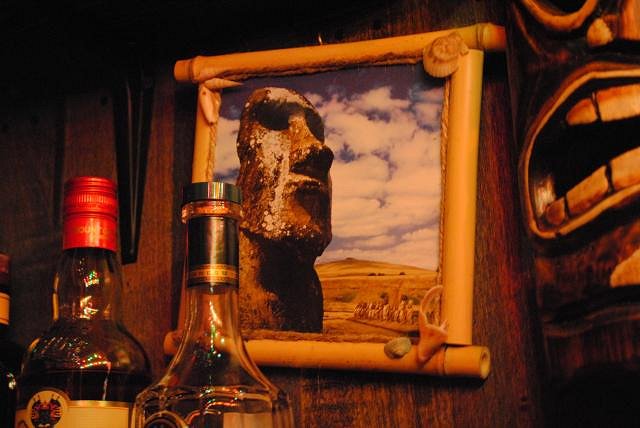
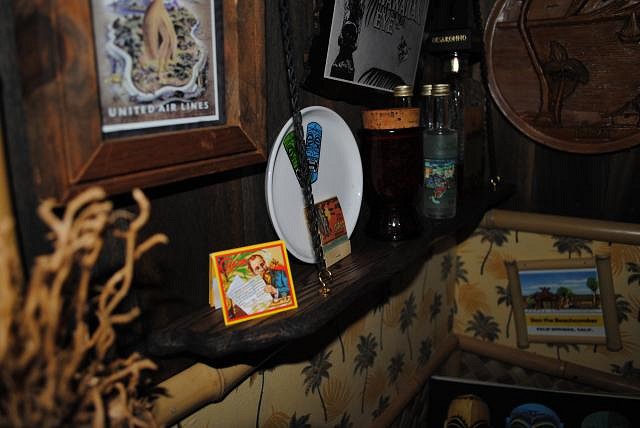
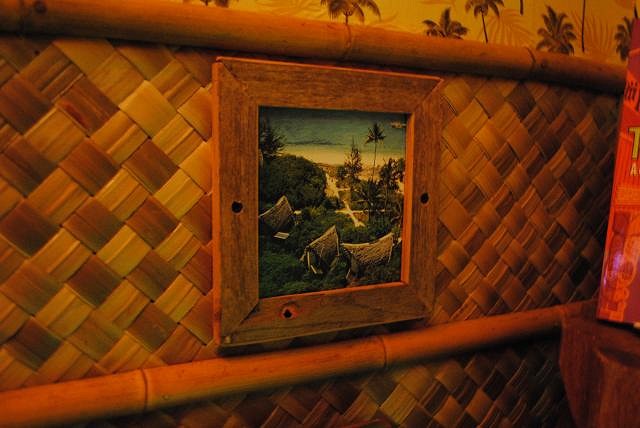
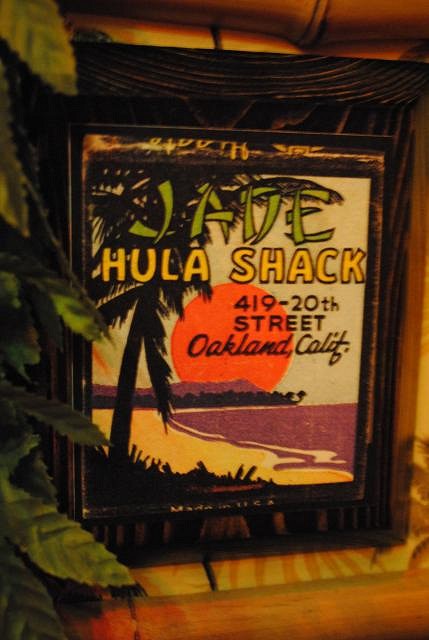
Slowly but surely getting some decorative elements into the space. Made this little bamboo framed picture in the corner from a page-a-day calendar...
And what tiki bar is complete without a little Shag? Found these cocktail napkins at Tuesday Morning for $1...
That's all for now. Have to get back to my real job for a few days.... |
|
J

jcorrigan
Posted
posted
on
Mon, Apr 12, 2010 7:21 AM
That's looking awesome!! Keep up the great work!! You are so lucky with your tiki finds!! Here it's a little tougher... |
|
P

Profit
Posted
posted
on
Mon, Apr 12, 2010 10:12 AM
Wow, what an inspiration... I might have to try something like this in my small "bump-out"... Looks great! |
|
W

WestADad
Posted
posted
on
Mon, Apr 12, 2010 11:54 AM
Wow, very cool idea on the awning. Going to thatch that? Love the whole package! |
|
K
Kon-Hemsby
Posted
posted
on
Tue, Apr 13, 2010 5:26 AM
That is looking excellent. You've made that space look bigger than it actually is whilst starting to fill it with enough 'clutter'. Brilliant job. I reckon you're going to be enjoying a few Mai Tais in there soon. |
|
A
ashman_atl
Posted
posted
on
Sun, Apr 18, 2010 12:45 AM
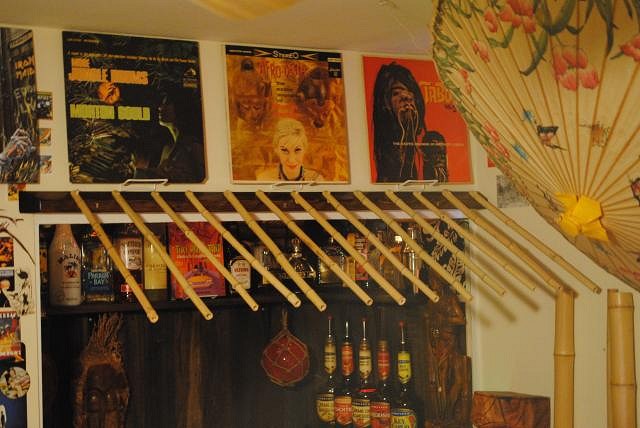
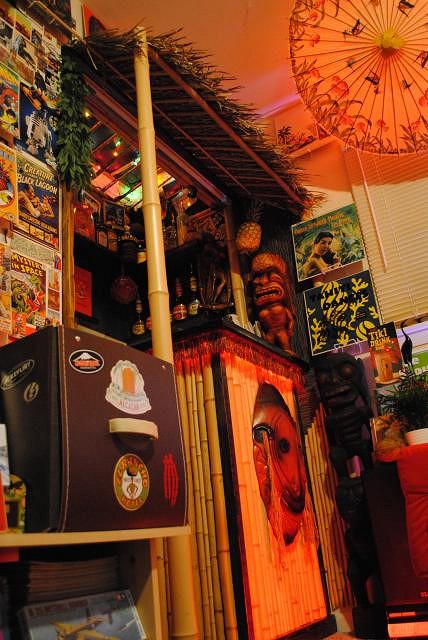
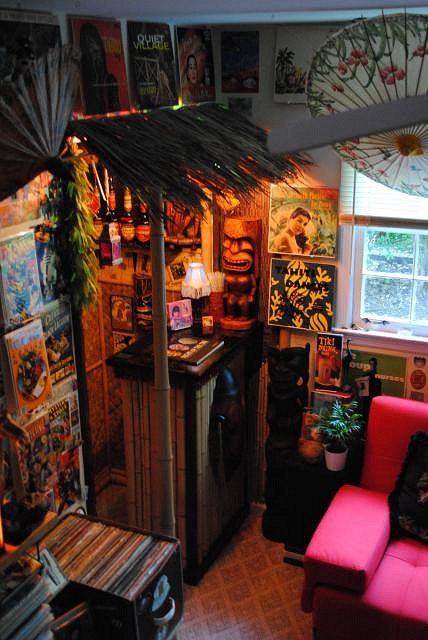
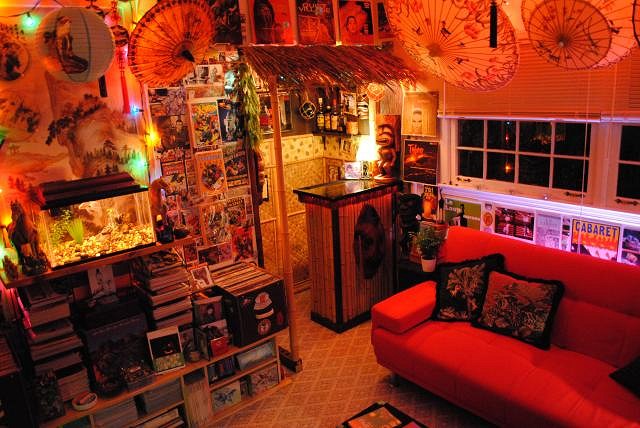
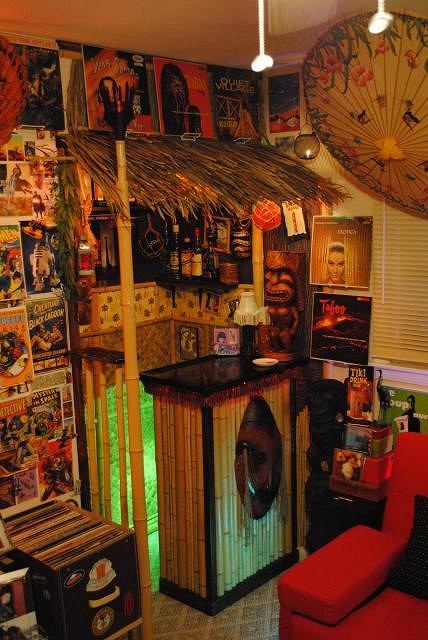
Made some additional progress on the hut this weekend. More fun than I've had in a long time... One of these days, hopefully I'll be able to spread out into something more than a closet. For now though, it will have to do. Got the awning thatched and here are a batch of various angles of the intstallation...
Looking up into the hut...
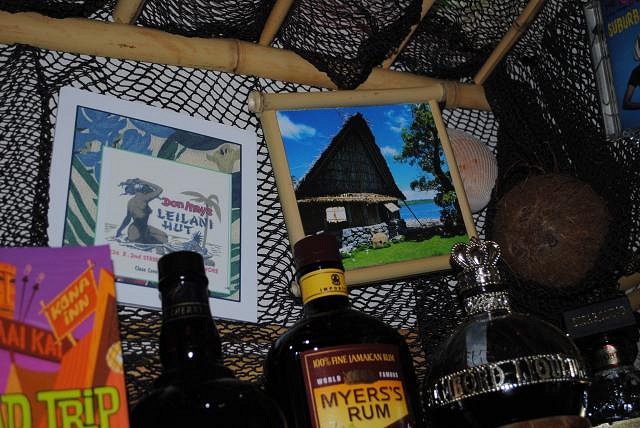
'nother yard sale find...
Detail of some art paper I found at Sam Flax that will use to cover some of the white space behind the fish netting....
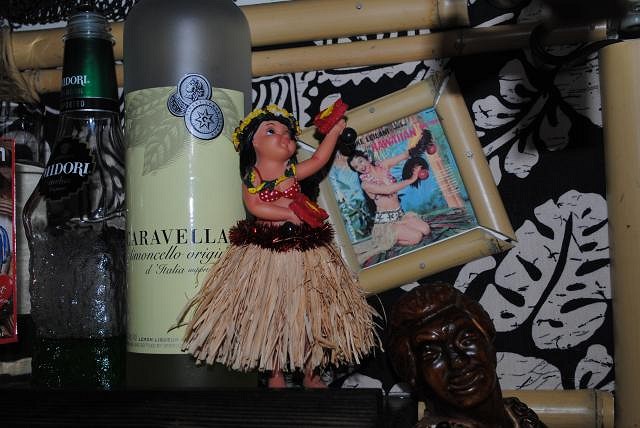
Added some clutter during the week...
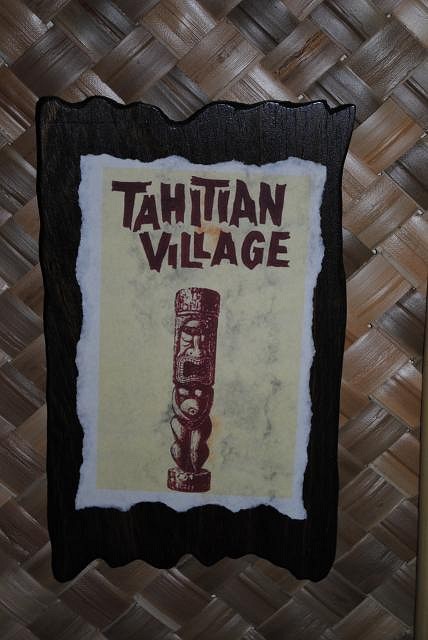
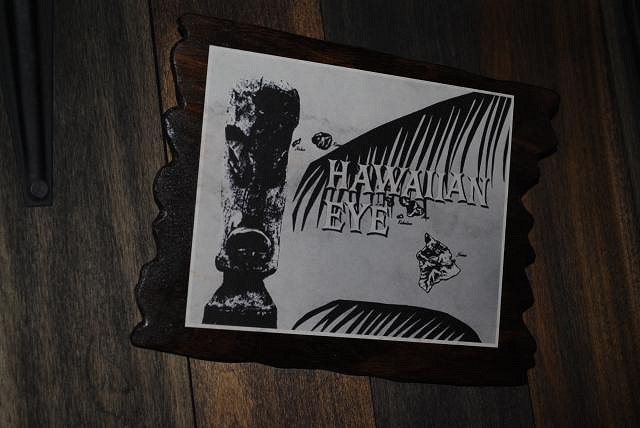
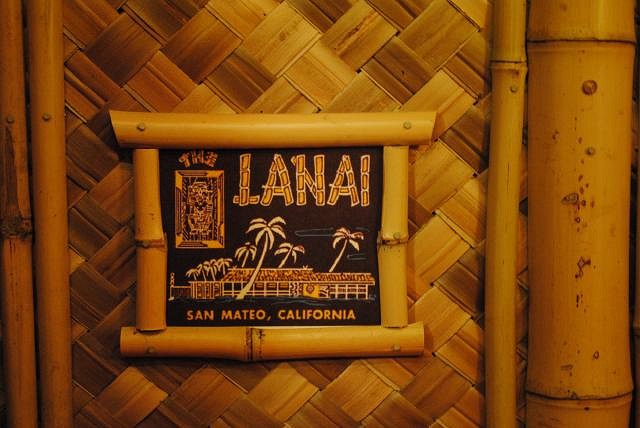
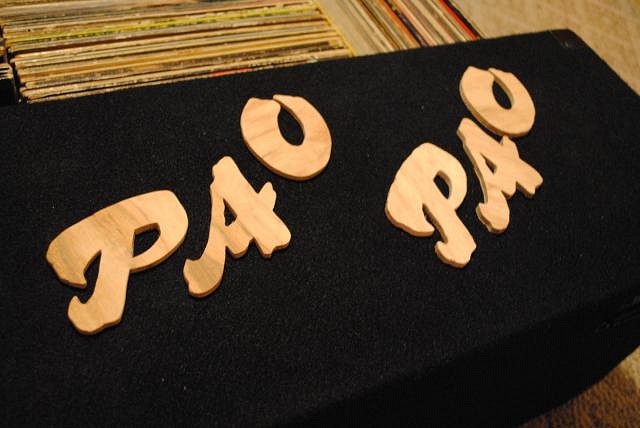
Fired up a borrowed scroll saw and made a couple of signs (quite a bit of fun these do-dads turned out to be)...
Blurry detail of the floor support for the corner pole...
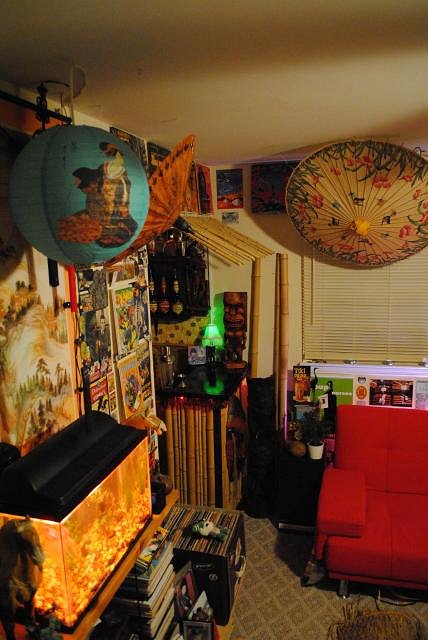
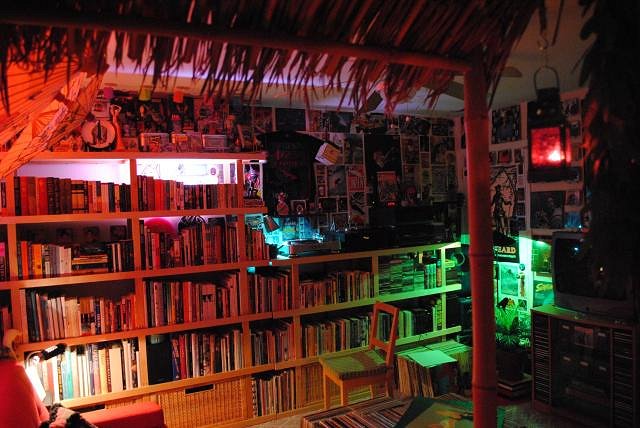
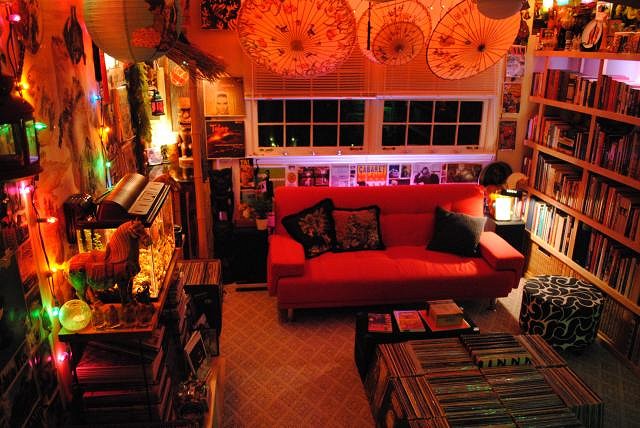
And last, but not least, the view from the hut into the library which is becoming quite the space to relax with a Mai Tai and a good read...
Again, thanks for the kind posts on this thread. I just hope to inspire others to make the most of whatever space they have. Glad to have the heavy lifting done, but still lots more details to add and, as may be obvious, I have a tiki mug collection to build! Mahalo! |
|
T

tikisafari
Posted
posted
on
Sun, Apr 18, 2010 12:56 AM
I know I'm a bit late to the thread, but that's an amazing transformation! You guys are so lucky to be able to find good stuff at garage sales and swap meets. That pretty much doesn't happen down here. |
|
TB

Trader Bob
Posted
posted
on
Sun, Apr 18, 2010 1:06 AM
Great room & bar |
|
BB
Bongo Bungalow
Posted
posted
on
Sun, Apr 18, 2010 3:35 AM
There's real devotion in them there details! Really nice! |
|
A
ashman_atl
Posted
posted
on
Mon, Apr 19, 2010 5:00 AM
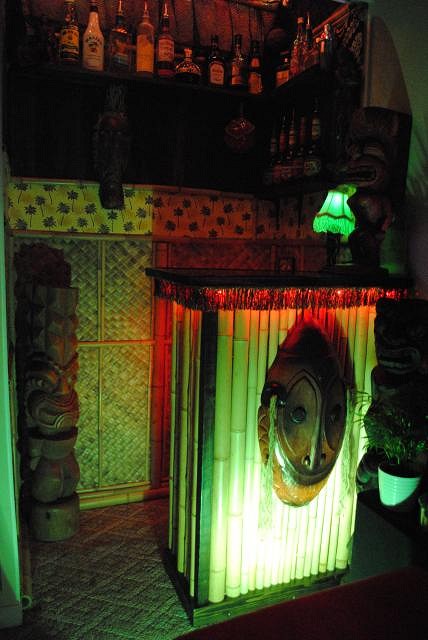
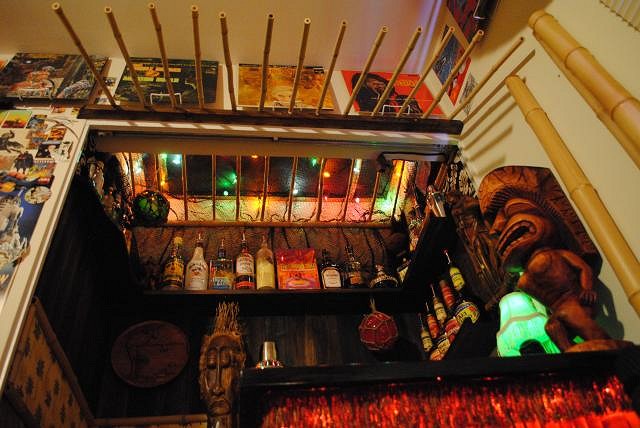
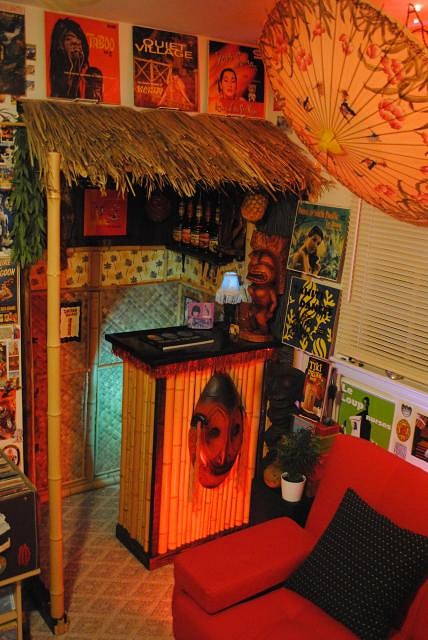
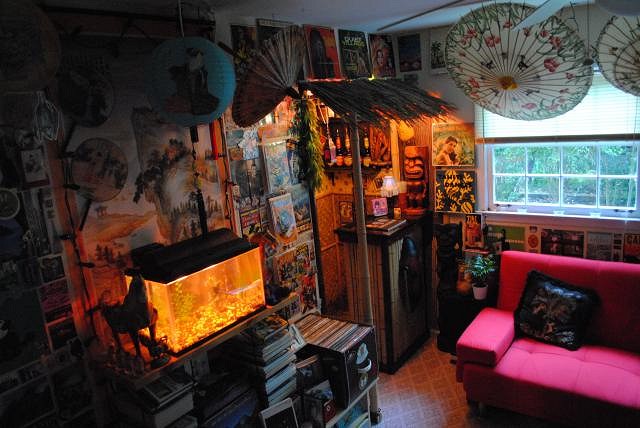
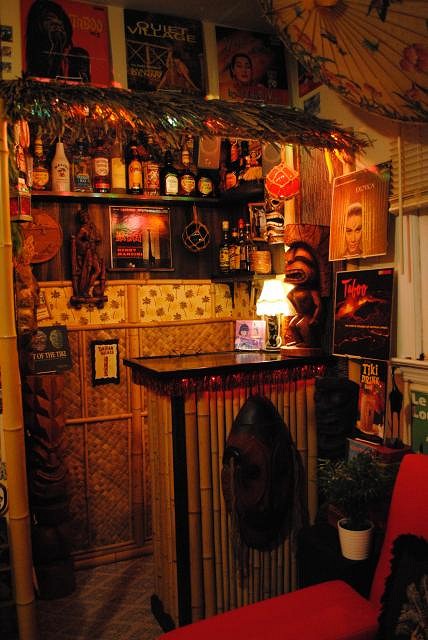
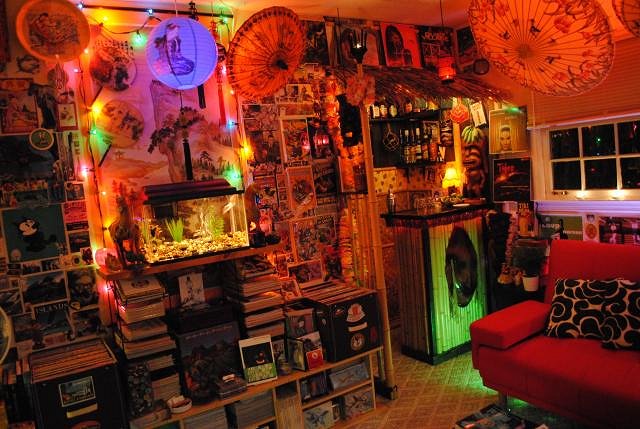
Not much to update, but took a few daytime pics yesterday after getting the lighting installed under the awning. Had some friends drop by to check it out and so far the vote is not to tear it out and start over (relief)... Sorry if some of these shots become a bit repetitive...
with flash...
Long view...
From above...
Had to cover up a lot of white drywall (still more to do) and found some great paper that kind of matched the stain colors (ebony/jacobean) I used on the paneling and other wood. This is it behind the Ku... (almost looks like bamboo paneling)...
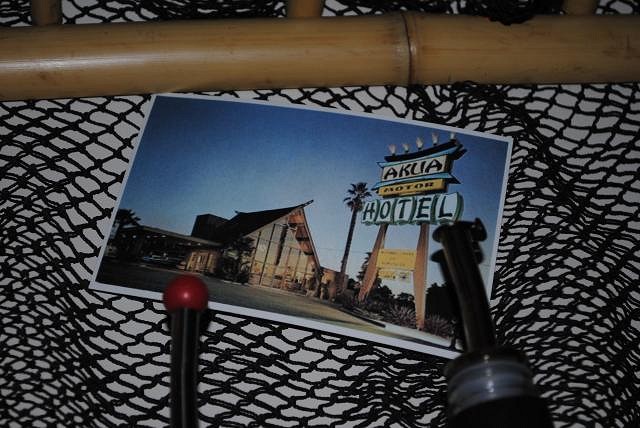
And picked up this frame for 69 cents at the thrift store. Took out the poem matted with mauve and teal and put in this picture I reduced and printed off from the computer...
Have a few more smaller shelves to put up this week as well as a couple more small projects and then it's the quest for clutter... |
|
W
WestADad
Posted
posted
on
Mon, Apr 19, 2010 5:28 AM
That's some nice work! I don't mind any repetition at all. Enjoy! |
|
A
ashman_atl
Posted
posted
on
Sat, Apr 24, 2010 9:58 PM
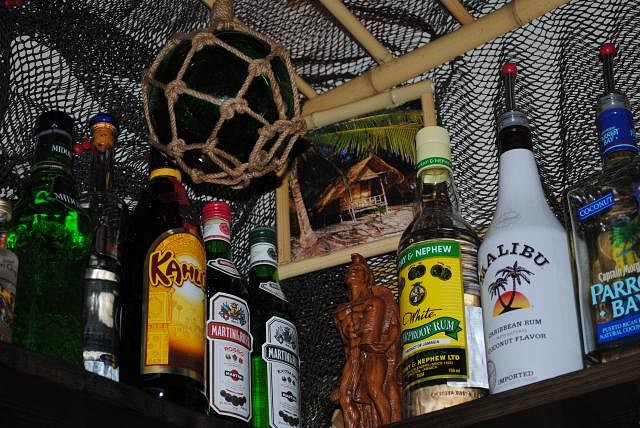
Time for a little weekend update... Found a minute here and there this week to do some more stuff to the hut. Finally got almost all of the white drywall covered up. Made good use of the split bamboo scraps to do part of the job and the rest got done with some more decorative fabric panels (fabric glued to foam core and affixed w/staple gun) and the decorative art paper I picked up last week. Some shots around the top...
After getting the netting back up and everything in place (w and w/o flash)...
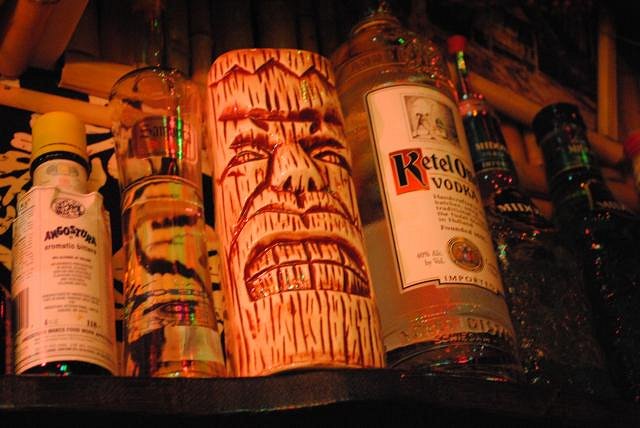
Took a break from the build for a few minutes and dropped by my local Goodwill Friday. Found my first tiki mug! And so, the collection begins (yes, I'm doing things backwards...).
Another page-a-day pic (needed Elmer's, Gorilla, and hot glue to keep this one together, but finally got it all to stick)...
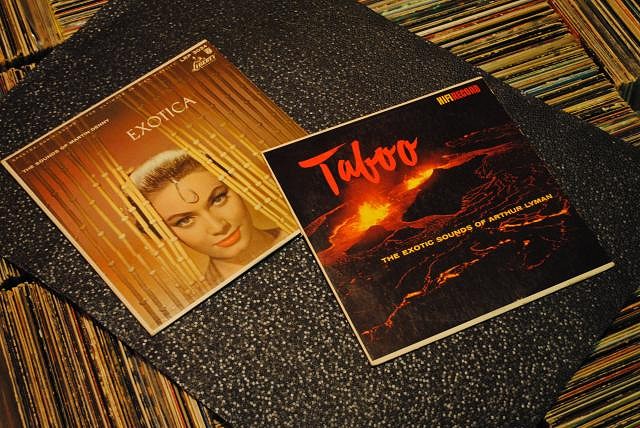
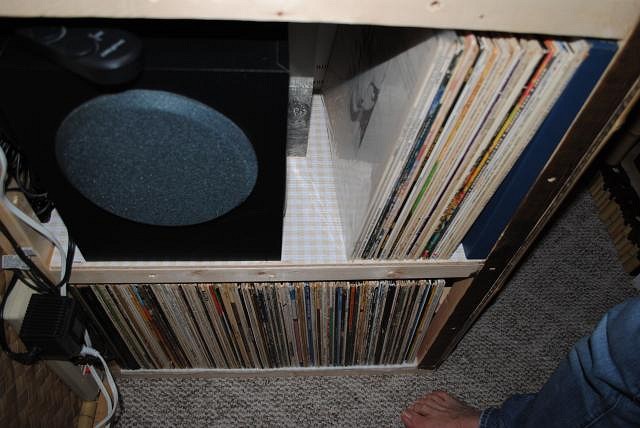
Scored some missing vinyl for the exotica collection (Atlanta's got some great used record stores)...
On the way to get milk this morning, noticed a yard sale going on. Decided to see if any tiki might turn up. A lady asked me what I might be looking for and I asked if there was any tiki stuff. Antiques? she said... no, "tiki"... she said no tikis but she had something I might be interested in- a set of Pacific Merchants Acacia wood serving trays. Rain was on the way and everything had to go. I got both pieces for $1! Proper nosh service...
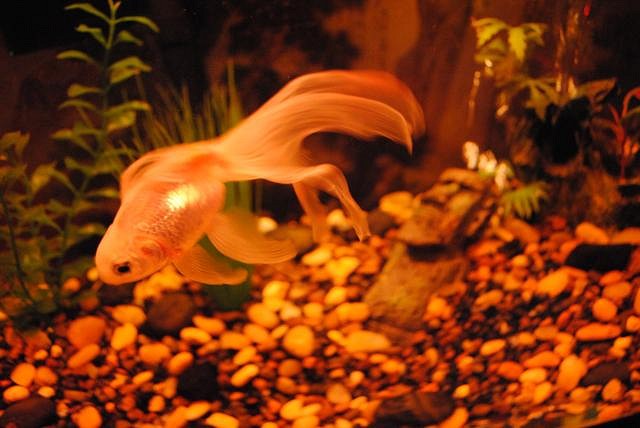
Had to clean the old goldfish bowl. Updated with pet store Moai...
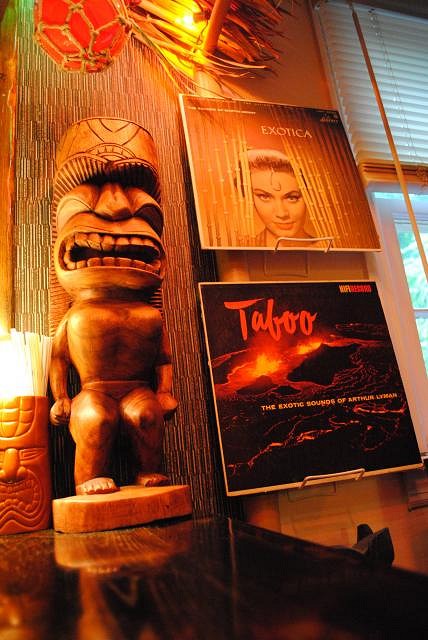
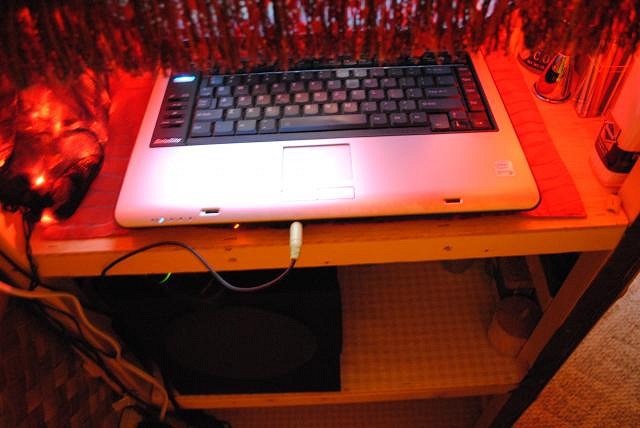
Got some of my lounge collection off the floor and into the bottom shelves of the bar. Also wired up a couple of speakers and a sub to run from the laptop. Don't really need it as the library has an adequate sound system, but just wanted to see what I could do w/stuff on hand...
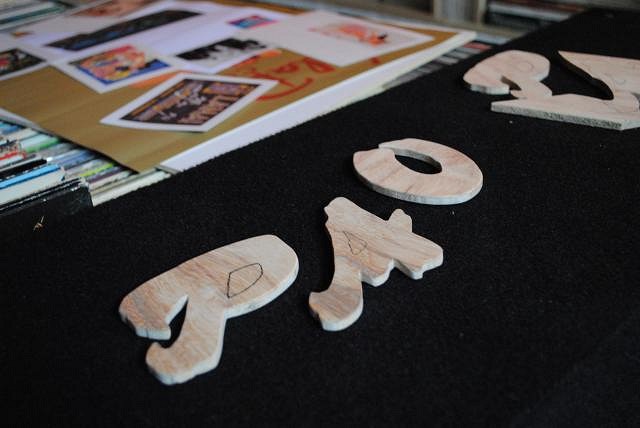
Used the scroll saw to start cutting out the letters for the sign that will hang above the awning...
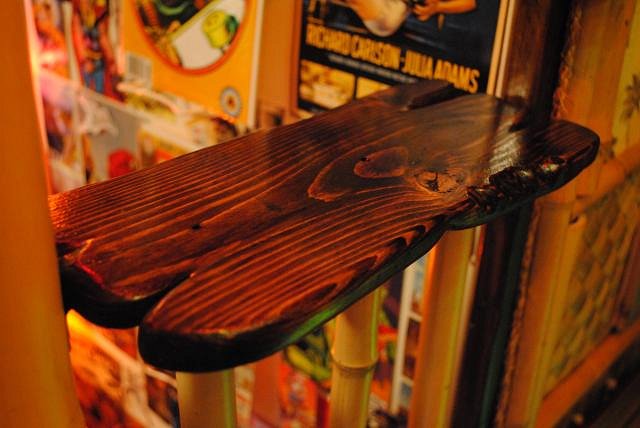
Needed some additional shelving and got the bright idea to use some old pallet oak... very tough and unruly but ended up with something nonetheless... (really like the way the chain looks; just spray painted it flat black)
Better idea of the shape from below... Still lots more space for do-dads and what-nots, but it's starting to look a bit more natural...
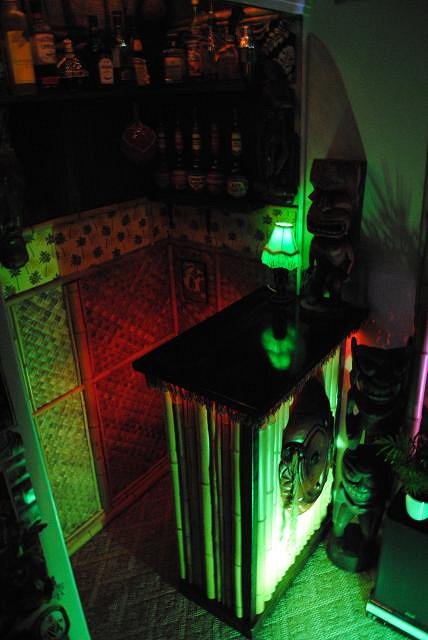
Some shots w/indirect lighting in effect...
Can't seem to find orgeat around here, so I'm ordering some Torani online, but except for a few details, this thing is just about ready for its first test drive. Next up- finish the sign and add a tiki torch atop the corner pole (and replace those white vinyl mini-blinds with some bamboo blinds). Hope to be back next weekend w/another update. Cheers! |
|
TB

Tiki Bird
Posted
posted
on
Sun, Apr 25, 2010 12:58 AM
Great use of a small space, thanks for posting the pics cheers! |
|
TB
Trader Bob
Posted
posted
on
Sun, Apr 25, 2010 1:48 AM
This rooms really taking shape. A great place to relax in. You have done a wonderful job! |
|
T

TorchGuy
Posted
posted
on
Sun, Apr 25, 2010 8:54 PM
Amazing little tiny bar! Fantastic work, great atmosphere in such a small space. Grab yourself one of those neon "flicker flame" light bulbs, a small socket and cord, and make your tiki torch glow. |
|
A
ashman_atl
Posted
posted
on
Sun, Apr 25, 2010 10:46 PM
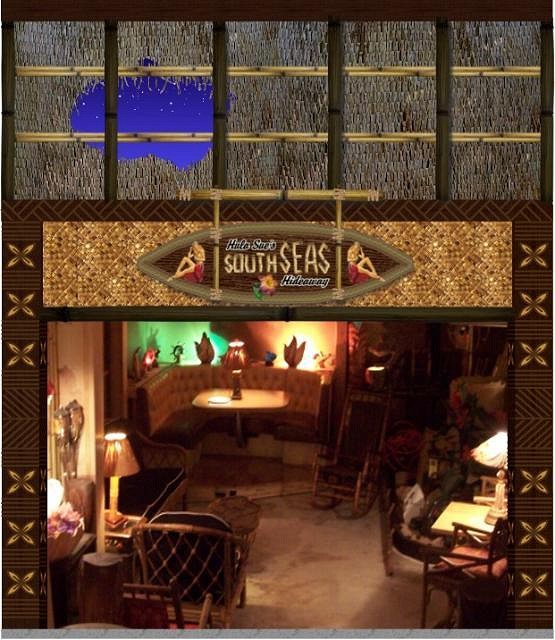
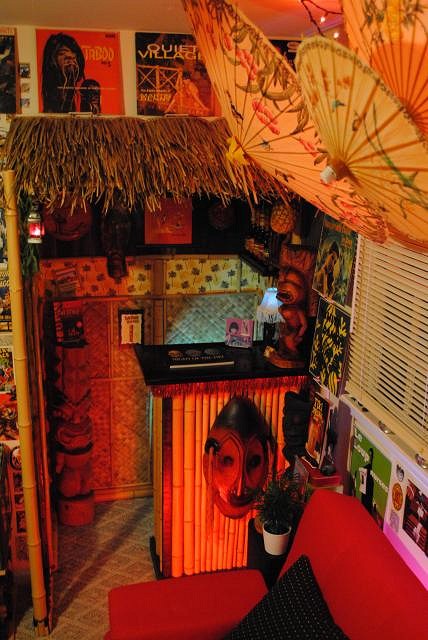
Didn't expect to get anything done today, but managed a few minutes to finish thatching the awning. Wanted the front to look like it peaked where the roof slants downward inside the closet. It's hard to get what it actually looks like from these pics, but the effect turned out pretty cool... From the front... Well, I'm off to check out these neon flicker bulbs that TorchGuy is recommending and look for a couple of puffers... Thanks for looking. |
|
W
WestADad
Posted
posted
on
Mon, Apr 26, 2010 8:11 AM
A rattle can of Bamboo color would fix those white wire things right up! Your place looks great! Love it! |
|
MPP
Mr. Pupu Pants
Posted
posted
on
Mon, Apr 26, 2010 12:28 PM
...or maybe even recreate them in roughed up wood for a more primitive look. Someone with your skills could crank that out in no time. Your room looks super cool. What a great place to hang out and relax. |
|
K
Kon-Hemsby
Posted
posted
on
Tue, Apr 27, 2010 5:31 AM
Your place looks brilliant. Time to mix up some drinks and enjoy it. |
|
A
ashman_atl
Posted
posted
on
Sun, May 2, 2010 10:35 PM
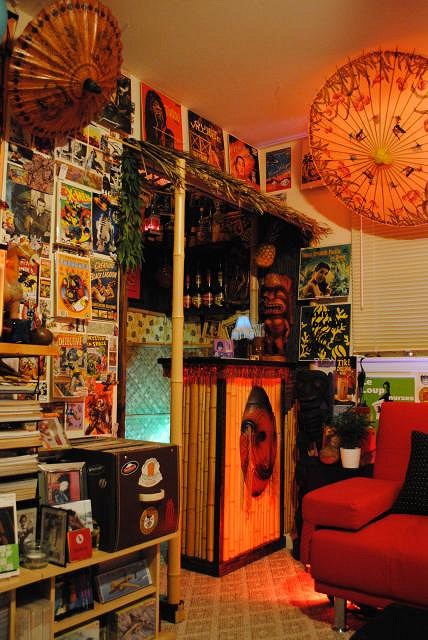
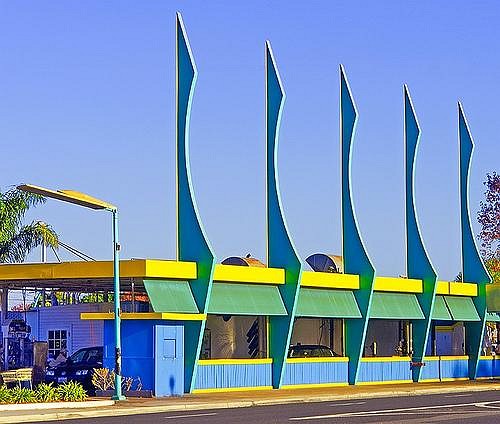
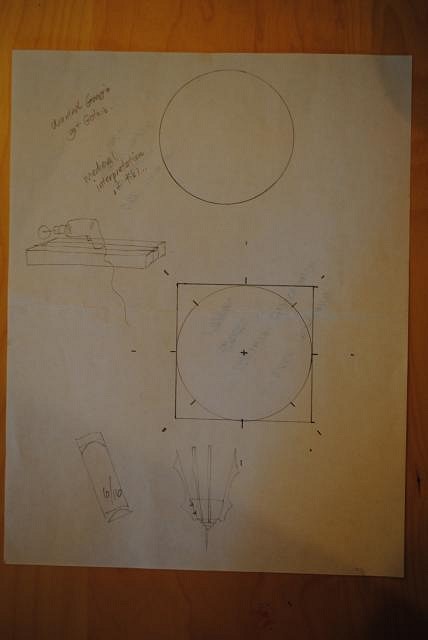
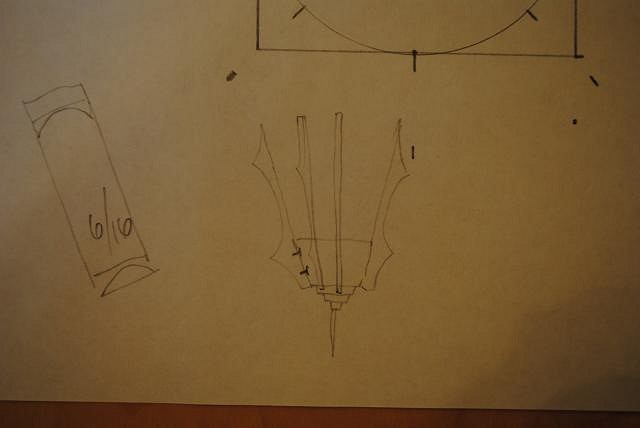
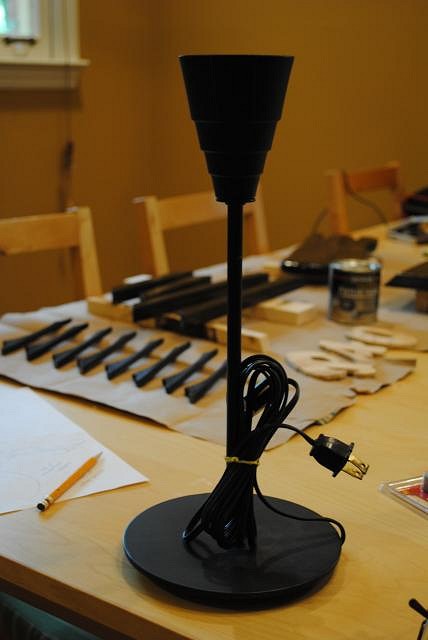
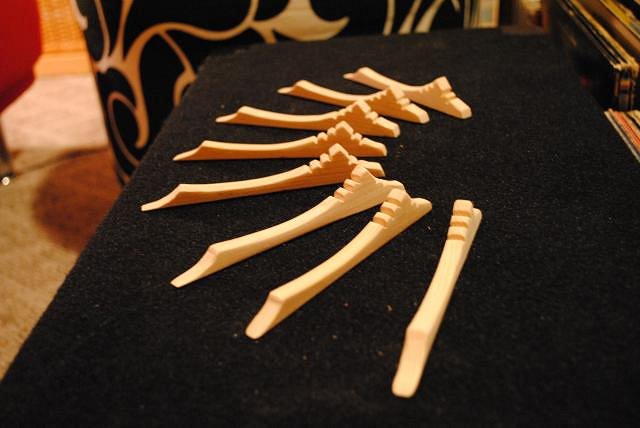
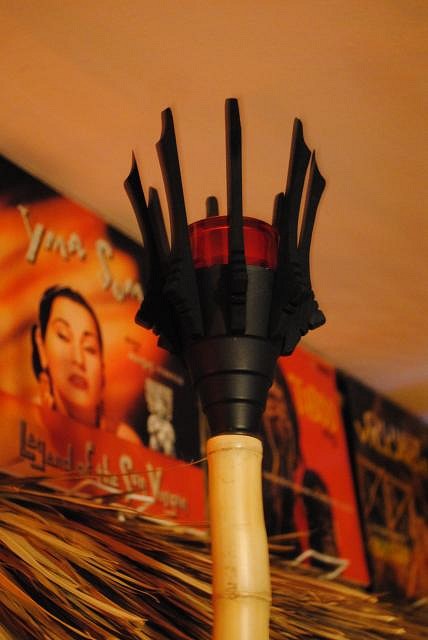
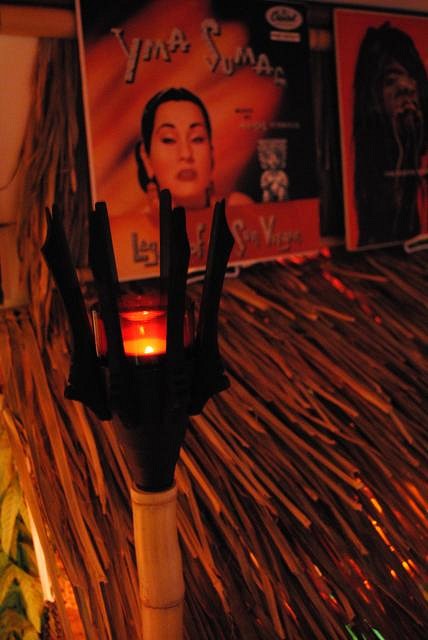
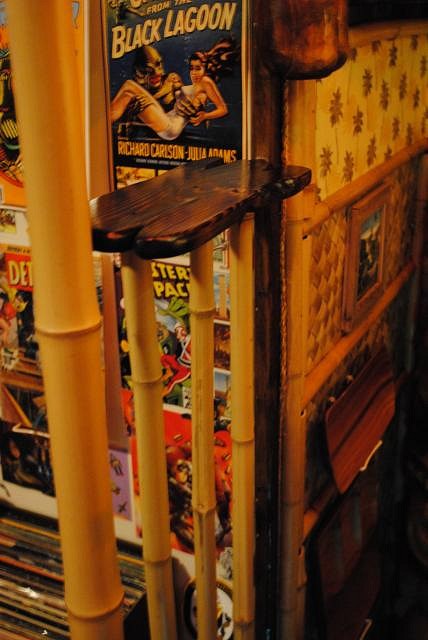
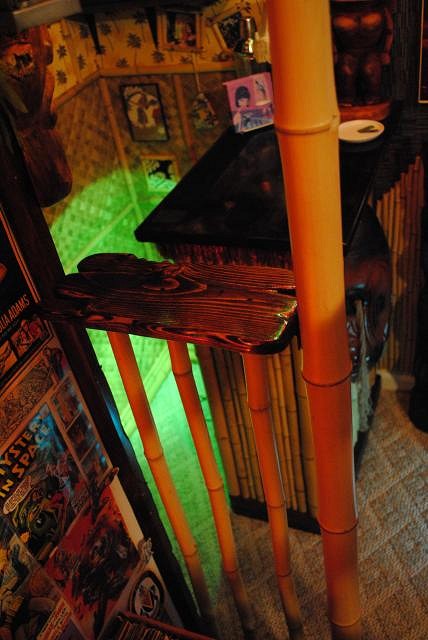
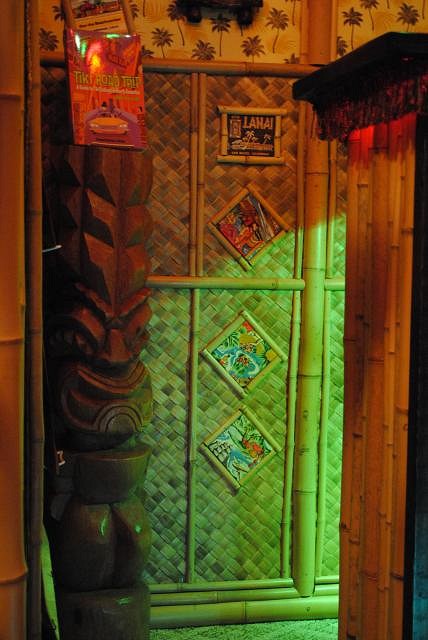
Well, I'm quite convinced that tiki tricking a bump-out from the ground up with little to no experience can be quite maddening. In my opinion, there are a lot of builders here who make it look easy, but it's been a battle for me. Anyway, after 10 weeks of messing with this thing, I'm about ready for a break. With the exception of the sign, which will be another story, everything I had imagined and conceived for the design is done. The main things accomplished this weekend have been the torch and the fence with shelf... (John and Chris- I have taken your suggestions for the easels to heart and will be working on something custom to replace them this week. Thanks guys, you knew I needed a little extra push...) I'm not completely satisfied with the torch, but from concept and design to the final product, it is my own work and I'll keep it for now. Here are some pics of the process (lighting is terrible in most of this post's pics, so please excuse...) I wanted to incorporate some Googie influence in the design and got some idea from this photo... My sketches for the design... An old lamp base that's been in storage for years would supply the "cone"... Chopped up some pine on the DeWalt and then sketched out the shape for cutting with the scroll saw. Lots of cutting and sanding, but here's what the "fingers" ended up looking like... After everything is put together... So, as you can see, it's a bit more goth than Googie (Neptune meets Mad Max?)............ Wanted to have the effect of separating the hut from the rest of the room, while still keeping the whole thing together and thought that a bamboo fence between the corner pole and the wall/closet corner would work. Here is the result... Those were the most perplexing things I did this week. Design was pretty easy, execution a whole other basket o' weasels... Managed to complete a few other things to help decorate the place up a bit... Another page-a-day calendar pic framed with scrap from the front of the bar top where I had to cut it down to size. At the bottom, you can see the hole where the bees made their way in and out of that old lumber over the years... (love the solar panels in use on these huts) More panels... Found a couple of wire basket candle holders at the thrift store. Spray painted them flat black and covered one with art paper and shells... Finished cutting out the letters for the sign... Made some labels for repurposed spice jars... Cut, sanded, and stained a couple of wood strips to finish covering up the white at the top of the opening... Managed to score some cups from the thrift store which will be perfect for holding stirring straws, etc. or for use in the kava ceremony! And one last going out pic (with the sorry lighting, angle, focus, etc., but you can get an idea of the fence and torch elements together here; also, the other, unfinished, wire basket candle lantern above the right awning corner)... Looks like it's about time to give Mrs. Ashman her living room back and a couple of Mai Tai parties next weekend means I have a lot of cleaning up to do. Still have a few irons in the fire, so hopefully some update will be forthcoming next weekend. Thanks for looking. Hope there's something new here you can dig. |
|
W
WestADad
Posted
posted
on
Mon, May 3, 2010 5:52 AM
WOW! I love that black lantern with the fingers! There's an old Italian joint here that used to have lamps like that with live fire fed by natural gas. Nice new set of pics! http://www.westadad.blogspot.com [ Edited by: WestADad 2010-05-03 05:54 ] |
|
A
ashman_atl
Posted
posted
on
Tue, Jun 22, 2010 10:07 PM
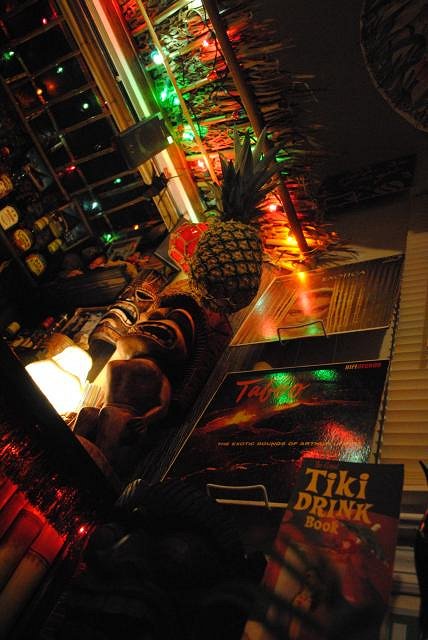
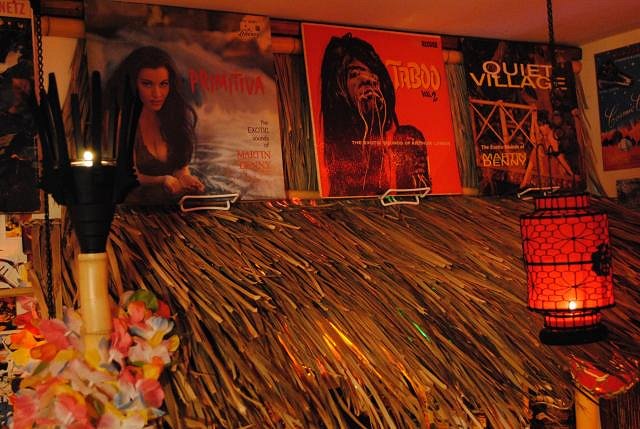
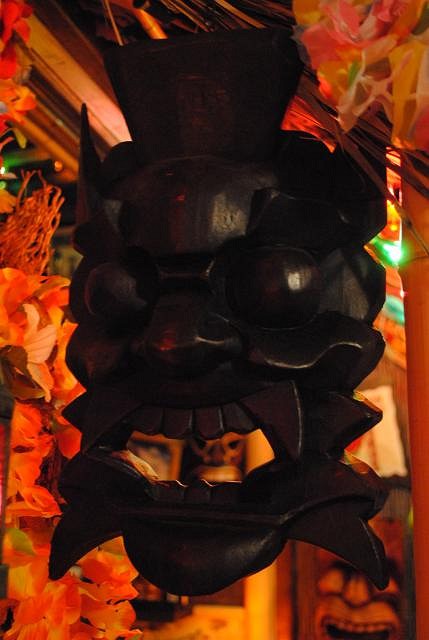
Haven't done much to the hut since last post except host a handful of parties. Even though the bar is quite compact, I've been able to service up to a dozen guests with only a mid-sized cooler tucked behind. Building this bar was so much fun, I'm kind of bummed that there's not much left to do. The good news is that I only have a year left on the lease and then plan to buy a house with room for a full-blown all-tiki lounge. Not much in the way of new pics to update, but throwing a few in here as an excuse to post...
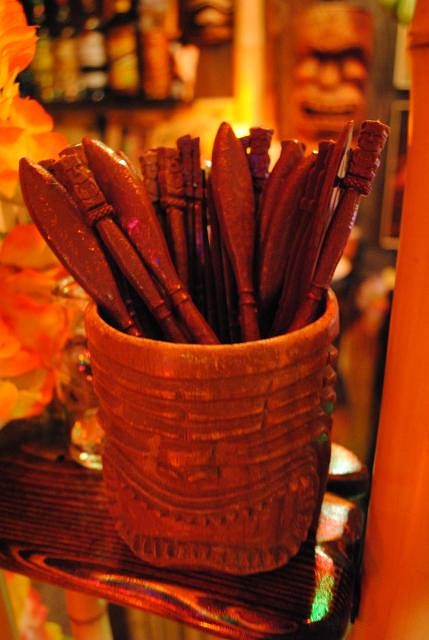
(finally found a copy of 'primitiva', now if i can just pick up 'forbidden island'...) (not tiki, but a cool mask i picked up on my last trip to china) (some swizzles from tikizone.com) (packed in...)
(busy, busy, busy...) |
|
BB
Bongo Bungalow
Posted
posted
on
Wed, Jun 23, 2010 1:51 AM
Love it, love it! |
|
F

freddiefreelance
Posted
posted
on
Wed, Jun 23, 2010 3:53 PM
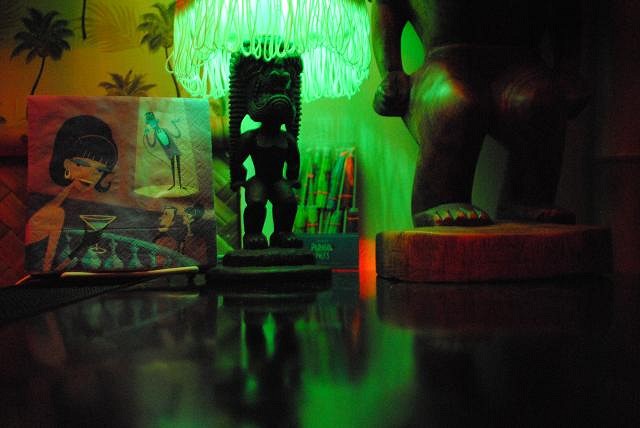
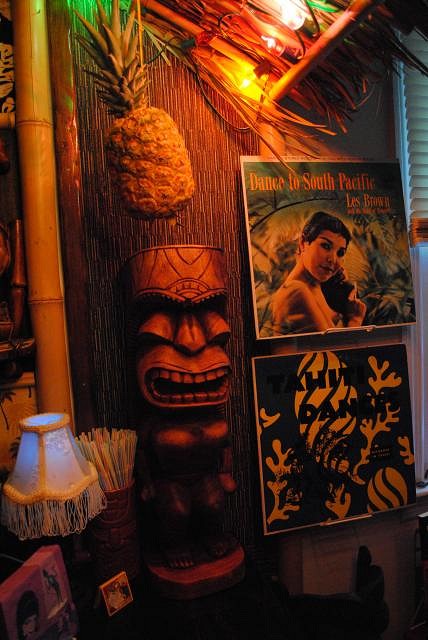
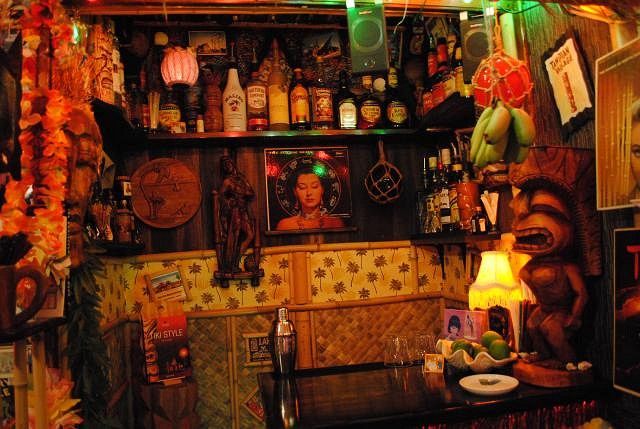
One thing I have to confess is bugging me: that Lampshade.
Is there a way to strip off that horrid fringe & trim and replace or cover the material on the shade? Maybe ripping off the trim & fringe and covering it with leftover strips of Bac Bac or Thatch? If you use an LED bulb you won't have to worry about the material catching on fire. How about replacing it with a simple cylinder covered in translucent prints of faked up Pau Pau Room ads, or drink menu graphics from Trader Vic's or Don the Beachcomber? |
|
T

TabooDan
Posted
posted
on
Wed, Jun 23, 2010 4:18 PM
Hey Ashman! Great place!! You notice something different each time you look at it. Great use of space and all your handy work is awesome!! Love the Bamboo Tiki Torch you made and lots more! Cool stuff. Mahalo, TabooDan |
|
S

seafoamer
Posted
posted
on
Wed, Jun 23, 2010 4:38 PM
I like small spaces, & I like very much what you've done with yours! |
|
A
ashman_atl
Posted
posted
on
Thu, Jun 24, 2010 8:10 AM
In response to the right reverend, good doctor, Freddie Freelance... "One thing I have to confess is bugging me: that Lampshade." ME TOO!! It hasn't yet driven me to despair or to climb the cliffs of insanity, but yeah... it's got to go. Thanks for your recommendations. Will try to fix 'er up ASAP. As always, thanks for the kudos and comments. I know this room, as a whole, is a real mash-up of disparate themes and what-not, and the purists may have some difficulty with it, but rest assured, I'm a purist at heart and when I finally have a house to call my own, we will do-it-right! In the meantime, I'm making notes of all the ideas I plan to "borrow" from fellow TCers when the time comes... Mahalo! |
|
K

kalenatiki
Posted
posted
on
Sat, Jun 26, 2010 8:26 AM
"quote"I wanted to incorporate some Googie influence in the design and got some idea from this photo... hey ashman_atl....saw this back a page or two and had to smile, I took this quick photo when driving a couple of months ago of the local old car-wash for sign ideas also.... [ Edited by: ka'lenatiki 2010-06-26 08:28 ] |