Tiki Central / Other Crafts
LSL Kahiki Pottery & Progression
|
U

umeone
Posted
posted
on
Sat, Oct 15, 2011 10:06 AM
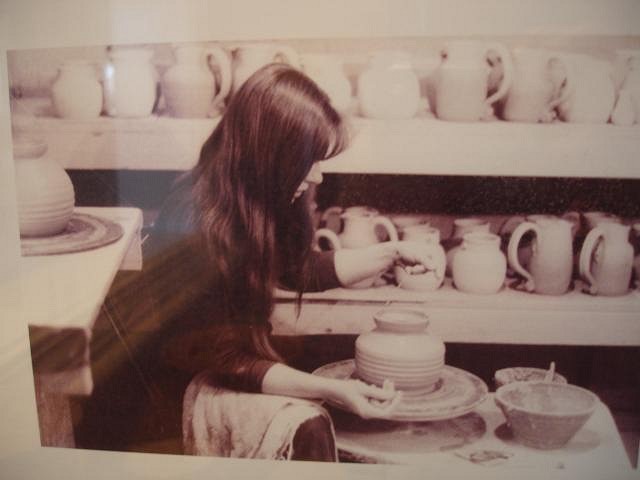
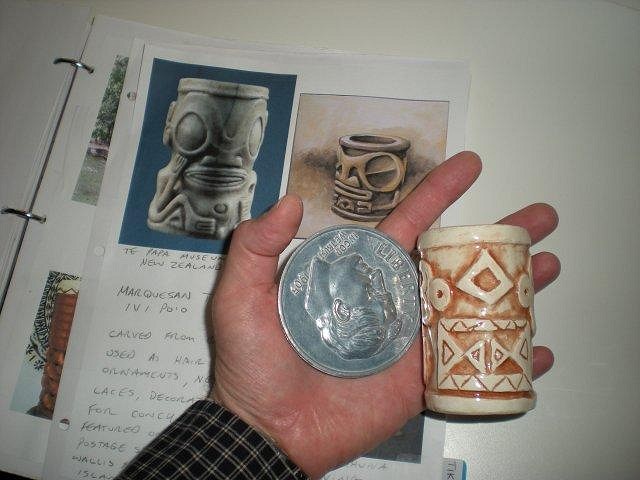
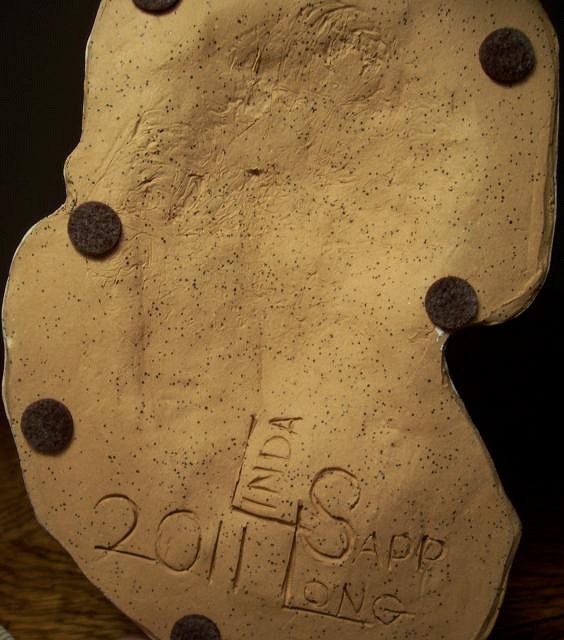
Aloha, I feel right at home saying aloha, for the years I worked at the Kahiki, I answered the phone "Aloha, Kahiki Supper Club, how may I help you?" I am so nervous but, here we go...most of you know that my Father, Bill Sapp and his partner, Lee Henry were the originators of the Kahiki Supper Club in Columbus, Ohio. My Mother, Marcy Sapp designed the Oil Lamps, ashtrays and various mugs that were used up to the late 1970's when the Kahiki was sold. My Mothers designs were made into molds and were produced in the basement of the Kahiki. I have always dabbled in clay but my main focus was on working in Restaurants all phases, Coat Check to Manager and everything in between. At 50 it just wasn't fun anymore, I had a calling back to Clay. So with the support of my Husband Craig, I am now a Potter.
So I'll share what I've done and doing in hopes to inspire more Tiki Creations. I do so miss the Tropics, the Kahiki was my refuge from the cold gray skies of Ohio. I can still hear the waterfalls, the soft Hawaiian Music, smell the aromas and feel the atmosphere. A carefree feeling of family and relaxation, being transported to the South Seas. That's what I want to evoke with my Pottery. I hope you will join me on my journey. Mahalo, [ Edited by: umeone 2011-10-17 08:36 ] |
|
D

danlovestikis
Posted
posted
on
Sat, Oct 15, 2011 10:35 AM
This is a great start Linda. You could also have a page for finished works on Gallery. Your history alone will cause us to come back over and over again. Thank you for posting, Wendy |
|
U
umeone
Posted
posted
on
Sat, Oct 15, 2011 11:43 AM
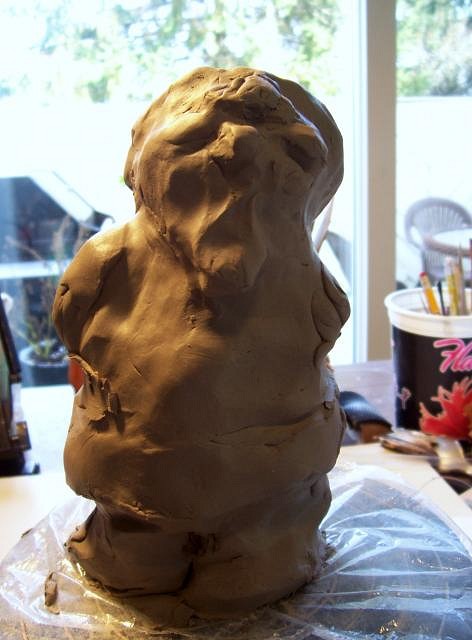
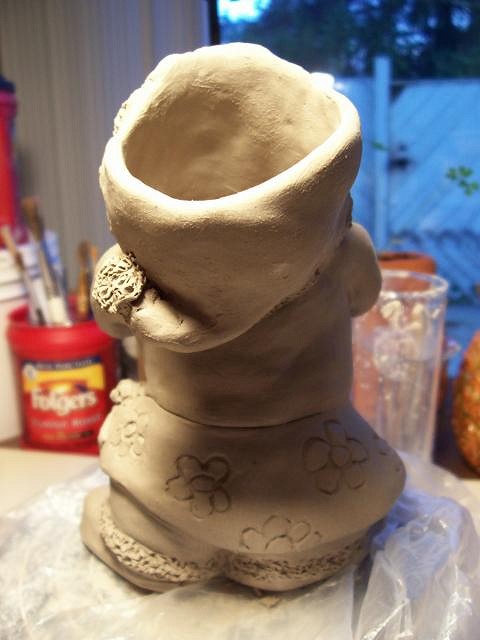
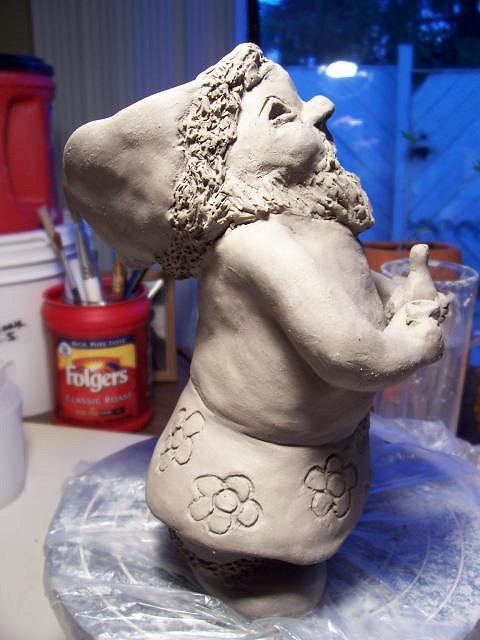
Thank you Wendy. I couldn't get my clay to do anything this morning, your suggestion of doing this was weighing heavy on my little brain! An Art Teacher Friend of mine in SC posted this on face book, I think it is a perfect start here, hit home to me; I almost quit doing what I love but, thankfully I have a friend who encouraged me to fight through and for that I am eternally grateful. Ok for what I'm working on now, I call it my Island series;
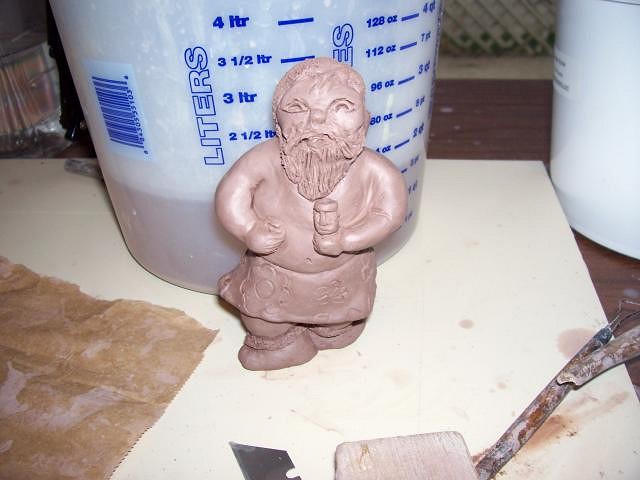
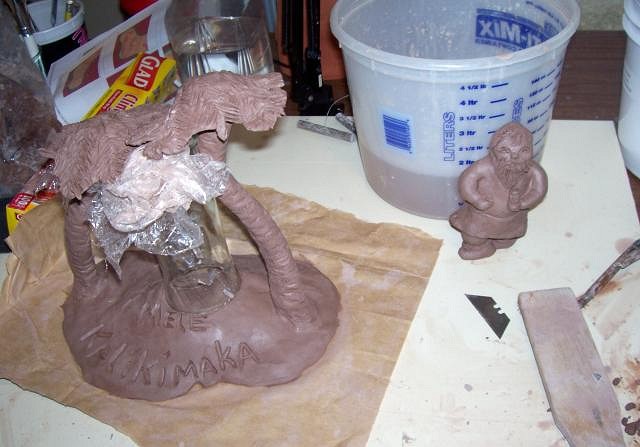
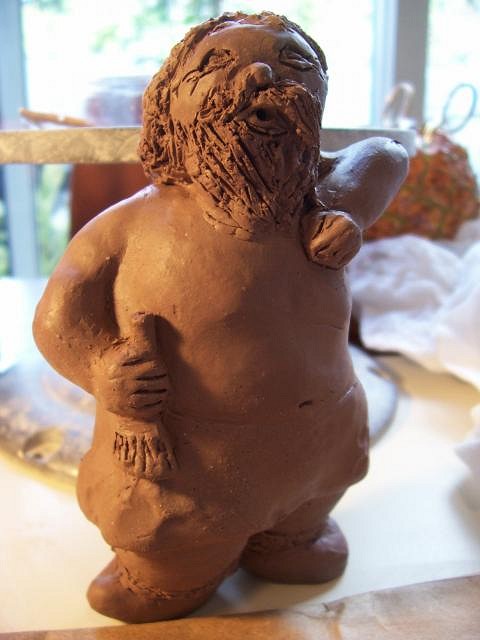
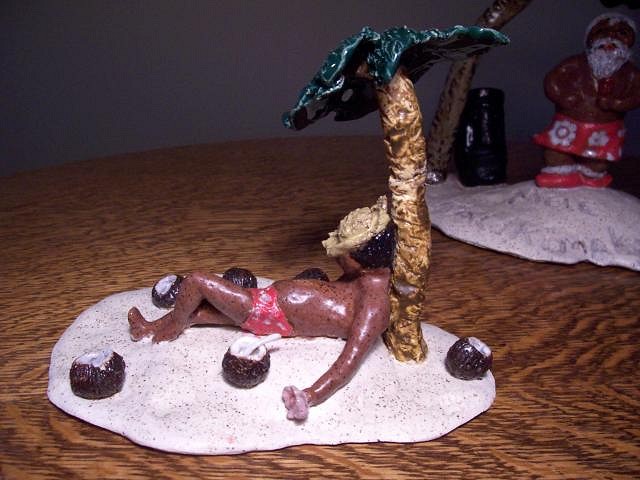
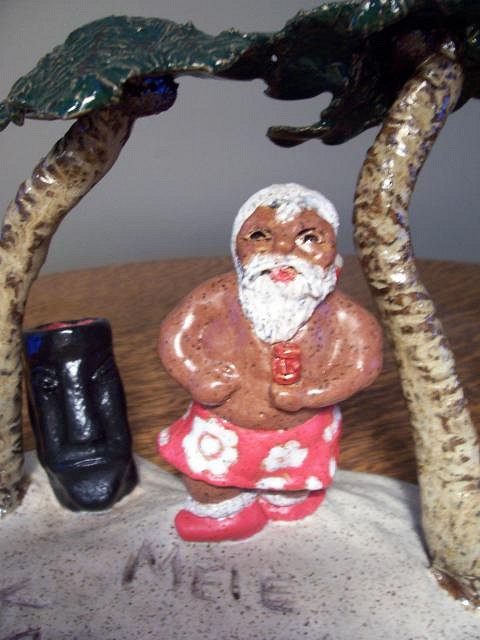
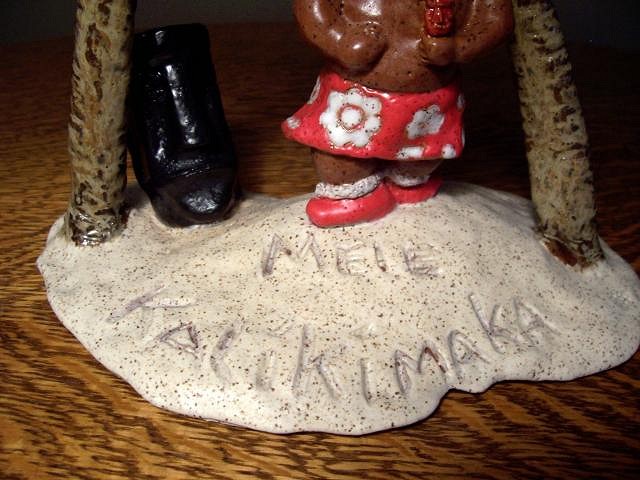
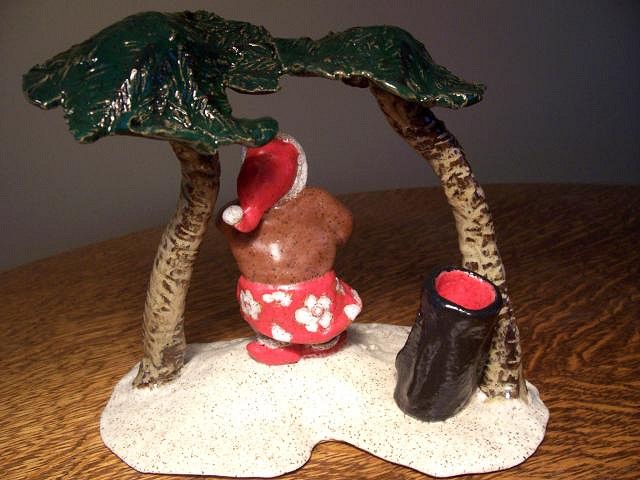
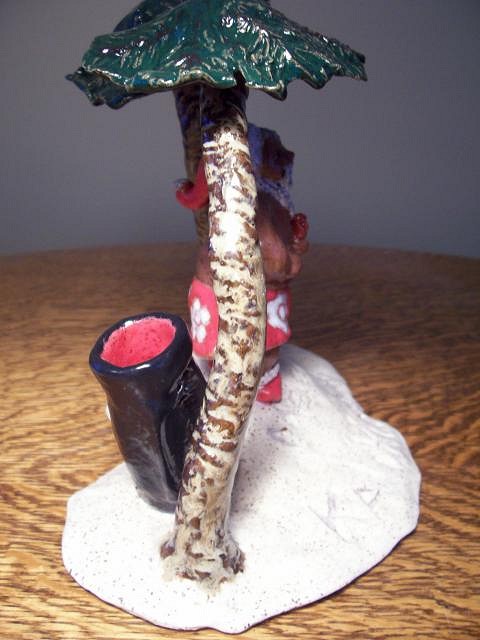
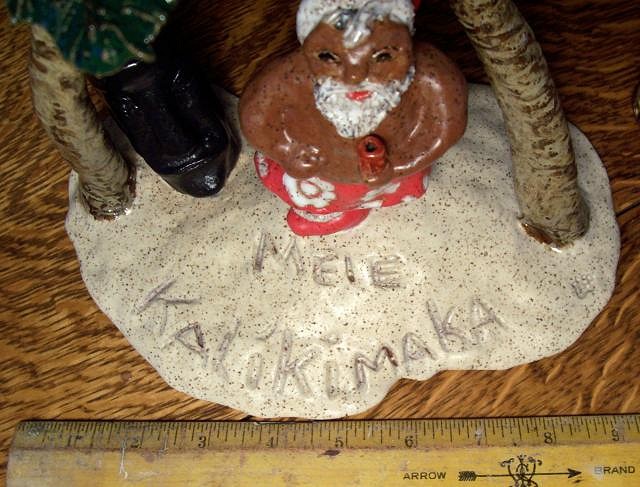
This is my Hawaiian Santa and his Island
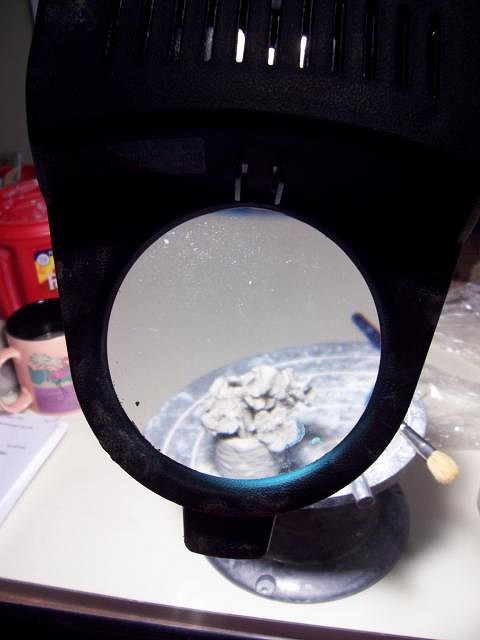
These guys are the first of the series. They are only 4 inches tall. Since I am maturing, :lol: I had to get Craig to rig up a magnifying light over my work space. I also suggest a little Rum in your coffee to steady the hands. Medicinal purpose only! :lol: Mahalo, |
|
M

MadDogMike
Posted
posted
on
Sat, Oct 15, 2011 3:13 PM
Linda, welcome to your own thread :) And you don't need to be nervous, you'll find people here to be very supportive. How cool to have inspiration AND history!!! Great words of wisdom from your friend. Love the little islandscapes, especially the cool palm trees. |
|
U
umeone
Posted
posted
on
Sat, Oct 15, 2011 3:38 PM
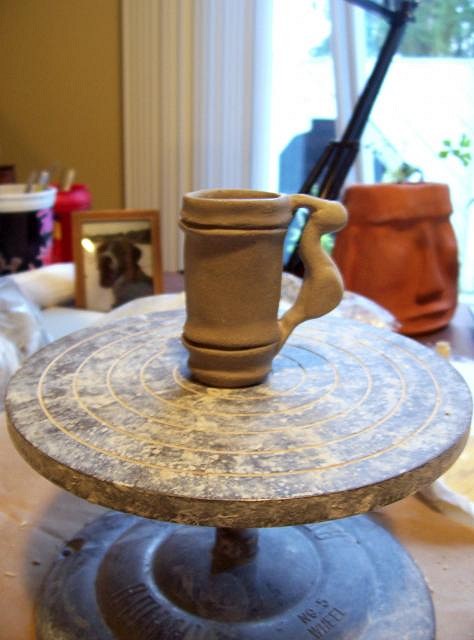
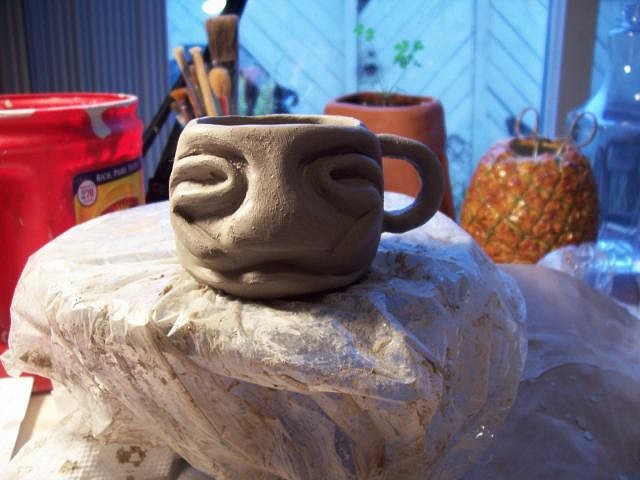
After I got my post up, I was ready to play with the clay! I need a Mauna Loa Mug for my new Tiki Island;
Need to cut him down some more!
Thanks MadDogMike, I love the smiles! |
|
G

gabbahey
Posted
posted
on
Sat, Oct 15, 2011 5:24 PM
I love mug island! This makes me want to start something, too. gabbahey |
|
D
danlovestikis
Posted
posted
on
Sun, Oct 16, 2011 9:04 AM
Linda, you've got the bug! I love it here and I knew you would too. You are among friends and fans. Thank you for posting the step by steps. I'll be back to see your progress. You are making wonderful art and we enjoy watching. Don't stop, let this thread become a daily way of life. You will make so many new friends you'll wish you had been posting for years. If you haven't started the Gallery thread with a photo of each finished piece its waiting for you! The Islands are great, so much fun. We have that Mauna Loa mug and you are doing a great job there too. |
|
V

VampiressRN
Posted
posted
on
Sun, Oct 16, 2011 9:46 AM
Welcome to the artist's community. I agree with Wendy...your history is a draw. People are so helpful on this board, you will be able to hone your skills in no time. Your ideas are wonderful...keep up the great work!!! |
|
U
umeone
Posted
posted
on
Sun, Oct 16, 2011 12:00 PM
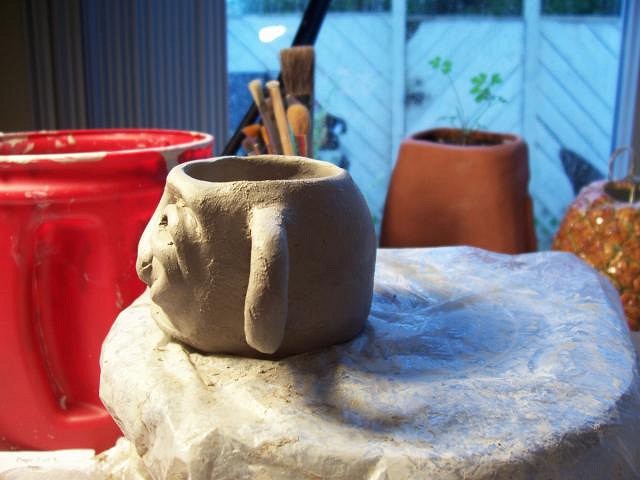
Thank you Wendy for your kind words and encouragement. I hope one day to get to meet you in person, I really do appreciate your friendship. And thank you VampiressRN for the warm welcome. I did a little more fine tuning on the Mauna Loa Mug this morning
Mahalo, |
|
U
umeone
Posted
posted
on
Mon, Oct 17, 2011 8:34 AM
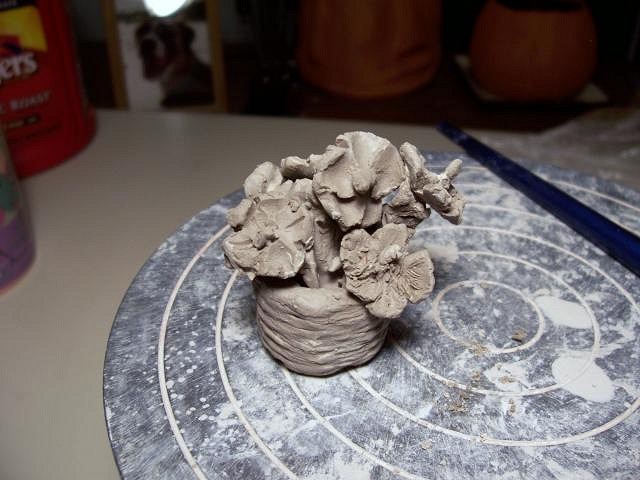
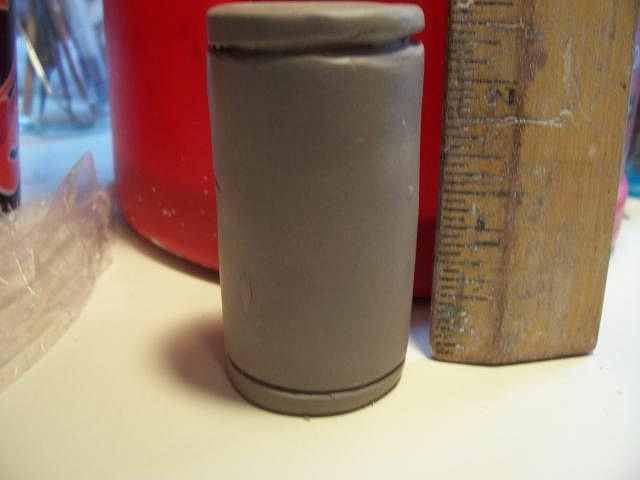
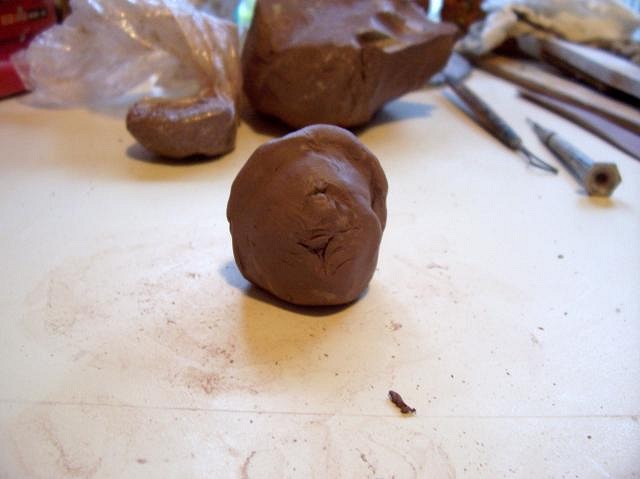
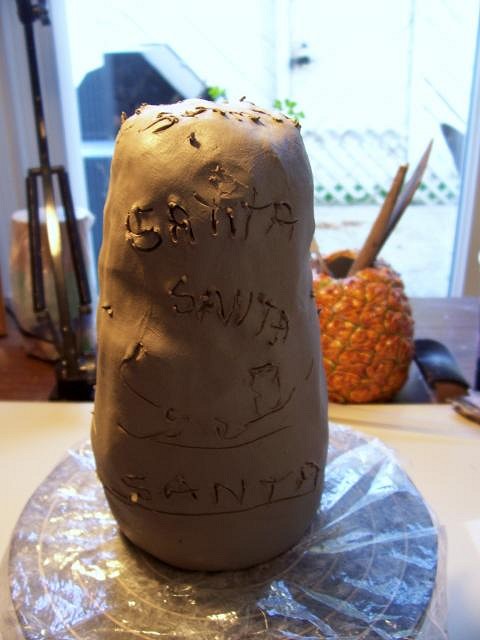
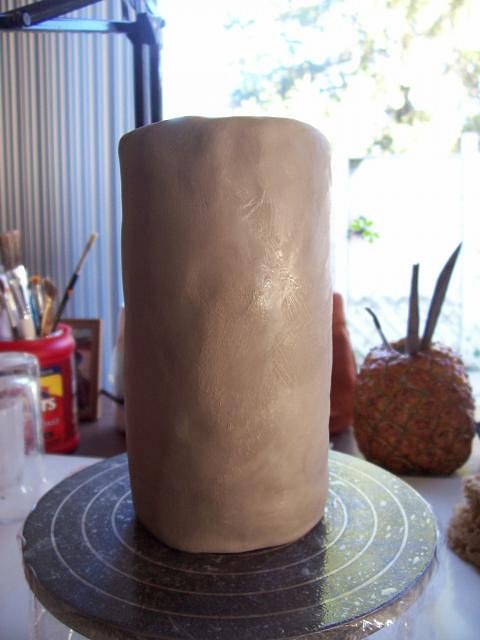
Aloha, I think my new obsession is miniatures for the Island Series, sorry no pictures of the beginning, I just started playing with the clay and pretty soon I had a Hibiscus Basket!
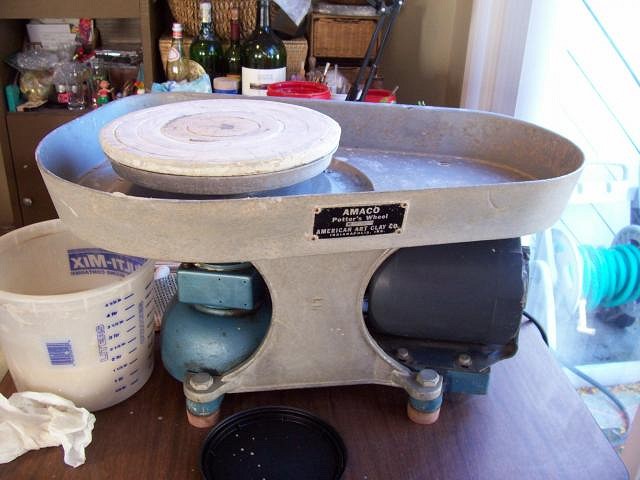
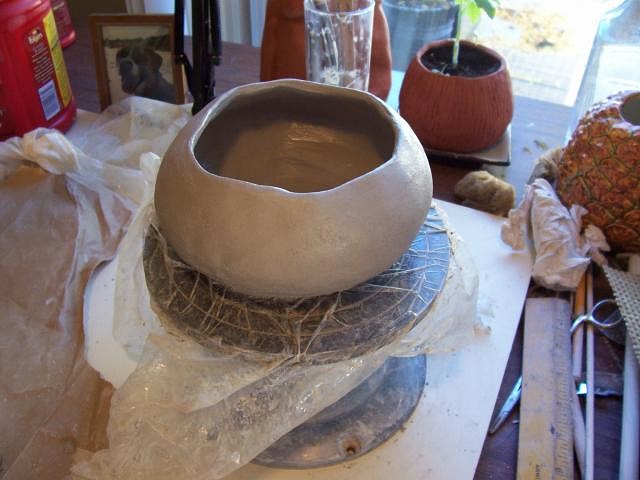
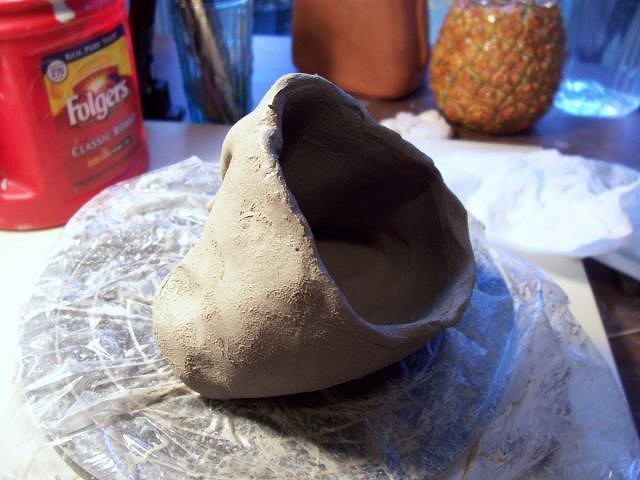
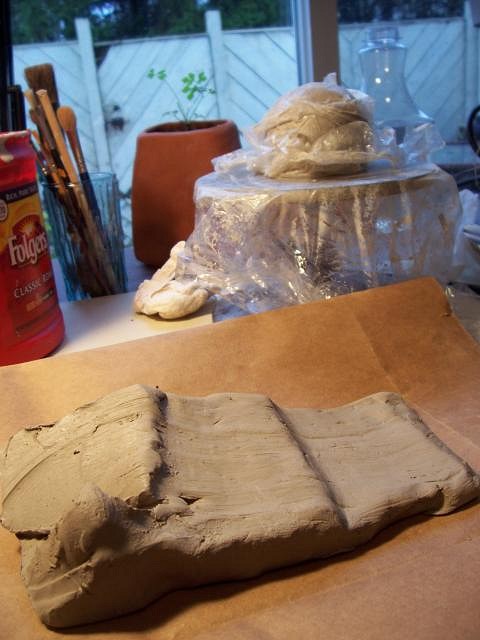
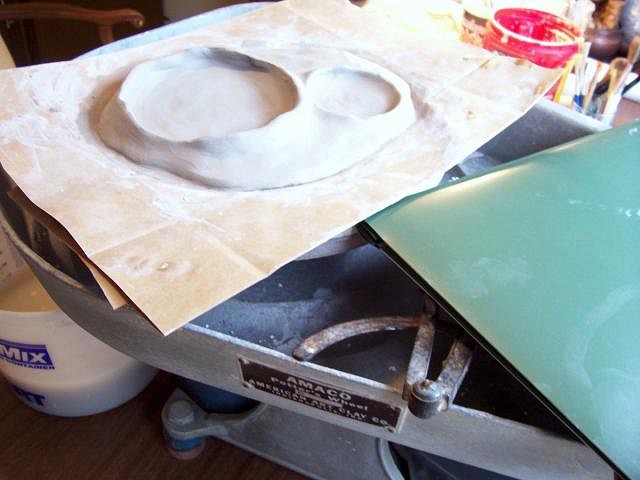
Craig and I were out hitting the yard sales a few weeks ago and found me this Potters Wheel $20.00. My Artist friend that fires my work, called it an antique, which is fine with me I love antiques. :lol: My first and only wheel I had was one I got for my 11th Birthday, it was on a wooden frame, with a 2x4 as the seat and you were to kick the wood around to make the shaft turn. I couldn't work that one either, since I was 4'something tall and probably 80 lbs. Anyway, getting back to my new acquisition, everyday I try to work on it and no matter what I've tried, no water, some water, more pressure or less, my piece will not stay on the wheel. Anybody have any suggestions? So I'm back to building bowls using my banding wheel. :)
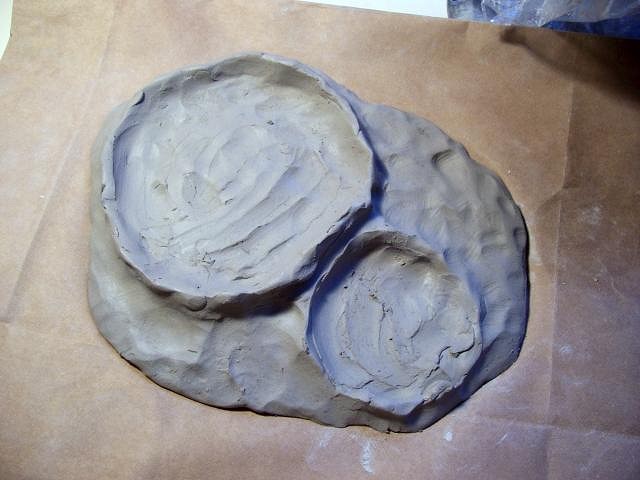
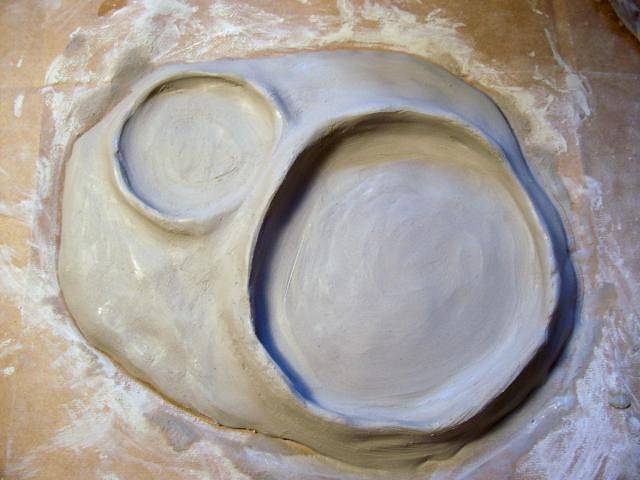
Hand built Bowl, is my project for today. the Artisan Center in SC, is having their annual Empty Bowl Fundraiser for the Food Pantry. You buy a empty bowl for $10.00, the Church Ladies donate soup and you get to keep your bowl.
Back to work. |
|
D
danlovestikis
Posted
posted
on
Mon, Oct 17, 2011 12:55 PM
Hi Linda, my sister was a professional potter during the 60's and 70's. She was so good at it I thought that I should take a Potter's class in college. I found that it is not in the genes. It was my first and only C in art.
I'd like to see if my suggestions work for you. In class they had us prep the wheel by scrubbing off any residual clay or clay dust and then dry it. We did not put water on the platform or the clay. We rolled the clay into a ball. Then we slammed it as hard as possible onto the platform. I mean the ball was raised above our head and brought down with considerable force. The tricky part is the centering. You would now dip your hands in water and place them on the clay and start the wheel to spinning and work to center. You can't make anything until the clay ball is perfectly centered. If you need to you can cut the clay if it is off on one side. I hope this helps, best wishes, Wendy |
|
U
umeone
Posted
posted
on
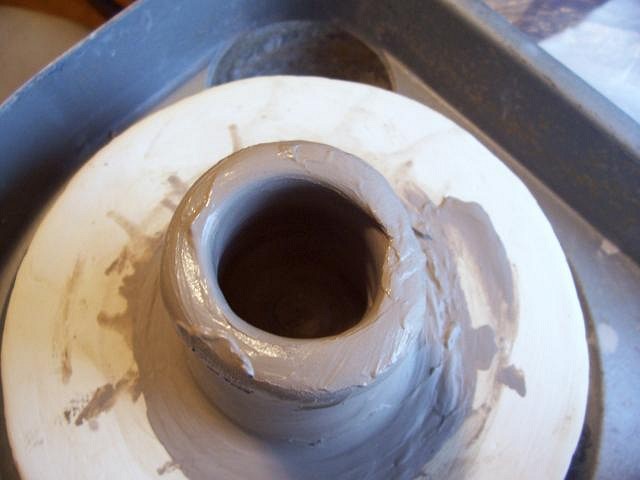
Mon, Oct 17, 2011 1:01 PM
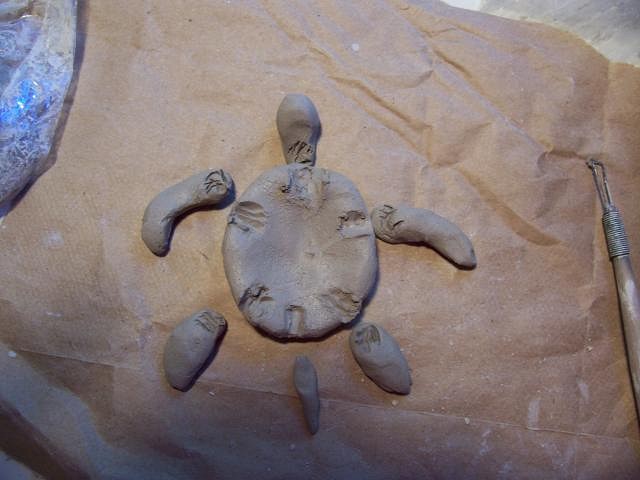
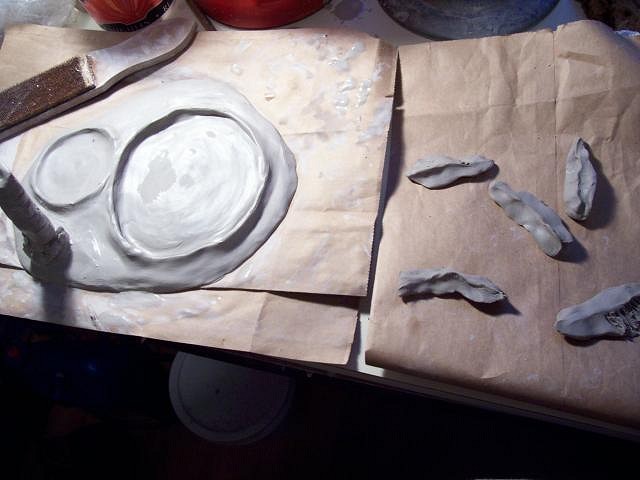
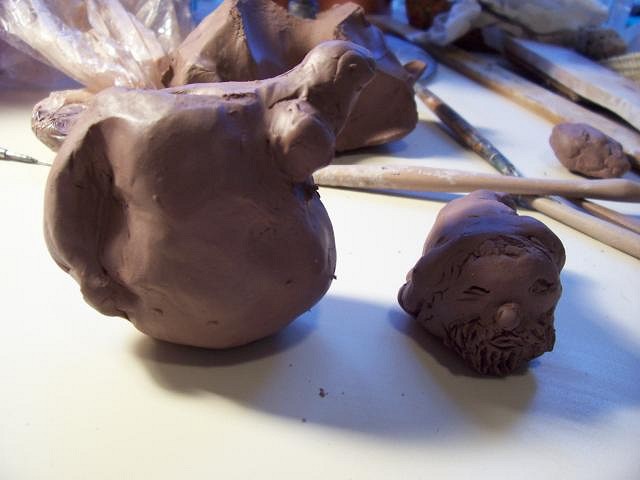
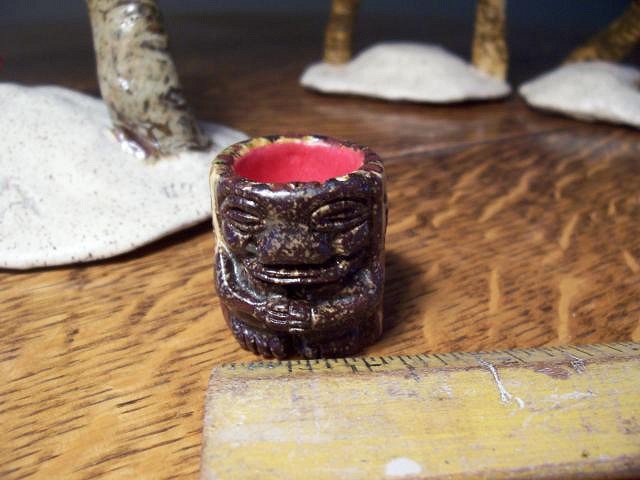
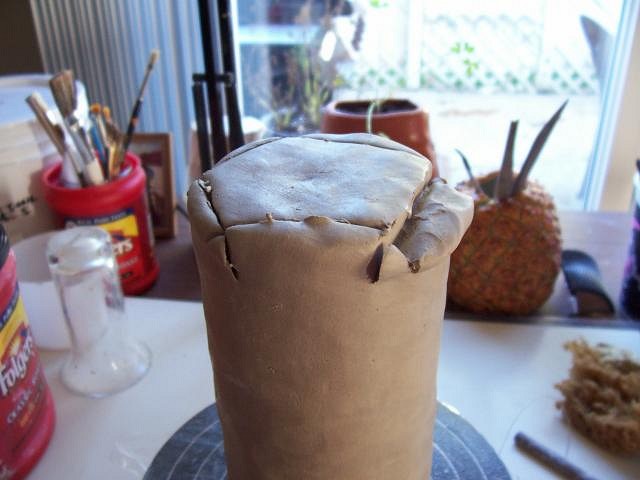
I decided to put a turtle on my bowl so first I get all the shapes ready;
Then I score the surfaces and use slip to join them together. I work on paper bags, my work doesn't stick to them;
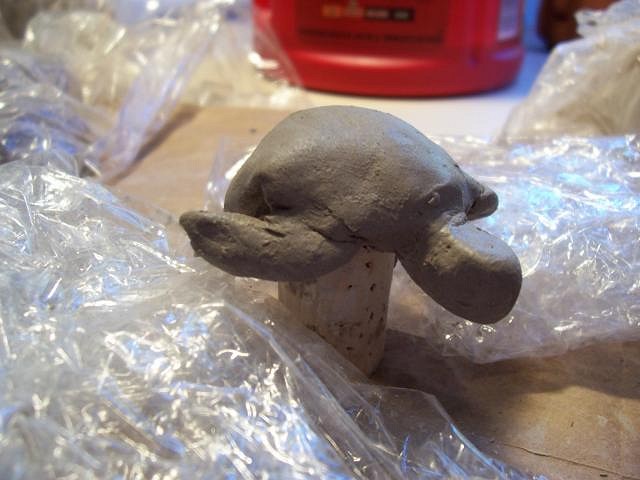
I got him a little to wet, so I used a wine cork to prop him up, to give him shape;
When done cutting the design in, I use more scoring and slip to attach him to the side of the bowl. I also stick a sharp object into his shell till I feel the void, so he doesn't blow up in the Kiln;
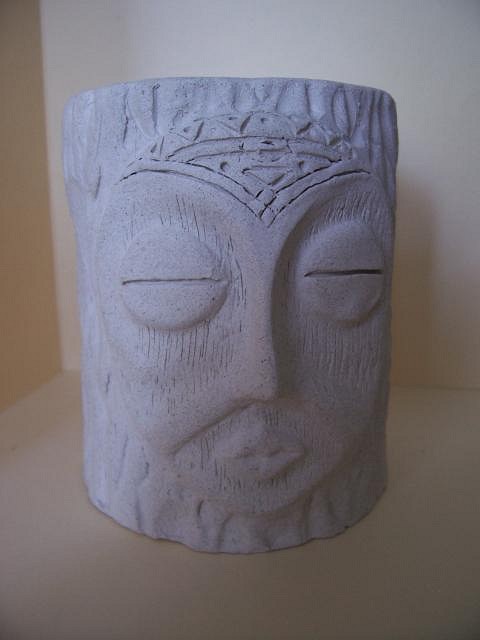
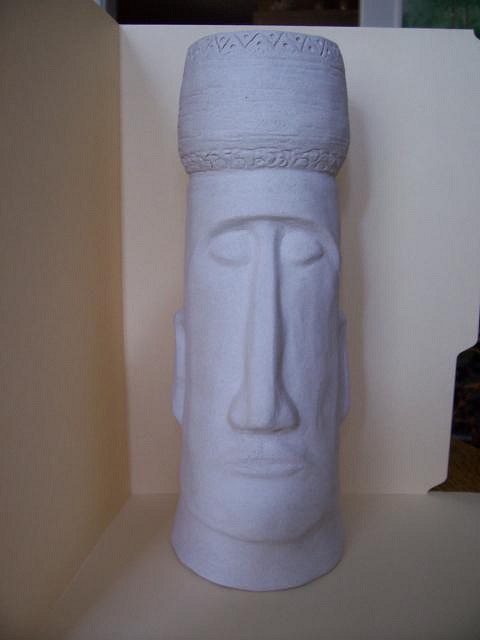
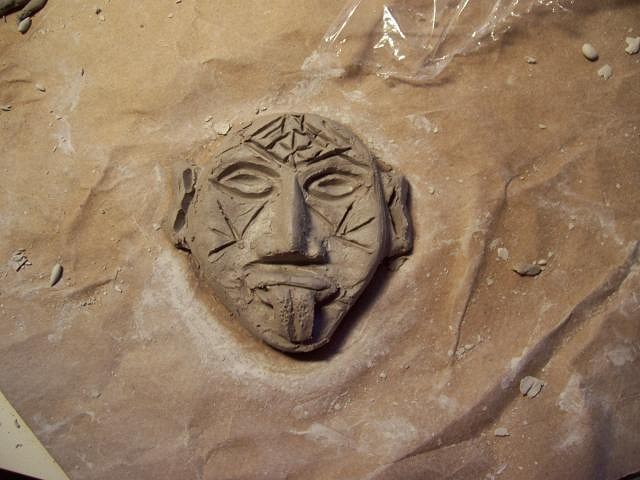
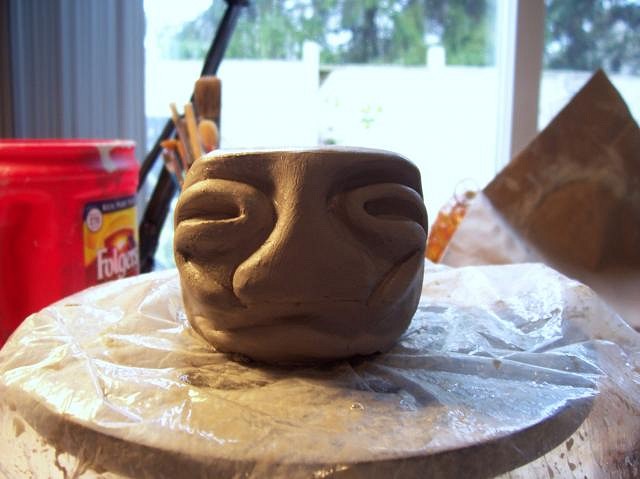
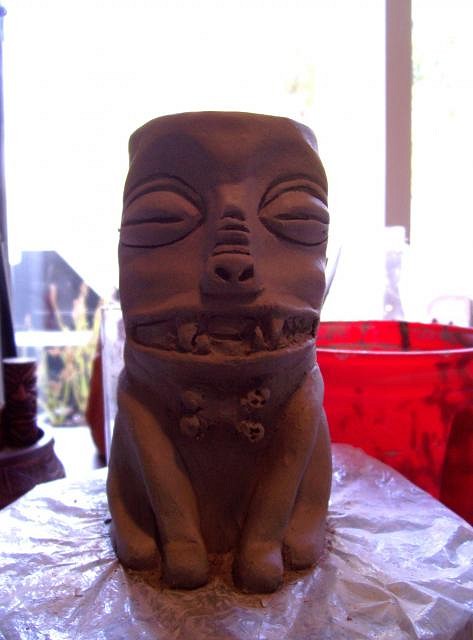
same process with Tiki Mask;
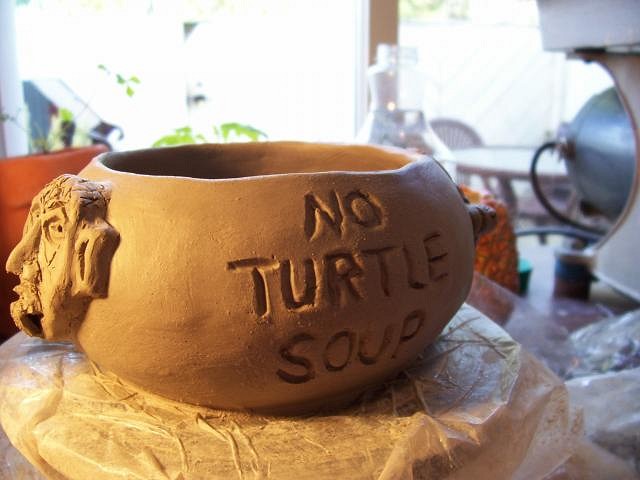
A little request from the Turtle; :lol:
MadDogMike, did I tell you how much I love the :) ! Mahalo, |
|
U
umeone
Posted
posted
on
Mon, Oct 17, 2011 1:12 PM
Thank you Wendy, I think you hit on 3 of my problems, get wheel clean and dry, throwing the ball with that much force and getting it centered! Piece a cake! :lol: I will try and implement your suggestions and continue my daily ritual till it works! :) Mahalo, |
|
M
MadDogMike
Posted
posted
on
Mon, Oct 17, 2011 2:57 PM
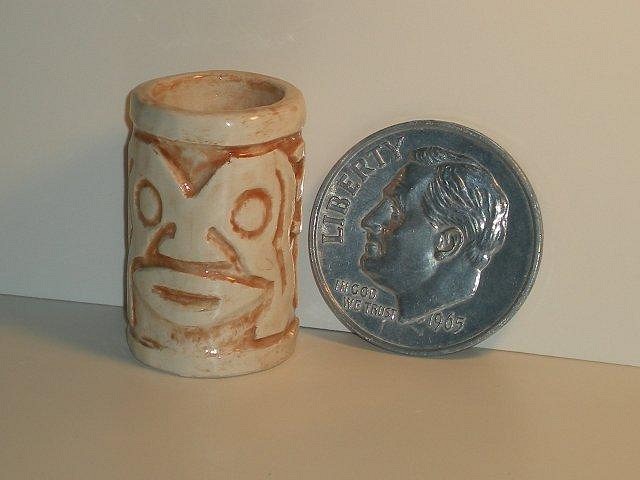
Linda, my only attempt at wheelthowing was a dismal failure, you're on your own there. I really like the miniatures you are doing, including "The Island of Misfit Mugs" :D Here's my attempt at a miniature "No Turtle Soup" - that's hilarious! |
|
U
umeone
Posted
posted
on
Mon, Oct 17, 2011 6:54 PM
Love your 4-1 joke MadDogMike. :lol: Have I told you lately how much I love the :) gabbahey, I'm glad I've inspired you, have you been thinking? Mahalo Y'all, |
|
CTIT

Chuck Tatum is Tiki
Posted
posted
on
Mon, Oct 17, 2011 7:12 PM
Those are some little hands Mike. |
|
B

Babalu
Posted
posted
on
Mon, Oct 17, 2011 7:51 PM
Hey Linda, that is an oldie but a goodie. Throwing takes a bit. I would consider taking a Community Collage course. It would be beneficial to you to learn to throw around others who are learning too. I never really got into throwing much back when, but I have a great many friends who are wonderful potters. I'm sure I would love throwing now...it is on my bucket list to take a class of my own at a Community College around here and focus just on throwing. I like you're energy. Keep at it mudslinger! |
|
B

Beachbumz
Posted
posted
on
Mon, Oct 17, 2011 8:31 PM
Aloha Linda, Awesome job on the mini Islands, your Hawaiian style santa is great! |
|
U
umeone
Posted
posted
on
Tue, Oct 18, 2011 4:02 PM
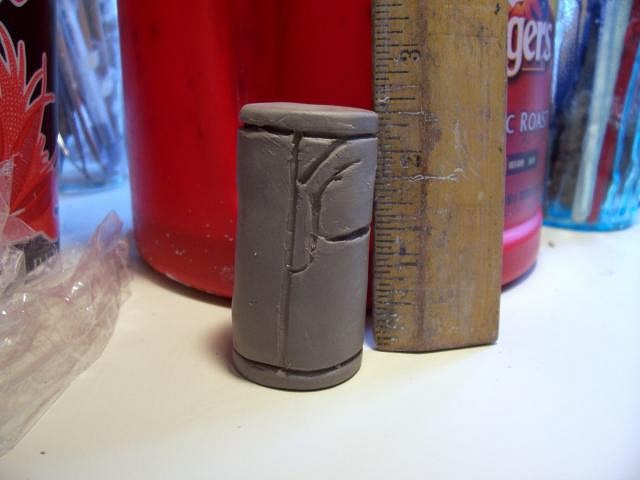
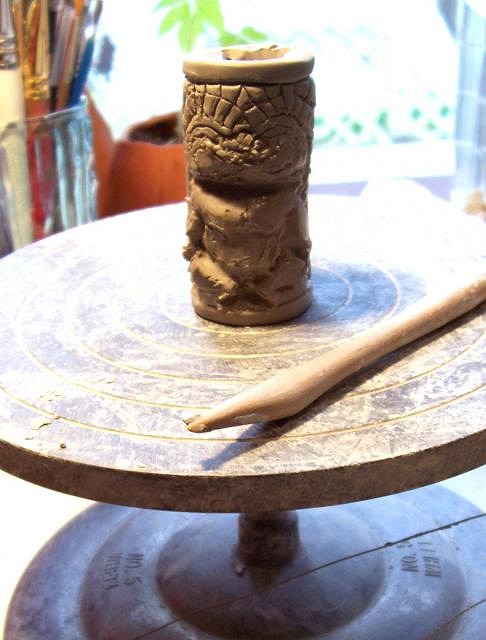
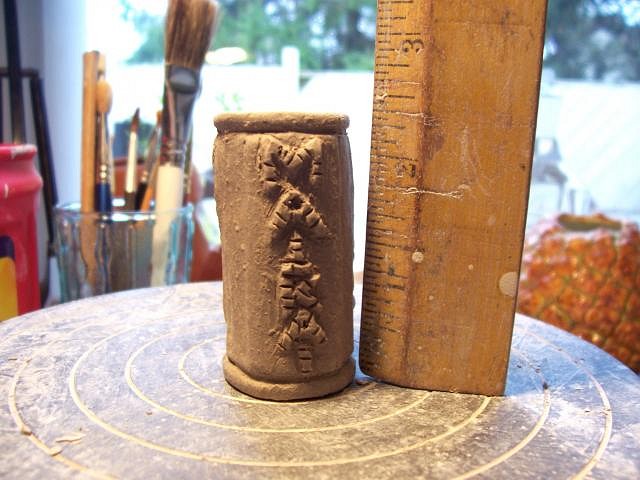
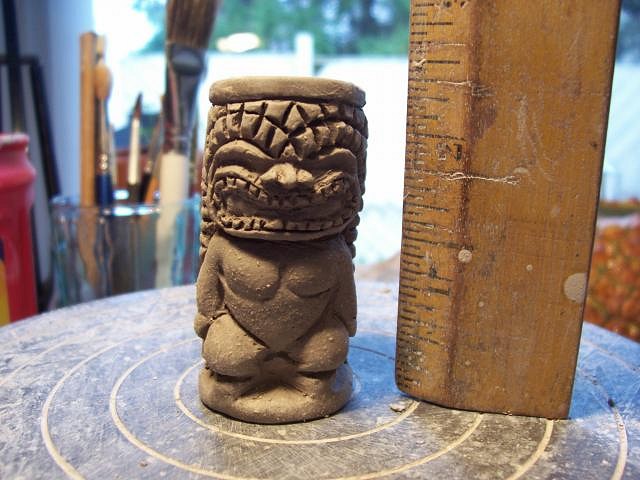
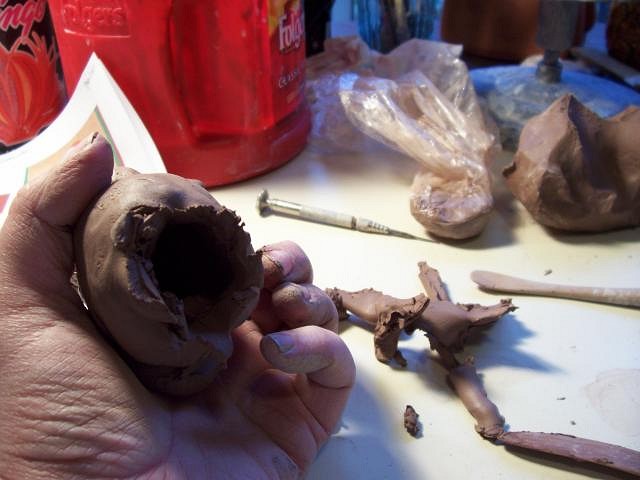
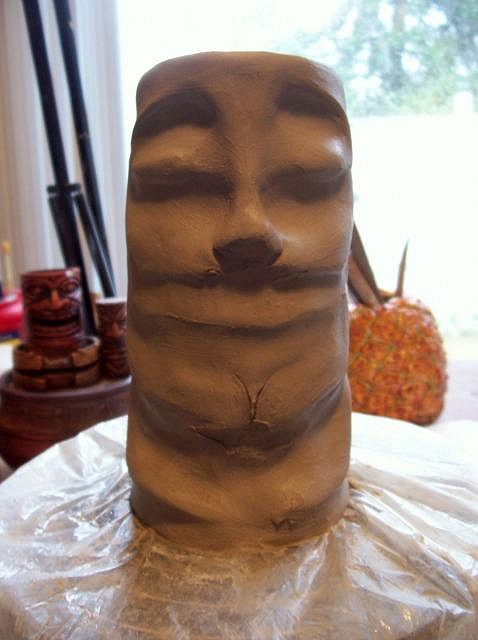
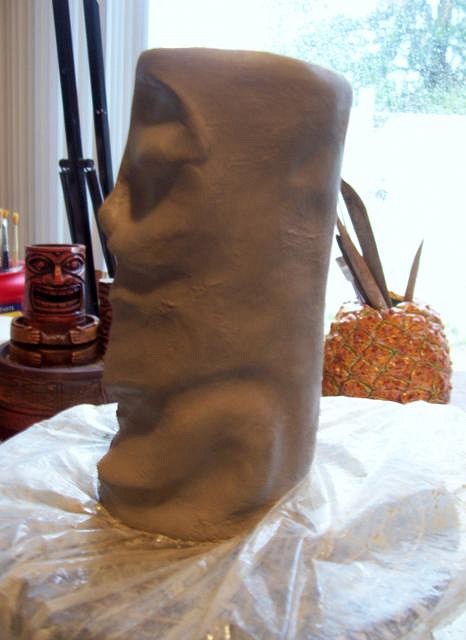
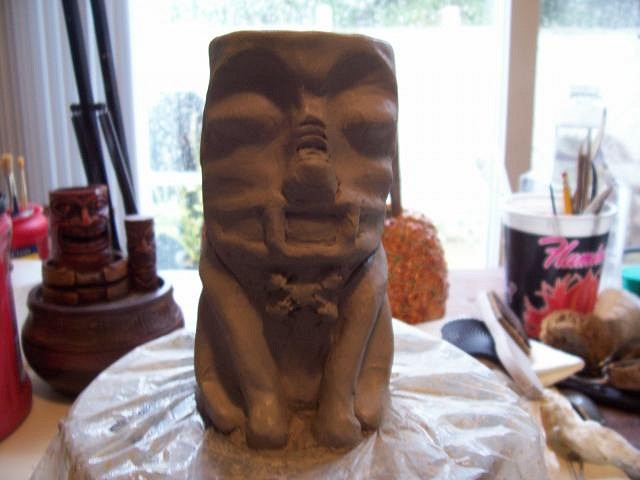
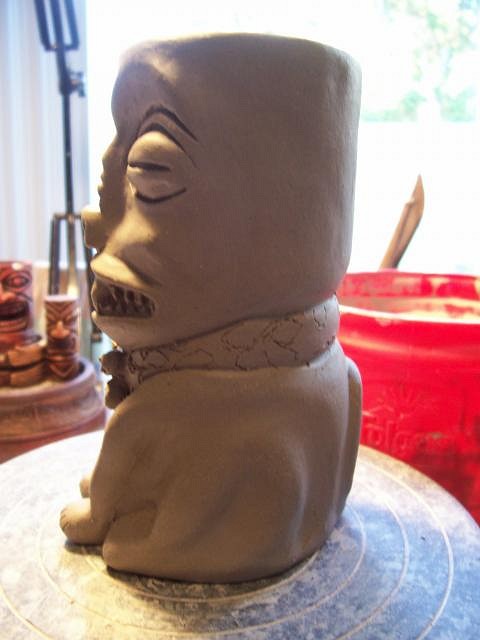
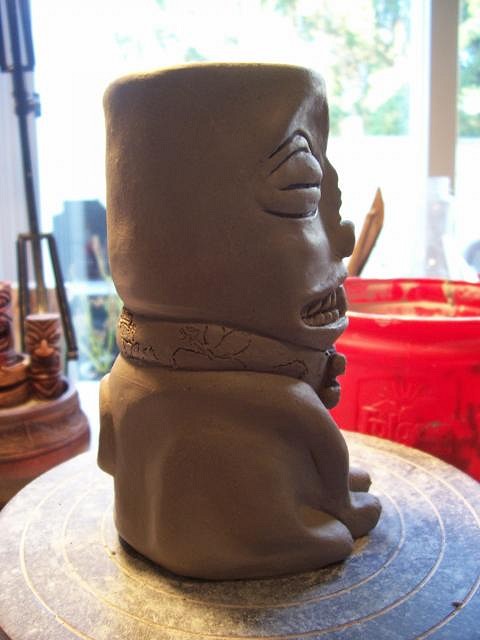
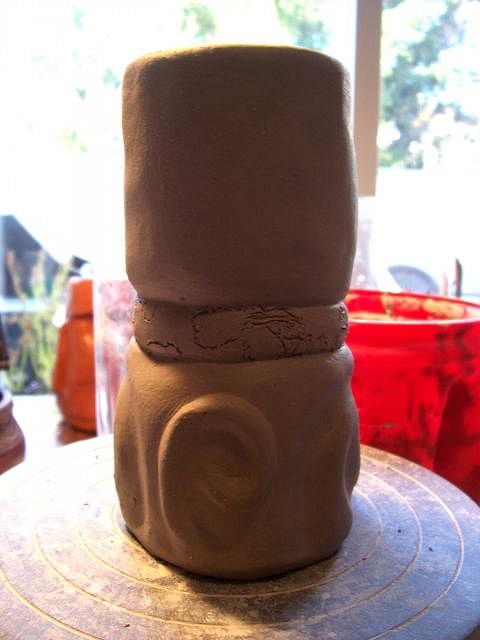
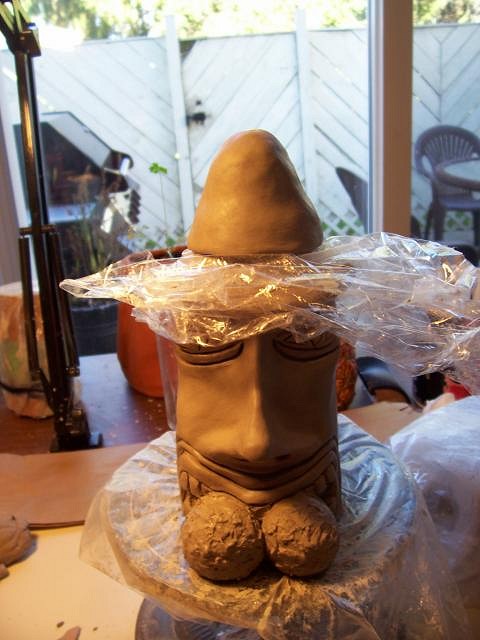
Aloha,
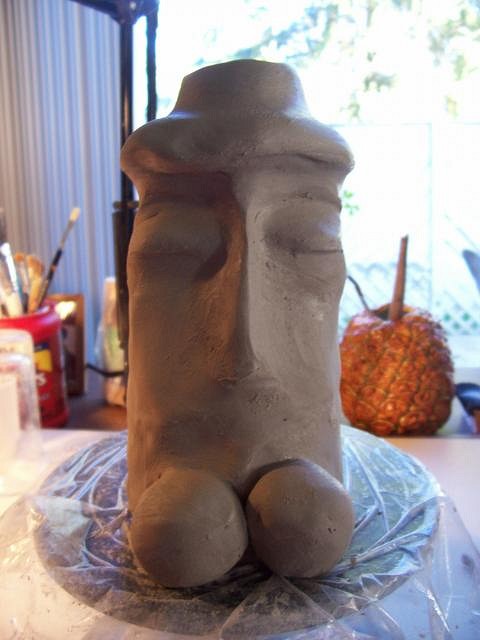
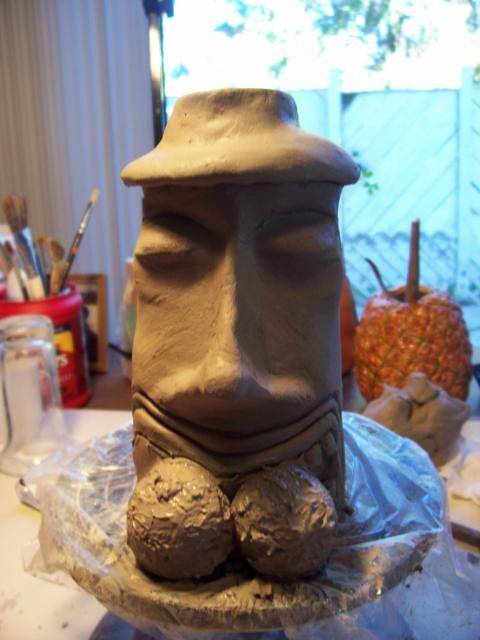
Then etched the figure on the cylinder, with reference points to keep him in proper proportion.
I was concerned that I wouldn't get all the detail right on this guy but, a little cut with a wire and I could see wear I was going with him.
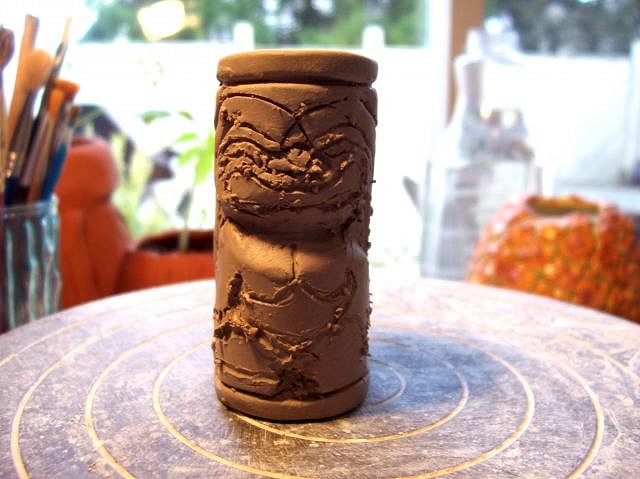
This little guy was quit intricate for me, very tense. Had to take a break.
I'm liking how he is progressing but, I need to work a little faster, he is drying out to fast.
Awesome, now just add the itty bitty letters and dig out the inside.
Ta-Da! Now he can join his friends on Tiki Mug Island! :lol:
Mahalo, |
|
D
danlovestikis
Posted
posted
on
Tue, Oct 18, 2011 4:10 PM
Hi Linda, your thread is pure enjoyment. I just knew this was where you needed to be. You'll be having fun every day even when it's raining out. Cheers, Wendy |
|
U
umeone
Posted
posted
on
Thu, Oct 20, 2011 7:54 AM
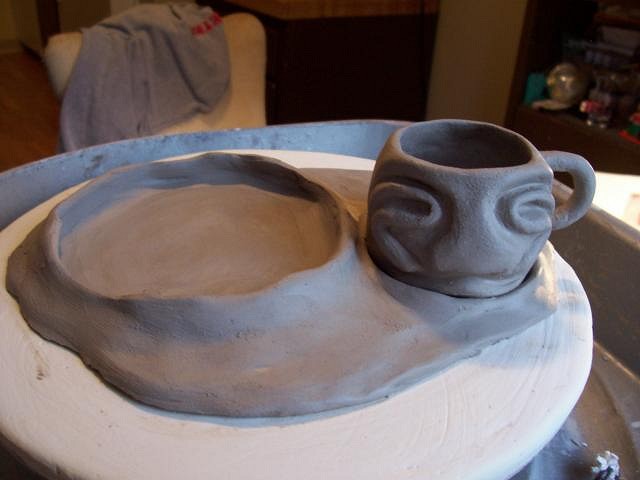
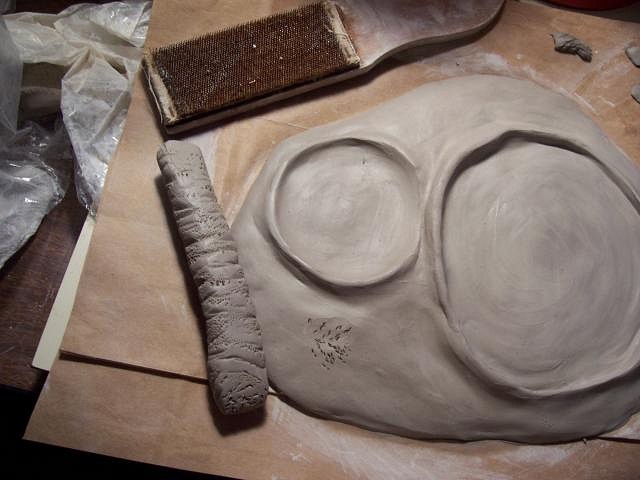
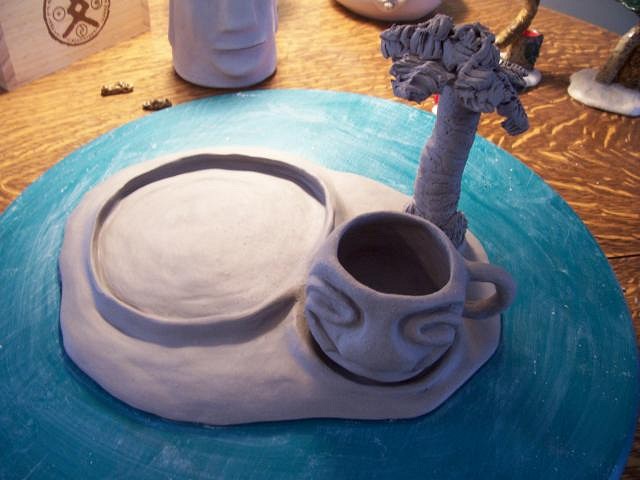
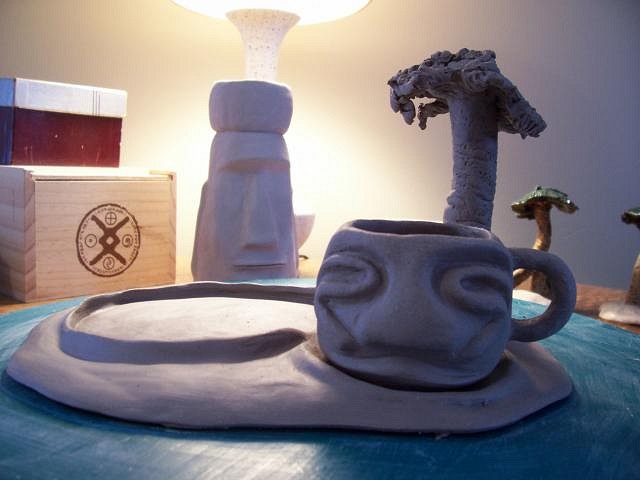
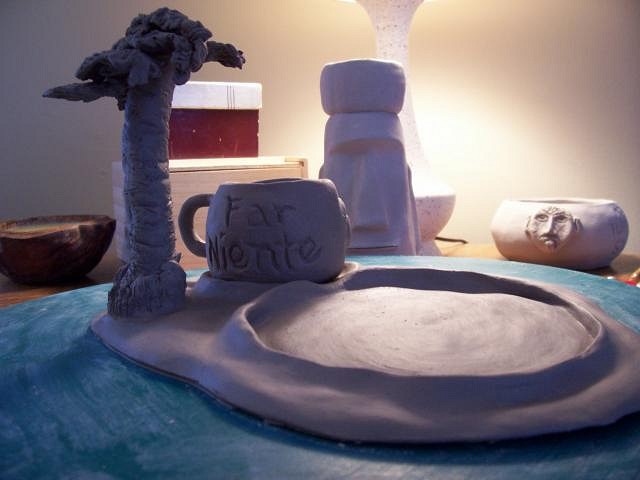
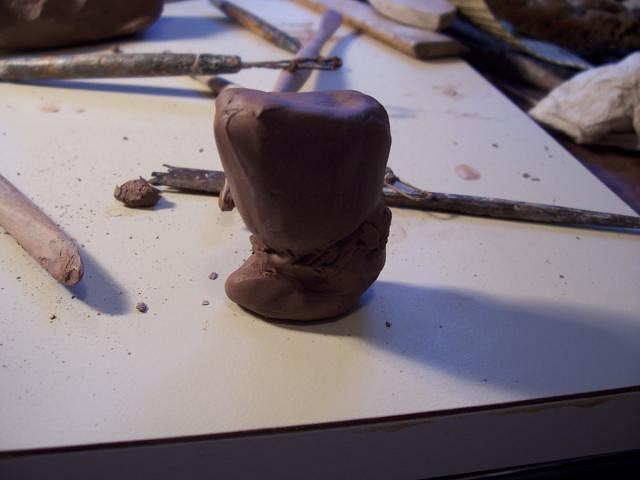
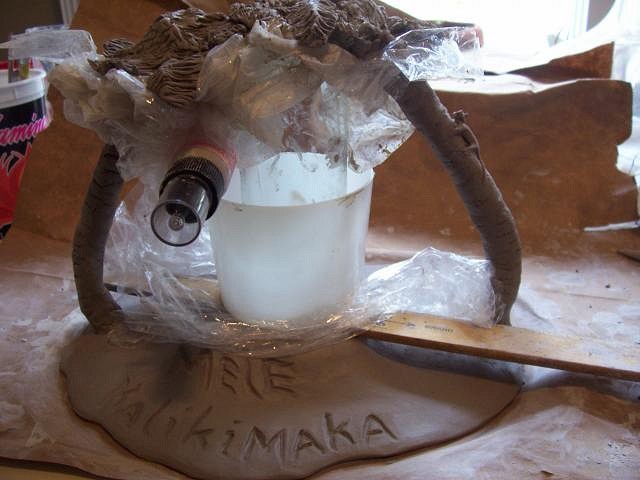
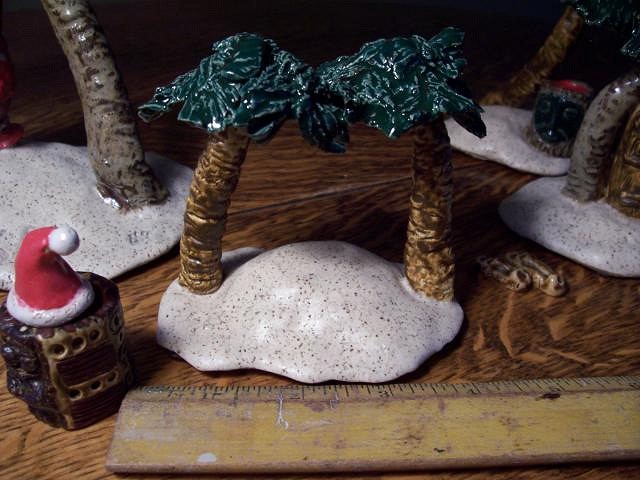
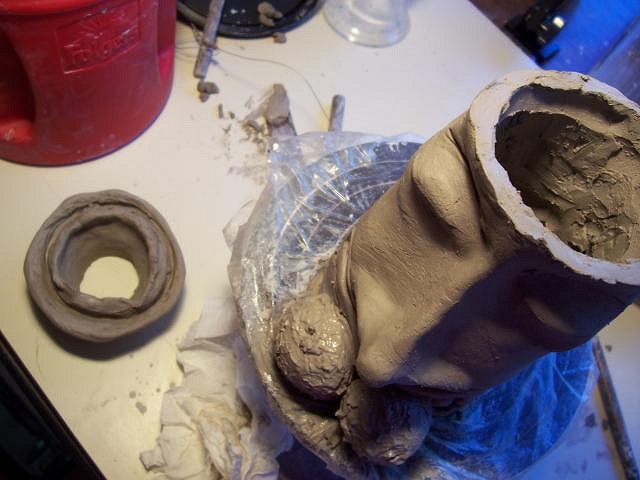
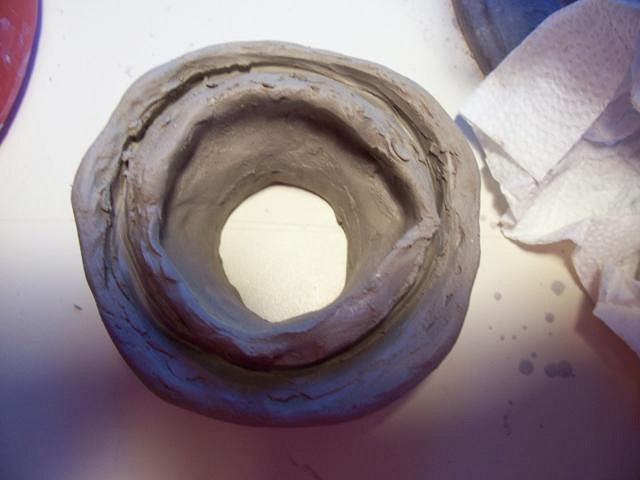
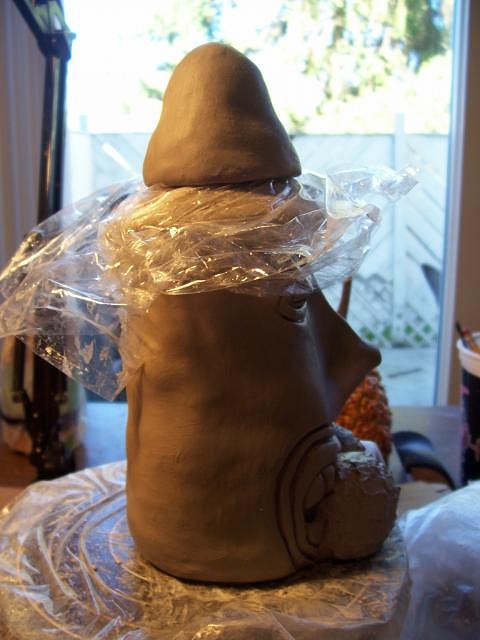
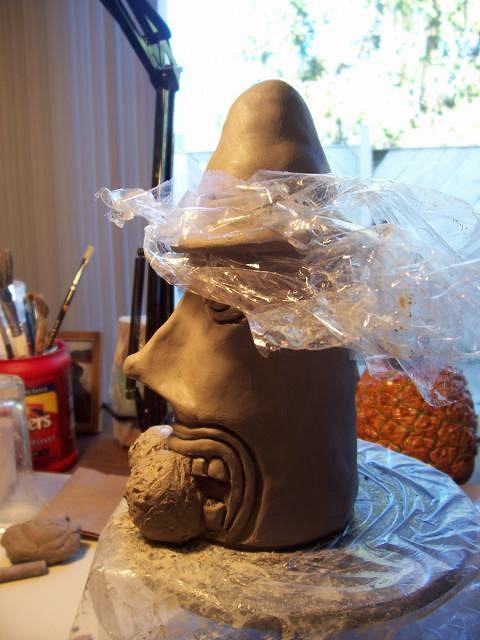
Aloha, Thanks Wendy, I know it's warm and sunny somewhere, just not here. Let's start with the base, I need a Tide Pool Snack Tray. A Pool for Snacks & a Pool for Cup. Smooth everything out, make sure to eliminate all air bubbles. New use for Potters Wheel! :lol: Moving on to the Grog Mug, decided to carve him first, then hollow him out. Ball of clay the size I want the Mug. Rough in Face. More detail, more coffee, "Oh darn" out of Rum! Hollow it out and add a handle. My handle is crooked and in the wrong spot, where the H is my Rum! About an hour fixing the handle, oh and the thin spot I made when hollowing him out. I need Pottery Throwing Classes and more Rum! Check the fit on the Snack Tray, making a few adjustments. Time for a Palm Tree, roll up a cylinder, put on marks for detail. Rough up and add slip to placement. Make Palm Fronds. Oh how I could use some Rum, grab anything within reach to prop up the Palm Fronds, I new this part was coming so you would think, as any reasonable person would, that I would have prepared for this ahead of time but, nooo I want to stress myself oouut mmoore! :lol: And now it's time to go to work...thanks for stopping by! :) See ya real soon! |
|
T

tikiskip
Posted
posted
on
Thu, Oct 20, 2011 8:48 AM
Looking good Linda!!! Good Luck. |
|
D
danlovestikis
Posted
posted
on
Thu, Oct 20, 2011 8:52 AM
Hi Linda, once your clay ball is on the platform and you are working to center it you will be dunking your hands into water repeatedly. The water slings off as the platform spins. Using upper body strength you center the ball. When that is accomplished your fingers stay on the outside and your thumbs together press into the center. Next you pinch and pull up. Over and over you dip your hands in water so that your skin never grabs the clay. Use a sponge to remove water that accumulates in the inside of the bowl. I'm leaving in a few minutes I have knee surgery today so I'll be gone from TC for a short a time as I can tolerate. I love your photos and seeing Kahiki stay alive through you! Wendy |
|
U
umeone
Posted
posted
on
Thu, Oct 20, 2011 9:02 AM
Aloha tikiskip, Thank you for the welcome and visit to my thread! I would love to collaborate on a project with you! As you know Craig and I love your work! :) It was great spending time with you and Barb, even if I couldn't keep my Jeffs straight. :lol: You're welcome here any time. Just give me a shout. Cheers, |
|
U
umeone
Posted
posted
on
Thu, Oct 20, 2011 9:08 AM
Aloha Wendy, thank you for more instruction. I will be keeping you in my thoughts and prayers, I hope you have a speedy recovery. Please let me know how you are doing. Till we email again, Cheers! Linda |
|
U
umeone
Posted
posted
on
Thu, Oct 20, 2011 9:23 AM
Aloha,
Without a care
|
|
U
umeone
Posted
posted
on
Fri, Oct 21, 2011 3:05 PM
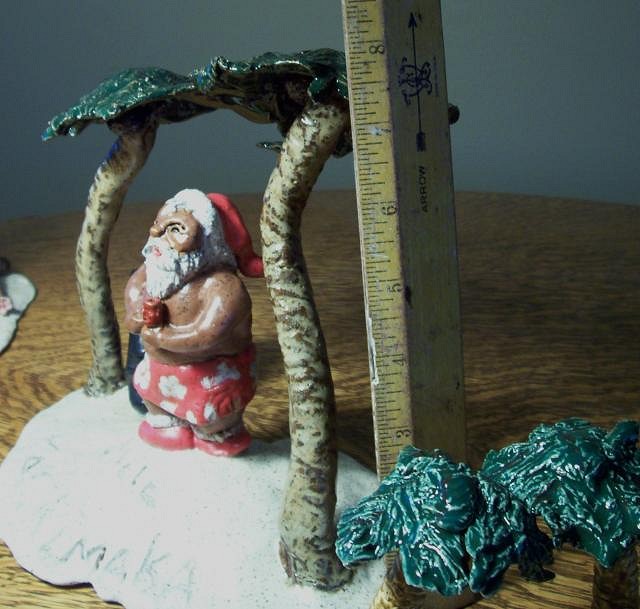
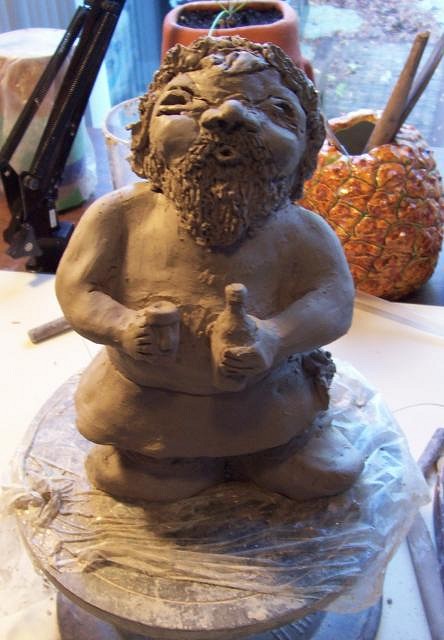
Aloha, Couldn't work out of the studio today, so I worked inside! Another Santa Island; dig out head and make body Put head on with slip and dig out body make legs put everything together with slip and pinching start smoothing everything out still tweaking more detail Just needs an Island Building his Island Thanks for stopping by! :) Mahalo Y'all, |
|
T
tikiskip
Posted
posted
on
Sat, Oct 22, 2011 5:33 AM
Santa kinda looks like ottis the drunk from Andy Griffith show. |
|
U
umeone
Posted
posted
on
Sat, Oct 22, 2011 6:08 AM
There is a little Otis in us all. :lol: |
|
M
MadDogMike
Posted
posted
on
Sat, Oct 22, 2011 7:33 AM
You've been busy Linda. The little MaiKai guy is so tiny! Be sure the closed up Santa body and head have vent holes so they don't blow in the kiln. Maybe you already put them in and I don't see them. Another wheel throwing tip is that some clays are better for throwing and some are better for handbuilding. You can check online for the characteristics of the clay you have. |
|
U
umeone
Posted
posted
on
Mon, Oct 24, 2011 6:42 PM
Aloha, I've picked up my bisque pieces and everyone came out fine, yay!
Santa Island getting a little love.
CoCo Loco wasn't bothered at all by the tickle of the brush! :)
A little more glazing and then off to the Kiln. Mahalo Y'all, |
|
U
umeone
Posted
posted
on
Sat, Oct 29, 2011 7:41 AM
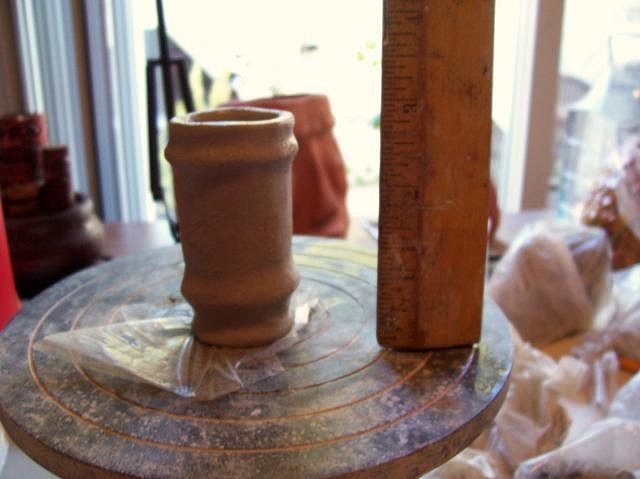
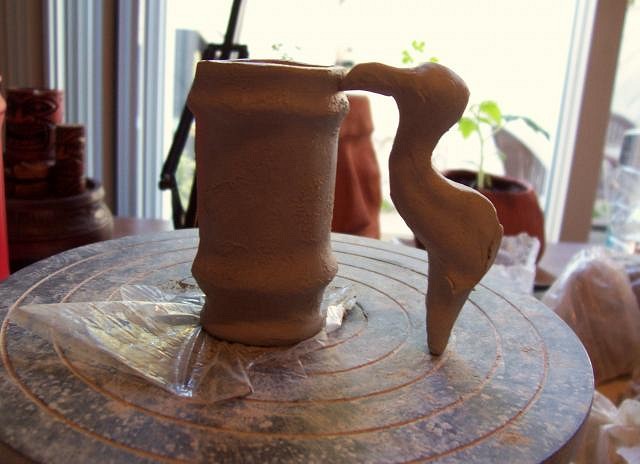
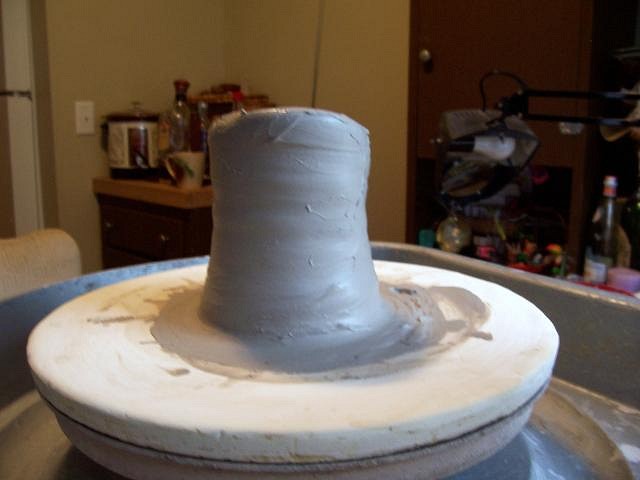
Well the last few days have been exciting. I figured out that I was attacking the Potters Wheel from the wrong end, oops, it helps to know which end is up, so to speak! :lol: I'm pleased to show you my first attempt at the wheel from the correct positioning;
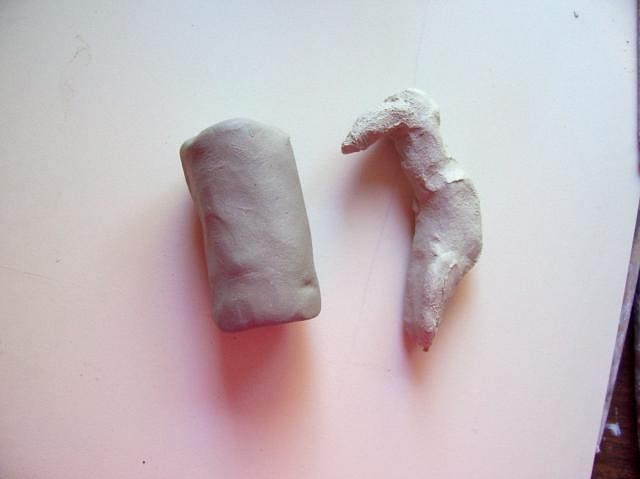
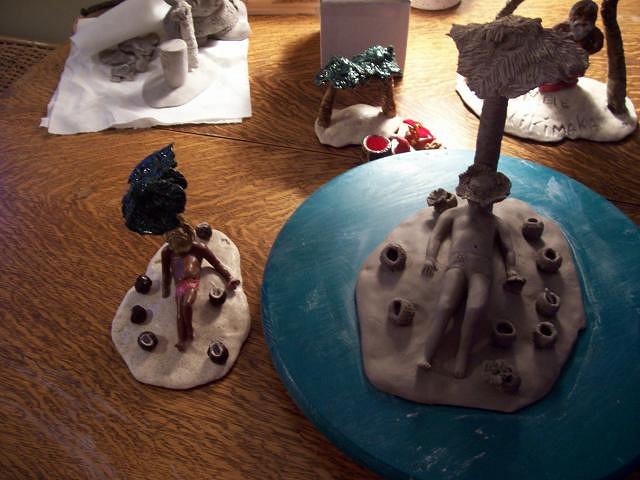
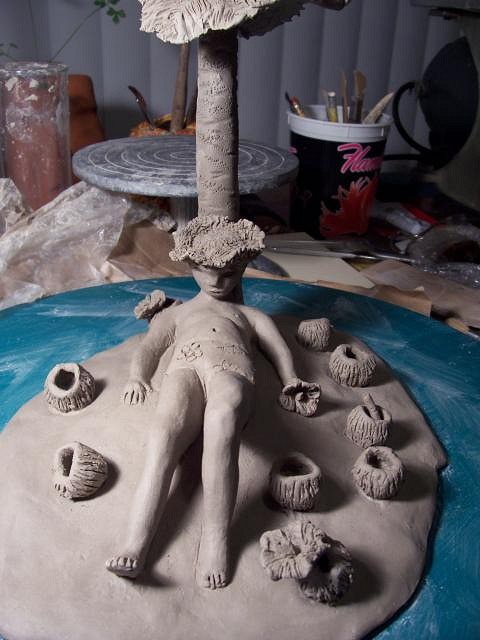
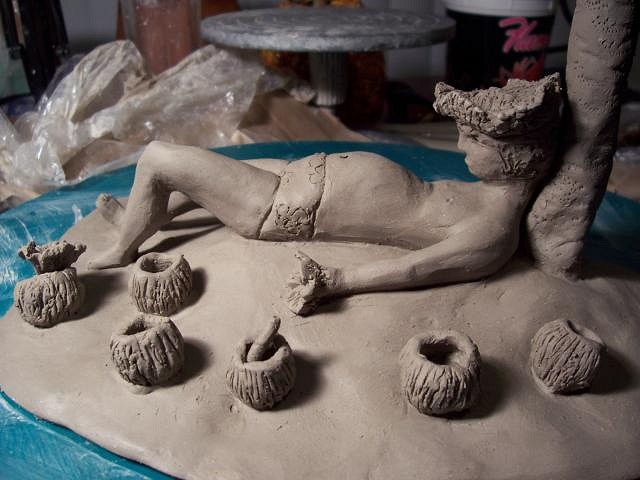
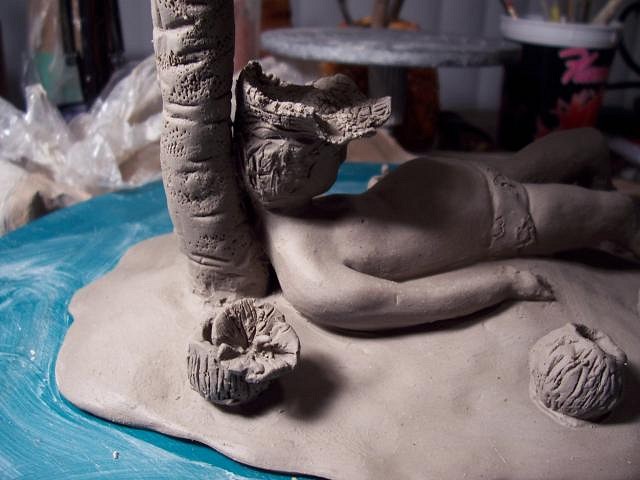
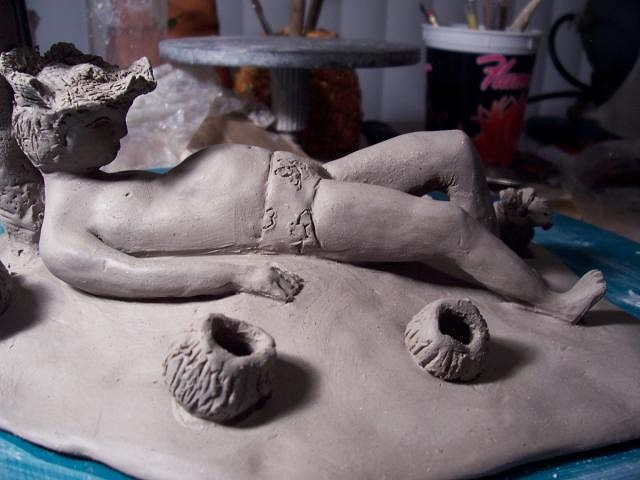
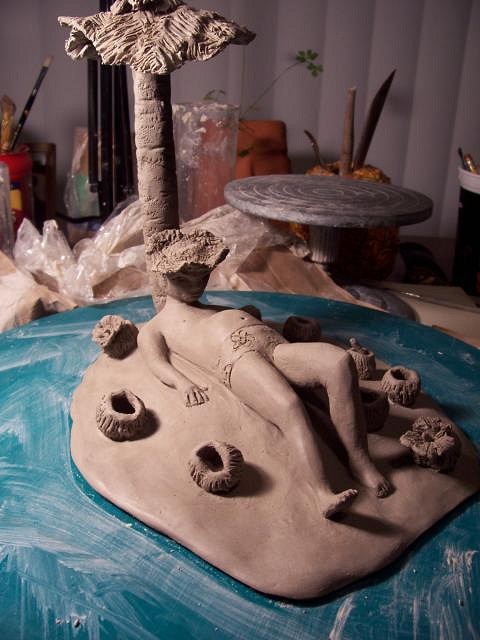
I got a call from the lady that fires my wares and she was ready to do a Glaze fire, so I packed up my pieces and started out to her house. I got about 3 lights when the lady in front of me decided to stop in the middle of the intersection to make a right turn from the left hand lane, I was able to stop, the lady behind me was not. Fortunately my car had very little damage compared to her whole front end being smashed in, I was shook up and had to call Craig to come deal with everything and sadly my newly made Island did not survive the crash. Although the glazed pieces held up fine, Thank God and I was sore but not severely hurt although Craig still insisted I go to the ER and get checked out. Sore but going to be fine. Moral of the story wear your seat belt! I had Santa Island straped into the passenger seat and he survived without a scratch, yay! :) Mahalo Y'all, |
|
D
danlovestikis
Posted
posted
on
Sat, Oct 29, 2011 10:36 AM
Hi Linda, your photos are terrific. So sorry to hear of your dogs passing and your car being rear ended. Loosing a piece of art you have worked hard on isn't fun either. You are creating so many fun new works that I'm addicted to your thread. Good job getting your first mug from your wheel. Make sure you use enough water that the clay never tugs at your hand. Sponges are a must for removing inner water while still spinning. The tribute mug is a wonderful combination of dog and tiki. Cheers, Wendy |
|
M
MadDogMike
Posted
posted
on
Sat, Oct 29, 2011 1:27 PM
CAR WRECK!!! Bummer, but glad you didn't have any serious injuries. Transporting greenware is always risky anyway because it is so fragile, when it gets slammed with a 1500 pound car it doesn't stand much of a chance. Several years ago I was stopped at a red light when someone rear ended me and pushed me into the car in front of me. The lady in the car I got pushed into got out and started yelling at me - "What the hell were you thinking?!" I told her I was thinking that the guy in the back was the one she should be yelling at. Glad you figured out the pottery wheel, I wish I had some sort of basic proficiency with a wheel. The Mia mug looks cool, tribute make awesome inspiration! |
|
U
umeone
Posted
posted
on
Sat, Oct 29, 2011 5:51 PM
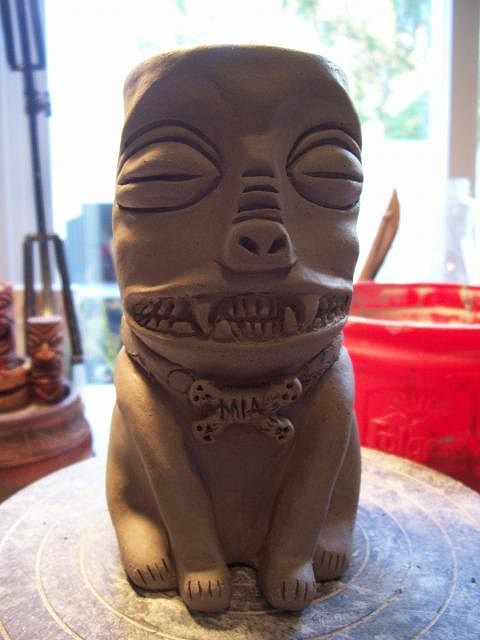
Awe my 2 fans, Wendy and Mike, thank you so much for your kind words and encouragement. :) I've been working on M.I.A. Tiki and am excited to share her with you. The real Mia was a Lab/Greyhound Mix that some how found her way from Marathon Key, FL to Walterboro, SC. Like I said, loosely based on her.
Gotta have that whip of a tail and her Hibiscus collar!
She was one special Dog...I think I would like to try a mold with this mug. Mahalo Y'all! |
|
U
umeone
Posted
posted
on
Tue, Nov 1, 2011 7:17 AM
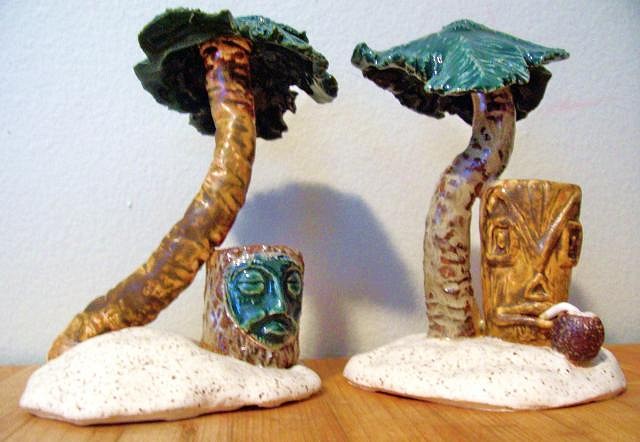
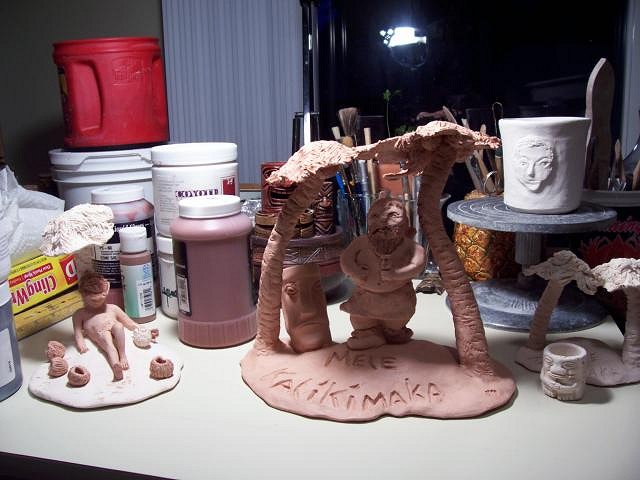
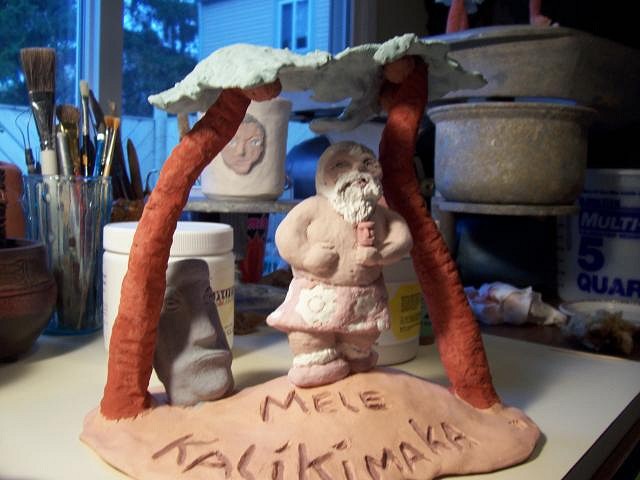
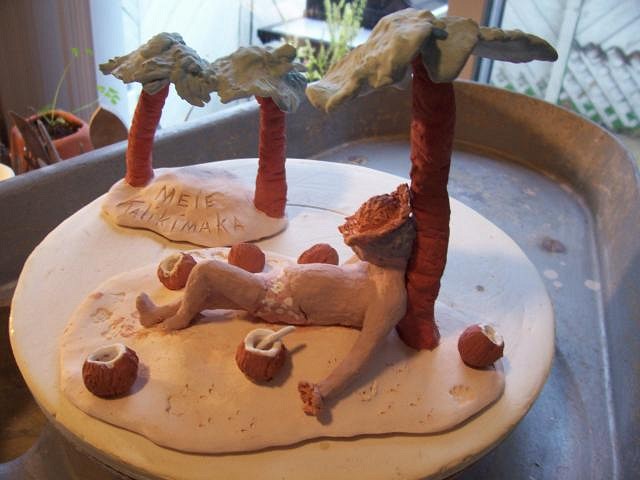
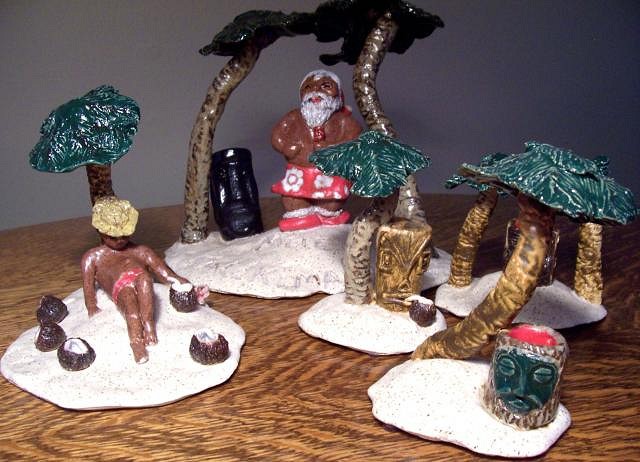
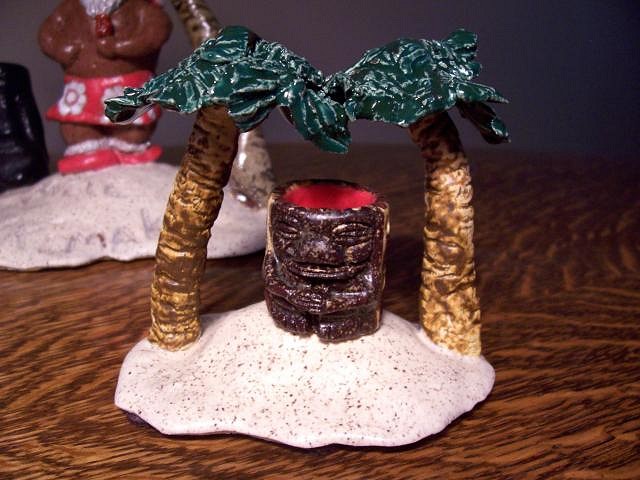
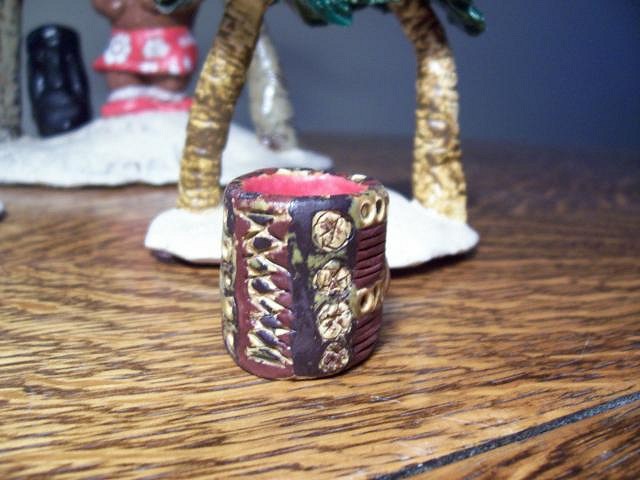
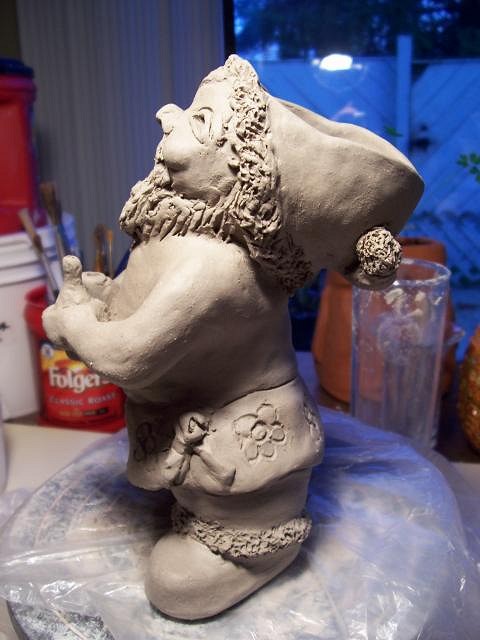
Aloha, I picked up my finished pieces. Sadly, Coco~Loco's palm tree did break off in the car crash, we fired both pieces and epoxied the Palm back on, he looks great but, repaired. Santa Island with the Tiki Mug came out great! :) So without further ado, I present you with Chapter 1 of the Island Series;
Mahalo Y'all, |
|
D
danlovestikis
Posted
posted
on
Tue, Nov 1, 2011 9:25 AM
Hi Linda, your islands are wonderful. The coco joe has a perfect belly! I love all the little mus. I hope you are still ok since your accident. Wendy |
|
U
umeone
Posted
posted
on
Tue, Nov 1, 2011 2:18 PM
Thank you Wendy, I'm still kinda out of it, I need to get back to work, I'm shoot-en for tomorrow! :) I hope you are doing alright! Take care my dear! Got to keep working! |
|
M
MadDogMike
Posted
posted
on
Tue, Nov 1, 2011 6:19 PM
Linda, those turned out great. Love the spotted glazes. There is a product called Magic Mender that is nice to have in your tool box. Sort of a cement that can be fired, you can repair fired pieces and then refire. I have even re-glazed the repair and it worked well. I think it comes in a high fire and a low fire formulation but I'm not sure about that. (Probably too late for Coco Joe, I don't think you can get rid of the epoxy) |
|
U
umeone
Posted
posted
on
Wed, Nov 2, 2011 6:21 AM
Thanks Mike I will have to get some Magic Mender, for things to break and just be gone is heart wrenching. The clay that I used showed up with the spots after the final fire, except for the sand that was intentional. Final fire is like life, according to Gump's Mom "you never know what your going to get." :lol: Mahalo Y'all, |
|
T

tigertail777
Posted
posted
on
Wed, Nov 2, 2011 10:59 AM
Aloha! Very cool stuff there Umeone! I especially like the Cocoa Loco Piece and the Mia dog mug (what a neat way to memorialize your furry pal). Sorry to hear about all the problems you have had lately I empathize. I will look forwards to seeing your thread grow with more artistic riches; the island series has a world of possibilities. :wink: |
|
U
umeone
Posted
posted
on
Wed, Nov 2, 2011 12:06 PM
Aloha,
a little proportion nip & tuck Time for a break...Ho Ho Ho and a bottle of Rum! |
|
U
umeone
Posted
posted
on
Thu, Nov 3, 2011 6:47 AM
Aloha Tiki Peeps, I am so getting into the Season, Santa Mug is done! :D
Well then there is that pesky trip to get him bisque fired, glazed and fired again, so almost done! Good thing I started him now, he might not be done till Kalikimaka! :lol: Mahalo, |
|
T
tikiskip
Posted
posted
on
Thu, Nov 3, 2011 11:21 AM
Hey Linda that Santa glaze looks kinda like the Hoffman glaze of old, Nice. |
|
T
tigertail777
Posted
posted
on
Thu, Nov 3, 2011 11:29 AM
Poor Santa has no brain! :wink: Nice work, that was some quick posting. I am anxious to see how the glazes work out for ol' Saint Nick. I really liked the other spotted glazes you used. I am curious have you had any mishaps in the kiln with any of these? I did some sculpture in High School and had a few go kablooey in the kiln, I guess because I didn't get all the air worked out of the clay on one occasion and on another it was too thick. I will keep watching your wonderful work progress. :) |
|
U
umeone
Posted
posted
on
Fri, Nov 4, 2011 6:48 AM
Aloha, John, I've been trying to find a match glaze for the Hoffman pieces. This one is close but, not close enough. My B-Day is 2 days before the Ides of March. Tigertail, I did have a piece blow up in the kiln, a very costly experience. I worked on a Mermaid laying upon a cliff, large piece with lots of detail, my Dad wanted me to make a bronze out of it, which of course I had no idea how that process goes. Anyway, this was about 12 years ago, I found a place that would fire her but, she blew up! The only thing left was the end of her tail. So that kinda ended my sculpting for about 10 years. Now I feel like I'm on fire, I love it and can't get the pieces in my head brought to reality fast enough! I've switched to cone 5 clay maybe for that reason, I can go a little thicker in some places and so far have had good luck. That being said I hope I haven't jinxed myself. :) I do hold my breath and pray till they get through the bisque fire. I always try to dig out the thicker parts and make sure to have a blow hole, like the belly button, a mouth or underneath Santa's Sarong! :lol: On to yesterday, there was a very creepy post on my thread that kept me off of here till Craig got home, when he went to check it for me, it was thankfully gone. Can anybody tell me what that was all about. Just curious. Anyway I did another Coco~Loco Island about twice as big and more attention to detail. I didn't take during pictures because of the post freaking me out. Here is the final piece although I do see some places where I could do a little more tweaking!
Thanks for stopping by and for all your supportive comments, except for creepy guy! :lol: Mahalo Y'all, |
|
M
MadDogMike
Posted
posted
on
Fri, Nov 4, 2011 10:41 AM
Was the creepy guy named Jimmy something? He was a spammer, anytime you see something funky like that you can send a PM to Hakalugi and he'll take care of it for you. Like to new Joe, looks like he's had a few too many! |
|
U
umeone
Posted
posted
on
Fri, Nov 4, 2011 2:53 PM
Aloha, Thanks MDM I sent you a pm. Yes the Creepy Guys name was Jimmy something! My Sister had a name for Creepy Guys, with arms above her head she would do her best impression of a penis and call them all "dick heads". I hope that this post doesn't offend anybody and / or get me kicked off of TC. Anyway, I had Karen in my head today, inspiration comes from the strangest places... Thank you so much for stopping by, I truly hope I didn't offend anyone! Except Creepy Guy! Mahalo Y'all, |