Tiki Central / Home Tiki Bars
Tiki Rock
|
E

eroc
Posted
posted
on
Fri, Nov 27, 2015 6:34 AM
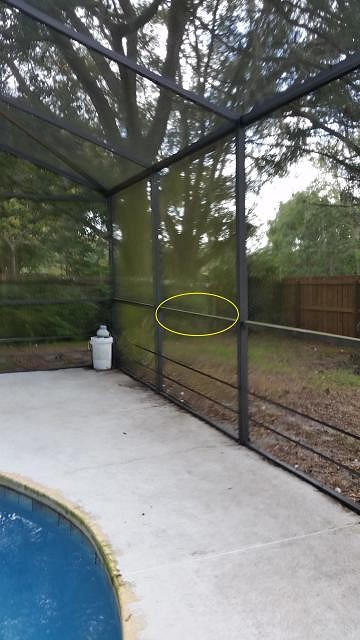
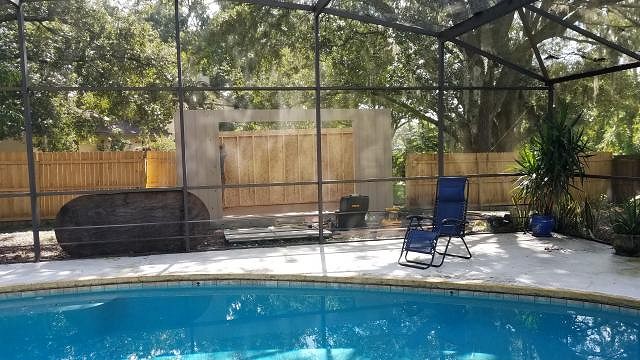
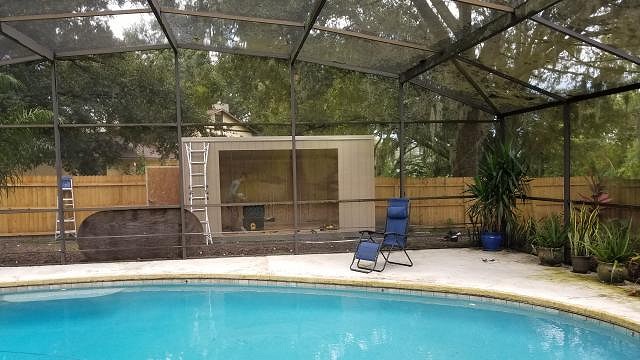
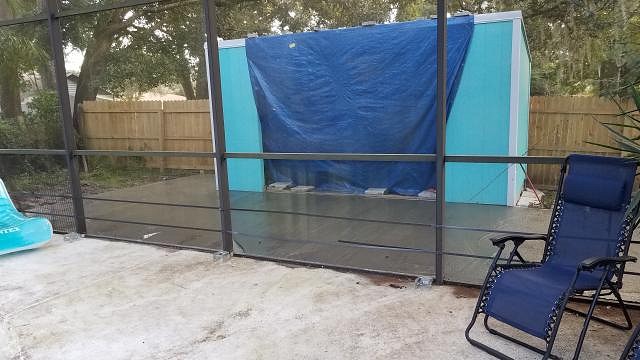
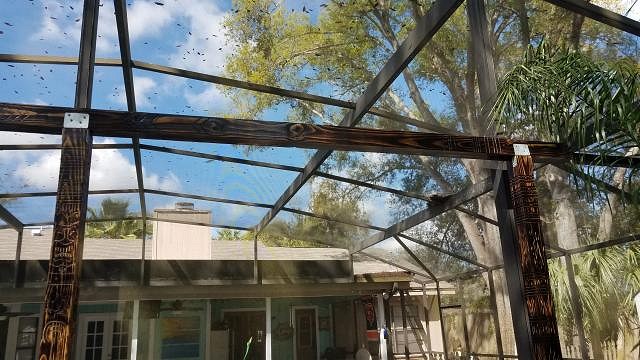
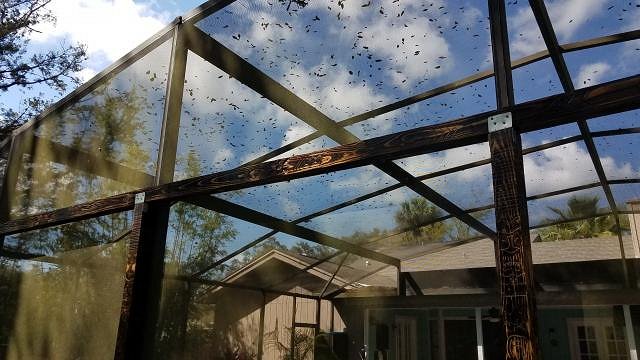
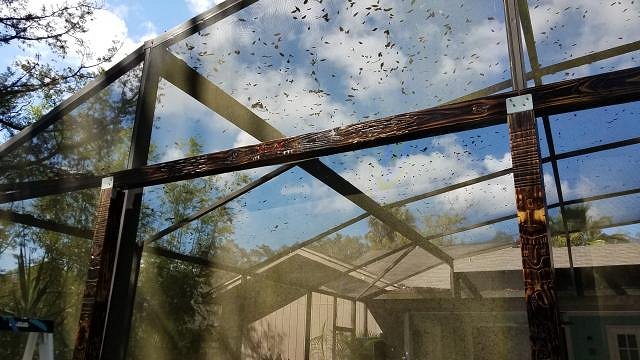
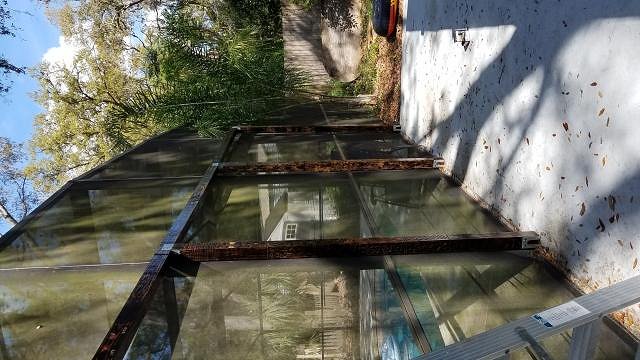
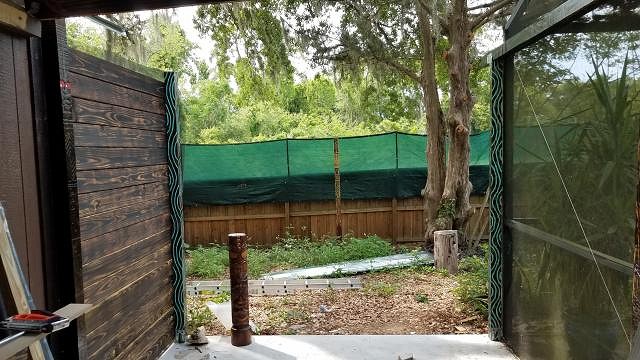
This thread was formerly known as "Sanctuary". Hello, I am going to be building my first Tiki Bar (walls, thatch-roof, door style), and this site has a lot of good ideas to borrow from. I had originally planned to make a 12 foot by 8 foot 'L' shape bar in the corner of my screen enclosure right on the existing deck, but then I thought, why not put it on the outside of the screen enclosure, save deck space, and remove a screen panel for a window into it? So I guess my question is, does anyone have any experience with screen enclosures? I want to know if I could remove the mid span circled in my image, and if it would degrade the structural integrity of the enclosure. I would more than likely build it back with 2x4's, as the mid span is actually 42", which is bar height. I would remove the same mid span at the next opening as well, and build back a framed door. If anyone has experience in this and could chime in, that would be great. This project is already green-lighted by the wife, so I just need to get past this planning phase and I'll start posting my step by step progression, including design plans. Thank you.
[ Edited by: eroc 2018-07-31 06:25 ] [ Edited by: eroc 2019-03-13 11:45 ] |
|
M

MadDogMike
Posted
posted
on
Fri, Nov 27, 2015 2:47 PM
Welcome to TC eroc and have fun with your build! I would be leery of removing supports in that structure, there isn't much to it. If it's just those 2 crossbars and you replace them with another one higher or lower you might get away with it. |
|
E
eroc
Posted
posted
on
Fri, Nov 27, 2015 3:42 PM
Thanks for the reply. I've actually moved the location, again...lol. It will be the same idea, but just another side of the enclosure. I think if I build up the structure braced against the current vertical support beams before dismantling the enclosure in any way, I should be able to then remove the horizontal ones. "Should" being the operative word. Again, I will be replacing one horizontal beam with a bartop that spans the same distance, and the other one will have a framed door which should technically be structurally stronger than the original aluminum beams. I'm working on design plans now. Will post more. |
|
V

VampiressRN
Posted
posted
on
Fri, Nov 27, 2015 9:36 PM
Welcome to TC. There are so many cool lounges in this thread. Very talented builders and decorators. This is a good thread to read as you get started with your project. http://www.tikicentral.com/viewtopic.php?topic=43018&forum=20&90 Have fun and post pictures along the way. |
|
E
eroc
Posted
posted
on
Thu, Dec 17, 2015 12:26 PM
(Edit: 2018 - Removed all the gobbledygook pictures that have no bearing on the current direction of this project.) [ Edited by: eroc 2015-12-17 12:36 ] [ Edited by: eroc 2015-12-17 12:37 ] [ Edited by: eroc 2018-07-16 05:12 ] [ Edited by: eroc 2018-07-16 09:05 ] |
|
M
MadDogMike
Posted
posted
on
Fri, Dec 18, 2015 7:50 PM
Looks good, have fun! |
|
W

W8N2Surf
Posted
posted
on
Tue, Jan 5, 2016 9:28 AM
This will be a fun one to watch! Post pics of the new site when you can. |
|
ATP

Atomic Tiki Punk
Posted
posted
on
Tue, Jan 5, 2016 11:30 AM
Are we going to stand around talking about which gauge of nails to use now? |
|
E
eroc
Posted
posted
on
Mon, Jul 16, 2018 5:10 AM
It's been awhile..... Should I do this? Should I do that? Eighteen months of inner battles. Lurking. Gathering ideas. Banging my head, and not to metal music, but against vertical objects. Well, the project is officially underway. And it's got a complete makeover from my first plan. To make things easy for me (also for the safety of me and those I love), I'm going through a shed company to build an 8' x 16' lean-to style structure. It will be set back 5' from my screen enclosure. I will then be personally building a deck and a 16' x 5' canopy between the shed and my screen enclosure, which I may lose life or limb or both in the process. With an 8' opening in the lean-to, that will server as my bar space. I will be stealing, borrowing, and hacking several ideas I have seen in this forum for decorations. Shed is in permitting. Support beams of canopy are being 'designed'. What follows may horrify you. Prepare for a complete amateur expedition. |
|
T

tikiskip
Posted
posted
on
Mon, Jul 16, 2018 5:16 AM
Might be finished by your 80th birthday party. Good luck. |
|
E
eroc
Posted
posted
on
Mon, Jul 16, 2018 5:20 AM
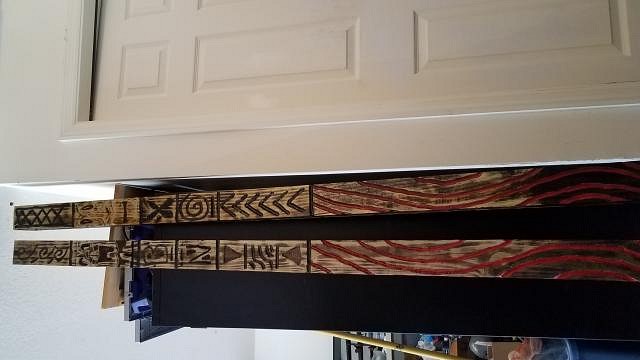
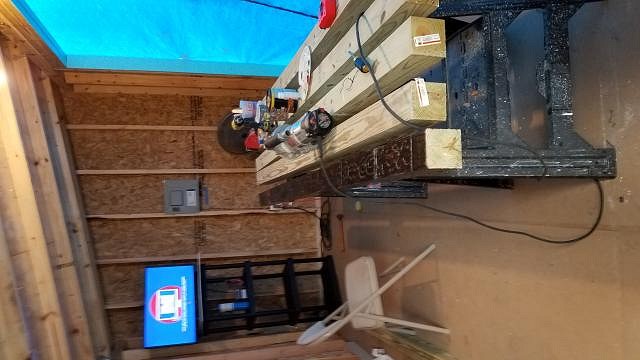
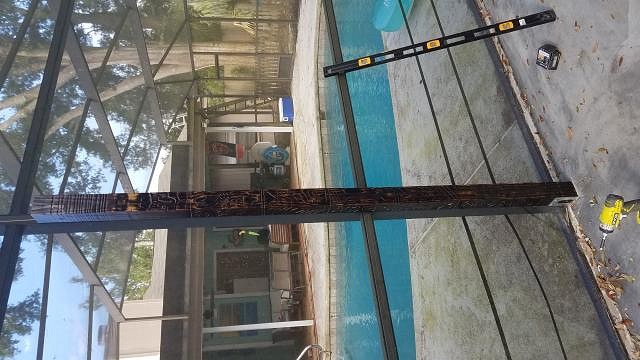
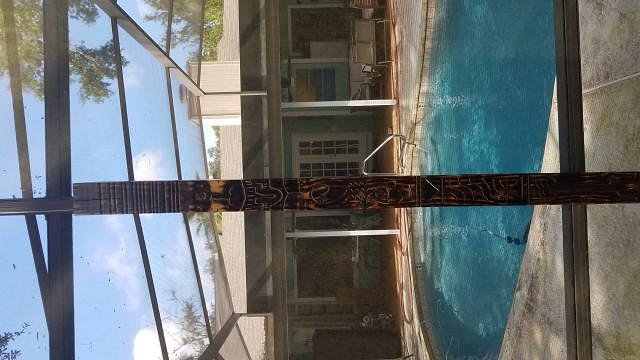
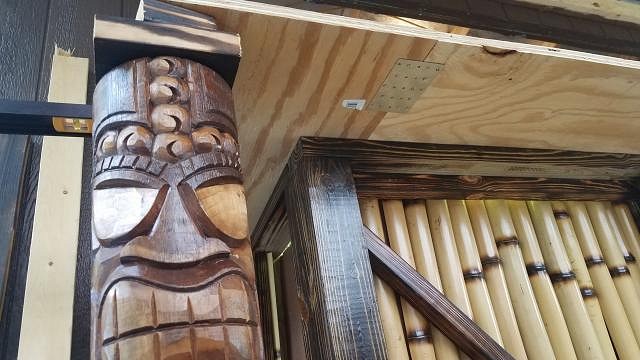
Beginning design of the support posts for the canopy
Watching their brother be born....
What did you do during the World Cup? I carved wood.
First two almost complete. Still adding sealant.
To be honest, the design in my head didn't translate to the real world. I suspect I am going to be running into that issue quite often during this project. Still getting used to the router. Never used one before. Who knows, I may just trash these and start over. Brutally honest comments are welcome. I have no feelings. |
|
N''

nui 'umi 'umi
Posted
posted
on
Mon, Jul 16, 2018 9:11 PM
Eroc, It’s your Tiki Space. Do what you like. I like what I’ve seen so far fwiw. Looking forward to your next post. |
|
E
eroc
Posted
posted
on
Tue, Jul 17, 2018 6:02 AM
Thanks. Will start to get more and more pictures once permitting is done with the City. Right now just doing some prep work. It's going to be a mixture of tiki, modern, and maybe some dragons. Who knows. I've seen several things on this forum that I absolutely love, so I've already got a few plans in the works. But I also want my own personal touch on it as well. I just going to organically grow this, and see how it turns out. |
|
H

HodagHut
Posted
posted
on
Mon, Jul 23, 2018 8:56 PM
Eroc - Don't be afraid of the router, and let your hands go where your mind thinks the design should be. I kept telling myself it had to be perfect, and then it dawned on me - Nobody from the Official Tiki Police is going to come and tell me it's wrong. Literally anything you do will be appreciated by your friends and family. Chances are, you're the only person they've ever seen do anything like this! Good Luck! |
|
E
eroc
Posted
posted
on
Thu, Jul 26, 2018 6:06 PM
Thanks for the tips! The first post I was definitely a little nervous, but it has been getting easier to use the router. Changing bits, getting the depth right, etc. Unfortunately, the City has come back and denied my permit due to setbacks, after I went to their office, twice, to confirm I could do what I needed to do. Frustrating. But, it looks like I can still do it, but need to push it out 10 feet from the screen enclosure. Doable, but now I have to do a little more redesign, and my deck space just doubled. Glass half full or half empty at this point, lol. |
|
E
eroc
Posted
posted
on
Tue, Jul 31, 2018 9:52 AM
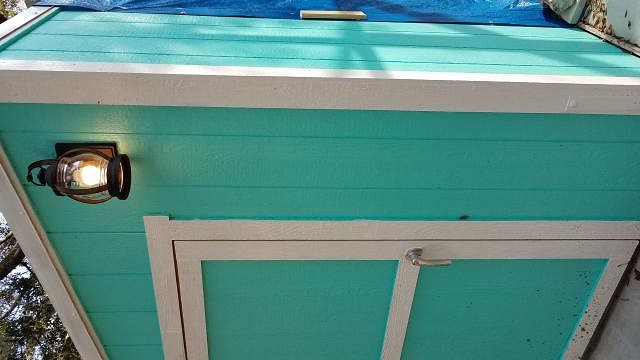
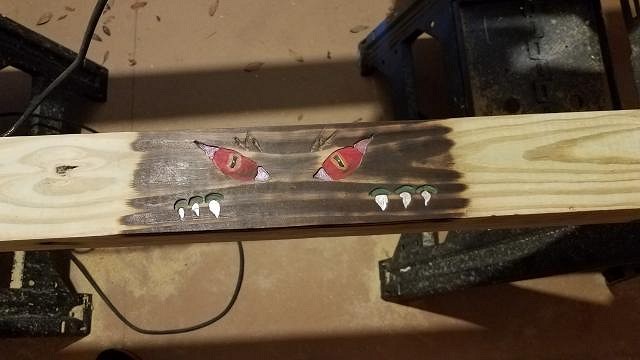
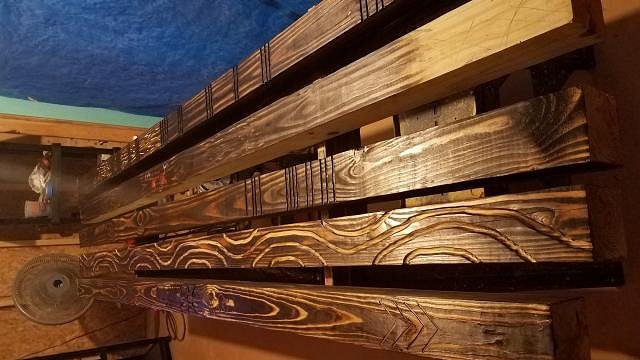
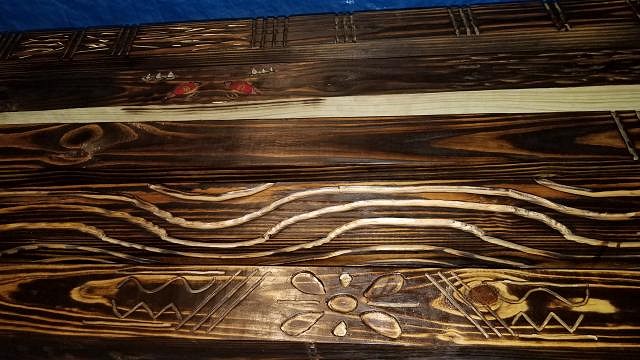
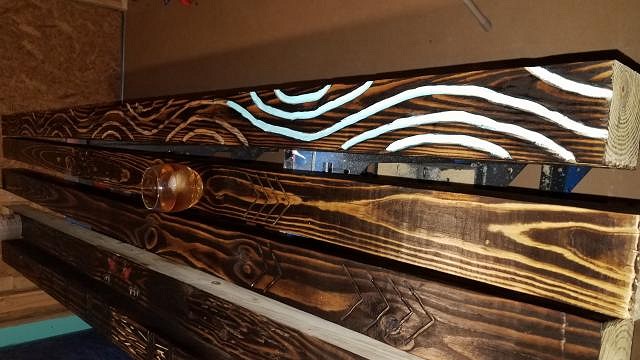
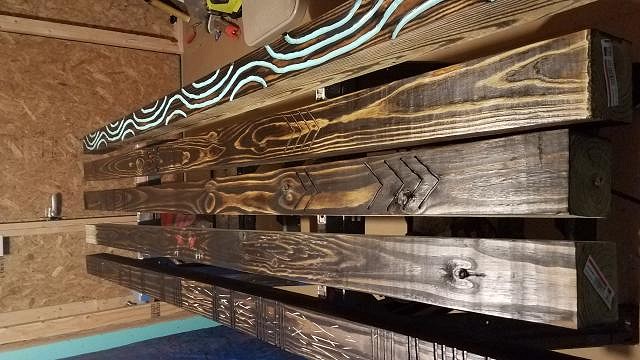
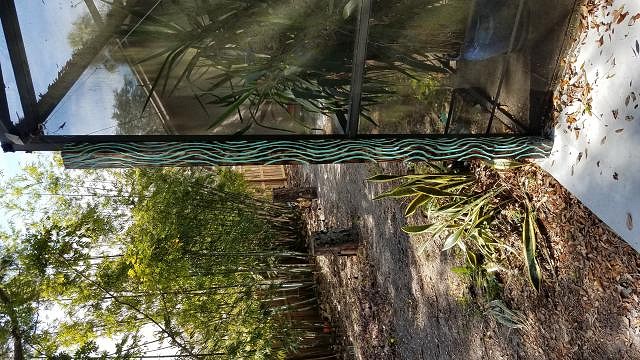
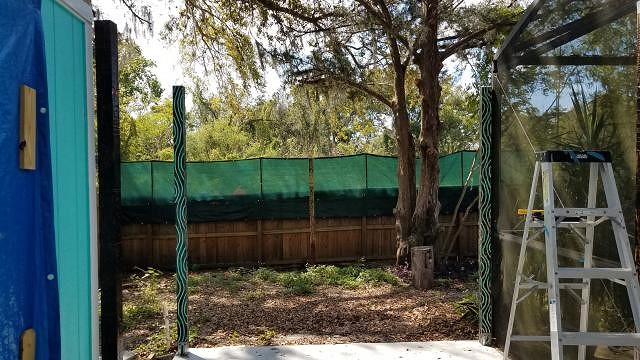
Now I see why people wait until they are almost done before they post their creations.....these onesie, twosies are annoying. Sorry about them. After going through the new designs, I realized this is more than a bar. It is going to be a huge outdoor space, a Sanctuary. So I changed the name. Think it's appropriate. Not as Tiki as some names, but I like it. For now at least, lol. Also, those two support beams I posted earlier? Forget about them. Trash. Probably turn them into bird feeders. After looking at Muskrat's backyard porch, I was inspired to go heavy with the blowtorch. And wow, I am so happy I did. Huge difference. Plus, I think I'm getting better with the router.
|
|
E
eroc
Posted
posted
on
Sat, Aug 4, 2018 12:40 PM
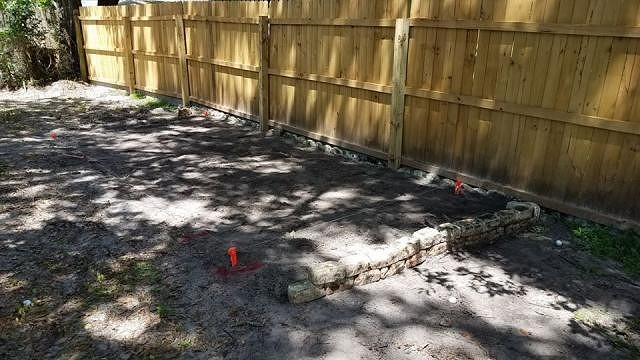
Site prep is done. You know, for as much back breaking work that was done, it looks like I just put a few orange pegs in the ground..... This is the full 8x16 dimensions. The pad was out of level by 6 inches on the right side (Due to modified type B lot drainage). So me and my trusty shovel fixed all that. Also made a stem-wall-ish barrier to retain the pad. We'll see if it stands up to this afternoon's thunderstorm.
|
|
E
eroc
Posted
posted
on
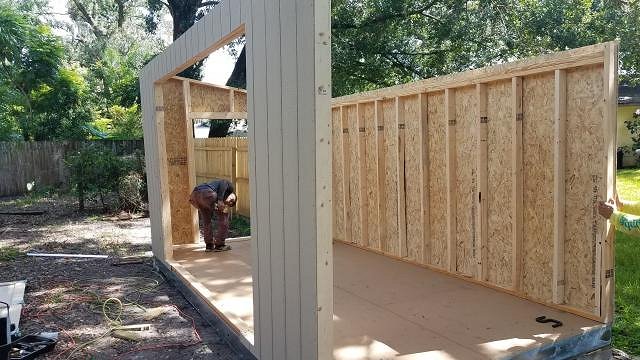
Sat, Aug 11, 2018 1:20 PM
Progress!!!
Walls and stuff
So everything was great, except the pre-fab'd the front wall wrong. The opening was supposed to be off-center to the right. Not much I could do except complain when they're open on Monday. Won't change what it is, however. Overall, I am happy with it. It is very solid.
So.... In my checklist of things to do....
This is going to be a long journey. |
|
E
eroc
Posted
posted
on
Wed, Mar 13, 2019 11:45 AM
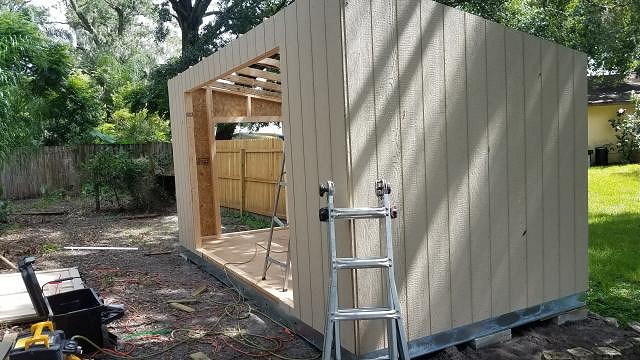
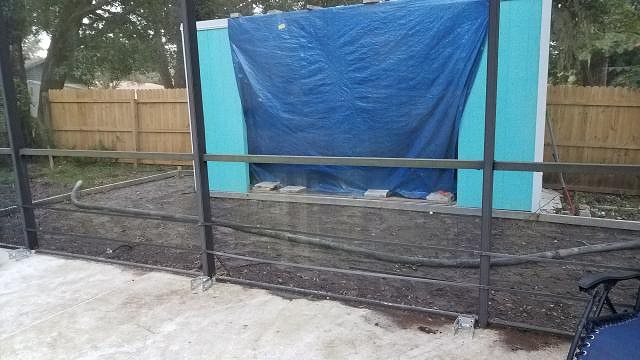
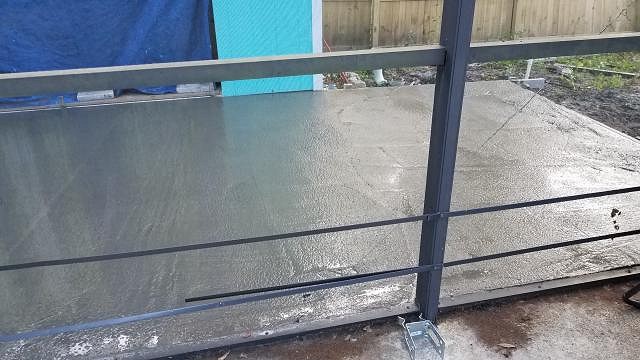
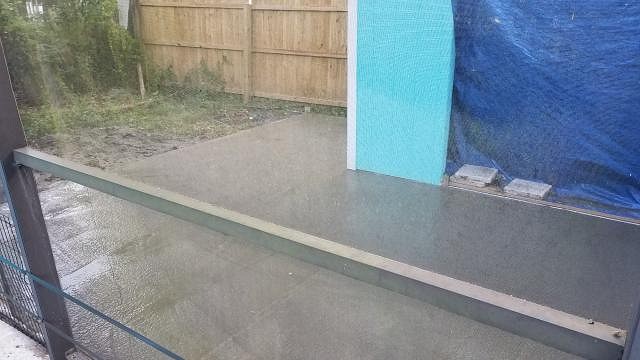
It's been awhile. Seems like this process is soooooo slow. Guess that is what happens when you're a one-man-show and you constantly throw out your back. But during this time, I got to visit some cool tiki bars in Vegas, refine my vision, and come to the realization that "the only right way to do tiki is how you do tiki, the way you like tiki." I also didn't want to post a single picture and come back two months later. I also decided upon a name for this monstrosity. "Tiki Rock". It's a play on my nickname, being E-roc. Corny as hell, but I refer back to my earlier stated realization. Here's some pictures of concrete: Screen enclosure extension out to tiki bar:
And finished:
If you could imagine, I will be ripping out that center bar in the above picture for an 'arch' opening into the bar area. I'll add more pictures when I get home tonight. Next up, posts and some electric stuff. Tag line: |
|
E
eroc
Posted
posted
on
Wed, Mar 13, 2019 2:22 PM
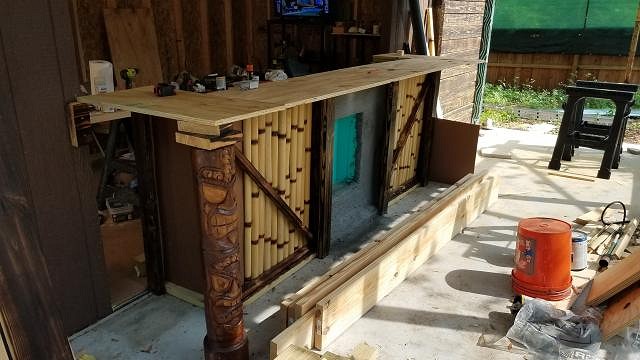
60 AMP service. Electrician said I can get three full fridges in there. Luckily, I only need one. Let there be light!
Inside the unfinished tiki bar, which is now become tiki workshop. TV to keep me company all these solitary hours....
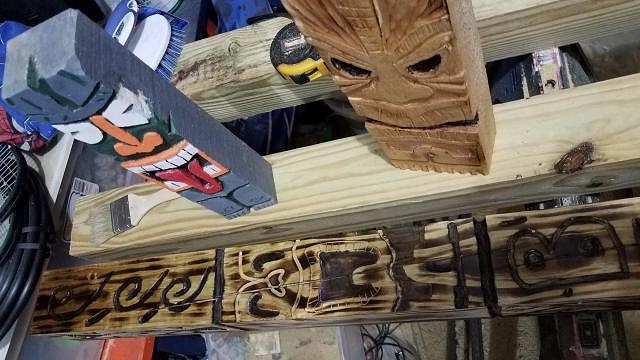
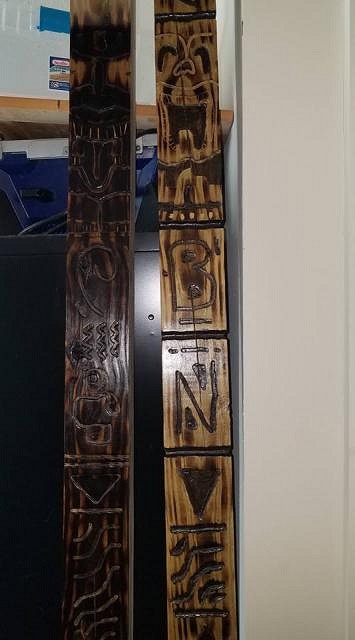
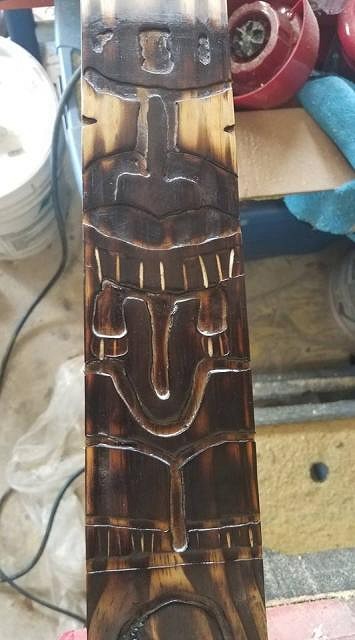
Here's some pictures of the product made inside the tiki workshop: The spirit who watches over the exit (it'll make sense when installed)
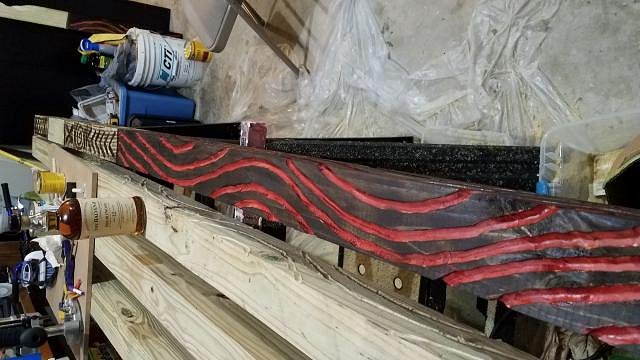
Structural members:
I did mention 'tiki my way', right? Well that means bourbon. Lots and lots of bourbon.
|
|
E
eroc
Posted
posted
on
Wed, Mar 13, 2019 2:35 PM
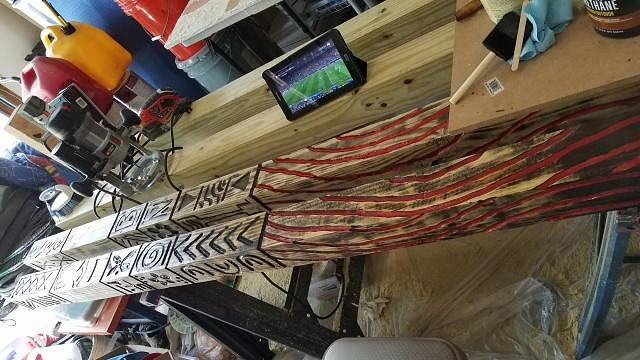
And now the installations of these posts. The will be holding up the roof structure, which lumber and roofing material should be here Saturday. As long as my back doesn't give out, should be done with that in a week. Or two. Well, maybe three. Stop pressuring me. (sorry, but can't figure out why these won't rotate correctly. They are upright on my computer. I have a hard time spelling HTML)
Headers, all 28 feet of them....
The exit header. And yes, his eyes will glow in the dark. Don't ask me how. They just will.
|
|
E
eroc
Posted
posted
on
Thu, Mar 14, 2019 9:59 AM
One of the 'inspirations' I picked up from Vegas. I knew there were dragons in tiki. I just knew it....
|
|
PP

Prikli Pear
Posted
posted
on
Thu, Mar 14, 2019 11:46 AM
Looking good, eroc! I know the frustrations of being a one-person construction crew. You spend 6-8 hours working on the tiki bar one day, then look at what you've accomplished and it seems maddeningly insignificant. The good thing is that those bits of insignificant progress do add up. The downside is they get completely covered with sawdust from newer bits of incremental progress! :lol: |
|
E
eroc
Posted
posted
on
Fri, Mar 15, 2019 4:38 AM
I decided a long time ago not to track my hours in this project. I figured I would be too depressed. There are days I'll just sit in the tiki bar, staring 360 degrees, trying to figure out what the heck I'm gonna do next. It takes time for the vision to come into focus, at least, for me. Roofing materials will be here tomorrow, and that design is pretty straight forward. Blowtorch some rafters, attach ledger board, and assemble. Easy, peasy. Just have to invest in a back brace.... |
|
E
eroc
Posted
posted
on
Sat, Mar 16, 2019 4:37 PM
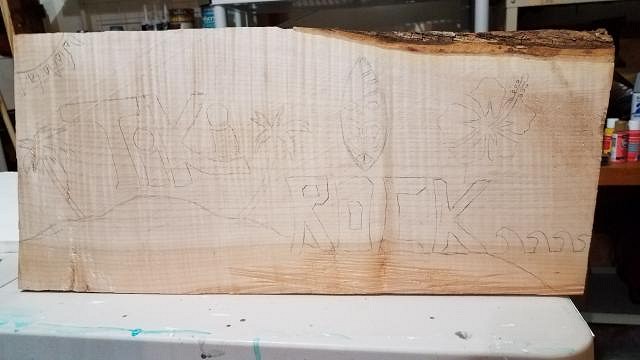
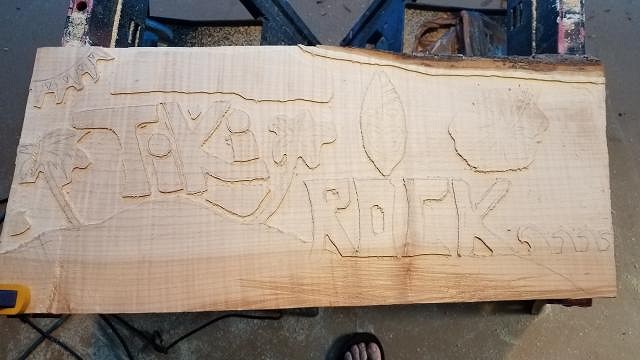
So while I waited for the shipment of lumber and roofing material to get here today, I decided to cement the tiki bar name by carving it into a sign. I used a 'maple flame billet' as the base, which has a 'live edge' at the top. Never made one before, so was hoping for a little beginner's luck.... Designing...
First pass of carving...
Applying some espresso stain...
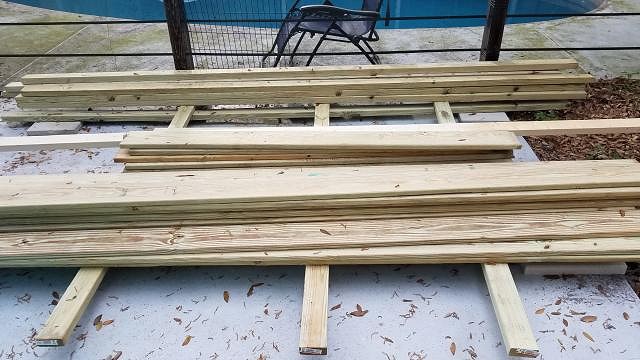
And so I had to stop because the shipment of lumber came. That took 2 hours to move from front yard to back yard. This is half of it, or the PT wood to finish the exterior portion. Here's a random picture of lumber....
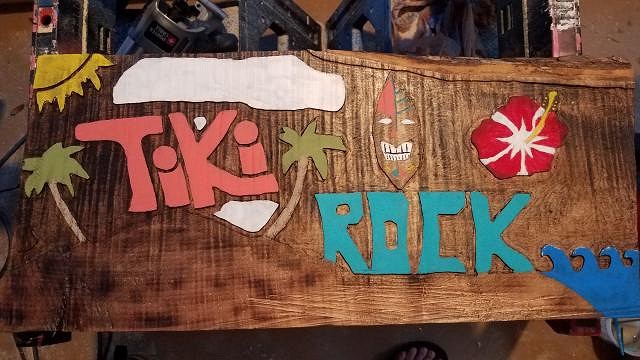
And then finally, after a long days hard work of moving lumber, carving a sign, and actually helping a friend move, here is the 'final' product which will be hung on the exterior wall of the bar.
"The only right way to do tiki is how you do tiki, the way you like tiki." [ Edited by: eroc 2019-03-16 16:44 ] |
|
E
eroc
Posted
posted
on
Sun, Mar 24, 2019 3:01 PM
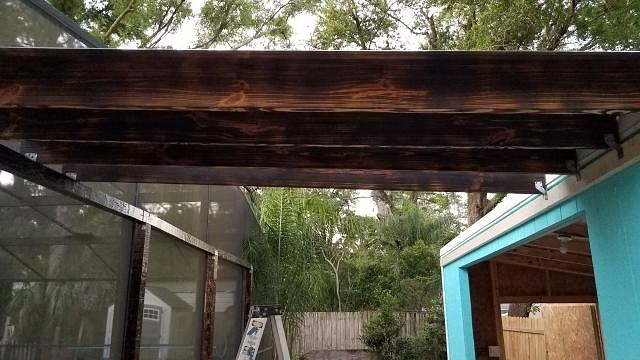
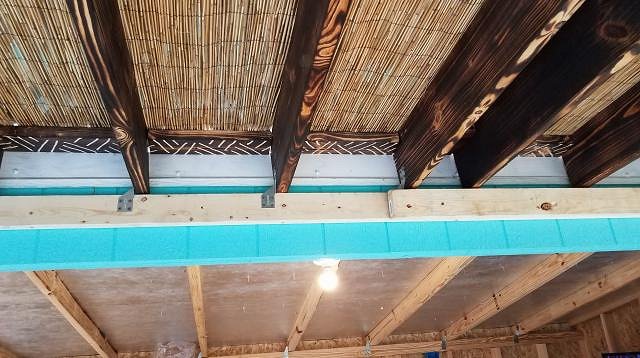
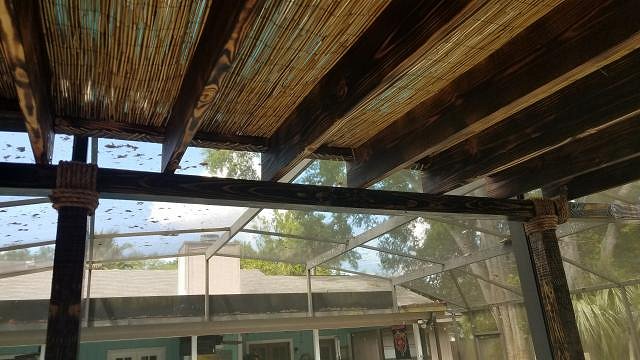
23 hours of labor in one weekend..... and I'm a wee bit closer to being done. 16'x10' roof....
I used a ledger board to connect the rafters from the 4x4 posts to the main structure. I wasn't happy with the hurricane straps showing, so I did a double ledger board, effectively hiding the metal straps. You'll see on the right, I have the second ledger board installed. I'll also be doing mini 'thatch' roof on this ledger board, as it sits right over the bar.
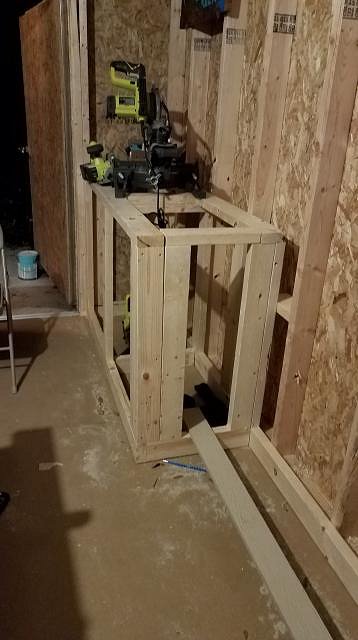
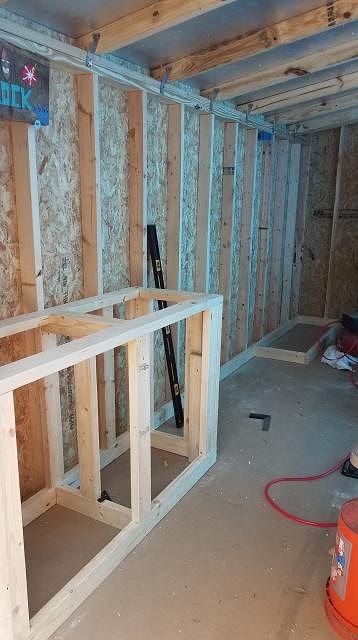
So far, I am absolutely impressed with my amateur expedition. The entire area will be about 450 sq ft of usable space, 320 of that under roof, and 160 is the actual bar. I'm probably getting rid of the teal color, so I'm sure that will appease the purists on the board. I might go back to my original paint of.... brown. I've got a complete interior cabinet/shelf system to build. It will have a rock formation, aquarium, volcano, and a sink. Should be able to fit all of that in the 16 foot back bar. Then I have to build out the 10 foot front bar. So much left to do...... Here's a start to the back bar build. Don't make fun of my cabinet skills. I know I built it funny. But i jumped on it and it didn't budge, so.....
|
|
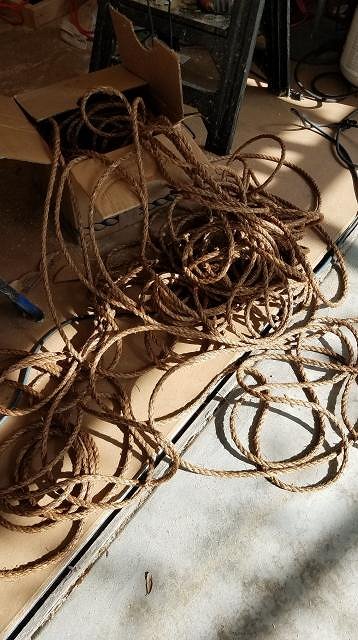
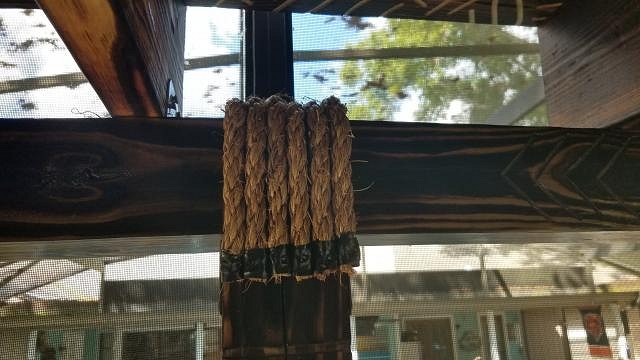
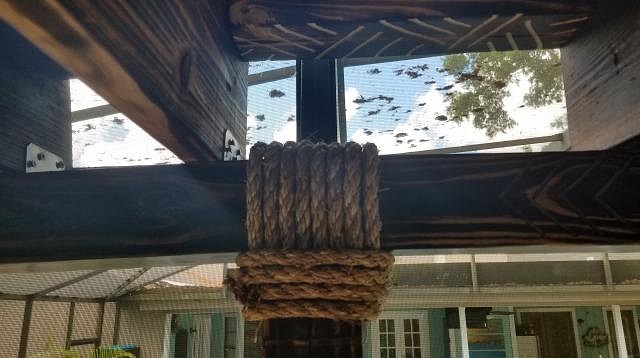
E
eroc
Posted
posted
on
Sun, Mar 24, 2019 3:11 PM
Need help here. Gonna make it painfully obvious I've never worked with rope before.... here is me 'opening' the 600 ft spool....
But rope management is not my problem. I need to figure out how to wrap "T" section of 4x4 posts and hide the structural metal. Any thoughts?
|
|
L

littlegiles
Posted
posted
on
Tue, Mar 26, 2019 8:43 AM
Since it isn't actually structural, you can fake it somehow. I would suggest just doing some searching online for pics and try and copy them. Good luck! Liking what you have done so far. |
|
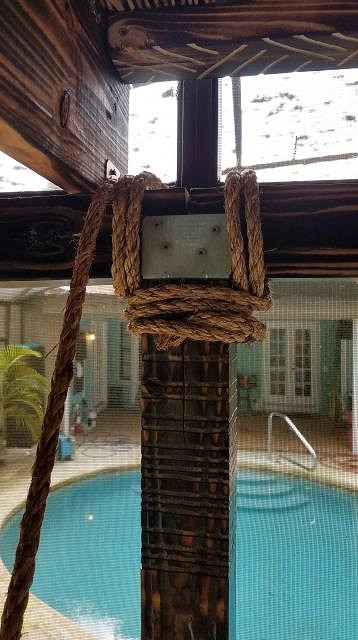
E
eroc
Posted
posted
on
Tue, Mar 26, 2019 9:24 AM
Been trying to research, not much out there... "lashing","tiki lashing","how do Boy Scouts tie a knot"? I think what I am going to end of doing is do the 'knot' you see above (poor man's Japanese Mark 2 square knot), but just staple some strips over the square metal part. That should give the illusion I am looking for. I'll let you know how it goes (or doesn't). Thanks! |
|
T
tikiskip
Posted
posted
on
Tue, Mar 26, 2019 1:51 PM
Sorry wrong thread. [ Edited by: tikiskip 2019-03-26 15:49 ] |
|
E
eroc
Posted
posted
on
Tue, Mar 26, 2019 5:20 PM
Work on the front bar has begun. Have I mentioned I have no idea what I am doing? Something like a two-tier bar.....
Or something....
The top will be 43.5" from the ground (I wanted it higher than 'standard'), and the back will be 36", but will have a glass 'lip' from the top bar protruding over it. I hope it makes sense once I put it together. |
|
E
eroc
Posted
posted
on
Fri, Mar 29, 2019 10:50 AM
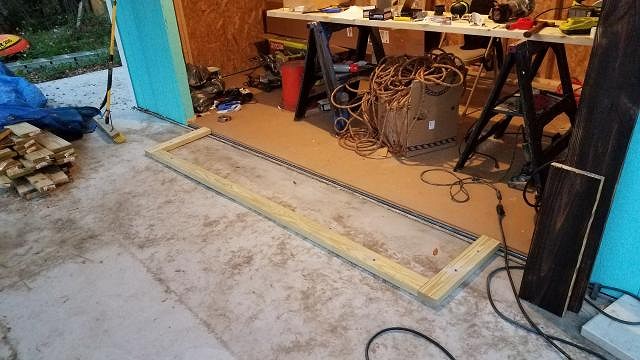
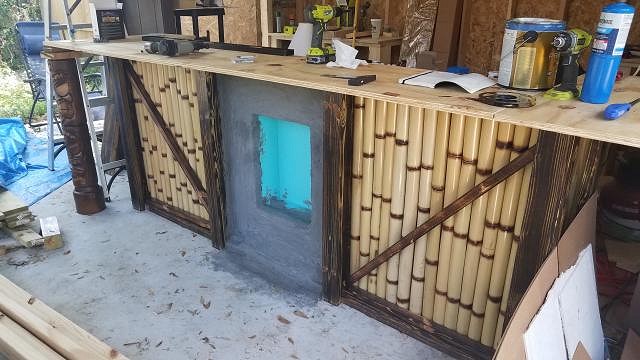
Should be done with front bar this weekend... But that means I need to start planning the back bar, and the back bar has a sink. My question to anyone who has a sink: What works best functionality-wise? I think I can tiki-up any sink, but was wondering would a shallow stone bowl be a pain with a bunch of tiki mugs? Or should I just go to Home Depot and get a stainless steel kitchen sink? I'm trying to find that balance between practical and "oohhh, that's bad ass!". As I've never had a tiki bar, let alone have to use a sink at one, I want to make sure I get a good functional sink that doesn't end up just being a cool water feature. Current picture of front bar frame. Three panels up front, recessed tiki figure in the middle. Scorched wood meets bamboo style. Lower tier in back for bartender.
|
|
E
eroc
Posted
posted
on
Sat, Mar 30, 2019 5:51 PM
So, good talk..... Just some progress pictures.....
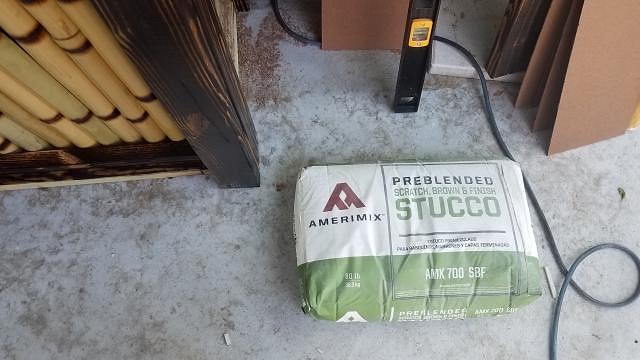
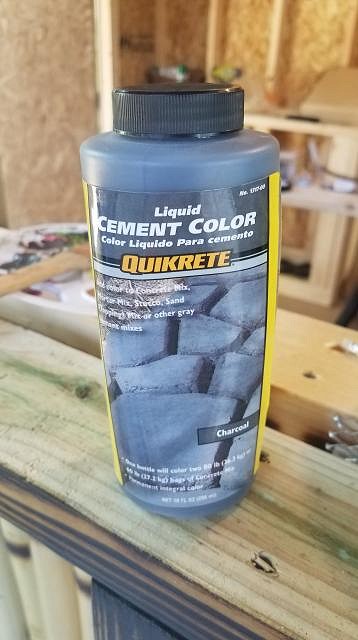
Tomorrow, I'll be adding a colored concrete to the attached lathe. Hopefully it comes out ok.... |
|
E
eroc
Posted
posted
on
Sun, Mar 31, 2019 4:34 PM
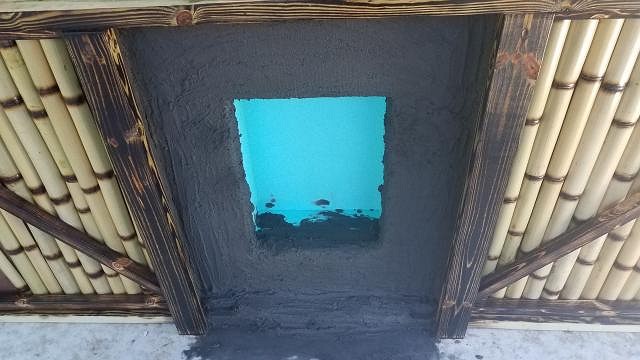
The idea I have for the bar is that the tiki bar was built into a mountain/lava flow. I'm going to carry the rock formation in the center, put it on either side of the bar, and also do a working volcano in the back that empties into an aquarium. Using a float valve and a 1/4" supply line, should not have to worry about any evaporation issues (that part of the build is a few months away). I added lathe to the bottom chord so that the rock is coming out of the bar and spilling onto the floor.
Scratch coat is on. Guess I need to wait 7-10 days until it cures before I put on the texture pattern, which will be a surface bonding concrete.
Gives an idea of the size of the bar, total visible roof line is 16 foot.
Also, figured out my lashing "issue". Stole an idea to just use a finishing nailer to put strips of rope in the blank spots, then used a Japanese Mark 2 square not to finish it off. Came out pretty good, I think.
|
|
L
littlegiles
Posted
posted
on
Mon, Apr 1, 2019 7:12 AM
Nice job on that Lashing! Looks great. Really like the idea of the lava rock texture in the middle of the bar. Haven't seen that done that I can remember and the ideas for behind the bar are intriguing. |
|
E
eroc
Posted
posted
on
Mon, Apr 1, 2019 10:37 AM
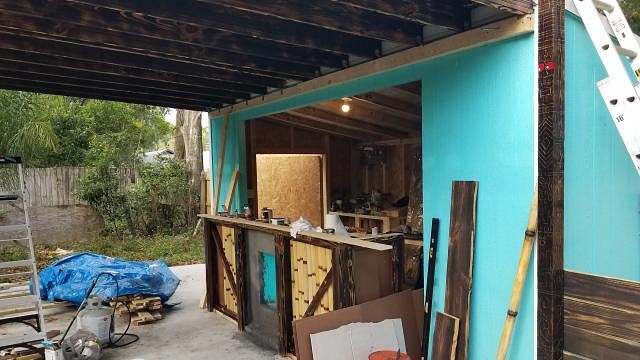
Thanks! The good news is that the lashing is actually structurally functional. Even without the metal tie downs, it will still have some uplift capabilities. I've always liked the mix of stone, wood, and metal in one decorative piece, so figured might as well incorporate that into my tiki bar. The vision looks really cool in my head, just a matter of making it happen. I'm off to buy dark brown paint for the exterior. The teal/aqua color is starting to get to me and not fitting my vision. |
|
E
eroc
Posted
posted
on
Sat, Apr 6, 2019 2:12 PM
While waiting for the stucco to cure, made some executive decisions and design changes. Going to add a 60 sq ft wooden alcove area next to the bar for additional seating/vibes. It will have wooden walls and ceilings. I'll put screen on the outside to ensure no insects can come in. My version of a 'wall'
I was even nice enough to add some vine things so that my neighbors didn't have to look at the ugly backside. You can see the framed-screen I put on the back. FYI - that teal is also gone. It's brown now.
The area to be walled in. The wall pictured above is to the left. You can see where it is in relation to the main bar area.
And speaking of bar area.... Got to work on getting the base down. Used 3/4" plywood, then will use T&G SYP for the decorative top. The tiki totem will actually be integrated into each corner of the bar.
Backside with two-tier style.
|
|
E
eroc
Posted
posted
on
Sun, Apr 14, 2019 9:05 AM
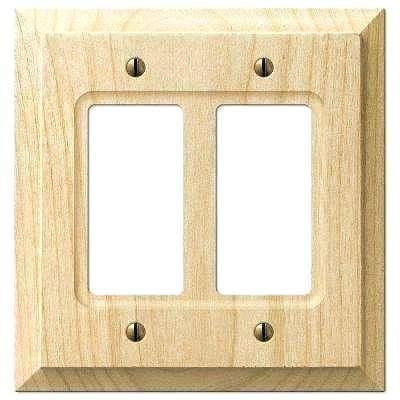
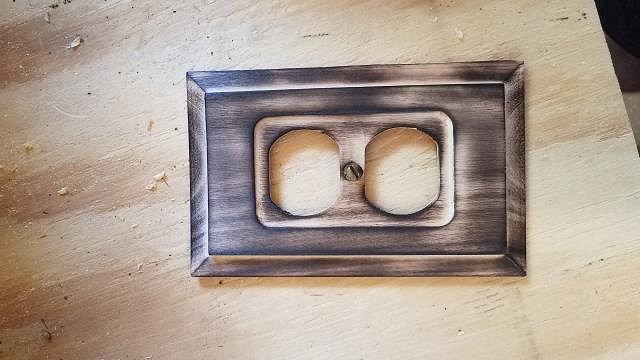
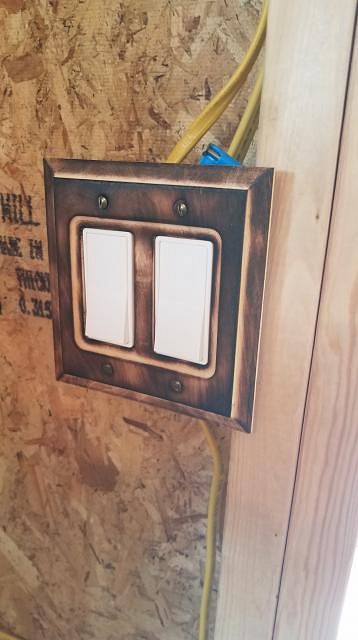
Trying to figure out how to run the electrical and discovered something interesting at Home Depot. Wooden electric covers. Hmmmm.....
So I thought, "Wonder if it burns......" And.... They do!
Here is one of them installed. Was going to swap out for black rocker switches, but this actually looks good too.
|
|
E
eroc
Posted
posted
on
Sun, Apr 14, 2019 9:11 AM
And speaking of electric.... My bar is lit up now
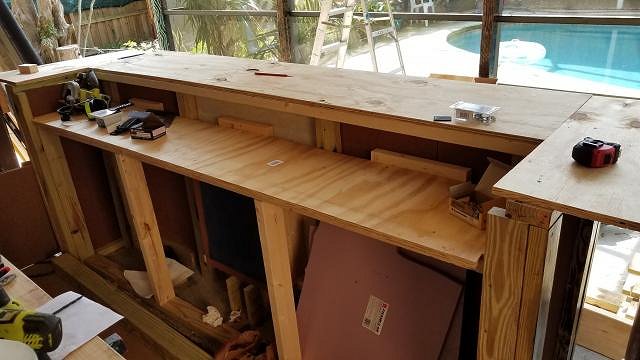
Also the base of the bar top is fully installed.
10" overhang, 3/4" plywood.... seemed sturdy enough, but added some hardware for a little extra.
Next week.... The obsidian/lava/glass/rock thing gets installed in the center (the thing that puts the Rock in Tiki Rock). No idea how that is going to turn out. Looks pretty in my head, though. [ Edited by: eroc 2019-04-14 09:13 ] |
|
L
littlegiles
Posted
posted
on
Mon, Apr 15, 2019 6:10 AM
Looking good. Extra support and hardware on a bar top is never a bad thing. You never know when someone will get the Tiki spirit and want to do a little dancing on it. :) |
|
H

Hearn
Posted
posted
on
Mon, Apr 15, 2019 1:55 PM
Looking great! Regarding the sink. I'd HIGHLY reccomend using a deep basin stainless steel style sink. It needs to be functional more than anything. |
|
M
MadDogMike
Posted
posted
on
Mon, Apr 15, 2019 2:07 PM
"No idea how that is going to turn out. Looks pretty in my head, though." I know that feeling :lol: I like what you're doing, looks great. |
|
E
eroc
Posted
posted
on
Tue, Apr 16, 2019 5:13 AM
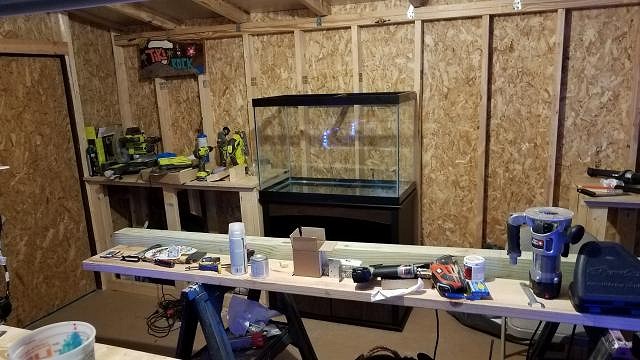
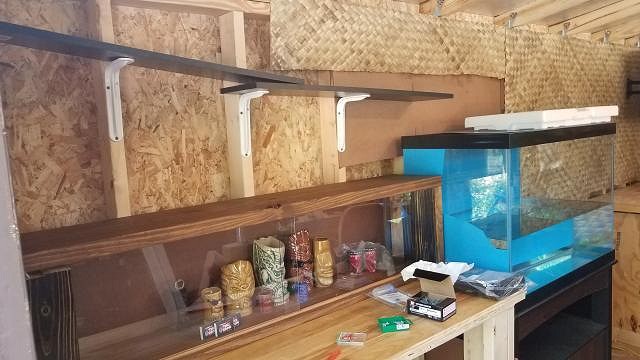
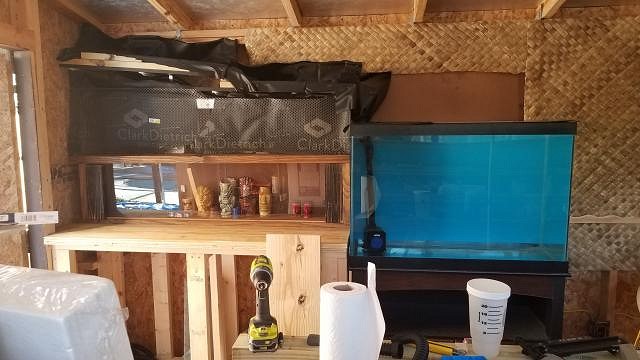
Hearn, thank you for the advice! I was all over the place with sink designs, but I think I am settling in the the deep basin version, but maybe a bronze or something dark. I ended up getting the aquarium last night. It became a classic case of "eyes bigger than my stomach". It looked much smaller at the store. Anyway, price was $400, but talked them down another $100 due to damage on the base (which I'm going to reskin anyway), and another 50% off because they didn't have the hood/light fixture (which I didn't want either). So $150 for this monstrosity. Pretty good deal, I think. I had to put it 'off-center' so that it would span two joists. It's going to be around 800 pounds (65 gallons), so wanted to make sure I had as much support as I could get. 50 PSF rated floor, 3x10 uniform load area is 30sf times 50psf, which means it can support 1500 pounds. Placed perpendicular to the joist at a bearing wall to reduce bending force. Fingers crossed... Going to have to get creative with my shelving design, now that I have much less space for them....
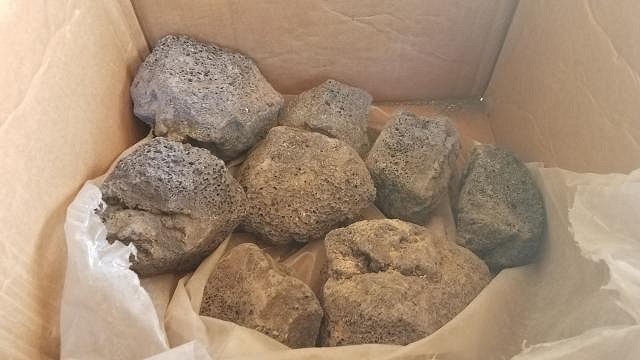
Guess who is excited about a box of rocks!?!?! This guy!
[ Edited by: eroc 2019-04-16 11:39 ] |
|
E
eroc
Posted
posted
on
Sun, Apr 21, 2019 2:03 PM
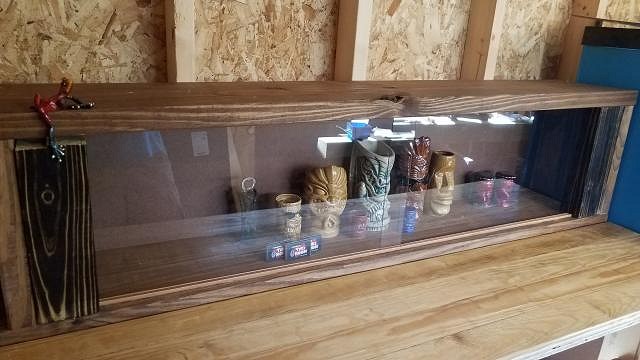
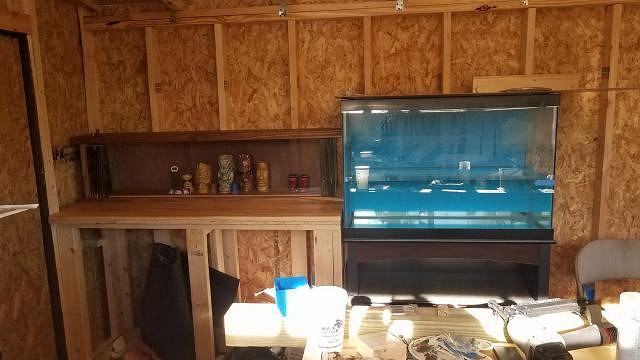
Didn't get to work on the front rock section. For some reason decided to get some inside stuff done. The beginning of my tiki mug display case.
Stained and installed next to aquarium
My current collection is..... lacking.
Maybe I should have made the case smaller, you know, perspective and all.....
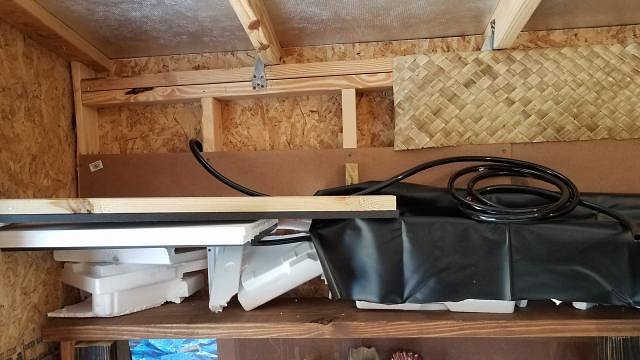
So since that was complete, might as well start on the mountain/waterfall/volcano thing that goes on top. No plan, just randomly throw stuff together... Start framing it out.
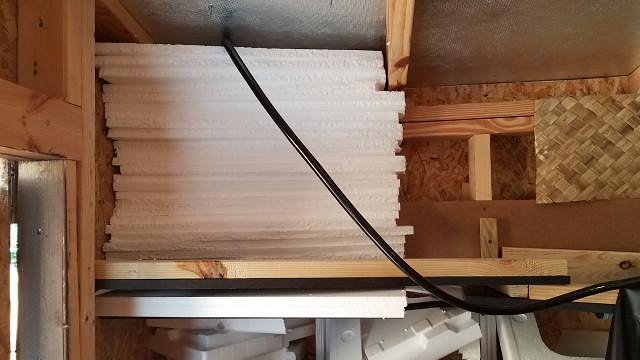
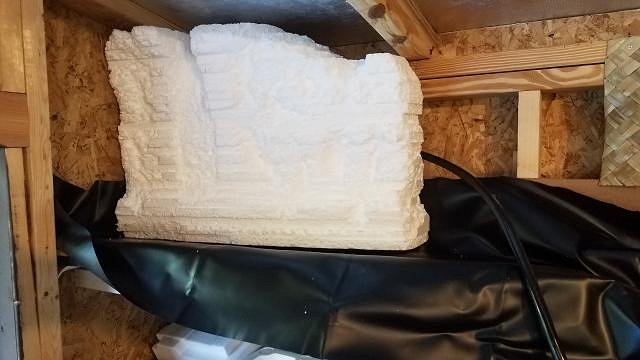
Guess I need to explain what is going on the next picture. I used pond liner to create a 'channel' for the waterfall on top. Underneath, I backfilled with styrofoam and metal lathe. Once ready, I'll use Great Stuff on the lathe to give it shape. When that dries, I'll carve it out and then apply hydraulic cement, aka, the mountain. It was also at this step that I did a dry run of the water run. It splashed everywhere. Apparently, 950GPH is waaaaaaaay too much for my little waterfall. So this is my stopping point until I get a much much much smaller pump.
|
|
H

Hamo
Posted
posted
on
Sun, Apr 21, 2019 10:57 PM
Be careful; another year, maybe two, and that mug case will be full and you’ll need to make second one.... |
|
L
littlegiles
Posted
posted
on
Mon, Apr 22, 2019 6:10 AM
Sorry, I had to laugh a bit when I saw the 950gph pump comment. I have had a similar problem when someone gave me a pump for a fountain and I didn't bother to research. After watering the neighbors lawn I decided to downgrade. :) Love the idea of the flowing water into the tank. Can't wait to see what more you do to that. As for the mugs.....it won't be long and you can build you another shelf. Keep an eye out at thrift stores and sometimes you can catch a bargain on eBay. Good luck and have fun searching. |
|
E
eroc
Posted
posted
on
Mon, Apr 29, 2019 5:27 AM
A little peek of what I have been up to.
Still a looooooong way to go....... [ Edited by: eroc 2019-04-29 05:27 ] |
|
E
eroc
Posted
posted
on
Tue, May 14, 2019 6:48 AM
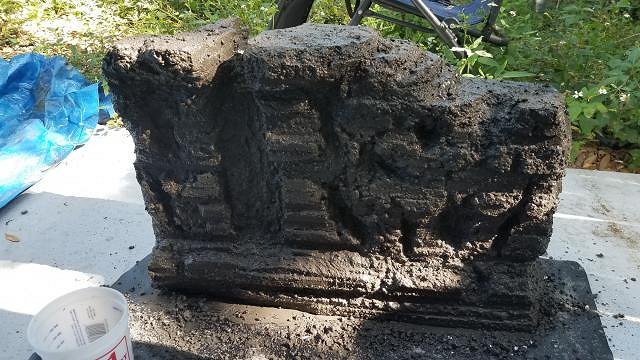
Update time.... Building the 'mountain'
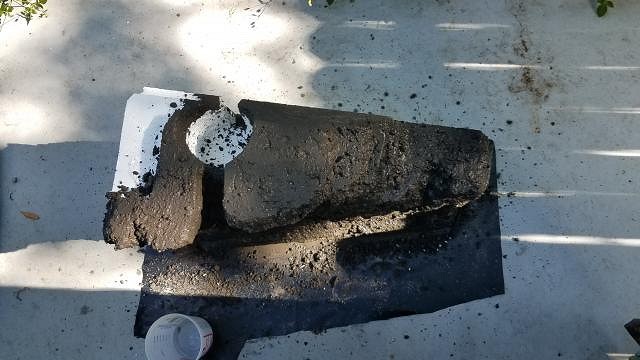
Making the main volcano 'removable' so I can service it.
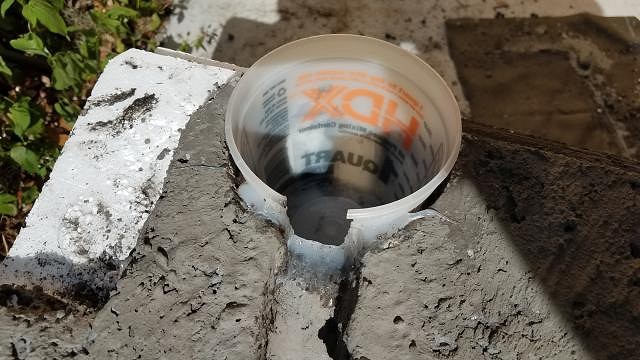
Used painters cup for the reservoir
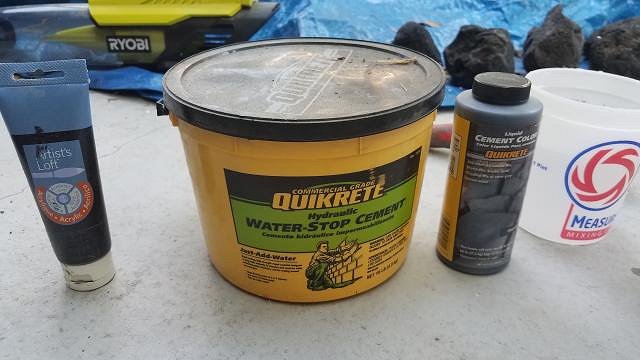
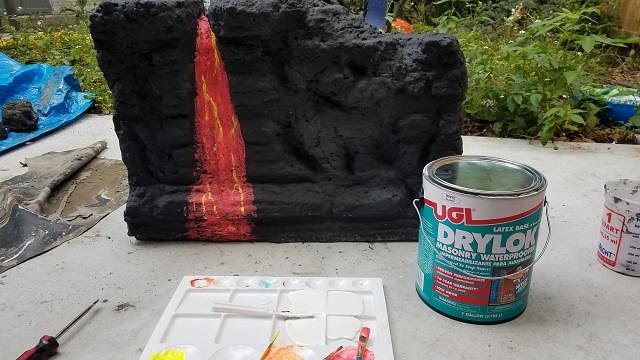
Bought UV reactive paint, mixed it with drylok (masonry sealer) to waterproof it
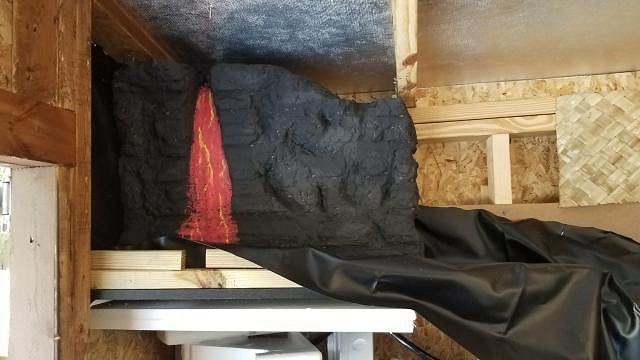
Top part almost complete, but bottom of mountain still has some work
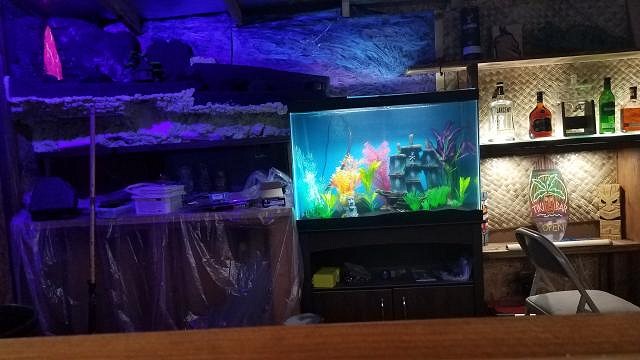
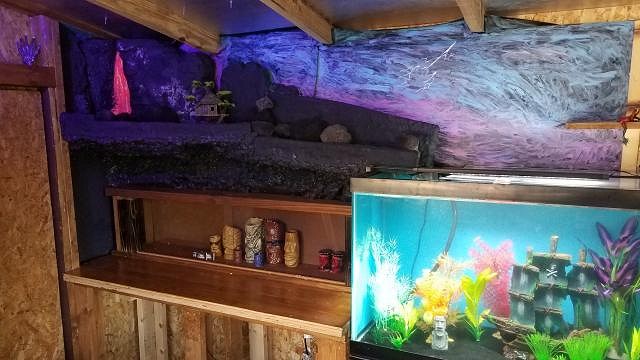
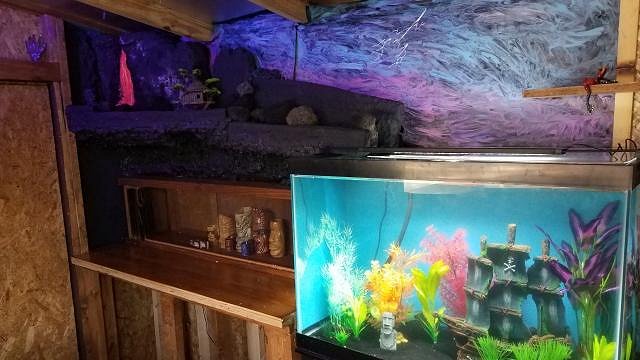
Working on the mural in the back. My artist nephew is in town, going to help make it look realistic while keeping the UV reactive paint. There is a pump in the tank that takes the water up to the volcano and it empties back into the tank after going through lava rock, making an effective filter.
Shelving to the right still has some work to do, but it is functional.
Standing in front
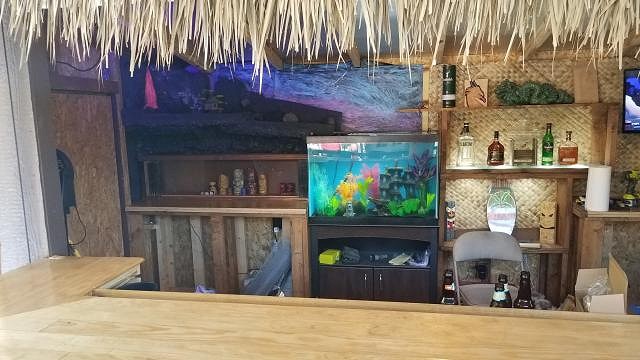
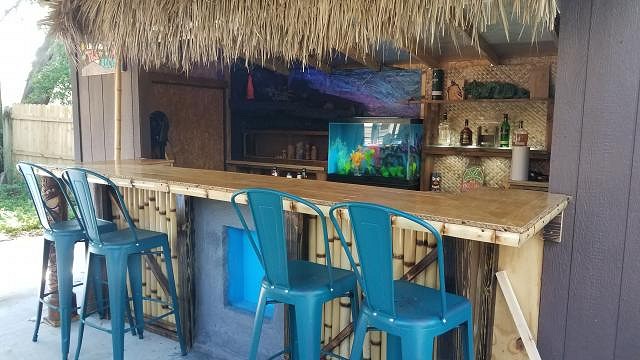
18 cu ft fridge delivered and installed on Saturday. So right now, it's a functional bar. However, still feel like have about 2 more years of development. |