Tiki Central / Home Tiki Bars
Home Tiki Bar Build Out - Spider Island Lounge
|
L

liabungalo
Posted
posted
on
Mon, Jun 30, 2014 8:53 AM
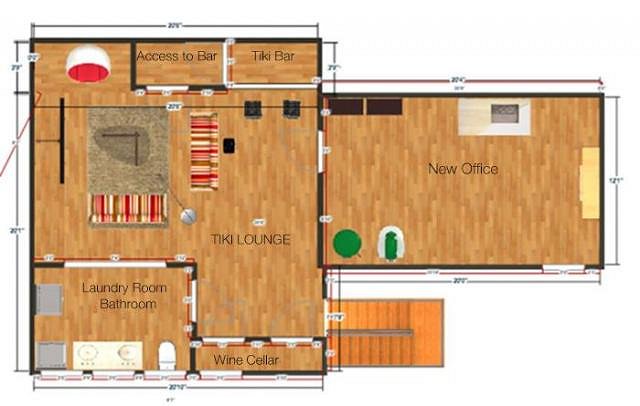
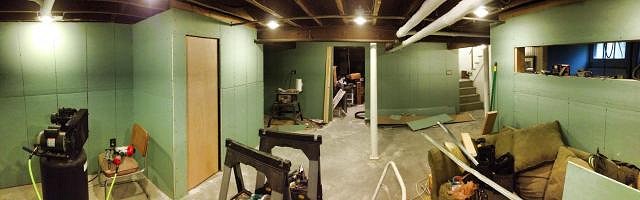
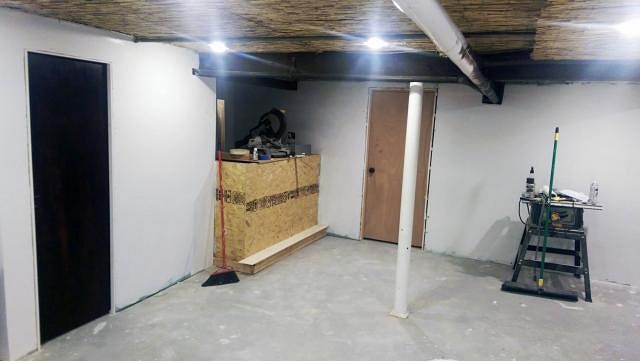
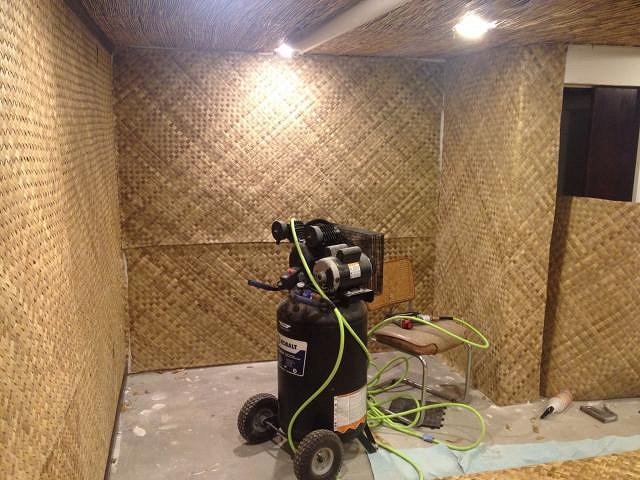
This has been a long time coming, but I didn't want to post photos until I had most of the non-Tiki frame work done for what will eventually be my Tiki basement. A little background: Three years ago, my wife and I purchased an 85 year old him in NJ with a short, but clean and dry basement. The goal was to eventually turn it into a Tiki lounge, but I first had to figure out what to do with the nearly 100 feet of asbestos piping that was falling apart and then learn how to actually frame out a basement. I have never worked with wood before, let alone done construction. I'm a wedding photographer and have never even used a saw before. Last October, I took on the asbestos. I sealed off the basement, dragged in the gardening hose, put on the mask and space suit and cut out everything, bagged, mopped and HEPA vacuumed the room for good measure. Hopefully, I didn't eliminate 30-40 years off my life, but I have a feeling smacking my head against the asbestos whenever I did the laundry would probably have killed me faster. Regardless, that sucked. For the past few months, I've learned how to frame walls, put up insulation and vapor barriers, ran electricity and plaster. All by myself. It's taken about six months, but I'm finally putting up the finishing touches and am ready to start Tikifying the room. Below is a montage of what I've been up to leading to now. I will probably have a ton of questions, particularly regarding what to do with the low ceiling (6'7"), so please don't kill me for the noob questions. Here are the blueprints. knocked down an outhouse that had a toilet in it and sealed off in a new enclosed laundry room. I put a cut-a-way in the wall between the laundry room and Tiki Lounge to get some natural light in and to offer a shelf for some of my Tiki mugs. I put a closet to hide the meters and piping that will double as a secret access to the tiki bar. The back half will become an office... eventually.
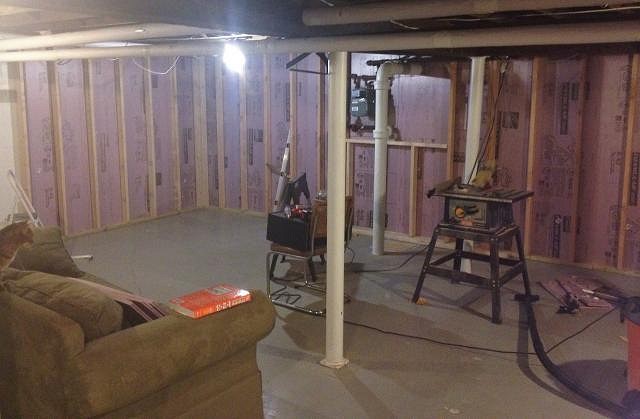
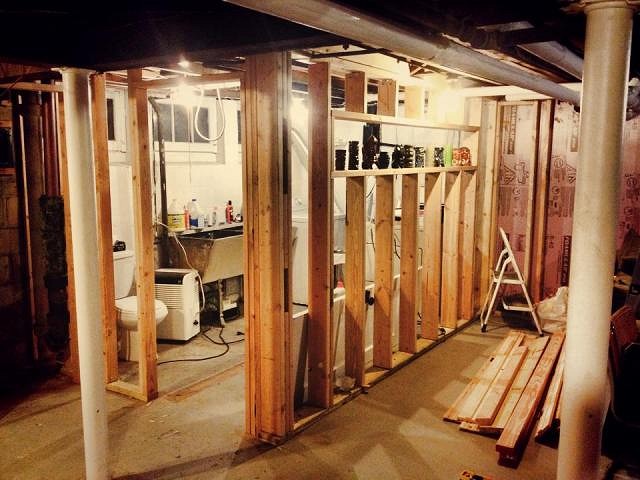
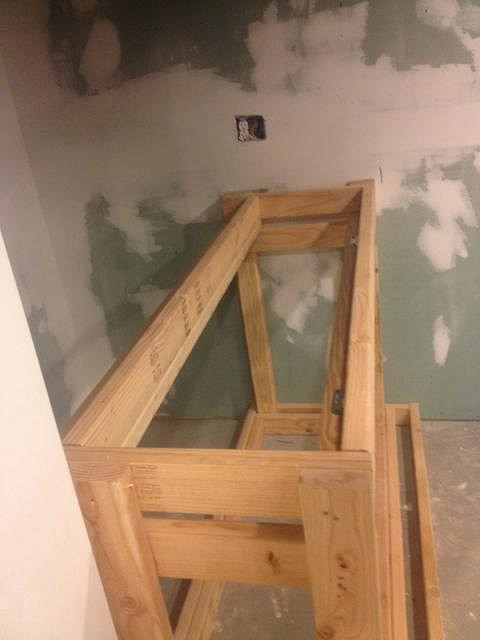
After one week of work and about 20 hours of cutting and hammering we have one framed wall almost complete. The bar will go on the right between the column and short wall. I'm going to build a secret access to the bar via a hidden closet that will be covering the gas meter and exhaust pipe.
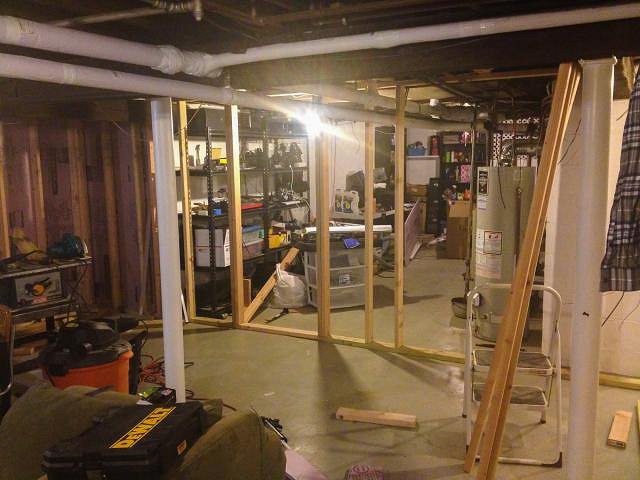
Partition wall between the Tiki Lounge and my new office is about half done. framing a door that I don't have yet sucks.
Half of the wall on the left side is up. I've also started putting cross-beam studs to support the wall separating the office and Tiki Lounge on the opposite wall.
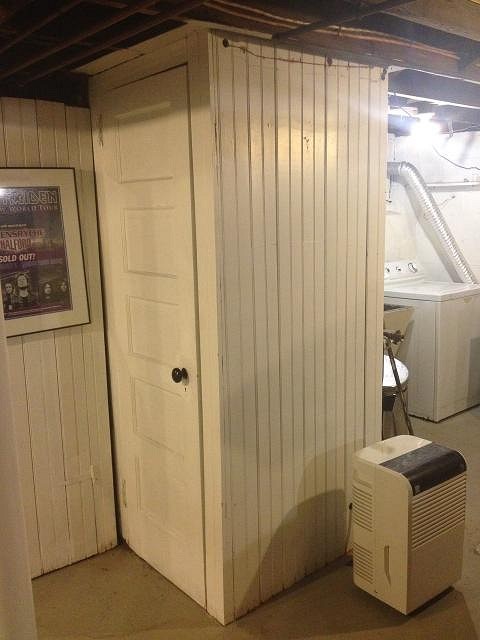
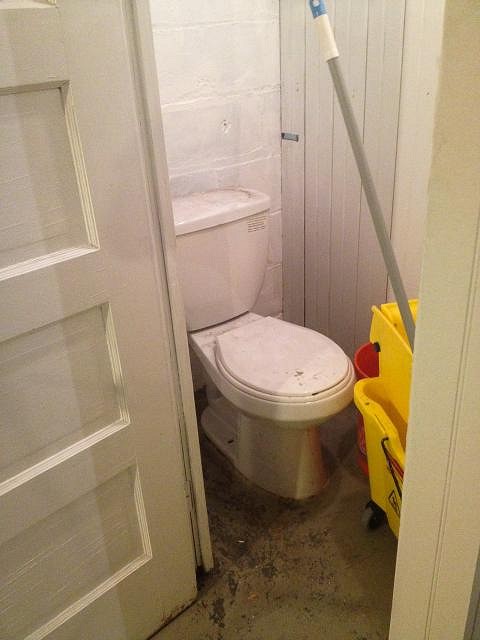
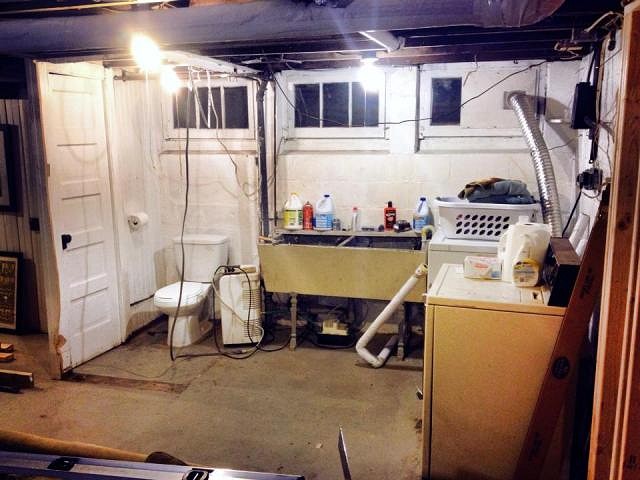
Demolished the outhouse.
Goodbye outhouse; hello nautical themed bathroom/laundry room.
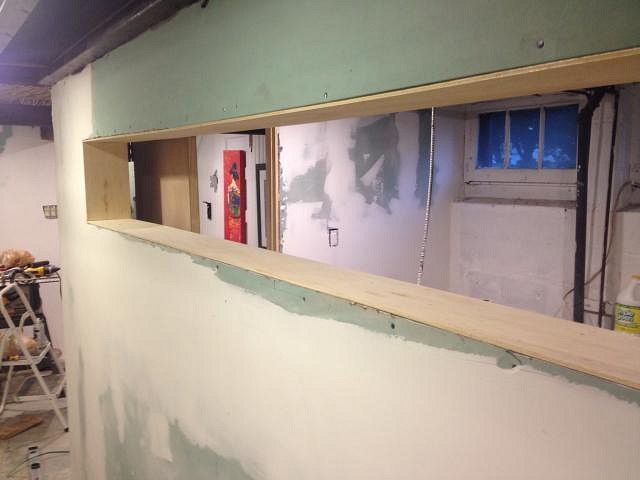
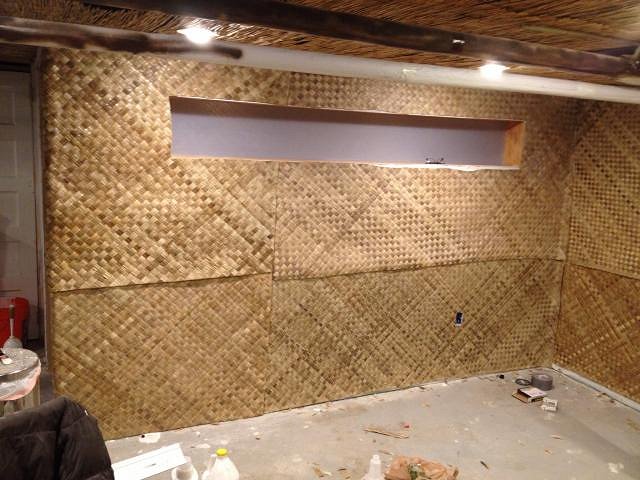
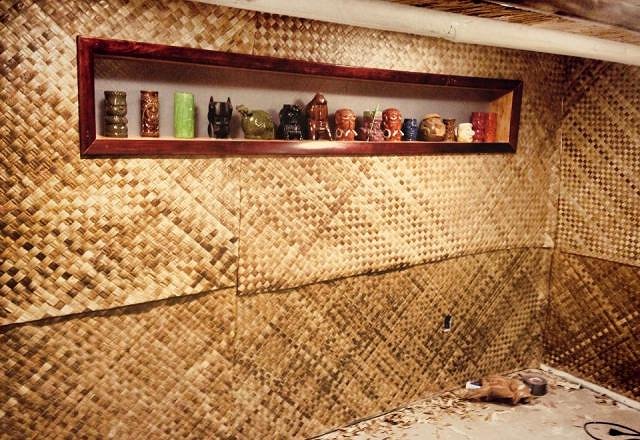
I hammered out the wall between the Pirate bathroom/laundry room and the Tiki Lounge. The 94-inch shelf in the top half is going to display some of my cooler Tiki mugs. The goal is to put an opaque acrylic window behind the display case (with hinges to switch out the mugs) and a clear one in front. This should allow some natural light into the Tiki Lounge without giving people a peep show. The plan is to put LEDs in the display case to light the mugs. We'll see how that pans out.
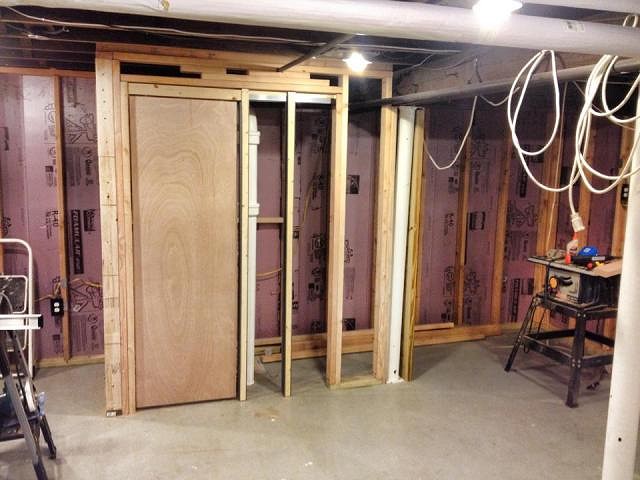
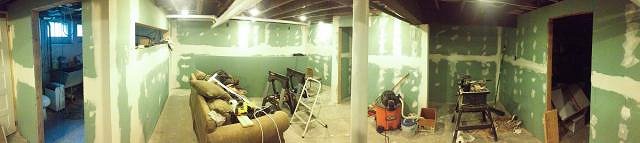
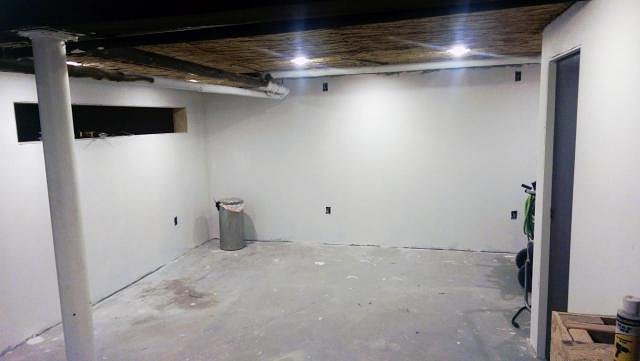
Spent an entire weekend running 250 ft of cable to 18 recessed lights, got power to laundry room, finished rebuilding the rotted closet, finished the pocket door frame for the secret access way and finally finished all the framing. All ready for a bigger breaker box and sheet rock.
Sheet rock is a hell of a lot more fun to work on than wood, but a ton more tiring too.
Plastering sucks
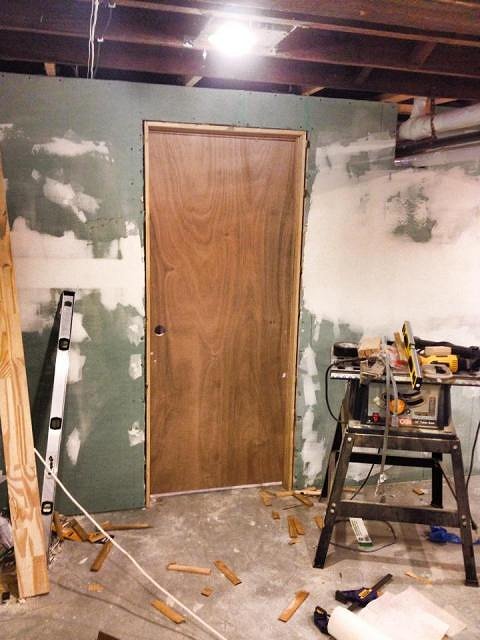
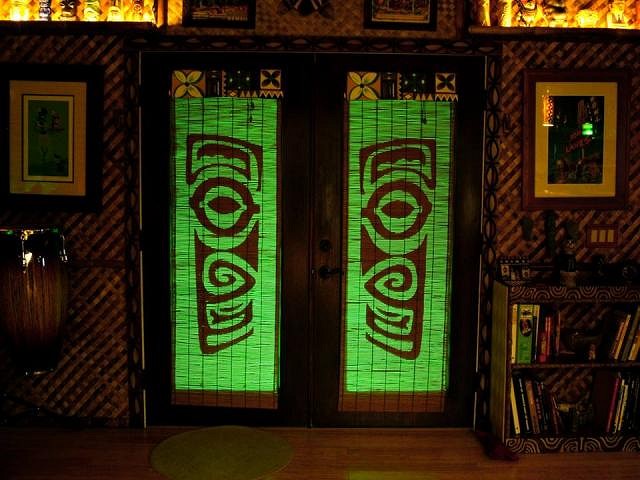
Had to custom build two doors from scratch, since the ceilings are so low.
|
|
EJ

El Jefe
Posted
posted
on
Mon, Jun 30, 2014 9:39 AM
Looks like a good start. Thanks for sharing. |
|
L

littlegiles
Posted
posted
on
Mon, Jun 30, 2014 10:51 AM
Awesome start!! Can't wait to see it get some tiki skin on those bare bones.
|
|
K

Kanu
Posted
posted
on
Mon, Jun 30, 2014 11:16 AM
Did you have any initial thoughts on the ceiling? With it being that low, I'm assuming drywall or drop ceiling as a starting point is out of the question (since you'd lose a few inches of space). I'm thinking spraying black matte paint up there would be a good starting point. It'd be your choice whether to re-route any electrical/plumbing beforehand for the sake of aesthetics. But the black could give you an easy backdrop to hide a lot of boring "house-stuff" and let you play mix-and-match with ceiling materials. Bamboo grids, fish netting, tapa, etc. I think keeping it dark otherwise is key, though. For your supports and PVC piping, a faux-bamboo/wood paint job might work well... maybe a rope wrap. Can't wait to see how it progresses! |
|
L
liabungalo
Posted
posted
on
Mon, Jun 30, 2014 11:34 AM
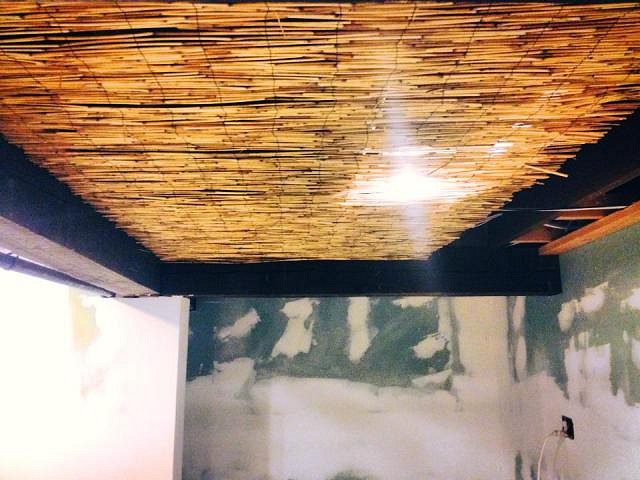
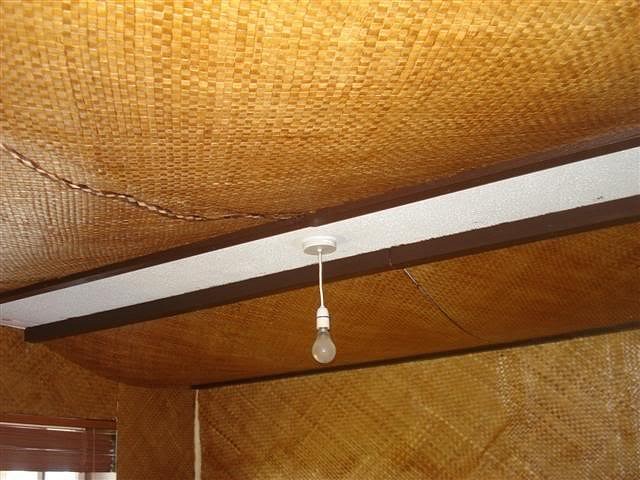
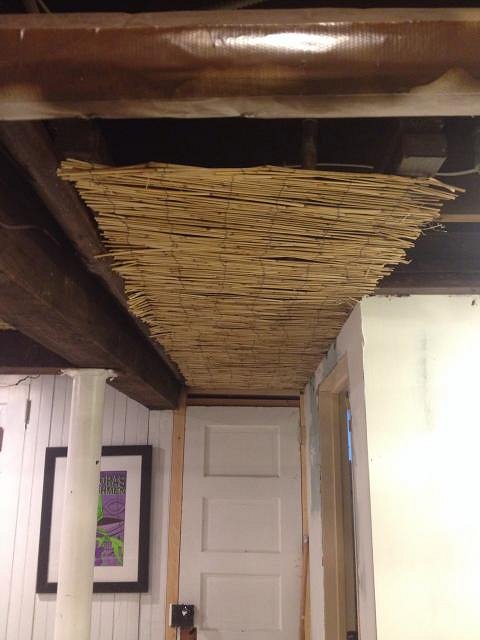
@Kanu: You have no idea how much thought I've put into the ceiling. It's really the toughest challenge I have, but I think I'm overthinking it. I don't want to use sheet rock because I don't want anything too permanent (who knows when an inspector might make a surprise appearance and I want access to the pipes). Drop ceilings just suck; even black ones. So what I'm going to test out tonight, is I'm going to drop the ceiling by an inch and a half using 2x4s to try to clear the shorter water pipes and then try stapling on a 4x8 section of reed fencing from Home Depot. It seems to work for other people here and since the studs and ceiling are already dark brown, I don't think you'll be able to see much. Also, it will allow me to do a proper trim around the top of the sheet rock, which is pretty amateur looking. Hopefully it works. It would definitely be a lot cheaper. [ Edited by: liabungalo 2014-06-30 11:34 ] [ Edited by: liabungalo 2014-06-30 11:51 ] |
|
K
Kanu
Posted
posted
on
Mon, Jun 30, 2014 12:20 PM
I agree with your assessment of the sheetrock. Even beyond inspection, an 83 year old home may have certain "quirks" that may need to be addressed easily. I think the reed fence idea is great! You'll be the best judge on whether that's the solution for the full ceiling... or if you'll want to change it up a little (for example, a slightly different ceiling over the bar from what's over the sitting area, etc.). Maybe find an organic way to transition (hanging thatch, bamboo trim, or something). Oh, and in regards to where your sheetrock meets the ceiling... it's amazing what a well placed rope or bamboo pole can hide! It's like tiki crown molding! |
|
L
liabungalo
Posted
posted
on
Mon, Jun 30, 2014 12:42 PM
@Kanu: I completely agree about the trimming. I just didn't want the sheet rock to die at the studs, if you know what I mean. You can see the light from the other side of the wall, etc. I think the reed should give me a nice line where the ceiling meets the sheetrock without going overboard. |
|
E

ErichTroudt
Posted
posted
on
Mon, Jun 30, 2014 12:48 PM
Congrats liabungalo, The fact the you went out of your comfort zone, and learned to do all the construction is great. Good job on taking your time and doing it how you want it. I look forward to seeing the progress.... Erich |
|
V

VampiressRN
Posted
posted
on
Mon, Jun 30, 2014 2:13 PM
Wow...you have done a lot of great work for a DIY and learn as you go project. CONGRATULATIONS. I also like the plan for your ceiling. I am looking forward to more pictures and explanations of your work. |
|
H

Humuhumu
Posted
posted
on
Mon, Jun 30, 2014 2:31 PM
Oh how wonderful, congratulations! That's a lot of hard work, now you get to start having some real fun. Regarding the low ceilings: one thought is that you could just embrace it and have fun with it. Put a bunch of jungle foliage up there, and make people have to bend over a bit to get around the room. This only works if you have easy access to ample seating for everyone, but it can add to the otherworldly feel. My initial inspiration to have a home bar (which ultimately led me to the world of tiki) was a housewarming party I went to. The house had a weird little bar room with ceilings even lower than yours. You had to walk in hunched over until you got to the bench seating along the wall. It was so crazy, I knew I had to have one of my own. When I bought my first house a few years later, I didn't have a room with crazy low ceilings, so I had to make do and make it crazy with tiki instead. You lucky duck, you get to have both! More practically: my current tiki bar has about 7.5' ceilings, low enough I can't go crazy up there. The hanging elements and lights are put in strategic spots where they aren't in the way; most of the light comes more from unobtrusive halogen spots that I can aim exactly where I want them without worrying about hitting someone's head. |
|
L
liabungalo
Posted
posted
on
Mon, Jun 30, 2014 9:33 PM
Thank you so much for the great feedback. I went to Home Depot today and bought four 2x4s and a roll of the smaller 4x8 foot reed gate and it looks pretty awesome on the ceiling. I may need to drop it another inch and a half to clear some pipes, but this should work. Best of all, it got the approval of the wife. The only hiccup is that you can still clearly see the beams from below. I'm probably going to have to pull the reed down and spray paint the new 2x4s brown, as well as all the 2x4s and light casings. Should be worth it in the end. Should I be worried about fireproofing? This stuff is basically kindling, but I'm not sure there's much I can do to make it safer, other than use LEDs and trust that my wiring is solid.
[ Edited by: liabungalo 2014-06-30 21:33 ] |
|
PP

Pele Paul
Posted
posted
on
Mon, Jun 30, 2014 10:10 PM
I believe there is something you can brush on or spray on to make the reed fire retardant possibly at Home Depot? |
|
K

Kon-Hemsby
Posted
posted
on
Tue, Jul 1, 2014 4:16 AM
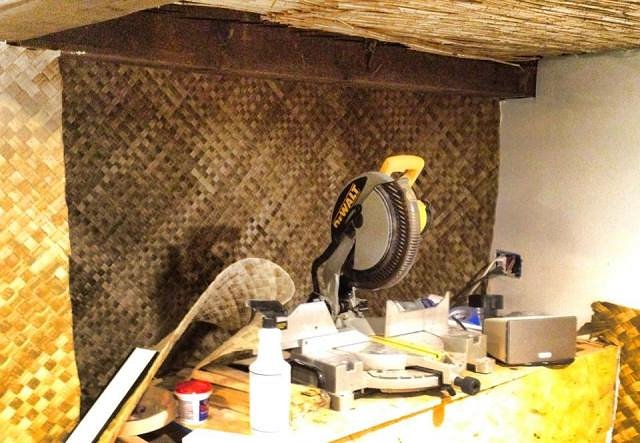
That is looking amazing. I huge task you're undertaking but it's looking great already. I also had a low ceiling and was worried about thatching, so I fixed sone Lauhala matting to hardboard, stained it and fixed these to the ceiling. Here is a mid build shot. |
|
H
Humuhumu
Posted
posted
on
Tue, Jul 1, 2014 5:34 AM
Here's what I use: No-Burn 1102A Original Fire Retardant Spray, 32-Ounce by No-Burn http://www.amazon.com/dp/B003M8G39E/ref=cm_sw_r_udp_awd_.OQStb1H8WHD3 |
|
R

RevBambooBen
Posted
posted
on
Tue, Jul 1, 2014 9:30 AM
also try http://www.flamestop.com |
|
L
liabungalo
Posted
posted
on
Tue, Jul 1, 2014 9:55 AM
Kon-Hemsby: My plan was to use lauhala, but I need to keep finances in check and that costs a bit more. What type of hardboard did you use? I'm finding most 4x8 sheets to cost about $25 and that will really balloon my costs. Also, it's a lot easier to maneuver the reed around pipes since it's flexible. That's not the case with hardwood, which would need to be fairly level. But I am open to the idea down the line. |
|
L

LoriLovesTiki
Posted
posted
on
Tue, Jul 1, 2014 4:41 PM
It's always nice to see another tiki lover from NJ! Your build is off to a good start. Take a look at my build and if you have any questions shoot me a PM and I'll be happy to answer them. |
|
K
Kon-Hemsby
Posted
posted
on
Wed, Jul 2, 2014 12:56 AM
I just bought the cheapest hardboard I could find. Sorry I don't rember the cost, but then I only had about 10ft by 20ft to cover. |
|
L
liabungalo
Posted
posted
on
Wed, Jul 2, 2014 7:20 AM
I went a little crazy last night and pulled down the reed covering and mounted 2 stacked 2x3s to the studs on the ceiling to lower it by three inches, clearing all the smaller water pipes. I figure I can either staple the reed directly to the 2x3s or eventually put up hardboard. Then my anal retentiveness kicked when I noticed that you can see the new wood and wires through the reeds. I went to Home Depot and bought Espresso-colored satin paint for like $8 a quart and started painting everything that wasn't brown on the ceiling. Turns out the color matches the studs perfectly. I think I'll keep the reeds down until I get some fireproofing supplies in. |
|
V
VampiressRN
Posted
posted
on
Wed, Jul 2, 2014 8:57 PM
There is a thread on this board somewhere that promoted Tiki decor on a budget, it was very helpful to builders. I will try to find it...after all, who doesn't want to save a buck but still have a great lounge. Wish me luck...I'm going dark!!! |
|
V
VampiressRN
Posted
posted
on
Wed, Jul 2, 2014 9:01 PM
The gawds were kind to me tonight....I found it on my first search. Hope it helps, plus you can add ways you have been able to stay in check on your budget to help others. http://www.tikicentral.com/viewtopic.php?mode=viewtopic&topic=20594&forum=18&start=0 |
|
K
Kon-Hemsby
Posted
posted
on
Thu, Jul 3, 2014 4:21 AM
Just an idea, but would hessian, fixed to board and then painted, be a sufficient solution? |
|
S

SufferinSimon
Posted
posted
on
Thu, Jul 3, 2014 2:56 PM
Enjoying your progress pics so far! I'm looking to do the same with polystyrene insulation |
|
L
liabungalo
Posted
posted
on
Fri, Jul 4, 2014 2:05 PM
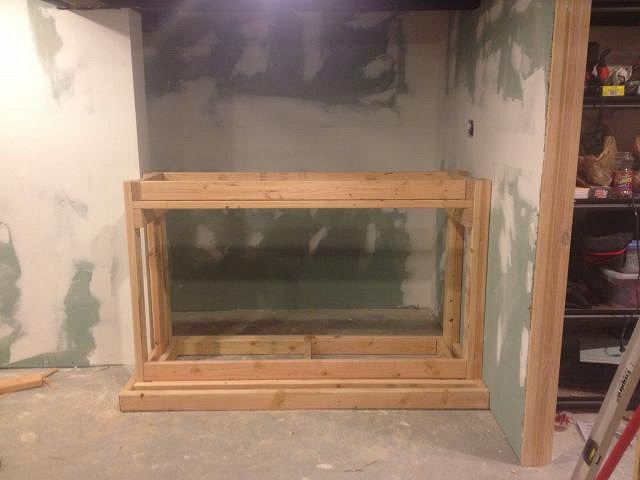
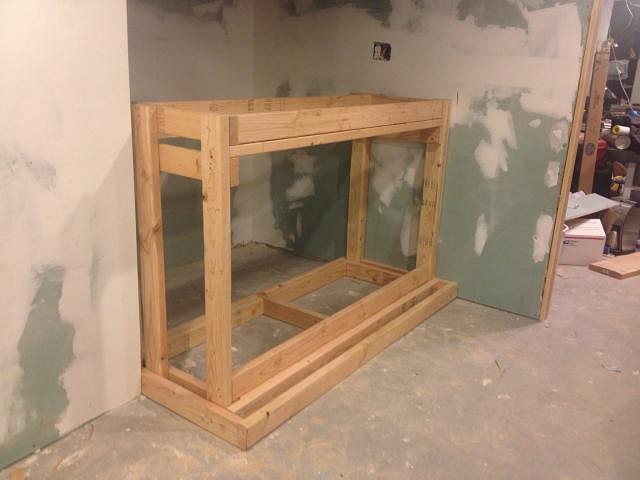
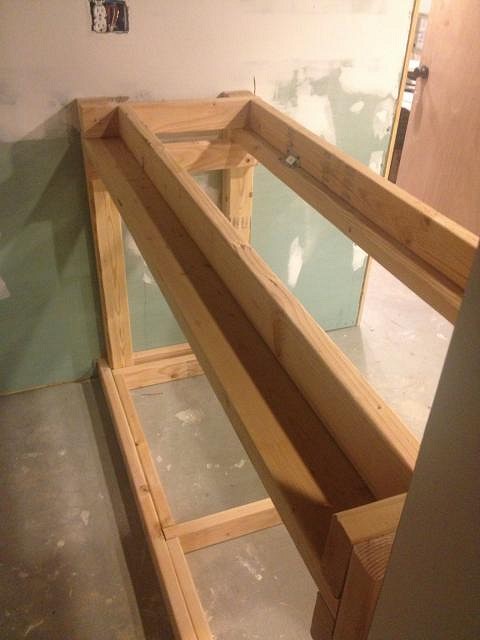
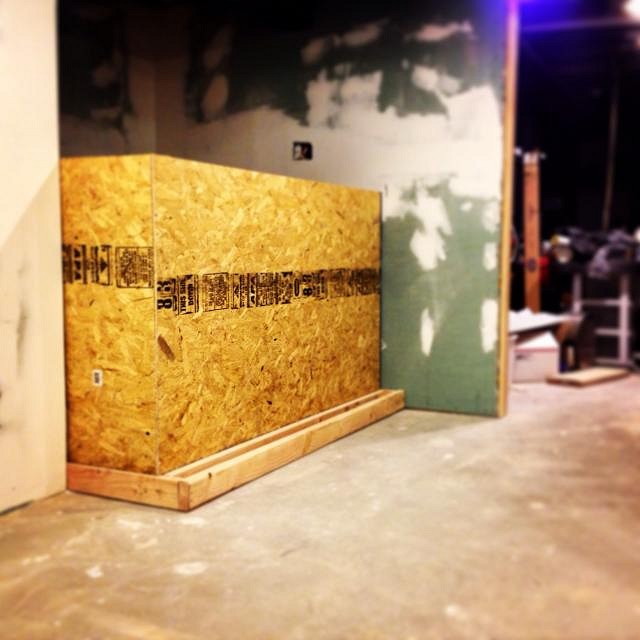
Spent 8 hours cutting and framing out the actual bar. Looking good so far. Need to find a pick up truck to get plywood to finish it off tomorrow.
[ Edited by: liabungalo 2014-07-07 08:12 ] |
|
L
littlegiles
Posted
posted
on
Mon, Jul 7, 2014 7:49 AM
Looking nice. What's the plans for under bar storage and are you going to have shelving on the wall behind the bar? Just curious and hard to tell spacing in the photos. -Dale |
|
L
liabungalo
Posted
posted
on
Mon, Jul 7, 2014 8:15 AM
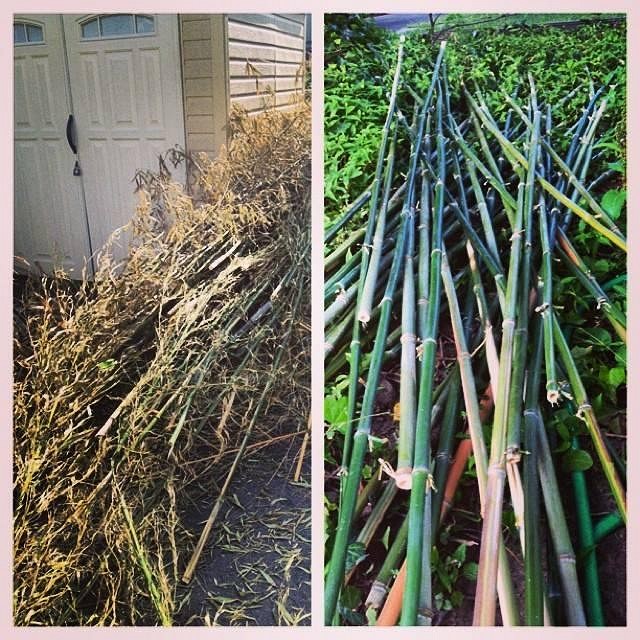
@littlegiles: The plan is to put shelves in and finish the inside of the bar too. So I will have plenty of storage. Still trying to figure out what to do with the top of the bar. Would love some distressed wood finish or something. I haven't decided what to do behind the bar. It's a tight fit and I don't want to make it tighter. Perhaps a painting to start out and then maybe some shelving, if I can find something narrow. After talking about the project to my neighbor, he informed me that he had a ton of bamboo growing behind is garage. So I spent a good chunk of the day yesterday harvesting and shucking bamboo. Got about 60 8ft poles of varying diameter out of the job. Now I just have to figure out what I'm going to do with them.
|
|
L
liabungalo
Posted
posted
on
Sat, Jul 12, 2014 2:35 PM
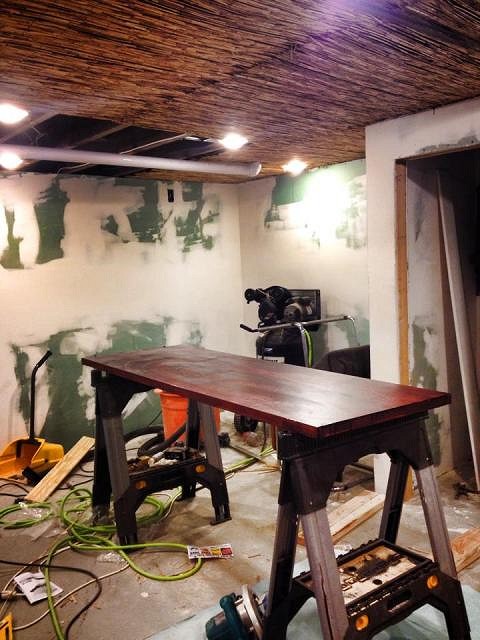
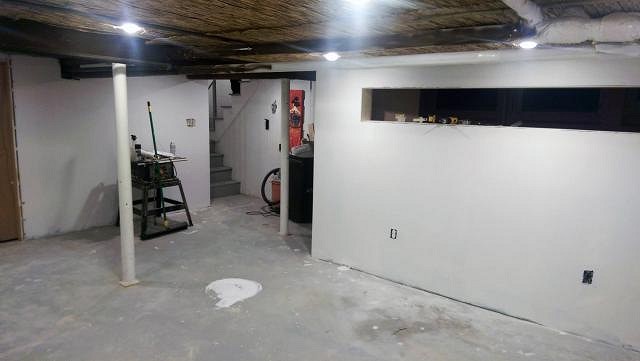
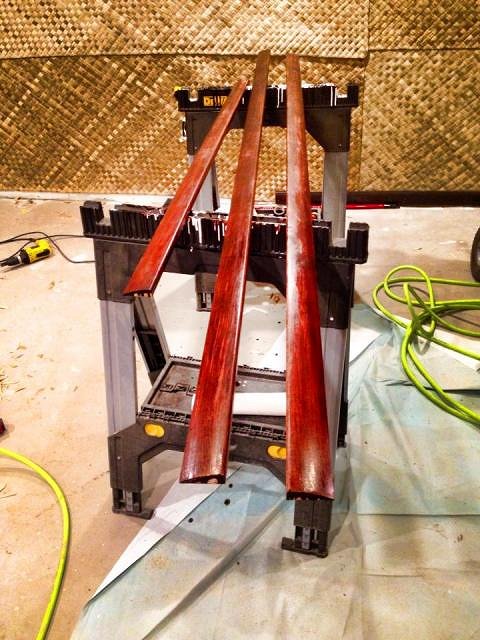
60% of the ceiling is done and I just started staining the doors Mahogany.
|
|
V
VampiressRN
Posted
posted
on
Sat, Jul 12, 2014 4:51 PM
Nice job...so fun to watch new builds. Congratulations on scoring that bamboo. |
|
L
liabungalo
Posted
posted
on
Mon, Jul 21, 2014 9:05 AM
So I have hit a slight snag. Due to the recent natural disasters in the Philippines, the amount of lauhala and other similar wall coverings being shipped to the US has shrunk to near non-existence or the price has skyrocketed astronomically. The only thing readily available is off sizes that would lead to a lot of wasted material. A few weeks back, I noticed that places like Forever Bamboo had been listing lauhala as out of stock for a while. Oceanic Arts confirmed it last Friday and said it could be months, without a real timeline. I could get a lot of 3'x50' and try to stretch my trim by 6-8 inches or just wait it out and paint the walls a brownish color. Fun times. |
|
L
liabungalo
Posted
posted
on
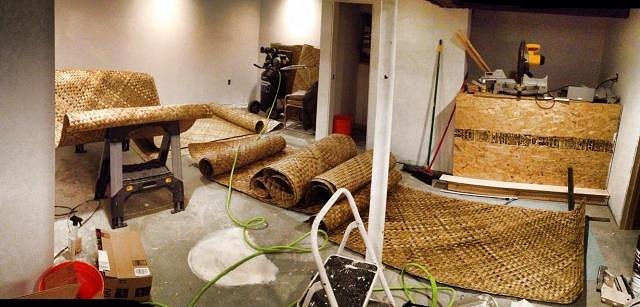
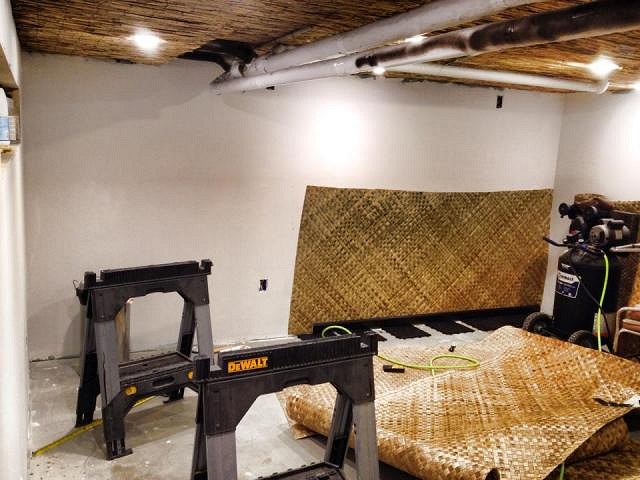
Mon, Sep 15, 2014 6:08 AM
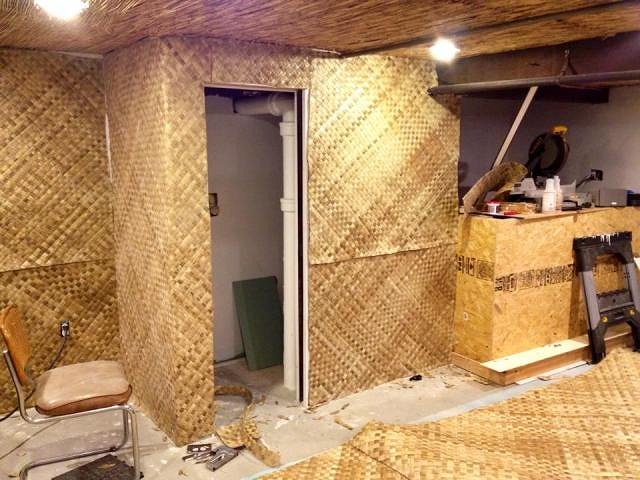
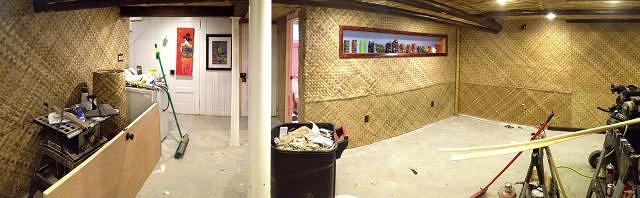
Short update Run of rattan in front of bathroom is in place. Finished the top, bottom and sides of the Tiki shelf. Just need to buy an opaque window. I lowered the ceiling in front of it by 3 inches to clear the pipes and I'm 90% done with the ceiling. We've got 165 pounds of lauhala and bac bac wall covering in the garage ready for fireproofing. Spent the night putting primer on the walls in preparation for ten tons of contact cement. The end is nigh.
|
|
L
liabungalo
Posted
posted
on
Tue, Sep 16, 2014 6:51 AM
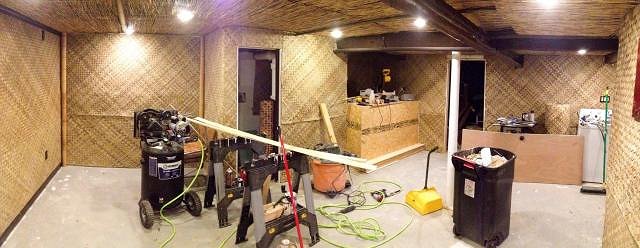
Made a ton of progress yesterday. Took forever, but I finally got 20 sheets of 4x8 lauhala from Forever Bamboo. I tried to wait for Oceanic Arts to replenish its supplies, but they told me that it could take up to two months to get another order in from the Philippines. One major thing I learned is that lauhala is very easy to cut and does not fall apart as easily as I feared. Just make sure you use a sharp straight blade when you cut. Also, make sure you remove your outlets before putting up the lauhala. :) The worst part was fireproofing the wall coverings. Took close to 24 hours to spray and dry both sides of each sheet. Took a while, but I got the first chunk of Lauhala up on the wall. Contact cement is a terrible thing to play with. There's got to be an easier way. Gave up on the contact cement and tried 3M spray adhesive, but the overspray got all over my hairy Greek arms. Finally gave up and started using clear-dry Liquid Nails along with a million staples courtesy of my trusty Harbor Freight 2-in-1 staple air gun. Aquarium alcove is 100%. Waiting on bamboo trim. Bar passageway is covered. Had to be careful that the staples didn't hit the pocket door. Used two whole tubes of Liquid Nails. Received a 93"x13" custom-cut 1/8-inch acrylic sheet from TAP Plastics for the privacy window on the Tiki shelf. It allows a little bit of light in from the adjacent laundry room, but you can't see through it. It's 60% opaque and typically used for light-through signage. I'm going to staple an 8-ft run of LED tape inside for ambient light. |
|
M

MaukaHale
Posted
posted
on
Tue, Sep 16, 2014 9:13 AM
That is a lot of matting! I'm anxious to see the finished product. |
|
L
liabungalo
Posted
posted
on
Tue, Sep 16, 2014 1:36 PM
I'm currently torn as to whether or not to trim the doors and ceiling with traditional moulding or 3-inch bamboo. |
|
M
MaukaHale
Posted
posted
on
Tue, Sep 16, 2014 3:14 PM
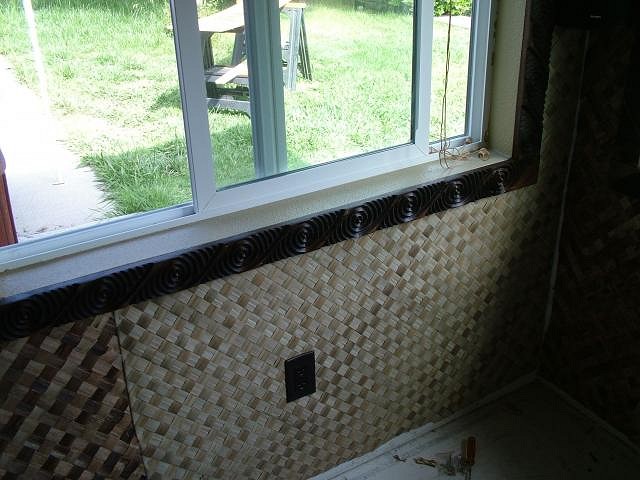
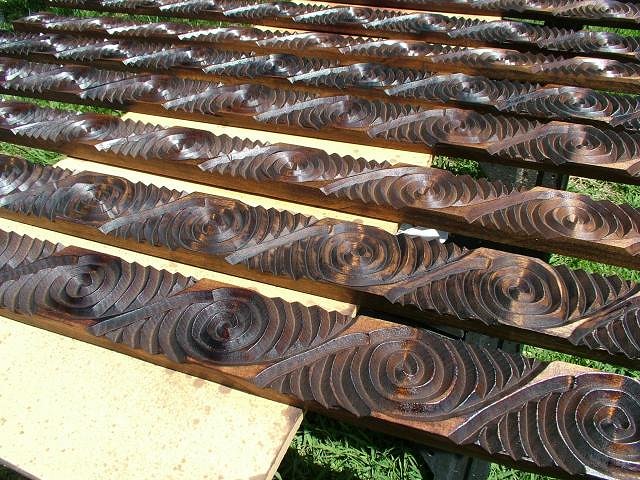
Its very difficult to get a clean edge on the door jam using bamboo. Another idea might be to use wood trim that has a design carved with a router. Here is what Monkeyman did in the South Pacific Room.
Here is an idea for trim. Monkeyman used this around his windows.
That pattern isn't that difficult to make once you get used to the router. |
|
L
liabungalo
Posted
posted
on
Wed, Sep 17, 2014 6:52 AM
Barback is almost finished. Last four chunks of lauhala are ready for fireproofing. Getting my stain on. Time to trim. Wall O' Mugs is almost done. Just need to plug some holes in the trim. Threw up a few random mugs to test it out. Wall O' Mugs side view. |
|
G

Greg_D_R
Posted
posted
on
Wed, Sep 17, 2014 3:02 PM
Loving the wall of mugs! Keep at it, I know it's going to be great when you're done. |
|
L
LoriLovesTiki
Posted
posted
on
Wed, Sep 17, 2014 4:20 PM
Love the wall of mugs! Wish I'd seen that when I was framing the hut. Fantastic idea. |
|
L
liabungalo
Posted
posted
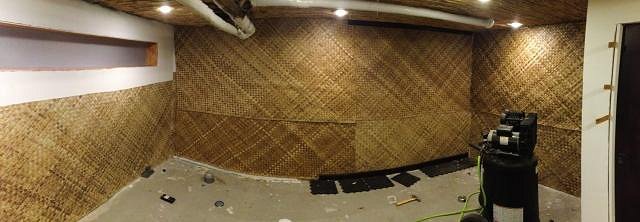
on
Thu, Sep 18, 2014 1:37 PM
Lauhala is 100% installed. Can't believe it's all up. Just need to get the rest of the bamboo trim and start putting down the modutile floor.
|
|
PP
Pele Paul
Posted
posted
on
Thu, Sep 18, 2014 9:13 PM
wow!! thats alot of work!!! great job! makes me wanna go outside to my little hut and work on it right now!!! cant wait to see the finished product! |
|
L
liabungalo
Posted
posted
on
Thu, Sep 18, 2014 9:21 PM
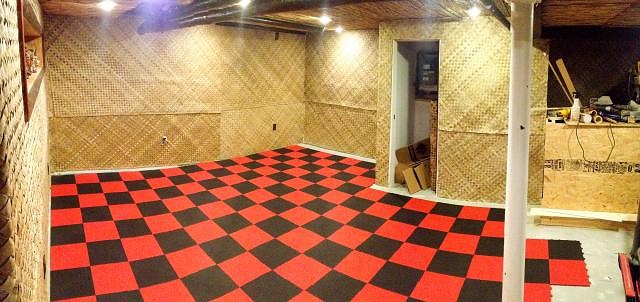
I'm so glad you mentioned the floor, because I just spent the whole night putting down 200 modutiles and I still need 125 or so more. I was going to go with epoxy, but I take on a little water every now and then, so I figured I might as well go with the waterproof basement flooring.
|
|
PP
Pele Paul
Posted
posted
on
Thu, Sep 18, 2014 9:23 PM
HOLY COW!!!!!!!!!!!!!! THATS AWESOME!!!!!! you mean theres no open 24 hour tile and flooring store in NJ? |
|
L
liabungalo
Posted
posted
on
Thu, Sep 18, 2014 9:28 PM
Hahahahaha. I'm so ready to be done with this. I love how it's turning out, but it's been almost a year solid of non-stop work and I have never done construction before. I can't wait to just trim this thing out and start enjoying it. |
|
PP
Pele Paul
Posted
posted
on
Thu, Sep 18, 2014 9:34 PM
well for someone who's never done construction, your doing a killer job on everything!!!! |
|
L
liabungalo
Posted
posted
on
Fri, Sep 19, 2014 8:44 AM
What do you guys recommend for ceiling and baseboard moulding? I was originally going to use generic flat wood, but then had second thoughts when I saw how nice the bamboo poles looked. That was until I saw how inconsistent the half rounds were. I've since started thinking about using bamboo slats for the ceiling and door trim since it appears they are more consistent. Has anyone tried that before? I'm not sure if 2-inches is wide enough to cover the door, but it might be worth it for the ceiling. I appreciate the tips to build my own trim using my router and some creativity, but I have neither the time or patience right now to learn how to use my router and dremel to carve. It's a ton of trim and I am looking for something as a stopgap until I can create something ore impressive. |
|
M
MaukaHale
Posted
posted
on
Fri, Sep 19, 2014 11:58 AM
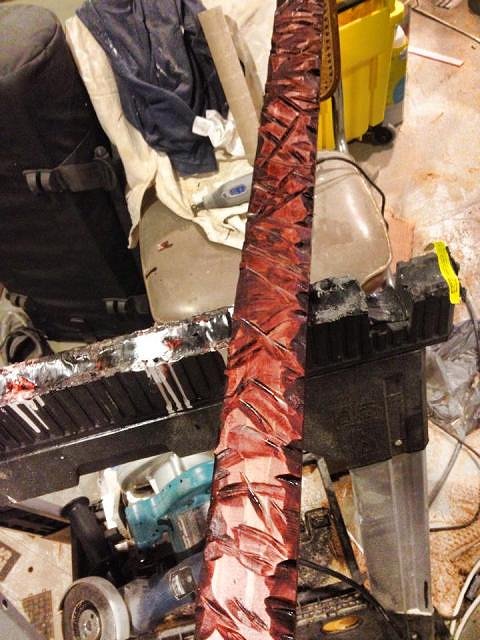
A simple solution (that could easily be removed later) would be to use pine 1 X 3 or up to 1 X 6 inch boards (or any other size) and distress the wood with a hand electric grinder. If you work the grinder in one direction it will look like hand carved rustic wood. Here is a picture of 1" X 2" strips I did for the ceiling.
|
|
L
liabungalo
Posted
posted
on
Fri, Sep 19, 2014 12:10 PM
@MaukaHale: Could you define hand electric grinder? I have a Bosch electric grinder for cutting metal on my motorcycles and I wouldn't dare take that to wood. I'd destroy it. Are we talking about the same thing? http://www.amazon.com/Bosch-1375A-2-Inch-Angle-Grinder/dp/B00004SUOU |
|
M
MaukaHale
Posted
posted
on
Fri, Sep 19, 2014 1:18 PM
The grinder in the Amazon link is what I'm talking about. You will need to buy a sanding disc to replace the cutting edge. I use a flap disk like the one in this link.
|
|
L
liabungalo
Posted
posted
on
Fri, Sep 19, 2014 9:03 PM
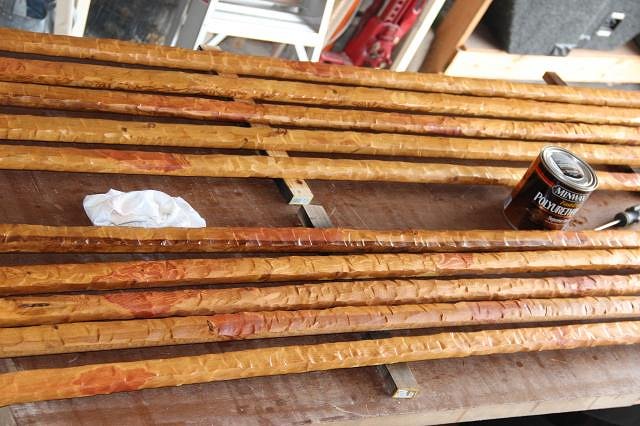
Great call, MaukaHale, spent a half hour tonight doing a test 1x3 and it looks really badass. Going to do the rest of the ceiling and door trim like this and then consider whether I want to do some 1x6s for the baseboard.
|