Tiki Central / Home Tiki Bars
Hula Sue's South Seas Hideaway
Pages: 1 2 3 4 5 6 7 8 9 10 456 replies
|
J

Jungalero
Posted
posted
on
Thu, Oct 23, 2008 7:07 AM
I appreciate the appreciation! Slightly off topic, but will there be any Tiki featured in the new Madagascar film, a la the bar scene in the first movie? Cheers, |
|
MPP

Mr. Pupu Pants
Posted
posted
on
Thu, Oct 23, 2008 4:12 PM
My bother is up here in Seattle as part of a press tour leading up to the release of Madagascar 2. We had a Family and Friends screening of the movie at Pacific Place Mall. It's a GREAT movie (of course I'm biased) and in every way, it's better than the first one. |
|
J
Jungalero
Posted
posted
on
Fri, Oct 24, 2008 7:48 AM
Heh! That sounds funny, I'll look forward to seeing it when it makes it's way across the pond. The penguins are great characters. When I told my girlfriend your brother does the voice of Skipper, she freaked out a little bit (she loves the first movie): she said it's like six degrees of tiki separation! Have a great weekend, |
|
SF

Slacks Ferret
Posted
posted
on
Mon, Nov 3, 2008 7:43 PM
Any update? It looks great so far! |
|
TT

Tucson Tiki
Posted
posted
on
Mon, Nov 3, 2008 8:35 PM
PuPU, People are watching. I am from Tacoma and I know of the cool resturant off 38th St in the Lincoln District that you got your stock from. I am jealous in a big way. My buddy always told me of that Chinese place but I never went to check it out. Damn! I wish I had. Good luck on your cool pad. TT |
|
S

Sneakytiki
Posted
posted
on
Sat, Nov 8, 2008 12:05 AM
Looking fantastic! |
|
T

tikiskip
Posted
posted
on
Tue, Nov 11, 2008 6:53 AM
Great job PuPu!! |
|
MPP
Mr. Pupu Pants
Posted
posted
on
Mon, Jan 5, 2009 6:24 PM
Hi Guys, sorry I haven't posted in a while (and thanks very much for the encouragement and feedback.
[ Edited by: Mr. Pupu Pants 2009-01-05 18:30 ] |
|
BK

Big Kahuna
Posted
posted
on
Tue, Jan 6, 2009 3:13 PM
We need more pics!!!!!!! |
|
J
Jungalero
Posted
posted
on
Wed, Jan 7, 2009 7:51 AM
Looking very cool! Can't wait to see the real thing. J. |
|
D

Danno
Posted
posted
on
Wed, Jan 7, 2009 6:42 PM
AWESOME!! Great job, Mr. Pupu Pants. You have amazing talent! |
|
RH

Robb Hamel
Posted
posted
on
Tue, Jan 13, 2009 4:25 PM
I MUST one day experience the MOOD of this place. I hafta figure out a way to see it in person when it's done. Are you gonna give tours to TCers? |
|
MPP
Mr. Pupu Pants
Posted
posted
on
Wed, Jan 14, 2009 12:11 AM
I am humbled. Robb, I would love to give you a tour if you're ever in the 'neighborhood'. |
|
MPP
Mr. Pupu Pants
Posted
posted
on
Mon, Jan 26, 2009 6:00 AM
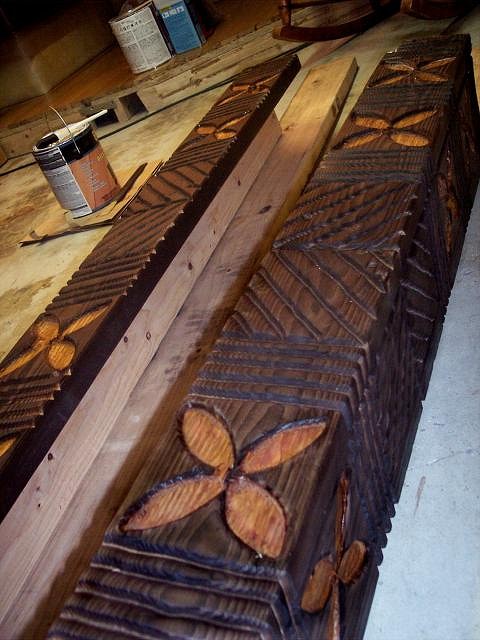
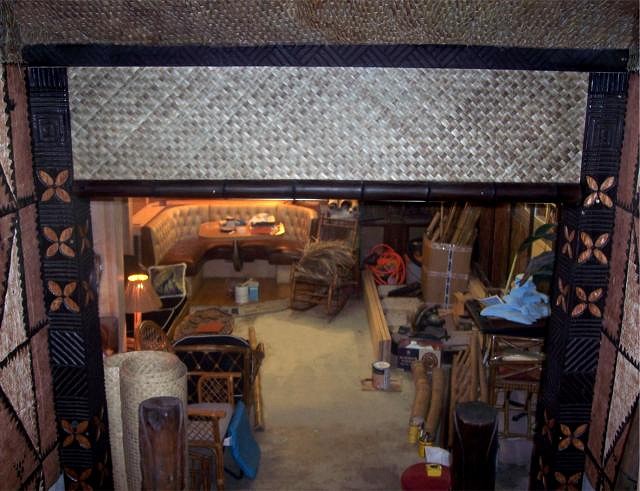
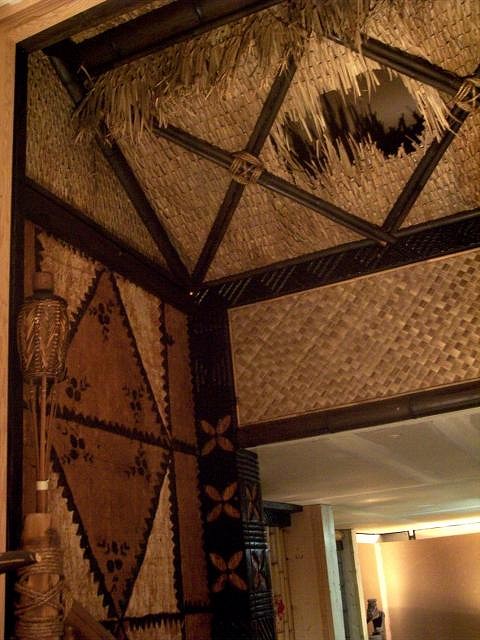
Some new pics of work on the basement 'entrance'. [ Edited by: Mr. Pupu Pants 2009-01-26 06:11 ] |
|
RH
Robb Hamel
Posted
posted
on
Mon, Jan 26, 2009 8:22 AM
NO,NO,NO,NO,NO,NO... NNNNNNOOOOO! I don't believe my eyes, they are lying to me. This whole thing is too awesome, and it cannot be real. The new posts are incredible touches, an excellent break from bamboo poles or totems. What gives you these superhuman skills of both design and construction??? |
|
P

palapala
Posted
posted
on
Mon, Jan 26, 2009 10:19 AM
OOOOH! PRiiiiTTY! |
|
4

4WDtiki
Posted
posted
on
Mon, Jan 26, 2009 10:38 AM
Those columns look great! Can you give some detail on yopur process? Like, chisel or router? And how did you bring out the grain? |
|
MPP
Mr. Pupu Pants
Posted
posted
on
Mon, Jan 26, 2009 1:50 PM
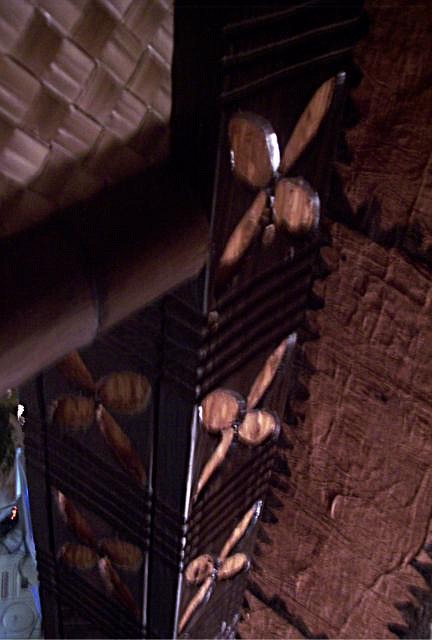
Dearest Robb, Palapala, 4WDTiki, you are all being waaaaaaaaaaaaaaay too kind (but I sure do appreciate the nice feedback --thank you :) ). Palapala, in my view, all of this stuff is god given :) 4WDTiki, I used a router for the lines (even to outline the flowers). I then used the tried 'n true propane torch technique. I torched the wood to the point that the burned surface starts puckering and then I wire brush away the charred remains to get that nice 'rise' out of the grain (since the grain burns slower than the meat of the wood). Sometimes I'll do this twice. Disneyland does this to some of it's woodwork but they more commonly use sandblasting to get the effect (ie--the beautifully textured wood railings and posts on some of the Fantasyland rides). For the flowers, I got out the chisels and, using the routered outline, chiseled them out to give them more of a concaved carved look and texture to add a contrasting look. I stained the poles a dark brown and 'stipple brushed' a golden oak stain on the flowers for contrast and to make them look warm but slightly faded and aged. On top of all that--a nice coat of satin polyurethane. [ Edited by: Mr. Pupu Pants 2009-01-26 13:59 ] [ Edited by: Mr. Pupu Pants 2009-01-26 14:00 ] |
|
L

leleliz
Posted
posted
on
Mon, Jan 26, 2009 2:08 PM
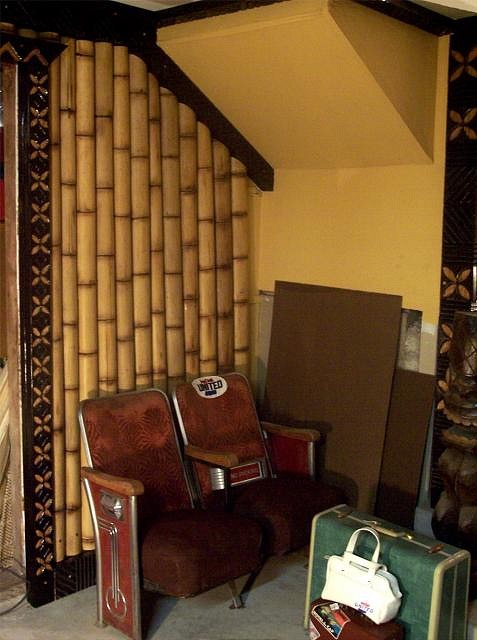
Your room is turning into one of my favorites on here.Such a great job! Did you ever post pics of any of the other rooms in your house? If not be sure to do so. Keep the pics coming! I like that you are using that padded diner bench set. Love the "hole" with the sky showing through. Nice touch! |
|
BK
Big Kahuna
Posted
posted
on
Mon, Jan 26, 2009 3:43 PM
After you're done practicing on your room, I'll give you my address & you can do mine! |
|
T

thisoldhippie
Posted
posted
on
Mon, Jan 26, 2009 6:30 PM
Just to let you know - I bookmarked this link because your room is awesome. I am very new to this site but want to build a tiki lounge in an extra bedroom that I have and you have given me even more inspiration than I had to this point. The connection that you have to Disney and what you have done and are doing in your house is awesome! I have one daughter who works for Disney World, (she hangs out with Mickey, Minnie, etc.) and a younger daughter who wants to work in concept, so believe me, I know where you are coming from, lol! (Maybe you can tell me what she needs to do i.e. school, etc). Anyway, this room is as good as I've seen at Disney and is absolutely fantastic! PLEASE keep posting pics!! |
|
B

Babalu
Posted
posted
on
Mon, Jan 26, 2009 7:17 PM
Dang Mr. Pupu...this place is HOT! Damn nice. I love that bit of twilight showing through in you concept...choice. Keep Posting! Welcome to TC thissoldhippie...love the name :lol: |
|
T
thisoldhippie
Posted
posted
on
Tue, Jan 27, 2009 5:35 PM
Thanks Babalu - love that one as well! My youngest daughter always calls me an old hippie, so I decided to run with it. I LOVE THIS SITE! It has become my home away from home to escape the realities of work and politics. I save my favorite pics and just spend time looking at them. Am I hooked on Tiki??? Is this what it's all about?? |
|
V

VampiressRN
Posted
posted
on
Thu, Jan 29, 2009 5:29 AM
It just gets better and better...really nice job. You are definitely an inspiration. PLUS>>>>you have the best name on the board. :D [ Edited by: VampiressRN 2009-01-29 05:30 ] |
|
MPP
Mr. Pupu Pants
Posted
posted
on
Wed, Feb 4, 2009 11:55 AM
Thank you all very much for the nice words. |
|
MPP
Mr. Pupu Pants
Posted
posted
on
Mon, Feb 9, 2009 11:09 PM
Bumping for my question. |
|
W

woofmutt
Posted
posted
on
Tue, Feb 10, 2009 11:40 AM
It would seem from the high level of detail and creativity you're capable of that you of all people would be able to figure out how to get what you want. But here's my 15 cent's worth... I've used all sorts of different things to age carvings, paintings, furniture, and natural mat like Lahala. Experimentation is best. Ralph Lauren Paint has several different aging materials. I've used the Smoke one and like the effect. Home Depot carries the Ralph paint line. Paint and wipe techniques generally work well: Apply a stain or thinned paint (I've also mixed water based stain and paint)and wipe off excess with a cloth. Whether the cloth is dry or damp or soaked in the material you're applying all depends on what sort of look you're going for. The surface of some natural materials can be resistant to taking stain so finishes have to sit on the surface. A full wipe will often remove everything applied but a patting technique will work. When I age something I don't want it to look like a piece of made in China "rustic" decor. Avoiding signs of brush strokes and wiping is important. Many surfaces in a bar that have acquired a genuine patina of age have often been cleaned over time so broad flat surface areas might be essentially clean with all the "age" showing in the cracks and edges. |
|
MPP
Mr. Pupu Pants
Posted
posted
on
Tue, Feb 10, 2009 1:24 PM
Thanks for the 15 cents Woofmutt. I really appreciate it. [ Edited by: Mr. Pupu Pants 2009-02-10 13:25 ] |
|
G

GatorRob
Posted
posted
on
Tue, Feb 10, 2009 3:15 PM
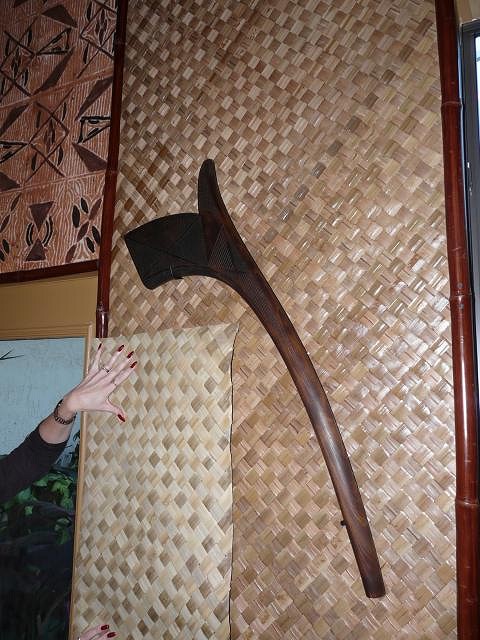
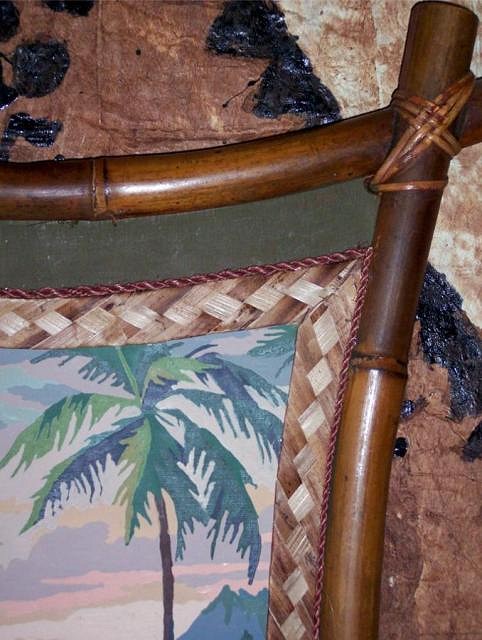
I can tell you what we did to "nicotine" age the lahala for our room. This came after many trials (and errors) with several products and at different mixtures. The winning combo we came up with was a 12-to-1 mix of poly to stain. Specifically, we used Minwax Red Mahogany stain and Minwax Clear Gloss poly. The goal was to give the lahala a rich, leathery feel like you'd get after decades of smokers. But without the smell. :) As for applying it, since we had a lot to do, we tried spraying it on with a garden sprayer, but the poly kept gumming it up and it didn't spray evenly anyway. We stayed clear of a brush to avoid brush strokes, so we decided to go the most labor intensive route (because we have nothing better to do I guess) and hand rubbed the mixture on with soft rags. We could get it in all the nooks and crannies that way. We went pretty light with it and wiped all the excess off. Didn't want to darken it too much. Here's a swatch of untreated lahala held up against a treated wall. The hand model is my lovely wife. :) The "unaged" lahala is rather flat, lifeless. The treated lahala takes on a deeper tone and has a light gloss to it (exaggerated by the flash). Here's a shot (flash again so you can see -- not a glamor shot) of part of the room so you can see the lahala color across a wall. The ceiling is a different material that is darker than the walls. I think it turned out pretty good. We're still in construction on the room. Lots more to put up on the walls and ceiling. [ Edited by: GatorRob 2009-02-10 16:54 ] |
|
T

TabooDan
Posted
posted
on
Tue, Feb 10, 2009 3:53 PM
That's a good tip GatorRob! Great way to age the matting. TabooDan [ Edited by: TabooDan 2009-02-10 15:54 ] |
|
MPP
Mr. Pupu Pants
Posted
posted
on
Tue, Feb 10, 2009 4:21 PM
Thank you Rob!! (and that lovely hand model of yours)! One question: did you try any other poly finishes (Satin, etc.) or was the gloss just right and you didn't feel the need? |
|
G
GatorRob
Posted
posted
on
Tue, Feb 10, 2009 4:53 PM
Honestly I'm not sure if we tried the satin. I have some so maybe we did. We did lots of combinations! But I wanted a slight sheen to it. It's not overly glossy though. Looks great when there's a low level colored light source (and there are quite a few) near by. We tried several stains... Bombay Mahogany, Dark Walnut, Red Mahogany. Ultimately went with the latter to get that slightest hint if red in there. We sanded and stained all the bamboo too. That's another time killer. Oh! I just re-read my original post and noticed I got the mix backwards. It's 12 parts poly to 1 part stain. Not the other way around! Otherwise your lahala would come out REAL dark. When the hand model comes home, I'll double check with her, but I'm 99% sure that's correct. I'll go edit my other post now... |
|
R

rocktiki
Posted
posted
on
Tue, Feb 24, 2009 1:39 PM
I love this place. I really wish I had a space to do that. You are doing a great job and I can't wait to see it finished. Keep up the good work. |
|
P
palapala
Posted
posted
on
Tue, Feb 24, 2009 8:10 PM
Aloha MR.3P, |
|
MPP
Mr. Pupu Pants
Posted
posted
on
Wed, Mar 18, 2009 1:03 AM
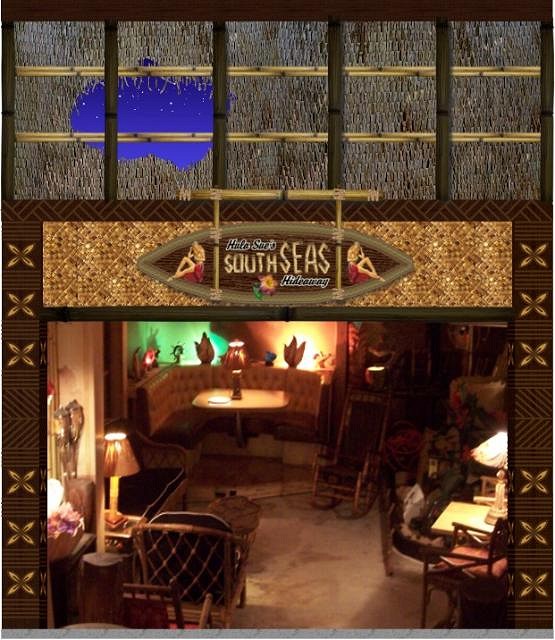
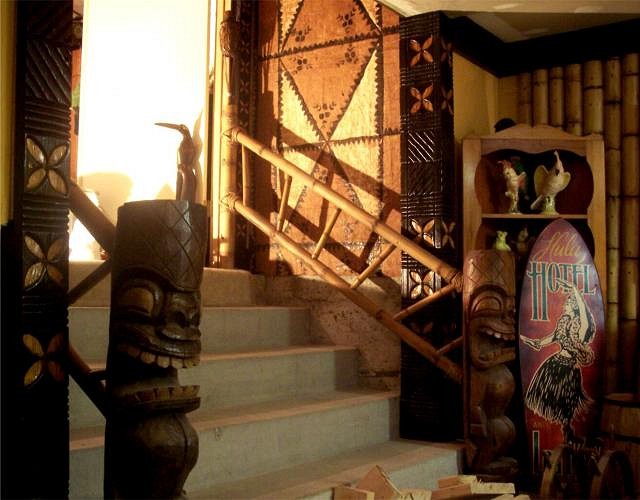
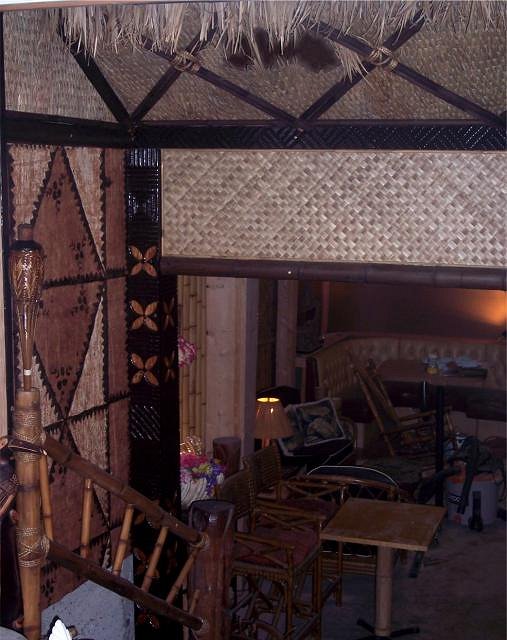
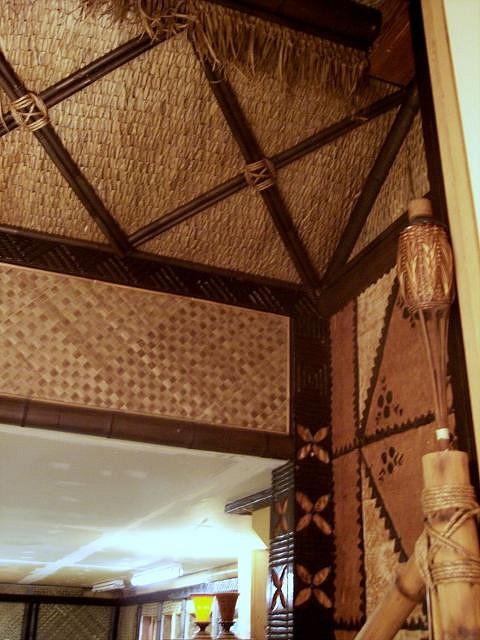
Aloha my friends! Got a few pictures of the entrance to post. To do: lava rock with 'natural' sills for tropical flowers creeping down the lower third of the wall as you come down the stairs, staining the lighter tiki to match the darker one, aged planks for surfacing the steps, and more. To do: Torches wired to be lit, sconce on wall, etc. To do: Dimly lit evening sky (curved graduated, painted MDF surface lit with colored flourescent tube) with several stars (fiber-optics) and/or moon showing through the 'hole' in the awning (evening light from this hole will also be directed to light the Hula Sue's sign that will hang at the center of the matting).
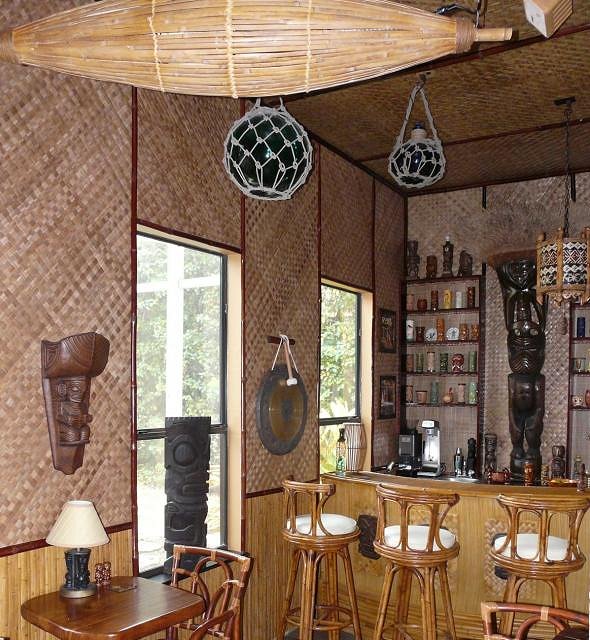
Here's an early one of the bar beginning to take shape. The hula girl masthead will fit in a lit alcove under the bar at the corner. More soon. Thanks again for the earlier comments!! [ Edited by: Mr. Pupu Pants 2009-03-18 01:17 ] |
|
L
leleliz
Posted
posted
on
Wed, Mar 18, 2009 10:01 AM
Always love your updates. The room gets better and better and its always impressive. Looking forward to the next round of photos. |
|
D
Danno
Posted
posted
on
Wed, Mar 18, 2009 11:24 AM
Ditto on leleliz's comments. Very, very nice! |
|
T

TIKIVILLE
Posted
posted
on
Wed, Mar 18, 2009 11:39 AM
keep posting the progress photos , very inspirational! |
|
M

machinelf
Posted
posted
on
Wed, Mar 18, 2009 11:51 AM
Absolutely incredible. This is exactly the sort of room I dream of having some day. Thanks so much for sharing your updates! |
|
M

Monkeyman
Posted
posted
on
Wed, Mar 18, 2009 2:18 PM
That is really nice. Excellent job. wow. |
|
MPP
Mr. Pupu Pants
Posted
posted
on
Wed, Mar 18, 2009 6:52 PM
Thank you all very much. Your comments made my day.
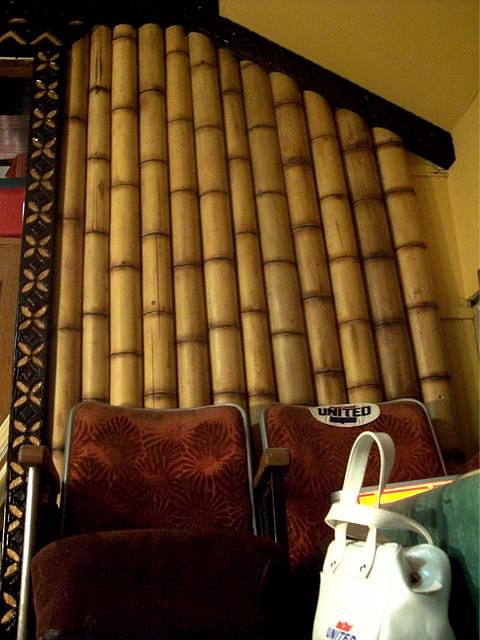
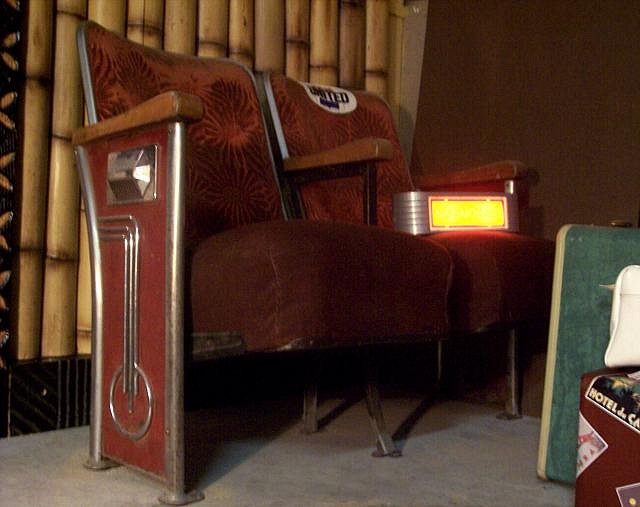
The seats I'm using came from an old art deco movie house. I'm going to add seatbelts and airline logo'd headrests. The seats will be raised on a platform to look like the broken floor of the aircraft with metal structural parts.
I have an old 'On Air' light that I'll use to make the 'Fasten your seatbelts' sign.
I think it'll work thematically with the rest of the room and particularly the 3D Hawaii travel map that will wrap around the back of the booth/hut in the opposite corner (shown in an earlier post). |
|
L
leleliz
Posted
posted
on
Wed, Mar 18, 2009 7:00 PM
Would you like to adopt me? I do windows and vacuum if that helps :) Love the airplane idea. Man this room is going to be so fantastic when its all done. |
|
T
TabooDan
Posted
posted
on
Thu, Mar 19, 2009 6:26 AM
Hey PuPu Pants, the place is coming along awesome!! You have some great ideas and it is really all coming together. Great job and keep posting the pic's!! Mahalo, TabooDan |
|
B

boutiki
Posted
posted
on
Thu, Mar 19, 2009 6:44 AM
Wow! Great attention to detail; and all that ceiling to fill with floats and lamps. I'm jealous. |
|
G
GatorRob
Posted
posted
on
Thu, Mar 19, 2009 10:19 AM
Yikes, you are too creative for your own good! Broken airline fuselage dragged up from the beach? Jeez, I was proud of myself when I managed to torch some bamboo without catching myself on fire! Nice work. Very nice. It's all in the details, isn't it... |
|
P

Polynesiac
Posted
posted
on
Thu, Mar 19, 2009 2:48 PM
Your creation is total eye candy filled with amazing ideas and attention to detail. You've made significant progress from the last time I stopped by and I have to say that I am very impressed with your capabilities at creating an escapist fantasy. Thanks for sharing your progress and I look forward to the next update! |
|
RH
Robb Hamel
Posted
posted
on
Mon, Apr 6, 2009 6:48 AM
Resus Rhist! I think we might be seeing the bar being raised here. |
|
MPP
Mr. Pupu Pants
Posted
posted
on
Wed, Apr 8, 2009 10:31 PM
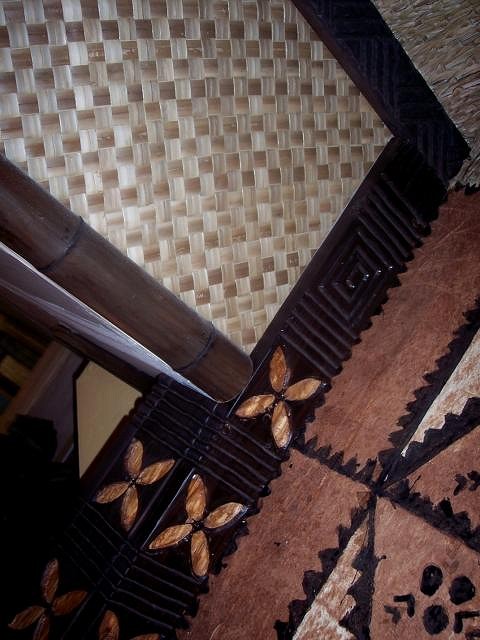
Thanks Robb, Rob and not Rob (Polynesiac). Made my day :)
On the wall: Edge detail: [ Edited by: Mr. Pupu Pants 2009-04-08 22:33 ] |