Tiki Central / Home Tiki Bars
The South Pacific Room-Vista,CA-updated 04/15/15
|
M

Monkeyman
Posted
posted
on
Sat, Feb 27, 2010 8:07 PM
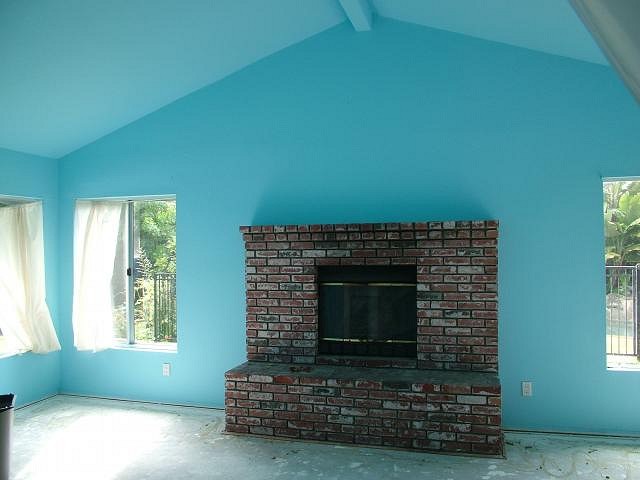
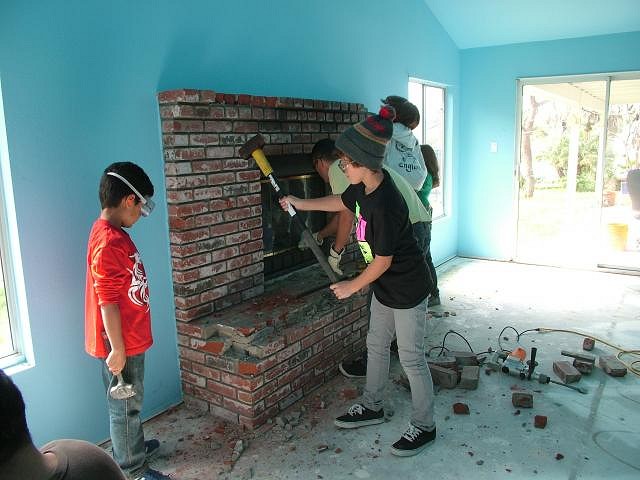
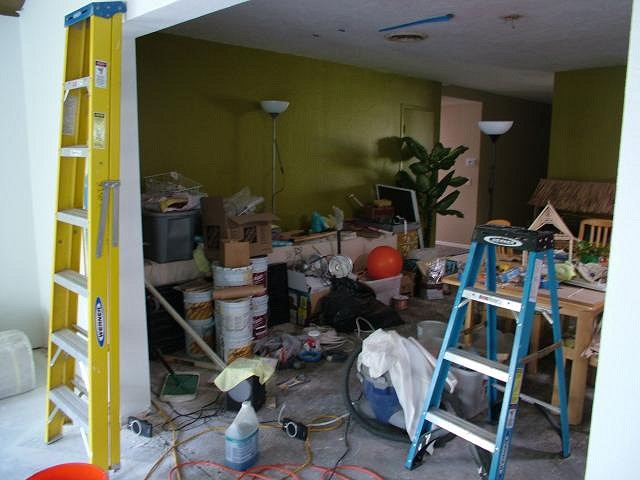
the beginning...progress to come Carpet Removed Fireplace demolition (the kids wanted to help) [ Edited by: Monkeyman 2015-04-15 15:45 ] |
|
M

Mongoloid
Posted
posted
on
Sat, Feb 27, 2010 10:44 PM
You are already starting with a nice A frame structure.......this is gonna get good! |
|
W

Wayfarer
Posted
posted
on
Sun, Feb 28, 2010 8:43 AM
Nice room to start with, will you leave the windows exposed or covered over? |
|
T

tikiyaki
Posted
posted
on
Sun, Feb 28, 2010 9:19 AM
Derek, are you taking out the fireplace feature altogether , or just making a new, more tiki-style one? |
|
TJ

tyger jymmy
Posted
posted
on
Sun, Feb 28, 2010 9:22 AM
great space man you can realy do a lot there . |
|
M
Monkeyman
Posted
posted
on
Sun, Feb 28, 2010 6:41 PM
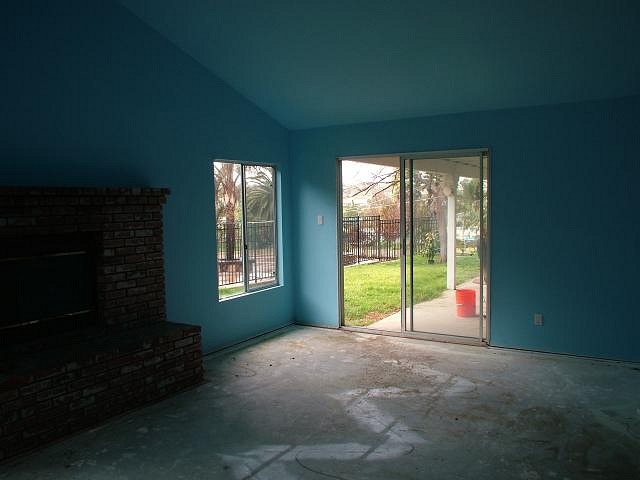
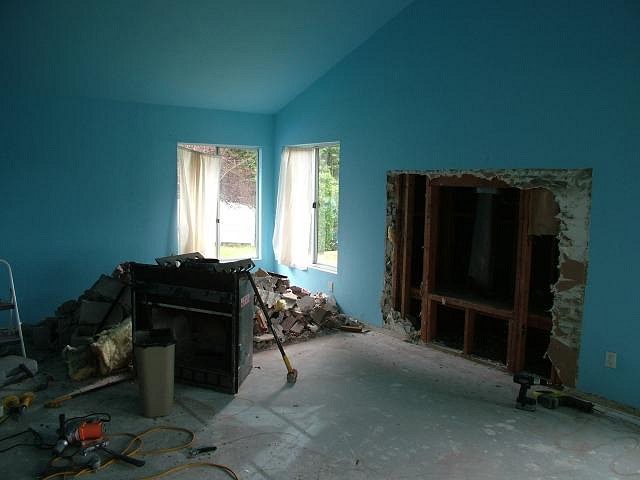
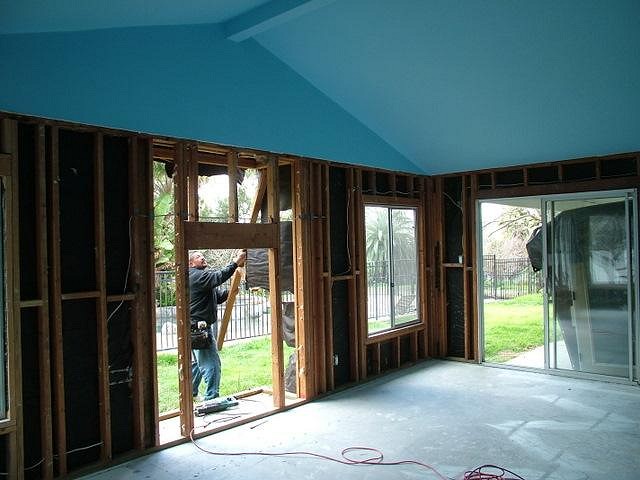
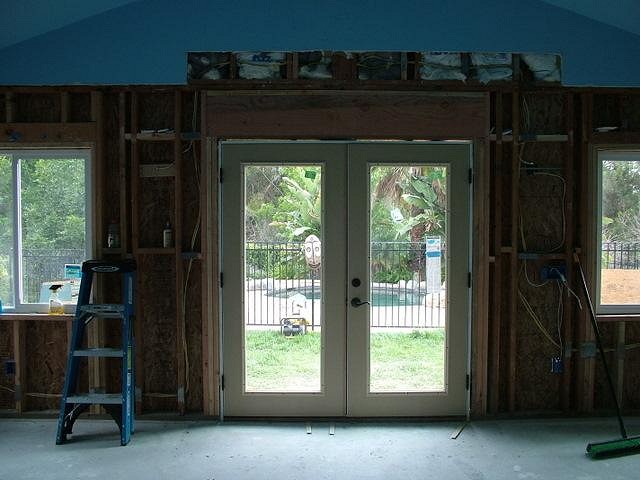
Thanks for your questions.. I didnt think anyone would bother to look at this since these are kinda pics of "nothing"... Im going to replace all the windows in the room with newer energy efficient windows, Im removing the sliding glass door, Im having a large double french door installed where the fireplace was. There wont be a fireplace in this room when its done. there is a really nice view out the back of the house (onto a tropical landscaped pool) but the former owner of my house had a view of BRICKS instead of their pool. This will open up the back of the house and be a natural segue to the backyard area where my standalone tiki hut will be. Thanks for looking. Im running phone line, cat5, and coaxial cable in the walls right now. The entire house will be connected to the LAN and thus I will be able to play the same music throughout the entire house without running speaker wire. it should be cool |
|
K

Kailuageoff
Posted
posted
on
Sun, Feb 28, 2010 6:54 PM
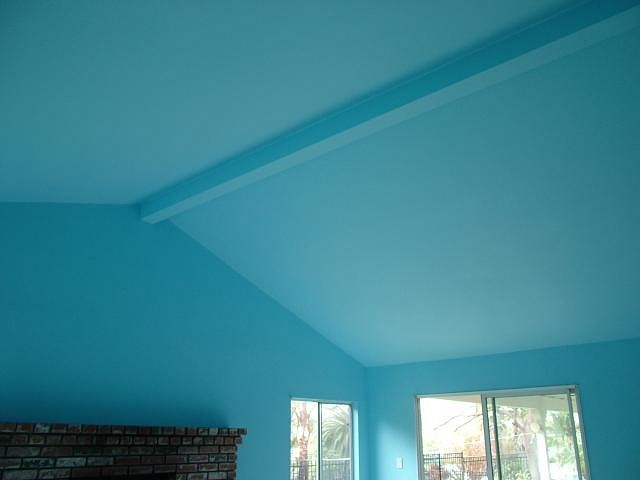
Looks like a nice large space, and as another poster said, the ceiling has lots of potential. |
|
V

VampiressRN
Posted
posted
on
Sun, Feb 28, 2010 7:46 PM
I love how this forum is inspiring folks. At first I thought...OMG don't demolish the fireplace, but replacing it with a tropical view of your yard...BRILLIANT!!! I enjoy watching the transformation from room to exotic lounge...fun. :) |
|
T

teaKEY
Posted
posted
on
Tue, Mar 2, 2010 12:42 PM
I really dig that Blue but I bet you won't keep it for your tiki room. Your blue room looks pretty close to my living room |
|
TS

Tiki Shaker
Posted
posted
on
Tue, Mar 2, 2010 12:47 PM
I've been wondering if you started this room yet! I hope you continue to post progress pics. You're a detailed craftsman, I'm sure the place will turn out amazing. |
|
A

ashman_atl
Posted
posted
on
Tue, Mar 2, 2010 6:04 PM
This is going to be great. Awesome space... keep the pics coming! |
|
8T

8FT Tiki
Posted
posted
on
Fri, Mar 5, 2010 8:58 PM
Hey Derek, Your room reminds me a lot of ours here. Same vaulted ceiling except our beams are wood tone and the ceiling wasn't painted, it had the popcorn stuff so we covered it with reed fencing. That fireplace..woah, I thought ours was ugly! |
|
M
Monkeyman
Posted
posted
on
Sun, Mar 7, 2010 10:37 AM
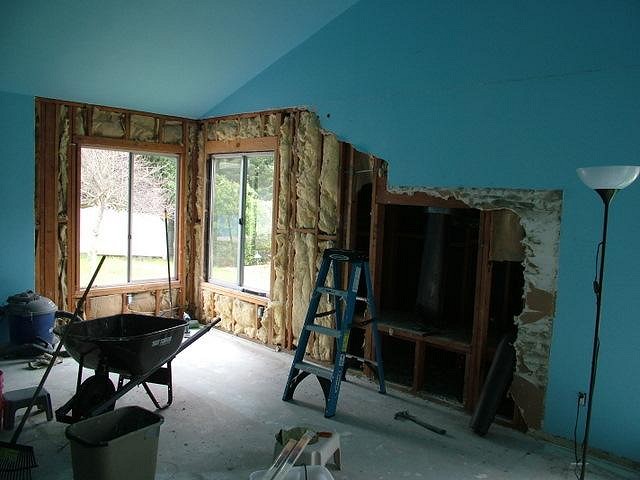
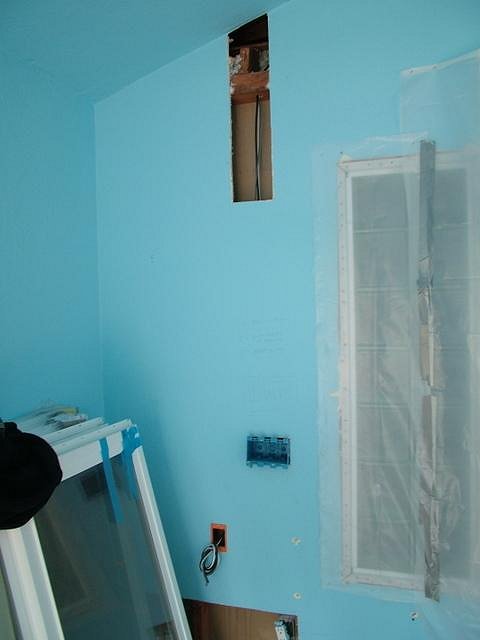
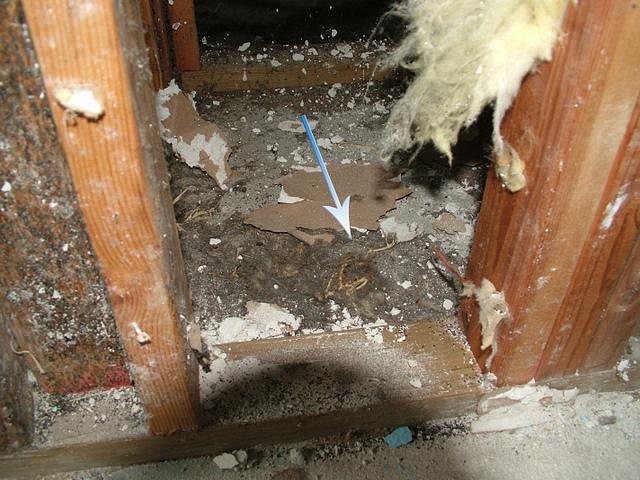
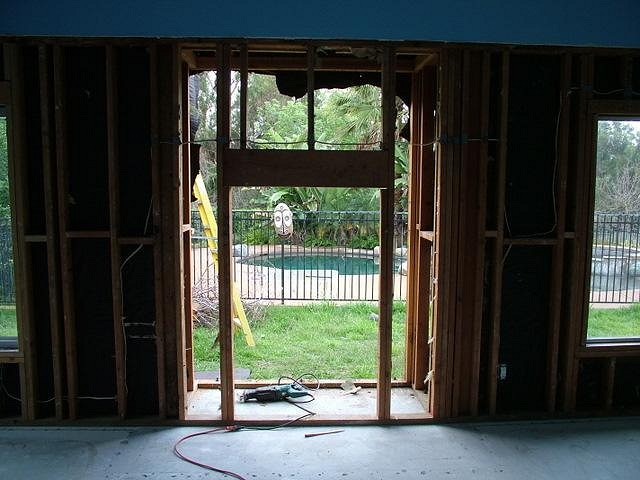
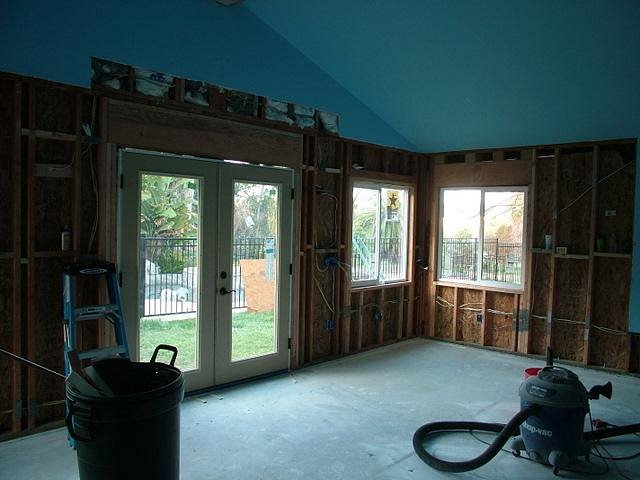
Today Im removing more of the drywall so that the new Windows and Doors can be installed this week. Running Cat5, Coax Cable and Phone line into the room for web, music, entertainment access. I still need to run my in wall speaker wire and decide on speaker placement in the room today. These are the LowE double paned vinyl windows for the south wall. The LowE double paned Fiberglass double French Doors are sitting just outside the sliding glass door right now. Just as when I ripped apart my old kitchen and get into the walls... I found critters. There were four dead birds inside the walls, and one dead rat. For those of you who were wondering why I would rip out the fireplace... this is why. This will be the view when the french doors are installed More to come.... |
|
K

kahalakruzer
Posted
posted
on
Sun, Mar 7, 2010 10:49 AM
Awesome view onto the pool. Hopefully the kids are old enough for you to rip out the fence. That would bring things to a whole new level! |
|
V

virani
Posted
posted
on
Sun, Mar 7, 2010 11:26 AM
Very nice. You have a lot of work to do, but that's a great project to work on. |
|
A
ashman_atl
Posted
posted
on
Sun, Mar 7, 2010 12:31 PM
Monkeyman- looks like you're making progress with the demo... great direction taking out the FP. Who needs it when you have such a smokin' hot view of that pool! Keep those kids busy and the updates coming! |
|
M
Monkeyman
Posted
posted
on
Mon, Mar 8, 2010 10:43 AM
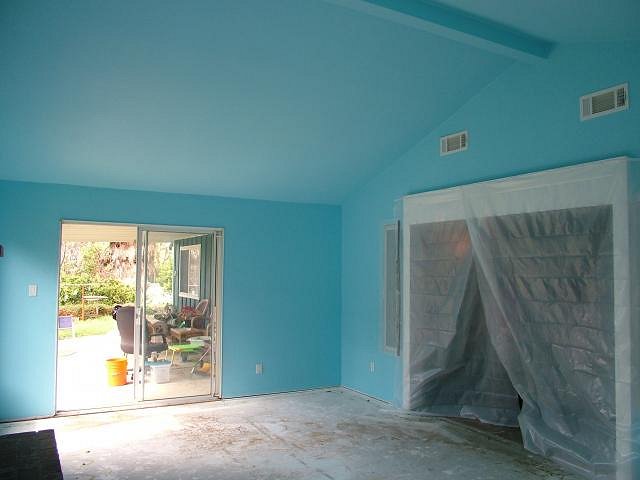
The Pro's arrived this morning... its amazing how fast they work.. The faux chimney is coming down and windows were being removed Fingers crossed that it doesnt rain today Future view through the spot the old fireplace was in. |
|
M
Monkeyman
Posted
posted
on
Thu, Mar 11, 2010 7:19 PM
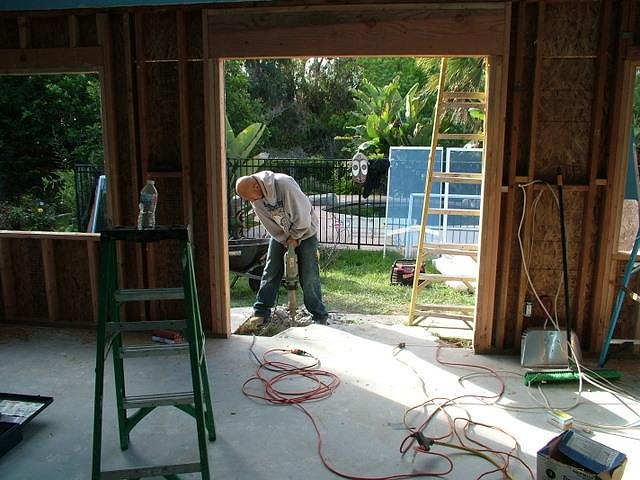
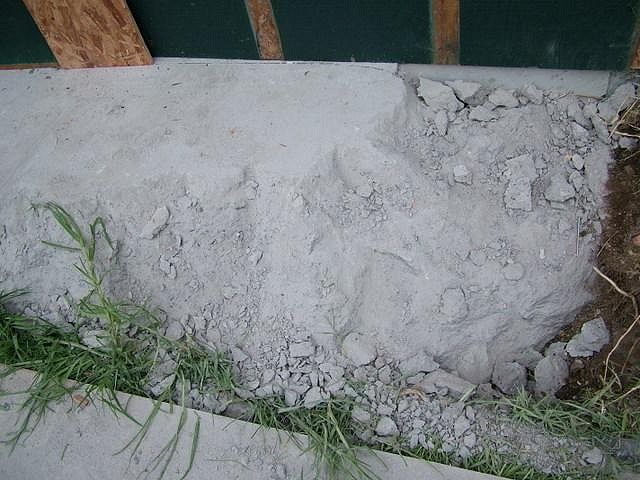
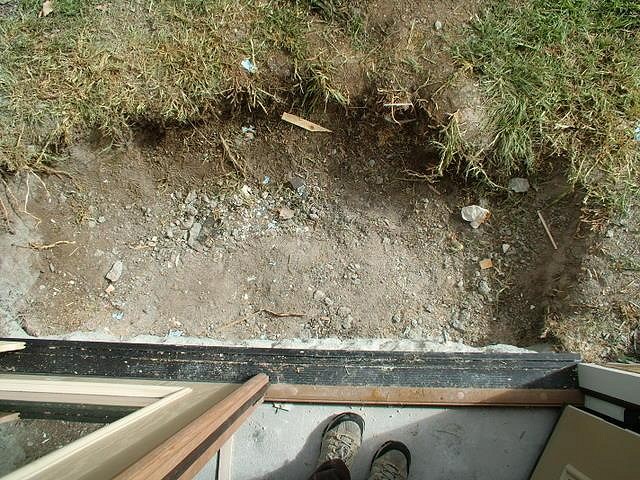
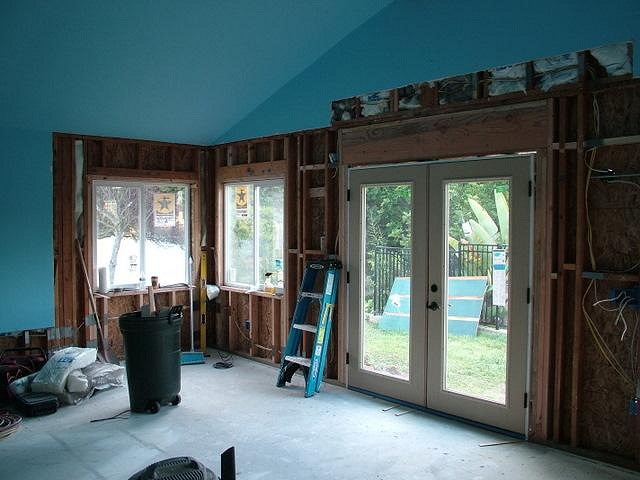
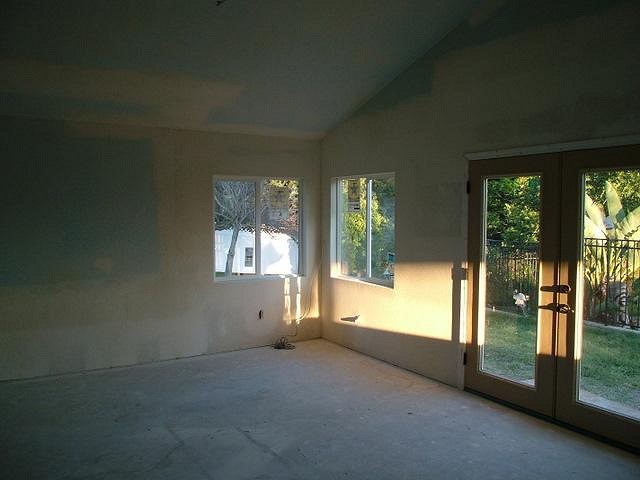
More Progress- The concrete slab underneath the chimney was built like Fort Knox... the concrete was about 20 inches thick... CRAZY. This poor guy worked a FULL day with a jackhammer to get it out. You can see that even with a jackhammer only small chips of it would come off. When it was fully removed it left a big hole in the ground right outside the doors.. I need to get some dirt from the yard to fill it before someone falls into it. Looking Southwest.. New Windows and Doors installed Southeast Due South The drywall went up today and they worked on the electrical for some new switches.. fan controls, and power strips at the peak of the ceiling for all the tiki lamps that will eventually hang there... progress.... :) |
|
H

hewey
Posted
posted
on
Thu, Mar 11, 2010 7:27 PM
Looking good mate. Cant wait to see what you come up with :D |
|
1

1961surf
Posted
posted
on
Thu, Mar 11, 2010 7:27 PM
Damn Derek you are doing a serious demo or what.I know you have great plans in the |
|
M
Monkeyman
Posted
posted
on
Mon, Mar 15, 2010 8:18 PM
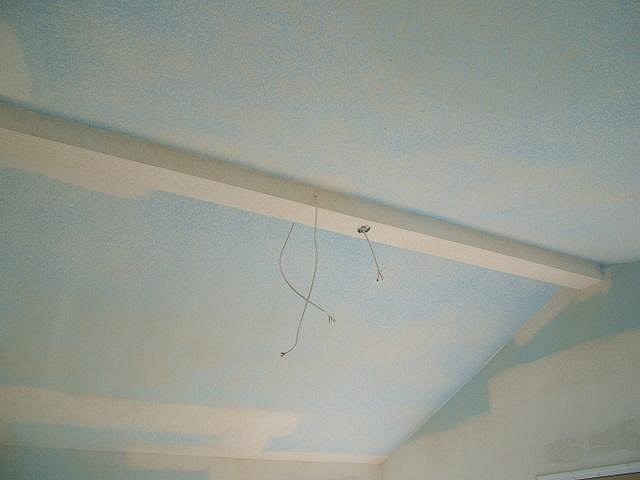
Drywall work is done. Sprayed and mudded over the weekend. They made my center beam wider so that they could fit my new electrical wiring in the ceiling. Back wall |
|
H
hewey
Posted
posted
on
Mon, Mar 15, 2010 11:51 PM
What a difference that makes already! |
|
M
Monkeyman
Posted
posted
on
Sat, Mar 20, 2010 6:03 PM
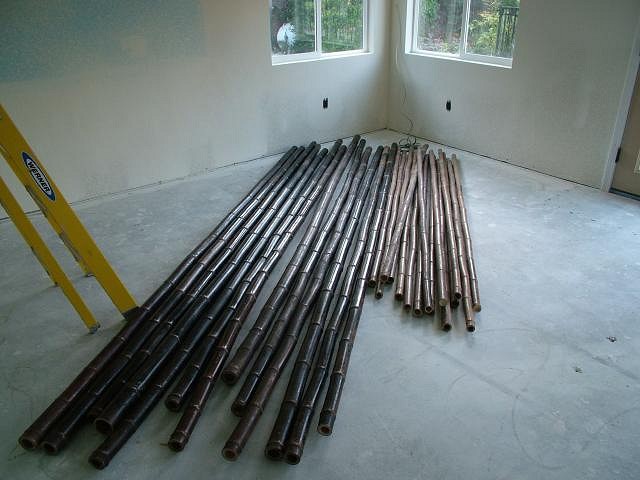
Supplies
[ Edited by: Monkeyman 2010-03-20 18:04 ] |
|
P

Polynesiac
Posted
posted
on
Sat, Mar 20, 2010 6:22 PM
lookin real good derek! Can't wait to see what magic you'll do with all that bamboo (and what type of MM lights will be hanging from the ceiling too!) I have to admit - Fireplace demolition looked like fun |
|
K
Kailuageoff
Posted
posted
on
Sun, Mar 21, 2010 11:22 AM
Man, getting the chimney foundation out must have been a real b*tch. They pour those super thick to keep them from settling under the weight of the chimney. The doors look sweet. |
|
V
VampiressRN
Posted
posted
on
Sun, Mar 21, 2010 1:02 PM
Those doors were a damn good idea...great view indeed. Never knew that about chimney foundations...makes sense. My back hurt just look at that demolition. |
|
M
Monkeyman
Posted
posted
on
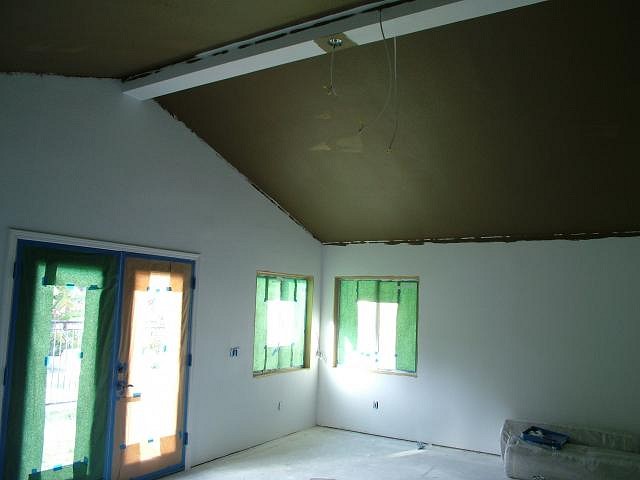
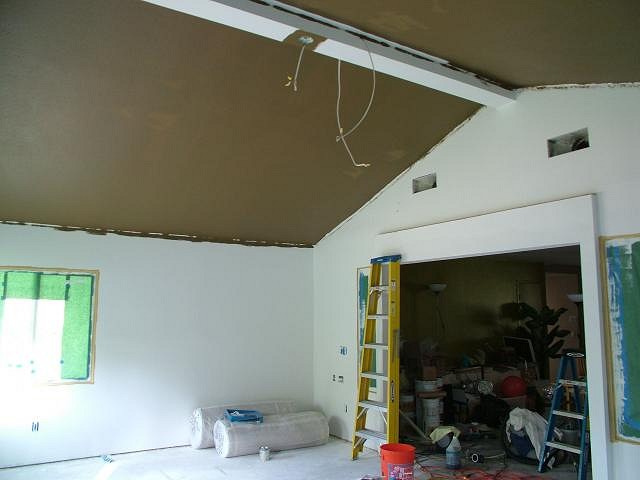
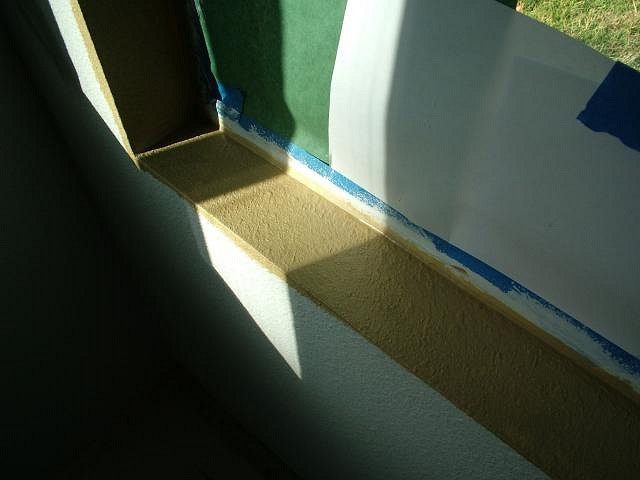
Sat, Mar 27, 2010 9:00 AM
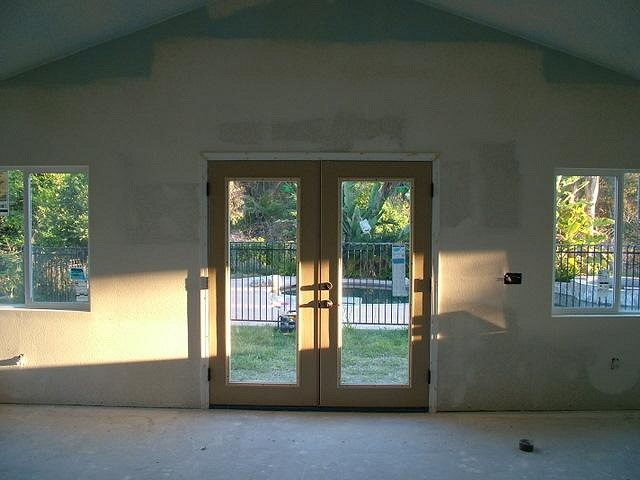
Updates- The new drywall and texturing has been painted with two coats of primer. Essentially bringing me back to ground zero (a finished room with no holes in the walls) The Ceiling was then painted brown. I will be using some reed fencing as a ceiling treatment and I wanted to avoid see the white paint through the small openings in that material. The olive brown will fill in the gaps between each reed. The window trim wont go all the way over the sill so I painted them for easier dusting/cleaning etc. UGGHH!!!! this is what your kitchen looks like when you've been living in "remodeling mode" for 8 months.... Its gets on your nerves after awhile...
|
|
S

SDshirtman
Posted
posted
on
Sat, Mar 27, 2010 2:48 PM
Cant wait to see how this turns out. Keep the pictures and updates coming. |
|
M
Monkeyman
Posted
posted
on
Mon, Mar 29, 2010 10:02 PM
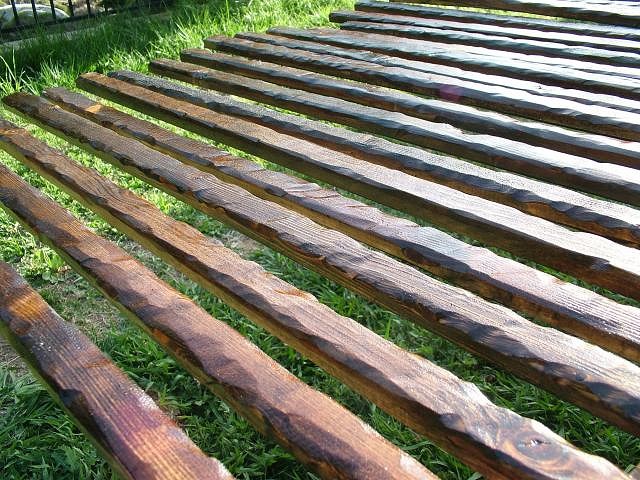
These 1x2's will be attached to the beams in the ceiling and will actually secure the matting and reed fencing to the underside of the drywall. The beams were straight from Home Depot and I shaped and distressed them with a grinder. Stain and Semi Gloss. My brother has been an excellent "second set of hands" throughout all of my remodeling. He is a huge help. The ceiling is starting to take shape. We will be attaching big bamboo perpendicular to the wooden supports. |
|
G

GROG
Posted
posted
on
Tue, Mar 30, 2010 12:47 AM
A helluva a start monkeydude. GROG looking forward to seeing what you do to the room. |
|
T

TikiG
Posted
posted
on
Tue, Mar 30, 2010 7:16 AM
Monkeyman...just a killer project you've got going' on there! The room and backyard environment is a crowning achievement for you, and I too can't wait to see it all decked out in Monkeyman lighting, art and frames etc . The progress week to week is an inspiration to us all. Shaka gesture and Thanks for the progress pics. Take Care. G |
|
S

Swanky
Posted
posted
on
Tue, Mar 30, 2010 9:39 AM
I'm guessing those wires are on a switch so you can turn on all the lamps easily. I envy your high ceilings. Looked at power strips for the Hideaway, but they were all white and compared to just using an already black extension cord and power strip, it cost a lot less. |
|
T

TikiVato
Posted
posted
on
Tue, Mar 30, 2010 9:43 AM
I like what you're doing with the ceiling. Your 2X4 beams look great, wish I would have used that idea for my bar. Did you get that look with just stain or did you burn it after using the grinder? Keep the pics coming. |
|
M
Monkeyman
Posted
posted
on
Tue, Mar 30, 2010 10:40 AM
Thanks everyone for the kind and supportive comments. This is a project Ive been waiting to do for a long time... just holding out till I had the right location for it. Swanky, The center wire in the ceiling is a slide switch to control the drop down ceiling fan. I can control the different speeds from the wall. The other two wires will have plugmold power strips along both sides that Im going to paint first. They will have a faux speckled brown colored sprayed on and then will be cut into the carved panels that Im going to install on the sides of the center beam. They will control all the lamps from a single switch and I wont have ANY wires or swag chains running up and down the walls. Tiki Vato, Those 1x2's were just plain old cheapy pine from Home Depot. I used a super course sanding attachment for my grinder and distressed them to look hand carved. It was a pretty quick process. Then I used a stiff wire paint stripping tool that attaches to my drill to beat up the wood. Then its just a stain and clear coat. No burning neeeded. In the end I will attach the bamboo beams directly to those strips of wood. |
|
LLT

little lost tiki
Posted
posted
on
Tue, Mar 30, 2010 2:36 PM
DAAAANG BOY! clown.... |
|
QK

Queen Kamehameha
Posted
posted
on
Wed, Mar 31, 2010 2:29 PM
looks great, can't wait to see more! |
|
M
Monkeyman
Posted
posted
on
Wed, Mar 31, 2010 6:57 PM
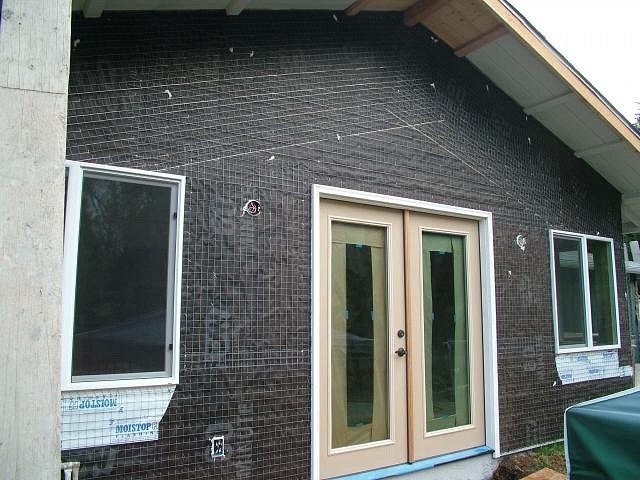
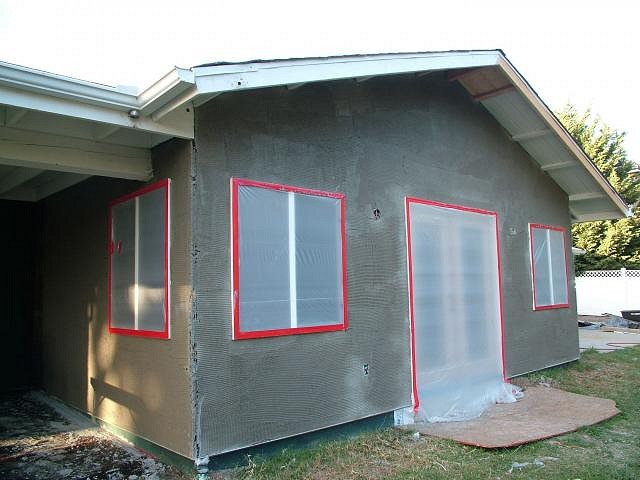
This is the outside papered and lathed ready for stucco. Here is the outside of the South Pacific Room with a "Scratch" coat of Stucco/concrete Its amazing how much more quiet the inside of the room is. It stops sound and vibration from the nearby road. Im also hoping to have better temperature regulation in the room... |
|
M
Monkeyman
Posted
posted
on
Fri, Apr 2, 2010 8:07 PM
slowly |
|
M
Monkeyman
Posted
posted
on
Sun, Apr 11, 2010 7:53 PM
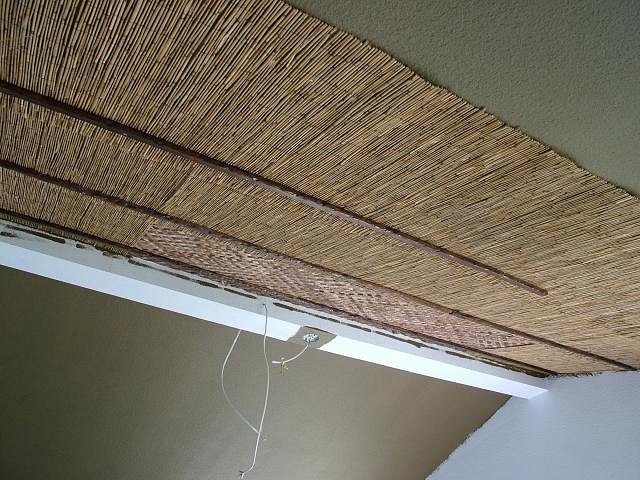
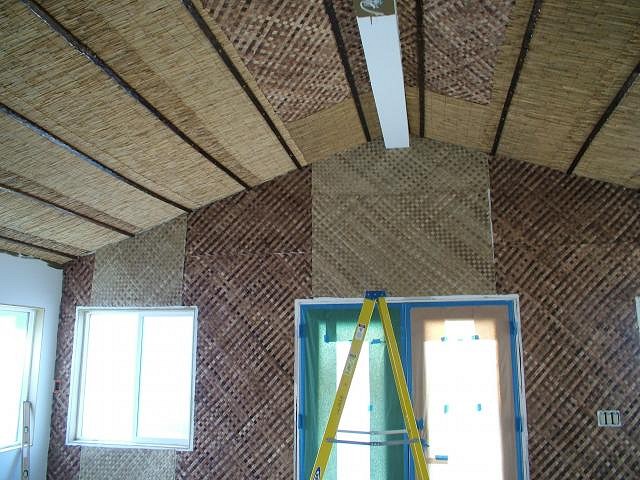
This weekend we installed the ceiling beams. [ Edited by: monkeyman 2010-08-17 20:35 ] |
|
A
ashman_atl
Posted
posted
on
Sun, Apr 11, 2010 9:44 PM
Looking better and better! Great job on the ceiling and that Ku is perfect scale for the room. Don't get tired- keep the updates coming... |
|
LS

Lake Surfer
Posted
posted
on
Sun, Apr 11, 2010 10:04 PM
Everyday, closer and closer to the dream. Looking good! |
|
W

WestADad
Posted
posted
on
Mon, Apr 12, 2010 11:57 AM
Wow!! Love that ceiling! Keep up the awesome work. |
|
F

freddiefreelance
Posted
posted
on
Thu, Apr 15, 2010 6:41 PM
I'm sorry to point this out now, but shouldn't you move the French Doors a little to the Right to better center how it frames that PNG Mask out by the Pool? :P Nice work! |
|
MPP

Mr. Pupu Pants
Posted
posted
on
Fri, Apr 16, 2010 2:07 AM
Hi Derek, BTW - wasn't it fun tearing out your fireplace? We rented one of those roto-hammers and obliterated our old 60's stone fireplace (to replace it with a Victorian styled one we built for the 'theme' of that room). It was a total blast. Had a big smile on my face the whole time. Hope you're having as much fun as it looks! |
|
T

tikitony
Posted
posted
on
Sun, Apr 18, 2010 8:29 AM
Awesome Roof Derek! Looking really good! I have been slowly building my backyard Hut/studio and went over all the exposed beams with the grinder like you did after seeing your photo! I liked the hand chiseled old look of it! |
|
M
Monkeyman
Posted
posted
on
Mon, Apr 26, 2010 8:15 PM
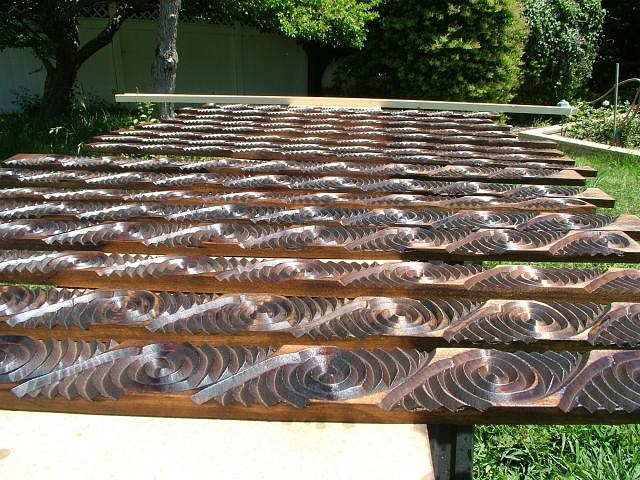
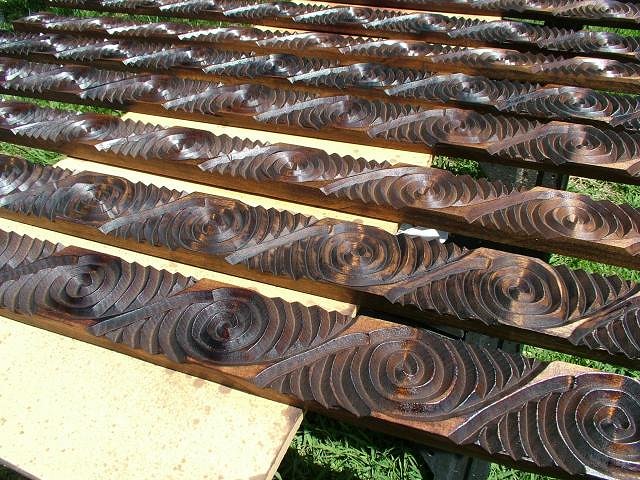
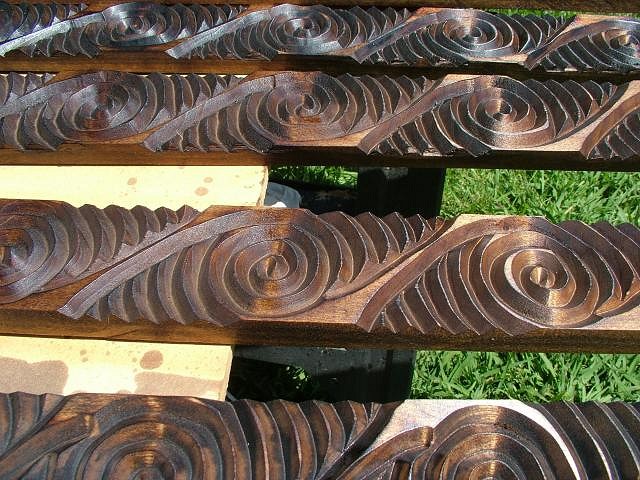
2 Hours of sketching....
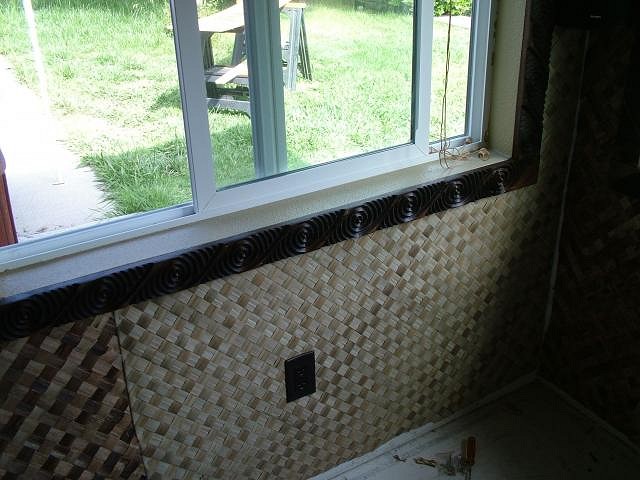
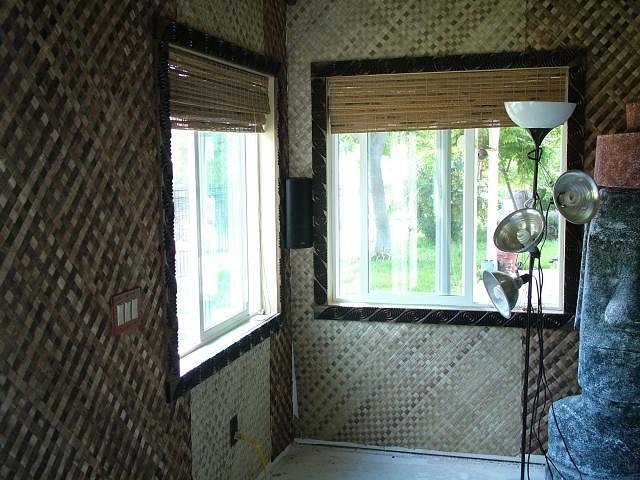
Its hard to keep the circles consistent and after a while my router bit was dull and harder to move through the material. Detail Installed. Sorry for the backlit photos. Kinda hard to make out the final look.
Lots more router work to do. Im sketching the other pieces this week. |
|
B

Beachbumz
Posted
posted
on
Mon, Apr 26, 2010 11:44 PM
OMG... Wow monkeyman that trim is awesome, really finishes off the window nicely... |
|
K

Kon-Hemsby
Posted
posted
on
Tue, Apr 27, 2010 5:23 AM
Wow, those pieces are gorgeous. |