Pages: 1 2 3 4 5 6 7 8 9 10 455 replies
|
T

tigertail777
Posted
posted
on
Fri, Feb 24, 2012 3:48 AM
Digging the Paris green with lime green. Very nice job on all of them. :) |
|
S

swizzle
Posted
posted
on
Wed, Feb 29, 2012 4:09 AM
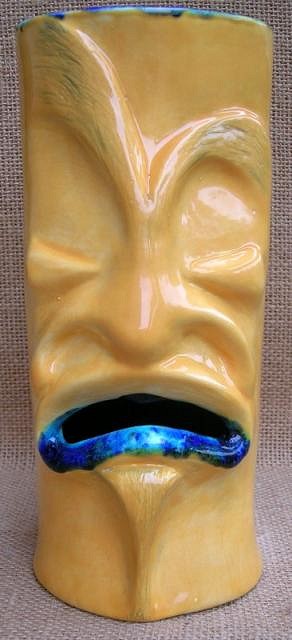
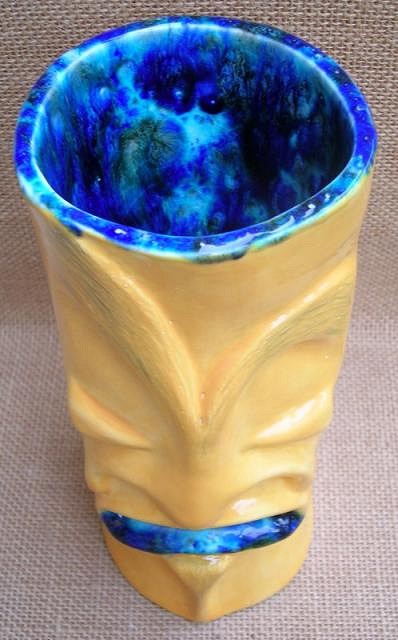
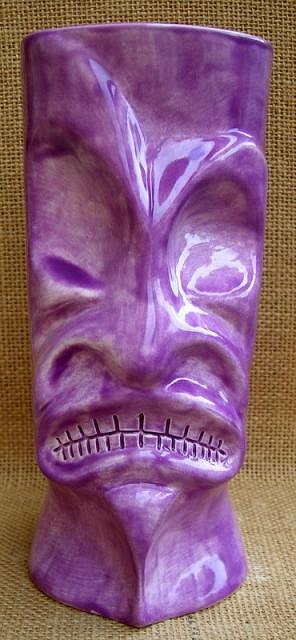
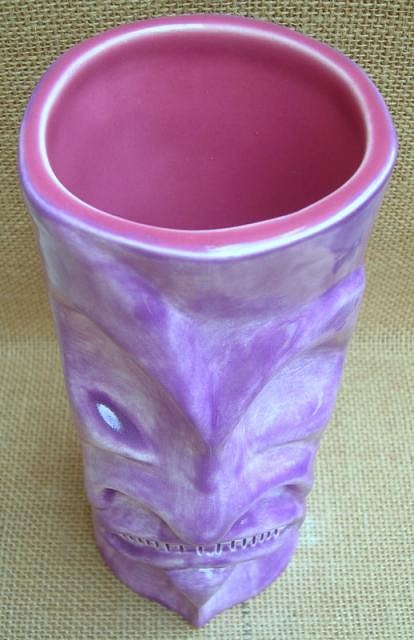
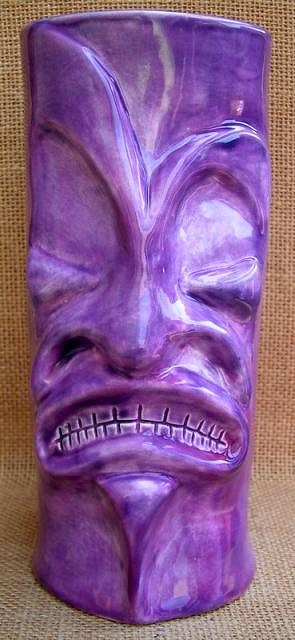
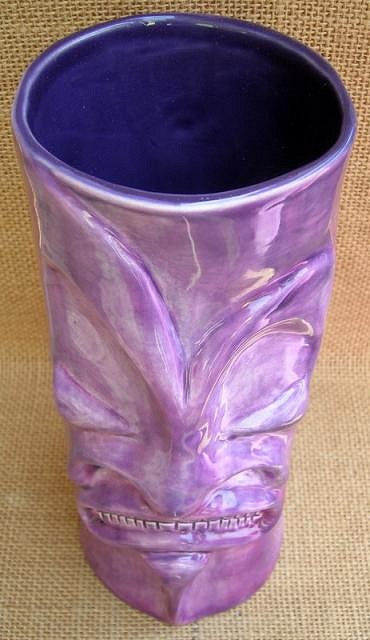
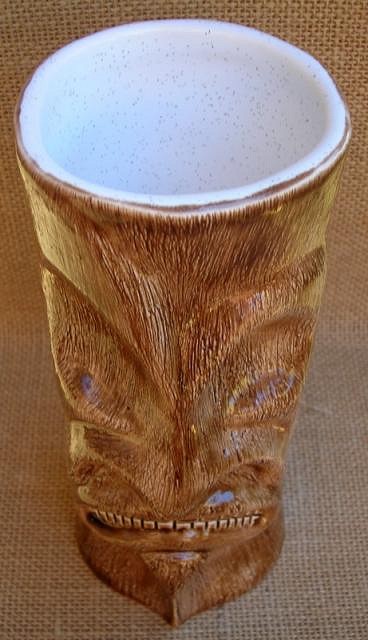
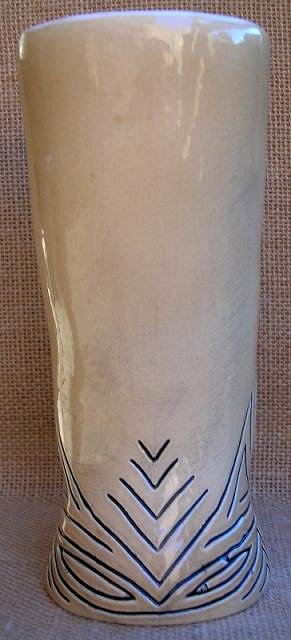
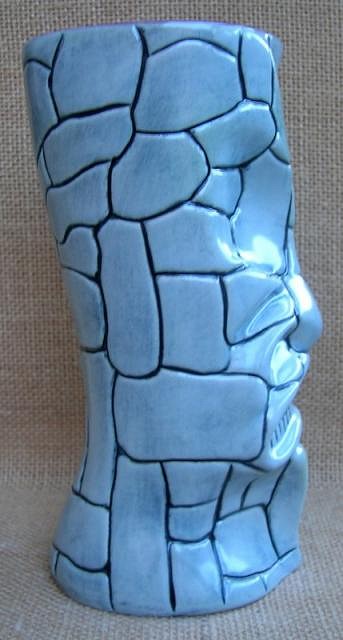
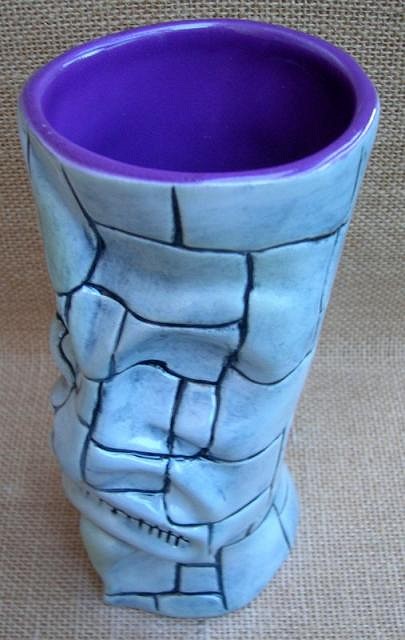
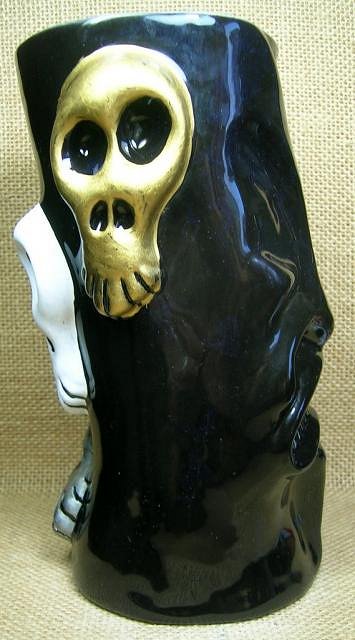
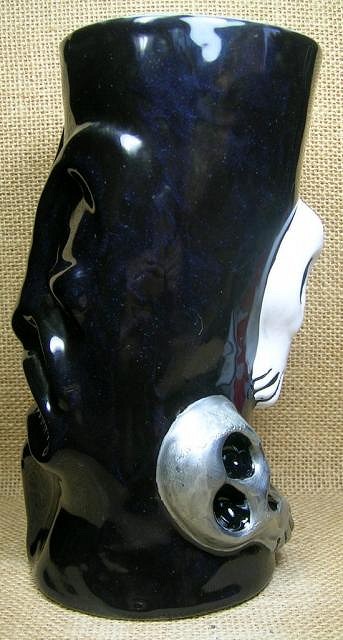
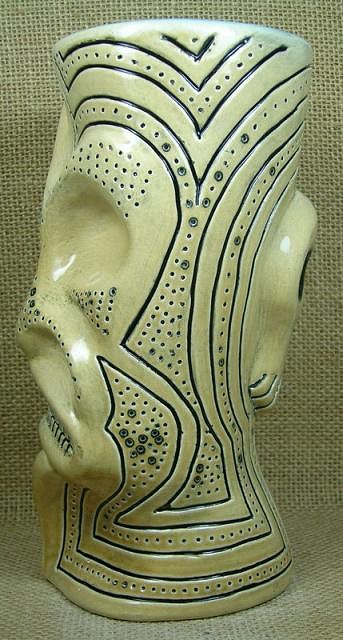
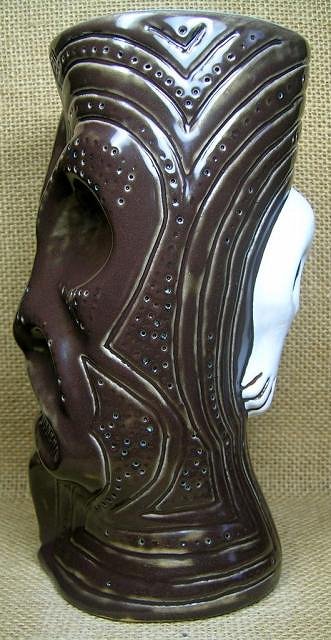
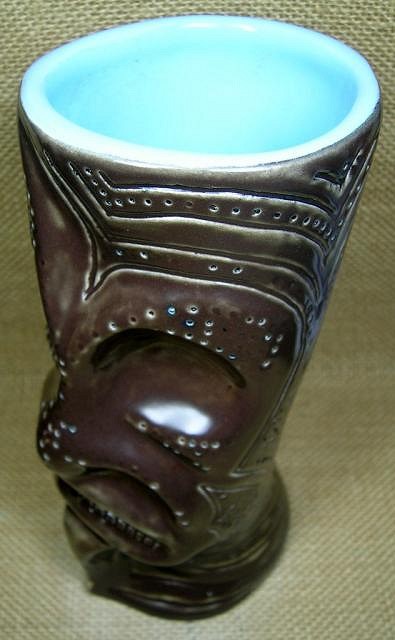
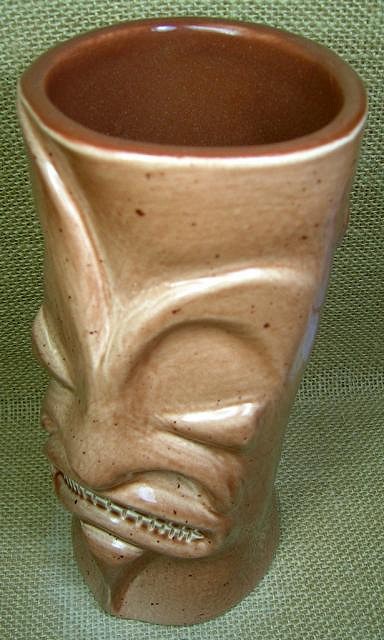
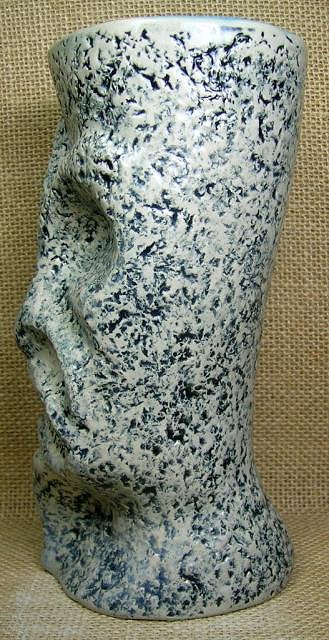
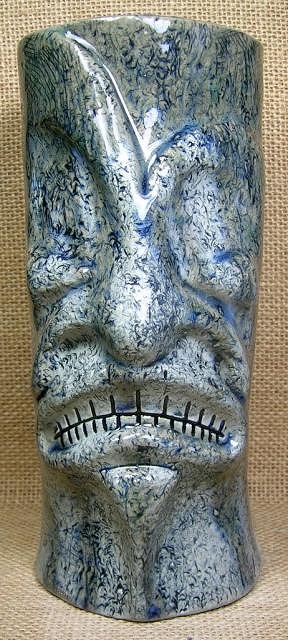
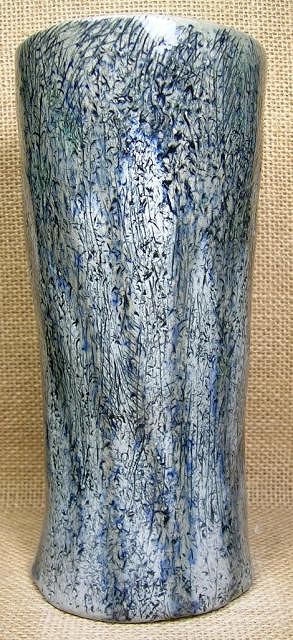
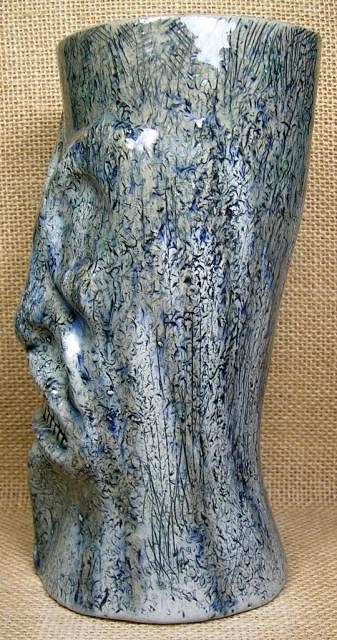
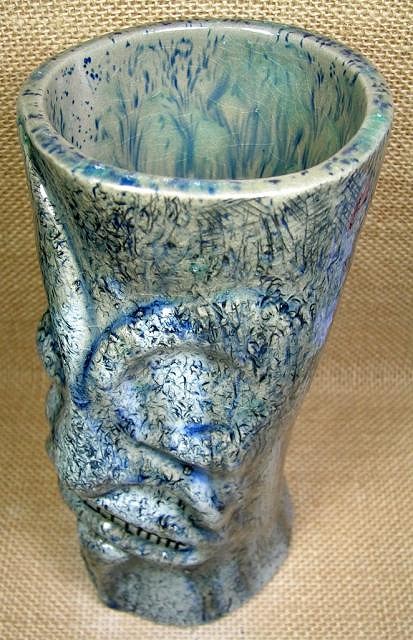
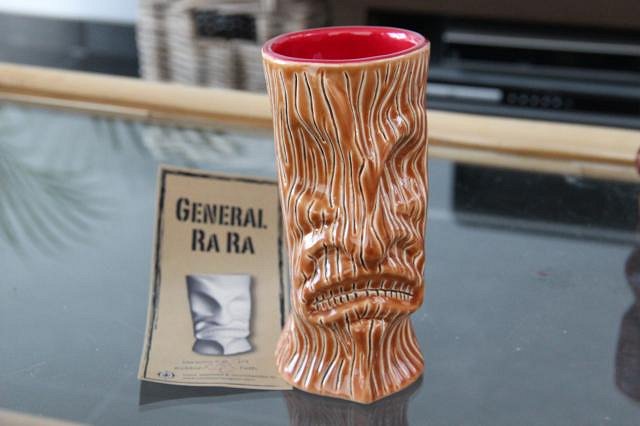
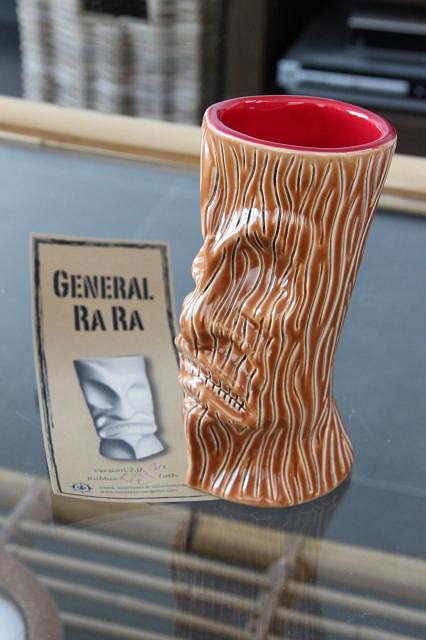
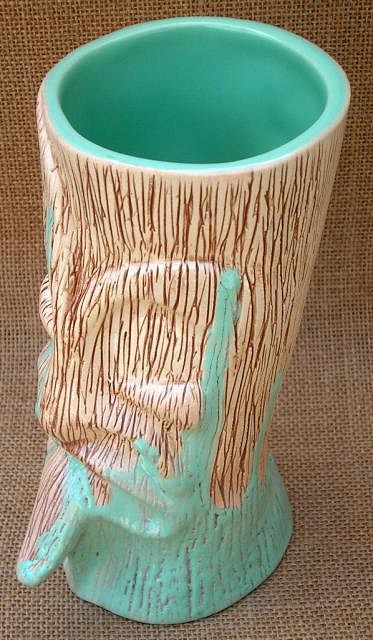
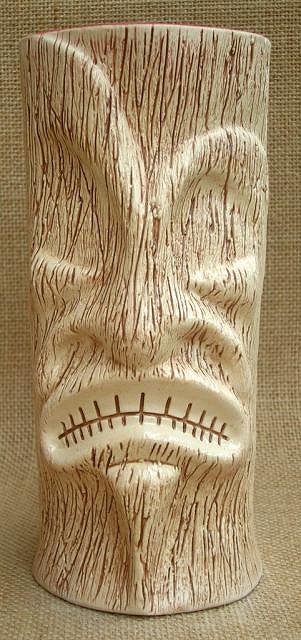
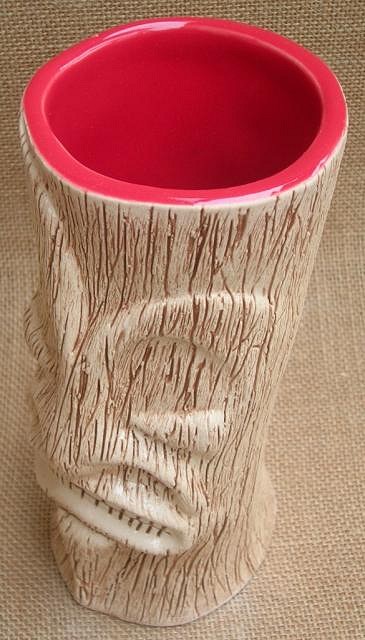
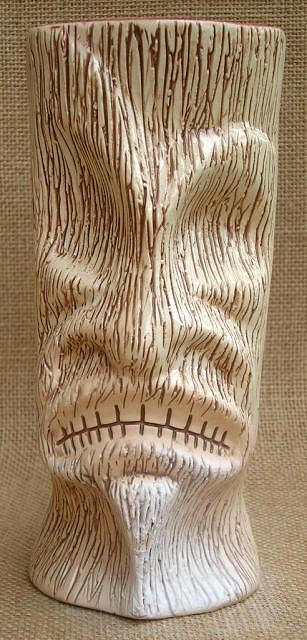
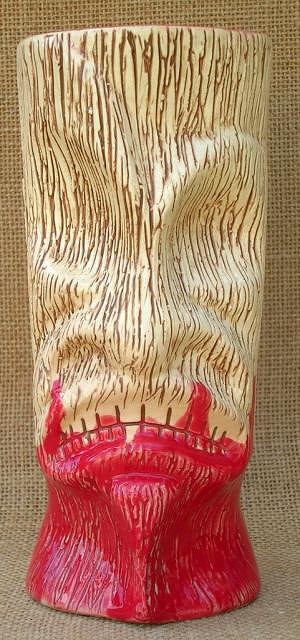
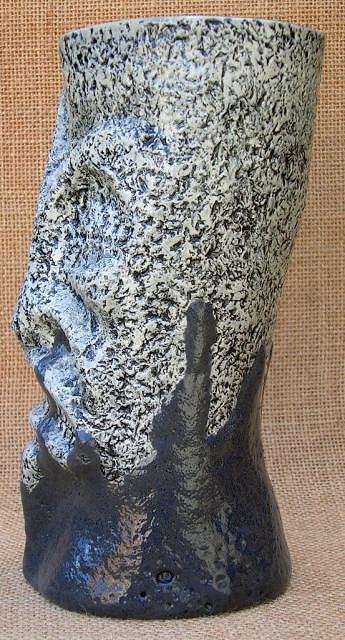
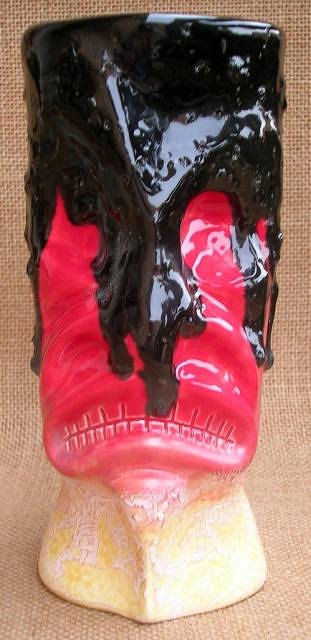
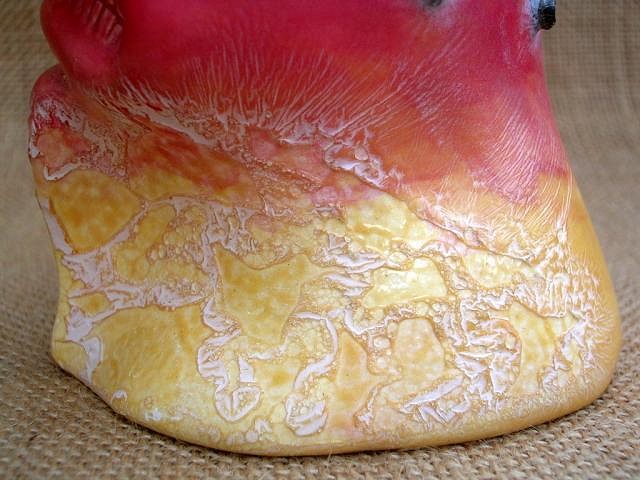
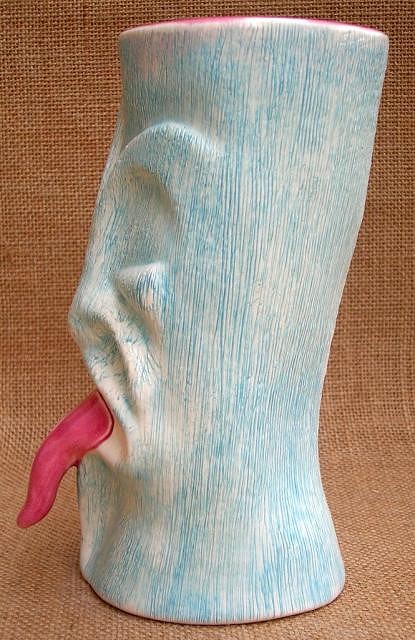
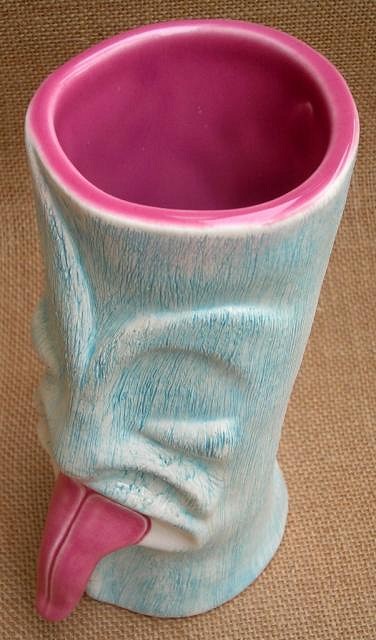
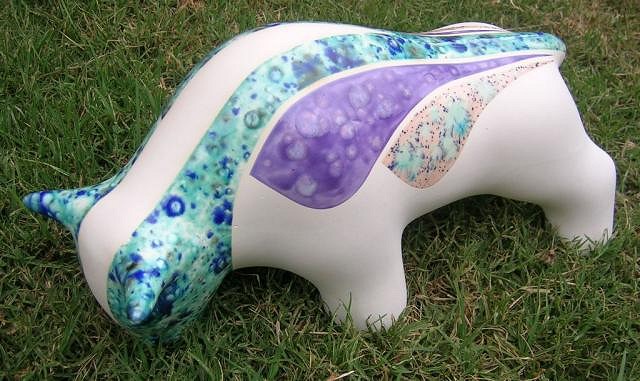
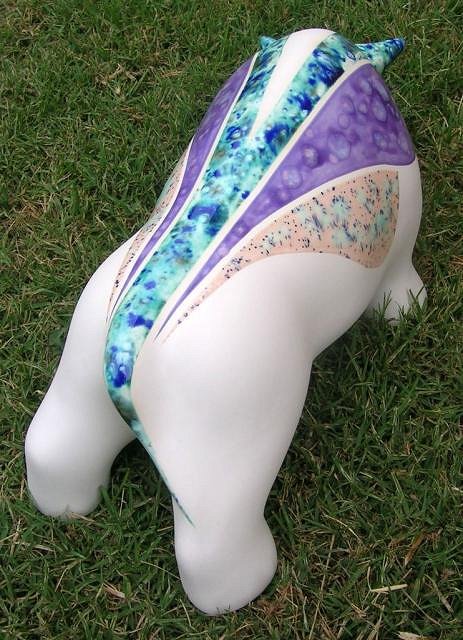
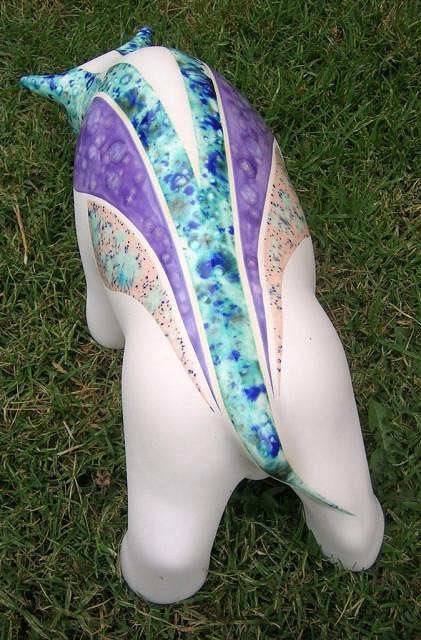
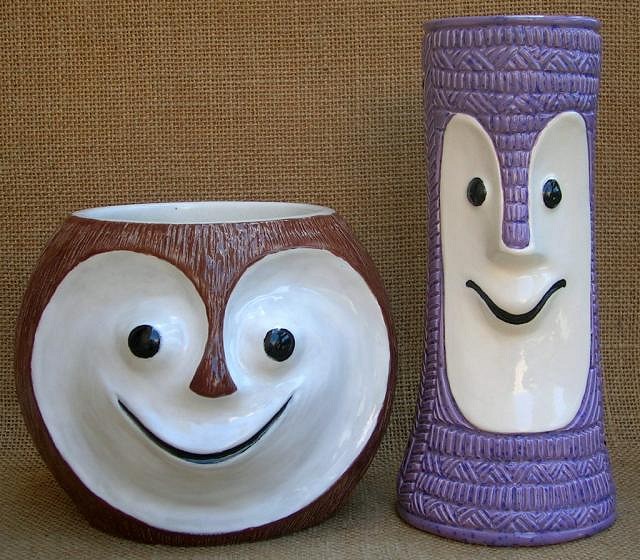
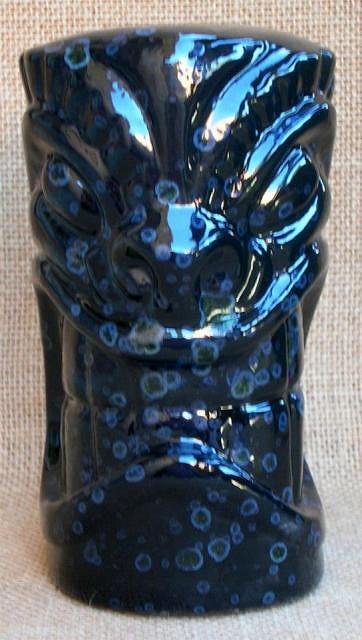
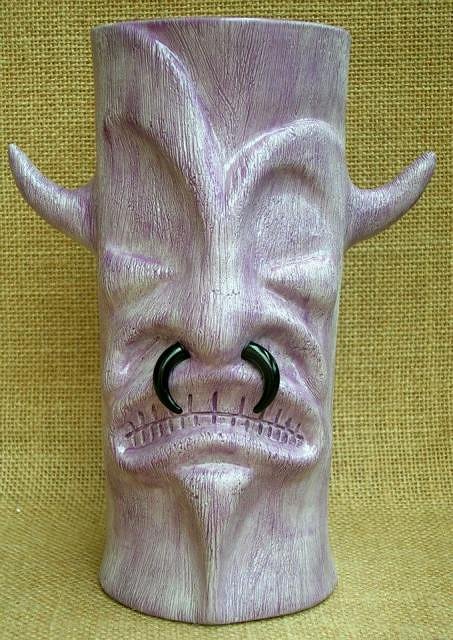
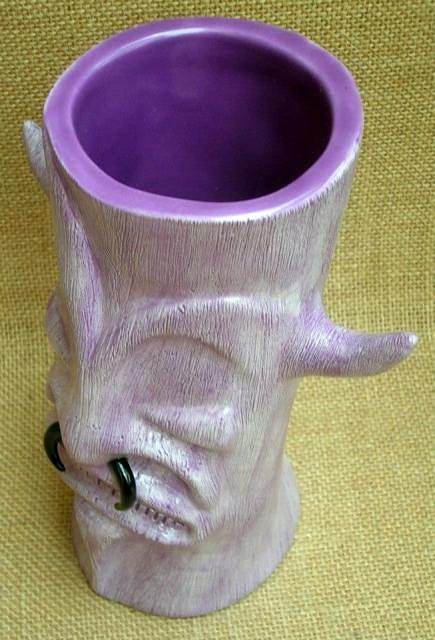
Thank you to everyone for your comments. Fortunately i haven't had any issues with mugs cracking recently. That only seemed to happen with one particular brand which from now i shall definitely not be using. And MadDogMike, i like that you said the pink mug looks like coral. I'm going to steal that. Certainly sounds better than the measles. :D So here are some pics of the mug i mentioned i was waiting to pick up this week. When i found the new brand of glazes i've been using lately i also found that they have crystal glazes, although they call them fantasy. Unfortunately it wasn't until the glazes arrived in the mail that i became aware that the fantasy glaze is not food safe, it wasn't mentioned on the website, so i decided to cut the teeth out of the mouth on this mug as i wouldn't be able to drink from it and i wanted to see what the fantasy glaze looked like. There are a couple of pinhole glaze skips when you look up close but i'm quite happy with the finish and colour combination on this mug. The orange is from the new brand also. Pumpkin and Nebula. |
|
D

danlovestikis
Posted
posted
on
Thu, Mar 1, 2012 12:06 PM
I like it, beautiful, Wendy |
|
M

MadDogMike
Posted
posted
on
Thu, Mar 1, 2012 1:25 PM
Very cool, it would make a good votive candle holder :D It's too bad the website didn't tell you it wasn't food safe. I don't know what brands you have access to but both Mayco and Duncan have some food safe crystalline glazes (but some of their's aren't too, I guess it depends on the ingredients) I have a "hot lava look' crystalline glaze I really like but isn't food safe, so I just use it on the outside of mugs. |
|
S

ScallywagCeramics
Posted
posted
on
Tue, Mar 6, 2012 11:26 AM
Hey Swizzle, I wish I had seen this thread earlier last year as I too jumped into the mug-making ring. Though I didn't have a class, I read up on as much casting as I could find both online and in print. One website I found said they used aluminum flashing sheets to make the square shape, which actually works rather well. I just have to make sure to bend it at right angles so that it gets a flat bottom. How did you make the round bottom part with your signature? I'd like to try that myself. You can see my mugs here: http://www.facebook.com/scallywagceramics Great stuff! |
|
S
ScallywagCeramics
Posted
posted
on
Tue, Mar 6, 2012 11:27 AM
Hey Swizzle, I wish I had seen this thread earlier last year as I too jumped into the mug-making ring. Though I didn't have a class, I read up on as much casting as I could find both online and in print. One website I found said they used aluminum flashing sheets to make the square shape, which actually works rather well. I just have to make sure to bend it at right angles so that it gets a flat bottom. How did you make the round bottom part with your signature? I'd like to try that myself. You can see my mugs here: http://www.facebook.com/scallywagceramics Great stuff! |
|
S
swizzle
Posted
posted
on
Fri, Mar 16, 2012 1:35 AM
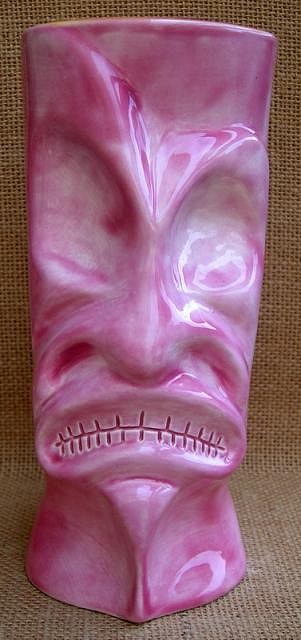
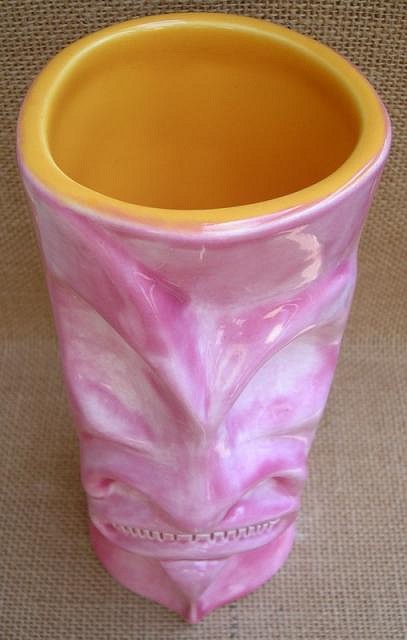
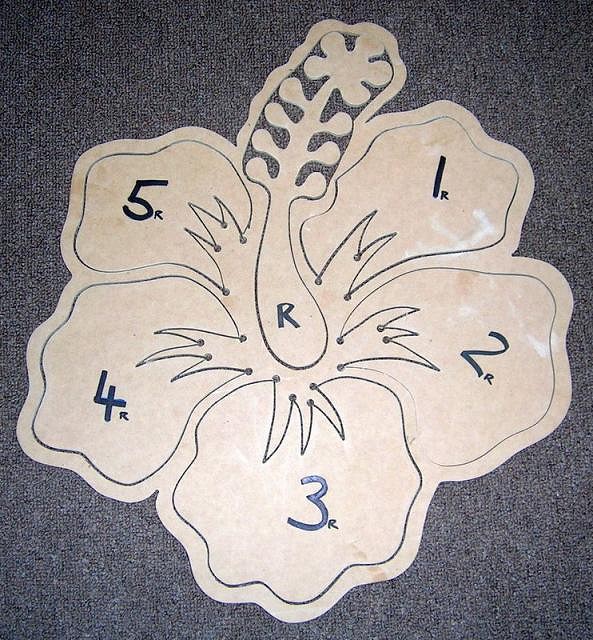
Thank you Wendy. Thanks MadDogMike. That's what i was thinking i'd use it for also. I thought i'd cut the mouth out of one mug just for the hell of it but after i realised about the glaze it became the perfect candidate to try it on. Thanks to you too Scallywag. I really like your skull mug. That bottom part is a tip i picked up from Maui Tiki and i'm pretty sure Wendy uses that technique now also. I must say that it's a great idea although my mold does tend to leak a little bit in that area. I'm not sure if that is more to do with how (badly :lol:) i made the mold or if it is something that will happen regardless. When i get around to making another mold i want to try something different i have in mind but it is a good way to achieve the sunken section with your name in it and i could end up going back to doing it that way if what i have planned doesn't work how i want it to. So today i picked up a few more mugs. I'm happy with the colour combinations, however i am still having issues with the glaze being patchy due to the visibilty of brushstrokes. I finally got around to spraying a mug with my new air compressor the other day and i'm extremely anxious to see how it is going to turn out. I was very happy with how the coverage looks on it after it was sprayed, but until it is fired i won't know the results. I'll take it in next week then i'll have to wait another week to pick it up. Here's the first mug with both colours the new brand glaze i'm using at the moment. Dusky Pink and Pumpkin. Mauve and Dusky Pink. I tried something different with this mug but it didn't work out exactly how i wanted, although i must say i had no idea what to expect at all, i just thought i'd experiment. I can't remember which colour i used first -one coat of each- but i do know the last layer was my own mixed purple. (That's what happens when you glaze drunk. :)) Mauve, Dusky Pink, Purple and Purple. I still have a few mugs that need glazing and also a couple of others that have a bit of a twist to them that need to be bisque fired. I'm quite happy with the added detail on these and look forward to finishing them and also peoples opinion on them. Now for those of you that noticed, i changed the title to my thread. I must admit that i have two bad habits. (I'm sure people that know me would say that i have plenty more. :wink:) One is that i procrastinate, the other is that i never finish work i start. Well i do finish it eventually, but i tend have to have an idea, start it, then have another idea and start that without finishing the other one. The following is an idea that i've had floating in my head for a while now and only recently got started on. I'll eventually post pics of some of my paintings here also. The owner of the Tiki Lounge and Bar here wants me to do an exhibition, i just need to finish all the paintings that i've started.:roll: A friend of mine is a signwriter with the contract for a large hardware store here. He gave me a stack of off-cuts of MDF (Medium Density Fibreboard) that he uses for the fit-out of each store, and i finally pulled my finger out of my bum and got started on this idea after i bought a scroll saw which was essential in allowing me to do this work. I found a font i liked on the internet and have cut out a few sets of the letters ready to go. I have a few ideas of backgrounds that i intend to try/use which i will show in my exhibition and also hope to sell if people are interested. They will be able to pick a style and i will paint everything in the colour of their choice. The pictures below are of the very first one of these that i've made and is for me. I will add hooks on it to hang all of my pendants off. This is the template for a hibiscus flower. As i said, i have another pattern/shape that i will use and also incorporate into the design.
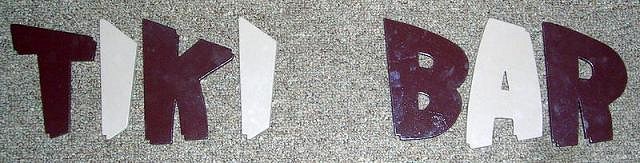
Here is the template for the font i chose.
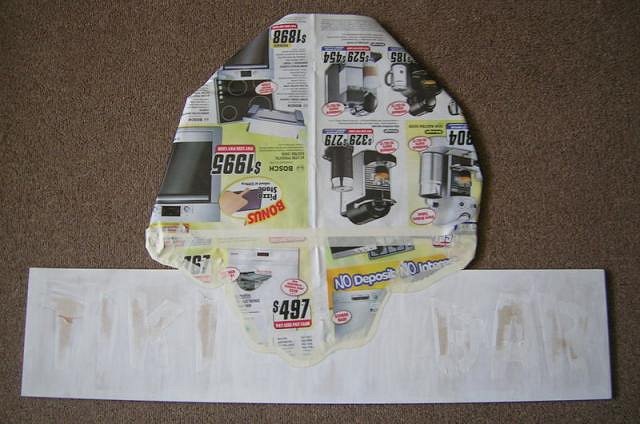
The background for the sign with the hibiscus outlined and masking tape where the letters will go so that when i glue the letters on they will stick to the wood instead of straight onto paint.
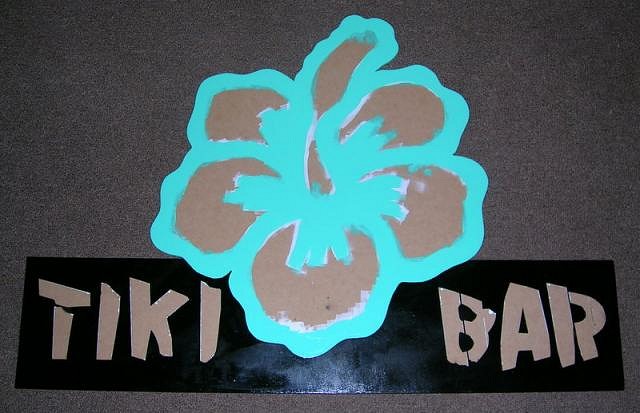
This is the background with an undercoat of acrylic paint. If i paint straight onto the MDF, it soaks it up and i lose the gloss finish. The flower has been masked off to avoid overspray but has an undercoat on it where it is needed that you can see in the next picture. Here is the sign with the basecoat. The black was done with an aerosol can and the aqua for the flower was painted with 1 Shot Enamel. The letters also have an undercoat of acrylic and have been spray painted. I have to cut out the petals on the flower, sand and paint them, then glue them on along with the letters. I'll post pics when it's finished. Thanks for looking.
[ Edited by: swizzle 2012-03-16 02:33 ] |
|
M
MadDogMike
Posted
posted
on
Fri, Mar 16, 2012 7:43 AM
Cool stuff Swizz, that sign will look nice when it's done. Congrats on the exhibition ~ a little exposure is always good. I have tried layers colors too and never really got anything I was happy with. In theory it sounds good, but it doesn't seem to work out.
Those two bad habits must go together because I do exactly the same thing :lol: |
|
H

hang10tiki
Posted
posted
on
Wed, Mar 21, 2012 12:47 AM
Purple, way cool |
|
M

MauiTiki
Posted
posted
on
Thu, Mar 22, 2012 8:53 PM
The purple mugs look great! Hey, where did you get the Hibiscus flower? Looks a lot like my sticker design I drew years ago.
Keep up the good work. Are you headed to Maui anytime soon? |
|
WP

Watango productions
Posted
posted
on
Mon, Mar 26, 2012 3:11 PM
The mugs are look'n great Robbie! |
|
S
swizzle
Posted
posted
on
Wed, Apr 4, 2012 4:37 AM
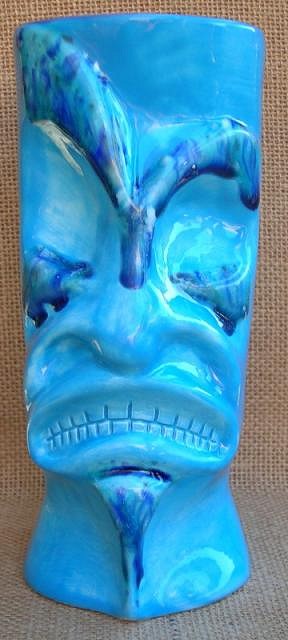
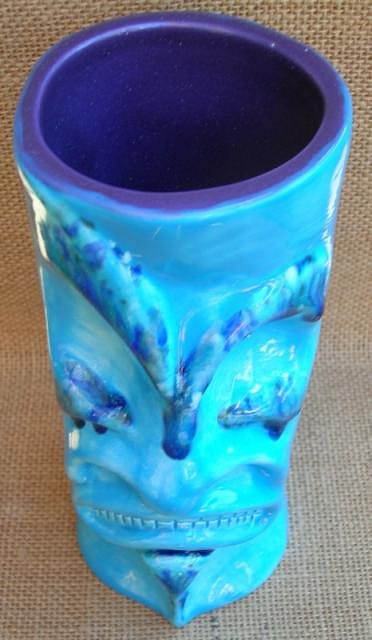
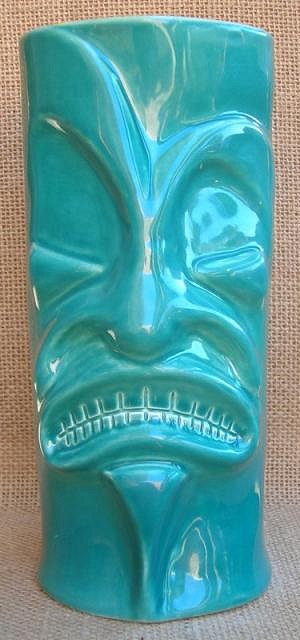
Thanks Mike. I appreciate your comments. Yeah, the layered glazing didn't turn out quite like i had envisioned. Also, i have to say i find it quite funny that you say you procrastinate and don't finish things either. You seem to be far more productive than i am. hang10tiki. I get the feeling you like purple. That's twice you've said that now. It's my favourite colour. Thanks Rob. I reckon that is your design. It's the same one as my tattoo. I just Googled hibiscus images and that was the one that i liked the most. I'm going to Tiki Oasis this year and will be stopping by Hawaii on my way home. I'll buy you a Mai Tai as commission. :D Thanks Campbell. As are your carvings. Here are a couple of mugs i had fired recently. The first one was just an experiment with the cyrstal glaze that is not food safe. The blue is another colour from the new brand i've been using that i haven't tried yet. Again i have the issue with brush strokes but i think it looks OK. Turquoise and Nebula with my self mixed purple. Now this mug is the first one i have got around to spraying, and i have to say that i am EXTREMELY happy with the result. Although i'll have to buy powders and mix my own glazes, from now on i'm pretty sure every mug i make will be glazed using a spray gun. NO MORE BRUSH STROKES! :) Peacock and Pumpkin. (Sold) I also finished the sign i started for my pendants. (See Mike, i'm not that useless.) :P: Like everything, you learn from your mistakes. The next one i make i'll do certain things differently. I've never used enamel paints before and although it looks OK in the photos, close up the paint is not that even/smooth. However, for what i made it for, i'm happy with the result. The finished sign. And with the pendants. (I still didn't fit them all) So that's it for the moment. I'm glazing a few more mugs tonight. Pics up when they've been fired. Cheers |
|
V

VampiressRN
Posted
posted
on
Wed, Apr 4, 2012 5:22 AM
Your glazes are awesome!!! |
|
B

Beachbumz
Posted
posted
on
Wed, Apr 4, 2012 5:13 PM
Brada Robbie, Very Nice!!! I like them both but the second one you sprayed.... Beautiful man.. great color combinations too.. I knew you'd like that sprayer setup, once you do it more it just gets easier and you'll learn some each time, at least I do.. See ya in August Bra..! |
|
S
swizzle
Posted
posted
on
Fri, Apr 20, 2012 1:20 AM
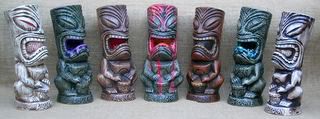
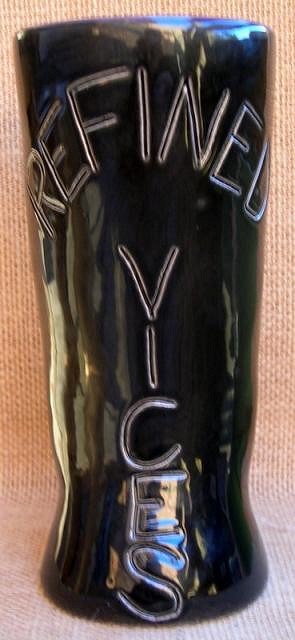
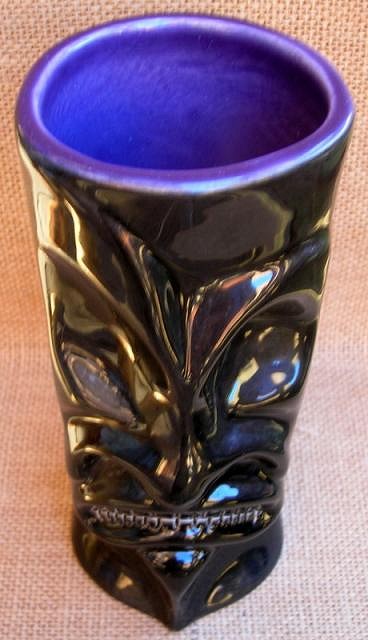
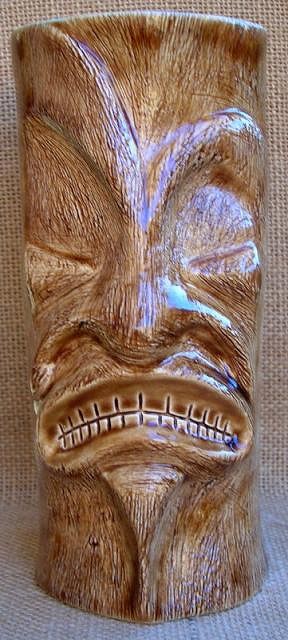
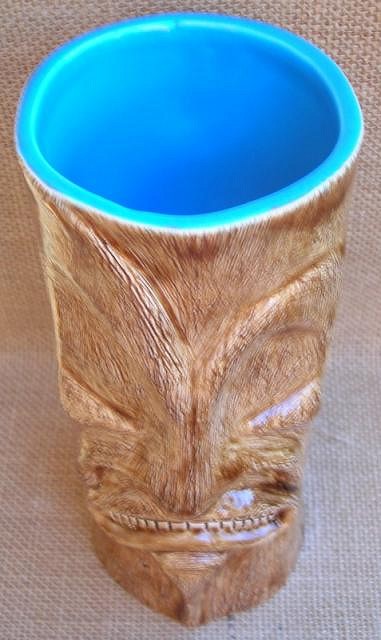
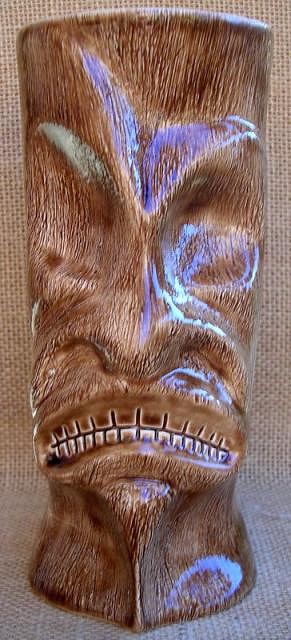
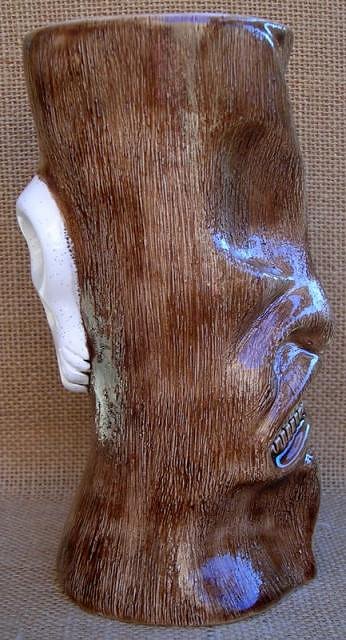
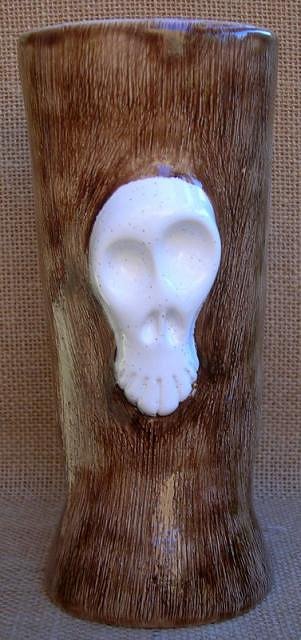
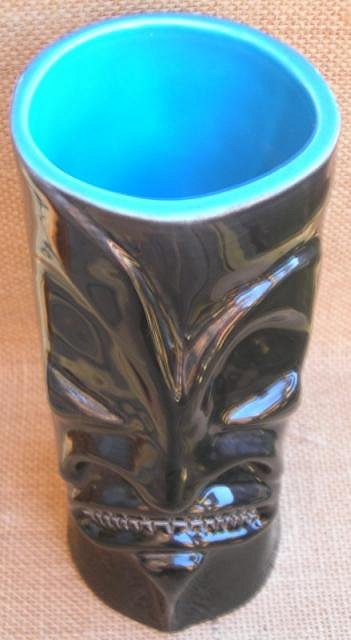
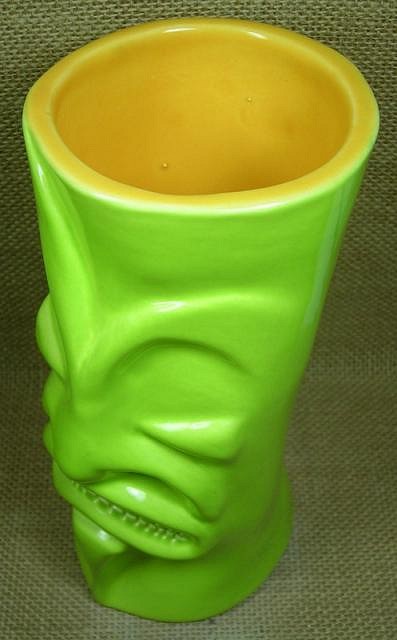
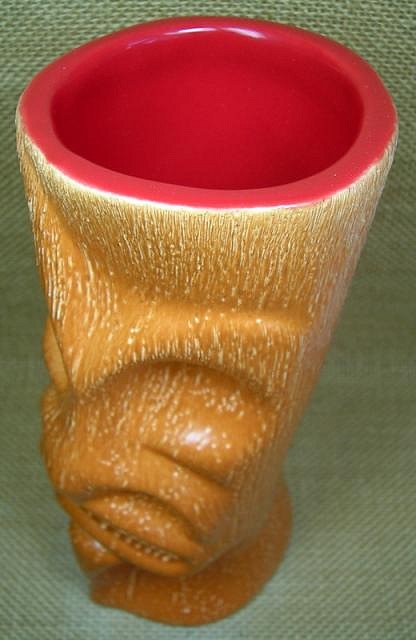
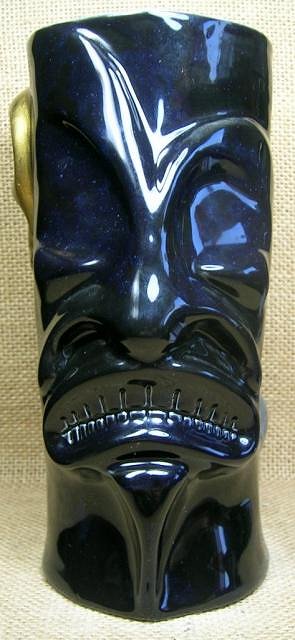
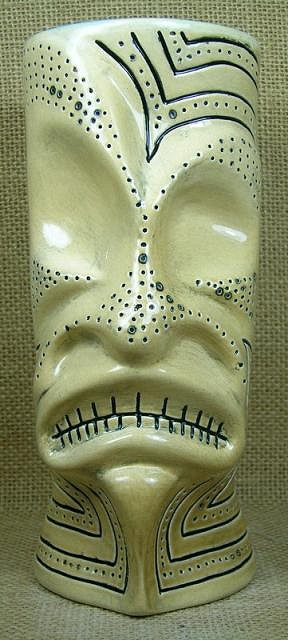
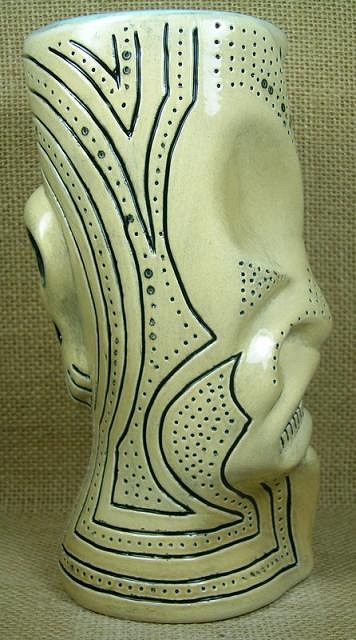
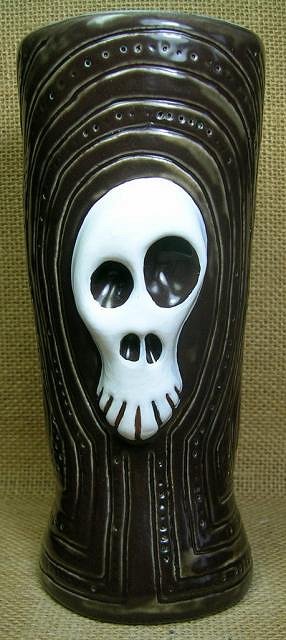
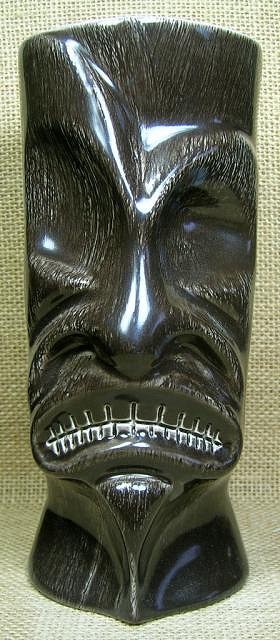
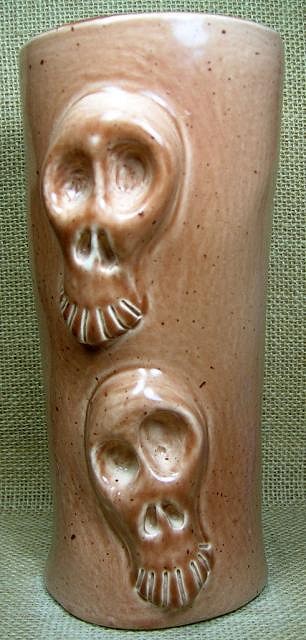
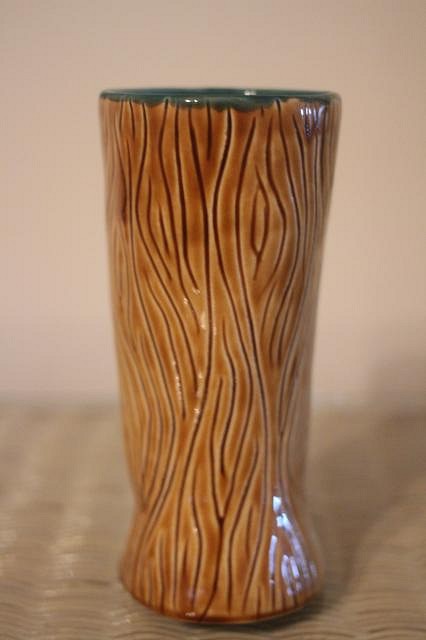
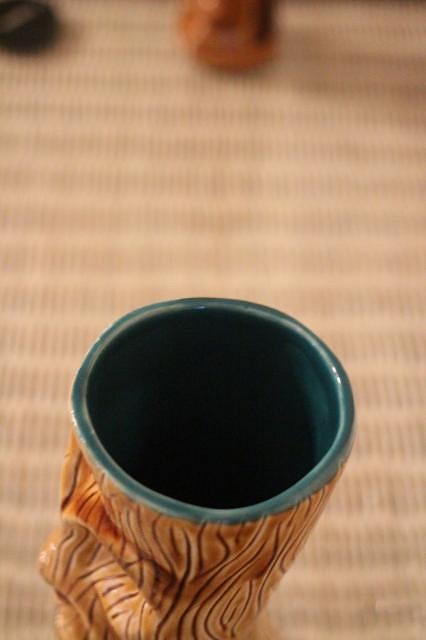
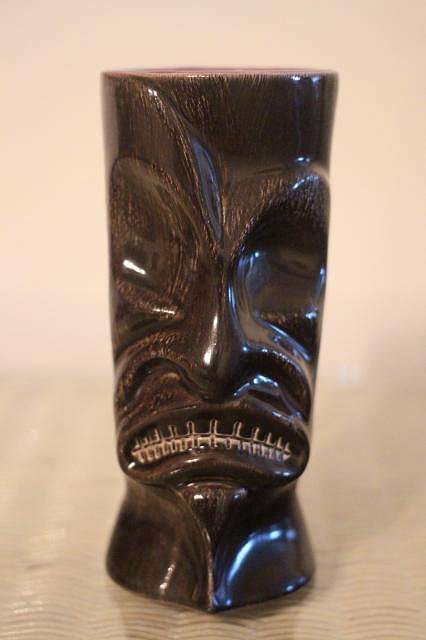
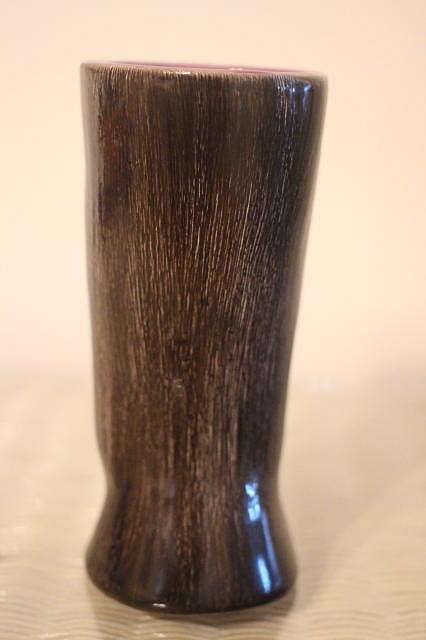
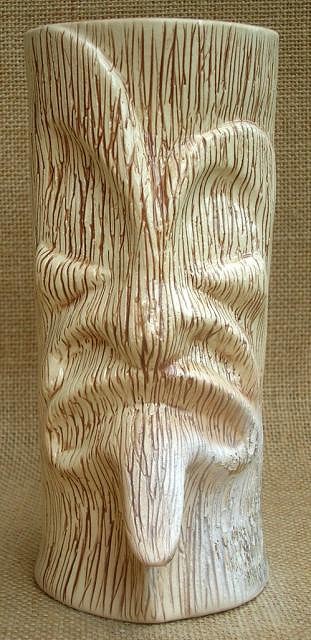
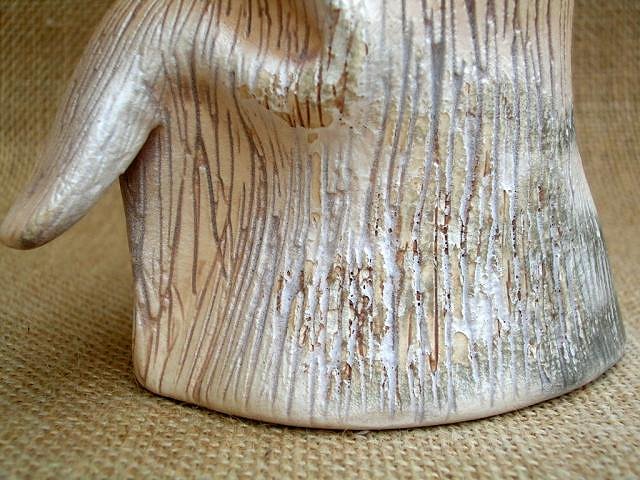
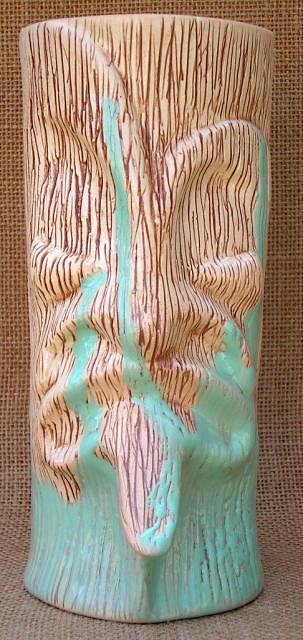
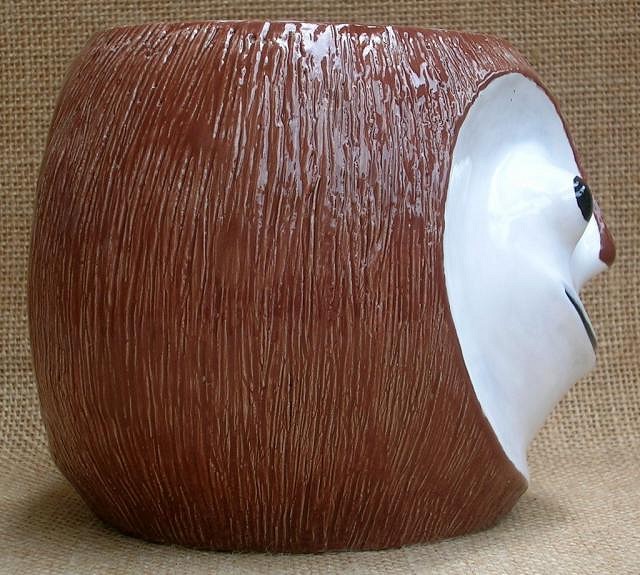
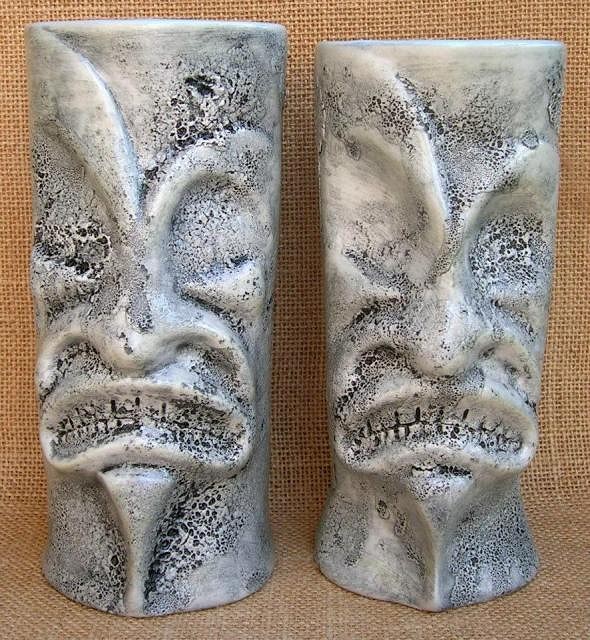
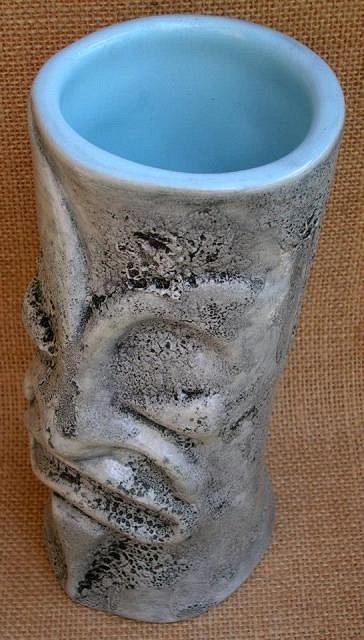
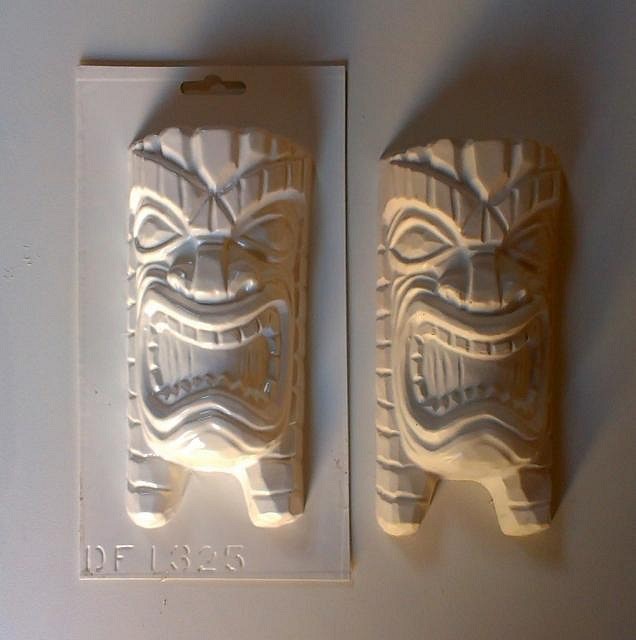
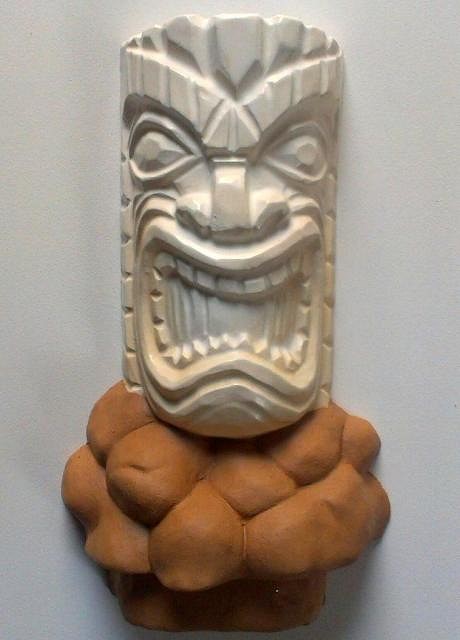
Thanks VampiressRN. Cheers Beachbumz. Yeah, i'm liking the spraygun. A few more sprayed mugs below with a something new i learnt exactly as you say. Here's a few more mugs i picked up this week. This first mug is for a guy i met last year who runs a website called Refined Vices and he said he'd be interested in one of my mugs and would like it in black. When i got this mug back there was a tiny bit on the tip of the nose where the glaze must have rubbed off in the box whilst i was transporting it so i painted some enamel over and now you can't even tell. Black and my mixed purple. With this mug i tried something different i hadn't tried before and i'm very happy with the result. I bought a wire brush and brushed over the greenware to give it this rough bark-like effect. A bit of Chocolate and Rockingham Brown mixed together with Turquoise interior. Next is something new i tried that i have added to several mugs since i really like it. On page 4 there is a skull i made out of clay that i gave to a friend who cast some in resin for me. I decided to make a mold using the resin casting and added the skull to the back of some mugs. Here's a pic of the castings he made. And here's the mug with skull added. I'm calling these mugs General Ra Ra with a Tumour.:D Same brown as above with Oyster Speckle White interior. (The skull was glazed in white also.) This mug also has a skull and like the Refined Vices mug was glazed using the spray gun, the two brown mugs were painted by brush. There are a couple spots on both black mugs where the coat of glaze was not thick enough so close up you can just see through it. It's in his nostrils and just under the mouth and also along the top edge where this happened. I learnt from these mugs where to go over them with the next lot i spray to make sure i get better coverage. I think i also learnt that by spraying, even if a particular area ends up with a thicker coat of glaze i don't think it is going to actually get darker there. It will blend in with rest. Well at least that's what i think will happen. Black and turquoise with a tumour. And last is a mug i had a go at carving a Moko on. I painted black glaze into the carved sections and then wiped it off. It was then sprayed. I used the Rockingham Brown glaze but watered it down so it wouldn't clog up the spraygun. I was quite surprised to see the colour it ended up being although i must say really like the outcome. Rockingham Brown and Oyster White again. That's it for the moment. |
|
D
danlovestikis
Posted
posted
on
Fri, Apr 20, 2012 10:04 AM
It sure is fun to see what you do with your mug. They all look great, Wendy |
|
B
Beachbumz
Posted
posted
on
Fri, Apr 20, 2012 11:44 AM
Once again Robbie, VERY COOL! The black with purple glaze looks great together and the skull attached.. xlnt.. The wire brush is great, gives your mugs a nice glaze texture too.. |
|
S
swizzle
Posted
posted
on
Sun, Apr 22, 2012 12:29 AM
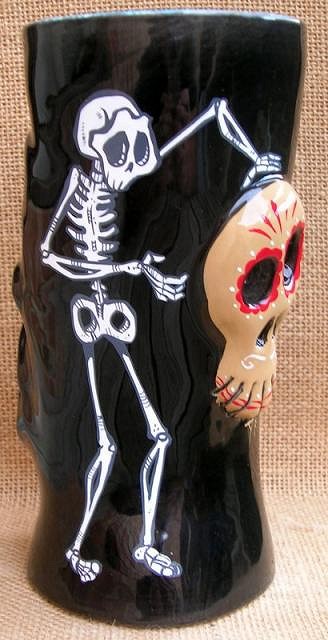
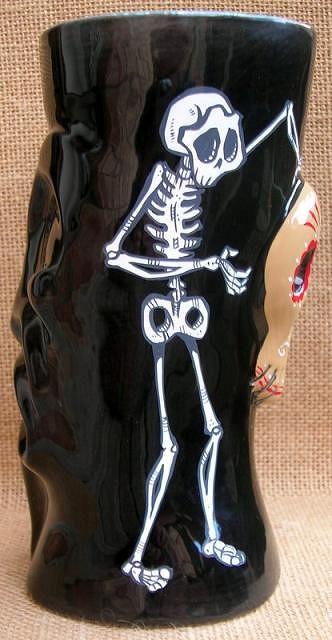
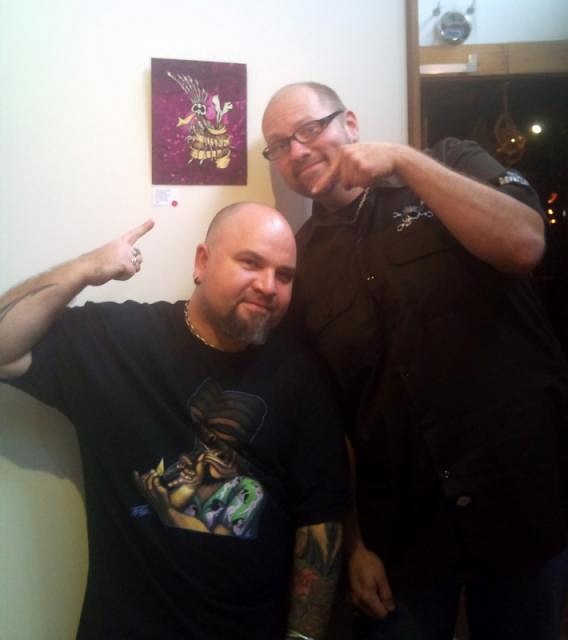
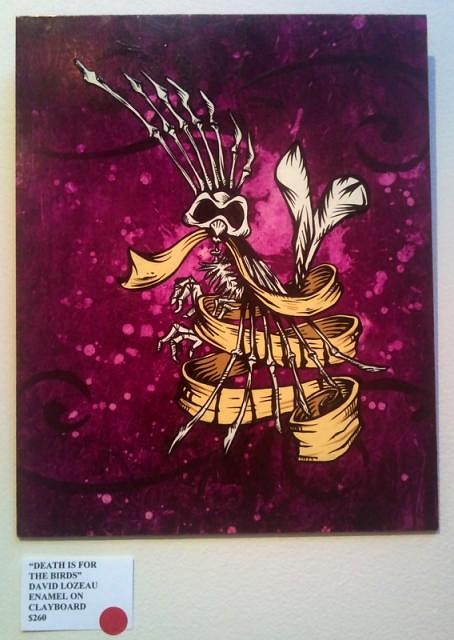
Thank you Wendy and Scott. Up until now i've really just been experimenting with glaze colours more than anything. Although i should really start a new design i'm enjoying playing around with different textures, carving detail, and adding the skulls at the moment. I also bought some matt finish glaze which i've mixed into three diffderent shades of brown so i look forward to seeing how that turns out. When i finished adding my last post on Friday night i went out to Kustom Lane Gallery to see the David Lozeau exhibition. For those of you that don't know Davids work, he can also be found here in the other crafts thread on TC under the name of Clysdalle. David is out here for the exhibition at Kustom Lane and then he's heading up north for a hot rod show next weekend. I messaged him on FB before he came and asked if he would do a custom painting on one of my mugs for me. He said that wouldn't be a problem and i must say i was extremely happy when i thought about offering one on my mugs as a trade for the painting and he said yes. The mug i traded is the woodgrain mug with the turquoise interior, and the mug he painted is the black one with the skull 'tumour', both from my last post. Here's a few pics of David and I, the mug that he painted which i think he did an absolutely awesome job on, and also one of his original enamel paintings that i purchased. |
|
D
danlovestikis
Posted
posted
on
Sun, Apr 22, 2012 7:58 AM
Wow, I'm sure glad I didn't miss this post. That's a terrific story and customized mug. See you at Oasis, Wendy |
|
B

Bowana
Posted
posted
on
Sun, Apr 22, 2012 8:20 PM
Nice one, Robbie! PS Watch out for that Low-Zo guy. He's trouble. |
|
C

Clysdalle
Posted
posted
on
Tue, May 1, 2012 11:29 AM
Hey thanks again for coming to the show and letting me toss some paint on that cool mug of yours!! ...and you better look out Bowana!! |
|
S
swizzle
Posted
posted
on
Thu, May 17, 2012 2:55 AM
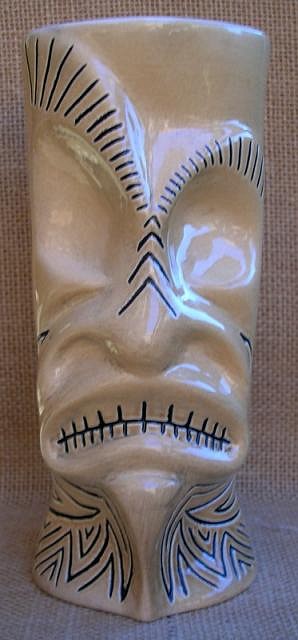
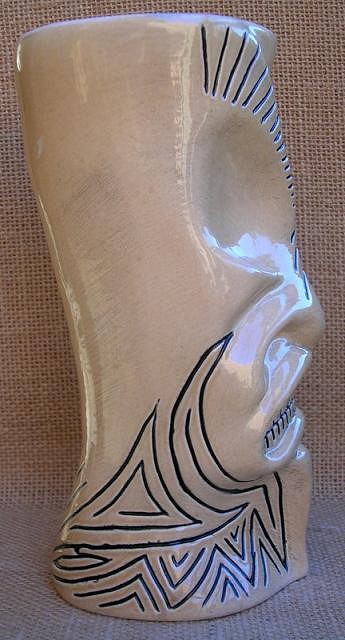
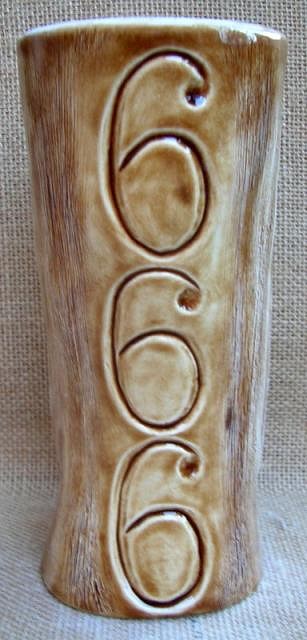
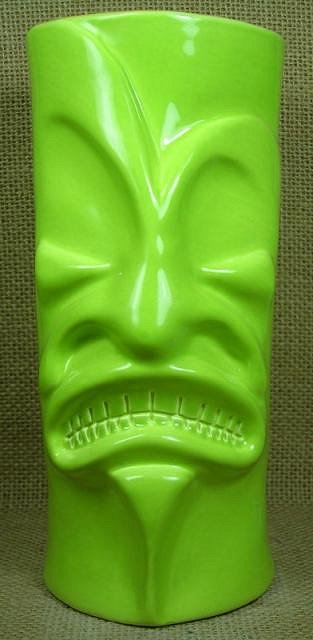
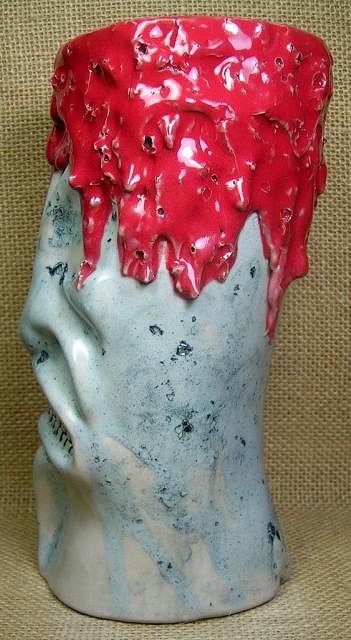
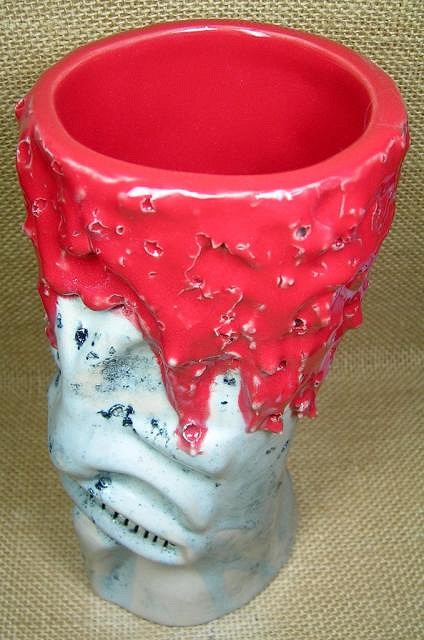
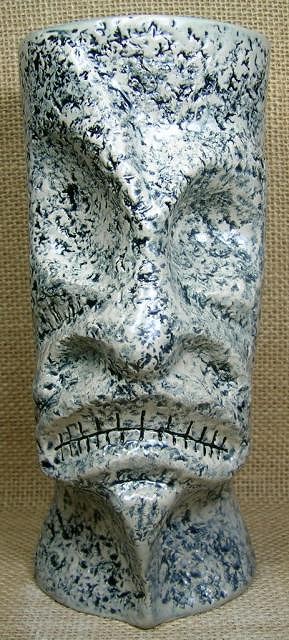
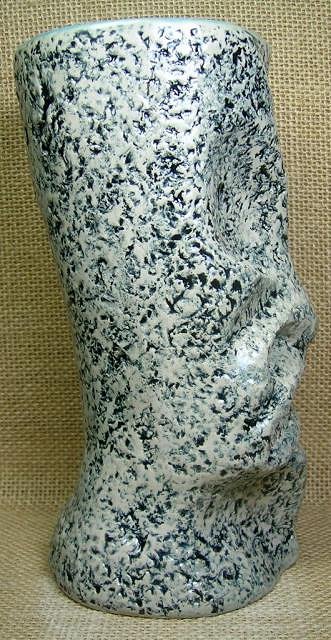
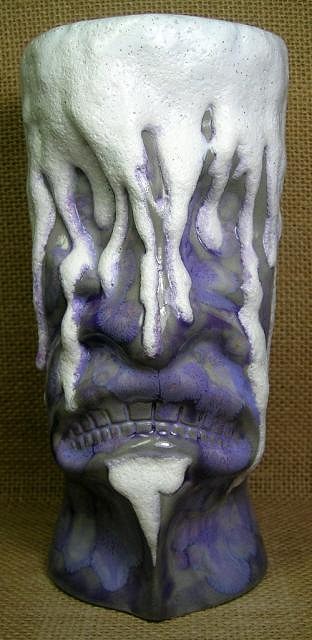
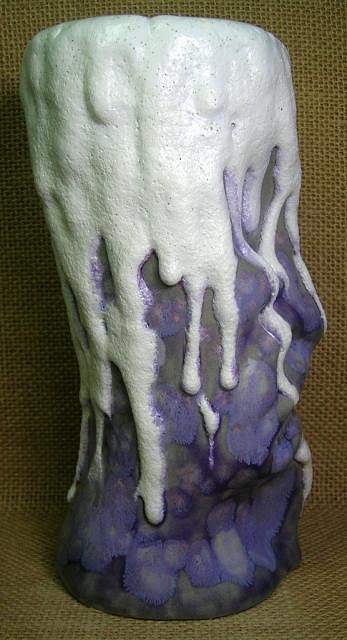
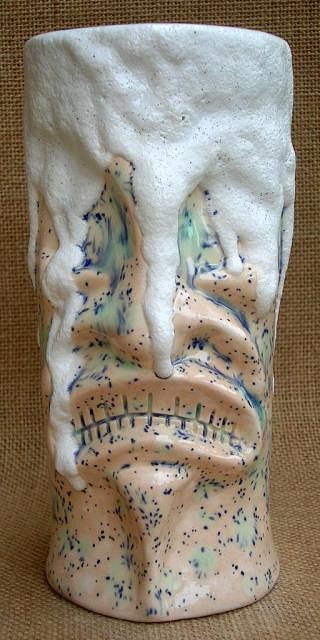
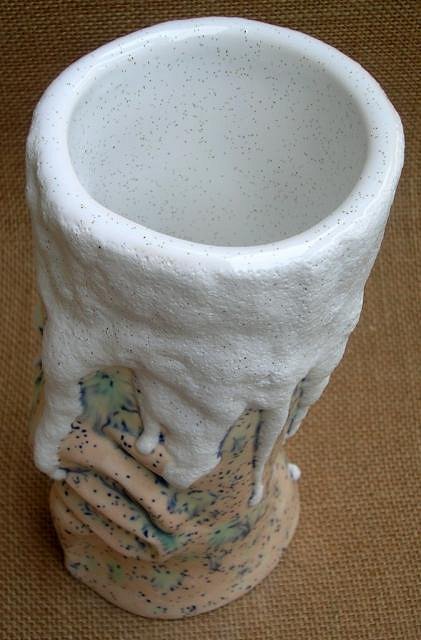
Thanks Wendy. I'm very happy with the trade i made. Thank you Bowana. I'm extremely flattered to receive a compliment from you. G'day everyone. Picked up a few more mugs today so here they are. This first mug is one i wanted to test on. It has black glaze painted onto the eyebrows and goatee (i roughed them up with sandpaper) and then wiped back and then has been glazed with the same lime green i have glazed a few mugs before with, however i wanted to try spraying it. Although it is actually a brush-on glaze, with a little added water to dilute it so it wouldn't block up the spray gun, it worked out fine so i'm very happy with the outcome. There is a small glaze skip on the top edge however which will need to be touched up and re-fired. Lime Green and Paris Green interior. Next up is a couple of custom mugs for some friends. The first is for a friend who is the brand ambassador for 666 VODKA. He requested white on the inside so that you could see the colour of the drink which made sense. The 6's aren't quite perfect but they are basically the same font as the logo. I had to freehand them from a pic off the computer. Rockingham Brown and Oyster Speckle White. Rockingham Brown and Lime Green. These next few mugs are part of my 'new', 'Grey Series'. :D I have to say that i'm very,very happy with how all three of these turned out. I added some black(powder)stain to the slip so that i could play with textures on the outside which i then would only have to glaze with a clear over the top. After the mugs had dried they lost a lot of colour so i thought i was going to have to add more stain to the slip however after being fired with the clear on top they darkened up again. I'll probably still try making another darker batch though. (All these mugs have had black glaze brushed on and then been wiped back.) Mauve and ummmmm......black and clear matte. This mug has been textured with a steel wool scrubbing pad. There's a couple of spots where i sprayed the glaze on too thick because i didn't move the gun around enough but that is something i put down to a learning mistake. Unfortunately the pics are a bit blurry so it doesn't show up in the photos but the profile pic gives you an idea of what the surface looks like. Dusky Pink interior. And finally, my attempt at 'Fat Lava'. The information i could find on the net and what has been given to me from local ceramicists on that style/technique has been very minimal. As i don't have my own kiln it makes it impossible to really experiment, however one of the guys who works where i get my mugs fired gave me a very interesting tip which is what i tried on this mug. Unfortunately that's something i want to keep to myself although i'm sure some of the mug makers out there probably have an idea of how i achieved this effect. Paris Green interior. That's it for now. I have a handful of mugs to glaze which will then need to be dropped off to be fired so i'll be back in a few weeks. Cheers [ Edited by: swizzle 2012-06-08 06:13 ] |
|
L

lunavideogames
Posted
posted
on
Tue, Jun 26, 2012 7:53 PM
Wow! Very nice job! Quite an inspiring story. I am not very artistic, but I have always wanted to try to make a mug or 2. I can't believe the results you got so quickly. I am impressed! I am also a big purple fan! |
|
D
danlovestikis
Posted
posted
on
Tue, Jun 26, 2012 8:32 PM
Way to go Robbie! |
|
S
swizzle
Posted
posted
on
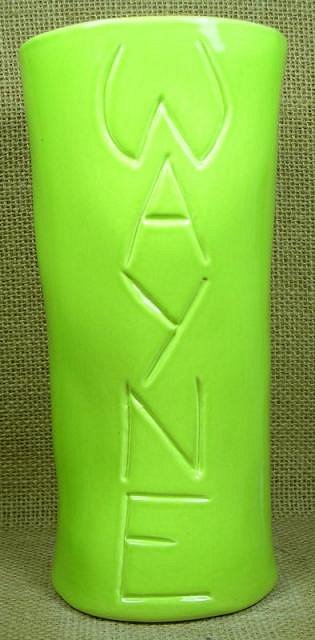
Sat, Aug 11, 2012 2:57 AM
Thanks for the compliment lunavideogames. Thank you Wendy. I'll see you in a few days. It's been a while since i last posted and i've glazed a few mugs since then so this post will be a bit of a photo dump. First up is a custom mug for Wayne Hoareau of Wild tHing creations in colours of his choice. Lime green and Pumpkin. These are some test samples of glaze i mixed myself. Although the brown on the left looks like a nice honey-brown colour in the sample for some reason the mug below came out quite orange after it was fired which i was a little unhappy with. Only because that was not the colour it was supposed to be. Brown? and Red. This is another mug i added some skulls to but i got a little carried away with this one. The skulls were hand painted with enamel. Black and Paris Green. This next mug didn't quite work out as i was hoping. It was glazed the same way as my previous mug with the 'Moko' but as you can see in the pictures the black didn't actually get right into the holes/dots i made and also in certain areas it exploded/bled around them. Because of that reason the only way i felt i could save the mug was to glaze it in a dark colour. As i didn't want to glaze it black i ended up adding black to one of the browns in the test samples above and reglazed it in that colour. Unfortunately because of the extra layer of glaze on it a lot of the carving detail got lost but i'm much happier with the result than what it looked like before.
Dark Brown and Light Jade. Dark Brown and Purple. I honestly can't remember which browns i used on this mug but both of them are again using ones from the test samples. Although the coverage on it is even i could have sprayed a few more layers of glaze onto it to get a deeper colour however i like how it came out as it doesn't look too 'flat', if that makes sense. I'll end up hand painting the skulls later.
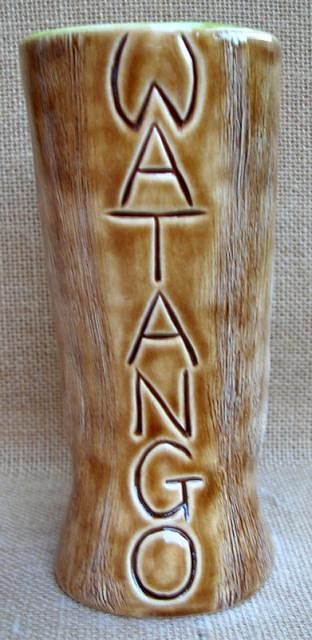
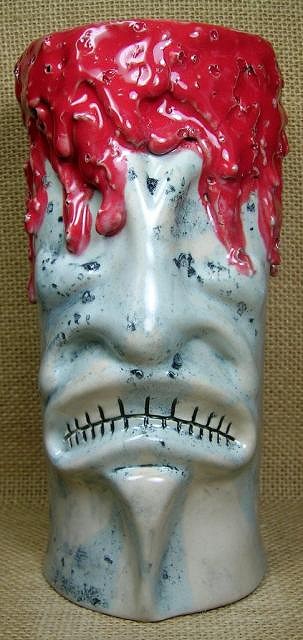
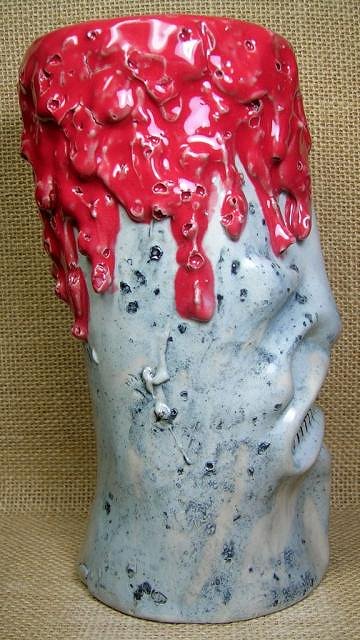
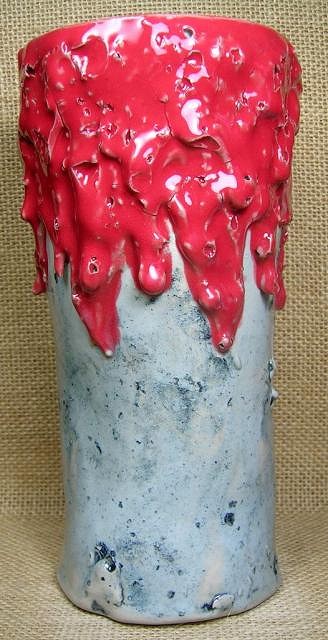
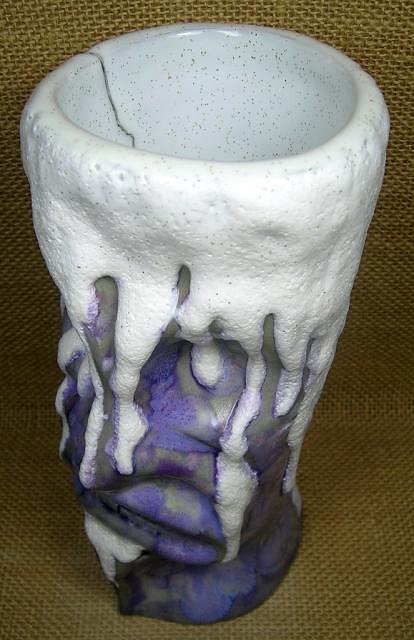
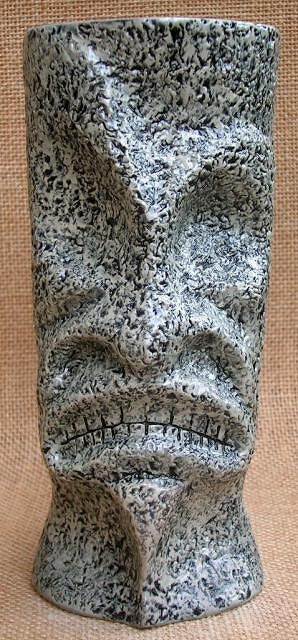
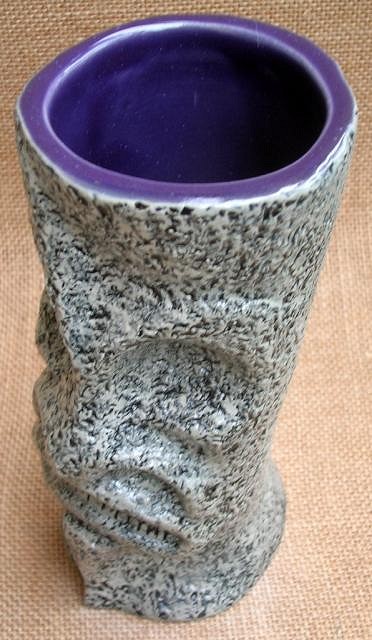
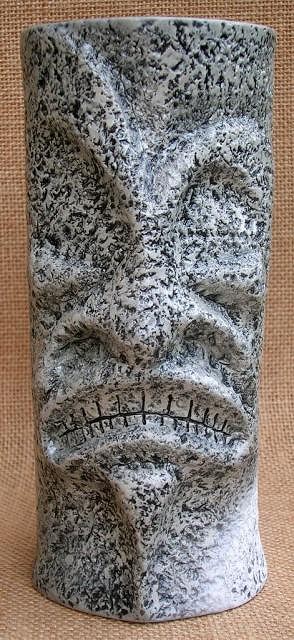
The following four mugs are all part of my 'Grey Series'. The first three mugs have had black glaze brushed onto them and them wiped back off. This first one was another attempt at a Fat lava. Happy with how it turned out and also learnt a few new things while making it, which is always a good thing. Grey slip, Red and clear. Extremely happy with this one. I have to say that this probably my most favourite mug i have made so far. Grey slip, Turquoise and clear. This is another mug which came out differently to what i expected but i'm still very happy with the outcome. I used a 'crystal' glaze on the inside which i then overflowed and let run down the outside. I'm pretty sure that i didn't get the desired 'crystal' effect on the outside because the base mug is grey and not white therefore it obviously doesn't stand out as much. I'm also wondering if the clear that was sprayed over the top of it reacted with the crystal glaze at all. Grey slip, Northern Light and clear. And last but not least, another one i'd have to say is also one of my most favourite mugs so far. Unfortunately the mug was quite hard when i was cleaning it up and it had distorted at the top and when i squeezed it back into shape it cracked. As it is a test mug and the crack is on the inside you cannot tell when it is on display so i'm not to worried about it. The white frothy stuff on the outside is a new product i found and i tried a different colour crystal glaze on the outside. I'm sure the crystal glaze would look different on a mug that is white and not grey but it still came out well. Grey slip, Grape Divine and Oyster Speckle White. I have two other mugs i didn't post as one is a custom mug for a trade and the other is a gift and i don't want the recipients seeing them yet. Well that's it from me at the moment and probably will be for a little while. Although i might still make a couple more General Ra Ra's, i think this mug has run it's course and it's time to start a new design. I already know what the next mug will be from one of my drawings, i just need to get off my butt and sculpt it..............then make the mold. :roll: Until the next time, P.S. I'll see some of you in a few days time at Tiki Oasis. [ Edited by: swizzle 2012-09-24 01:42 ] |
|
M
MadDogMike
Posted
posted
on
Sat, Aug 11, 2012 6:45 AM
Swizz, you've been busy ~ even mixing your own glazes! I'm either too chicken or too lazy for that. Seem sometimes our best inspirations come from our mistakes. I know this wasn't the colour you wanted but it has a cool texture to it The random "bleeding out" on this looks cool too, you couldn't have planned that if you wanted to The fat lava glaze turned out wicked and the crystal glaze one is awesome, subtle but still noticeable. I'm not sure clear would make it better and it could make it worse. And this guy is definitely made for drinking Foster's (that's Australian for beer, right?). Looks like the beer foam has run over the top and down his face :lol: See ya in a few days mate! |
|
W

wim"flap"thielemans
Posted
posted
on
Thu, Sep 27, 2012 8:32 AM
WOW!!!!! has been a while since i've been on tiki central, way too busy!!! |
|
D
danlovestikis
Posted
posted
on
Thu, Sep 27, 2012 3:08 PM
Swizzle you are doing so well. The glazes look terrific. You get bonus points for experimenting. I'm looking forward to your next design but I never get tired of seeing this one. Cheers, Wendy |
|
B
Beachbumz
Posted
posted
on
Thu, Sep 27, 2012 8:37 PM
Looking Good Flap! I'll be filling my General up tonight with some good rum hopefully after work.. Great job on the glaze Robbie, really came out nice, wait a minute.. RED?? No purple?? :wink: |
|
N''

nui 'umi 'umi
Posted
posted
on
Thu, Sep 27, 2012 9:07 PM
Robbie, You spent a bit of time with us here in SoCal and I thought your only talents were conversation and imbibing. Your mugs are outstanding! |
|
S
swizzle
Posted
posted
on
Fri, Nov 2, 2012 3:37 AM
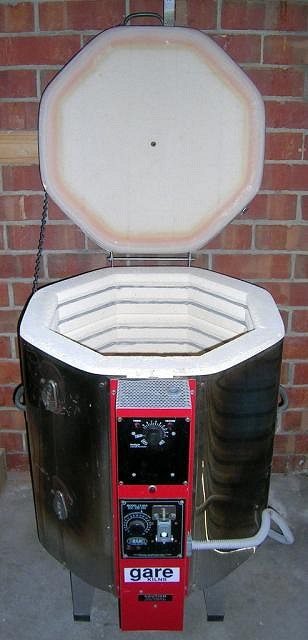
Look at what i bought last weekend!!!
I'm very happy with this purchase. It is in extremely good condition and also a good size. And even though i still need to get an electrician out to wire it up, i think it will be worth the money in the long run. Thanks Wendy. I haven't quite retired this mug yet regardless of how much i'd like to and will have a few more 'experiments' to show in a week or so. My next design is actually on it's way. Thanks braddah Scott. It would have been purple if i had the choice but FLAP requested red. :D David, thank you for the compliment on my mugs, although conversation and imbibing are talents that are not to be sneezed at. :lol:. Hopefully sometime in the future i can make you some more Mai Tais, in my mugs, and the conversation can last all night.
[ Edited by: swizzle 2012-11-02 03:39 ] |
|
M
MadDogMike
Posted
posted
on
Fri, Nov 2, 2012 5:48 AM
Awesome Swizz! Congratulations! |
|
B
Beachbumz
Posted
posted
on
Fri, Nov 2, 2012 7:27 PM
Nice Robbie, you scored bra!! Can't wait to see all the art that comes out of it.. |
|
V
VampiressRN
Posted
posted
on
Fri, Nov 2, 2012 7:34 PM
Congrats on the kiln...looking forward to your creations!!! |
|
A

anthonymaye
Posted
posted
on
Fri, Nov 2, 2012 10:09 PM
love the brown with red at the top of the page just stunning! |
|
T

TikiTomD
Posted
posted
on
Sat, Nov 10, 2012 5:21 PM
Robbie, two of your awesome “General Ra Ra” Tiki mugs now grace the Blowfish Bar in Flagler Beach, Florida. Really appreciate the extraordinary effort you undertook to get them to me. Here they are...
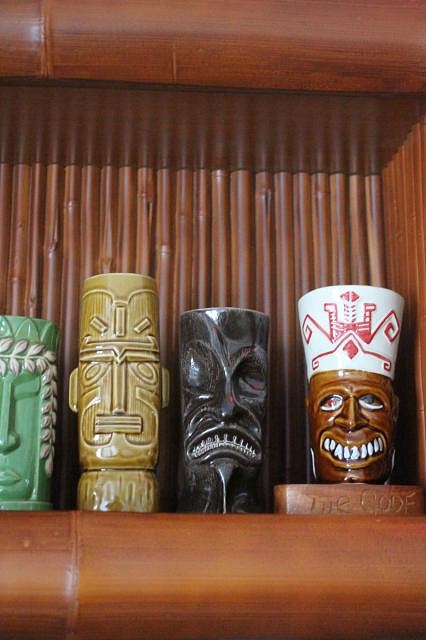
Here these beauties are on the shelf above the bar...
-Tom |
|
D
danlovestikis
Posted
posted
on
Sat, Nov 10, 2012 7:24 PM
Robbie it is so cool that you have a kiln, congratulations. I'm very excited. Now make a board for your glaze tests and keep up with them. Cheers, Wendy |
|
S
swizzle
Posted
posted
on
Sat, Dec 29, 2012 1:10 AM
Thanks Mike, Scott and VampiressRN. Thank you anthonymaye. Thanks Tom for liking my mugs enough to purchase some from me. The drama getting them to you was quite entertaining though i must say. Thanks Wendy. It feels good having my own kiln knowing i can fire stuff whenever i want to. Well since my last post i have had the kiln wired up and have done a couple of firings which i'll get to later. First up is a few more of my General Ra Ra mugs. A couple of months ago we had another get together at the Tiki Lounge and Bar here in Melbourne and i made a few mugs to take along and sell. If you've been following my thread you'd be aware that there are two versions of my mug which i call V.1 and V.2. With this batch of mugs i decided to detail and glaze both V.1 and V.2 in the same style and colour to make a matching pair. I did this with three pairs and there were 4 other 1/1 mugs to make up 10. Now this was the last batch of mugs i had fired where i buy my ceramic supplies from before i bought my kiln. And as Murphy's law would have it, this was the first time i had any real dramas using a community kiln and it had to happen with only a couple of weeks before the show. I won't go into all the details here but there was some sort of powder or something in the kiln (which my mugs happened to surround) which when the kiln was fired, this substance fused itself onto some of my mugs, damaging them. There's no need for me to explain what happened, you'll be able to tell from the photos, but as luck would have it, there was one mug from each pair that got damaged. So i unfortunately i didn't actually end up with a 'pair' of the matching mugs i was hoping for. The pics below will show the mug that survived, it's 'pair', and the damage on it, and then the damaged mug repaired the best i could. The only way i could try to fix them was to glaze over where this substance had fused to the mug and hope that it covered it when it was refired.
These two mugs i didn't know what to do with and just left them. Because of the glaze colour the damage wasn't as noticable. :lol: One friend really didn't care and actually liked it so he bought one, at a reduced price, and the other i just gave to the owners of the bar.
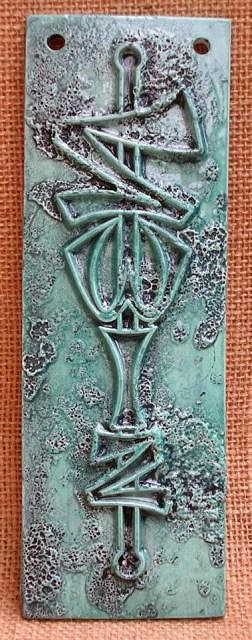
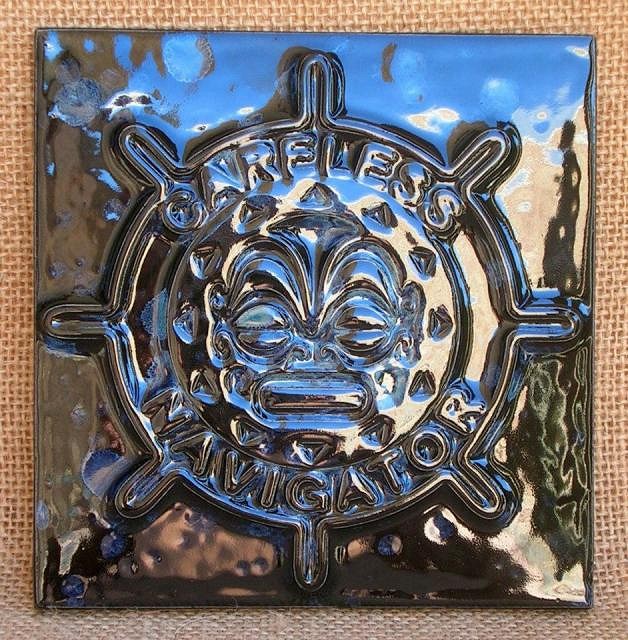
These two mugs were the only other ones that came out unscathed.
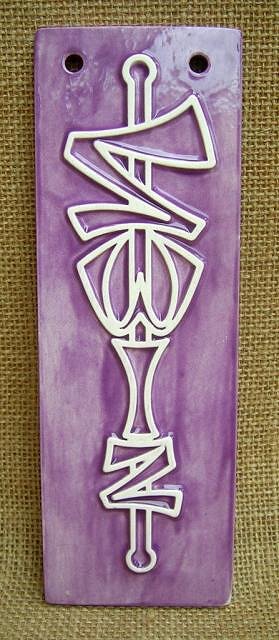
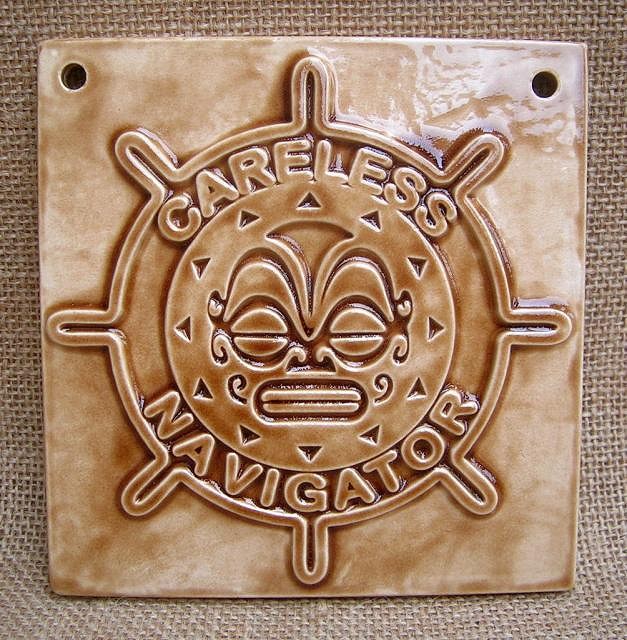
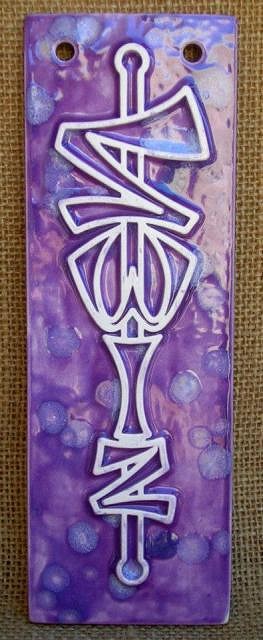
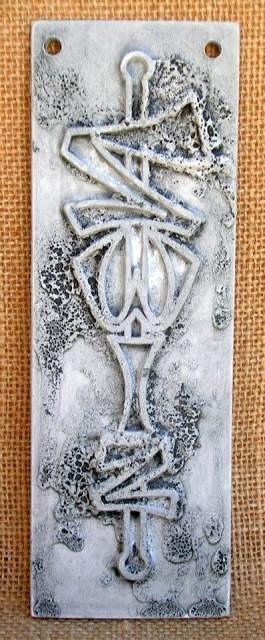
Next up is the first few pieces i have fired myself in my new kiln. These are effectively tiles, or you could use them as a drink coaster. As i have put holes into them i'm going to thread some rope through them and hang them up on the wall. The first one is a logo i designed for my Tiki user name, the other my friends logo. (Before anyone asks, i made a mold from something for these that i'm keeping as my little secret. Sorry.)
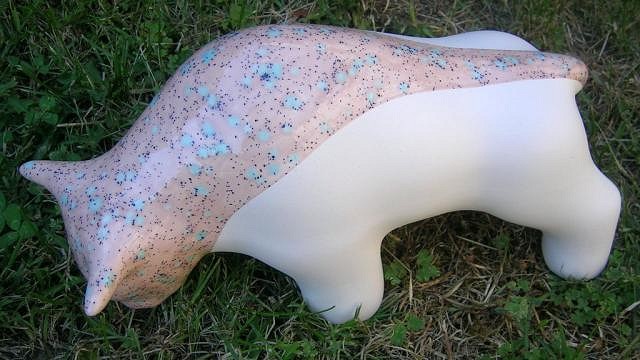
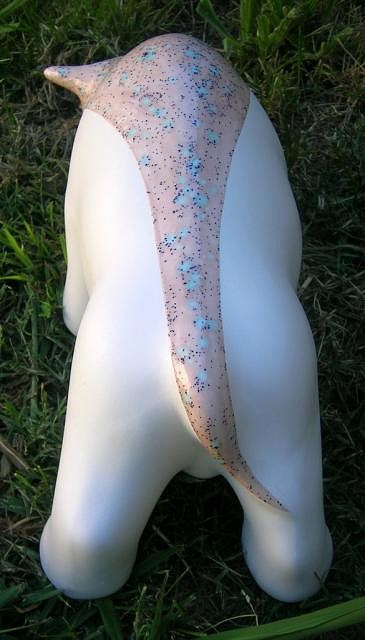
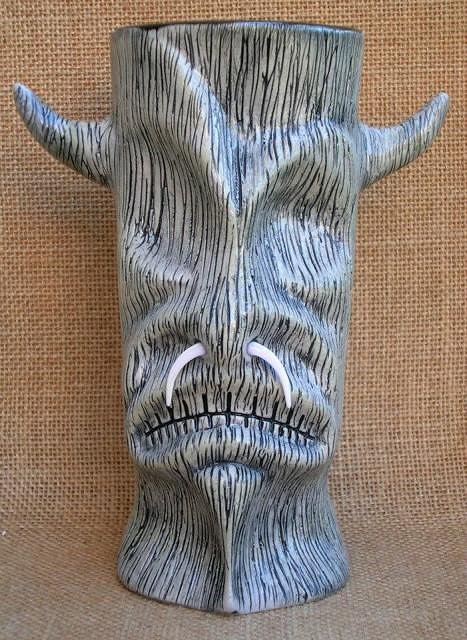
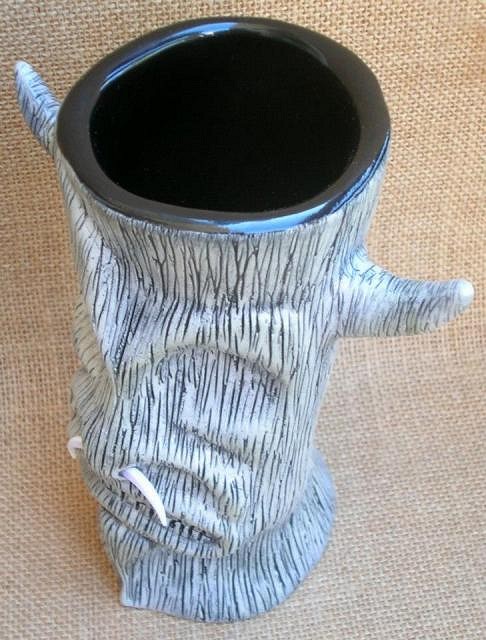
The following two pieces are not related to Tiki in any way at all, but i thought i'd show them regardless. I became friends with a guy recently who is actually an airbrush artist but also does ceramics. I gave him two of my mugs, a V.1 and V.2, in greenware which he is in the process of modifying. I've seen some progress pics on Facebook and they look AMAZING. I'll post some pics here when he's finished them. The first one i gave to my mum for Christmas (her star sign is Taurus), the second i'm keeping for myself. After the first one came out exactly as i wanted, i went a little crazier on the second. I really was expecting the glazes to bleed, especially the blue, but i was so happy when i opened the kiln this morning.
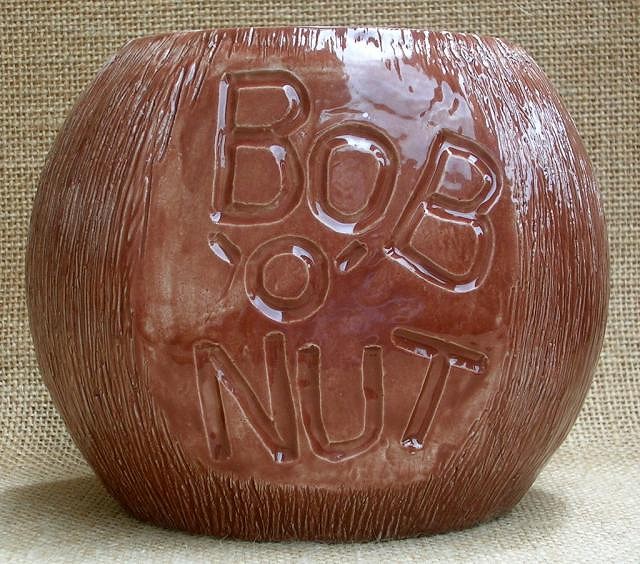
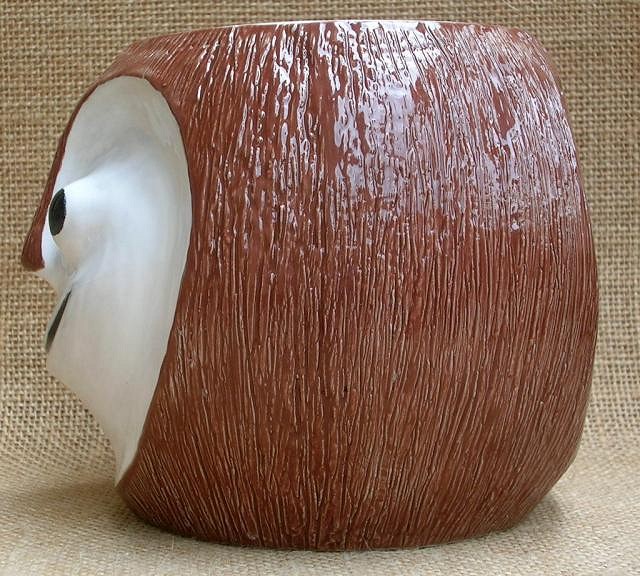
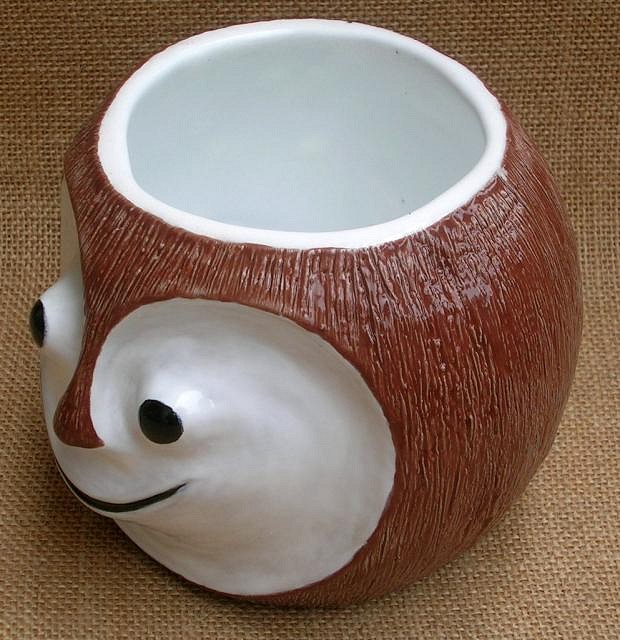
And last but not least, yes, i finally have made a new mug. It's not what i had pictured to be my second mug but as i've only made two molds before, and that was about 18 months ago, i decided to start of with something simple so i chose a coconut. Now as there are dozens and dozens of coconut mugs around i had to put a twist on it, and what better than my favourite Tiki, Tiki Bob. :lol: So without any further ado, ladies and gentleman, i give you "Private Bob 'O' Nut".
I need a cup of tea and a lie down after all that. Cheers |
|
M
MadDogMike
Posted
posted
on
Sat, Dec 29, 2012 8:15 AM
Swizz, I'm glad you got you kiln fired up! The grey General with the black slime is great, nice save! The bulls are awesome! Especially the multicoloured one, I'm very surprized that those crystaline glazes did not move more. And I love the Bob 'o Nut! Very cool. Good to see you busy, I hope you are enjoying your summer more than I am enjoying my winter :D |
|
D
danlovestikis
Posted
posted
on
Sat, Dec 29, 2012 9:44 AM
Hi Swizzle, I sure would like to see the step by steps on how you glazed the bulls. Did you use tape? I can't begin to guess how you did these glazes with such straight lines. They are perfect, Wendy |
|
S
swizzle
Posted
posted
on
Sat, Dec 29, 2012 1:46 PM
Thanks Mike. I'm pretty happy to have the kiln finally running. I'm glad you like the bulls, i'm very happy with them. When i glazed the first one i was expecting the crystal glazes to move myself so i was quite surprised when they didn't. As the first one came out perfectly like i was hoping i decided to try something different with the second one. Although the pinkish colour glaze didn't move i wasn't sure how the blue and purple ones would behave and it was the blue one i was most concerned about, so i was extremely happy and surprised when i opened the kiln. And i'm actually quite enjoying my summer because it hasn't really been hot yet. When it does start warming up i'll be wishing i was with you where it is cooler. Hi Wendy. Unfortunately i never think to take progress shots as i'm doing things so i cant show you how i did the bull, but yes, i did use tape. I masked it off with the tape that airbrush artists use to outline flames when they spraypaint hot-rods. |
|
G

GROG
Posted
posted
on
Sat, Dec 29, 2012 2:08 PM
Go Swizzle, go!! |
|
H
hang10tiki
Posted
posted
on
Sat, Dec 29, 2012 4:12 PM
Love Bob-O-Nut |
|
D
danlovestikis
Posted
posted
on
Sat, Dec 29, 2012 5:33 PM
The bulls glazing just is excellent. I like all your tests too. Wendy |
|
HT

Hale Tiki
Posted
posted
on
Thu, Jan 3, 2013 9:07 AM
The bulls aren't my style, but I dig what you did with the glazes. And actually, I like all the nutty glazes on your mugs too. Shame about the dust. The Bob 'o Nut is downright nutty! I wasn't a huge bob fan either, but I too like what Wendy has done, and your Bob o' Nut is an EXCELLENT addition. You need to do a run of them, then get that run here to the US for someone to sell/ship for you, to save everyone on shipping. I'm pretty sure you'd find quite a few TC'ers here that would want one. (And a few on ebay.) It's real kooky, man, and a good addition to what is usually pretty bland coconut mugs. |
|
S
swizzle
Posted
posted
on
Fri, Jan 11, 2013 2:45 AM
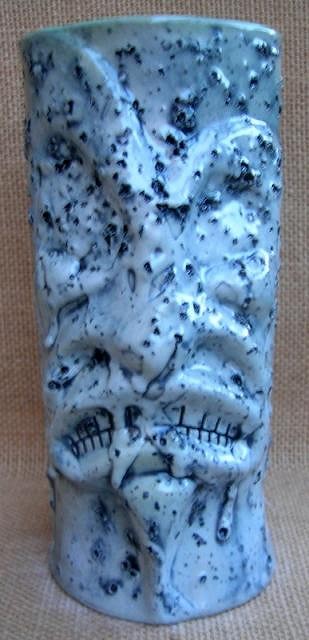
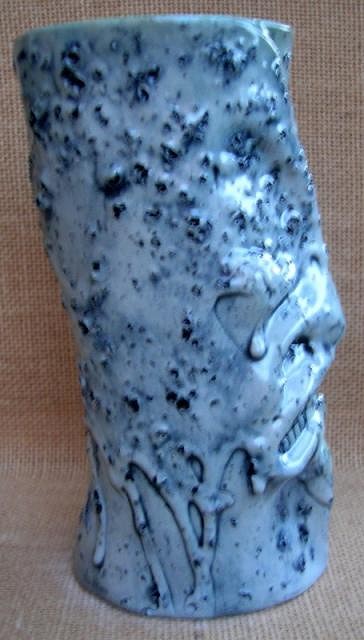
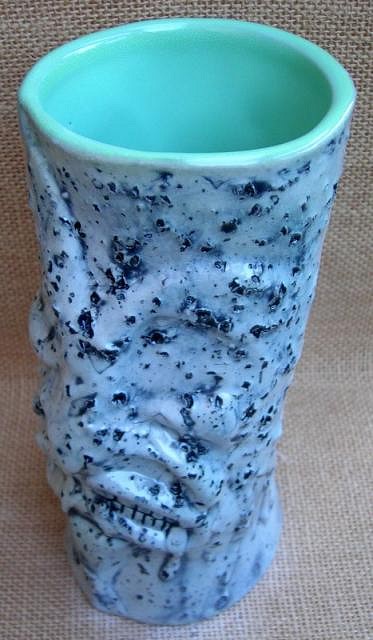
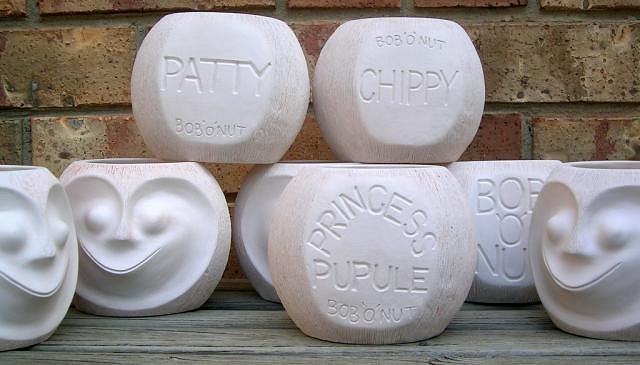
Thanks GROG, hang10Tiki and Wendy. Thanks for the various comments Hale Tiki. Speaking of which, i forgot to mention in my last post that i'm making these mugs to order and if anyone is interested, please send me a PM to discuss the details. Your name can be carved into the back of it if you'd prefer.
Also, my custom super-carved Tiki Bob from Wendy arrived. Here he is next to Bob 'O' Nut.
And finally, when i stayed with Wendy on my trip to the U.S. in August she gave me a couple of bisqued pieces which i could glaze how i chose. This is the first piece, a Bumatay pendant in Rockingham Brown. It took me ages but i finally decided on what colour i'm going to glaze the other piece (not a pendant, something different) of which i'll post pictures of when it's done. Hopefully it'll look good in the colour i've chosen. Thanks Wendy, you're an angel.
[ Edited by: swizzle 2013-01-11 02:50 ] |
|
S
swizzle
Posted
posted
on
Mon, Apr 8, 2013 4:44 AM
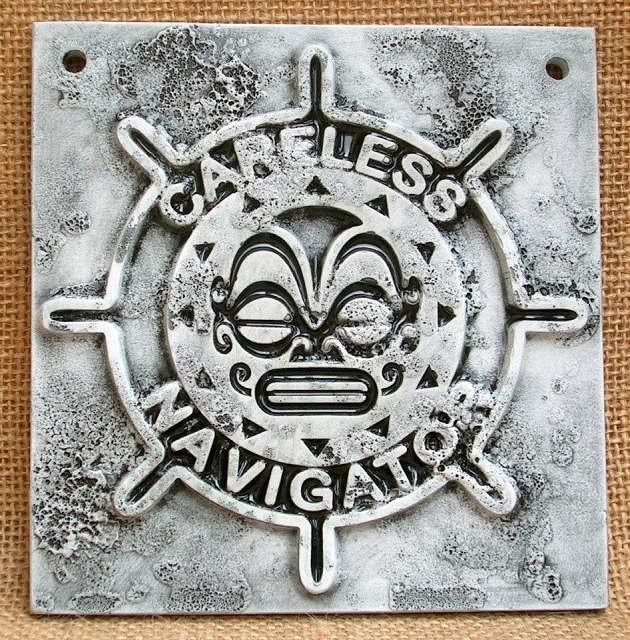
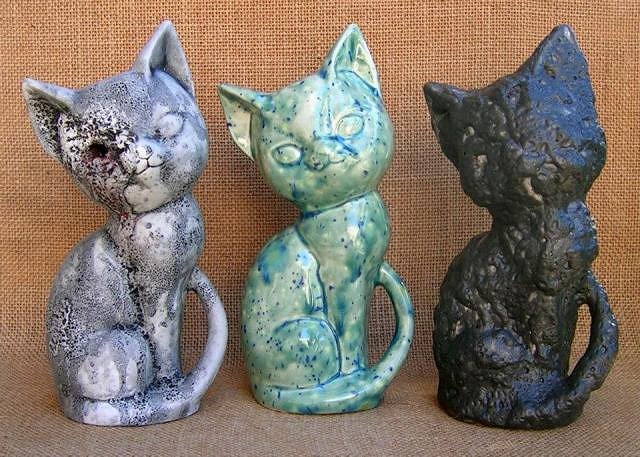
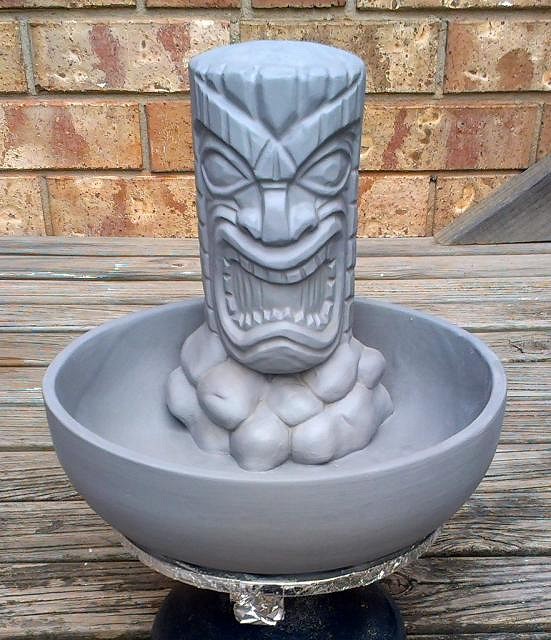
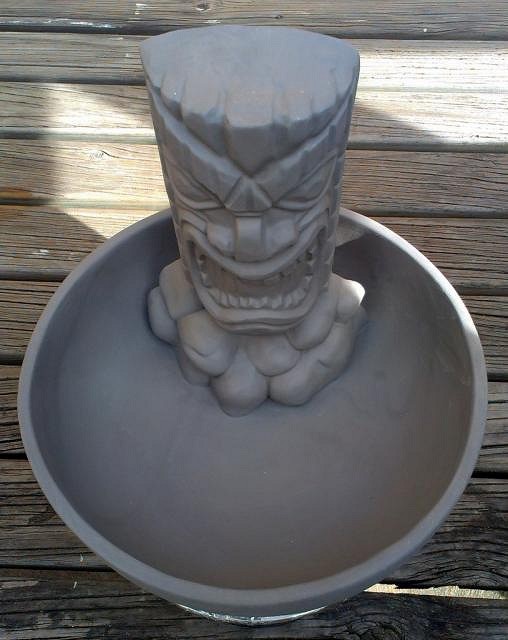
It's been a while since i last posted and in that time i've been playing around with new glazes and finishes which you'll see below. I've also started on a new piece. First up is a Frankoma War God which was another gift from the lovely Wendy when i stayed with her and Dan. It took me forever to decide how to glaze it before i ended up choosing this crystal glaze. This is a group shot of the first batch of my Bob'O'Nut mugs that went out. I had an issue with the second batch where i had opened up the peep holes when the kiln was cooling down as well as cracking the lid and the mugs that were near the peep holes developed cracks in the glaze. It was both on the inside and outside on the opposite sides so i get the feeling the mug is actually cracked internally also, and although it is something that you can only really see close up, and i'm not sure if they actually leak or not, i've decided to make those mugs again. Here's a couple of General Ra Ra's. I tried a couple of different things on one and when a friend saw it she HAD to have one also. Black one is mine, purple one is hers, both with added horns and nose piercing. Next is my logo and the Careless Navigator logo which i pour each time i pour something as it's easy to do and clean up and also gives me something to test new glazes and/or techniques on. I also picked up a really cheap cat mold off eBay (i'm the male version of the crazy cat lady) which i've also been pouring just to play around with. (The purple logo is from an earlier post, i just went over it again with a crystal glaze.) Here's the cats with two new finishes i finally worked out. It's awesome having my own kiln as i can now experiment a lot easier. As you can see on the cat on the left (Zombie Kitty, who i think looks great) and on a few of the logos above, i've worked out a technique which gives me a pitted effect. When i finally worked out how to do that (i've been trying to work that out since i started making mugs two years ago now) i had to try it out on a couple of Ra Ra's. I'm extremely happy with the result but also extremely disappointed that i dropped the one on the left and broke it. The other one will be going off for a trade so i've made myself another two. They just need to be glazed and fired, although i'll be using a darker blue on the inside on those. And last up is a new piece i've made, "Lance Corporal Stoney". I made the molds a couple of weeks ago and made the first piece on the weekend. Unfortunately i can't take credit for designing the Tiki but everything else is all mine. :D I picked up a plastic mold off eBay several years ago which i had previously only poured plaster casts of and then painted. I decided to use that to make a plater mold and then make a plaster mold of that to use for slip casting. I also made a bowl mold using a metal bowl i bought for cheap from a discount store (no pictures). Here's the plastic mold and the plaster casting. I still have no idea what the things on the bottom are (legs?) but for what i wanted to do the Tiki needed to stand upright so i had to cover them no matter what, so i added clay to make the Tiki look like it is sitting in a pile of rocks. Here's a pic of the mold and the first casting to come from it and also where i'm at so far. I plan on making several variations of this bowl and this first one is actually different to what i originally had in mind, although i'll definitely be making what i first envisioned also. There is a little more clean-up to do when it dries a bit more and i should be able to glaze it next week. I've already decided on the colours i'm going to do it, i just hope it comes out looking as good as i'd like. I'll post some pics of it when it's done. Cheers |
|
HT
Hale Tiki
Posted
posted
on
Mon, Apr 8, 2013 6:27 AM
Swizzle, I wondered the same thing for a long time. I got that mold many moons ago. It's supposed to be the bottom of his headdress. |