Tiki Central / Home Tiki Bars
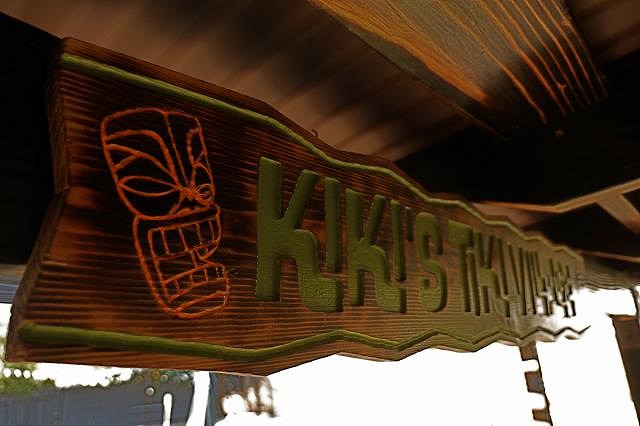
Kiki's Tiki Village
|
M

muskrat
Posted
posted
on
Tue, Jul 8, 2014 11:03 PM
finally getting around to starting a build thread for "Kiki's Tiki Village". [ Edited by: muskrat 2014-07-10 11:47 ] |
|
V

VampiressRN
Posted
posted
on
Tue, Jul 8, 2014 11:16 PM
Welcome to the fray...looking forward to seeing more pictures of your fun project. |
|
M
muskrat
Posted
posted
on
Wed, Jul 9, 2014 3:51 PM
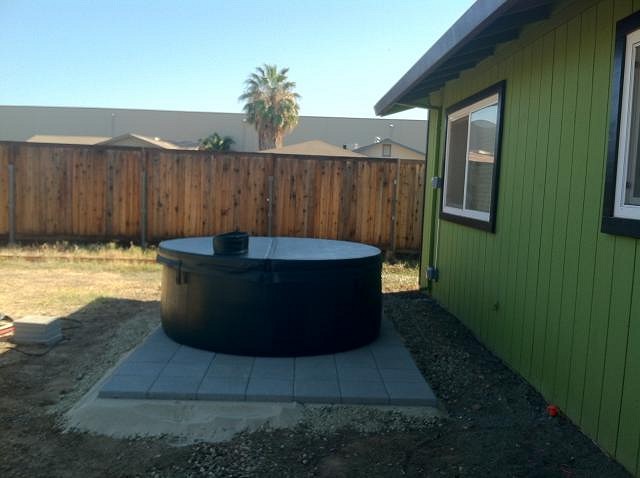
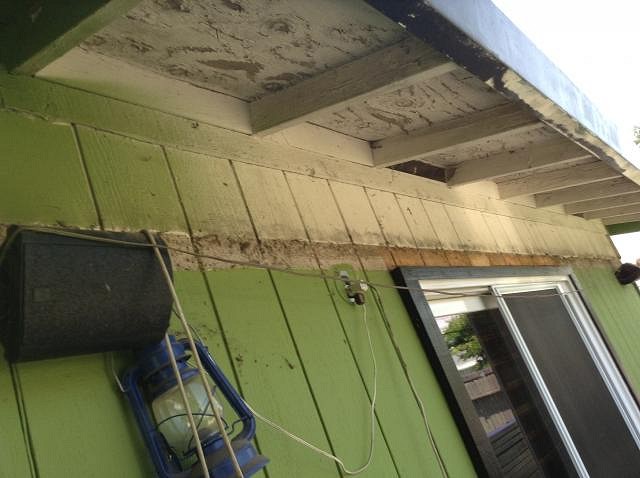
so here's what we had to start with.
an uneven slab that pooled water, a poorly constructed cover made from pine 2x4's that was ready to come down and at 10x20 (half of which was at a different level as a step for the slider) wasn't much space. |
|
M
muskrat
Posted
posted
on
Wed, Jul 9, 2014 5:05 PM
so, what was the first thing we did...
yep, we got a hot tub.
[ Edited by: muskrat 2014-07-09 20:58 ] |
|
M
muskrat
Posted
posted
on
Wed, Jul 9, 2014 8:56 PM
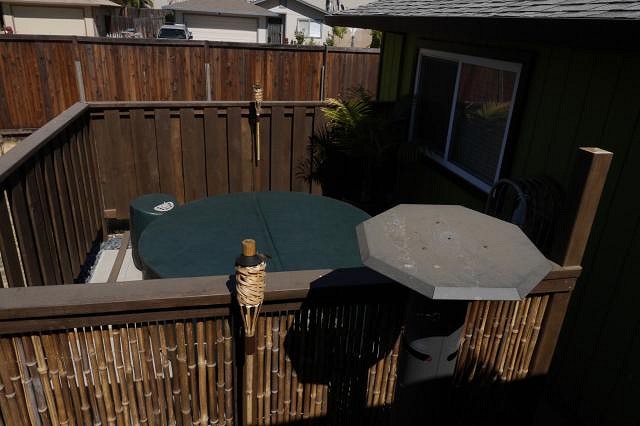
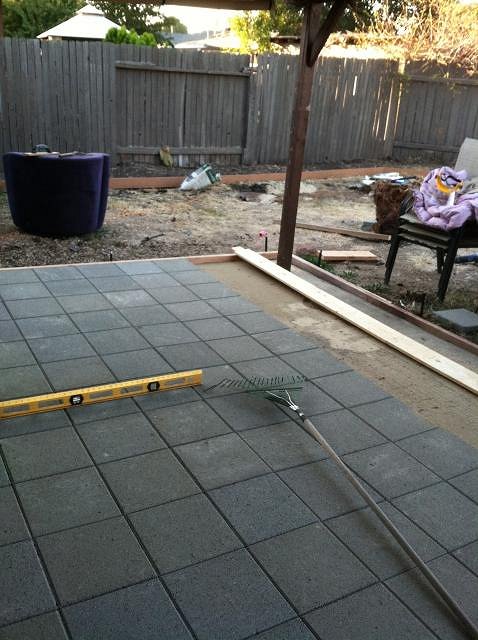
next up was leveling off the existing patio.
the view from the hot tub
|
|
M
muskrat
Posted
posted
on
Wed, Jul 9, 2014 10:11 PM
then came concrete.
and with concrete came Samoans.
they had more fun playing bocce than anyone i'd ever seen playing before. |
|
M
muskrat
Posted
posted
on
Wed, Jul 9, 2014 10:33 PM
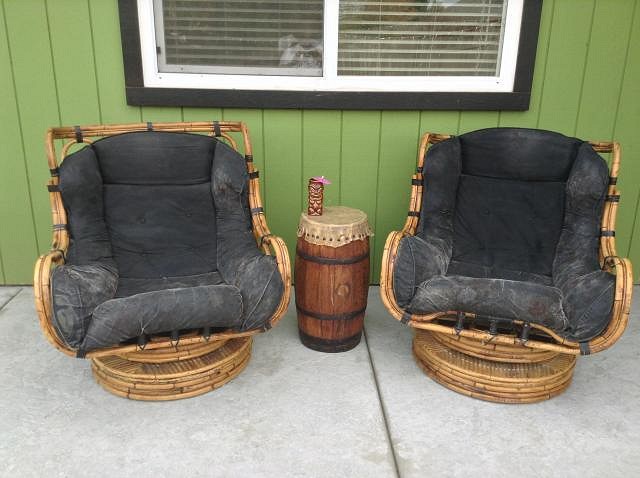
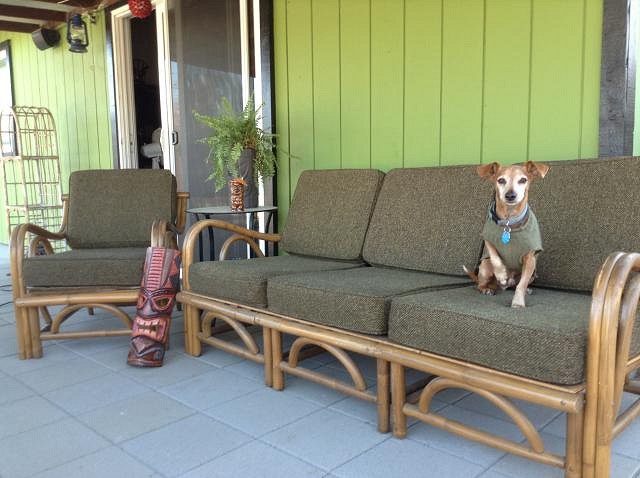
concrete finished
with the concrete done i started gathering furniture on craigslist.
Red the dog approves this purchase.
|
|
M
muskrat
Posted
posted
on
Wed, Jul 9, 2014 11:58 PM
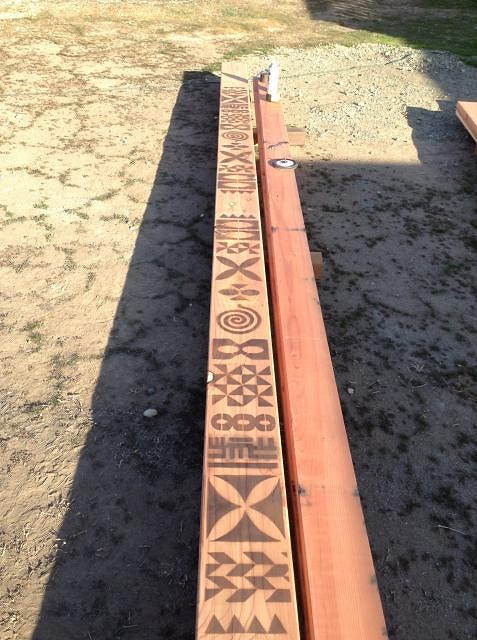
now it's time to get down to business.
next up...FIRE! [ Edited by: muskrat 2014-07-10 08:52 ] |
|
H

Hakalugi
Posted
posted
on
Thu, Jul 10, 2014 12:03 AM
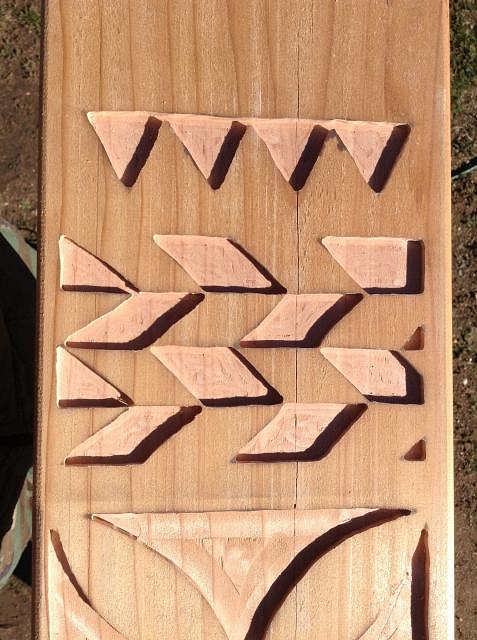
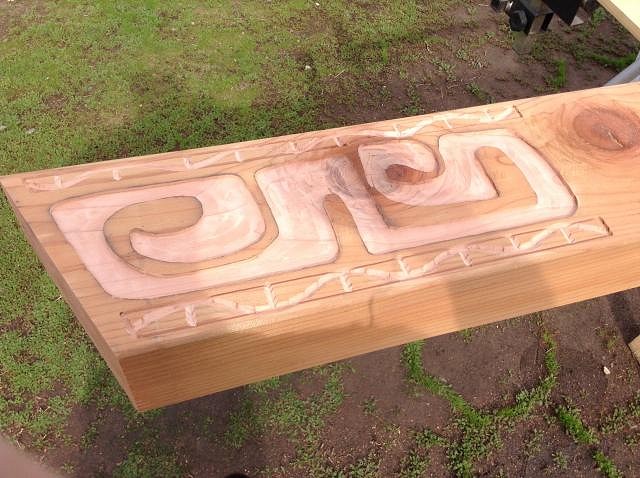
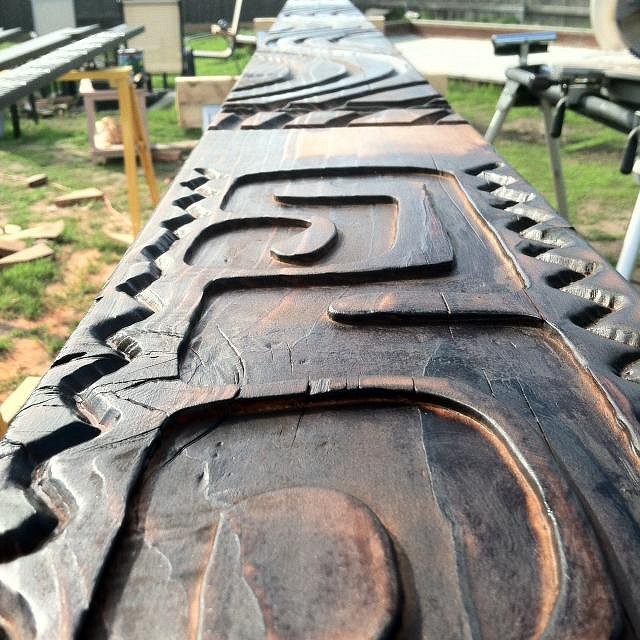
Nice routing work. Good stuff indeed! Can't wait to see more. |
|
L

littlegiles
Posted
posted
on
Thu, Jul 10, 2014 6:37 AM
Really nice looking! Love the privacy fence around the hot tub and the routing work is amazing. Can't wait to see more of your work.
|
|
L

Longboard
Posted
posted
on
Thu, Jul 10, 2014 7:54 AM
Nice work. I've also got a bocce Ball court at my tiki bar. Rum and Bocce just seem to go together. -Longboard |
|
M
muskrat
Posted
posted
on
Thu, Jul 10, 2014 8:51 AM
thanks for the props! longboard, what type of surface do you have on your court? |
|
M
muskrat
Posted
posted
on
Thu, Jul 10, 2014 9:38 AM
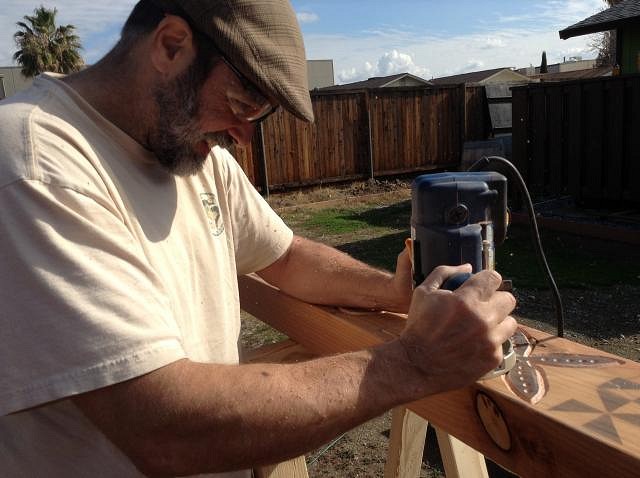
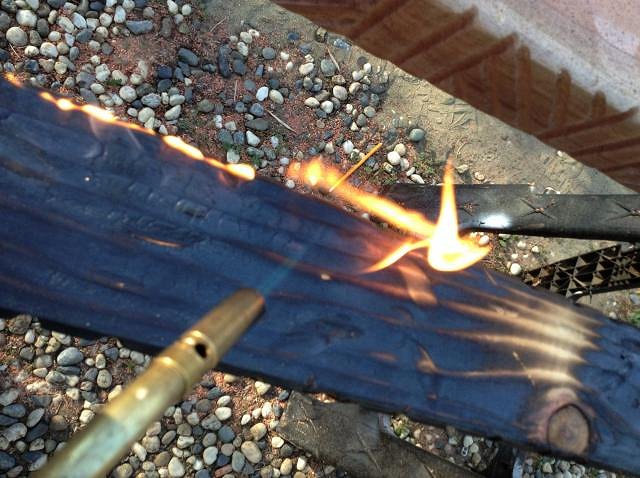
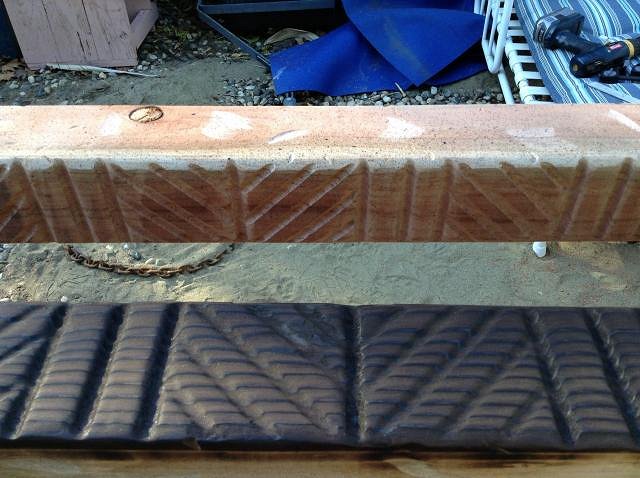
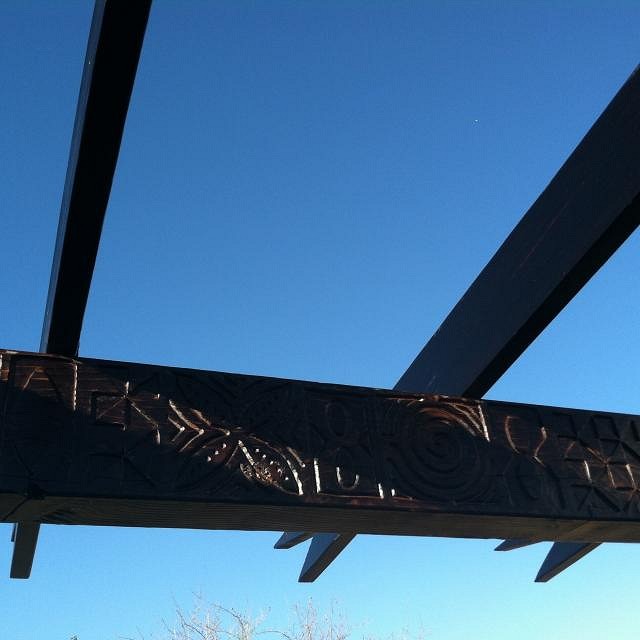
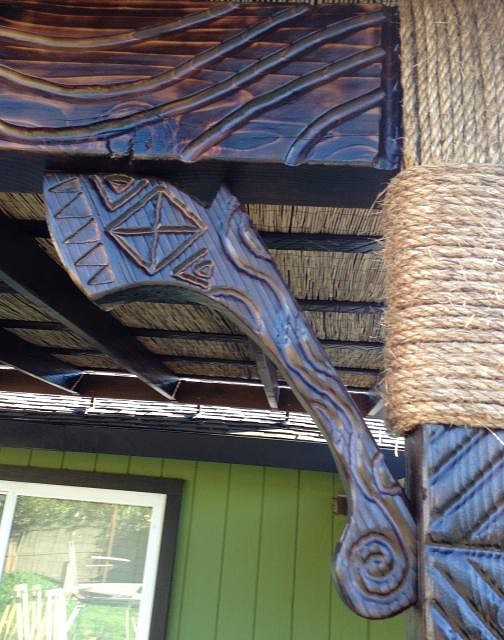
next up, torch time.
mmmm, crispy.
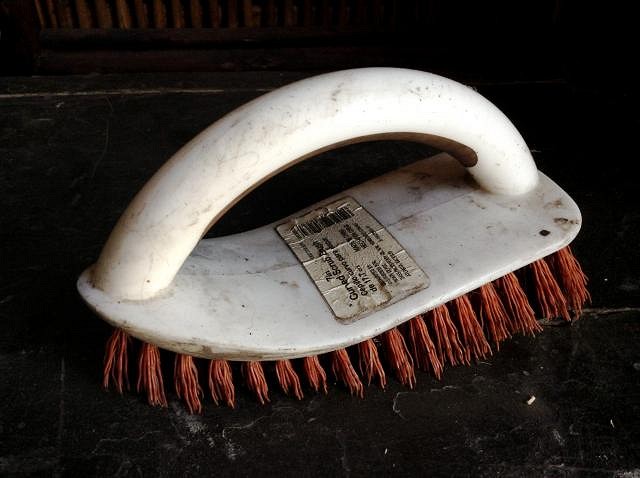
then comes the brushing.
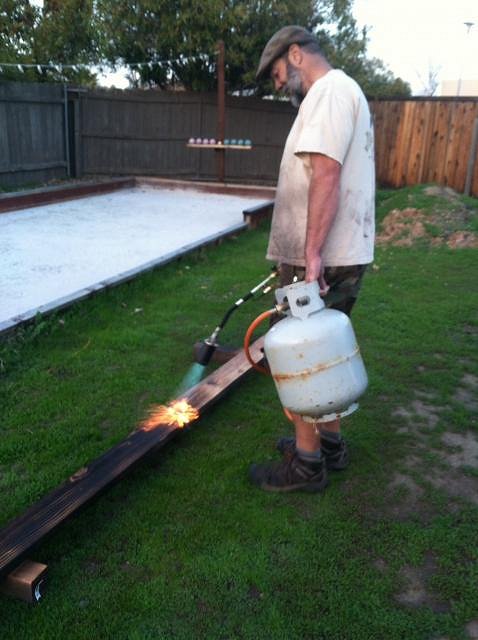
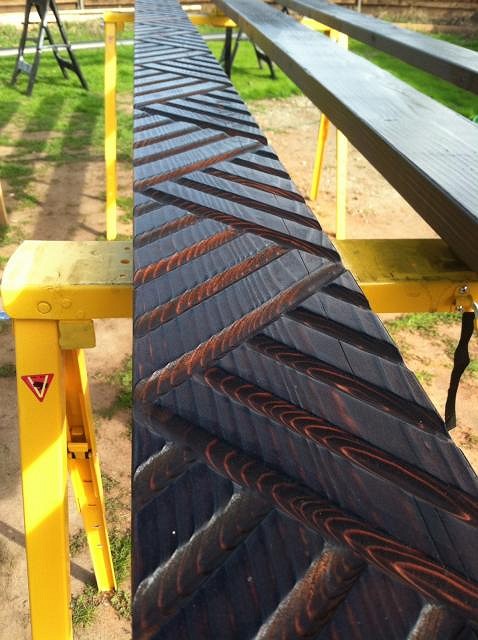
purty. i decided to burn the wood on the upright poles several times to really bring out the grain in an almost witco-esque style. after doing 2 of the uprights with the small torch and looking at the huge amount of lumber i had to burn, i decided to break out the big gun.
after several days of burning and brushing i was ready to move on to sealing the wood.
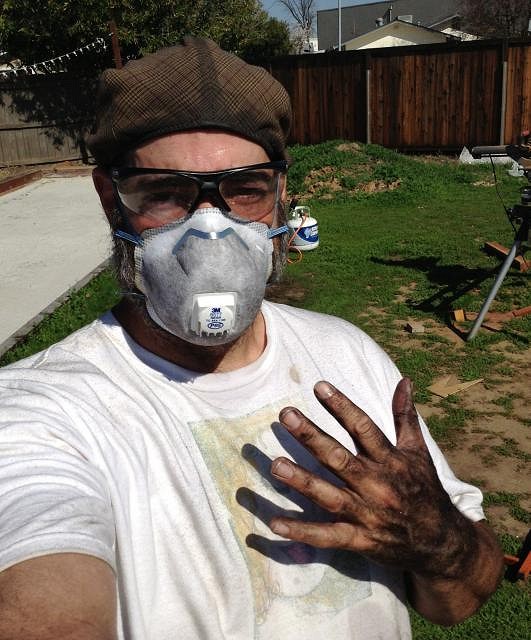
"sorry ladies, he's taken" - mrs. muskrat. (please wear a mask and safety glasses when brushing the wood) [ Edited by: muskrat 2014-07-10 09:39 ] |
|
L

Luckydesigns
Posted
posted
on
Thu, Jul 10, 2014 6:14 PM
Nice work!! |
|
M

MadDogMike
Posted
posted
on
Thu, Jul 10, 2014 6:33 PM
I like it Muskrat. Nice deep router work. Longboard likes rum and bocci, I think I like the rum and hottub combo better :lol: |
|
M
muskrat
Posted
posted
on
Thu, Jul 10, 2014 9:04 PM
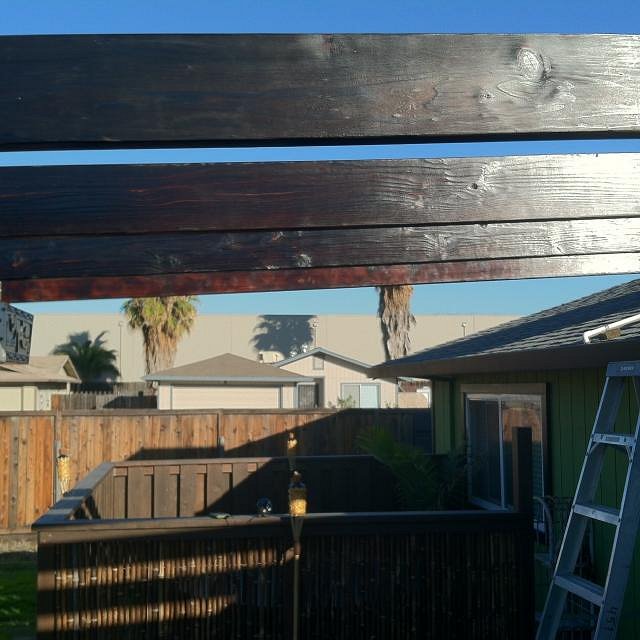
next up was sealing all the wood.
4 coats of gloss polyurethane then it was time to get building. |
|
M
muskrat
Posted
posted
on
Fri, Jul 11, 2014 10:39 PM
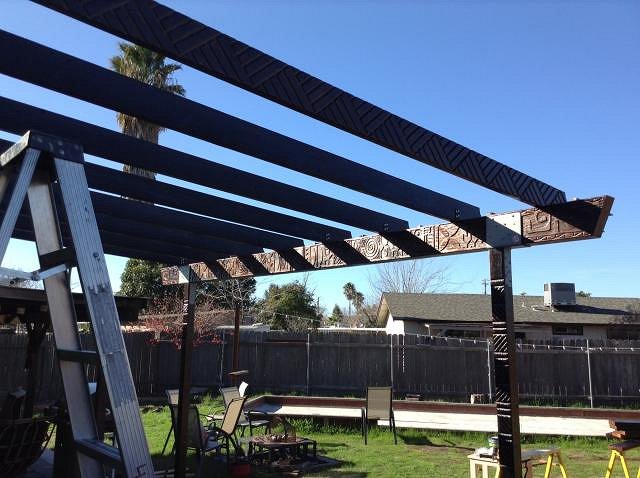
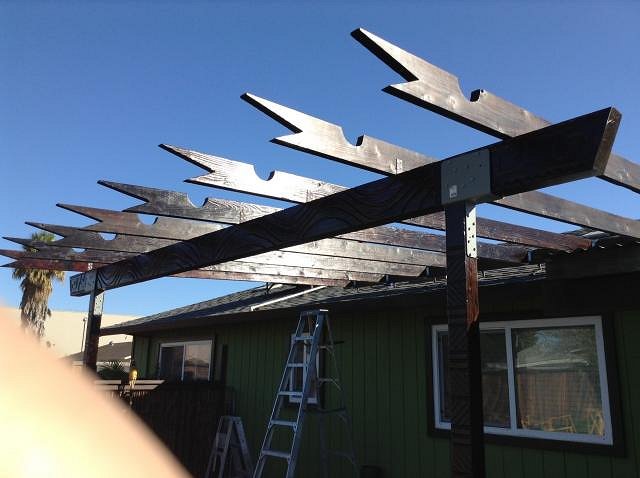
with all the wood carved, burned and sealed, it was time to start building.
with the basic frame in place it was time to build the corner supports and the gutter. |
|
M
muskrat
Posted
posted
on
Fri, Jul 11, 2014 11:18 PM
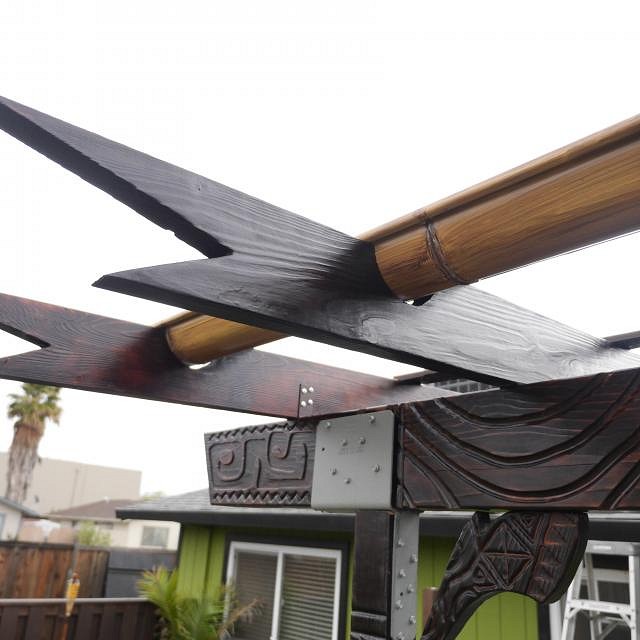
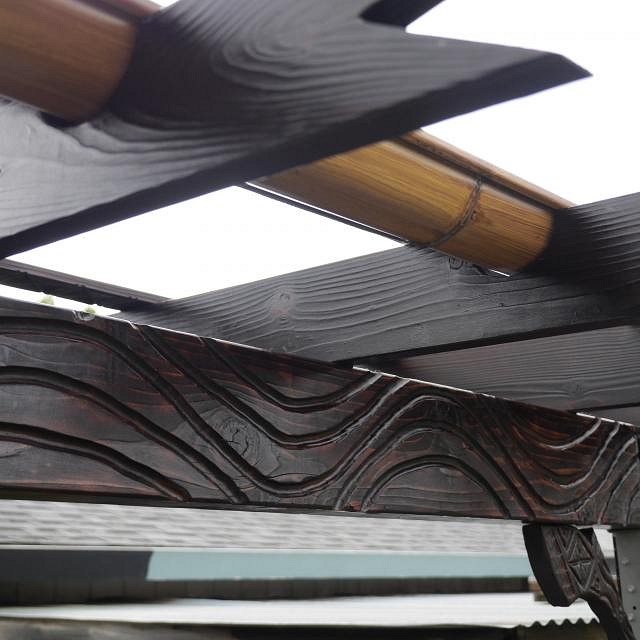
next up was building the gutters. i wanted bamboo gutters but the cost was prohibitive and they would need to be replaced more often than i'd like so i made some from 5" half round sheet metal gutters. i used epoxy to make nodes and used a paint process i came up with to make them look the business.
i did a step by step tutorial on how to make these. you can see it here [ Edited by: muskrat 2014-07-12 09:32 ] |
|
M
muskrat
Posted
posted
on
Sat, Jul 12, 2014 9:30 AM
now it was time to install the gutters.
all it needs now is a rain chain. now to put a roof on it. |
|
M
muskrat
Posted
posted
on
Sat, Jul 12, 2014 9:34 AM
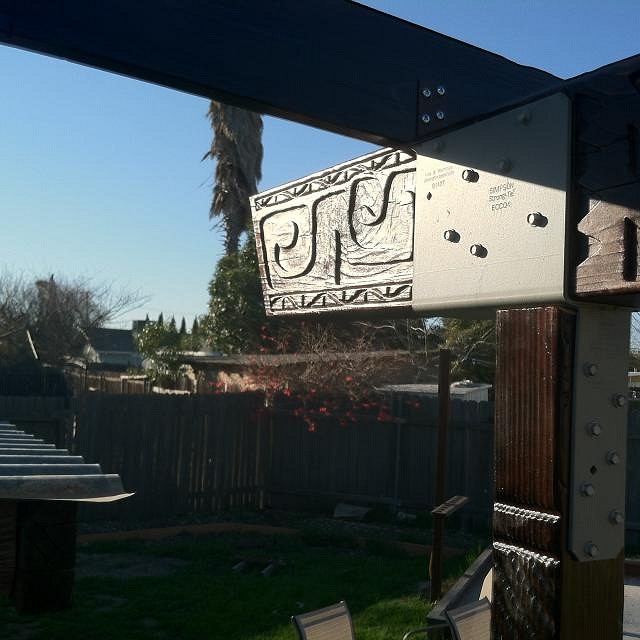
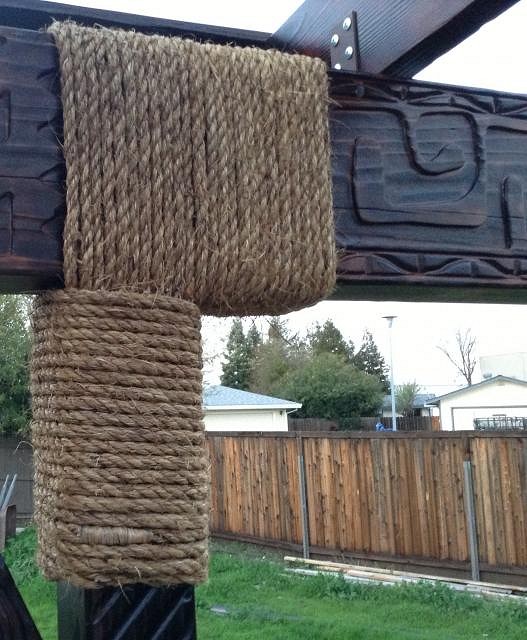
next up was wrapping the hardware with manila rope to make it look like it had been lashed.
once that was done i wrapped around the uprights.
with the massive hardware i used to attach the 4x4's to the 4x8's, corner braces weren't necessary but i had an idea and i think it panned out.
ok, now we can put a roof on it. |
|
S

SufferinSimon
Posted
posted
on
Sat, Jul 12, 2014 11:15 AM
I love the whole project so far, but the "bamboo" gutters look amazing! Thanks for documenting the process and keep the pics coming. |
|
V
VampiressRN
Posted
posted
on
Sat, Jul 12, 2014 4:49 PM
AWESOME construction...just love it!!! |
|
ATP

Atomic Tiki Punk
Posted
posted
on
Sat, Jul 12, 2014 8:29 PM
Really coming together nicely! |
|
M

MissClaireTiki
Posted
posted
on
Sun, Jul 13, 2014 1:21 PM
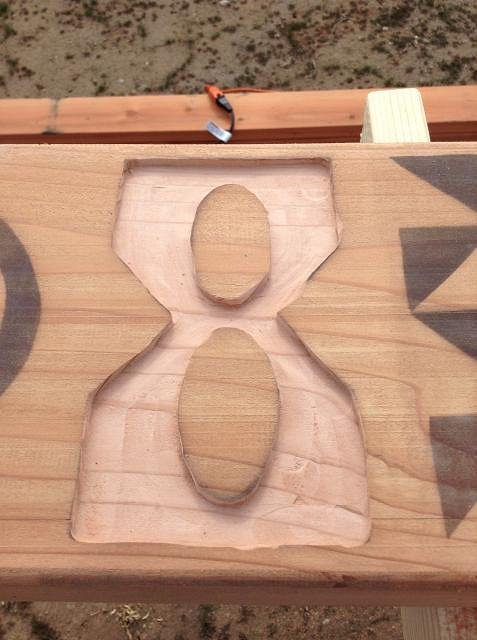
The progress you've made is very impressive. Thank you for posting before and after pictures of the beam designs, i'm motivated to try making my own.
|
|
G

Greg_D_R
Posted
posted
on
Mon, Jul 14, 2014 9:23 AM
Excellent design and fab skills on display here. I feel the need... the need to steal! |
|
L

LoriLovesTiki
Posted
posted
on
Mon, Jul 14, 2014 1:28 PM
Looks GREAT! Thanks for sharing your efforts. |
|
FT

forgotten tikiman
Posted
posted
on
Mon, Jul 14, 2014 2:25 PM
This is pretty rad!!!! Like those routing skills. Those war club supports are a great idea. I'm digging your style. Can't wait to see the finished product. :D |
|
M
muskrat
Posted
posted
on
Tue, Jul 15, 2014 12:07 AM
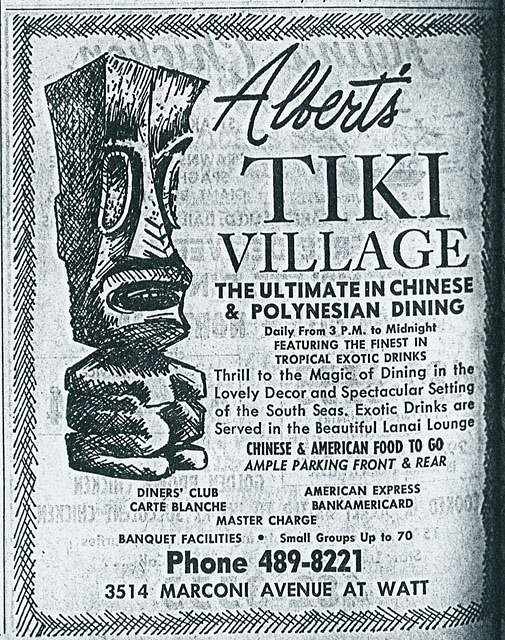
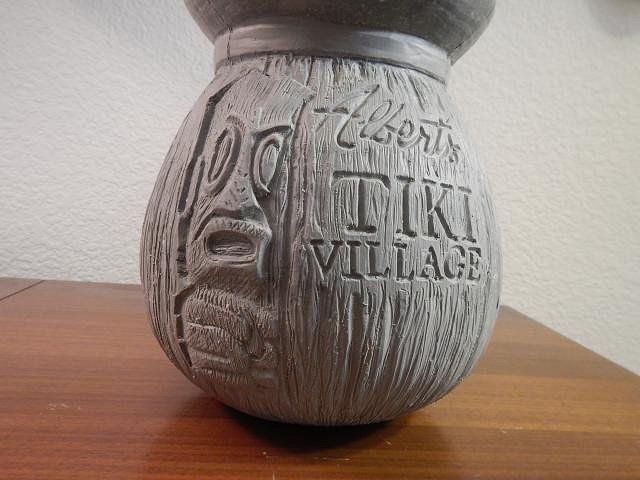
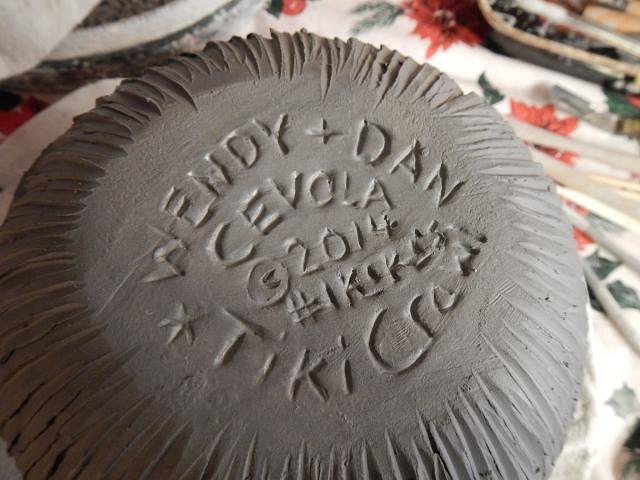
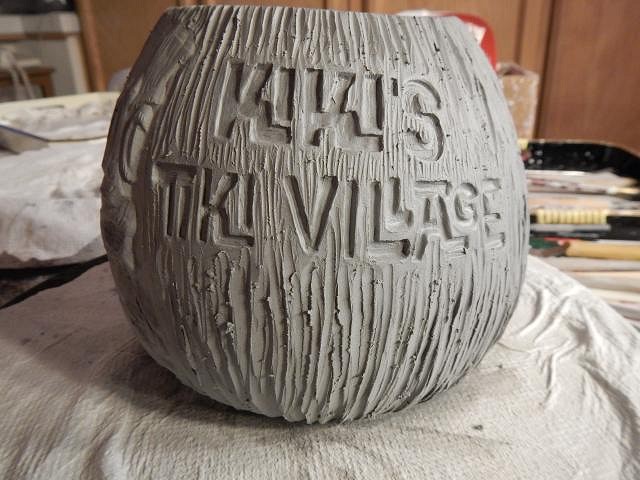
thanks to all for the kudos. before i move on to the roof i thought i'd share the story of how we came up with the name, as this is about the time during the build we solidified it. we had been tossing around a few names but only one of them was sticking.
it was my favorite place and introduced me to exotic drinks in fancy mugs (shirley temple with an umbrella).
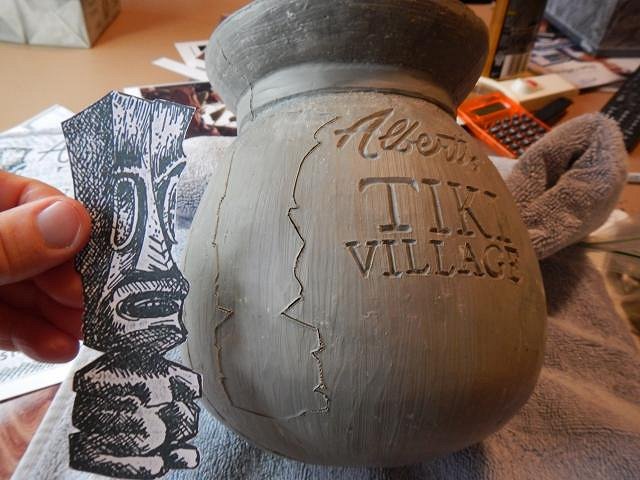
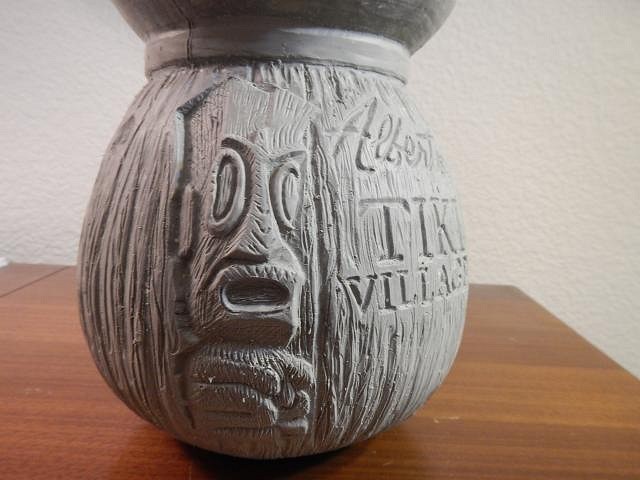
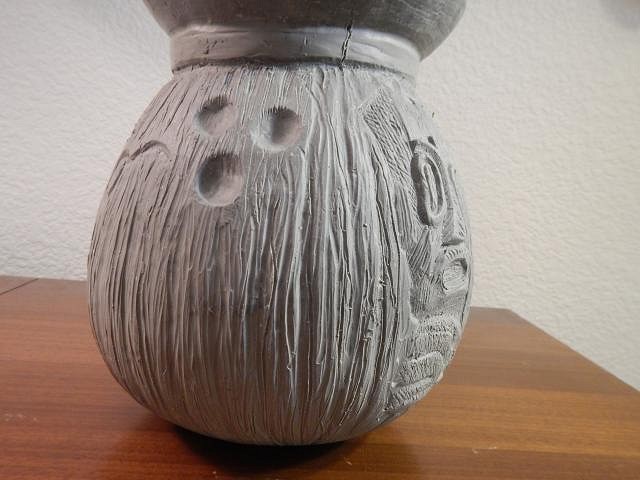
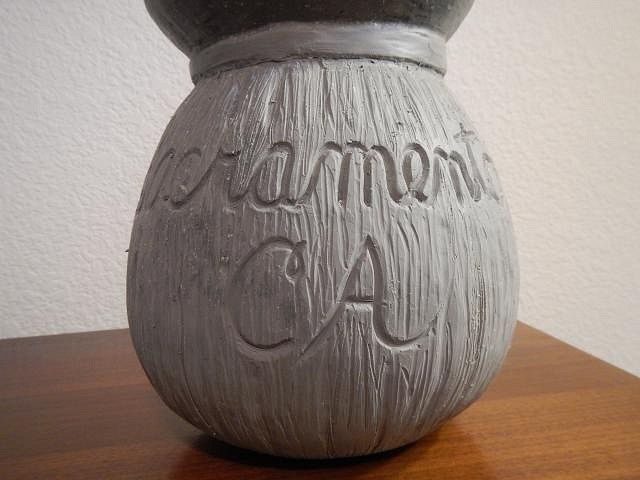
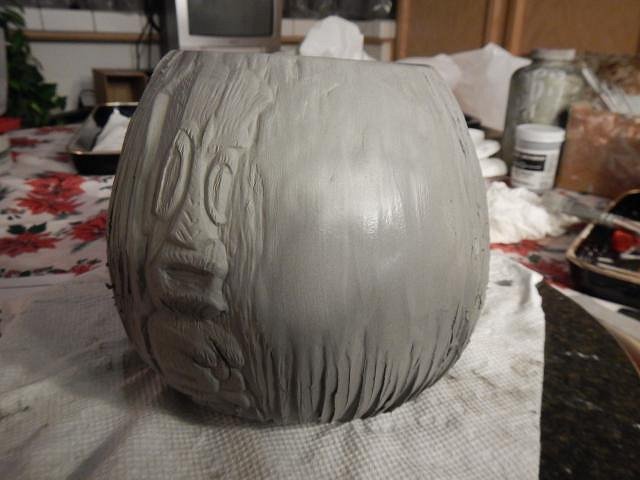
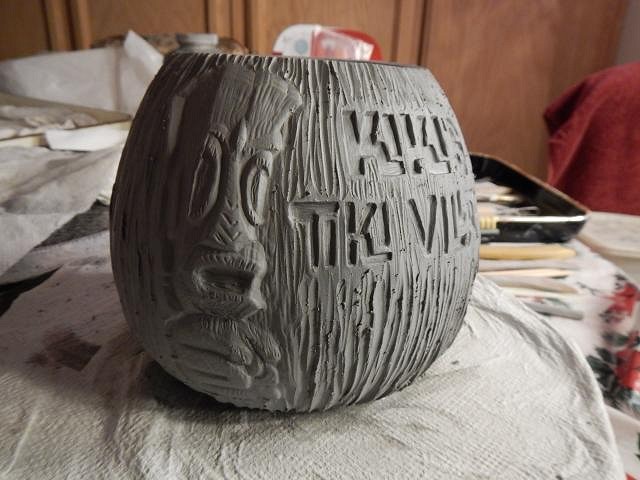
we contacted wendy and told her about our bar and asked if we could commission her to make one mug with our name and script instead of albert's. we went to meet wendy and dan and got the grand tour of their collection (it is most impressive) and bought a coral reef mug while we were there. wendy agreed and here's the beginnings of our very own mug.
wendy's work amazes me and it was her mug that solidified the name choice for our bar. thanks wendy. tomorrow...the roof. |
|
J

jimsflies
Posted
posted
on
Tue, Jul 15, 2014 10:50 AM
Awesome build. Looking forward to more! Please share your bamboo painting for your eves trough...looks great! |
|
M
muskrat
Posted
posted
on
Tue, Jul 15, 2014 9:49 PM
thanks jimsflies. i did a step by step tutorial on how to make the faux bamboo gutters. you can see it here |
|
M
muskrat
Posted
posted
on
Tue, Jul 15, 2014 10:10 PM
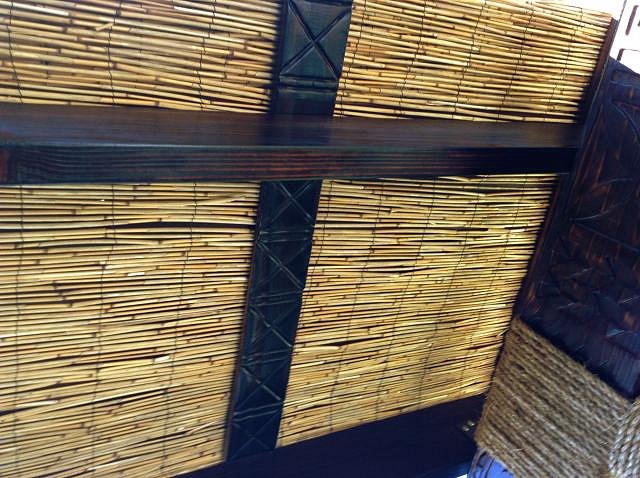
now...on to the roof. i decided to use corrugated tin for ease of installation, low cost and the sound it makes in the rain. i painted all the tin brown on one side in preparation for the install. i had already carved, burned and sealed the cross supports so they were ready to go up. while the paint was drying on the tin, i started to unroll reed fencing across the beams, stapling as i went. then i would put up a piece of the tin roofing and fasten it down. repeated this 7 more times and this is what we ended up with.
this completed the first major portion of the build. we moved the furniture from under the old patio cover to the new and set up the temporary lounge. next up, rebuild the other patio cover. |
|
G

Ghostsoldier
Posted
posted
on
Wed, Jul 16, 2014 7:21 AM
Awesome work, Muskrat...you are indeed skilled. Although I'm new here, a tiki bar is the next item on my Honey-Do home renovation list (after my wife's kitchen remodel, lol)...you have given me tons of inspiration. Thanks for sharing! Rob |
|
T

TikiAno
Posted
posted
on
Wed, Jul 16, 2014 9:28 AM
Looks awesome- just got caught up on the thread. Love the router work and especially the darker/ Witcoesque treatment. Though not traditional, we play bocce on the beach here in San Diego, and I've seen friends build similar set-ups at home. Sand is cheaper than other fills (I think). Years ago we would back and forth along the beach, throwing ahead of us. A bit non-traditional, but was always a fun time. Look forward to seeing more! |
|
K

Keaka-tiki
Posted
posted
on
Thu, Jul 17, 2014 6:41 PM
Muskrat, Jack [ Edited by: Keaka-tiki 2014-07-17 18:42 ] |
|
D

danlovestikis
Posted
posted
on
Fri, Jul 18, 2014 9:32 PM
Wow you are so good at this. Love all the designs. Wendy |
|
S

swizzle
Posted
posted
on
Fri, Jul 18, 2014 9:33 PM
Pretty damn cool. |
|
M
muskrat
Posted
posted
on
Fri, Jul 18, 2014 9:35 PM
i must say, i'm happy to be inspiring others and humbled by the praise. @keaka-tiki...i tried a wire brush but didn't care for the results. next i tried a small stiff bristled whisk broom, which worked great but was very labor intensive.
please be sure to wear safety glasses and a mask when brushing the burnt wood. it's nasty stuff.
next up, tearing down the original patio cover to start anew. |
|
M
muskrat
Posted
posted
on
Sat, Jul 19, 2014 12:03 AM
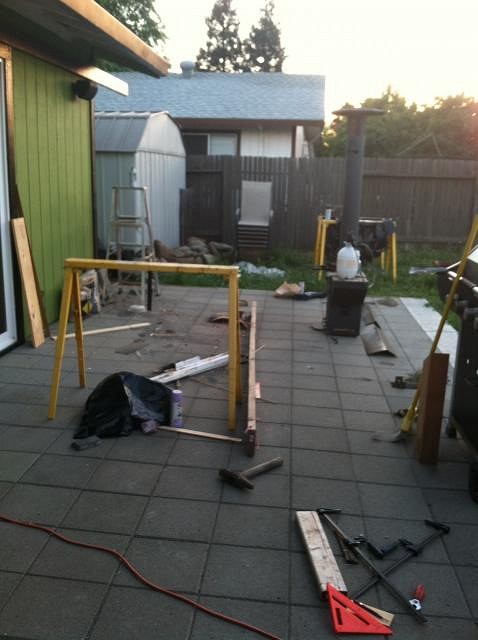
next up was dismantling the original patio cover.
once that was done the first order of business was to scrape the old peeling paint and repaint in the new color.
after that the poles and beam went up followed by the joists. next up was building 2 walls to enclose the end of the patio. |
|
V
VampiressRN
Posted
posted
on
Sat, Jul 19, 2014 6:49 PM
"How to" pictures are great, carry on.......... |
|
J
jimsflies
Posted
posted
on
Sun, Jul 20, 2014 6:26 AM
I'm wondering on your bamboo eves trough, does that empty into a "bamboo" downspout? Ceiling looks fantastic. Did you paint the topside of your tin roof? |
|
M
muskrat
Posted
posted
on
Sun, Jul 20, 2014 10:53 AM
the gutter on the taller cover empties into the gutter on the lower cover. i sealed all the seams and screws on the topside of the roof but haven't got it painted yet. |
|
M
muskrat
Posted
posted
on
Wed, Jul 23, 2014 12:38 AM
with the 2nd patio structure done i realized that the lower height posed an issue with the tail design i had on the joists.
with that issue taken care of i began to frame out the walls.
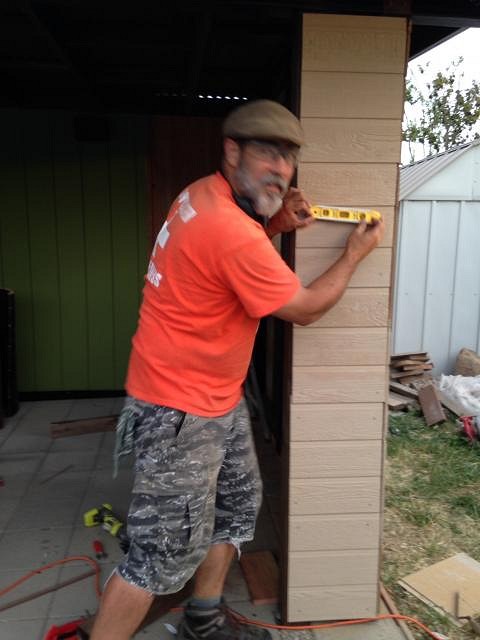
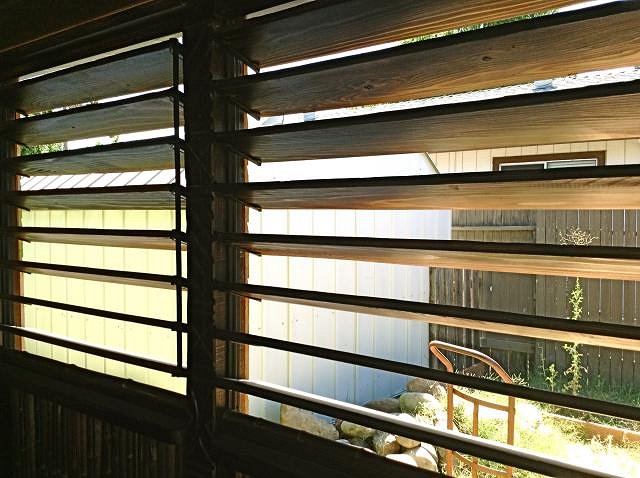
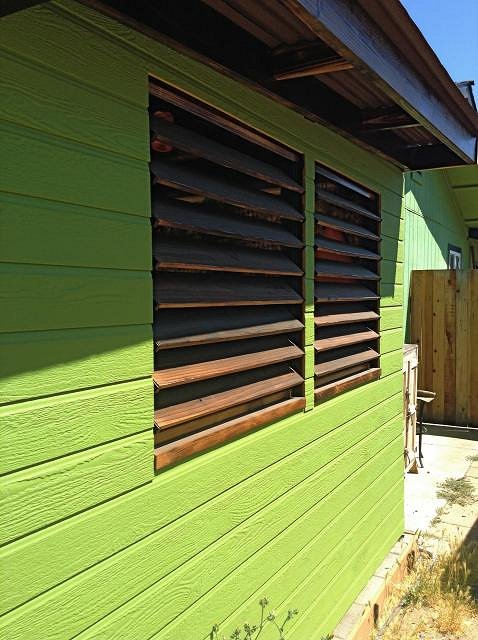
there are 3 wall sections, the main wall with 2 windows, a small kick-out on the outside and a 3 foot section extending from the house out to the corner. with the walls framed and the siding in place i started on the opening which has large slat plantation shutters.
once they we're test fitted i disassembled them then back to burning, scrapping and sealing. these are fully functioning shutters which can let the breeze through, let light in or keep the glare out as well as keeping the elements at bay. http://www.flexfence.com/theHardware/index.shtml you use standard 1x6 fence boards (or whatever wood you choose in those dimensions) fairly straight forward install. next up finishing off the interior walls. |
|
L
Longboard
Posted
posted
on
Wed, Jul 23, 2014 7:33 AM
Muskrat, Wow, those slat plantation shutters are bad ass. I'm going to use those in my build. Thanks for sharing! -Longboard |
|
M
muskrat
Posted
posted
on
Thu, Jul 24, 2014 3:47 PM
glad ya like them. with the boards all burned and sealed it was time to reassemble the shutters. with that done we began to finish the inside walls with cedar siding, bamboo and dark baka mat.
we had changed our minds completely about how the layout was goin to go and decided to keep the lounge on the other side and put the bar under the 2nd, lower cover as it would feel more intimate. this necessitated a redesign of the bar so i got to work drawing up new plans.
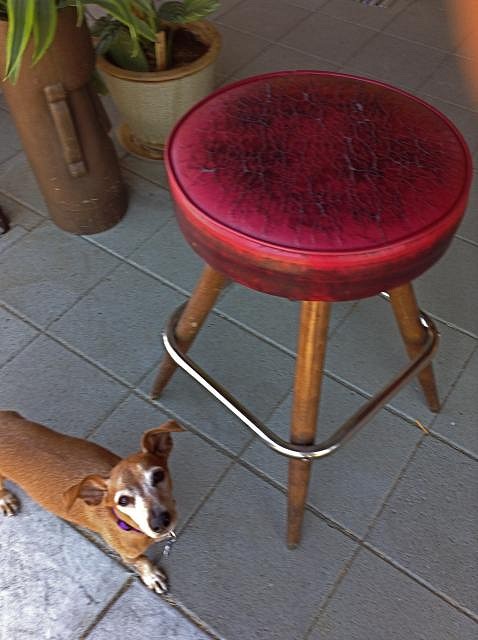
i had been on the lookout for bar stools and came across a great deal. a local restaurant was remodeling and i got 5 bar stools for $25...SCORE!!!
these stools are Red the dog approved. they have just the right lived in feel that will work with the look i'm going for at the bar. next up, starting the bar build (it's about time...) |
|
PP

Pele Paul
Posted
posted
on
Fri, Jul 25, 2014 12:43 PM
that is some series burning work, first time Ive seen the huge BBQ size gas tank!! Im sure your neighbors think they live next door to a forest fire!!! great work, always love your update photos!!! |
|
M
muskrat
Posted
posted
on
Sun, Jul 27, 2014 10:56 PM
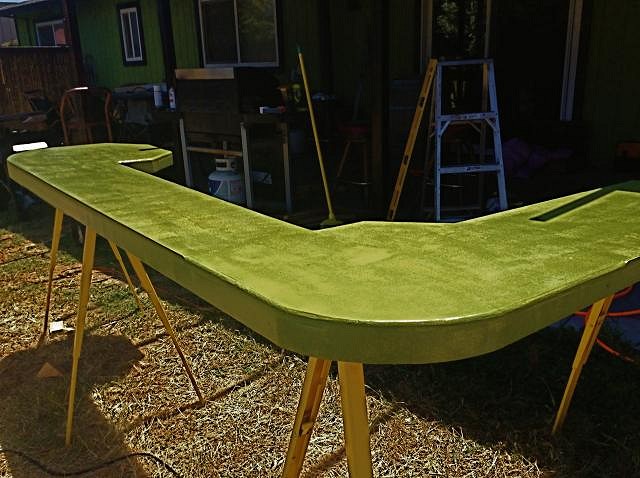
thanks pele paul. alrighty then...time to start on the bar. the plan all along was to have a more cobbled together feel to the bar so i picked up a few wine barrels to use as the ends of the bar.
the rest of it would be built around those. we were originally looking to build a bar that sat 5 but relocating it changed the design and we decided to basically fill the whole area under the new cover with the bar. the redesign now saw the bar size increasing to seat 8 with room behind the bar for a stool as well. there would also be room for walk up traffic or more stools could be pulled up to seat 9-10.
the color looks off here but it's textured with a dark green glaze and is close to the color of the house without being an exact match due to the faux finish. now with the platform finished it was time to fit it in place. i had test fit it to make sure it fit and was level before i painted it. now it was time to mount the barrels. next up, preparing the barrels. |
|
L
Longboard
Posted
posted
on
Mon, Jul 28, 2014 8:05 AM
Muskrat, Bocce, I did decomposed granite and at some point add the layer of oyster flower The italians play on any flat surface in the old country. Where is your place? -Longboard |
|
M
muskrat
Posted
posted
on
Mon, Jul 28, 2014 12:28 PM
i'm in sacramento. i'm thinking the DG with a light dusting of oyster flour is the way to go. i can't get the shell to compact enough to keep the court in playable shape without a ton of water. by the ways, i just put together that you own fu-bar. that's one of my favorites. so much texture, it's beautiful. |