Tiki Central / Home Tiki Bars
The Lili-Kai Club of Metro Detroit
|
JB

Jeff Bannow
Posted
posted
on
Wed, Jun 8, 2016 11:33 AM
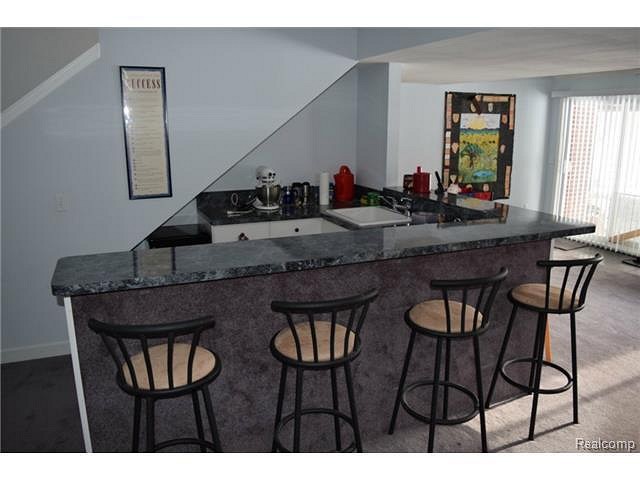
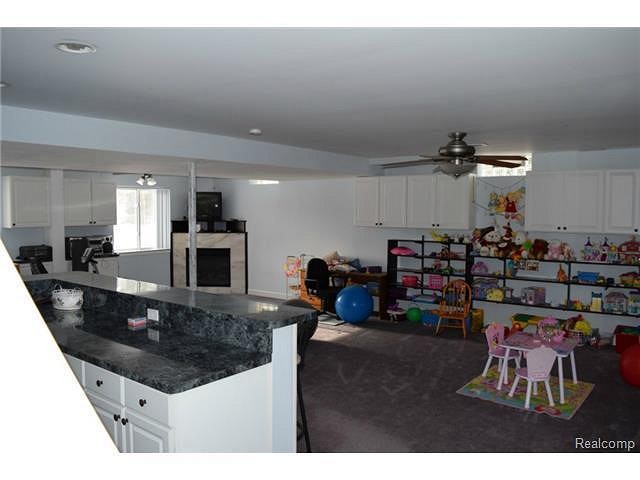
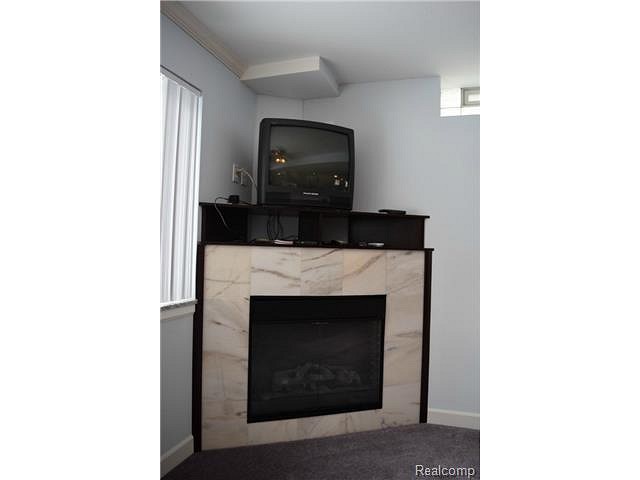
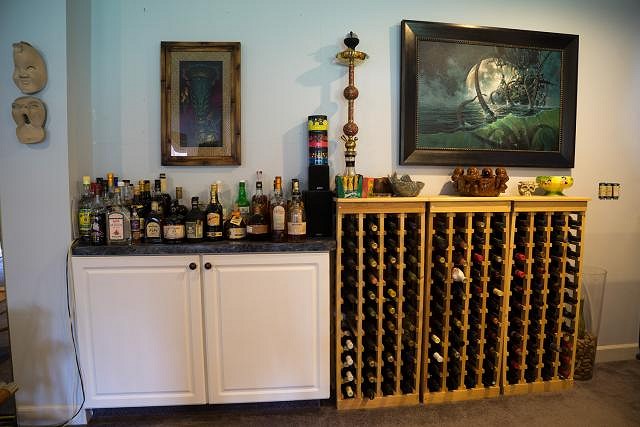
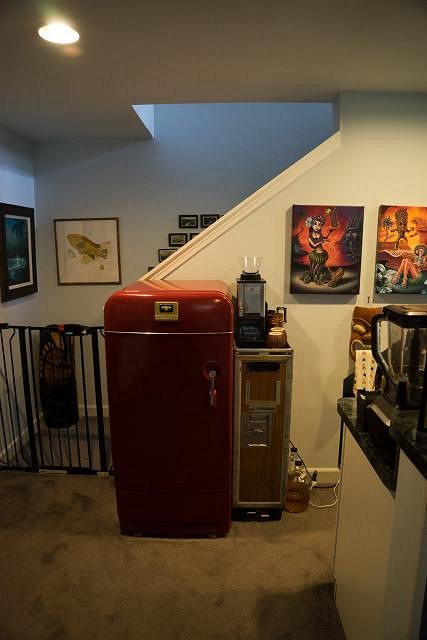
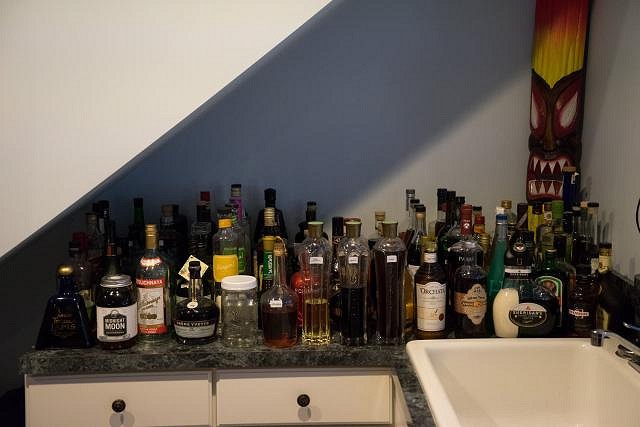
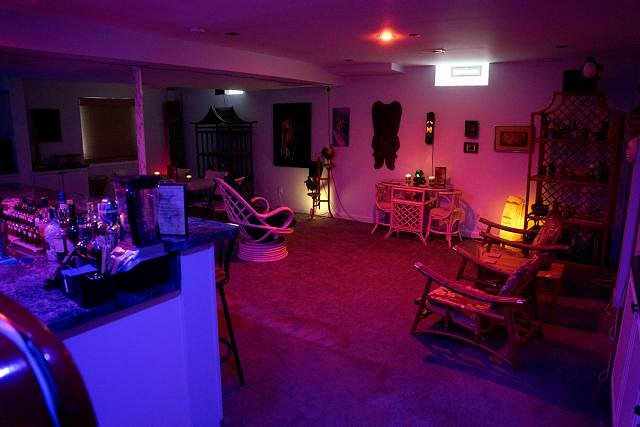
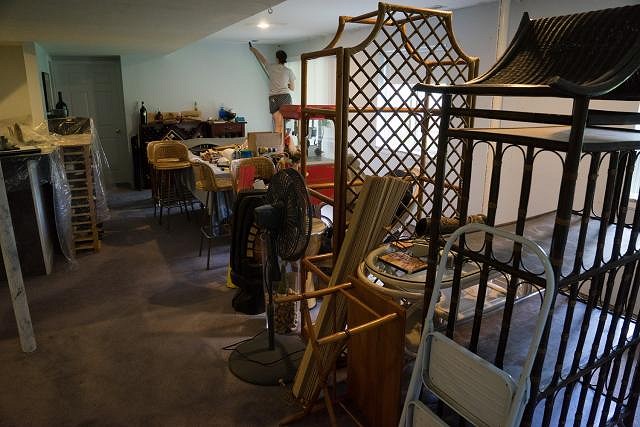
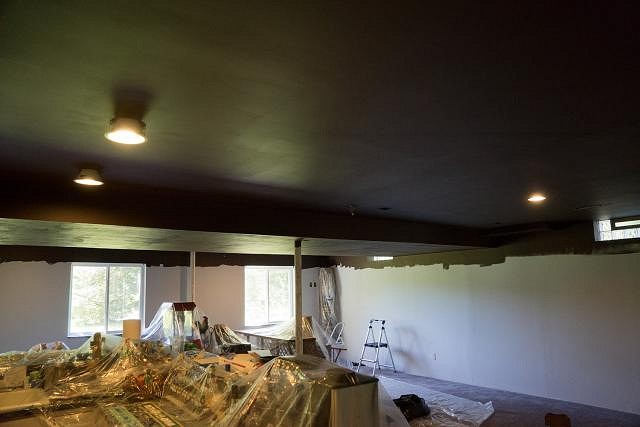
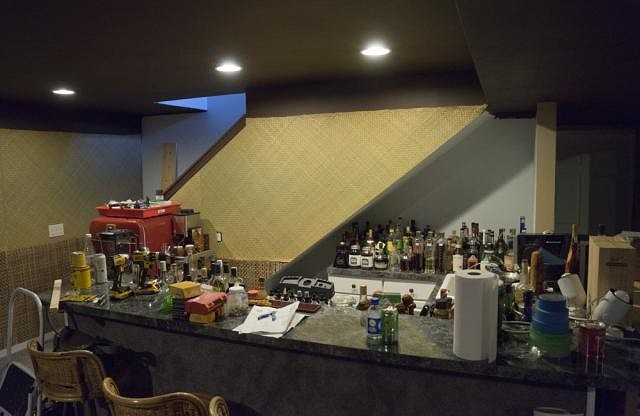
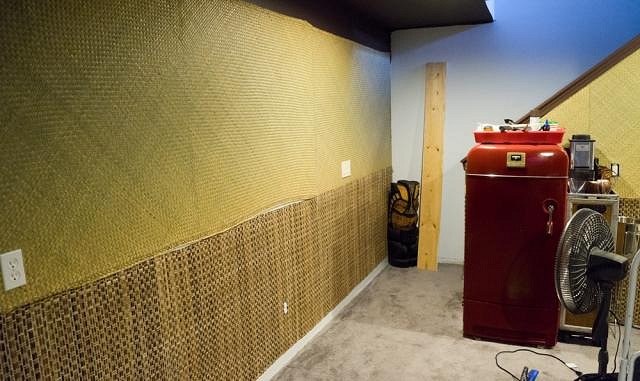
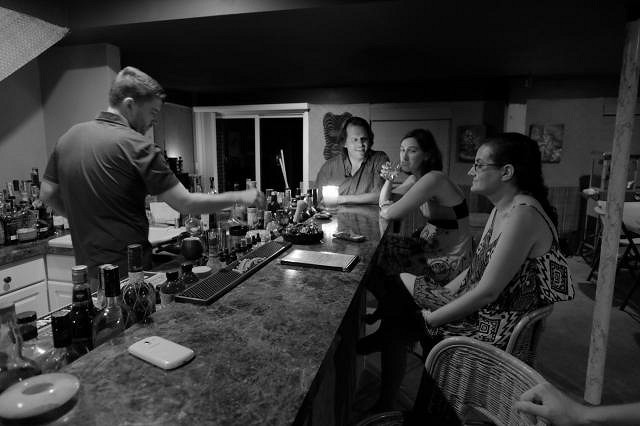
Here's my first home Tiki bar, The Lili-kai Club. The name mashes together lilikoi (passion fruit) with kai (ocean), and club (a large piece of wood used to hit people over the head.) We moved into the house last year. It came with the basement already finished, but in a decidedly un-tiki baby blue color. Before we moved in:
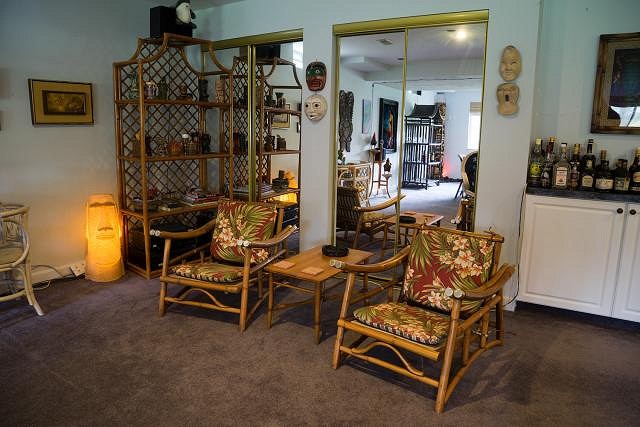
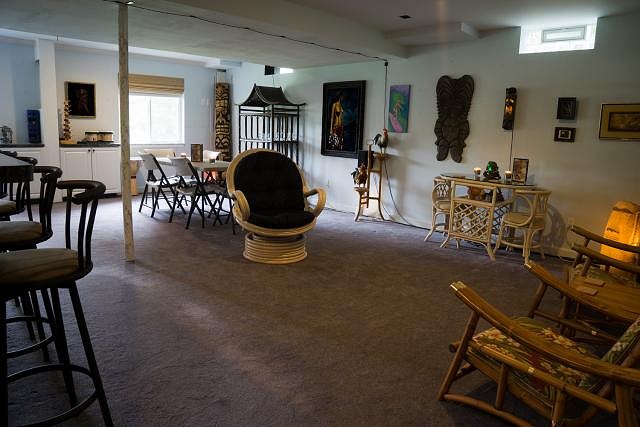
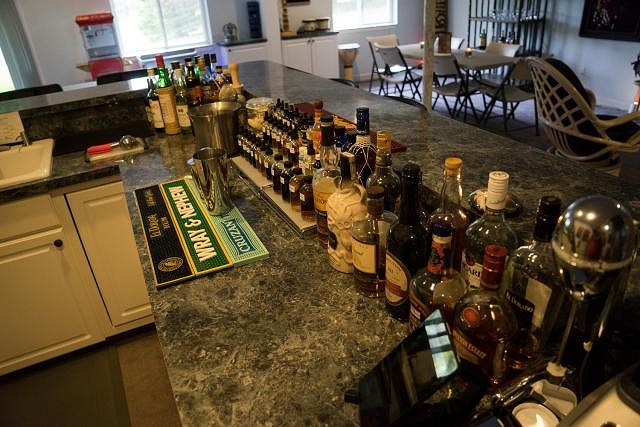
Despite my protests, remodeling the basement wasn't the first item on the agenda. So, I've been slowly adding furniture and decorations for the last year, until we reached this point. The Lili-Kai Club, May 2016, during the day:
And at night:
It's been a great space for entertaining, and I've learned a lot about what we want from the space. My cocktail skills have been getting slowly better over time. We finally decided it's time to tear it all down and put some legitimate wall coverings up. Stop by our home bar, The Lili-Kai Club. [ Edited by: Jeff Bannow 2016-06-08 12:21 ] [ Edited by: Jeff Bannow 2016-06-08 14:58 ] |
|
JB
Jeff Bannow
Posted
posted
on
Wed, Jun 8, 2016 11:41 AM
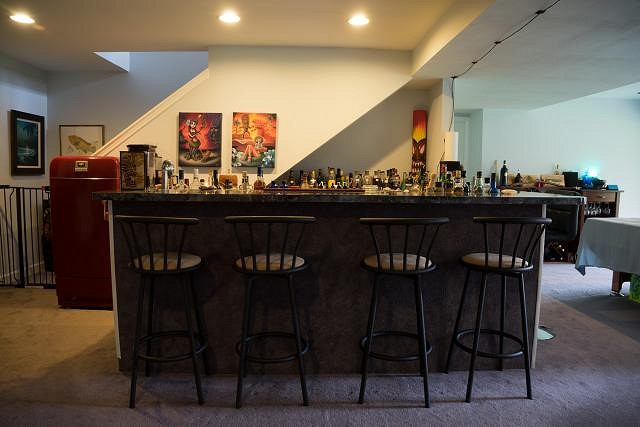
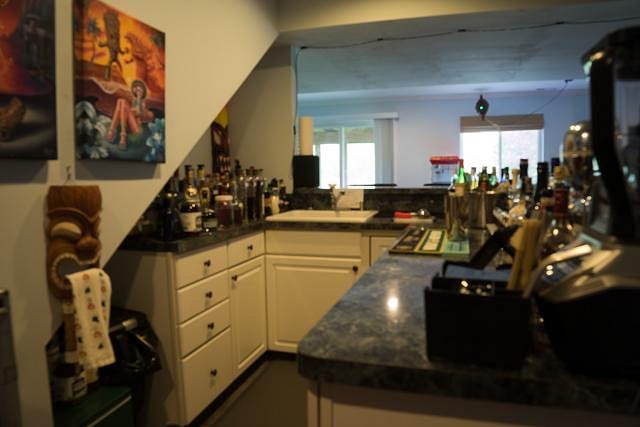
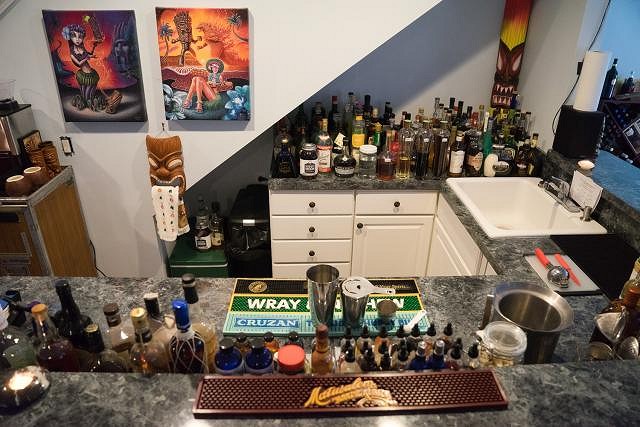
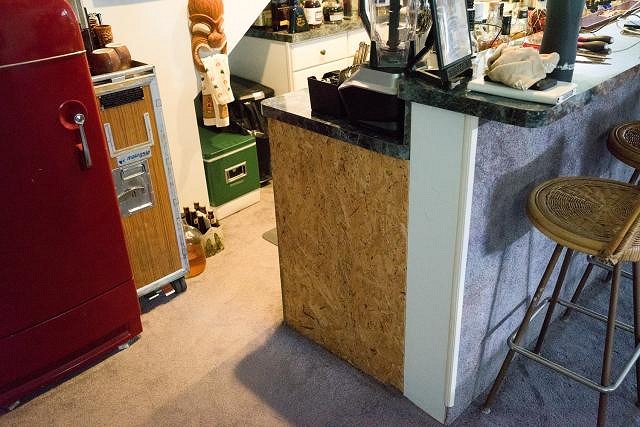
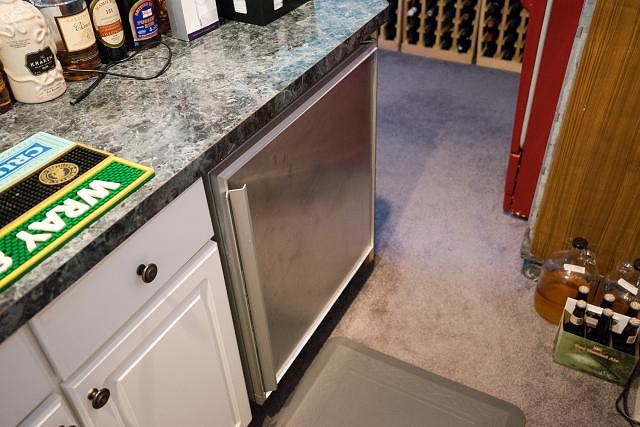
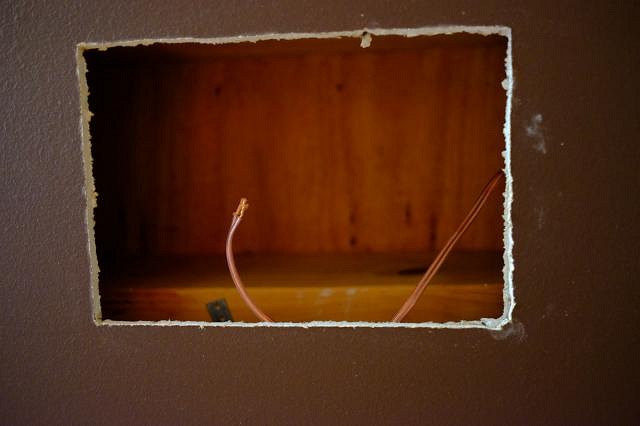
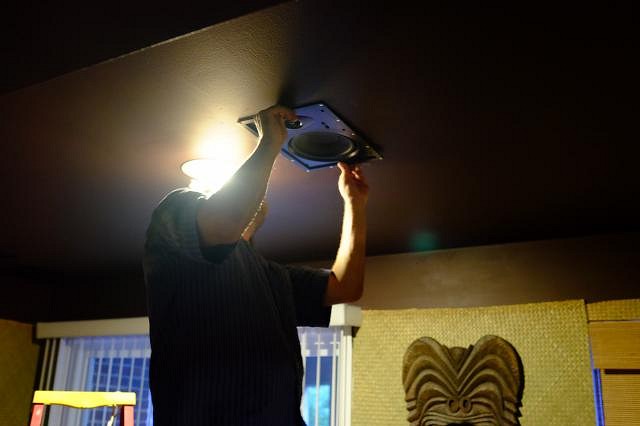
The above images actually show some major changes already from the original configuration. When we moved in, there were cabinets everywhere (and I mean everywhere). I removed about 15 cheap white Home Depot cabinets from the walls. Also, there were 3 ceiling fans mounted in the basement. Those had to go, and we needed to add outlets to the ceiling to facilitate some real lighting down there. Muchos thanks to Daniel Seybold for his electrical assistance - we managed to remove the fans, replace them with recessed can lights, and also install 7 new double sets of outlets on the ceiling, all controlled by a pair of light switches on the wall. Additionally, we installed a new outlet in the closet to hide my stereo from view, and a new outlet under the counter to run my new (to me, used from Craigslist) built-in freezer. I ripped out the rightmost cabinet to fit it in, and built a new end wall to support the countertop.
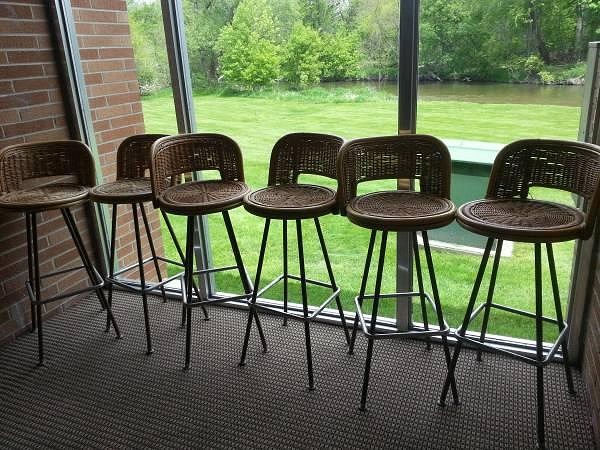
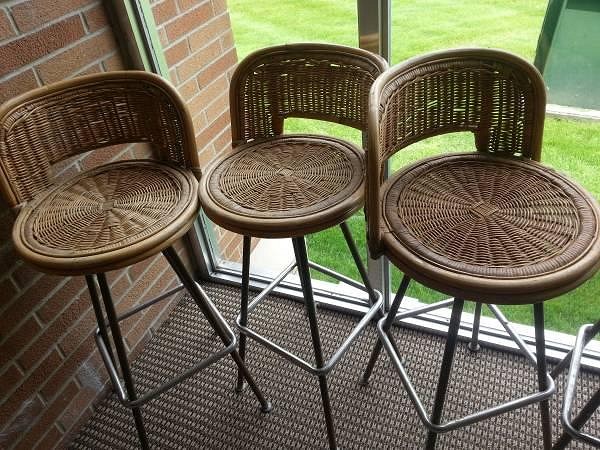
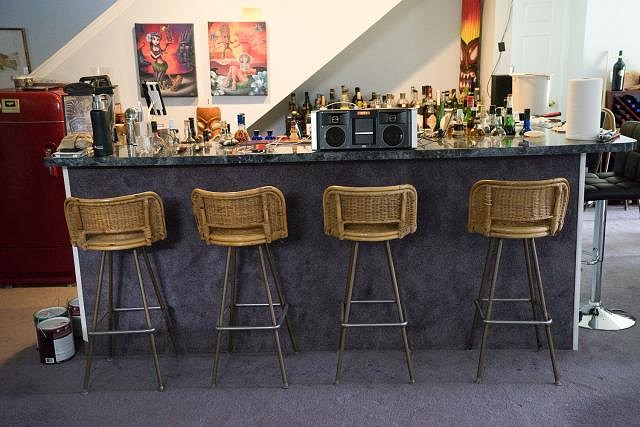
Another new change was replacing the Wal-Mart bar stools with something a little more appropriate.
They need a little restoration, but are in good overall shape. Anyone have any pointers on wicker repair? |
|
JB
Jeff Bannow
Posted
posted
on
Wed, Jun 8, 2016 11:42 AM
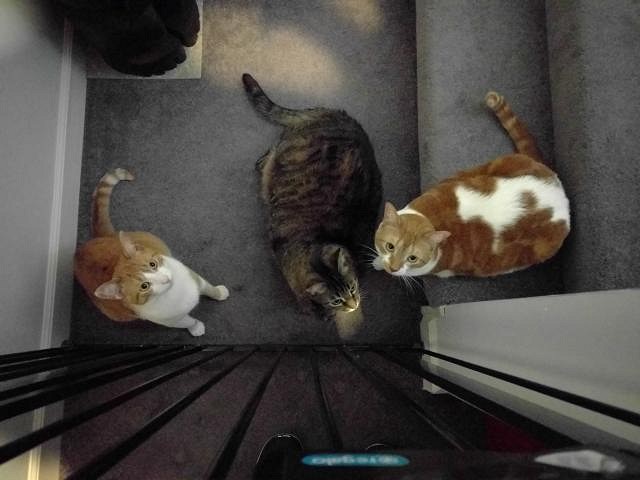
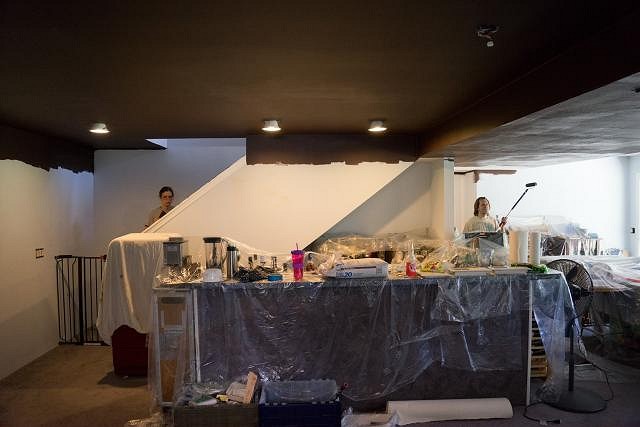
A quick break for some adorable cats. Here are 3 of the lushes, waiting for the bar to open.
Cuthbert, No Balls, and Roland. Missing from photo: Mifune, aka the old man. He was likely sleeping upstairs somewhere. Stop by our home bar, The Lili-Kai Club. [ Edited by: Jeff Bannow 2016-06-08 12:22 ] |
|
JB
Jeff Bannow
Posted
posted
on
Wed, Jun 8, 2016 11:48 AM
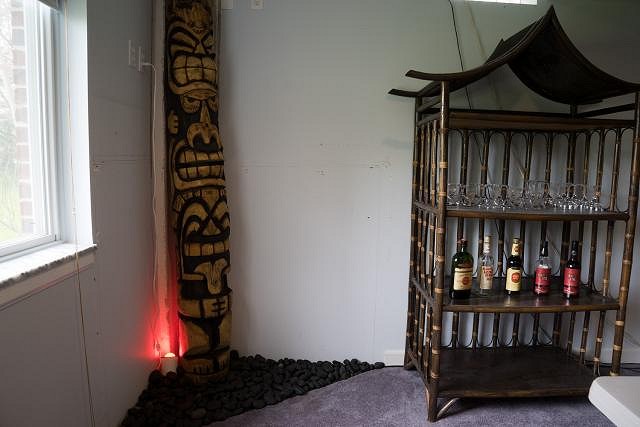
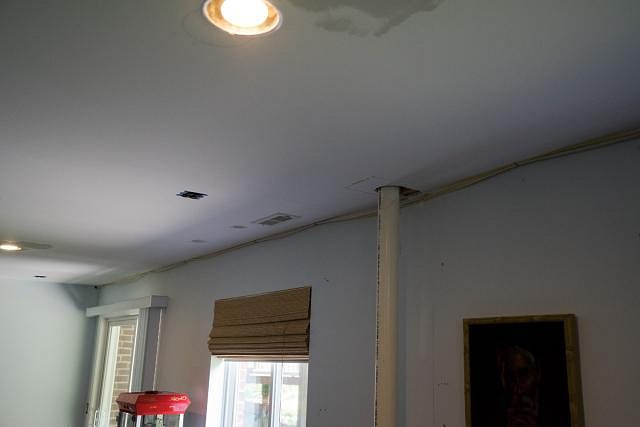
While taking down the one strip of crown moulding on the far wall, we discovered this little gem.
They added outlets by stapling the wiring to the wall, throwing some moulding over it, and calling it a day.
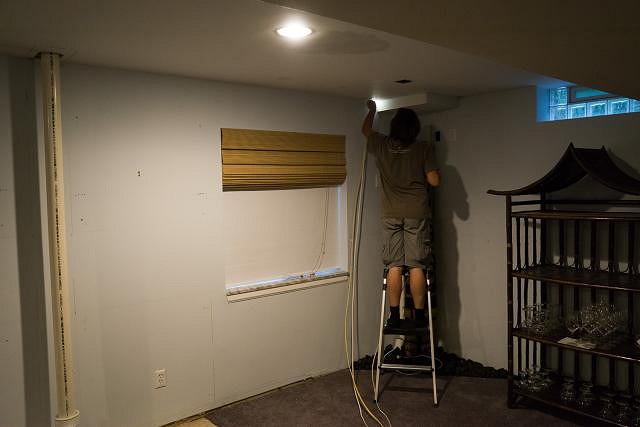
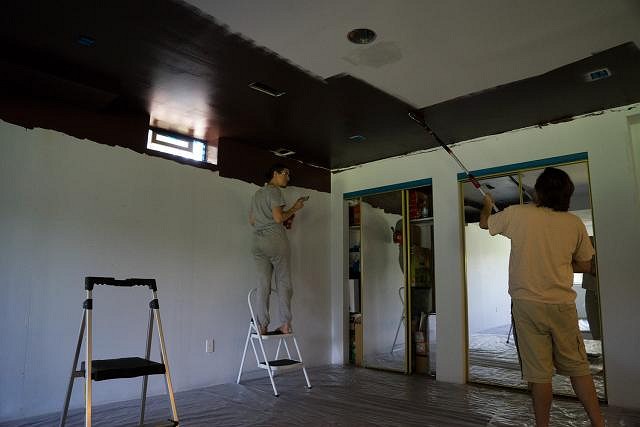
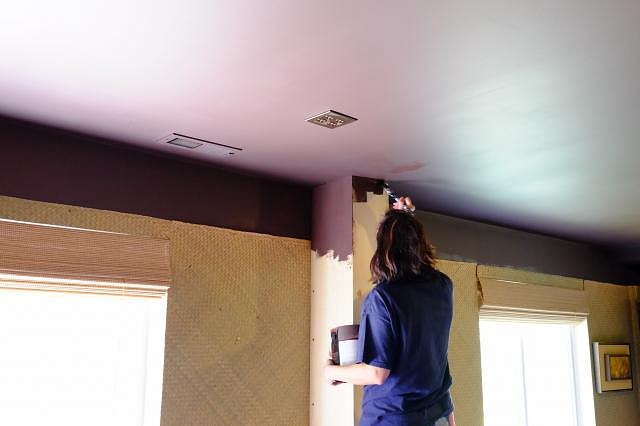
Here's Daniel, my electrical savior, helping to rectify the situation. And finally, a sad state of affairs, hopefully quickly leading to a reopening with much more appropriate decor.
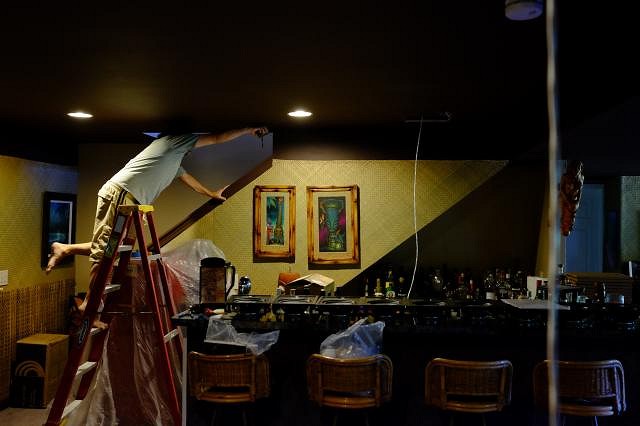
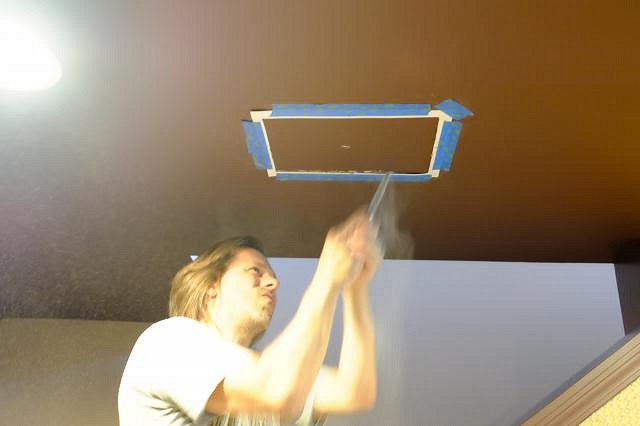
That's my lovely wife in the background, tirelessly helping me prep the ceiling for paint. |
|
JB
Jeff Bannow
Posted
posted
on
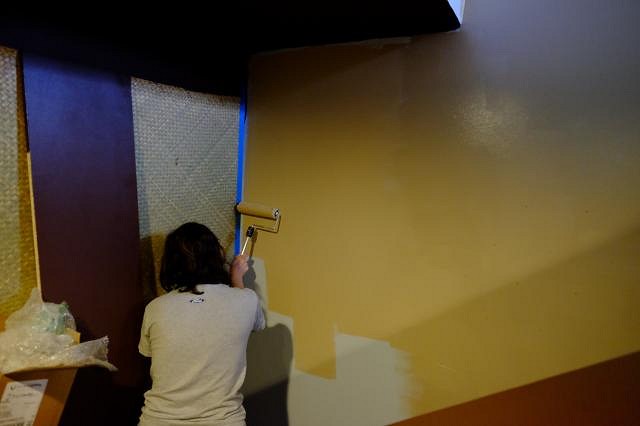
Wed, Jun 8, 2016 11:56 AM
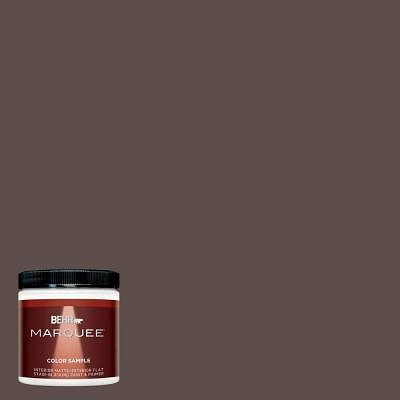
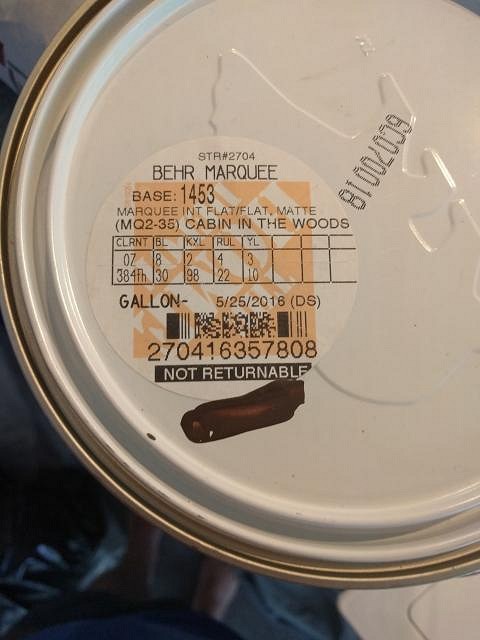
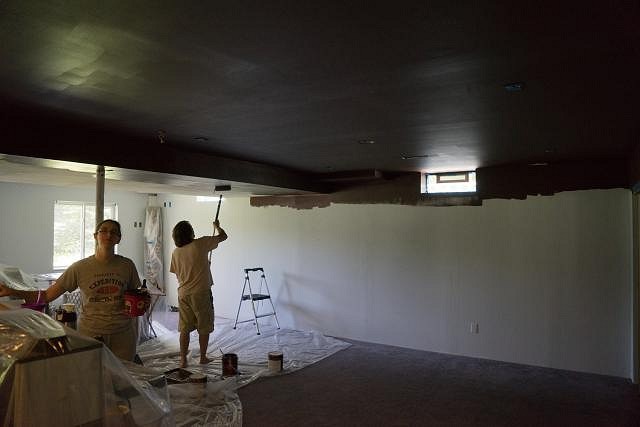
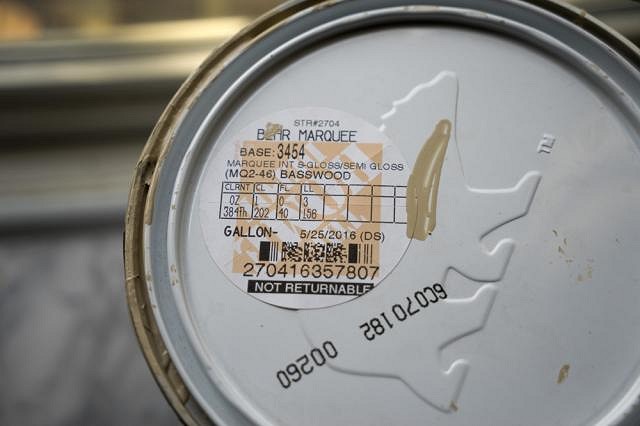
The ceiling is going to be "Cabin in the Woods," also known as brown.
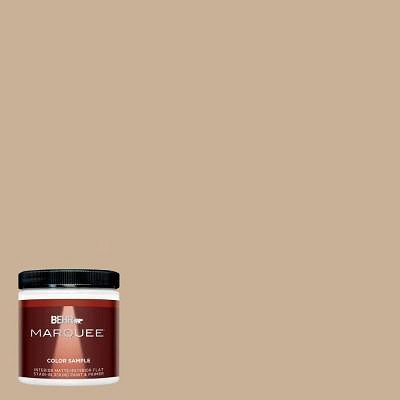
And the trim and such will be "Basswood," also known as tan.
These images don't really represent the colors well, but you get the idea. We went with Behr Marquee paint, because it is amazing. The wall treatments have been ordered from Oceanic Arts. Here's my mockup of what the wall will look like:
1 foot of brown at the ceiling, which will end up being above a small shelf at crown moulding height. Then 4 feet of Tonga Matting #823, then bamboo trim, and then 3 feet of Bac Bac w/ Abaca #822 running down to the floor. We ended up ordering: We're hoping to start putting it onto the walls before the end of the month. Stop by our home bar, The Lili-Kai Club. [ Edited by: Jeff Bannow 2016-06-08 11:57 ] |
|
JB
Jeff Bannow
Posted
posted
on
Wed, Jun 8, 2016 12:03 PM
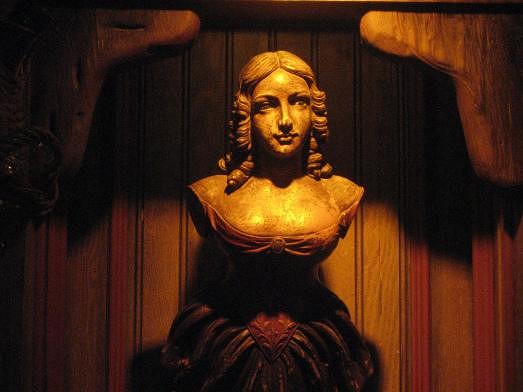
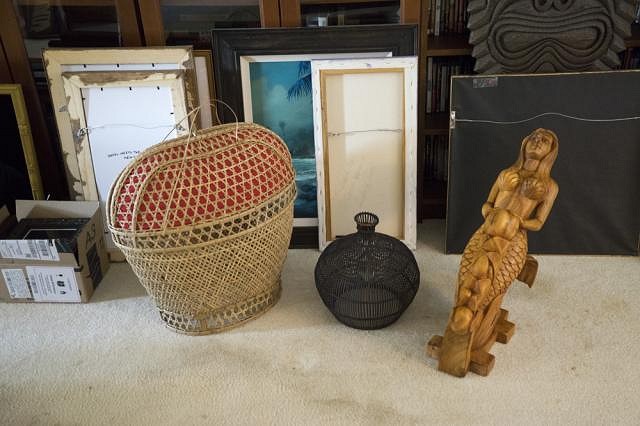
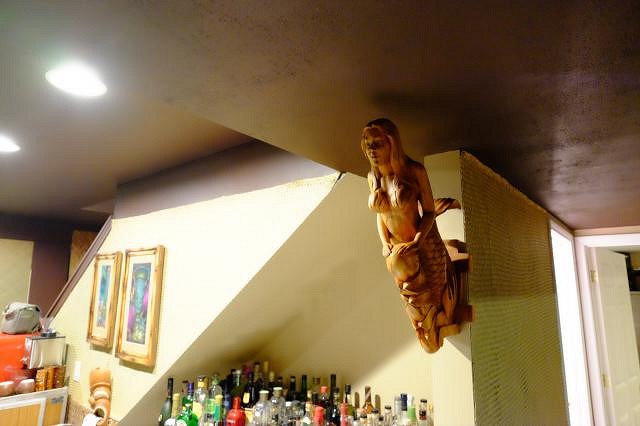
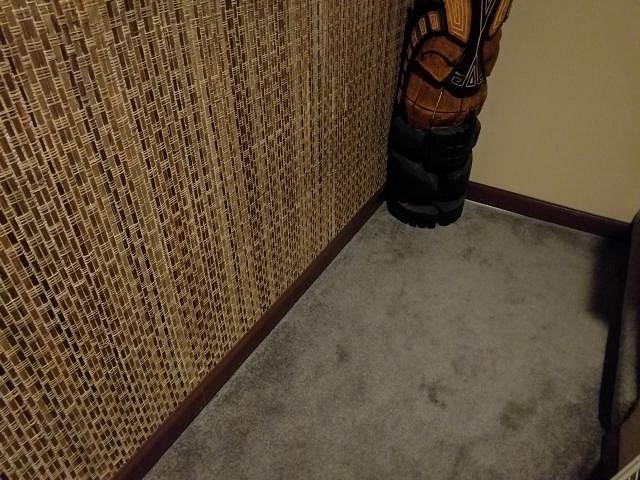
One final update for now. While at the Mai Kai earlier this year, I fell in love with the figurehead in the Molokai Bar.
Following in that tradition, we ordered this lovely lady to adorn the post to the right of the bar itself.
Mine is the one that sold, not the one being repaired as listed in the image. We ordered her from Nautical Antiques in Galveston, TX. They had her custom carved in Indonesia. The price was surprisingly affordable. http://piecesofship.com/picturesIndonesia2016.html Stop by our home bar, The Lili-Kai Club. [ Edited by: Jeff Bannow 2016-06-08 12:04 ] |
|
PP

Pele Paul
Posted
posted
on
Wed, Jun 8, 2016 2:58 PM
wow very cool! cant wait to see the updates! youve got a great space to work with! id keep an eye on those 3 lushes, they look like trouble!!! |
|
JB
Jeff Bannow
Posted
posted
on
Wed, Jun 8, 2016 3:21 PM
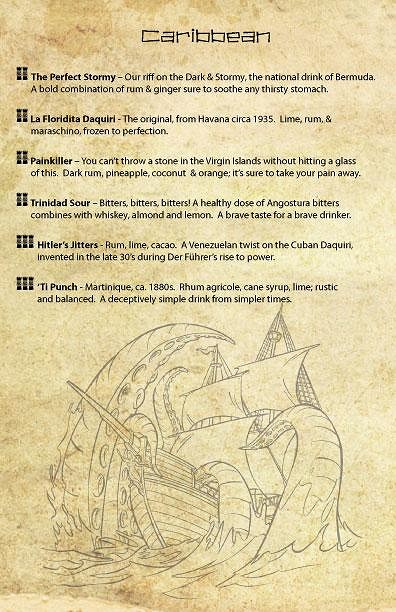
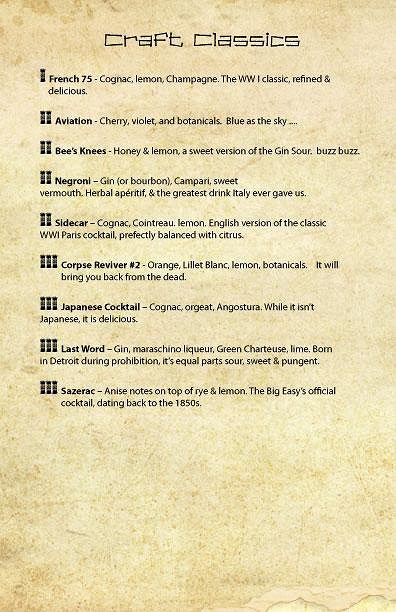
The current cocktail menu. Still a work in progress for sure, but it's coming along. All artwork is placeholders until I can get something custom.
I use these for the menus. They have worked great so far. Note: I was able to get them for cheaper than the Amazon price listed. |
|
UT

uncle trav
Posted
posted
on
Wed, Jun 8, 2016 5:00 PM
Alright!! Another Michigan Tiki holdout. Please keep us up to date!!!! |
|
JB
Jeff Bannow
Posted
posted
on
Thu, Jun 9, 2016 8:25 AM
Thanks guys. Will definitely be posting more photos soon. Should have the ceiling painted by the end of the week. Can't wait for that - the drywall patching has been killing me. |
|
C

creativenative
Posted
posted
on
Thu, Jun 9, 2016 1:54 PM
Great start. Funny my wife and I are planing to move to LA area in the beginning of next year because of her work. Look out SoCal TCers here we come! Anyway we are keeping the Hawai'i home for future retirement and we are going to keep the L.A. place small and simple, in other words no room for my tiki stuff. Meanwhile a son and a daughter has moved to the Detroit area, for various reasons, and I'm going to help my daughter buy a place WITH a basement. Planing on buildings a tiki escape in her basement for me and other Detroit TCers. Can't wait to join you Jeff. [ Edited by: creativenative 2016-06-09 13:56 ] |
|
M

mikehooker
Posted
posted
on
Thu, Jun 9, 2016 2:03 PM
That's a lotta drinks for a home bar menu!!! Looks great for a rough draft though. I usually just choose 3-4 four options for people when we have gatherings to make it easy on myself. |
|
L

lunavideogames
Posted
posted
on
Thu, Jun 9, 2016 3:14 PM
I agree with Mike. It is great to have a big variety of drinks on the menu, but you have to keep ALL of the ingredients for all of those drinks on hand. I made my bar menu with a dozen drinks a little over 3 years ago. NOw, no one really orders off the menu, they either drink what I am making or I'll come up with something for them. Usually I will have just 2 or 3 drinks on special for the night and that is plenty. I am sure you will figure it out for yourself. Try it for a bit and tweak it. That is what we all do with our home bars. Looks like it is coming along great for you. A fun project! |
|
JB
Jeff Bannow
Posted
posted
on
Fri, Jun 10, 2016 5:07 AM
I love mixing cocktails, so when we have 10 people or less over I love being behind the bar mixing drinks. If we have a larger crowd, I'll be picking 4-5 cocktails and pre-batching them for easy serving. For the next party, we might even consider hiring a bartender for the evening. |
|
JB
Jeff Bannow
Posted
posted
on
Fri, Jun 10, 2016 7:05 AM
Big thanks to Doug Horne. Got another new piece on its way.
"Hazel Meets the New Guinea Man" |
|
JB
Jeff Bannow
Posted
posted
on
Sun, Jun 12, 2016 10:24 AM
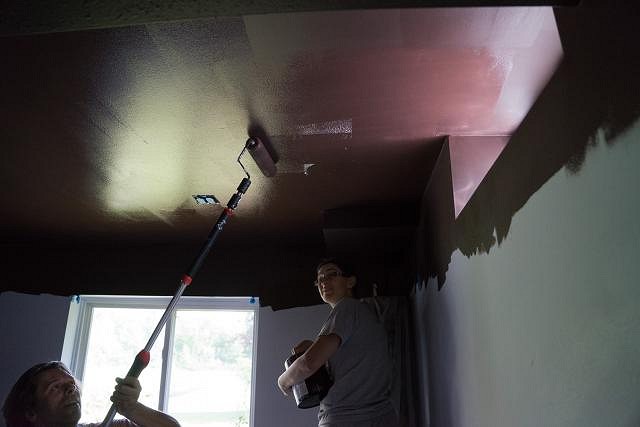
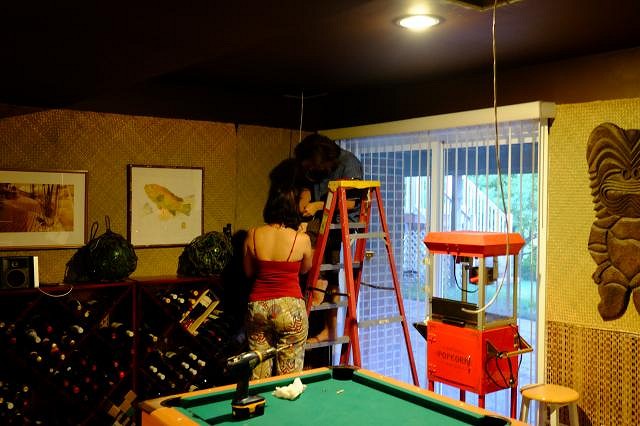
Got the ceiling painted. More thanks to Daniel for his assistance with the monumental ceiling job - around 650 square feet of ceiling to paint, with multiple soffit boxes to deal with as well.
|
|
PP
Pele Paul
Posted
posted
on
Sun, Jun 12, 2016 1:26 PM
better buy that friend some pizza and beer for all that work!! can he come over and paint my ceiling too? lol! awesome job looking really good |
|
JB
Jeff Bannow
Posted
posted
on
Tue, Jun 14, 2016 5:29 AM
I'm letting him work off all of his free drinks .... :wink: |
|
JB
Jeff Bannow
Posted
posted
on
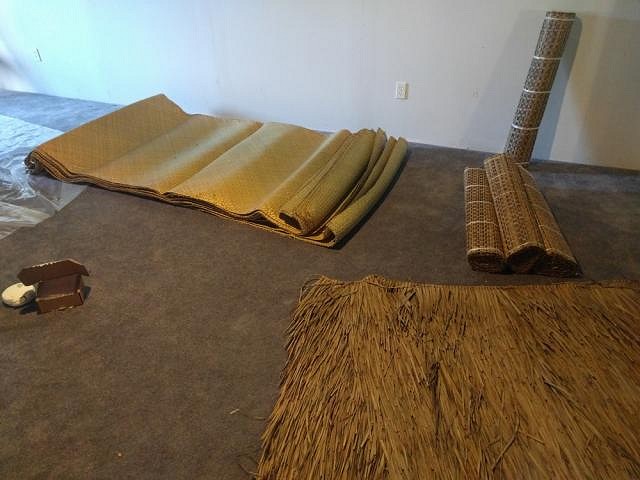
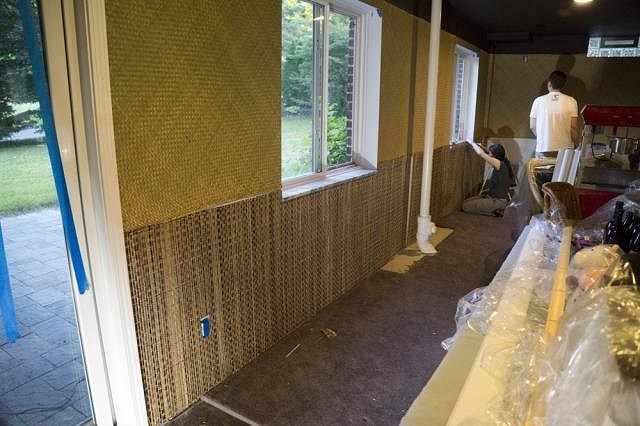
Fri, Jun 24, 2016 6:41 AM
The matting is here and ready to go up!
|
|
JB
Jeff Bannow
Posted
posted
on
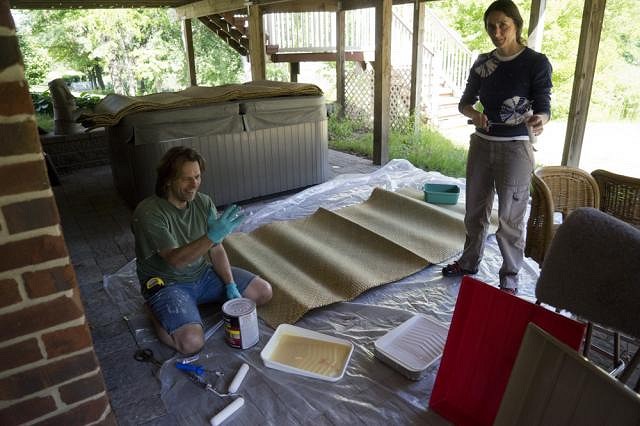
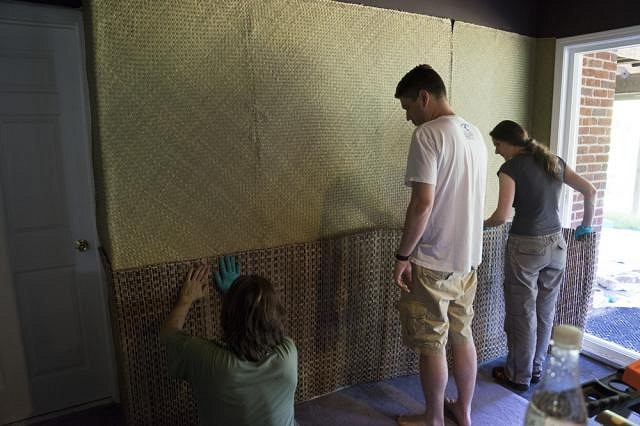
Sun, Jun 26, 2016 6:25 AM
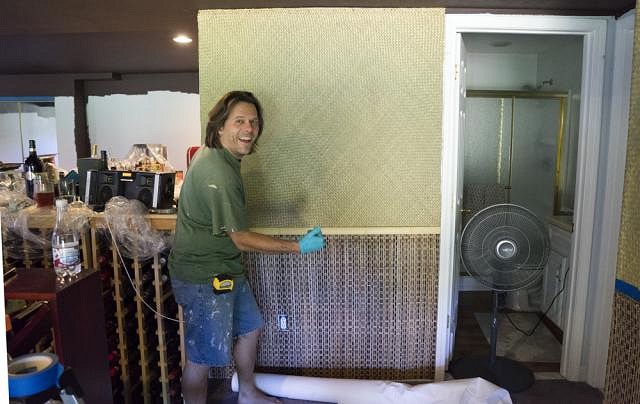
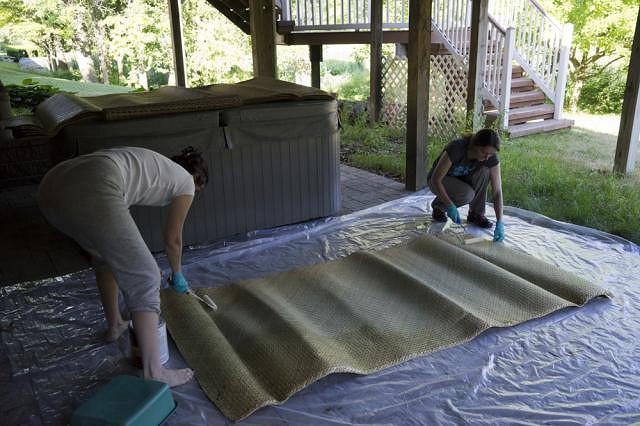
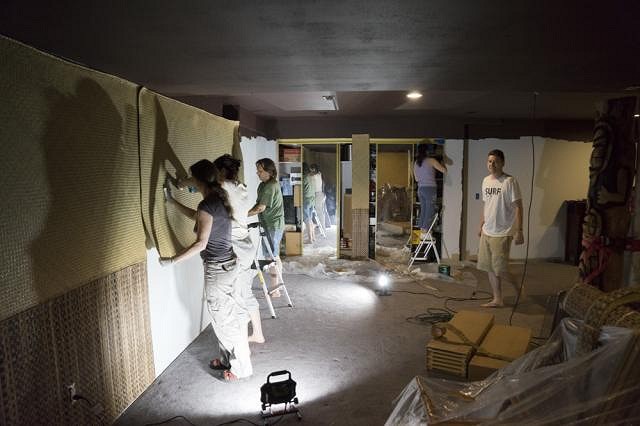
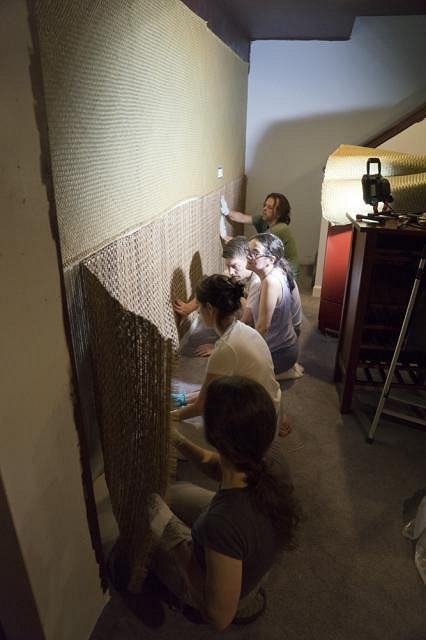
We got the matting up yesterday. Couldn't have done it without the help of our friends - big shout out to Daniel, Silke, Mark, and Jen for coming through! We did a 4' section and a 3' section and we have 8 foot ceilings, so there's paint at the very top that we applied when we painted the ceiling. We set the matting up outside due to the fumes. Here's what Oceanic Arts told me about putting up the matting: Our process (pretty much the same as O.A.):
It was really a very simple process overall. It took about 6 hours of work to put up about 120 linear feet of matting. Not bad considering none of us had any clue what we were doing when we started. Fans were a must - we opened up the windows for ventilation, and the fans kept the air moving. That contact cement is very stinky stuff!
[ Edited by: Jeff Bannow 2016-06-26 06:43 ] |
|
JB
Jeff Bannow
Posted
posted
on
Sun, Jun 26, 2016 6:38 AM
|
|
P

Polly_Nesia
Posted
posted
on
Sun, Jun 26, 2016 12:24 PM
What a great space to work with and its fun watching the transformation. I just love these all out redos. Nice choice on materials. Look forward to seeing the decor as it goes up. That mermaid is a terrific piece and the big tiki piece hidden kind of behind her looks interesting. Any plans for the support pole in the room? If you can carve, I can see fitting it inside two halfs of a tiki carved post, making it into a tall tiki totem. [ Edited by: Polly_Nesia 2016-06-26 12:35 ] |
|
R

rumackay
Posted
posted
on
Sun, Jun 26, 2016 4:00 PM
What an awesome space. This has got epic written all over it! Great job so far and looking forward to more progress pics. Keep the updates coming :) |
|
JB
Jeff Bannow
Posted
posted
on
Mon, Jun 27, 2016 7:54 AM
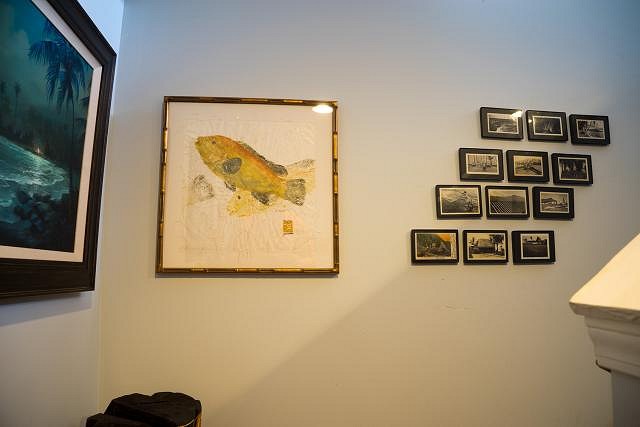
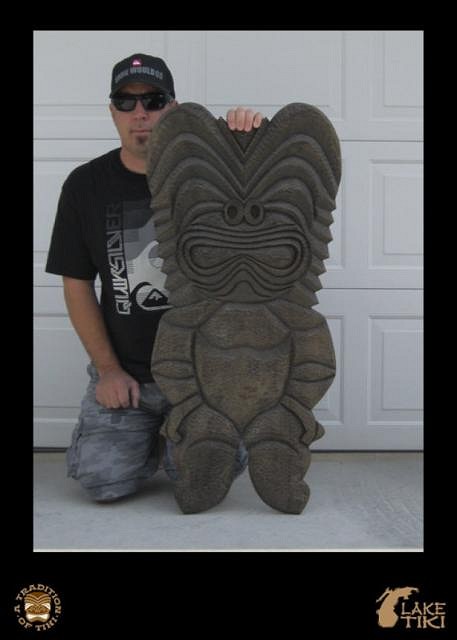
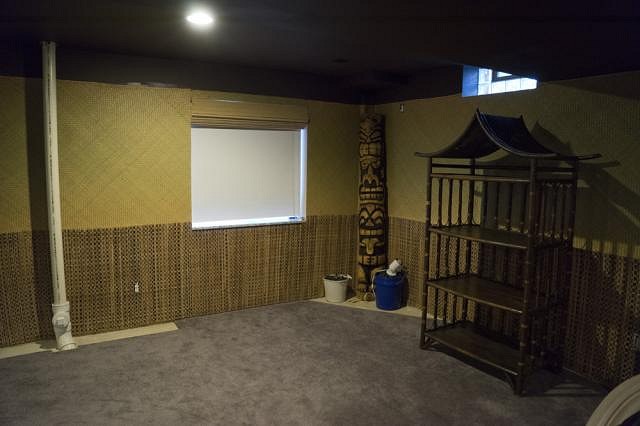
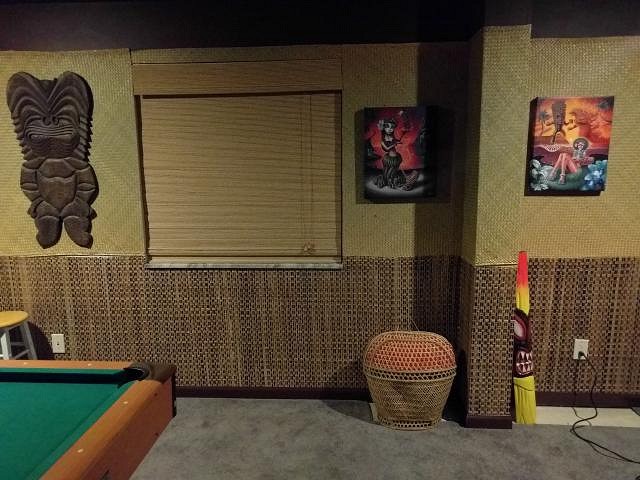
Thanks everyone! The support pole is going to be wrapped in rope soon. I wish I could carve - it would be neat to have it wrapped in a carving for sure. Here's a better image of the tiki in question there.
|
|
JB
Jeff Bannow
Posted
posted
on
Mon, Jun 27, 2016 8:07 AM
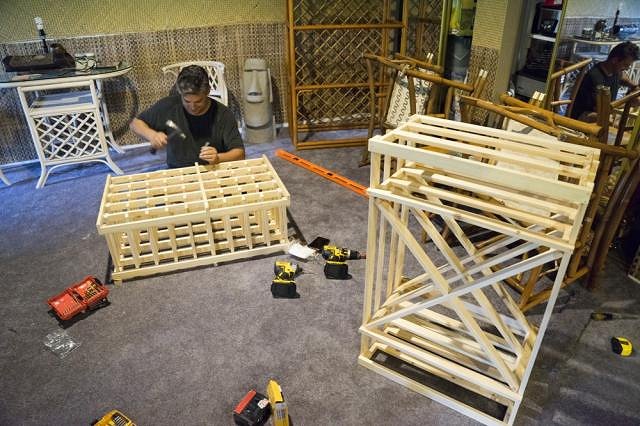
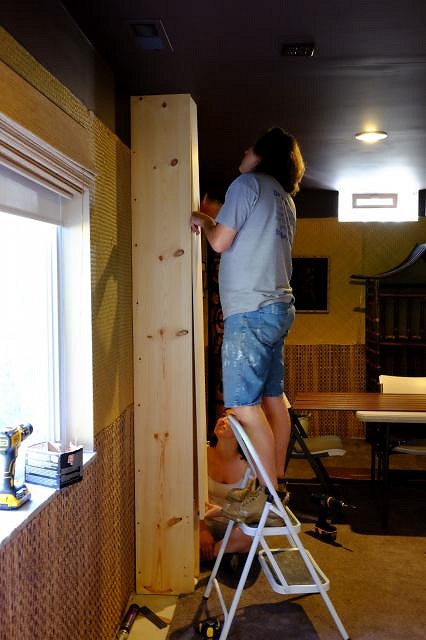
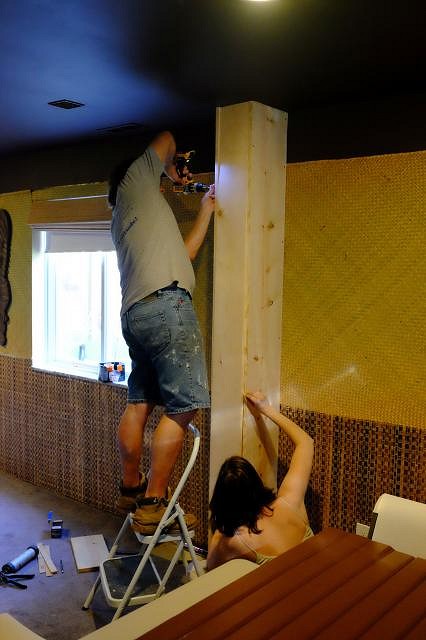
Yesterday entailed a whole lot of cleanup! In the afternoon, Tom came by to give a hand. After helping me schlep around a bunch of heavy things, the three of us got to work on the new built-in wine racks.
These will be stacked and screwed into the wall. One side is getting plywood, which will be matted to match the wall. I think we are going to stain or paint these a darker brown color. The units themselves seem decent in quality. They are nailed together, which made them a bit flimsy in spots, so we beefed them up a bit with screws as needed. https://www.winecellarinnovations.com/res-kits-vintner-wine-racks |
|
JB
Jeff Bannow
Posted
posted
on
Mon, Jun 27, 2016 8:12 AM
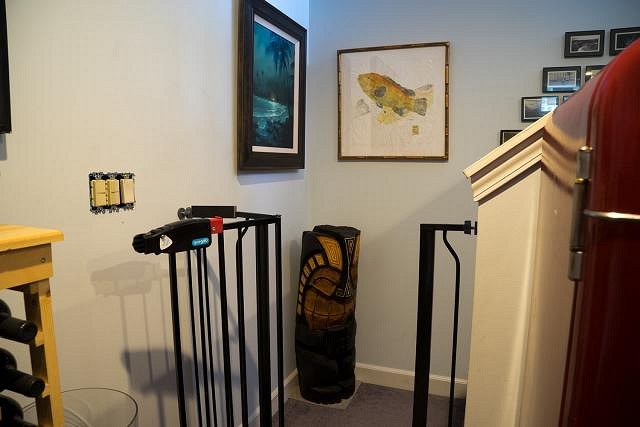
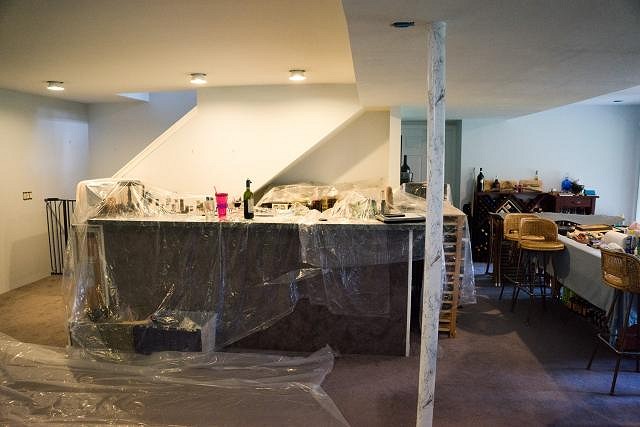
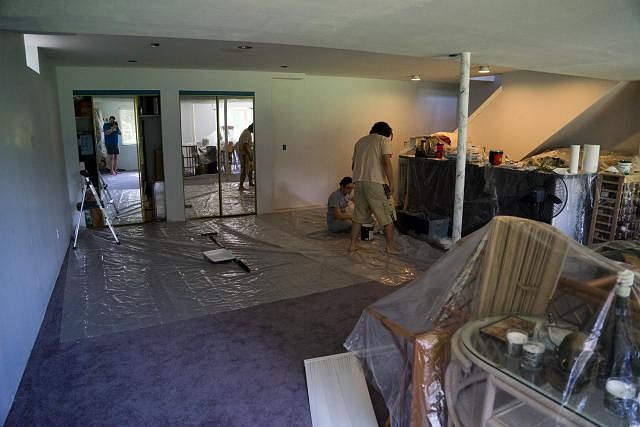
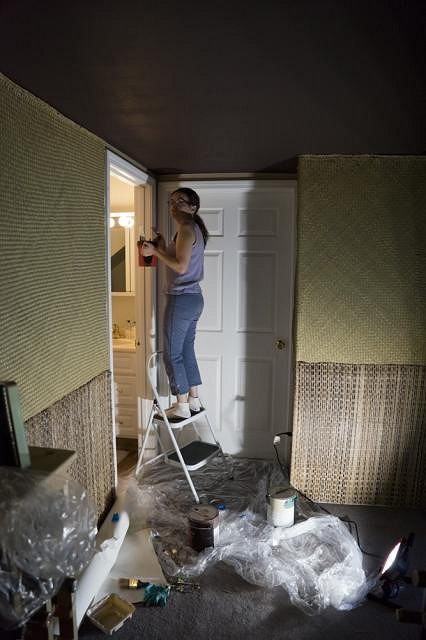
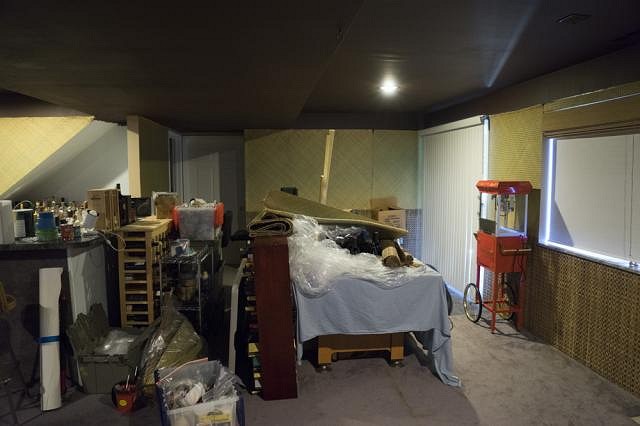
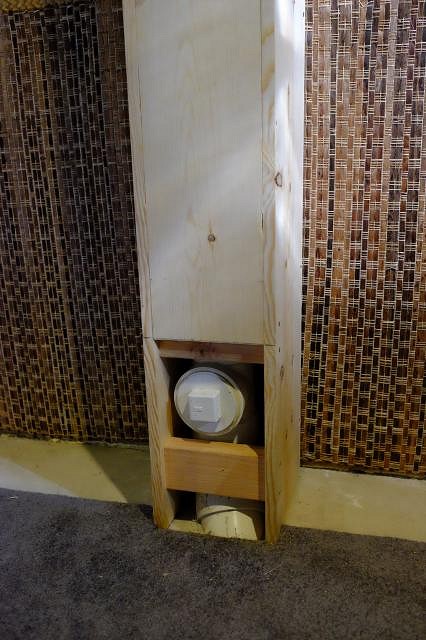
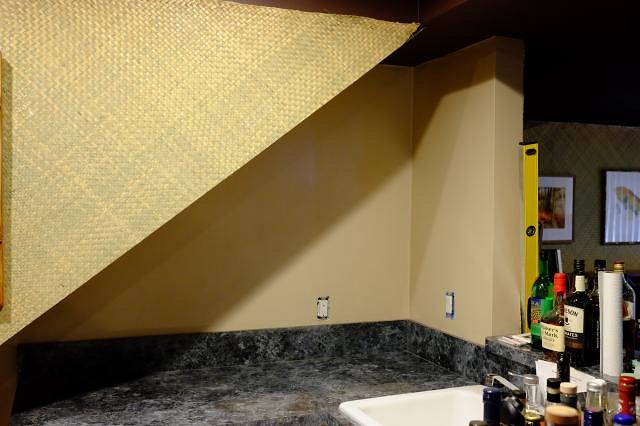
Here's where the room is at currently, at the end of a busy, productive weekend.
We will fully reassemble the room soon, once the trim gets installed. |
|
P
Polly_Nesia
Posted
posted
on
Mon, Jun 27, 2016 10:00 AM
Thanks for the tiki photo (he's so cool) and the heads up on Dave. Checked in on his FB page and saw lots of things I would love to have :) Very nice work. |
|
JB
Jeff Bannow
Posted
posted
on
Mon, Jun 27, 2016 10:39 AM
He's a great guy and a great carver. He posts here on Tiki Central as well. |
|
JB
Jeff Bannow
Posted
posted
on
Fri, Jul 22, 2016 12:04 PM
|
|
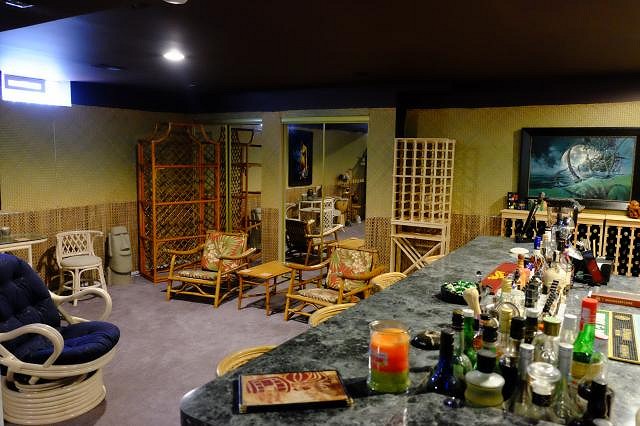
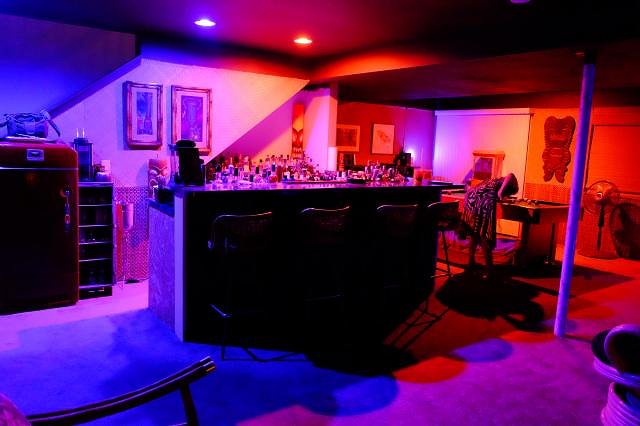
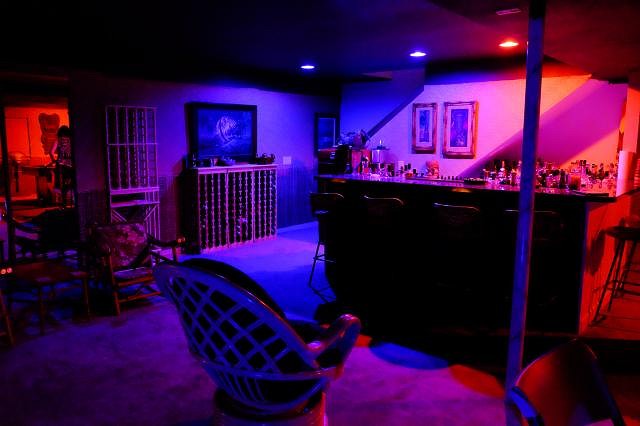
JB
Jeff Bannow
Posted
posted
on
Fri, Jul 22, 2016 12:07 PM
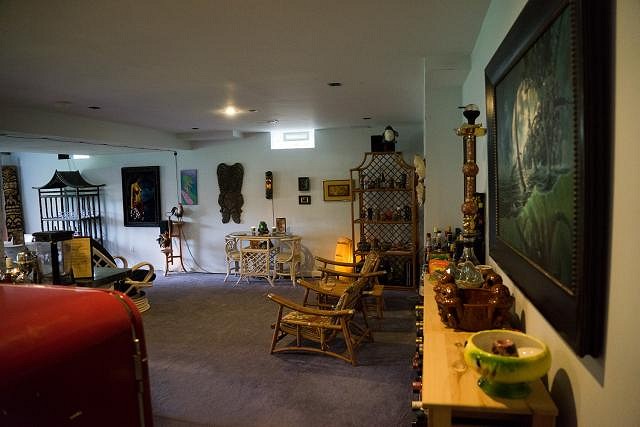
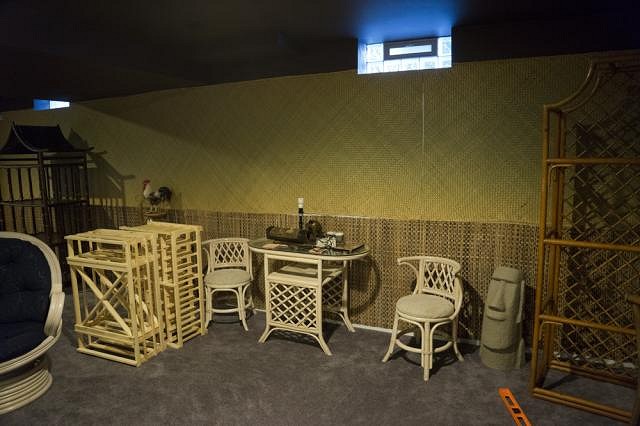
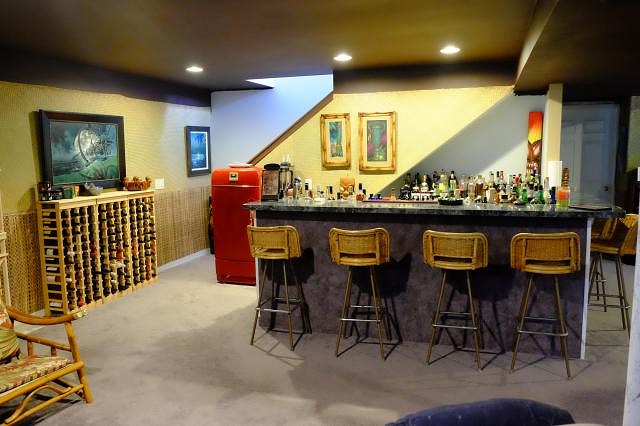
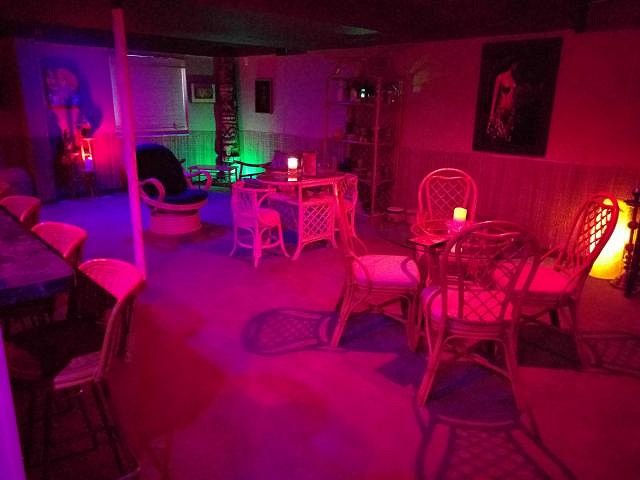
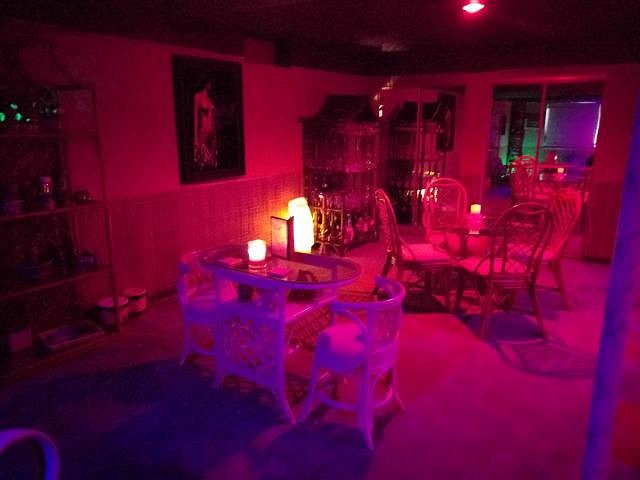
Some photos of the current progress, in regular and bar light.
It's coming along, but we have a long ways to go. |
|
V

VampiressRN
Posted
posted
on
Sun, Jul 24, 2016 8:38 PM
Wow...what a great space and all the work you have done is fabulous. You have wonderful decor talent. I like that airplane cart. CHEERS |
|
JB
Jeff Bannow
Posted
posted
on
Tue, Jul 26, 2016 7:38 AM
Thanks! It's been a fun project so far. Lots of work to go. :) |
|
JB
Jeff Bannow
Posted
posted
on
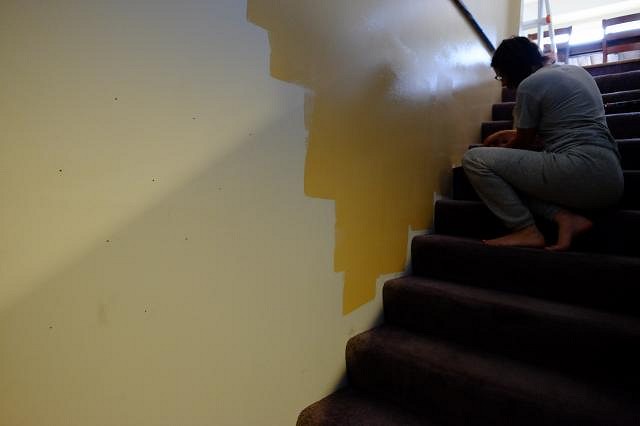
Wed, Jul 27, 2016 9:56 AM
The stairway into the basement is finally getting painted. Goodbye, baby blue walls!
|
|
JB
Jeff Bannow
Posted
posted
on
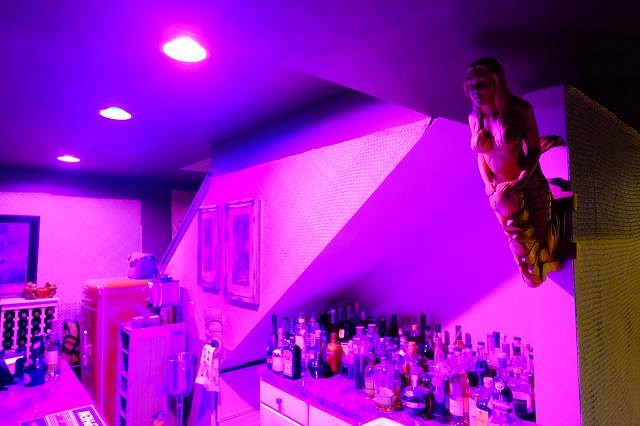
Wed, Jul 27, 2016 9:57 AM
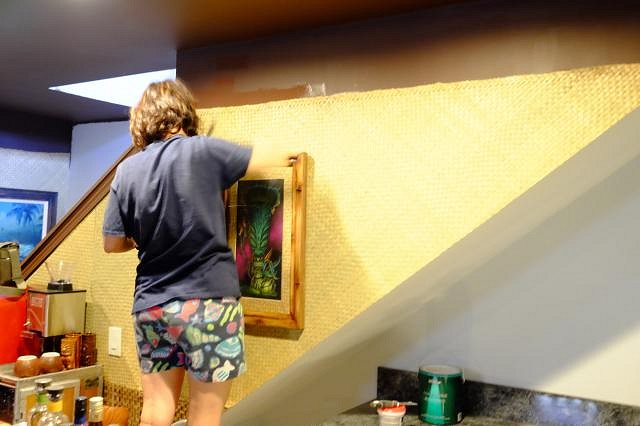
The mermaid is finally hung, with assistance from Daniel. We routed out the back and installed keyhole mounts so that it will sit flush against the wall. She's holding tight to the wall now, so no worries about her coming down any time soon.
|
|
JB
Jeff Bannow
Posted
posted
on
Wed, Jul 27, 2016 9:58 AM
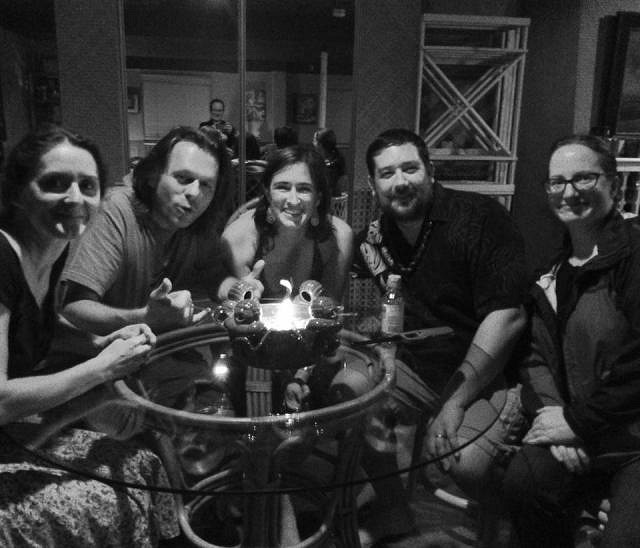
And, an action shot from last weekend's festivities. That's Mark making a rare appearance as bartender.
|
|
JB
Jeff Bannow
Posted
posted
on
Thu, Aug 11, 2016 5:49 AM
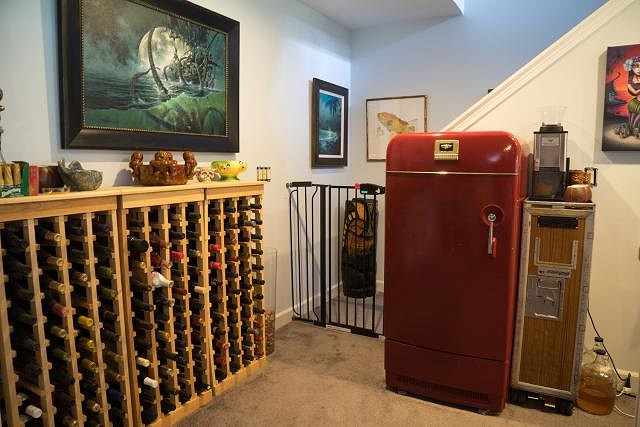
Some more progress, thanks to my wife Eva and friend Daniel.
Looking much more finished now. Thanks guys! |
|
JB
Jeff Bannow
Posted
posted
on
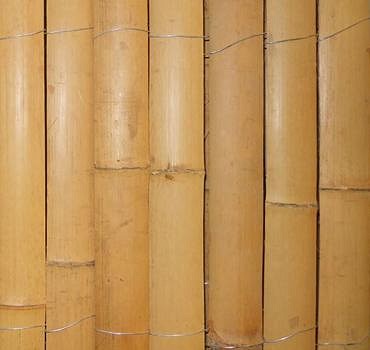
Thu, Aug 11, 2016 11:56 AM
Just ordered Oceanic Arts #1065 bamboo fencing. Will be using this to surround the bar. Should look much better once that goes up!
|
|
JB
Jeff Bannow
Posted
posted
on
Sun, Aug 14, 2016 4:20 PM
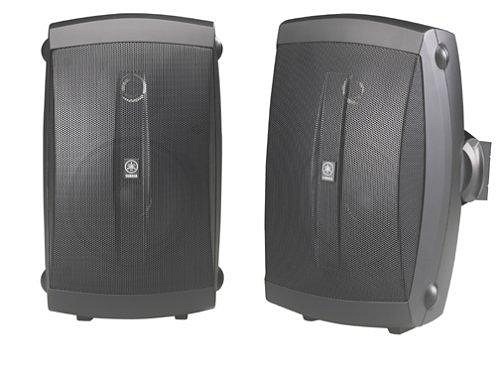
Just ordered 10 of "Dayton Audio ME825W 8" Micro-Edge 2-Way In-Wall Speakers" and 500 feet of in-wall cabling.
6 will be dedicated to music, and 4 to ambient sounds (birds, waterfalls, lightning, etc.) I'll be painting the grills with the same ceiling paint so they blend right in. We will also be mounting a pair of Yamaha NS-AW150BL waterproof speakers outside under the deck, to continue the music outside for parties.
|
|
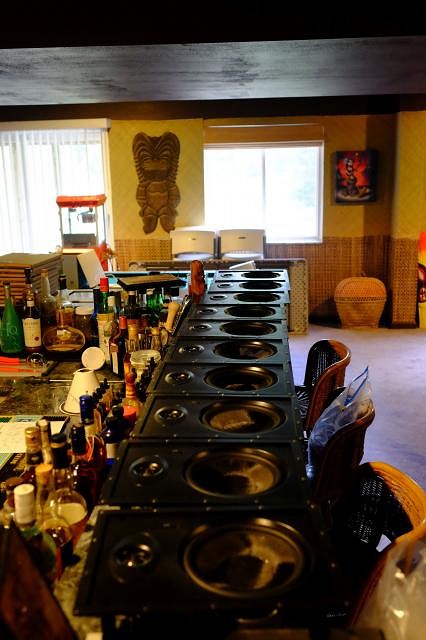
JB
Jeff Bannow
Posted
posted
on
Thu, Aug 18, 2016 7:21 AM
It's all installed now, and had a test run last night. Works great, far better than I expected. And you can't see them - they blend right into the ceiling color. |
|
JB
Jeff Bannow
Posted
posted
on
Thu, Aug 18, 2016 10:02 AM
|
|
JB
Jeff Bannow
Posted
posted
on
Thu, Aug 18, 2016 5:27 PM
Just picked up for a song on Craigslist. Finally, a replacement for the folding table that has been down there. |
|
JB
Jeff Bannow
Posted
posted
on
Mon, Aug 22, 2016 12:37 PM
|
|
H

hiltiki
Posted
posted
on
Tue, Aug 23, 2016 9:19 AM
Looks like a lot of fun, nice job. |
|
JB
Jeff Bannow
Posted
posted
on
Wed, Aug 24, 2016 7:57 AM
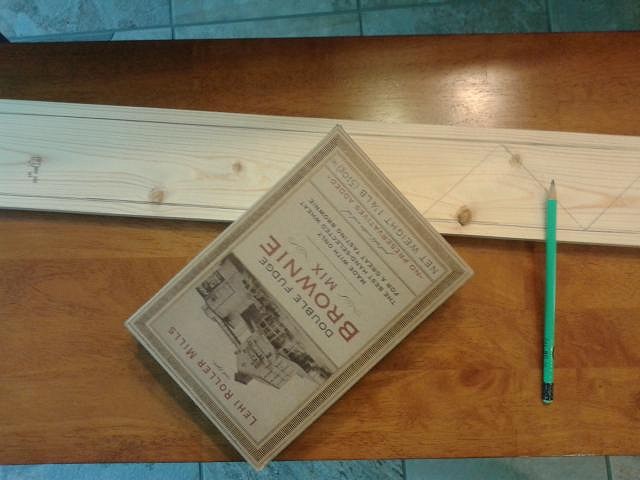
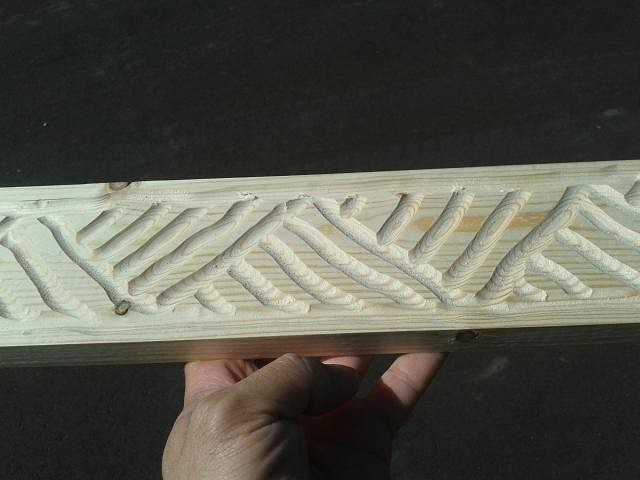
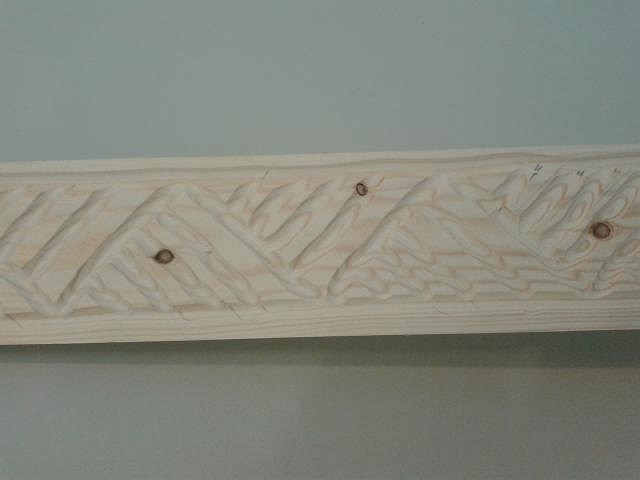
Our good friend Daniel has had some free time, and foolishly offered to help route the trim. Here's the test run on 1x3s:
This trim will run horizontally on the border between mattings. We need 12 8 foot pieces of trim to complete the room - that's a lot of routing! |
|
JB
Jeff Bannow
Posted
posted
on
Wed, Aug 24, 2016 8:04 AM
Thanks! It's been a great project, and so much fun to share with our friends. |
|
JB
Jeff Bannow
Posted
posted
on
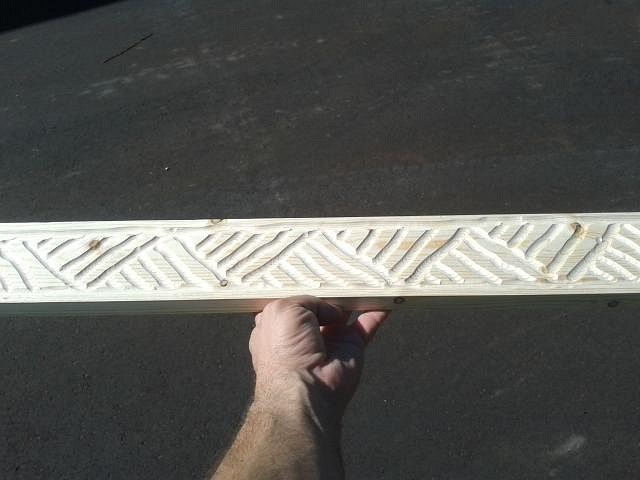
Thu, Aug 25, 2016 8:46 AM
96 feet of trim, routed and ready for burning. |
|
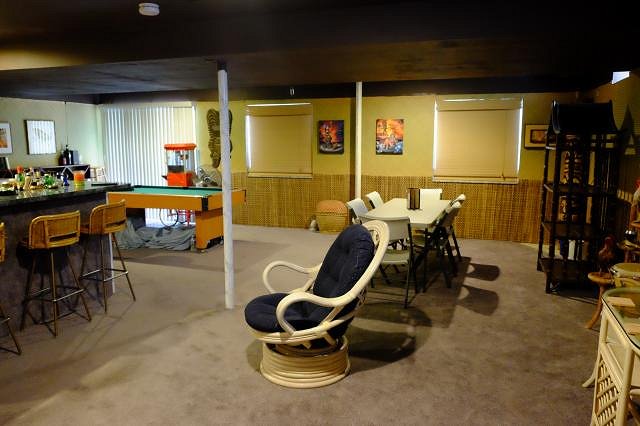
JB
Jeff Bannow
Posted
posted
on
Thu, Aug 25, 2016 6:52 PM
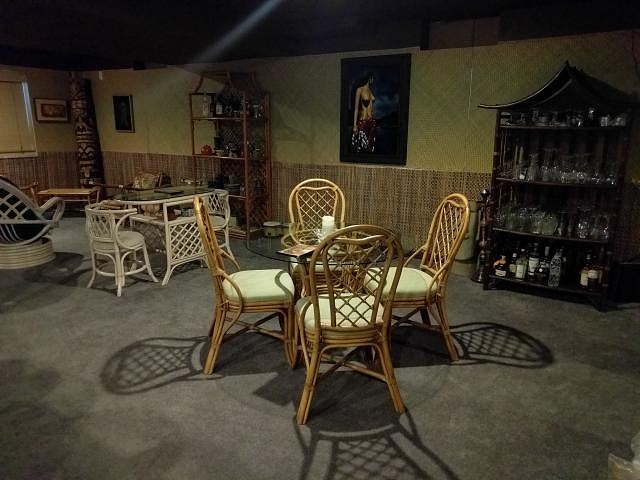
I almost forgot to post daylight photos of the new furniture setup.
|
|
JB
Jeff Bannow
Posted
posted
on
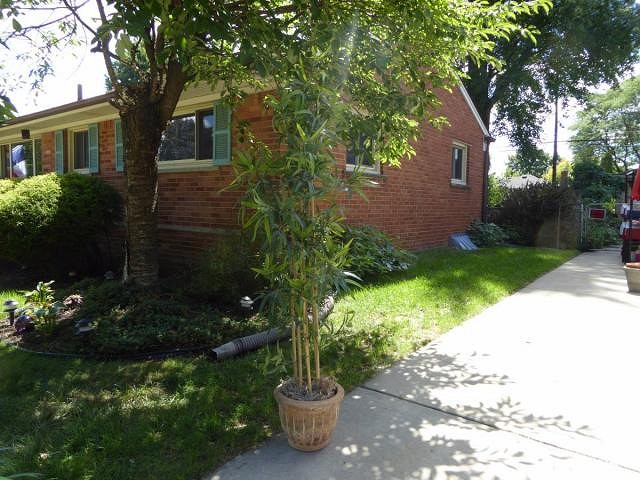
Mon, Aug 29, 2016 8:49 AM
Small new addition - fake bamboo plant, found on Craigslist. |