Tiki Central / Home Tiki Bars
The Tiki Bar to be Named has a name WIKI-TIKI BAR
|
N

newB24
Posted
posted
on
Tue, Jul 19, 2011 12:02 PM
Well, it actually does have a name but has taken me 2 weeks to figure out how to edit the title!
my youngest (5 year old) loves Scooby Doo, and anything that is Tiki to them is part of the WIKI-TIKIs from that show. So the bar is named WIKI TIKI Bar. This is a picture taken from Scooby Doo Pedia of the WIKI TIKI who ended up just being a surfer but would have gotten away with it if it wasn't for those meddling kids. So there you have it, updated post and a name! |
|
CTIT

Chuck Tatum is Tiki
Posted
posted
on
Tue, Jul 19, 2011 12:11 PM
Excellent! |
|
TM

Trader Mitch
Posted
posted
on
Wed, Jul 20, 2011 12:05 AM
Very cool flooring material. I have never seen that before. Kinda looks like a sandy beach! I like the red glass material too, reminds me of lava. |
|
P

phinz
Posted
posted
on
Sat, Jul 23, 2011 9:15 AM
Just be very careful about sugary spills. We wound up with a huge quantity of ants one time after not getting a small amount of spill up. It's amazing how much can get on the floor when you have people over and are pouring drinks. |
|
R

RevBambooBen
Posted
posted
on
Sat, Jul 23, 2011 9:53 AM
mold too.in the pits. |
|
N
newB24
Posted
posted
on
Sat, Jul 23, 2011 10:27 AM
All good points and well noted....my sister has this stuff in her entire basement, she uses a carpet cleaner or a garden hose and shopvac to clean hers. Next day after cocktails will not be fun, but I guess it is the price I have to pay!!! I don't want to build a subfloor to put in hardwood floors, preengineered hardwood just doesn't feel right to me and anytype of tile would be just too cold. A very close second was a slate floor, but this won out! [ Edited by: newB24 2011-07-23 10:29 ] |
|
N
newB24
Posted
posted
on
Sat, Jul 23, 2011 11:02 AM
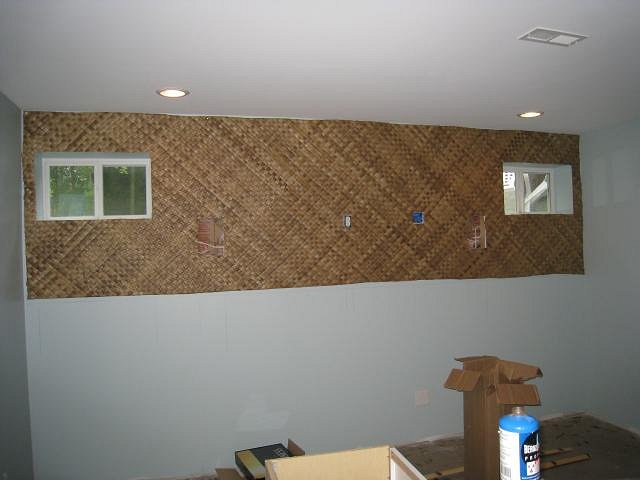
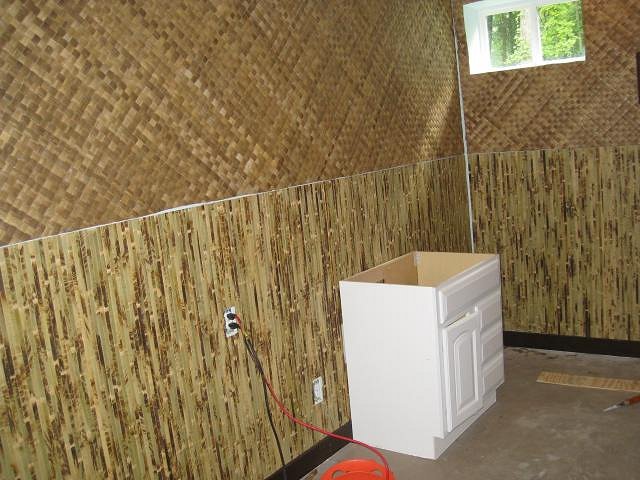
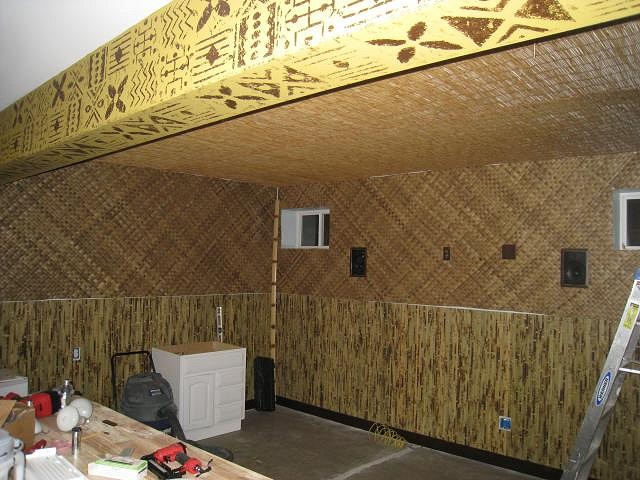
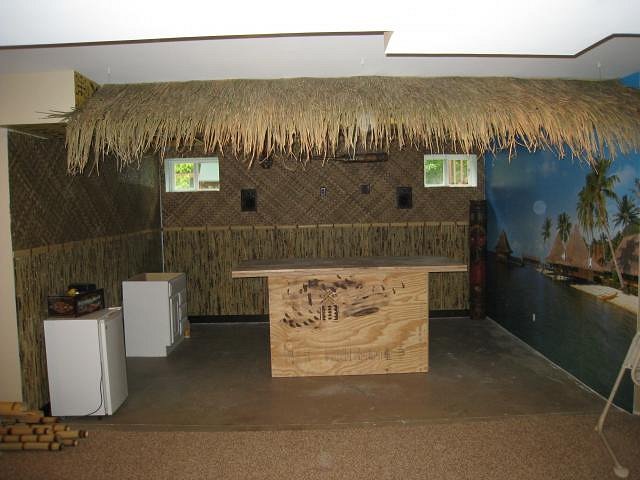
Well, got a little jump start on the wall coverings. I decided to put the lauhala first, knowing that it might not lay too flat or straight. Boy was I right, that stuff is not very fun to work with. My batch was REALLY dry, not what I was expecting at all. I basically made a mark down about 50" level across the wall and tried to keep it fairly close along the bottom. I just have to keep my bamboo wainscoting and the bottom of the lauhala closer than 2" apart (the width of my bamboo chair rail). So in all its glory....
The top and bottom lines are a bit wavy but it will all be hidden behind something else, plus in this picture the entire mat looks wavy but she is flat against that wall, no humps or high spots anywhere. I'm hoping to get the floor sawcut and patched back tomorrow but no promises on that! Unfortunately not much more progress until that is done, that outlet in the middle of the wall is the one I am tying into. So I can't put up my baseboard until that is completed. If you look closely you can see I tried my hand at torching some bamboo, well I let the boys torch the bamboo. Stunk up the place, so I need to do the rest outside I think! EDIT: Got the second wall done, it kind of dives down on the end, but I think I am leaving it. Meets the height requirements across the wall.
[ Edited by: newB24 2011-07-23 11:04 ] [ Edited by: newB24 2011-07-23 15:06 ] |
|
V

VampiressRN
Posted
posted
on
Sat, Jul 23, 2011 8:52 PM
Love the beam. I like that kind of floor, but it is good to know the issues that can occur with it. Keep up the great work!!! |
|
N
newB24
Posted
posted
on
Mon, Jul 25, 2011 6:54 AM
Thanks so much to everyone checking in on the build, love the comments and feedback! |
|
N
newB24
Posted
posted
on
Mon, Jul 25, 2011 7:06 AM
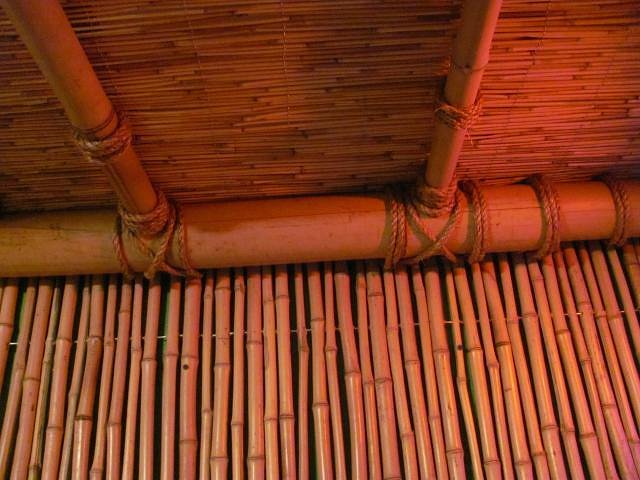
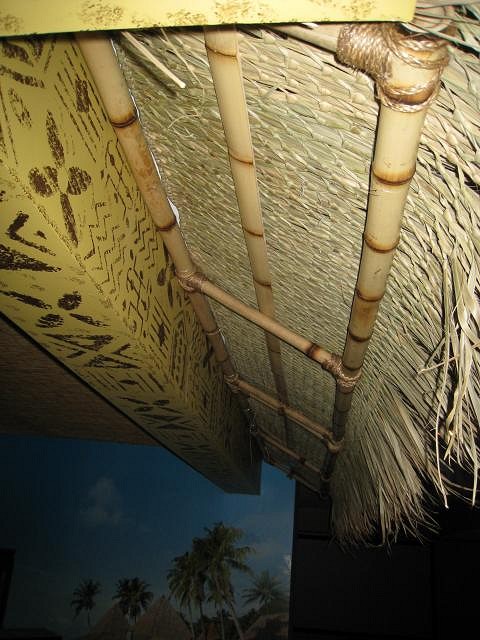
Well I thought I was set on my ceiling plan, but as I got to looking at it. I'm at a cross roads of sorts. This was the original intent:
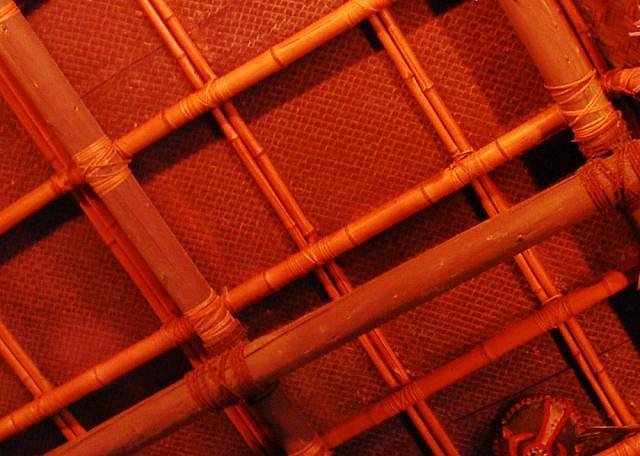
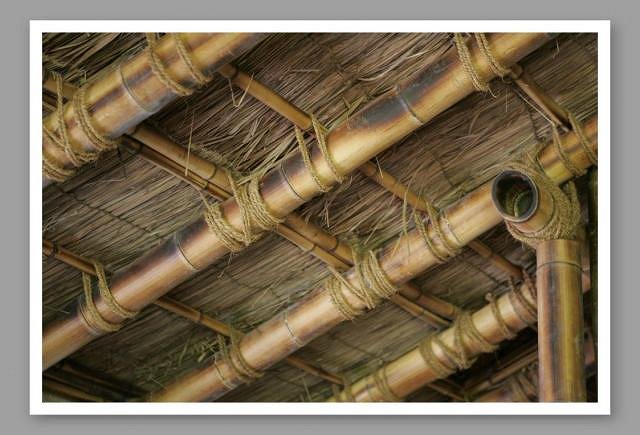
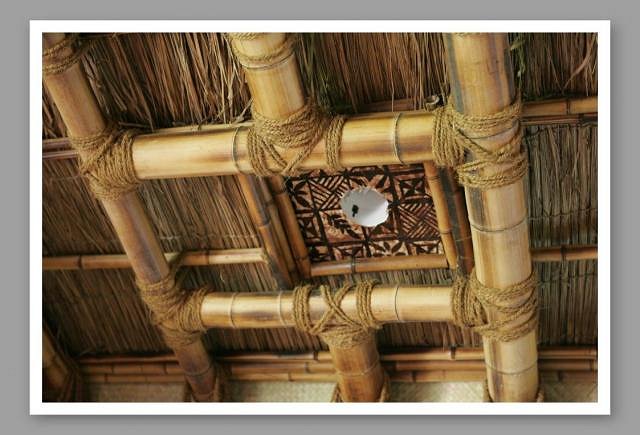
I still love this BUT....I'm confused on how to attach the smaller bamboo to the larger bamboo? Do you drill a hole in the bigger bamboo and slide it in or is it glued and lashed? So after doing some drooling, I mean research on other builds. I found these....
I know this is REVBAMBOOBEN's handiwork!!!
I don't remember where I copied this from...whoever I owe you proper credit!!!! So these 2 ceilings have literally put me upside down in my thinking.... The smaller bamboo is secured to the ceiling and the bigger stuff is lashed below...a much easier install (at least in my pea brain, maybe not in reality). I don't have a real preference because both will work to hang my fishnet and lamps and such but I do think that the bigger bamboo on top works a bit better for my situation with hiding all of the joints and such. Can anyone give me some insight on how to do what MARKMYWORDS did with that smaller bamboo attached to the larger? [ Edited by: newB24 2011-07-25 07:09 ] |
|
R
RevBambooBen
Posted
posted
on
Wed, Jul 27, 2011 8:24 PM
Can anyone give me some insight on how to do what MARKMYWORDS did with that smaller bamboo attached to the larger?It's all fake. Think "Stage Crafts" |
|
BB

Bruddah Bear
Posted
posted
on
Wed, Jul 27, 2011 9:28 PM
So Ben, you mean it just has to look functional to the casual observer, but doesn't need to fool a structural engineer? Bear |
|
N
newB24
Posted
posted
on
Thu, Jul 28, 2011 7:12 AM
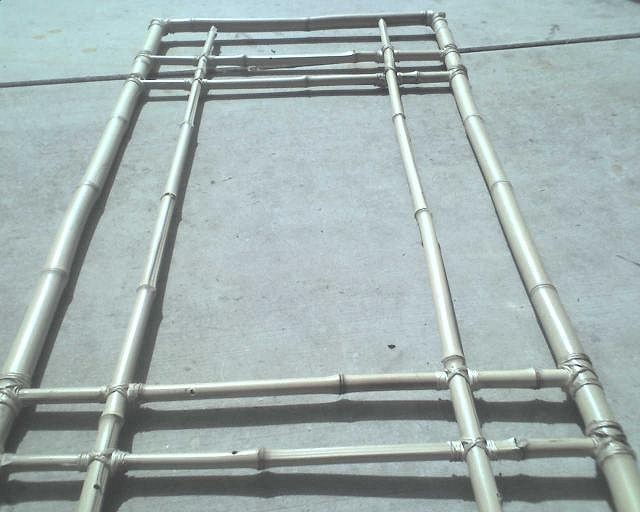
Stage Crafts you say....interesting enough, that rope lashing must hide the magic.
So from the pictures, it looks like you secured plywood strips to the ceiling, installed your matting on the ceiling and then secured the smaller bamboo poles to the plywood strips then hung the bigger bamboo off those secured pieces.
Your joints and angles on that box out for the light are about perfect, I'm not sure I have the skill set to make that happen. Plus I will be hanging lights, netting and other oddities from the structure so it has to have some sort of strength to it. I think I am going to have to just go reverse, secure my 4" bamboo to the ceiling joists and then hang my 2" bamboo underneath, lashing it and securing it with screws to the 4". I'll lose another 2" in ceiling height but for peace of mind, it might be better. The awning that I am building for the front will need to be structurally built as well, I can't afford to lose any height by stacking bamboo on top of each other so I need to work on a plan to build that like I'm framing a wall and it will have to somewhat self support itself with the thatch laid on top of it. So I am back to my initial problem of securing the 2" bamboo to itself. I think I may try a hole saw and stick the bamboo into each other and then secure it with some screws. The lashing will hide the nastiness so I just need to make it strong and durable. I can't find any pics right now of what I want to do other than this window treatment.....
|
|
R
RevBambooBen
Posted
posted
on
Thu, Jul 28, 2011 8:02 AM
p.s. remember, when it comes to bamboo, nothing is perfect. :) |
|
N
newB24
Posted
posted
on
Thu, Jul 28, 2011 10:00 AM
That has been my mantra for this whole build!!! BUT your projects do look damn close to perfect!!!!!!!!!!!!!!!!!!!!!!!!!!! |
|
R
RevBambooBen
Posted
posted
on
Thu, Jul 28, 2011 10:23 AM
I was taught by the best... |
|
R
RevBambooBen
Posted
posted
on
Sun, Jul 31, 2011 7:56 AM
3 days no posting? Clues that someone is getting into it. :wink: |
|
N
newB24
Posted
posted
on
Sun, Jul 31, 2011 12:37 PM
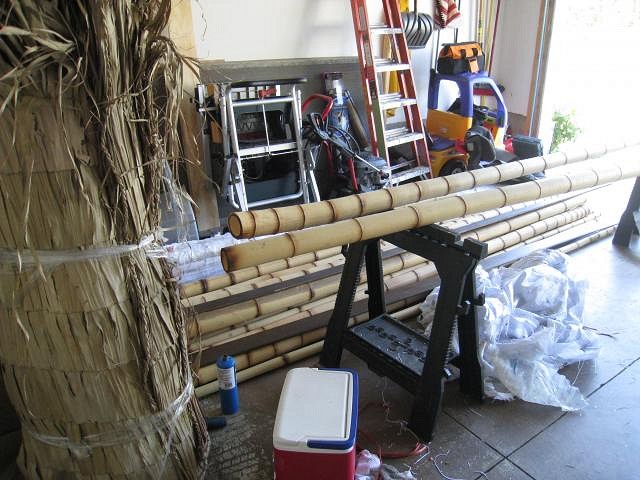
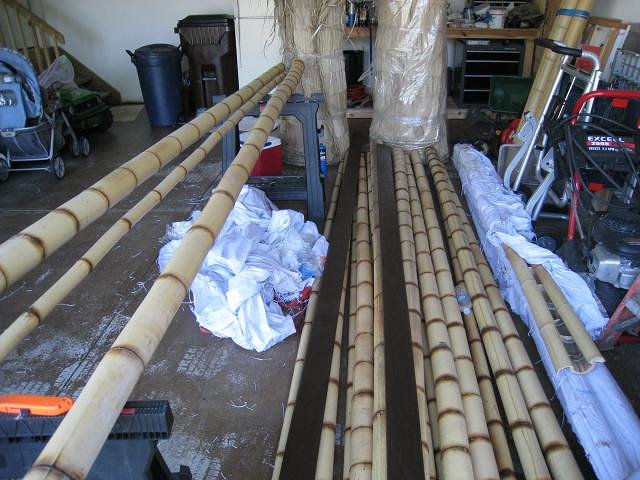
Well not quite getting into it....but making some progress. Torched the crap out of some bamboo for hours on end last night.
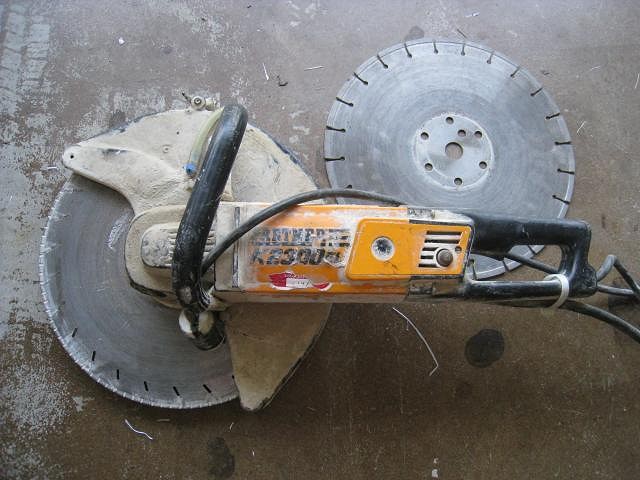
And this looks to be the way I am spending the rest of my Sunday afternoon....cutting a trench to get power over to the bar. CRIKEY!
Once I get power over to the bar, then I can put my base in and then I can put up the bamboo paneling. I have a ton of torching yet to do.... |
|
N
newB24
Posted
posted
on
Fri, Aug 5, 2011 4:37 PM
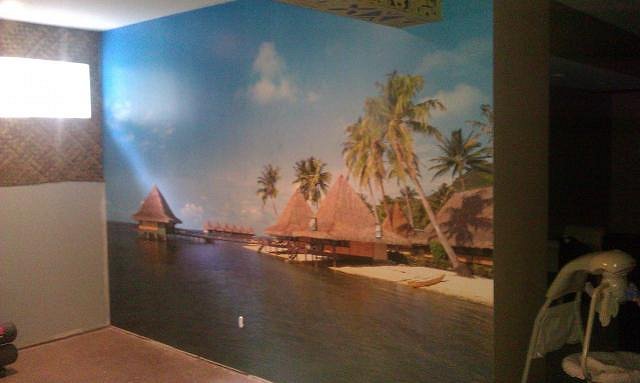
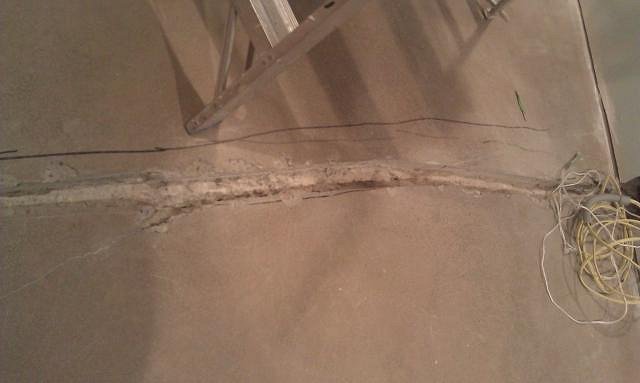
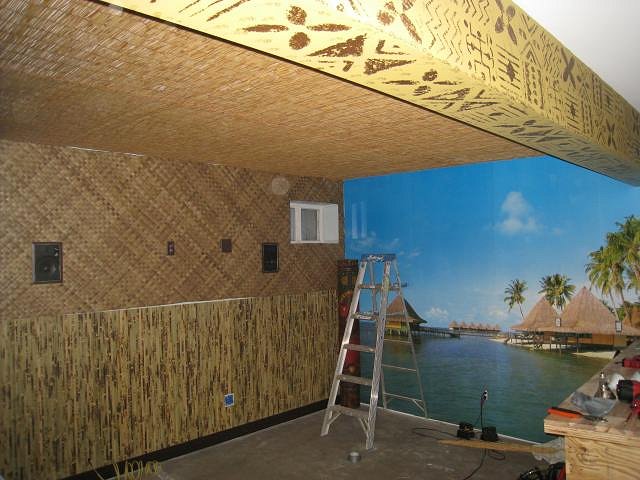
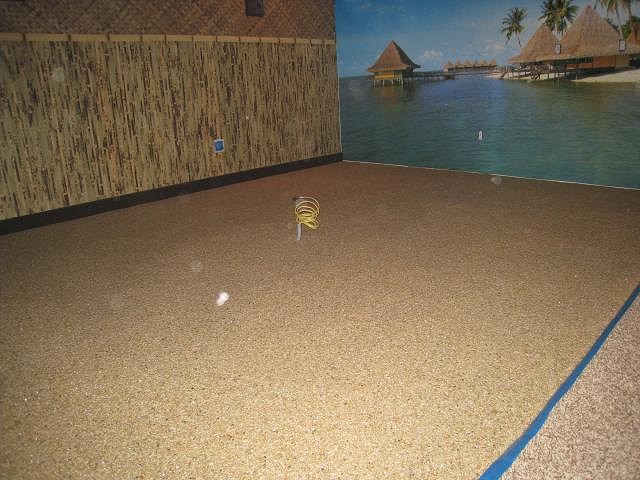
Wall mural got installed today and I actually finished the d@mnable electric trench and got the wired pulled. Now just need to pour in some vinyl concrete patch and be done with it!!!! I may actually get some trim and bamboo wall covering up this weekend!!!!!!!!!!!!!!!!!!!!!!!!!!!!!!!!!!!!
UPDATED: Here is the trench that tried to kill me....
[ Edited by: newB24 2011-08-06 05:14 ] |
|
N
newB24
Posted
posted
on
Sat, Aug 6, 2011 12:30 PM
Started to look a little like something.... Installed the baseboards and put up the bottom tortoise shell bamboo.
|
|
N
newB24
Posted
posted
on
Sun, Aug 7, 2011 3:54 PM
Putting up the bamboo paneling was quite easy actually.. 1 laid out where the holes were to be cut, just like hanging drywall You can't even see the joints where this stuff goes together and it lays perfectly smooth on the wall. I'm either going to tackle the chair rail bamboo next or maybe I might put up the reed on the ceiling. I need to figure out how to post a poll on here, I need to decide what to do with the window wells... A. Paint them the same as the soffit [ Edited by: newB24 2011-08-09 04:19 ] |
|
T

tigertail777
Posted
posted
on
Mon, Aug 8, 2011 7:57 PM
No, I think its just such a tough call. I think I would try to make it as close color to the tortoise shell as possible, but windows to me really are not something a tiki bar should have (it dilutes the romantic lighting of the colored hanging lights) so I would put either a colored opaque plastic over the windows, or get some kind of tiki theme scene printed on plastic and put it over the window. Either way once the windows are covered somehow the window ledge would make an ideal holding spot for tiki mugs. :wink: I think I might also frame the windows in bamboo strips. It's all up to you of course, but that is my two cents. |
|
K

KAHAKA
Posted
posted
on
Tue, Aug 9, 2011 12:34 AM
I say put tapa over the windows. During the day light will glow through and highlight the details. |
|
N
newB24
Posted
posted
on
Tue, Aug 9, 2011 4:22 AM
AWESOME IDEAS! I just don't have the vision for some of the smaller details and those are very clever....I was really thinking about doing something about that light coming in, it just washes everything out during the day! THANKS A BUNCH! |
|
P
phinz
Posted
posted
on
Tue, Aug 9, 2011 4:51 AM
We made blackout curtains from Tapa-printed cloth with a blackout liner for Trader Scott's. You don't know what time of day it is when you're down there. The only time we see daylight is when we open the basement door to release the hounds. We made a curtain out of the same material to cover the exercise room when we have large parties. You can see these curtains in this shot of Tiki 65.
|
|
N
newB24
Posted
posted
on
Tue, Aug 9, 2011 7:37 AM
Another great idea...maybe take some bamboo and make a removable masking frame out of it. once I frame out the window, I can make something happen! |
|
T

tikiskip
Posted
posted
on
Tue, Aug 9, 2011 10:45 AM
I would put frosted plexi glass in front of the window. |
|
T
tikiskip
Posted
posted
on
Tue, Aug 9, 2011 11:00 AM
Oh yeah, |
|
CN

Club Nouméa
Posted
posted
on
Tue, Aug 9, 2011 6:54 PM
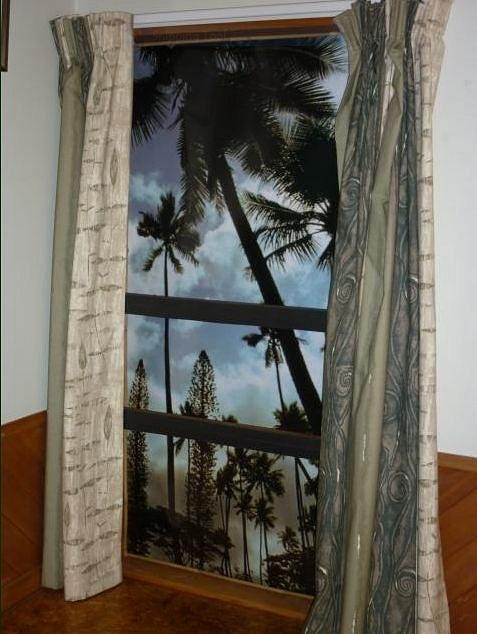
I had a window like that - it was letting in too much light, so here's what I did:
The image is printed on photographic paper, which only lets in a low level of light during the day. It was backed onto a a piece of clear rigid plastic jammed into the window frame to protect the paper from condensation on the window pane, which has worked really well. Then I nailed in some small bamboo around the edges to hold it all in place and to stop light getting in around the edges of the picture. I didn't use any glue and the paper is attached to the plastic only with Scotch tape. That way I can replace it easily if I decide I want to put another pic in there. CN |
|
N
newB24
Posted
posted
on
Wed, Aug 10, 2011 3:03 PM
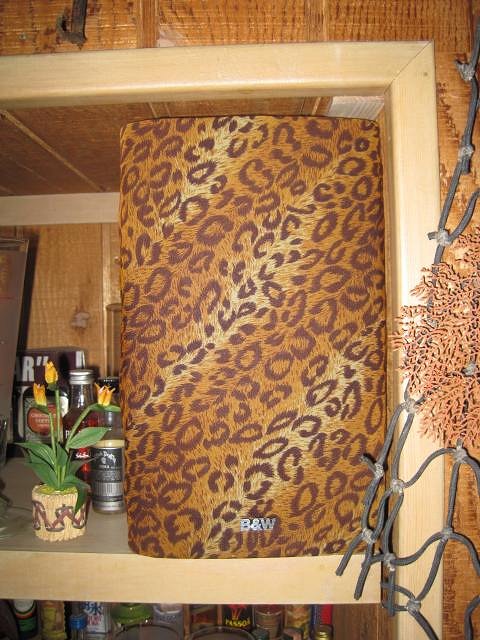
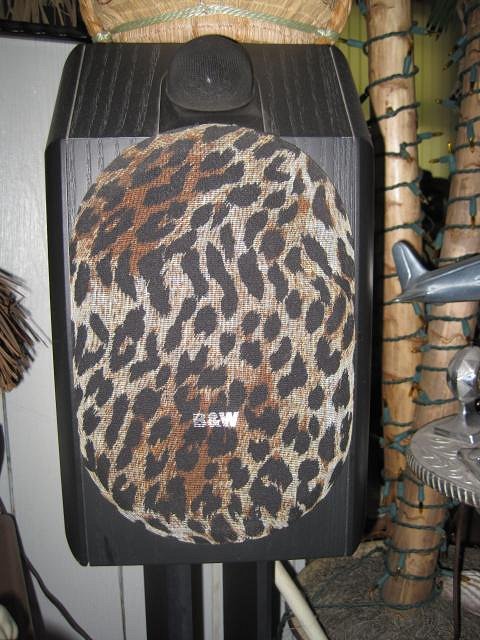
Love those speaker covers....definitely a must. Window treatments are going to take some trial and error I think, so many good ideas... I think some mugs or booze will definitely find a nice home up there....stay tuned! |
|
T
tikiskip
Posted
posted
on
Thu, Aug 11, 2011 7:29 AM
Your bar is coming along nicely. |
|
N
newB24
Posted
posted
on
Fri, Aug 12, 2011 6:20 PM
Well I need to know more about that customs girl!!! I think I am on the right track, the whole reason I dug that trench was to put lighting around the bar....i kept telling myself it would be worth the effort (not sure I'm buying it yet, because it SUCKED big time cutting that trench). I also put in some outlets in the ceiling and have an extra outlet here and there to assist with more lights in the end I probably will not have enough. I'm just trying to make a push to get some of the major construction done so I can work on the small details and not be tripping over tools or moving that bar from one side of the room to the other. Did I mention it weighs a ton? Would be nice to get the flooring installed as well! OK, enough of me complaining, I really appreciate the advice....KEEP IT COMING! |
|
N
newB24
Posted
posted
on
Fri, Aug 12, 2011 6:32 PM
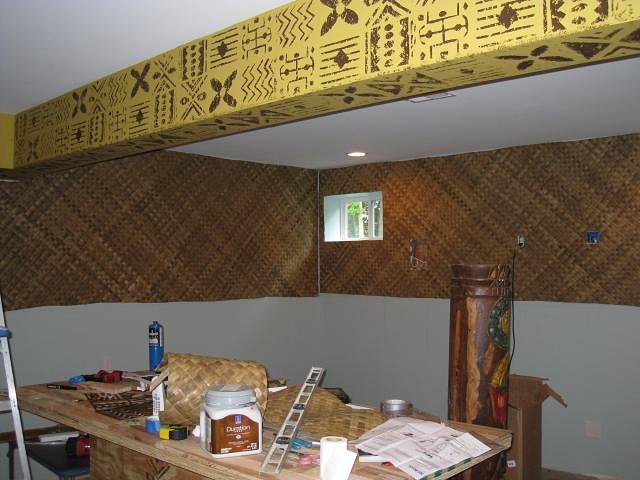
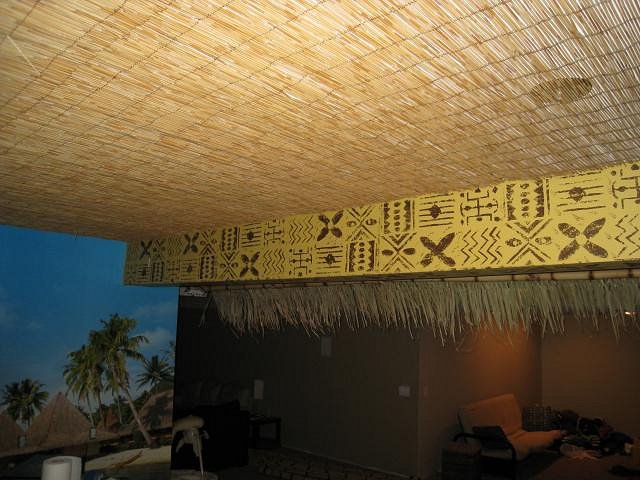
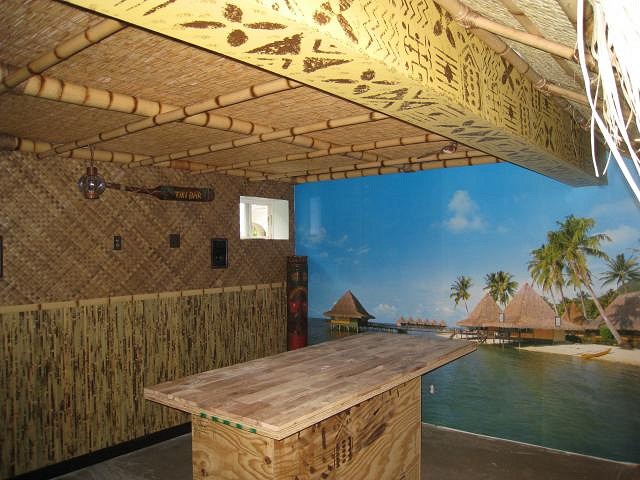
Well I took some time and got the reed fencing installed on the ceiling. Went up pretty easy with a helper and a big push broom. I lined up the joint in the middle of the room with just a little bit of overlap, the joint will be hidden by the 4" bamboo so I think it worked out pretty well. Basically just took my air stapler, kept the pressure way down and stapled the thin gauged wire up to the ceiling. I don't forsee it falling down on our heads but I guess you never know! Really changed the look of the room in my opinion....
I'm ready to put up some bamboo......WAHOOOOOOO!!!!!!!!!!!!!!!!!!!!! |
|
T

TikiTomD
Posted
posted
on
Fri, Aug 12, 2011 7:31 PM
The room atmospherics are starting to peg the exotica meter with the addition of those reed ceilings... and I really like your soffit (or beam) art work. -Tom |
|
E

ErkNoLikeFire
Posted
posted
on
Fri, Aug 12, 2011 9:52 PM
That mural really ties the room together! |
|
M

MadDogMike
Posted
posted
on
Fri, Aug 12, 2011 10:49 PM
I haven't checked in on your thread in a while, you are really making progress! I think that mural needs a rail mounted across it, like your bar is on the dock facing that harbor. You don't want any of your tipsy guest falling into the water! :D |
|
H

hang10tiki
Posted
posted
on
Fri, Aug 12, 2011 11:37 PM
Lookin good |
|
N
newB24
Posted
posted
on
Mon, Aug 15, 2011 12:26 PM
Thanks so much for the kind words and for checking out the build! I about burned up the search engine looking for ways to attach the manila rope to the bamboo and so forth...can't wait to get some bamboo up in the air! I have been doing some research on creating a water feature and the darn search engine is failing me....can some of the grand masters lead me to some threads that show some waterfalls/features?! My initial thought is to use some split bamboo and have it cascade from side to side running from 1 piece to another. Need to figure out a cool 'spout' and a slick looking bowl/basin.... What does the mister/fogger/light thing look like? http://crafters2000.stores.yahoo.net/newimifowile.html What is a good gallon per hour pump? 165 GPH, 300 GPH, 1000GPH? This all way too premature, but just daydreaming during my lunch about what could be and what will be....yes, I am totally consumed! Call it, fight is over....TKO... [ Edited by: newB24 2011-08-15 12:28 ] |
|
N
newB24
Posted
posted
on
Sun, Sep 4, 2011 1:38 PM
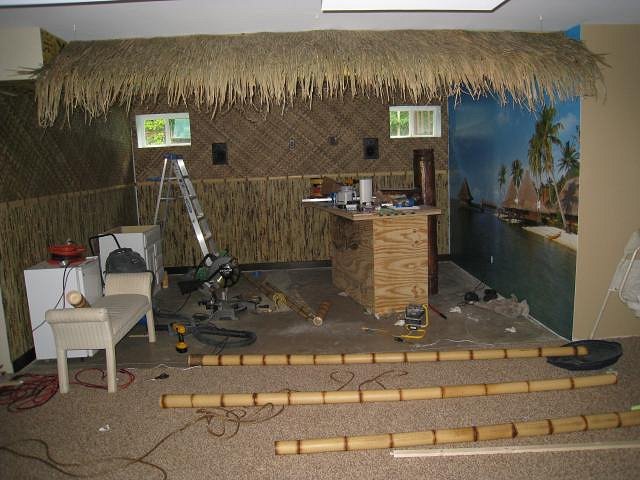
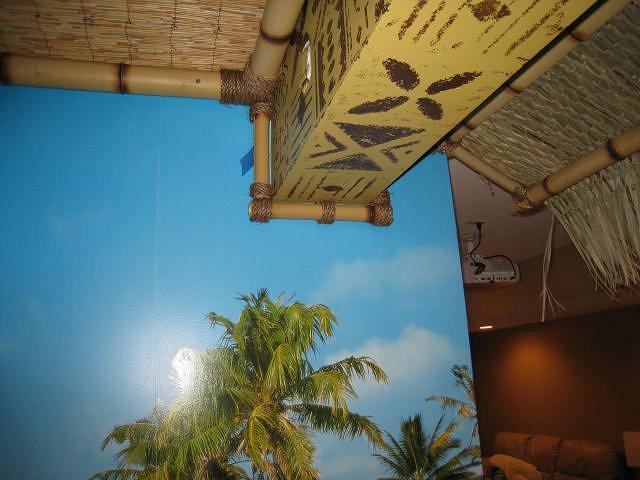
Well I guess no information on the water fall, that's OK, my brain has moved on and trying to get the room structurally done and we shall get back to the details at a later date..... More importantly, I got the awning up and installed this weekend, need to do some touch up work and more securing but for the most part she is up.... For those who care, I ended up hole sawing the 2.5" bamboo and inserted the 1" bamboo pieces in and then applied gorilla glue to hold it all together. I also predrilled the 2.5" bamboo and used 6" screws to secure it to the soffit 2 x 4's. I ended up making 2 panels of structural bamboo so it was kind of a pain to put together but I think in the end, it was better for my peace of mind. Once it was up, I put some 2.5" flat trim up to keep the angle of the thatch at just the right degree! PLEASE EXCUSE THE MESS....MAJOR CONSTRUCTION ZONE GOING ON,plus I'm only doing this a few minutes at a time when the family is asleep or eating!!! Looks may be a bit deceiving but I still have 7' clear under the thatch, could not have turned out better in my opinion....
No worries, I plan on tightening up that thatch to conceal the ceiling a bit better. I will also be running some rope lighting up in there for some added effect. I also whipped out the bamboo trim between the bamboo panels and the lauhala, which was a piece of cake. I'm trying to get all the 4" bamboo up in the air this weekend but I may run out of time. [ Edited by: newB24 2011-09-04 13:42 ] [ Edited by: newB24 2011-09-04 13:43 ] |
|
N
newB24
Posted
posted
on
Mon, Sep 5, 2011 7:16 AM
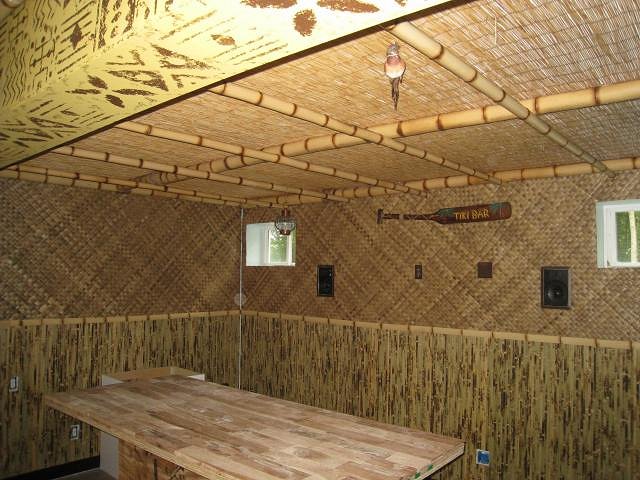
The wife and I stayed up past our bed time last night and got some bamboo hung in the air. I spent an hour or so cleaning up the area and voila, ceiling bamboo installed. Need to put up some rope lashing but looking good in my personal opinion
I really can't go much farther structurally right now, I need to get this flooring installed so I can put up more bamboo borders and such.....so until then, might sit like this for a while....back to dreaming about water features! |
|
N
newB24
Posted
posted
on
Wed, Sep 7, 2011 8:25 AM
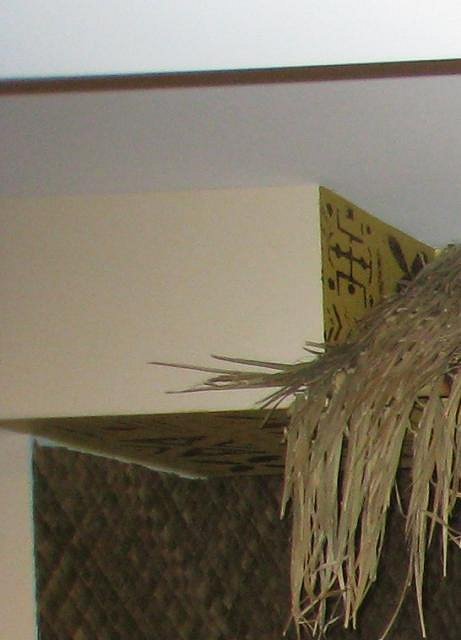
OK, after further review and discussion with the boss, appears we are at a stalemate....
My original plan for this area was to just cut some thatch down and put it up on the plain white soffit and make the heights work out. Well, the boss thinks that is a bad idea and wants to just leave it white. As a compromise, I offered to paint it and stamp it like the rest of the soffit.....request denied. The more I look at it, the more it is bothering me....keep in mind that I will be running 2" bamboo trim around that soffit to hide the joint in between the lauhala and the bottom of the soffit. I'm also considering covering up the painting and the mural pieces that are extending beyond the angle of the awning... What say the masses? Any comments or ideas? Leave it be, paint it, put up some thatch????? What about the triangle pieces of paint and mural that are showing? Leave them be or hide them? [ Edited by: newB24 2011-09-07 08:28 ] |
|
K

komohana
Posted
posted
on
Wed, Sep 7, 2011 7:04 PM
looking good newB24, i vote cover/paint the blue triangle. the end of the bulkhead could be used to display some artefacts?, |
|
N
newB24
Posted
posted
on
Thu, Sep 8, 2011 4:24 AM
that is 2 votes (mine/yours) to cover but 1 BIG vote from the boss to leave it! Need some more votes to convince her! Great idea, put some tiki up there....I'm digging it Thanks so much for the nice comment and checking out the build...I really appreciate it..... [ Edited by: newB24 2011-09-08 04:51 ] |
|
N
newB24
Posted
posted
on
Mon, Sep 12, 2011 4:41 AM
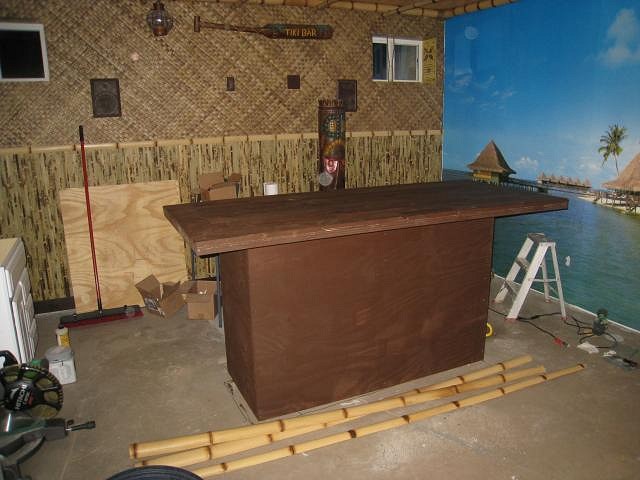
Still awaiting some information on the floor, so I took the time to clean up some of the rough construction areas and worked a bit on the bar. Nothing exciting but these areas were bothering me. I painted the bar a nice dark brown, just something to hide the gaps when I put the 4" bamboo on later. I was tired of looking at my practice stenciling and stomping.
I never really cut the windows in really well, plus the blue paint shining through was bothering me, so I cut the windows out a little tighter and in the meantime while I make a decision on what the windows will be later, I just hit them with some stomping.
I did a small test on the soffit, where I wrapped it with the smaller bamboo. Didn't turn out too bad....I guess I missed a piece of blue painters tape, I had the entire room sectioned off when I sanded the bejesus out of the bar top!!!!
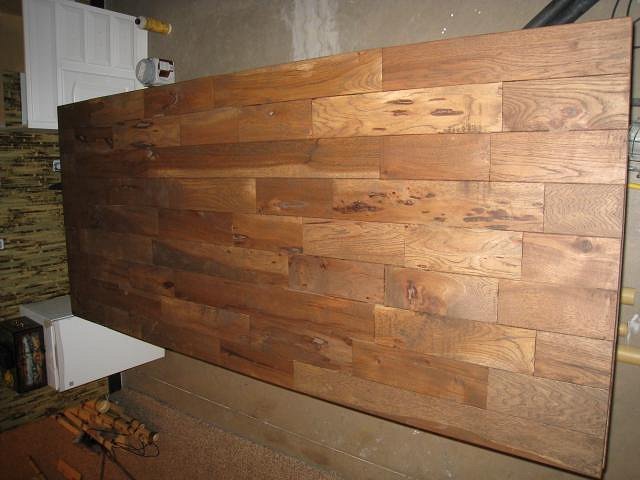
After much deliberation and painstaking research I put the stain on the top of the bar. It definitely turned out a bit darker than I liked but it is more matchy to the other browns in the room and really makes the bamboo on the edge standout. You can't say that top doesn't have any character!
Until we get this flooring issue settled, I'm back to working on the bar but am also going on a golf trip the end of this week, so it looks like this is how she will stand for the next couple of weeks. The current discussion in the house is how the wet bar on the side of the room is going to look....my little white sink cabinet will not make the cut, oh how I had plans for you little guy, the boss just doesn't have my same vision. [ Edited by: newB24 2011-10-04 17:30 ] |
|
N
newB24
Posted
posted
on
Tue, Oct 4, 2011 4:46 PM
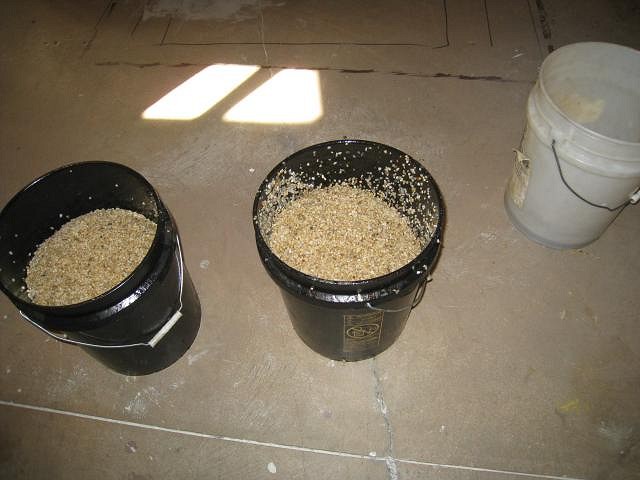
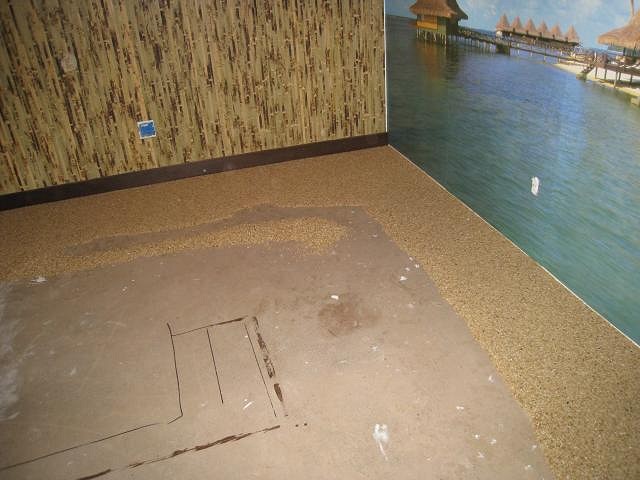
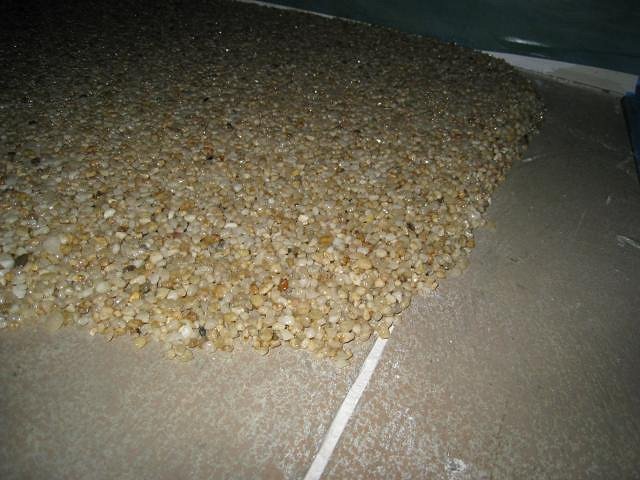
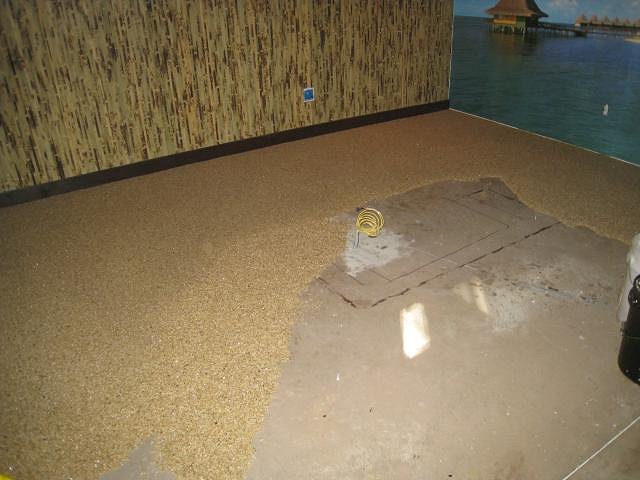
I'm still here! Finally got the flooring installed, now is the time to run like crazy, everything is a go remaining bamboo around perimeter can't wait to get to decorating stage.... If you remember I went with a pebble epoxy floor, bascially 50 pound bags of pebbles mixed with epoxy to a rice krispy texture and troweled on the ground. Bar took 18 bags of pebbles and 10 gallons of epoxy, was put down in 1 hour and 45 minutes flat. Needs to sit for a day before I can get on it.
|
|
Q

Q-tiki
Posted
posted
on
Tue, Oct 4, 2011 5:54 PM
The floor looks great! Really good idea. I've enjoyed the reading the entire thread. Good job and thanks for posting!! Cheers! |
|
N
newB24
Posted
posted
on
Wed, Oct 5, 2011 5:06 AM
Thanks for the comment and checking in on the build! The floor really turned out fantastic, much better than I ever imagined, the wife did a great job on picking out the color. I'm making big plans for the next few weeks, hopefully I can get through some of the structural aspect of the build and get to decorating and using! |
|
TM
Trader Mitch
Posted
posted
on
Wed, Oct 5, 2011 3:24 PM
The floor looks fantastic! Like a sandy beach. I'm curious to see how it stands up to traffic and spills so keep us posted. |