Pages: 1 2 3 4 5 6 7 306 replies
|
GSM

Gene S Morgan
Posted
posted
on
Thu, May 23, 2013 10:13 PM
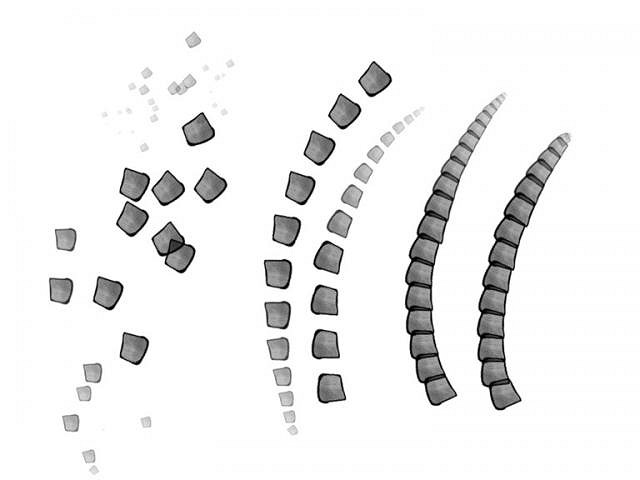
It is not just how good your brush looks but how you use it. There are brush controls that allow you to stroke it onto the canvas lots of different ways. The left example is a scatter stroke. Best used for texturing. The middle is an even stroke spaced out a bit. Maybe a necklace. Also note that there is a taper to the stroke. There are lots of other ways to affect how the stroke looks. The one on the right has the brush elements touching each other. Does it look like anything?
|
|
GSM
Gene S Morgan
Posted
posted
on
Thu, May 23, 2013 10:15 PM
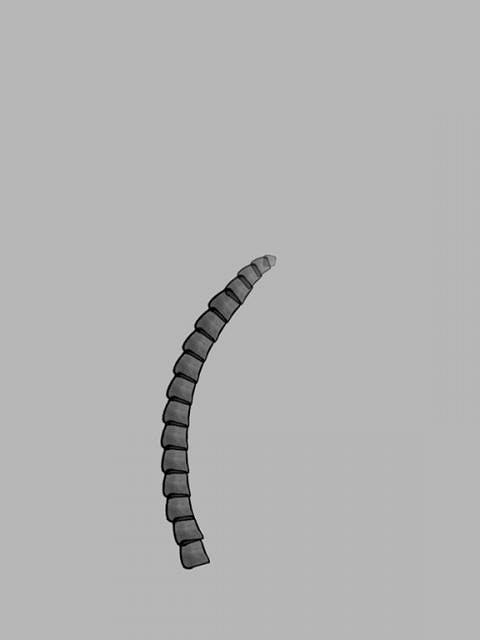
Back on gray again.
|
|
GSM
Gene S Morgan
Posted
posted
on
Thu, May 23, 2013 10:17 PM
Some color and shading.
|
|
GSM
Gene S Morgan
Posted
posted
on
Thu, May 23, 2013 10:21 PM
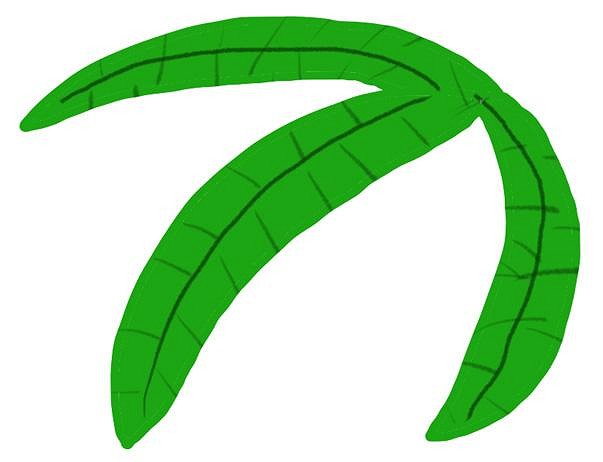
Another leaf brush.
|
|
GSM
Gene S Morgan
Posted
posted
on
Thu, May 23, 2013 10:24 PM
More leaf
|
|
GSM
Gene S Morgan
Posted
posted
on
Thu, May 23, 2013 10:26 PM
Kinda like a leaf.
|
|
GSM
Gene S Morgan
Posted
posted
on
Thu, May 23, 2013 10:32 PM
Put it all together and you got another kind of palm. I used all the different leaf brushes layered on each branch.
|
|
GSM
Gene S Morgan
Posted
posted
on
Thu, May 23, 2013 10:34 PM
More digital magic. Did not like that last image. Thought the proportions were off. Layers coming to the rescue with some moving and re-sizing. That is more like it.
|
|
GSM
Gene S Morgan
Posted
posted
on
Thu, May 23, 2013 10:37 PM
Background added. The background palms are actually brushes I use when I'm lazy. They are kinda stylized, but don't look too bad way back. You can make a quick jungle that way.
|
|
GSM
Gene S Morgan
Posted
posted
on
Thu, May 23, 2013 10:40 PM
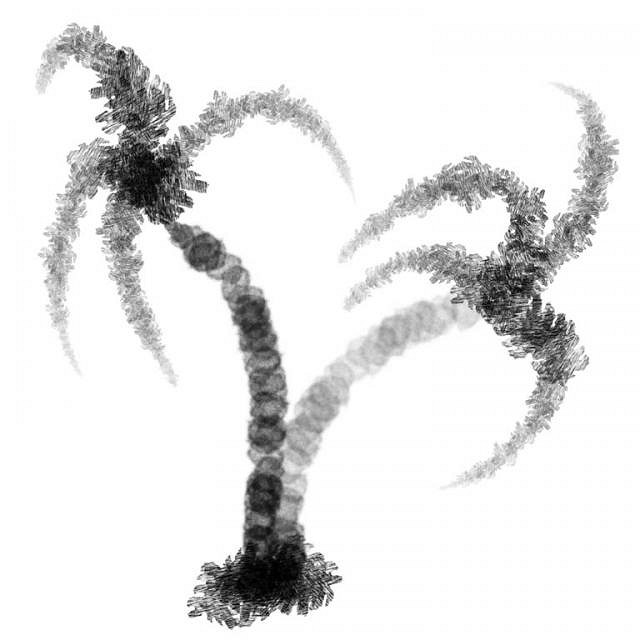
I used all three of the leaf brushes starting with the darkest green and lighter as I move forward. I like that effect. I mentioned using a brush for texture. I like texture a lot. I pretty much abstracted the sky and clouds by using a texture brush to roughen things up. All done.
|
|
GSM
Gene S Morgan
Posted
posted
on
Sun, May 26, 2013 9:30 PM
My last image had a couple of palm tree stamp brushes. As you can see they are pretty stylized.
|
|
GSM
Gene S Morgan
Posted
posted
on
Sun, May 26, 2013 9:32 PM
Another stamp brush of a simple ukulele.
|
|
GSM
Gene S Morgan
Posted
posted
on
Sun, May 26, 2013 9:34 PM
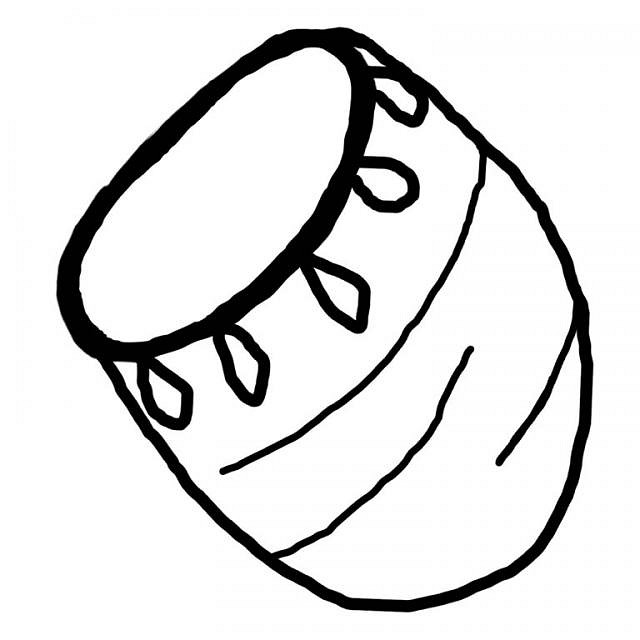
Since most stamp brushes are applied pretty small you do not have to have much detail, just a few lines to establish shape and give an idea of the look of the item. Here is a drum.
|
|
GSM
Gene S Morgan
Posted
posted
on
Sun, May 26, 2013 9:41 PM
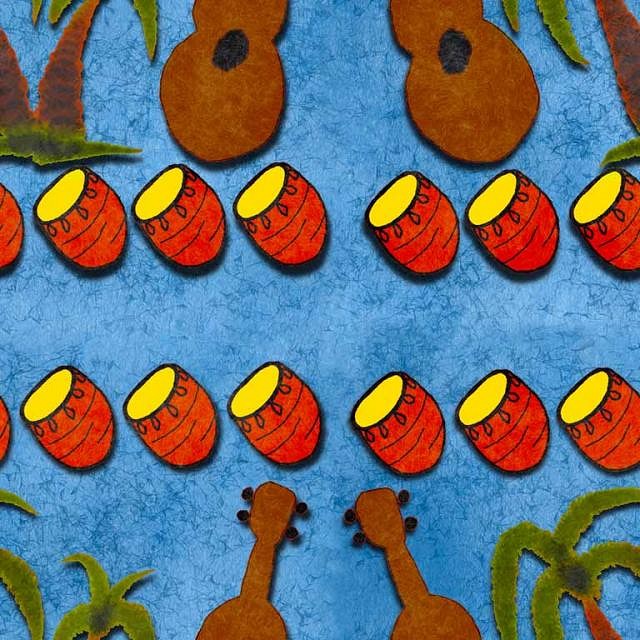
Some more weirdly shaped palms.
Color and texture and I got another pattern.
When tiled it looks like I got a problem You can see sharp edges between the tiles. This don't look so good on fabric.
|
|
GSM
Gene S Morgan
Posted
posted
on
Sun, May 26, 2013 9:51 PM
I brought the pattern into PhotoShop on my computer and used an offset filter to show the edges better. Not looking too good.
Using heal and stamp brushes I covered up the edge with texture taken from other areas of the image. This takes a little work, but you get it looking pretty good that way.
There is still some areas that look repeated when tiled. You can keep working that out more if you want. The best thing to do, is be aware of light and dark in your textures as you apply them. Trying to match contrasting areas is what causes the sharpness in the borders. You will have less work in cleanup if you are careful making your texturing in your patterns. We are thinking of using this design on a shower curtain.
|
|
GSM
Gene S Morgan
Posted
posted
on
Wed, May 29, 2013 8:16 PM
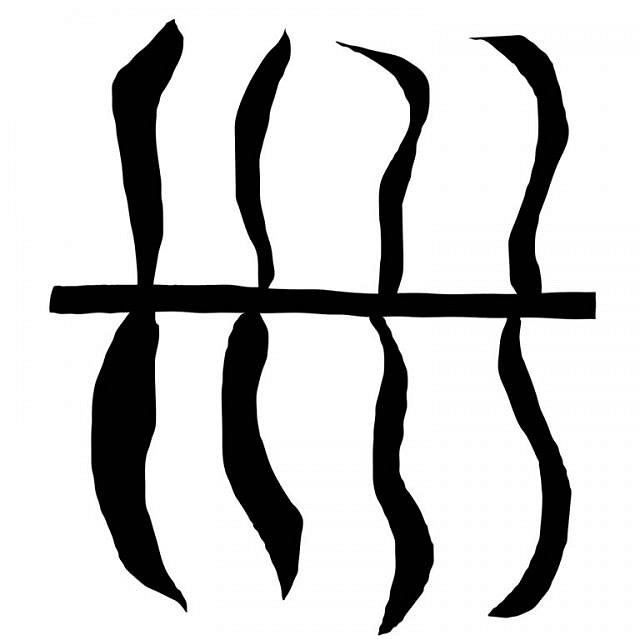
It took me long enough, but now I will discuss the way most people draw. Most folks just draw lines and make them look like something. Sounds easy and it can be if you stick to a simple cartoon style, I need some palm trees so I draw some lines ….
Like a coloring book you just fill in the color. With digital there is an easy tool for that surprisingly called the fill tool. You tap inside the shape and as long as it is closed with no holes, it will fill it in with whatever color you want. And some people think this art stuff is difficult.
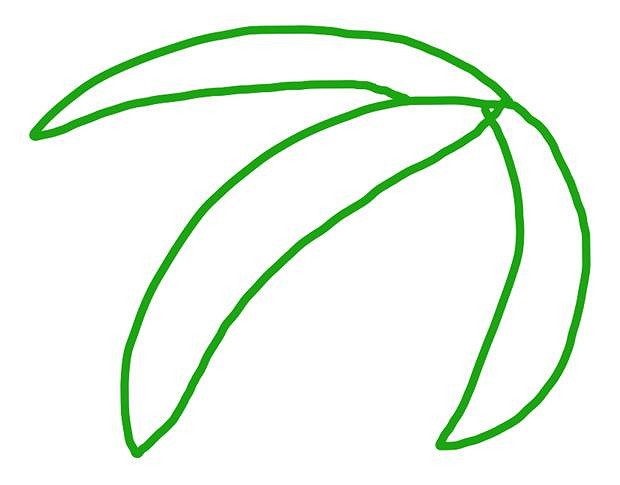
Some lines and it does look kinda like some sorta tropical leaves. Squint and use your imagination and you might see it.
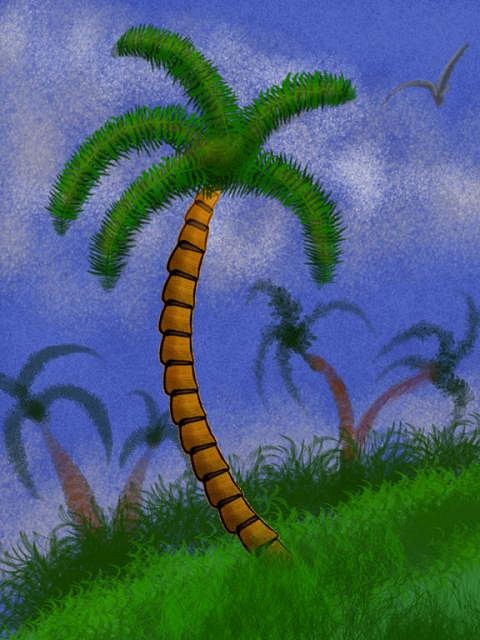
Using the basic method I came up with a palm tree … sort of like. I tried a little harder and got a somewhat better look. The trunk was created the same way and then I did some shading and texturing, It's digital, so it was easy at that point to copy, move, flip, resize … ending up a couple of fairly good stylized palms.
Some extra texture on the trunks and some shaping to the leaves. Not the Mona Lisa of palm trees, but close enough for my use.
|
|
M

MadDogMike
Posted
posted
on
Wed, May 29, 2013 9:21 PM
Gene, you've been busy with all kinds of good stuff! |
|
GSM
Gene S Morgan
Posted
posted
on
Thu, May 30, 2013 6:20 PM
Thanks Mike for checking out my goofy stuff ..... |
|
GSM
Gene S Morgan
Posted
posted
on
Thu, May 30, 2013 6:39 PM
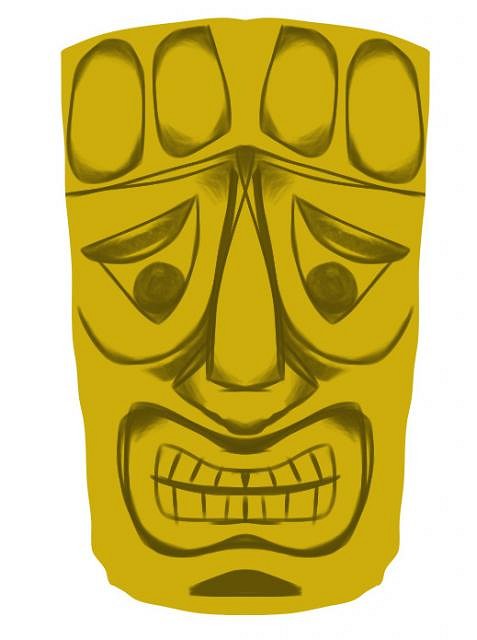
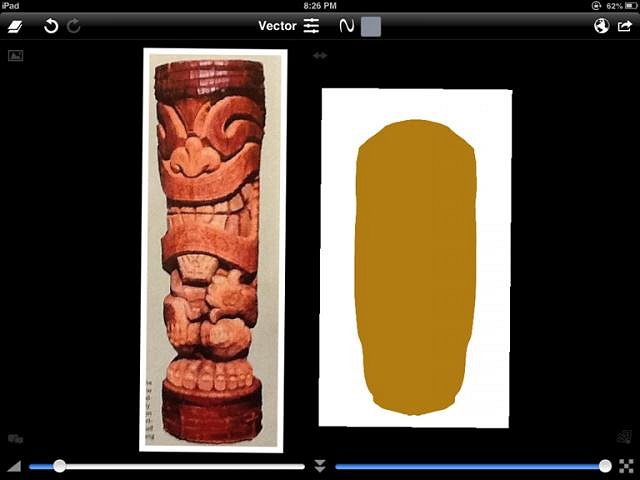
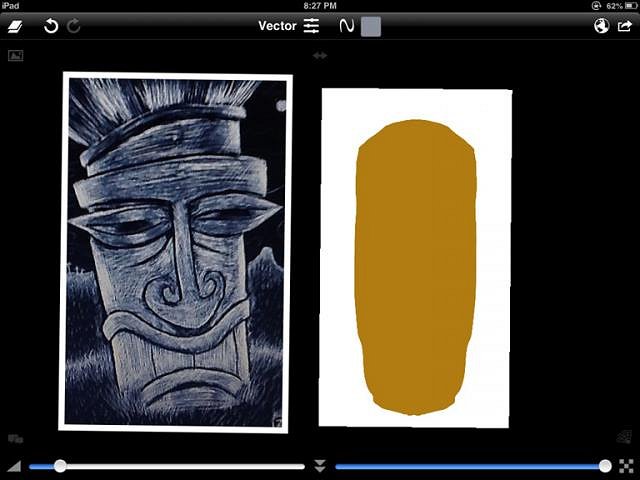
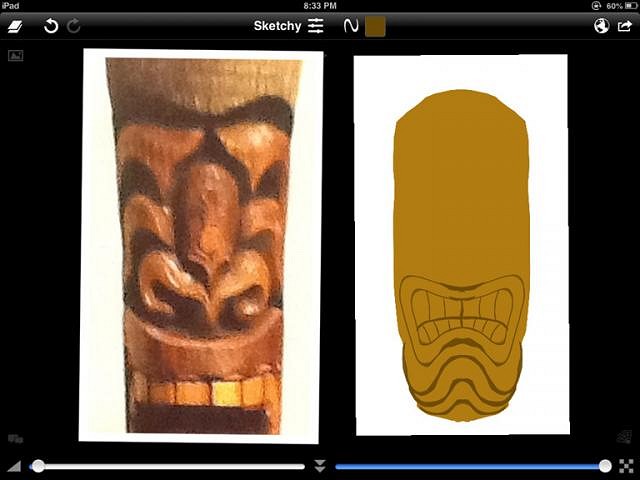
I know up until now I have used the method of starting in grayscale, but this tiki is what the cool kid artist call a speed sketch, so I started more simply. I used the vector method to create the basic head shape already the color I wanted. Then quite quickly I sketched in the features, eyes, nose, mouth, and some other stuff. It was sloppy but I find that you often come up with some fun images by just letting your hand go where it wants. You get some extra strange lines that way, but as they say in the music biz, we can fix that in the mix.
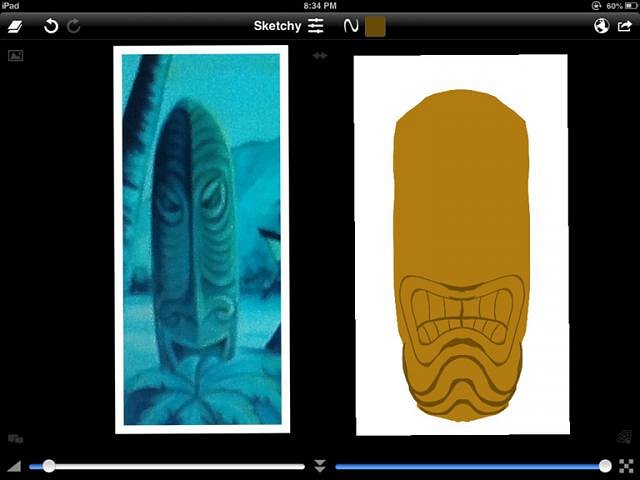
The eyes were kinda dorky and the nose was weird. With a brush I covered up some lines and added some shaping, coloring, and shading. Looks a little better.
Extra heavy dark shading around the eyes and nose adds a little drama. I smoothed pretty hard and blurred the image more than usual. I think it gives it a bit of a watercolor look.
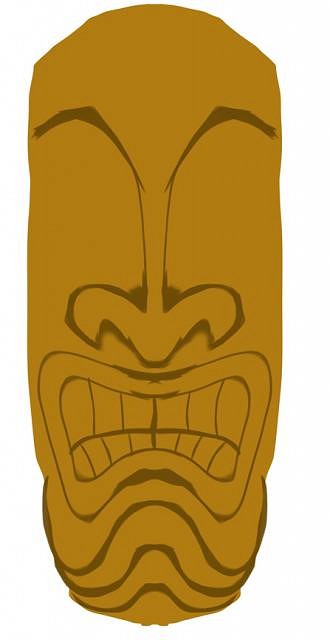
Textured and highlighted the guy.
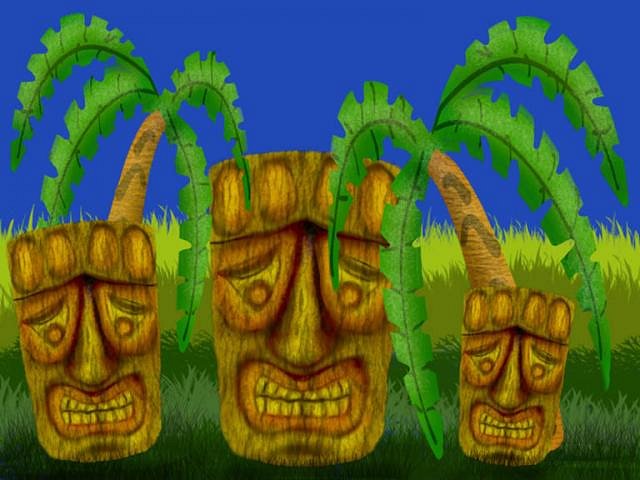
Gave the tiki some wood grain and made a couple of copies and resized them. Now I got a tiki family. Might as well add some palm trees. Notice that one of the tikis looks like it is behind the palms and the others in front. That is the magic of layers again. Each one and the trees are in different layers. You can shuffle the layers around any way you want to create your scene.
Added some background as always. Making grass brushes is fun.
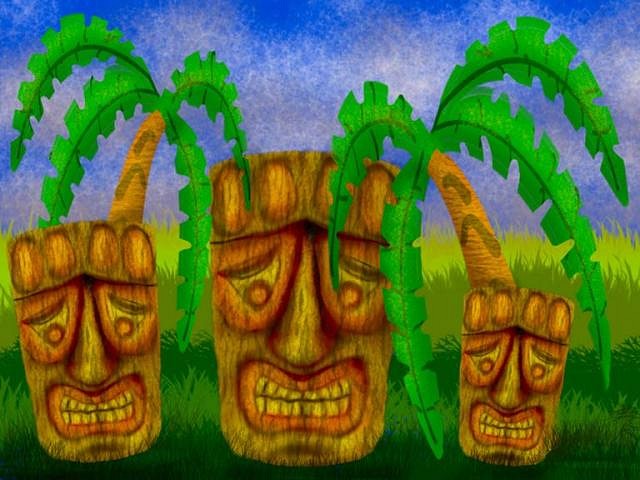
Added some sky and did some cleanup and extra shadowing. It is best to wait until you are sure you have done enough damage before you combine all the layers which is usually the final step. One example of that is you may notice in the first background image the bottom of one of the palms seemed to be sticking out of the baby tikis head. Since the tree was on a different layer, I was able to erase the part I did not like without affecting the rest of the image. This was a fun image to make.
|
|
D

danlovestikis
Posted
posted
on
Thu, May 30, 2013 8:32 PM
The technique on the last picture is interesting. You keep making it better. Wendy |
|
GSM
Gene S Morgan
Posted
posted
on
Thu, May 30, 2013 10:04 PM
Thanks for the kind comments Wendy ... Clothing in that design is in my future ... My wife has been too busy gardening to get it done now .... It is a natural for me. I'm a uke player ... |
|
GSM
Gene S Morgan
Posted
posted
on
Sun, Jun 2, 2013 7:47 PM
I'm taking a little break from the Ipad here. This may not seem to connect with what I have done so far in this thread, but I thought some folks might be interested. The question is: “What do you do with all those cool tikis you make by painting on the Ipad?” I have over the last few years experimented with different ways to use digital images once they are made. This image is of an older design I made on a PC a couple of years ago. If you have seen my past threads you know that I first used a digital sculpting program called Sculptris to produce these earlier tikis of mine. This one I ended up making a 9/12 print of.
Here is the same image used as a pendant. Now I know it is not carved out of wood or cast ceramic, but it is still a tiki around your neck. There are several ways to make a graphic into a pendant. I have embedded tikis and other art in polymer clay. That is kinda fun but is a complicated process. I have also made wooden domino pendants by decoupaging printouts on them. That is fun too, but I was never sure if they were durable enough. There is a magic product that many of us played with as kids. Folks call it shrink plastic. (OK, I'm talking about Shrinky Dinks) There is now a shrink plastic you can put into your computer printer. Any image can become a plastic pendant.
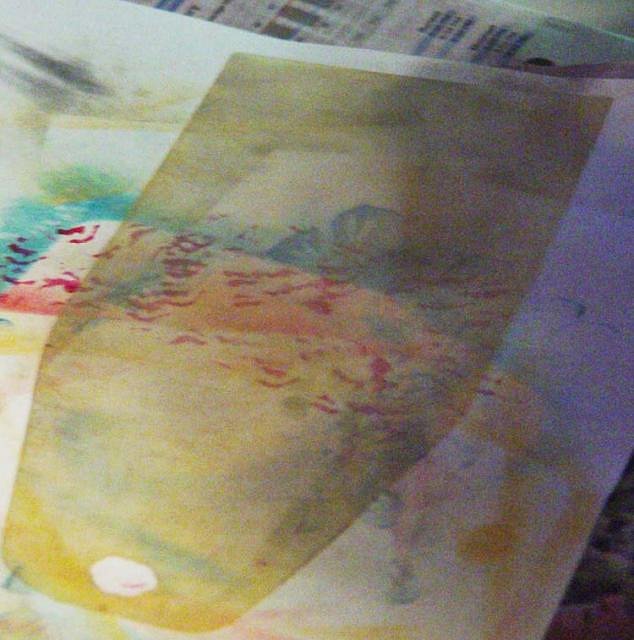
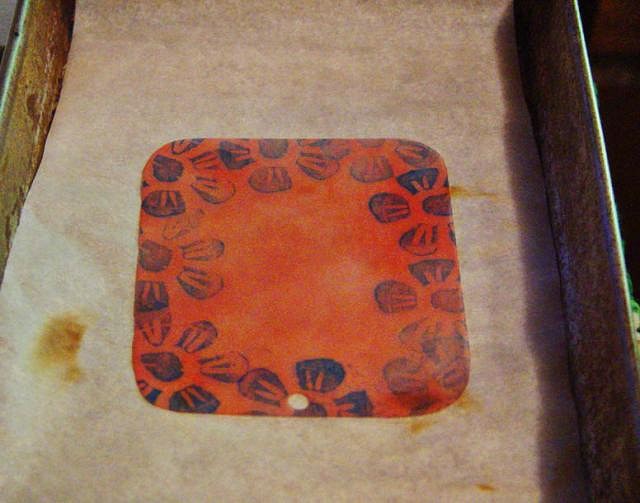
Now, printing is easy. But first you need a background to attach your image to. This can be a fun part too. As you can see the plastic looks like a sheet of vinyl for covering your book report. That is pretty much what it feels like. You can get in white, black, clear, and semi-clear which has a rough surface that is the best for painting and other surface treatments. I cut this piece to a shape I wanted. You cut it with scissors about twice the size you want the final pendant to be. (Sorry, not a great photo)
This is gonna sound pretty weird, but I do the base coloring with chalk. After the magic shrinking, the chalk will be embed into the plastic and become darker and stronger. I rub the chalk on with a paper towel.
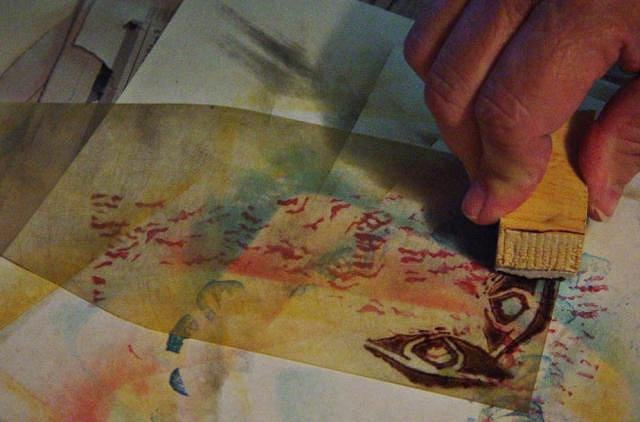
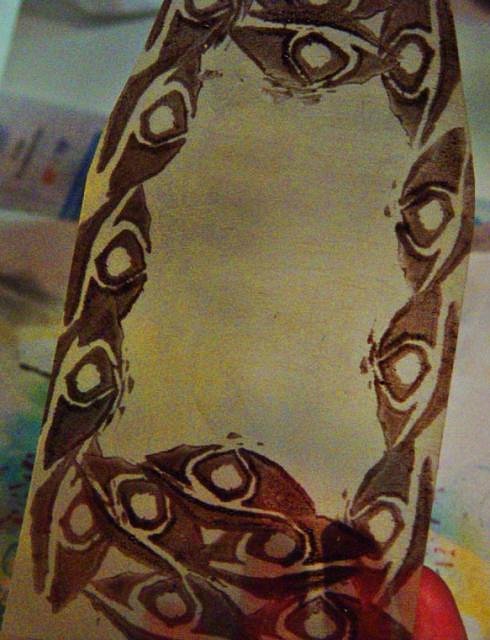
I make my own rubber stamps. I used a permanent ink and stamped a design around the edge.
It looks a little rough but after it shrinks that will not be noticed. This is the big version of a pendant.
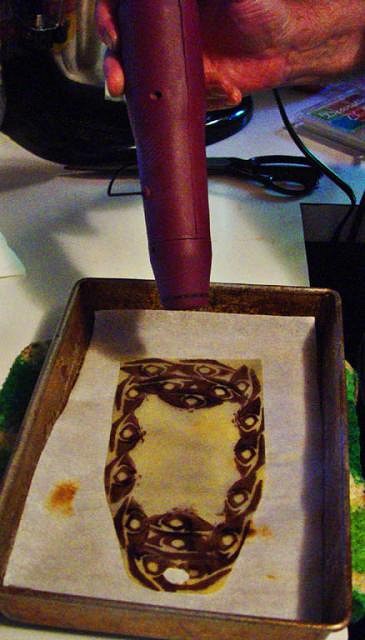
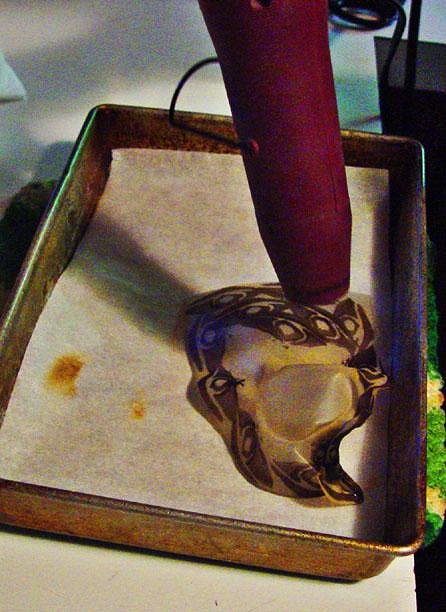
If you have never done this before it may seem a little crazy. You take a heat gun to the plastic. You can do it in the oven, but you don't have much control that way and I found I had more stuff to throw away after an oven trip. You may understand better with the next photo.
Yes folks it curls all up when you apply the heat. It is a scary sight to see, and it is best to keep the heat gun moving so you get a even heat. Sometimes it does stick to itself.
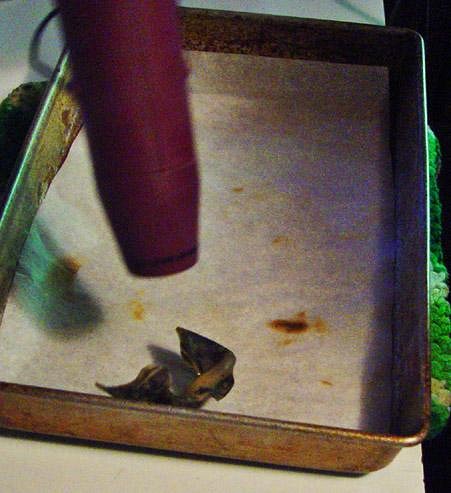
It shrinks to a little ball. It looks like junk at this point.
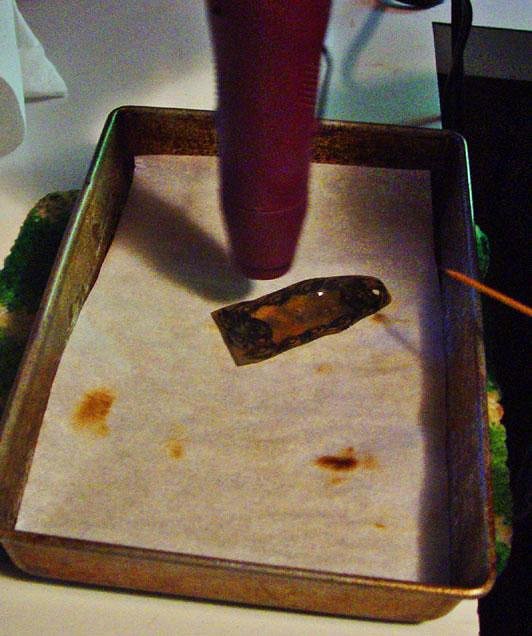
It flattens itself out into a thick little pendant base. It is magic. (the stick you see at the right is a chop stick I use to pull back a stubborn edge that tries to stick to itself)
I usually use a spatula while it is still hot to make sure it is flat. Usually it all works pretty well, but the process is fun and easy, so messing a few up before you get it right is pretty easy to live with. The bad news is I don't have a photo of the final product. I forgot to take the picture and the pendant is long gone now. The next post will show a quick look at an actual pendant process and final product.
|
|
GSM
Gene S Morgan
Posted
posted
on
Mon, Jun 3, 2013 6:56 PM
I'm going to show a quick example again. This time I will show the final product. This was created the same way as the last one with chalk and a rubber stamp. The hole for the jump ring was cut with an oversized hole punch. Make it plenty big. The hole shrinks too. And, also it is a good idea to round the corners so they are not sharp.
Here it is after the shrink process. You can see how much it has shrunk. It is also much thicker. Notice how much stronger the color and design looks.
This is the final funky pendant. The tiki image is glued to the base with super glue gel.
Here is one that is a kinda stylized PNG look. You can see that the plastic has a bit of a rough surface. I think that makes it look less like plastic. I use a matte clear spray as a final finish.
As you can see, even though the tiki print is basically a square photo print, the background can be any size or shape you want. Hope you folks found this to be somewhat interesting. I'll get back to the Ipad now.
|
|
HT

Hale Tiki
Posted
posted
on
Mon, Jun 3, 2013 7:04 PM
ARTS AND CRAFTS! Now we're talking. |
|
GSM
Gene S Morgan
Posted
posted
on
Wed, Jun 5, 2013 8:40 PM
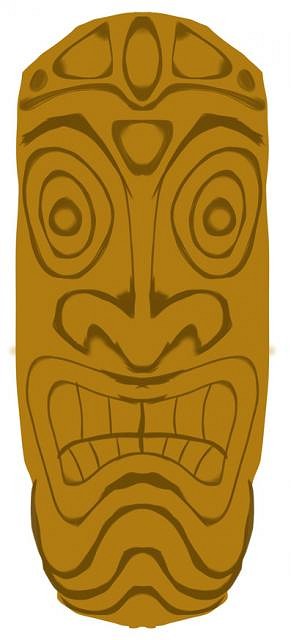
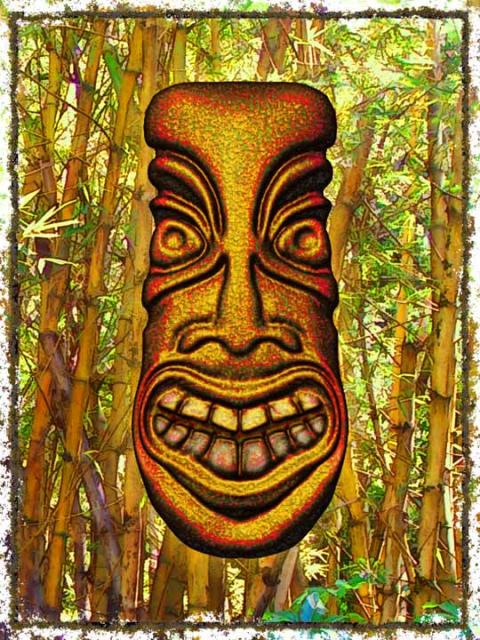
ALERT !!!! WARNING!!!! My next series of post in this thread will seem to go on forever. Being of advanced age I can only hope I live long enough to finish it. I don't usually go this long with a thread, but there seems to be some folks reading these post and I hate to disappoint an audience. I have not had a lot of feedback, but that is OK with me because I don't always answer questions so good. As always some of the very great artist here kindly checked in on what I was doing and left nice comments. A few other folks have come around as well. Of course those young kids who infect all forums on the web jumped in trying to bully me with silly immature attempts at insults. I'm old and life is too short to worry about young folks trying to get attention. I have been pretty careful here trying to not talk about my attitudes about modern tiki culture. They are different than most others here at TC. My goal is to present things that I have learned to others and let them decide if they are useful. I'm for sure no expert on anything but I try in my own way to contribute to the common good in society. And, TC is a society I feel it is worth contributing to. So I'm still here. Usually my ADD kicks in before I get this far in a thread, and I go looking for squirrels. But, what can I do, I'm still getting more than 100 hits a day. There must be some of you folks out there who like getting bored. It must help you sleep. I have one last series of Ipad painting post left in me. It will be a long one because I plan to try to cover all aspects of the Sketchclub interface and show as many painting tricks I can think of. OK, just more of the same …. Hope you can get something useful out of it. This is the tiki we will be working on ….....
This image is one of my early tiki t-shirt designs. Oh man, is the tiki police gonna jump on me with both feet? The strange thing is this is one of my most sold designs. I have never really tried to market my CafePress designs here on TC. I came here mostly to learn and have had lots of help from some of the great artist here. Lots of folks in the forum have visited my online shop but, as far as I can tell I have never had a sale from anyone here. I expected that because I knew that I did not always follow the tiki design rules that this community adheres to. Lucky for me that there others folks who buy my stuff and like my goofy designs.
I felt it was important to try to get at least a general accepted tiki image. I have captured a bunch of reference images, some from books and websites, but most from artist here on TC. I did not do this to copy other folks work but get inspired. So many cool artist are here. There are examples here from everyone from the fantastic work of Robert Jimenez to great sculpts by LakeSurfer. It is easy to find inspiring work on this forum.
As always I start with a shape. You may wonder why all my tikis are straight on poses. As I have said before I am not an artist, but I do design t-shirts and other products. (My web store offers everything from tote bags to coffee mugs) I think simple images are best for multi-use and size products.
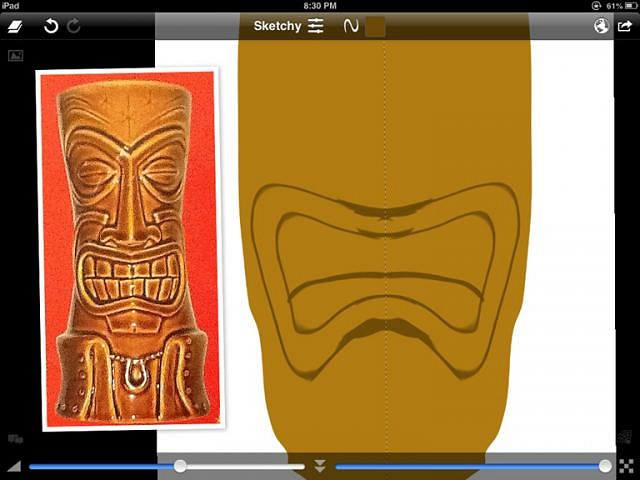
Let us start with the mouth. A popular mouth type is big with lots of teeth. I have never been sure if that was as tiki as most folks think, but it is a cool way to make the mouth stand out.
This great painting by Robert Jimenez shows the advantage of a a big mouth. It adds so much to the overall expression that you are really drawn to the image. I like the size of the teeth and the fact that you only see the uppers. Make a very distinctive image.
You gotta remember we are not copying here, just trying to get inspired. Look at lot of different examples …... If you want to make great art you have to study great art …. Study, study, study …
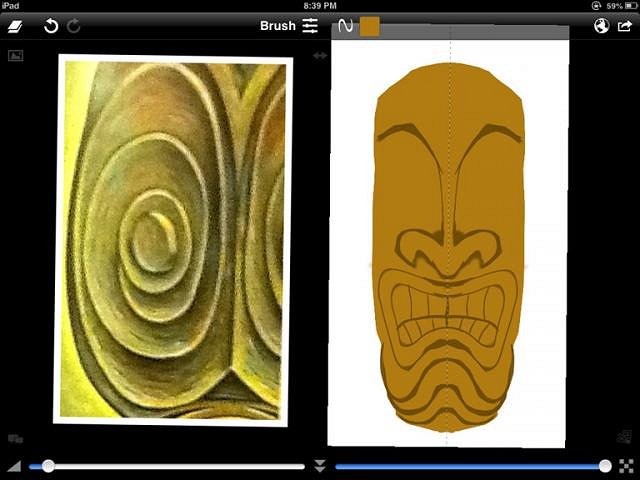
OK, here we go. First, just by using two fingers on the Ipad you can move or zoom in on your canvas. By zooming on one area of your image you can concentrate on one feature at a time. We chose a color, in this case a much darker brown. You can see at the top center of the interface we are using the sketchy pen. It draws a kinda uneven less than perfect line. The slider on the lower right shows that I have it set at maximum darkness and the one on the left determines the size of the brush or pen. Just rough in some simple lines. The dotted line down the middle of the image indicates that I have the mirror feature on, so I only have to draw my lines on one side and the program does the rest. Thank you geeky computer programmers for thinking of that great tool.
It is important to note that at this time you are just sketching. You don't have to worry if your lines are not perfect. This is only the first step and there are lots of tools in this app to help you smooth things out later on. I purposely made the upper teeth bigger and curved the tooth line down for the fun of it. This is a funky version of common tiki mouth.
A few more lines at the chin line to add some interest to the face.
|
|
GSM
Gene S Morgan
Posted
posted
on
Thu, Jun 6, 2013 9:31 PM
For many years I worked on learning to draw human faces. I had to unlearn stuff to create tikis. Noses are not supposed to look human, so I have to study how other folks do it.
Deep sculpting in wood produces very stylized nose shapes. But there are so many possibilities.
This detail of a Dawn Frasier painting is a great example of stylized, primitive, and at the same time a kinda fancy nose design. My goal is to combine ideas from all these examples to try to develop my own look. With one continuous line I created the brow line and the basic nose. Remember with mirror on you only have to draw one side and the app fills in the other. I added some thickness at the brow. It is a nice primitive look but I was not to happy with it.
By covering over parts of the nose line that I did not like with the background color I improved and changed the look of the nose a bit. The face so far.
I'm partial to round eyes. Years ago I made primitive mask out of clay. I usually made round eye holes in them. It is a hard habit to break.
Folks seem to have fun coming up with unusual eye designs. For a creative person the imagination rules.
Folks may wonder about how I get all these reference images next to my image. It is just another great feature of the Sketchclub app. I like this set of eyes. It is close to a style I like, but I want it simpler.
This is not much different than how I would do it in clay. They are simple, but have much potential to shape up later on.
A few more simple shapes and we have our basic tiki design.
|
|
ATP

Atomic Tiki Punk
Posted
posted
on
Thu, Jun 6, 2013 9:46 PM
You could try doing Traditional Tiki designs instead of the cartoon faces. |
|
GSM
Gene S Morgan
Posted
posted
on
Sun, Jun 9, 2013 7:16 PM
No I did not drop dead even though I predicted the possibility. I a little trip out of town to a Richard Thompson concert kept me away from my computer for a couple of days, so I fell behind in my post. But I'm back now .... On with more SketchClub fun .... Next I chose a soft brush like an airbrush. Notice that at the bottom of the brush menu the word “on” is selected. This method allows a more free brush technique because it keeps your strokes from falling off the edge of your image. See those little fuzzy things on the edge of the cheeks. That was a case of me forgetting to change the method to on. I'll fix it later.
With the brush size up a bit and the darkness on the low side, I do some shading. A real artist would decide which way the light is coming from and shade only the other side. But we all know I'm not a real artist. I'm just shading to establish some form. I brush around the eyes and under the nose and around the edge. Notice I have shut off the mirror feature at this time, because we need more variation and randomness.
With a smaller brush I go over the image again and darken strong areas like the brow and under the nose. Think of where shadows would fall on a carving. You are starting to turn the cartoon into a more 3 dimensional shape.
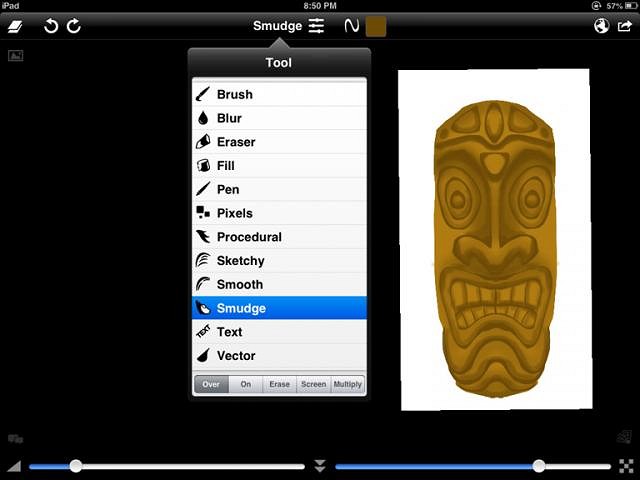
Now for the magic smudge tool. Smudge is a little hard to explain. It is kinda like a chalk artist rubbing edges to smooth out the lines. That is our goal, to soften and shape our cartoon lines. In the case of smudge the right slider controls the strength of the effect. Too strong and too many pixels get moved. It looks like runny paint. Not a good look.
I have used the smudge on the nose. Notice how the lines are smoothed and shaped. Compare how the nose looks different from the mouth. Like I say, less cartoony.
Now I have smudged the upper mouth and teeth. This may be one of the hardest techniques to learn if you have never painted before. But if you work at it, things should get easier with practice.
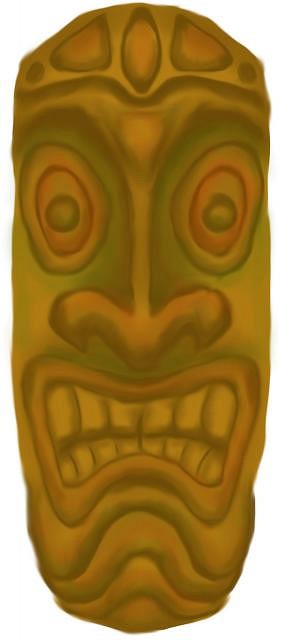
The whole tiki is now smudged. You can see that what started as rough cartoon has taken on a 3D look. It almost looks carved. That is really the basis for all pictorial art. The goal is to create the feeling of shape on a flat canvas.
A closer look at the eye and bridge of the nose shows just how simple the basic process is. Shading one edge of an object and then smoothing the lines and the shading creates an impression of volume in an object. Of course real artist (unlike me) have all kinds of tricks up their sleeves to make objects look real.
|
|
ATP
Atomic Tiki Punk
Posted
posted
on
Sun, Jun 9, 2013 8:06 PM
You can take some "Art" classes and learn how to do those tricks first hand It will require a little bit of learning, but that is the only way you will get any good |
|
D
danlovestikis
Posted
posted
on
Mon, Jun 10, 2013 8:08 AM
https://tikicentral.com/uploads/73658/51abfa76.jpg I wish I had a glaze that looked like the texture on your tiki. The bamboo background looks really good with this face. I like the key chains. Thank you for all the effort it takes to post so many photos for us to enjoy. Wendy |
|
GSM
Gene S Morgan
Posted
posted
on
Mon, Jun 10, 2013 8:12 PM
Thank you so much Wendy ... Your kind words a much appreciated .. I get so few here. The bamboo was a photo of mine taken on Oahu. I can't come close to all your great in process photos. You are the queen of step by step images. And, mine are just screen shots, yours involve physical labor ....... |
|
GSM
Gene S Morgan
Posted
posted
on
Mon, Jun 10, 2013 8:32 PM
I have explained before why I add greens and reds to the image. I love all primitive art. It amazes me that they could produce such wonderful art with very simple tools and limited materials. Styles are always associated with the tools and materials they came from. To me tikis are like impressionist artist of the 19th century. They are not meant to portray the reality of their environment. They are imagined beings that look almost alien. They inspire my own imagination much the way Van Gouth or Picasso do. Using greens and red in shading is an impressionist technique.
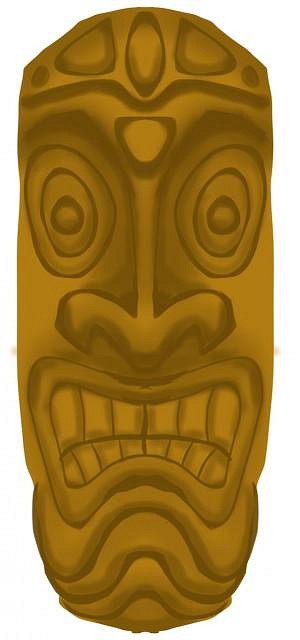
Our tiki with some color.
The next step in my process is to add texture. I do this to age the tiki image. Hey, tikis are suppose to be old, right? They need a rough surface. You can see on the interface that I have the brush menu open and there are lots of brushes in it. Some of them I made and others I got from other folks. You can never have too many brushes. I chose one of my crack textures.
Before I start painting texture I go to the filter menu and increase the contract and saturation of the image. Applying texture tones down the color of the image so you gotta boast color before you start.
I apply texture over the entire tiki starting with a fairly big brush with a lower strength.
I don't think that I have mentioned it but the color you are using appears in a box next to that wavy line at the middle top of the interface. There are several ways to chose colors, and they are very easy. Just click on that box and see your choices. It is always a somewhat dark color when shading or texturing. I switched to a smaller brush size and darken some areas such as under the nose even more.
Using the same brush I change my color to white and add subtle highlights. This just adds a little more form to the features. As I said, keep it subtle. The strongest area is the tip of the nose.
|
|
S

SandraDee
Posted
posted
on
Mon, Jun 10, 2013 8:47 PM
Regardless of the negative opinions of one loud mouth you have as much right to post on this forum the art you are into as anyone else does. Keep doing your thing and enjoying yourself. I'd like to see more of the fabric designs. I know Eric October (Tobunga) has been doing a lot of designs using Spoonflower lately so its great to see artists branch out in that medium. [ Edited by: SandraDee 2013-06-10 20:59 ] |
|
ATP
Atomic Tiki Punk
Posted
posted
on
Mon, Jun 10, 2013 10:08 PM
Well the loud mouth never said anything of the kind, get your facts right (for once) I did offer positive criticism that can only help him improve But anyone who posts "Art" on the internet & then cannot take the criticism of putting it out there And since when do you stand up for anyone Liz, you spend so much time attacking people |
|
GSM
Gene S Morgan
Posted
posted
on
Tue, Jun 11, 2013 9:27 PM
Sandra, thanks for your comments. I really liked doing the fabric patterns as well. I'm coming to the end of this thread for now pretty soon, because I have so many irons in the fire at this time I have to back off from some things. I will try to come back and experiment more with fabric patterns. |
|
GSM
Gene S Morgan
Posted
posted
on
Tue, Jun 11, 2013 9:33 PM
I apologize in advance for this post. I'm not a hard guy to get along with. There have been continuous insults thrown at me from this young fellow that I have ignored because I do not wish to dialog with a bratty child acting up. I know that this is his way with many people, and I have no trouble paying no attention to his silly rants. But, some of his misinformation in recent post may lead folks who follow my thread to come to some wrong conclusions. I want to clear a couple of things up. I am serious when I say I do not consider myself a real artist. That does not mean that I don't have a great deal of experience creating artistic things. In this thread I am not trying to teach folks how to paint. My images as I have said before are graphic designs. I create designs on products sold all over the world. (even in California) I hate to express the following, but I feel I have credibility in the art world. On art sites my images have been featured a number of times and the idea that folks pay me real American dollars for my designs kinda convinces me that some people value my work. In my other graphic work, my Photoshop filters have been featured on several graphic oriented web sites and even included in a tech article in the New York Times. I'm sorry folks, this sounds too much like bragging, and I am the last person to brag. But, why would I care what a young kid who needs attention has to say about my work? I have cred folks. Besides, you guys keep checking out my thread. Majority rules. I should have discussed this next thing already. The puke kid tried to educate me by listing a few other programs I should be using. His list seemed to me to be some list googled for popular apps and it is pretty wrong. There are many cool and useful apps and computer programs that can get you started creating you own images. Painter on the PC has always been the best program for what is called natural media painting. It is great for mimicing real world paint and I have been using it for two decades. The trouble with that and many other good PC programs is the method of inputing your tools. Drawing with a mouse is not fun and even devices like Wacom tablets that allow you to draw with a stylus are hard to use because of the disconnection between the hand and eye. Ipads have given us a method with a stylus or finger to do things just like you would with a paint brush. I have tried many apps and the problem is the same with computer software. There is no one app that does all things you want to do. That is why I have a dozen graphic apps on my Ipad. Sketchclub is what I use most because it is laid out in a logical way and has loads of useful tools. It also has a friendly on line community that offers lots of help and lots of tutorials. I also use an app called Procreate because it has a cool brush design tool. SketchBook Express and Paintbook are pretty good apps but I find their interfaces to be kinda clunky. Inspire Pro has some nice natural media tools, but again a clunky interface. My go-to app is Artstudio. It has both drawing and filtering tools. It is as close to PhotoShop and I have seen on the Ipad. Sorry for this long rambling post. I just wanted to clear a couple of things up. Now back to what I was doing before I interrupted myself. |
|
GSM
Gene S Morgan
Posted
posted
on
Tue, Jun 11, 2013 9:43 PM
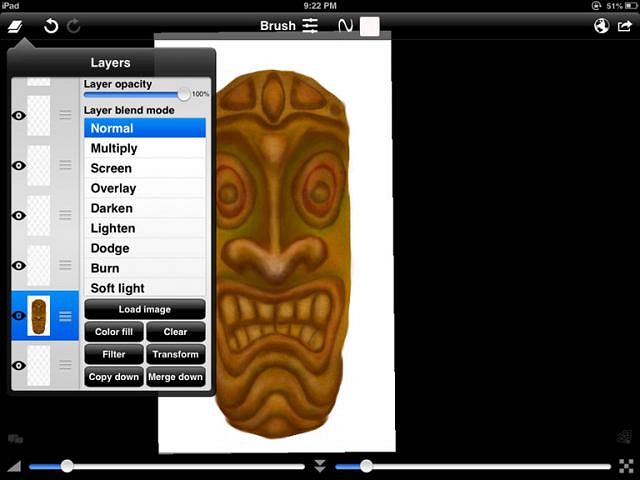
I have opened the Layers menu. This is a little detour from our goal just so I can show you some cool cheating magic you can only do with digital graphics. Click the Transform button to open a whole new world.
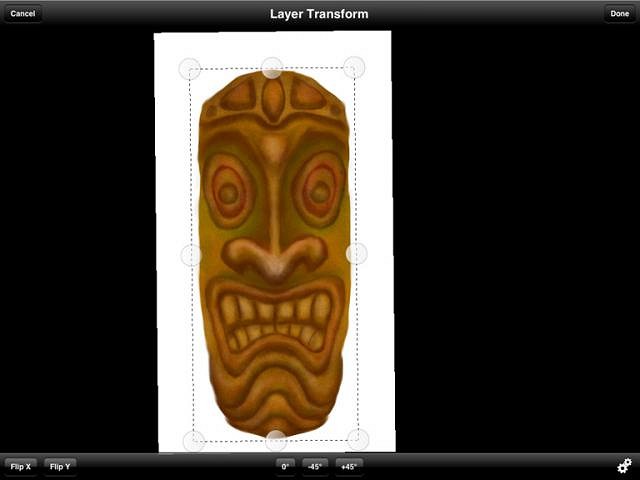
When you get to the Transform screen you see lots of stuff. I ain't got time to explain it all. The important thing at this time is that dotted line and little circles around the tiki.
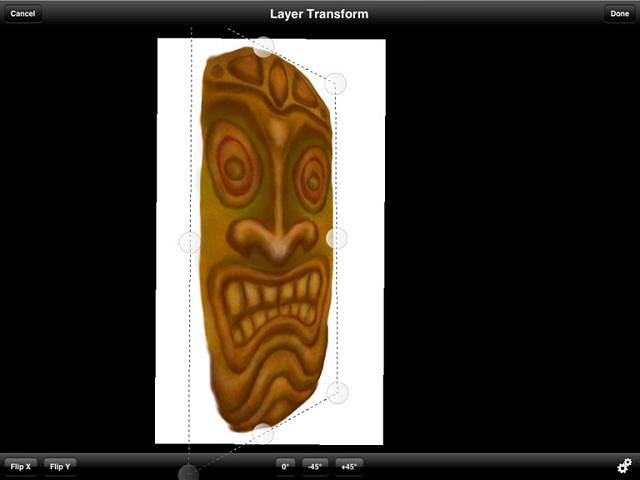
You tap and grab those circles and they move. Pull one up and the other down and you get instant perspective.
Hey he is looking over that way. Glad I didn't have to actually draw it that way. Just one of many cool effects possible. But I'm not going to use it on this tiki.
|
|
V

VanTiki
Posted
posted
on
Tue, Jun 11, 2013 9:55 PM
Well said! As one who draws all day on a computer I couldn't agree more. Software for creation on computers is just like any "natural" media - it is just a tool. In my opinion, there is no "best" tool for creating - but there are tools that resonate better with certain artists more than others. I used to swear by photoshop and dread working in Illustrator - then I had a vector tool epiphany and spent most of my time away from Photoshop. Who knows what I'll be using to push pixels with a year from now. When I teach digital illustration and design, if a student wants to use some alternate software to complete an assignment that is fine by me, as long as the finished product works. I have a slew of apps for drawing on my iPad, and I have mixed feelings about them. It is fun - but I still lean towards my trusty sketchbook for doodles, and do final work on my wacom monitor. I need to make myself spend some hours with the ipad app so it becomes intuitive like it is for you. Wanted to also thank you for introducing me to Spoonflower. I've ordered several of their 1 yard color palette samples in various cottons and wallpaper, and I can't wait to start experimenting! Henrik "VanTiki" |
|
GSM
Gene S Morgan
Posted
posted
on
Tue, Jun 11, 2013 10:17 PM
VanTiki ... your post made my day ... It is good to know that I'm not the only pixel pusher on board here. I don't work for a living anymore, but if I did I would love to fool with graphics programs for a living as well. Nice words from and artist and teacher such as yourself. Yes, Spoonflower is cool. I'm glad you liked it. Of course Dawn Fraser creates some fabrics much cooler than anything I come up with. She has a nice selection in her shop on Spoonflower. Thanks again Gene |
|
ATP
Atomic Tiki Punk
Posted
posted
on
Tue, Jun 11, 2013 10:44 PM
The first program I listed was "Painter" now owned by Corel, which I have used since version one |
|
B

bigbadtikidaddy
Posted
posted
on
Wed, Jun 12, 2013 7:48 AM
Hey ATP, why don't you lay off the guy? He is clearly a grown up who doesn't feed trolls & you just aren't. |
|
HT
Hale Tiki
Posted
posted
on
Wed, Jun 12, 2013 8:49 AM
I have to jump in here, because I'm tired of seeing the back and forth malarkey. I've been to two of the best art schools in the country, receiving a bachelors from one of them. One of the smartest things I ever heard a professor say, was that you learn nothing if all you receive in critique is positive feedback. No one's work is perfect, and no one worldview is correct. It's always good to receive opinions be they positive or negative. It helps you learn, it helps you grow. Unless you're Picasso, you suck. Not really, but there's always room for growth. And Gene, you have room for growth. I'm not saying you suck, but you certainly have room for growth. And instead of other people, and it does seem to be mostly aggravated by other people, putting down any negative criticism, take it and learn from it. As far as the iPad goes, I agree with you. It's a portable Wacom Cintiq, which is the greatest invention for the digital realm since, well, computers. A Cintiq is what professional designers use the world over for an unbelievable amount of control. It's just as good if not better than doing things by hand. I'd bank on the better side. And the iPad is like a $400 Cintiq, with less control. And with the right tools, you can create some amazing things with an iPad. I've seen some gorgeous artwork created on an iPad, and Gene, I'll be straight with you, yours does not fall under that category. You have a good start, a load of spirit, and a positive attitude, but again, there's always room for improvement. Consider taking art classes, or watching tutorials online. Hell, I've been working with computers and digital everything since the late 1980s. I'm still learning, and my work still could use improvement. I don't know if you've seen what Adobe just made, but it's going to be a revelation for touch screens. Check out the article: And in the meantime, since you've likened your working style to painting, are you using your finger? Or a stylus? Or a brush? If you haven't seen them, you must check them out. I've used them, and they really are a great tool. Here's the two best that I've used so far: And since you like working with a reference, and who doesn't, consider finding some of the hundreds of books available on tiki culture. I'm of the internet age, but I'll be damned if books don't do an infinitely better job of reference than the internet. I have to compile a list of the best that I've got soon, so I'll be sure to post that on here for you. They're fantastic, and I couldn't do the work I do without being inspired by them. Also, since you do like to paint from reference, have you considered a camera lucida? Don't know what that is? Well, artists have used them for centuries. And no, it's not tracing. It's a wonderful artists tool, and I'm sad that I couldn't get in on this kickstarter, as I'm sure they'll cost a bloddy fortune when they come out. But consider getting one. It'll change your entire artistic experience. AND would be perfect for painting on an iPad. Man I want one. So in summary, all thoughtful criticism is helpful, no matter how it's conveyed. Some people have more tact than others, some people choose to have more tact than others. No disrespect, ATP. I'm obviously not one to sugar coat things myself. Glean out all the good information you can, and grow as an artist. And for everyone else, stop stirring up shit. You don't need to white knight for someone else, Gene is apparently an older gentleman, well spoken, and capable of defending himself if he's offended. Tiki on, man. Edit: There's nothing wrong with positive criticism, either. You need a little of both to grow. Wendy is great for positive criticism, because she's a warm wonderful person that it's hard not to want to hug. But even her work needs some negative criticism here and there. And what does she do? Takes the suggestions she likes to make awesome mugs even more awesome-er. Nobody's perfect. Learn, grow, keep making art, and do what makes you happy. [ Edited by: hale tiki 2013-06-12 09:13 ] |
|
HT
Hale Tiki
Posted
posted
on
Wed, Jun 12, 2013 8:50 AM
Hey Henrik, check out the tools I mentioned above, you might like them too! |
|
H

Hakalugi
Posted
posted
on
Wed, Jun 12, 2013 9:13 AM
My sentiments exactly. Thank you for that Hale Tiki |
|
HT
Hale Tiki
Posted
posted
on
Wed, Jun 12, 2013 9:27 AM
My pleasure. Also, it sounds bad that I just called you an old man, Gene. Sorry about that. What I meant to convey was that you're not some young buck that can't handle himself. You've got more years of life experience to draw on. That's all. Respect your elders, people! :D :drink: [ Edited by: Hale Tiki 2013-06-12 09:28 ] |
|
ATP
Atomic Tiki Punk
Posted
posted
on
Wed, Jun 12, 2013 11:42 AM
Hale Tiki has more eloquently said what I have been trying to convey to Gene myself the whole time Well Hale Tiki is %100 right and said it better then I did, I have no more reason to comment here again Cocktail Time, Bitches! |
|
HT
Hale Tiki
Posted
posted
on
Wed, Jun 12, 2013 12:59 PM
ATP, it's only 1PM your time. |
|
S

swizzle
Posted
posted
on
Wed, Jun 12, 2013 2:42 PM
Exactly! |


