Tiki Central / Other Crafts
rvictor's tiki lab
Pages: 1 2 3 4 5 6 7 293 replies
|
H

hang10tiki
Posted
posted
on
Thu, Apr 16, 2015 9:31 AM
6,7,8 Ps- skips new hat might not fit his head All looks great |
|
T

tikiskip
Posted
posted
on
Thu, Apr 16, 2015 9:43 AM
Yeah 6 and 10 are good. Here are my lights for trade. Would look good next to your wife's Can't wait to use this mug this summer. PM sent. |
|
R

RVICTOR
Posted
posted
on
Thu, Apr 16, 2015 11:40 AM
Hang10 - Thanks for voting and checking in. You the man. Tiki Skip - Thanks for voting also and thanks for the trade. Look forward to wowing the family with the new lamps. I know they will love them. Your right - the large tile would be easier to make and fun to try out. I guess I should have put another item in the photos for scale. Most of these are 2" maximum dimension or less. It's hard to see how small they are without scale. It is hard to keep my hand steady enough for them to get better detail. Scaling up would be a good experiment. |
|
D

danlovestikis
Posted
posted
on
Thu, Apr 16, 2015 2:20 PM
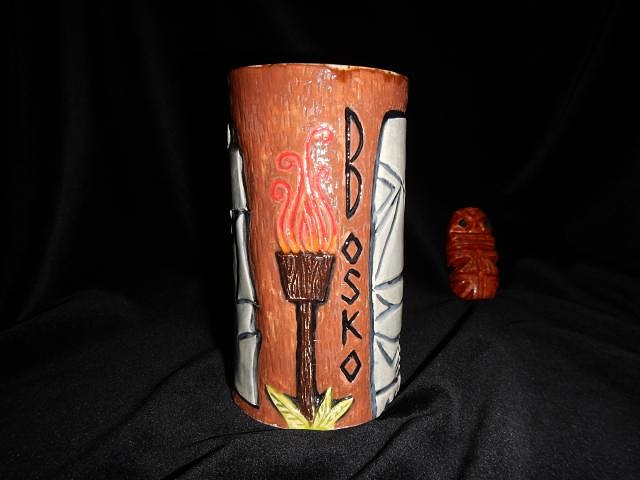
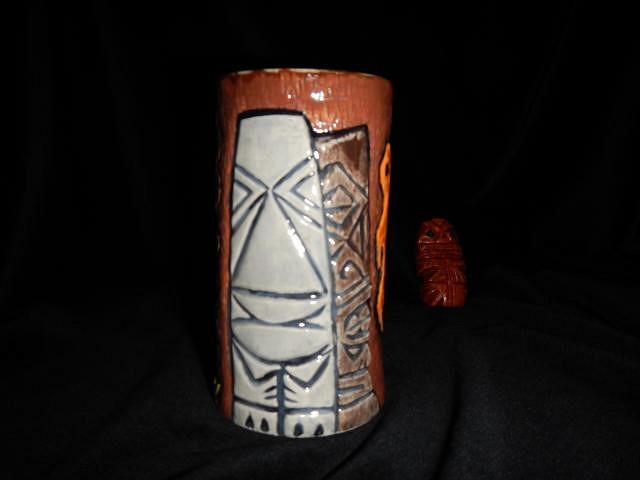
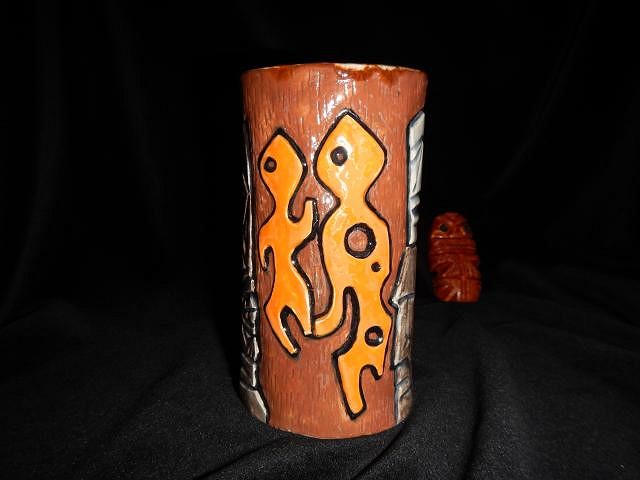
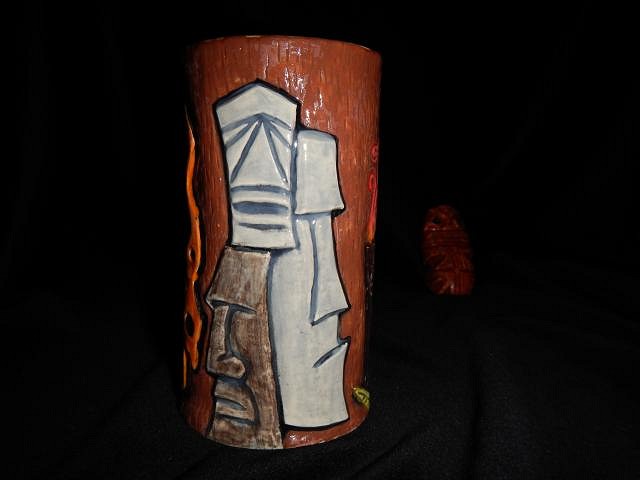
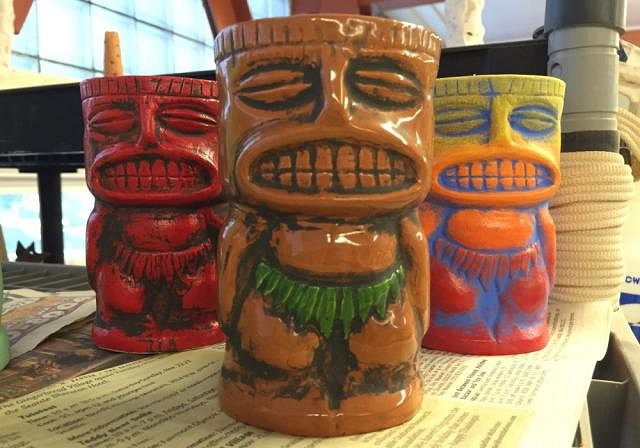
This mug is by RVICTOR. He and I made a deal and I requested to glaze it myself. Now that I've seen his work I should have let him do it. I'm lucky that Dan was happy with my glazing and loves his new Bosko Tribute mug Thank you RVICTOR.
What do you think? Wendy |
|
R
RVICTOR
Posted
posted
on
Thu, Apr 16, 2015 6:10 PM
Wendy - I love the flames. The orange on the modern figures is totally different...I like it. It's cool to see you play with it. Glad Dan likes it. |
|
R
RVICTOR
Posted
posted
on
Sun, Apr 19, 2015 11:30 AM
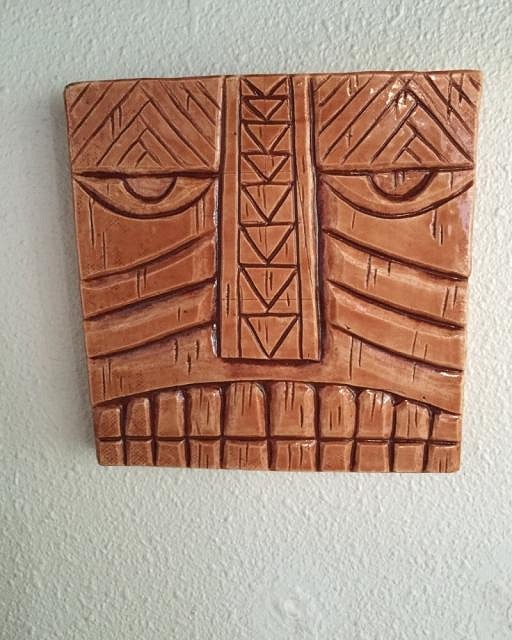
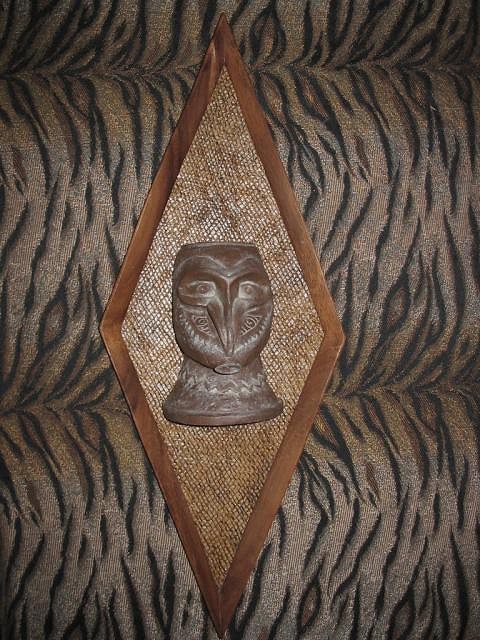
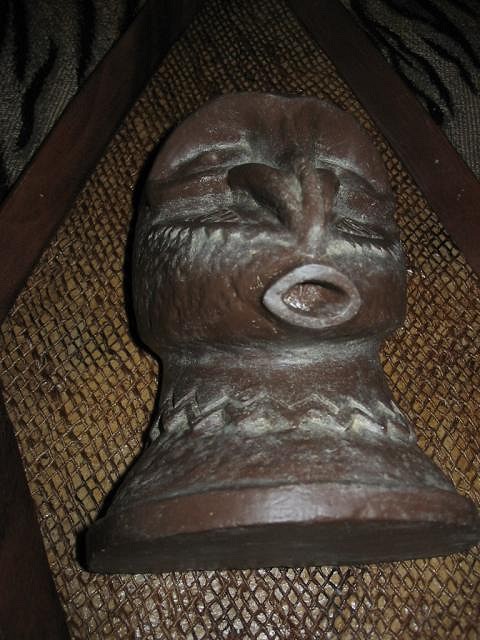
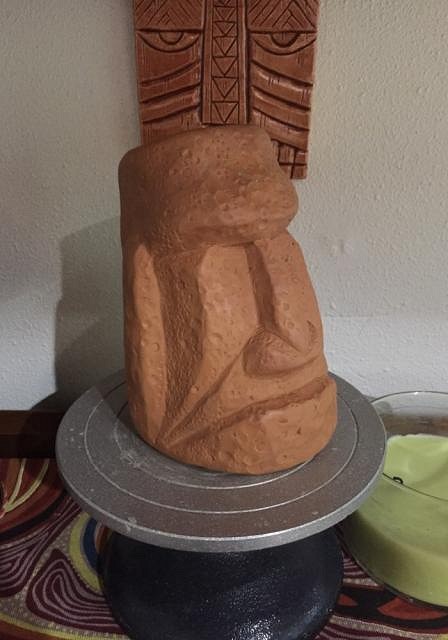
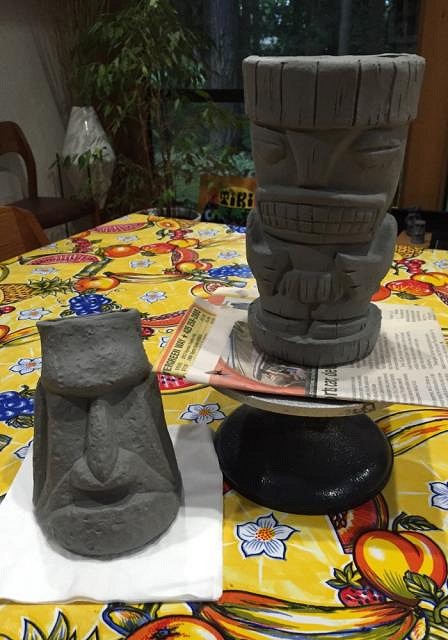
A Big Aloha to everyone...this post will be short and sweet. A few small items that I was working on earlier that made it to the end of the assembly line. First, this one was something I did early on but didn't post. Kind of like a Vantiki tile but not as good. I'm always inspired by illustrators, like Vantiki and Bai, that work in sculpture. They do the most awesome work I think.
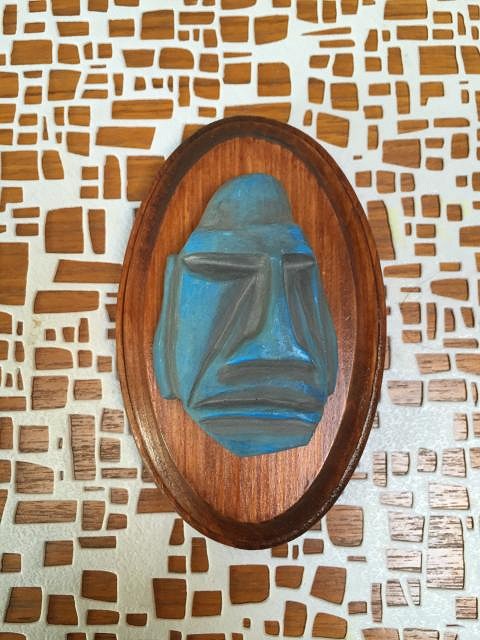
Another one...this was just a quick moai sculpt that I have tweaked over the past several months. Little by little I finally figured out what to do with these little heads. Not an original idea, but I think it's a fun idea. Should I do some more like this or let the idea go? I would probably spend more time on the sculpt in the future though. What do you think?
|
|
T
tikiskip
Posted
posted
on
Sun, Apr 19, 2015 12:27 PM
"Should I do some more like this or let the idea go? I would probably spend more time on the sculpt in the future though. What do you think?" Could be good. Here is one I did with a Kahiki lamp style base, just half of lamp. |
|
D
danlovestikis
Posted
posted
on
Wed, Apr 22, 2015 8:34 PM
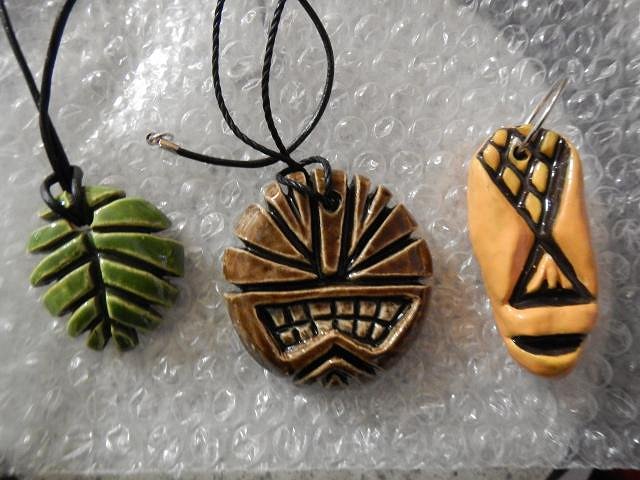
The PNG looks really old which is really good. I like the way you have mounted it too. A wonderful surprise in the mail! Dan and I thank you very much for the necklaces. I can now say we have an RVICTOR necklace collection. Did I say we? Dan disappeared with them all!
Made our day a happy one, Wendy |
|
R
RVICTOR
Posted
posted
on
Wed, Apr 22, 2015 10:15 PM
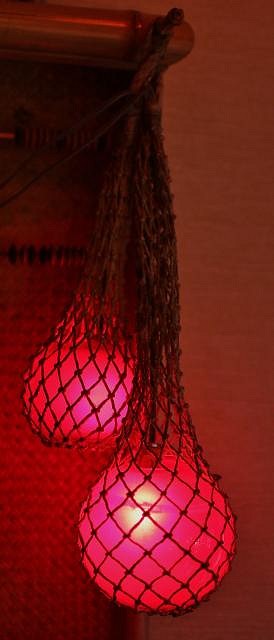
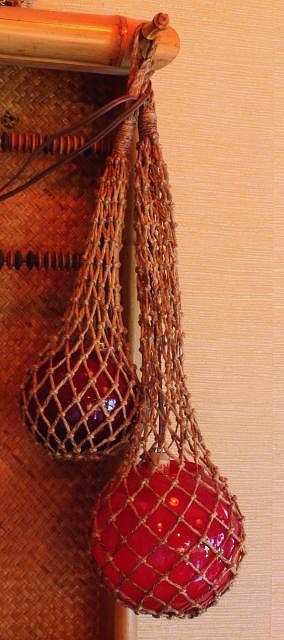
Wendy-glad you like them...Just fun little things to give to friends, family, etc. It looks like tiki skip and I got our art trades in today....check out the float lamps!!! Stoked.
Post more later...tired now. Goodnight John boy. |
|
R
RVICTOR
Posted
posted
on
Thu, Apr 23, 2015 7:31 PM
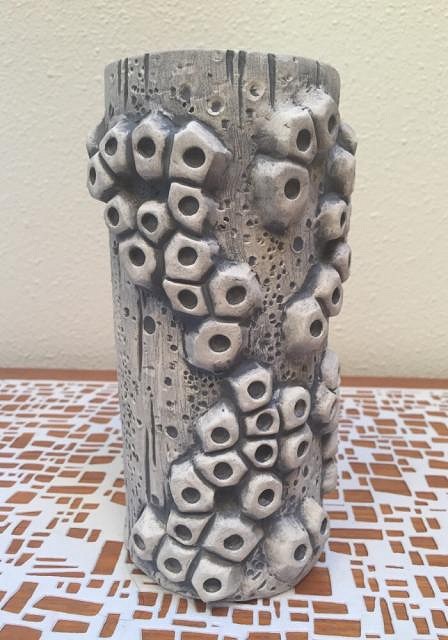
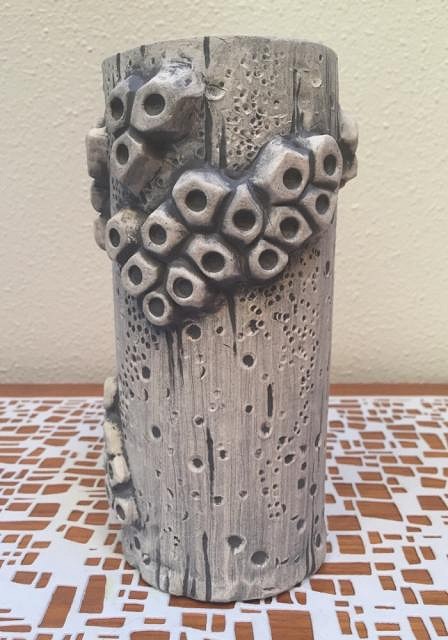
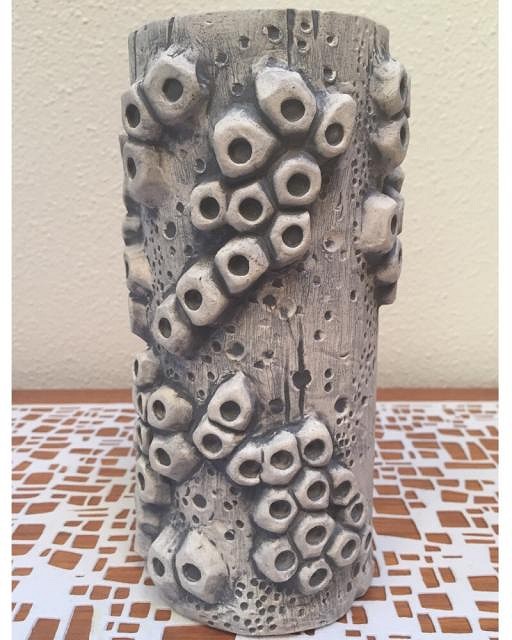
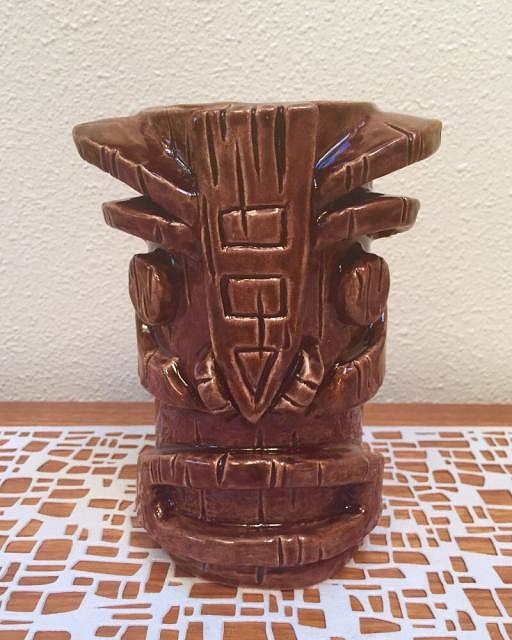
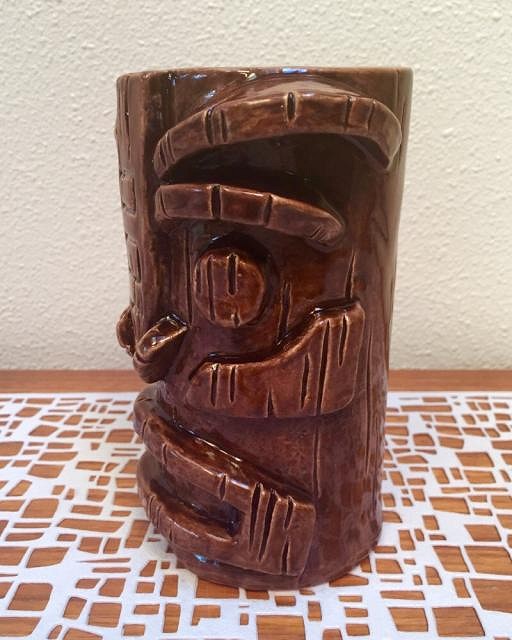
Aloha again...posting some photos of finished mugs...not allot of new mugs...working on a larger super-secret side project that I'll share a while later. Taking up all my carving time but it'll be worth it. It should be another month or so before I post it, so stay tuned... Barnacle Mug #1 - was considering colors but the wife liked it like this so that's where it's staying I think...
OK - time for a game? NAME THIS MUG....
As always....Mahalo for looking. |
|
D
danlovestikis
Posted
posted
on
Thu, Apr 23, 2015 8:55 PM
I just figured out that for me the first mug looks like a post from a pier that washed ashore after a tsunami. I like it. Wendy |
|
H
hang10tiki
Posted
posted
on
Fri, Apr 24, 2015 7:30 PM
Awesome Got a lil package in the mail today Bruddah
U da man Jon |
|
R
RVICTOR
Posted
posted
on
Sat, Apr 25, 2015 10:41 PM
Wendy-thanks. I had been thinking about the idea for a while now. I may do another, more realistic one in the future. We'll see how it shakes out. Hang10 - Glad you like it. It's funny because I bought that same mug for my sister in law at Christmas for $50. Shnikes. |
|
R
RVICTOR
Posted
posted
on
Mon, Apr 27, 2015 8:29 AM
Aloha tiki ohana,
Again, thanks for looking. |
|
D
danlovestikis
Posted
posted
on
Mon, Apr 27, 2015 9:03 AM
A simple master piece in the works. Wendy |
|
T
tikiskip
Posted
posted
on
Wed, Apr 29, 2015 2:35 PM
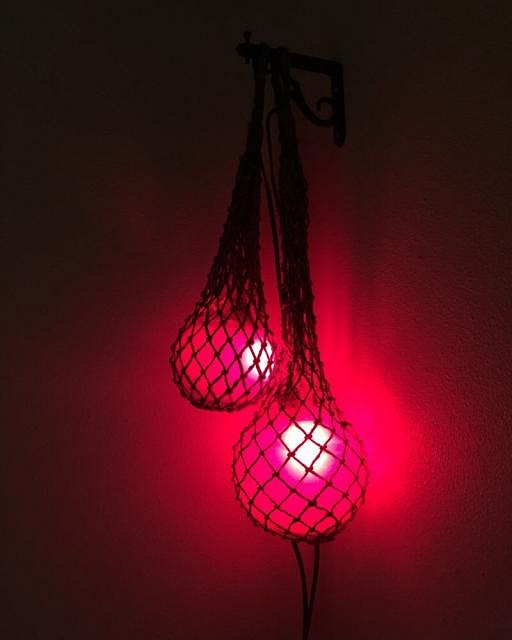
Hey Rvic good to see the lights up! I love it! Just what I had in mind and more. |
|
H
hang10tiki
Posted
posted
on
Wed, Apr 29, 2015 9:32 PM
Mail man stop by? |
|
R
RVICTOR
Posted
posted
on
Wed, Apr 29, 2015 10:03 PM
Wendy - Thanks for the complement. However, a Masterpiece to me is limited to any toupee big enough to fit my fat, bald head. Skip - Love the lights. Glad it met your specifications as well. It will be a cool conversation piece for sure. Hang10 - You rock brother. Wasn't expecting a package but it sure same. Mug plus a barrage of shwag. Check it...
Very generous and unexpected. You are a gentleman and a scholar. Mahalo to all my tiki ohana. |
|
H
hang10tiki
Posted
posted
on
Thu, Apr 30, 2015 6:48 AM
Glad it arrived safe Jon |
|
R
RVICTOR
Posted
posted
on
Thu, Apr 30, 2015 7:57 AM
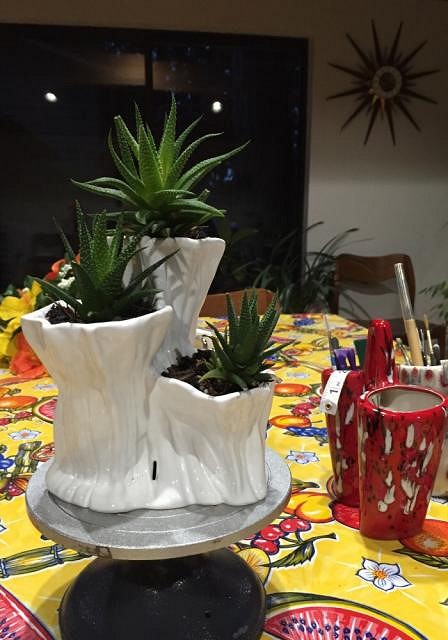
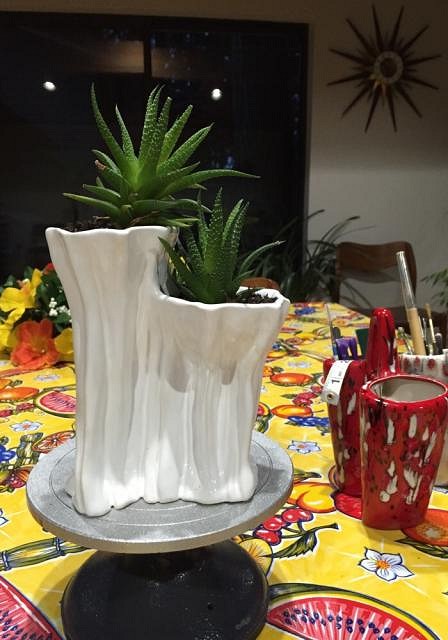
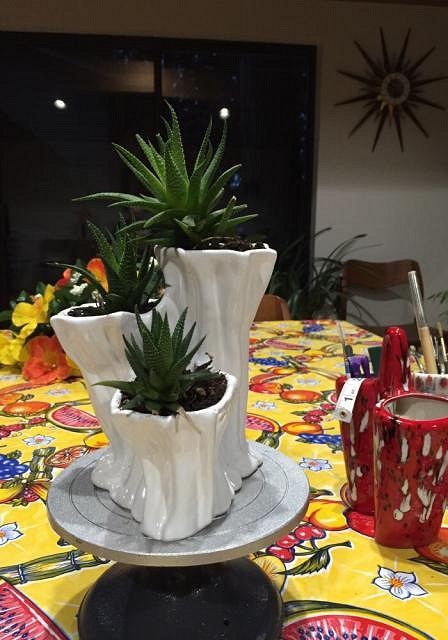
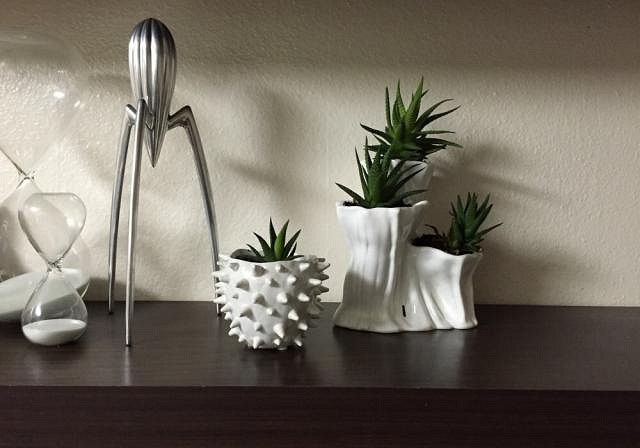
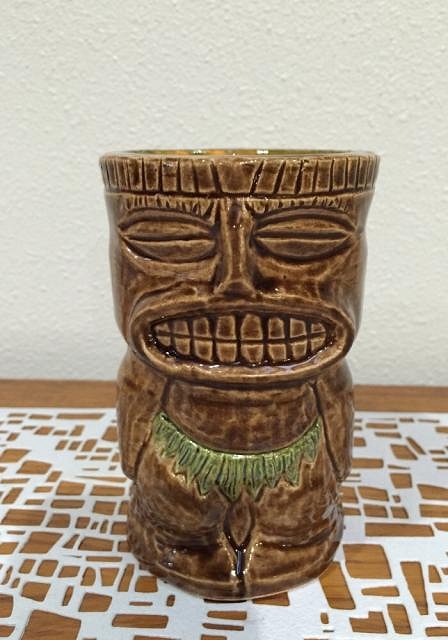
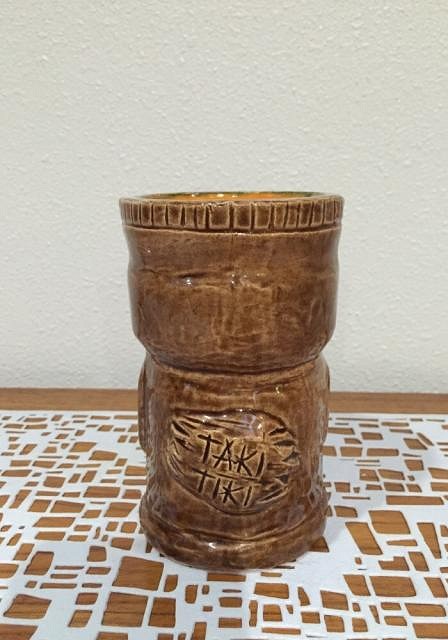
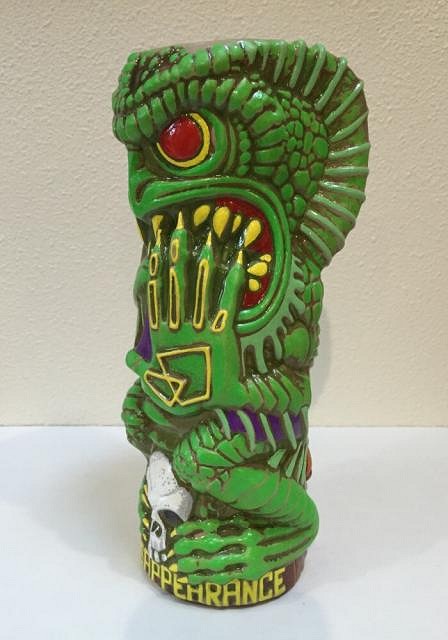
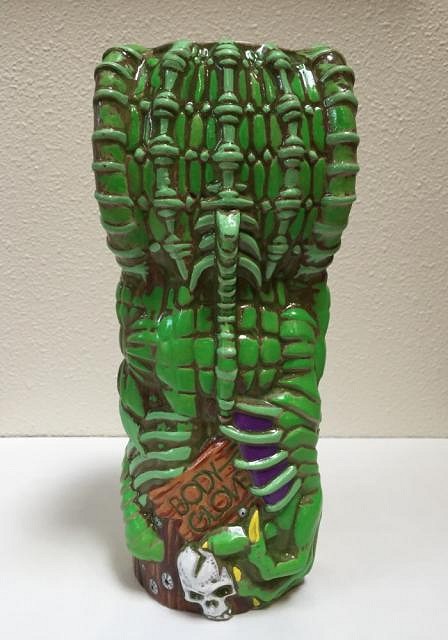
Top o the mornin to ya. Had the sculptors workshop last night and picked up a couple things to post. I also had a few really cool things happen yesterday. Maybe some of today's post isnt all about tiki but i figured I'd share. First cool thing that happened was I got to meet Mike O'Day. He's an Edmonds artist that has been into ceramics for about 10 years. His ceramics and paintings are cool and fun...i think he is very talented. His work is displayed all around Edmonds, WA and he has a website at http://odayart.com/ I've been admiring his work for years...and ran into him at a workshop next door to the one I go to. I was just checking out the art in the room and noticed him working...after introducing myself and talking about the upcoming show with a "bird theme" that was happening in about 1-1/2 weeks away, he asked me if I was that "tiki guy". When I told him I was, he was nice enough to tell me how much he liked my work. We got to talking and, while I won't bore anyone with the details, but he was complimentary and encouraging towards me. I think he was a little disappointed that I wasn't participating in the upcoming show. Maybe it's just me but I get a real kick out of meeting other artists...it was really cool getting to meet Mike. The next cool thing was that I have a custom mug order from the local tiki bar now. Need to do a carve and a mold and have 10 by June-July. Going to have to delay some projects until the mold is done I think. Enough of the banter....I should get to posting more work. First up, not tiki but the finished planter that I posted earlier. Other than one blemish from the kiln (something touched an edge in the kiln), it turned out fairly well...i may end up doing some more of these sometime as it was fun to do...
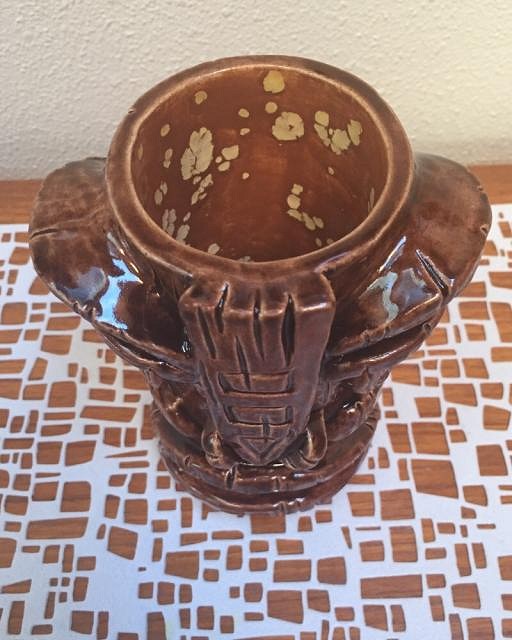
Next up...The original carve of the Taki Tiki that survived the mold. Not happy with the glazing...but it's more of a momento anyways. It's a really small mug and I will have to do a new carve for production of the order. Besides, I know I can do it better now.
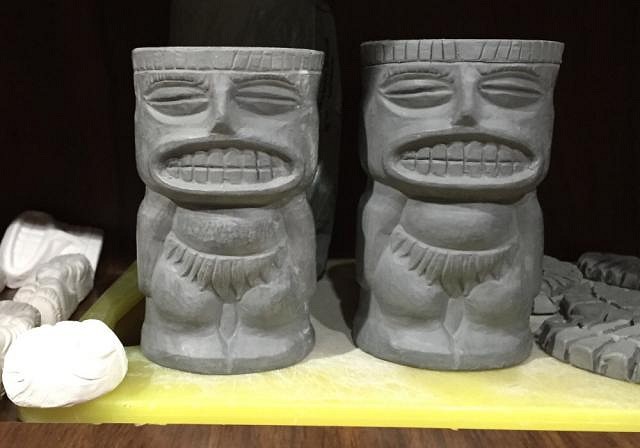
The minions are drying....tiki mugs with your happy meal kids?
That's it for now. Mahalo again for looking. RV |
|
D
danlovestikis
Posted
posted
on
Fri, May 1, 2015 9:36 AM
He's a really cute small mug. Congratulations on making a working mold. hang10tiki is one of our close friends and isn't it wonderful how tiki brings us all together? Wendy |
|
R
RVICTOR
Posted
posted
on
Sun, May 3, 2015 2:49 PM
Wendy - your right. I think that Tiki does bring us together. Its also very fun and full of Aloha. |
|
R
RVICTOR
Posted
posted
on
Mon, May 4, 2015 5:00 PM
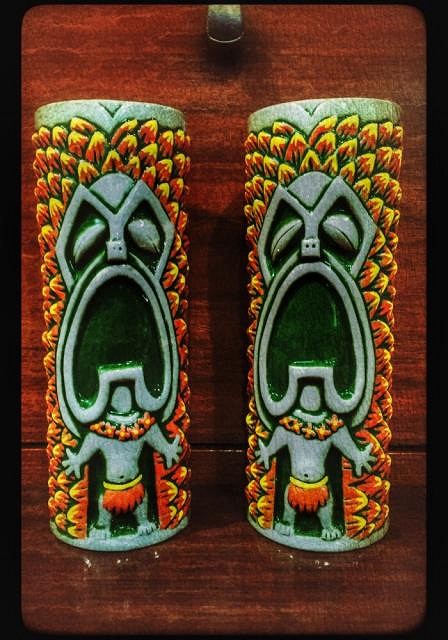
The Kolohe brothers stair into the morning sun...their transformation is almost complete. One to the tiki mug collection and the other to the Hawaii General Store in Seattle.
|
|
H
hang10tiki
Posted
posted
on
Mon, May 4, 2015 8:22 PM
Way kool |
|
R
RVICTOR
Posted
posted
on
Tue, May 5, 2015 12:11 PM
Finished product...
Hang10 - Thanks brother. |
|
R
RVICTOR
Posted
posted
on
Thu, May 7, 2015 7:18 AM
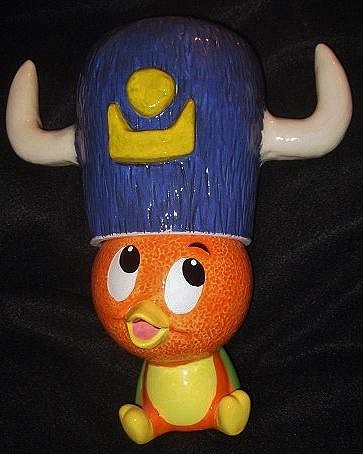
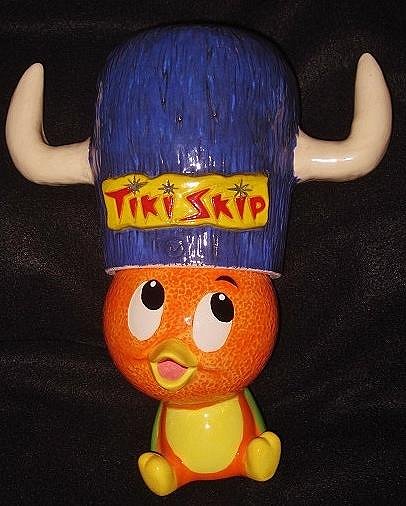
Aloha all, Here is the answer to that question.... I am all sure we know what the before picture looks like (image from tiki farm website)...
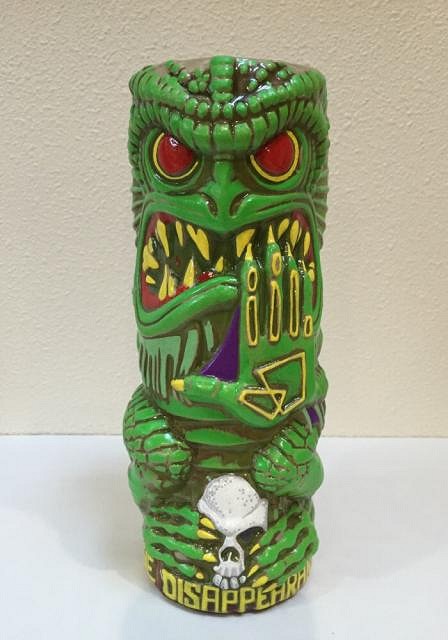
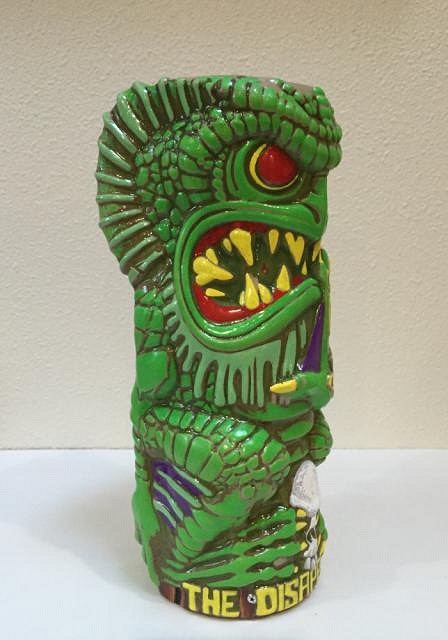
Here it is...after the custom paint job.
Hope you all like it. All of Parker's mugs are fun to customize. They are so packed with detail that it's fun to paint. Like a 3-D coloring book...pretty easy. I would encourage everyone to get one and try it out. |
|
D
danlovestikis
Posted
posted
on
Tue, May 12, 2015 8:14 PM
Wow you are an expert at jazzing up these mugs. I hope Tiki Art Shark enjoys seeing them. They look terrific. Wendy |
|
R
RVICTOR
Posted
posted
on
Wed, May 13, 2015 4:39 PM
Wendy - Brad did such a good job packing those mugs with such detail that they practically paint themselves. Anyone could do it really. I appreciate your compliments all the same. Mahalo. |
|
R
RVICTOR
Posted
posted
on
Thu, May 14, 2015 10:13 PM
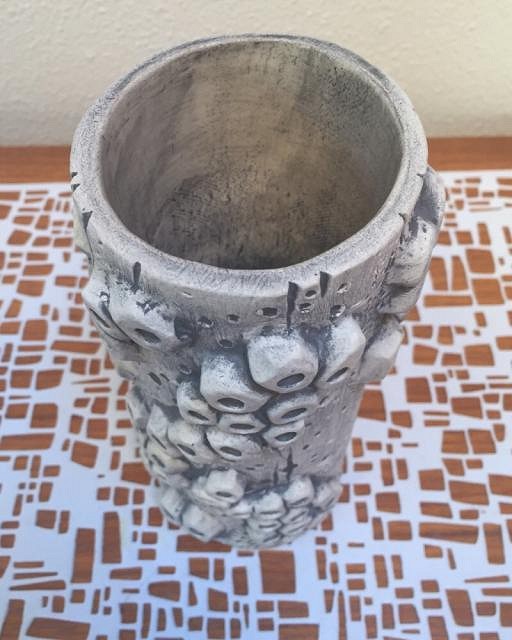
Ok...I know this is not my work...but I just got my favorite tiki mug ever in the mail today. I've been hunting for this almost every day for almost a year now. First time i saw it I fell in love with it. Same color and everything. Augie Colon mug in white bone. I've been staring at it allot. Just stoked about getting my hands on it. Killer mug by Geckoz.
|
|
T
tikiskip
Posted
posted
on
Thu, May 21, 2015 8:23 AM
Here is the picture is promised of the custom Tikiskip mug you made me. Can't get him to stop wearing it so I can drink out of it. Will send photos if I ever get the chance to drink out of it. |
|
R
RVICTOR
Posted
posted
on
Fri, May 22, 2015 11:03 AM
The first batch of minions enter the kiln for the last round
|
|
R
RVICTOR
Posted
posted
on
Fri, May 22, 2015 1:09 PM
Skip - The fact that you keep a cartoon character as a pet doesn't surprise me much. I think if you want your mug back anytime soon, your going to have to sneak up on him with a fist full of erasers. |
|
H
hang10tiki
Posted
posted
on
Fri, May 22, 2015 7:03 PM
Minions look awesome Keep it up sir |
|
T
tikiskip
Posted
posted
on
Fri, May 22, 2015 7:36 PM
"cartoon character as a pet" He's the best pet! Plus if he should die I will squeeze him and make a Vodka and Orange juice |
|
H

hiltiki
Posted
posted
on
Sat, May 23, 2015 8:30 PM
Minions look great. |
|
R
RVICTOR
Posted
posted
on
Thu, May 28, 2015 10:23 AM
Hang10 and Hiltiki - Thanks, glad you like them. More of these will follow as we have to make 10 from the mold as a class assignment. I have other things in the works but haven't posted them yet. Should be in the next 1-2 weeks. Been practicing making molds. TikiSkip - Toasted Orangie should be a flavor at Starbucks. |
|
D
danlovestikis
Posted
posted
on
Thu, May 28, 2015 10:44 AM
I sure have fun reading your thread, Wendy |
|
R
RVICTOR
Posted
posted
on
Tue, Jun 2, 2015 11:51 AM
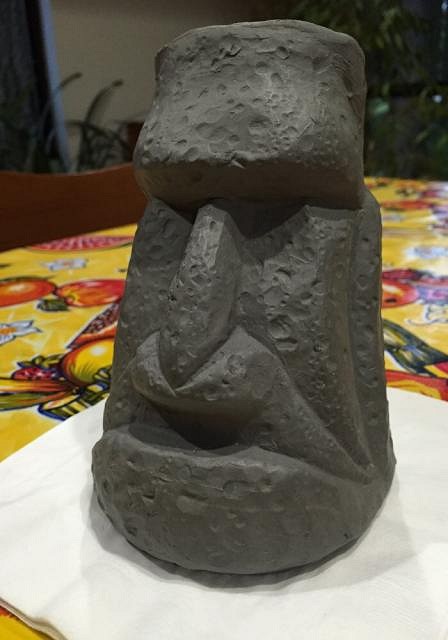
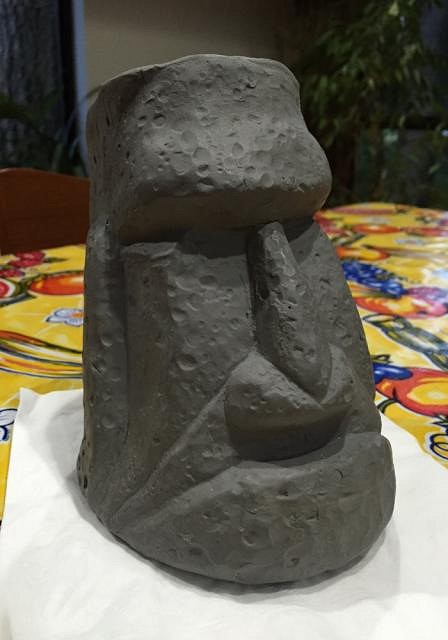
Wendy-Thanks, I think your posts are the best. I owe you allot already for providing such good guidance. Today I am really happy to be finally able to post more work. The following photos are just a few points taken over several weeks. I didn't want to share anything until I knew that I had a working mold. I actually injured myself over the memorial day weekend (pulled hamstring, broken elbow, bruised ribs...yeah, a real train wreck). This has slowed the process...but today I am finally able to share some of my work. First, an experiment making a model and mold using oil clay... So here is the oil clay sculpt I did with the intention of making a mold afterwards...Yet another moai.
And here are pictures of the first cast from the mold (post initial clean up)
The hardest part of making this mold was getting the angled top right. The actual cast line moves from the midline of the ear (at the top of the ear) to the top of the forehead. This was so that it could be removed from the mold. It had to be planned ahead of time. Lessons learned with this mold: I will post this one again later and try and give an idea of scale. |
|
D
danlovestikis
Posted
posted
on
Tue, Jun 2, 2015 2:00 PM
That's a unique Moai. Good job and good hints. I always open the mold the first time by using the salad chopper and a rubber mallet. One whack and the mold is good from then on. The mold does have to dry completely before the first cast or it does from that point on fall apart. I'm looking forward to when you glaze this one. Back to your post. You broke and elbow? Were you roller skating? That's horrible. I don't see how you are doing anything at all. Best wishes for a speedy recovery. Wendy |
|
R
RVICTOR
Posted
posted
on
Tue, Jun 2, 2015 4:47 PM
Wendy - I was playing basketball with the neighbors during a bbq on memorial day weekend. I was running so much that I pulled my hamstring and then took a hard crash on the pavement. Not pretty and I'm still struggling allot to keep pace with the demands of life. It'll be 6-8 weeks of time for the bones to heal and probably as many weeks in physical therapy. Luckily I have a desk job, so going to work is easy. It's hard to pull the plug and hold off because I have a commitment that I need to work on...I am working on a Limited Edition Mug for the local tiki bar in Edmonds, WA right now. The owner would like to have them this summer, so I am sort of committed to making it happen injury or no injury. If I get him 10 now, that is all he is looking for. I also have one other person that has requested a mug Speaking of that...here is a photo with both mold mugs...
I will post more photos of Taki Tiki #2 a little later... |
|
R
RVICTOR
Posted
posted
on
Thu, Jun 4, 2015 9:44 AM
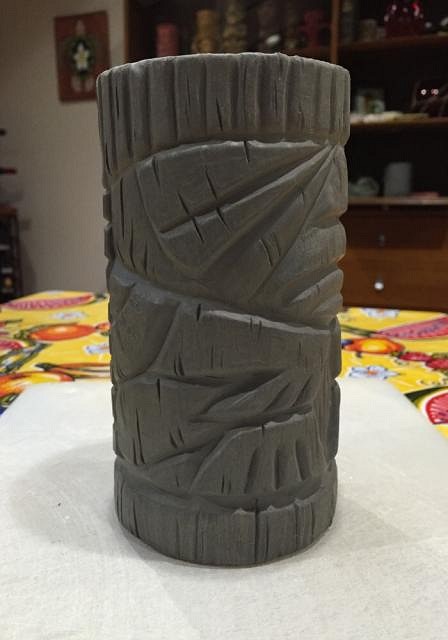
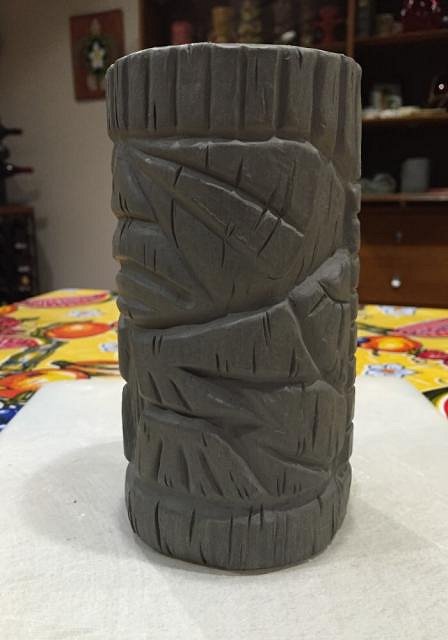
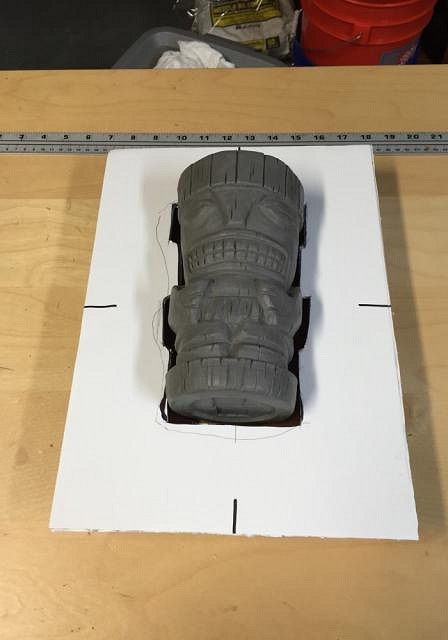
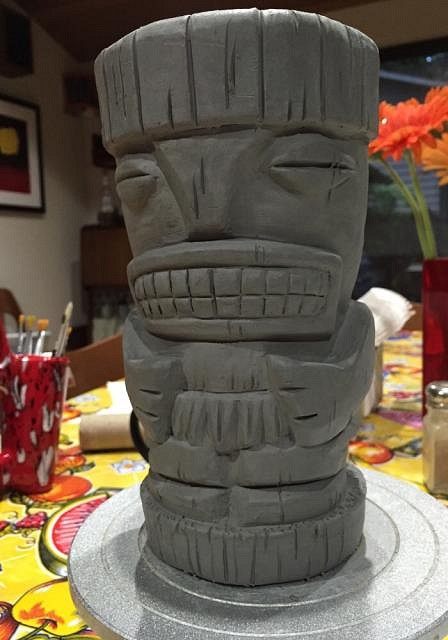
Aloha all - Posting photos of the mold making for the larger Taki Tiki. This one is being made for a local bar in Edmonds called the "A Very Taki Tiki Bar and Grill" in Edmonds, WA. It's our local tiki bar and part of the inspiration for me starting to make Tiki art in general. Several months ago the owner Brian and I had a conversation about tiki mugs in general and we found out that we both had a common interest in it. Over time we spoke more about how things were going and the idea of making a mug for the bar came up somehow. Anyways, I was planning on the first mug being for the bar...until after I learned about double shrinkage the hard way (original carve shrinks as it dries, you cast it, and the slip cast shrinks again). Anyways, once he asked me if I could do 10 mugs just to see if the loyal customers would be into it, I accepted the challenge and came up with a new mug design that was loosely based on the first. I was also inspired on the Cannibal mug idea that Wendy Cevola put in my head some time back... Anyways, enough of the storyline. Some photos of the bottom half of the mold making are attached. Mainly I took these photos to show the build up technique in casting the first half of the mold. I did this same construction with a bottle mold and had a blow out disaster that required me to start over, so I would definitely recommend that you take the time to assure that the object is both fully sealed and supported the first time. It worked just fine the second time when I was more attentive to those details. I think I am going to give Wendy's idea of foam blocks a try once I run out of foam board. Oh, and get the foam board that has the smooth, sealed surface if you have the choice. Here is how I supported the carving...with a wood block, foam pieces, and tape.
Then I build up the foam board build up platform. There are foam supports underneath the main platform. The platform height was set between 1/4-1/2" below the mold joint line I marked on the carving.
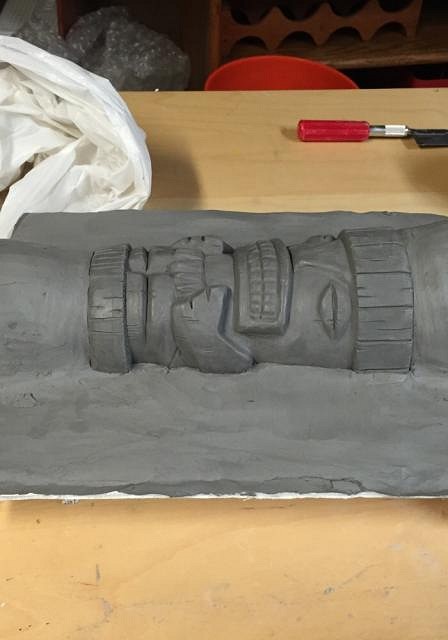
This next photo shows the clay build up on top of the platform to the joint line, the pouring cone at the top, and the base mold area at the bottom.
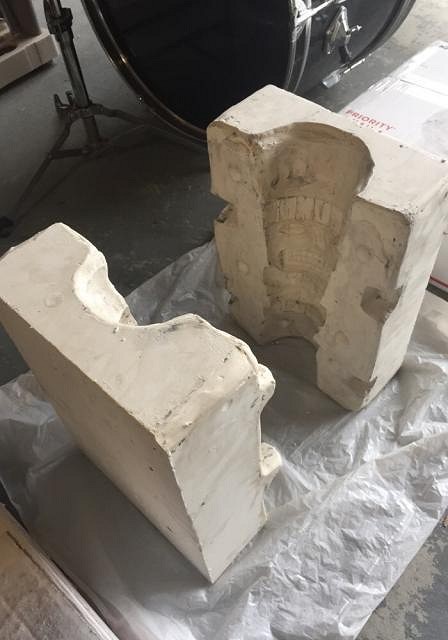
From this point, I made keyways/registers around the edges. I set up my cottle boards to pour the bottom half of the mold and sealed the board joints and perimeter edges with clay. After pouring the first half, I built up the top pouring cone and bottom base plate again and put three coats of mold soap on the plaster areas. I again sealed the boards and perimeter areas with clay to seal them and poured the second half. The resulting mold looked like this...It's sort of a heavy monster (another lesson learned?)...
I wish we lived in a dryer climate. I let the mold dry for two weeks indoors (where there is heat) and I'm not too confident that it was as dry as I would have liked it to be. I think in the future I may want to bring my molds into the workshop to dry. The kilns make the room very dry and is probably a better place to let them cure. Wish I lived some place dryer like California or New Mexico...or maybe I just need to get a kiln. And finally, photos of the first casting out of the mold after minor trimming (needs clean up).
The mug is still rather large...so I am hoping I didn't overshoot with my sizing. I will only be able to tell after firing. Wish me luck? Mahalo for looking. |
|
R
RVICTOR
Posted
posted
on
Tue, Jun 9, 2015 11:00 AM
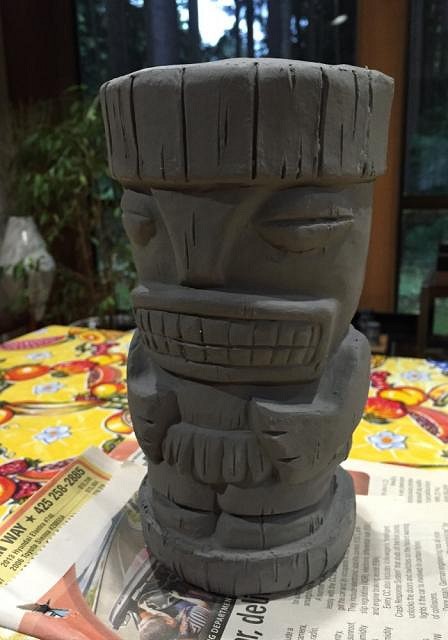
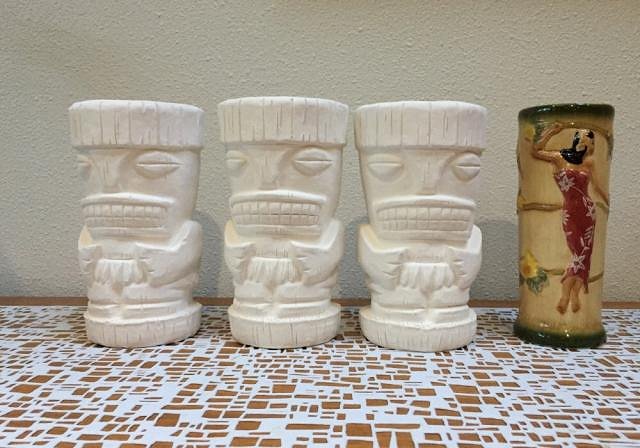
Great day here in Seattle...it's been about 80 degrees for several days and were all loving it up here. Best part is the ceramics are drying much faster than normal...which helps. Here is a photo of some of the Taki Tiki mugs drying. The one on the right has been drying for about 4 days, the one in the middle about 2 days and the one on the far left was taken out of the mold yesterday. It's cool to see the difference setting the three of them together side by side.
|
|
R
RVICTOR
Posted
posted
on
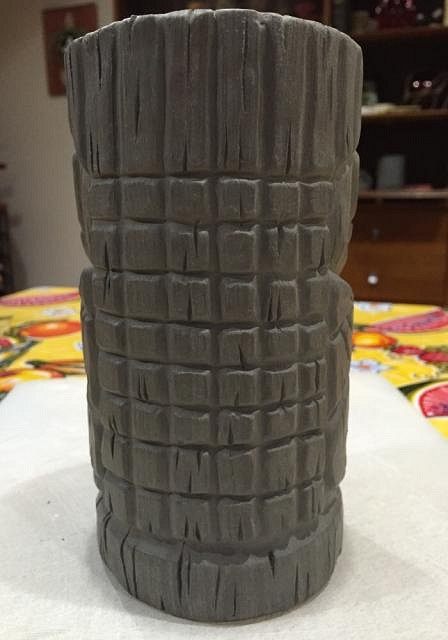
Thu, Jun 25, 2015 8:46 AM
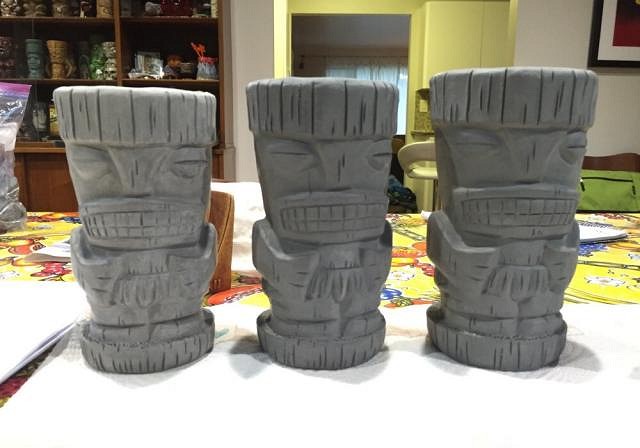
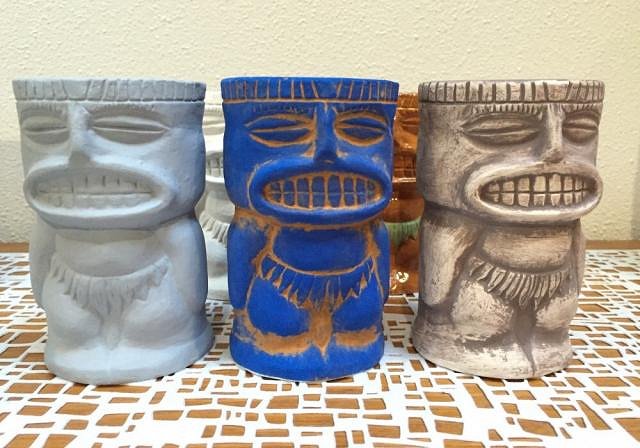
Aloha, The Taki Tiki 2.0's came out about the size I had calculated (roughly). I took a photo with them lined up next to one of the Tommy Bahama mugs for scale. Once I go to wash them out (get any loose ceramic removed), I will check the final average volume. They are on the larger size...but I like the wide opening...it's so much easier to fill with ice and pour drinks into...Plus allot of surface space for garnish.
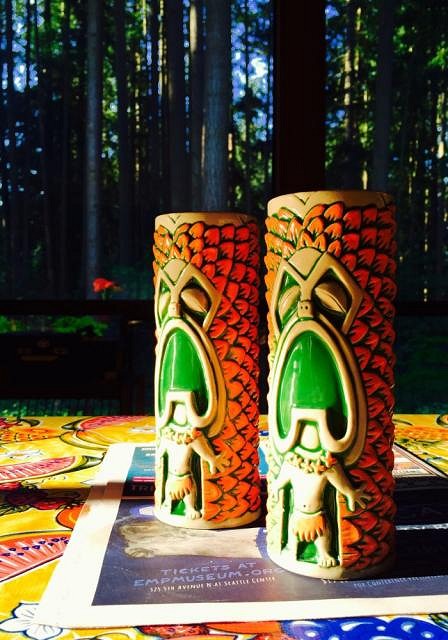
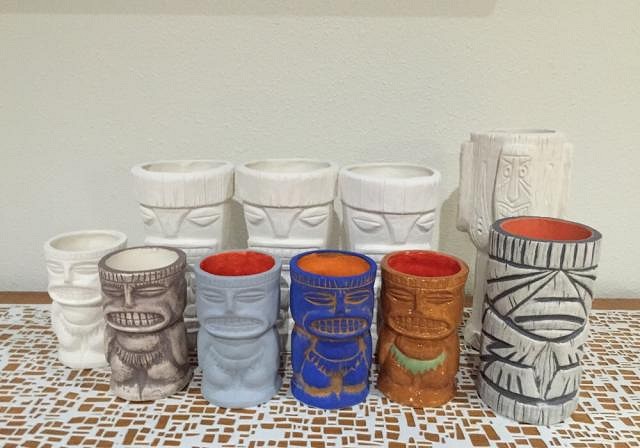
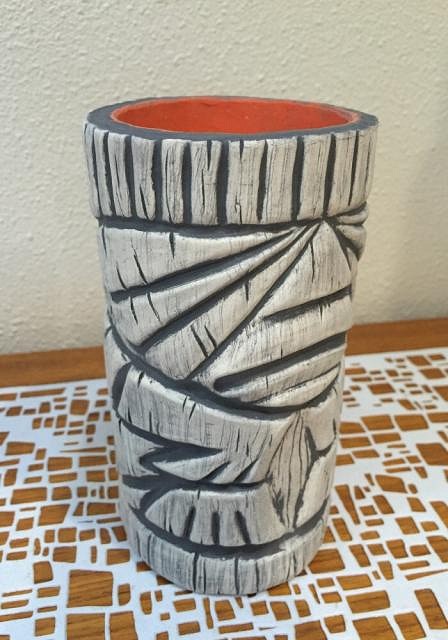
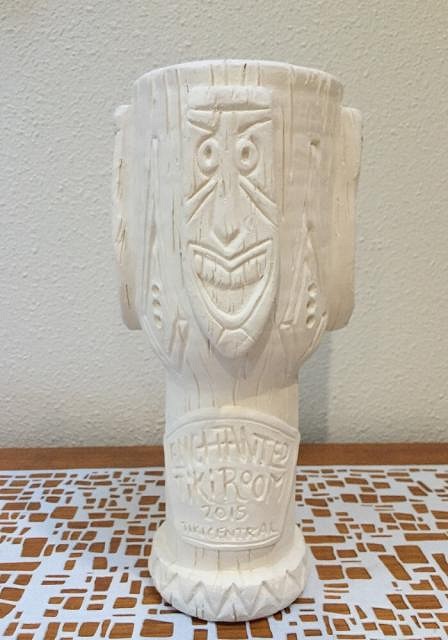
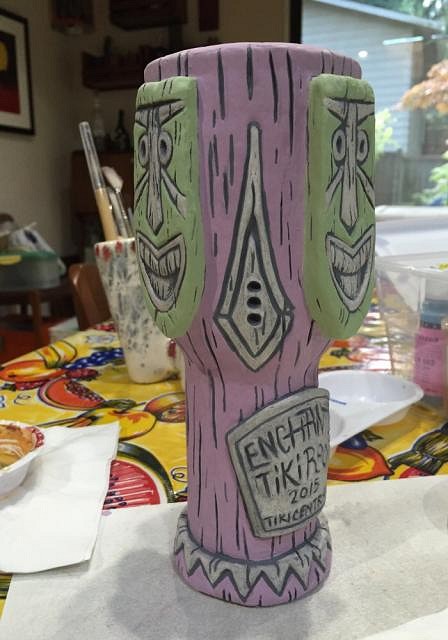
Pictures of some other Taki Tiki 1.0's in various stages of glazing... a picture of the Ku mug I posted earlier... and finally (posting on the regular thread as well), the enchanted tiki room chalice survived the kiln!! Now...lots of glazing, test tiles, casting, etc. Much work still to go...but it's fun finally getting some fired pieces back. Mahalo for looking. RV |
|
D
danlovestikis
Posted
posted
on
Thu, Jun 25, 2015 1:07 PM
I had some catching up to do. Reading and looking at all the photos was so much fun. I'm happy that it's all going so well for you. I worked my way through college as a dental assistant and those teethy tikis make me think of those days. The Swap goblet is what everyone is hoping to trade for, it's wonderful. Cheers, Wendy |
|
H
hang10tiki
Posted
posted
on
Thu, Jun 25, 2015 4:35 PM
Lookin good..... |
|
R
RVICTOR
Posted
posted
on
Thu, Jun 25, 2015 7:09 PM
Wendy - Glad you liked checking out the posts. I still read yours as often as I can. Love what you've been doing this year. If you ever want to collaborate or just shoot each other ideas, you know I'm open to it. Thanks for the complement on the goblet mug. Yours is every bit as cool. Everyone so far is doing so well. I am proud of the tribe. Hang10- thanks bra. You da man. Love the trip photos. Look like your working on a tiki bucket list most of the time. |
|
H
hang10tiki
Posted
posted
on
Thu, Jun 25, 2015 7:31 PM
:) |
|
R
RVICTOR
Posted
posted
on
Mon, Jun 29, 2015 10:59 AM
Posting ETR photos here as well... |