Tiki Central / Home Tiki Bars
The Cannibal Cove, Wolverhampton, UK
Pages: 1 34 replies
|
A

AdOrAdam
Posted
posted
on
Sun, Mar 27, 2016 7:53 AM
Hi all I have been working on a home tiki room for about 6 weeks now & (maybe doing things back to front) haven't made a 'this is my home bar' thread. So today is the day to make things right & belatedly start! |
|
A
AdOrAdam
Posted
posted
on
Sun, Mar 27, 2016 8:01 AM
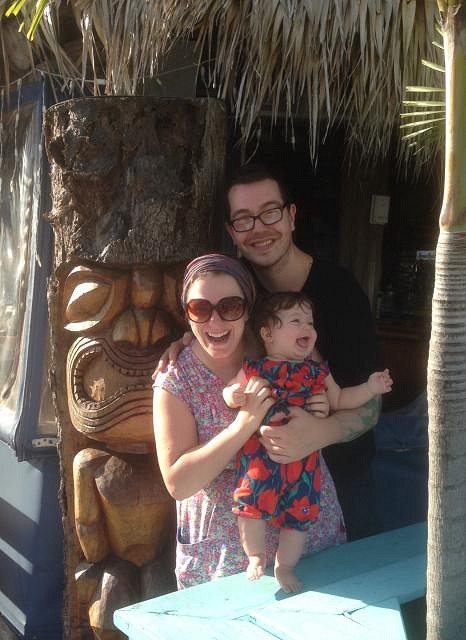
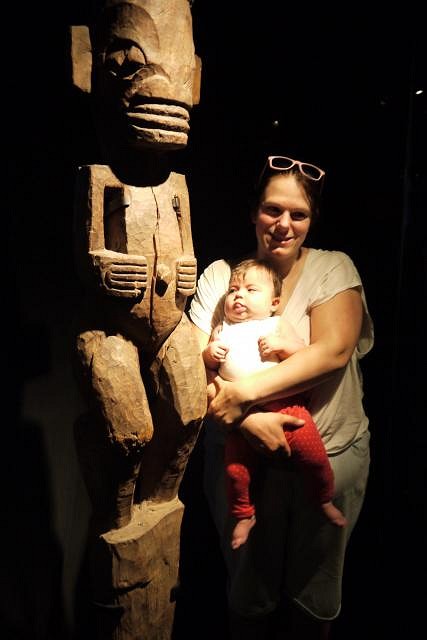
First, meeting us & the set up: About 9 months ago we moved house, our current house has room for a tiki room. TC can be a little bit anonymous - 'we' is me (Adam), partner Jo & daughter Rosie. It's probably no surprise to you that I'm the tiki fan out of the 3 of us! Here's a pic of us enjoying a little sunshine in Florida a few years ago:
Our previous home was a 2 bedroom flat in a city centre, our current home is in a nice quiet green belt area with good transport links & local amenities. My first priority was somewhere nice that Rosie could grow up & be safe to walk on the pavement to the local shop as a child. Unbeknownst to me, Jo knew I wanted a tiki room & had that in her mind as a priority! Her introduction to the property was 'here is a 3 bedroom house, it's in a good area, we can afford it, it has room for a tiki room... let's do it!' The tiki room is 11 ft x 7ft next to the kitchen, a downstairs bathroom & the garage. When we had 'committed' to having a tiki room, Jo & I discussed the budget. Although we both have good jobs, etc etc the budget couldn't be bottomless. We did a bit of research & this was quite an easy discussion. By the end of it we had a definite budget that although it was flexible (ie our first budget was what we wanted to spend), we were also realistic that everything can cost money... just not too much more! |
|
A
AdOrAdam
Posted
posted
on
Sun, Mar 27, 2016 8:14 AM
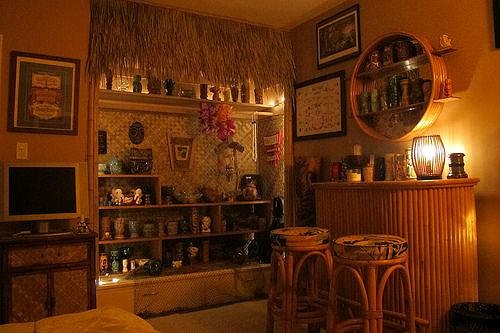
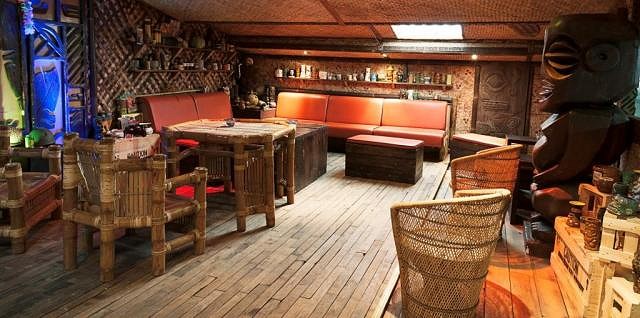
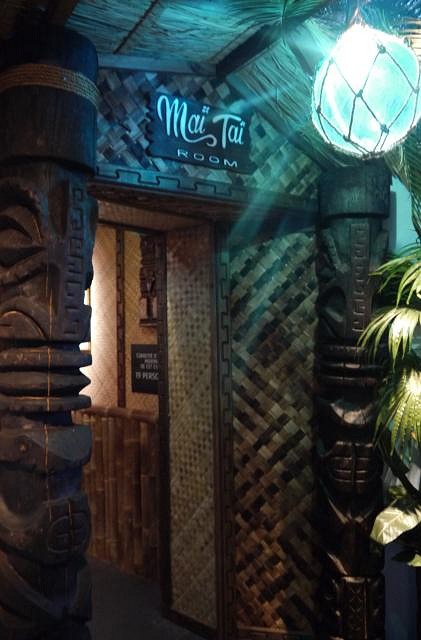
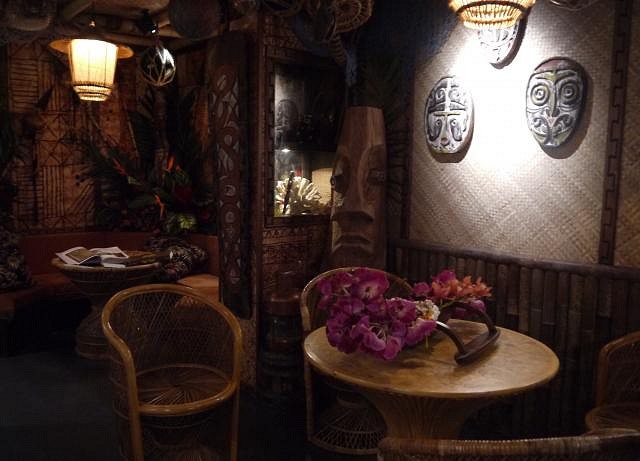
Our inspirations: I came 'into tiki' through the drinks, I love the breadth of flavours & ingredients in the drinks - 'normal' cocktails in the UK aren't like this. However, I love the immersive atmosphere of tiki bars & characterful carvings - to go into a place & have that wow factor is something I'd like to recreate at home. The Mai Tai room at the Tiki Pop exhibition in Paris in 2014.
For me this is numero uno - it's a relatively normally shaped room that has been fully knitted out with almost 'one of everything' that you might think of as tiki style. Its a room in 3 parts - the bar, the main part & a seating booth area. The photo here is of the 'main part' with the bar in the background. Given that it was part of an art exhibition, it is robust & uncluttered but still retains that rich level of flotsam & jettson. Considering the exhibition was called 'Tiki Pop' none of it is what I call 'tiki pop' or 'tiki light' - no colourfully painted tikis or plastic mugs. Trader Vic's in London.
A photo can't do justice to how wonderful I thought my first visit to Trader Vics was - it was my first 'wow' experience of going to a tiki bar. It was perhaps the first time I've been to a bar & not been interested in what I should have to drink! I had (unsurprisingly) had a Mai Tai first. By the second round, I must have been round the bar four times. The above photo is from my second visit when I remembered I could take pictures. Another great source of inspiration has been... the home bar thread of TC itself. There's a great range but here are a few of my favourites: This bar features some great carvings but they are nicely peripheral to your enjoyment of the room, not too 'look at this carving!'
This post has the best mug display, the 'uplit shelf' featured in the photos when Poly Pop had the flu is something I would like to emulate.
Whereas the photos in the Desert Oasis room are of the mugs up close, this post on The Tiki Chick has a great use of uplighting on a mug shelf when viewed a bit further away.
NB: I have shamelessly lifted these photos from their original sources, I apologise for any infringements. |
|
A
AdOrAdam
Posted
posted
on
Sun, Mar 27, 2016 8:47 AM
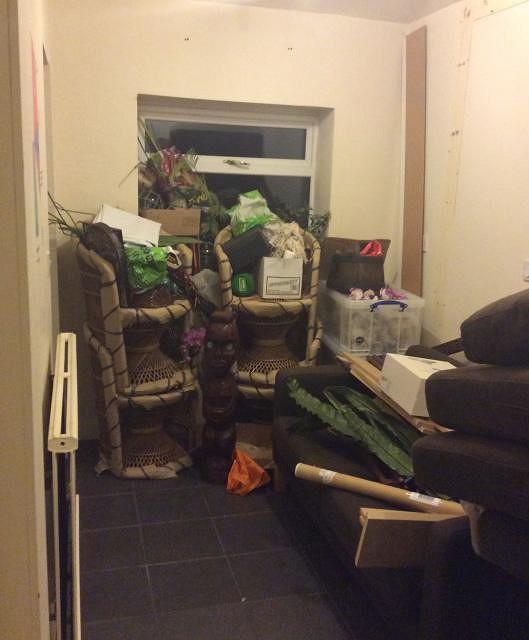
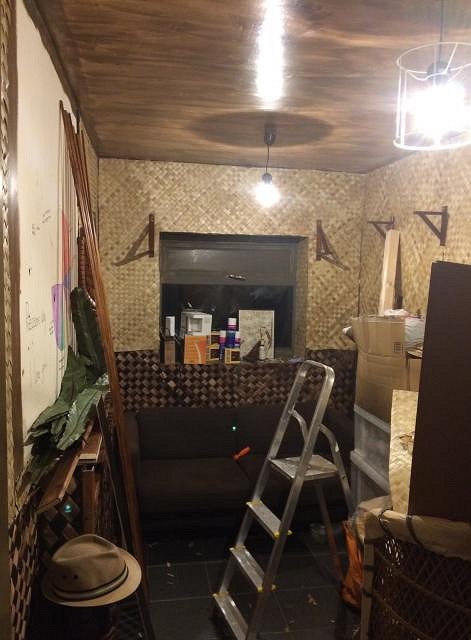
Next, designing the tiki room: Given the size of our tiki room (7ft x 11ft) - a lot of those inspirations are too large to recreate but the Mai Tai room at Tiki Pop was a perfect inspiration. It's slightly larger than our tiki room is width ways but not too dissimilar length ways. I pondered for a while the idea of having a bar in the room - I redesigned the room several times with it in different places, included a wet bar, included a dry bar etc etc. Eventually we decided to have it as a seating only area, drinks could be prepared in the nearby kitchen - I quite like 'producing' a round of drinks from another room all at once so this was fine. We did want to the room to have two uses - a relaxation room for us & a room to socialise in with friends. Typically we socialise with other couples & have found that being round a table works best. We decided to meet both requirements having both a sofa with a table & chairs. We also thought that it would be good to have a shelf along one wall with up lighting to display mugs. I was keen on a thatch roof type awning, Jo wasn't... We elected to put one in & see where it went after that. There is also an external door to the garden & a window. The room in its original state had a few things we wanted to change - namely removing a washing machine & moving a radiator. Unsurprisingly the washing machine had to go! A plumber friend did some pipe work & we relocated it to the garage. There was nothing wrong with the radiator itself but it left very little room for a cover so we moved it about 6 inches to the left. This radiator cover could serve as a place to put some of my cocktail books between some tiki bookends I have. I don't have a picture of the room in its original state but here's a photo of it full of stuff mid way through the build:
|
|
A
AdOrAdam
Posted
posted
on
Sun, Mar 27, 2016 8:50 AM
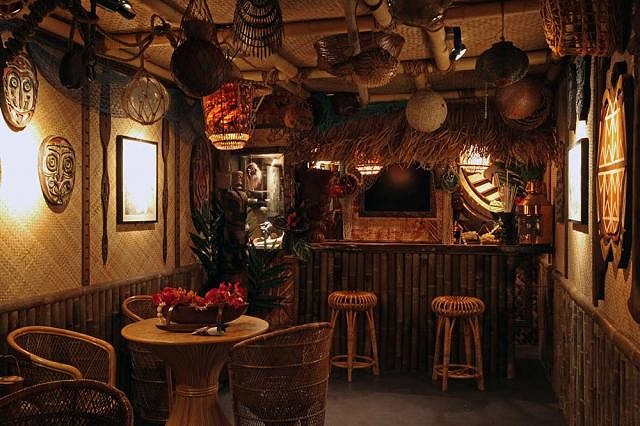
Then, collecting materials & readying the room: I looked around to find materials - it can be a frustrating game when you aren't sure of the quality of the items. I visited a few DIY superstores to explore what could purchased & repurposed for my needs. Jo's father was a big help here - I had a chuckle when he'd say things like 'nah, that's not tiki enough, this has a nice retro finish tho' alongside more practical advice of what materials to use & how to fix them to walls. I'm definitely looking forward to hosting a proper visit from him when the room is finished. Cheeky Tiki dominates the UK market for tiki room supplies. Jo contacted them & arranged a surprise visit for me to their warehouse in December 2015. Cheeky Tiki have supplied a number of UK bars with round tables & tub chairs, when I contacted them they told me they are about to start selling new furniture ranges so I could test them out during our visit. Holly (the brand manager) was very accommodating & we spent 2 hours in their (slightly too cold) 'home bar' showroom on a Monday morning - Cheeky Tiki really could be a one stop shop for your home bar needs! Here is a promo photo of their home bar room:
This must be an old photo because their room is now packed to the rafters. I'd seen the materials online but it was much better to have seen them in person. Seeing the tables & chairs made all the difference - I was sold on the buri style pieces they did. I'm quite indecisive normally so it was quite fun to turn round at the end of being there & say '2 of those, 3 of those, 2 of those, etc etc'. I also got to ask 'how much for this?' about a few ceramics in test colours & masks in different sizes which aren't on general release. I took home what I could & made plans for what I would be receiving afterwards. I looked at fabric after fabric online but I'm not really a 'Hawaiian print' kind of guy - I eventually picked out some hessian fabric on eBay to make into a curtain over the external door in the room. I also opted for a wooden slat blind to cover the window. I already had a few carvings & plenty of mugs but I picked up a few more that were on my bucket list. I was thrifty with the tapa cloth & scored a two pieces (one big, one small) on eBay. I visited a fake flower shop where I scored a bundle of slightly damaged 3 foot banana leaves & orchids (no major damage). I had no real plans for these but knew I wanted to include some sort of foliage, it was a case of they were impressive & I should 'buy it now before its gone'. Jo requested & I picked up a bag of orchid flowers that had been broken off their stems to make lei. I contacted a local glass cutter for some shelves; I was surprised to find how cheap it was & how flexible the pay could be - proving what you always hope, that sometimes 'going to the small business' is better. This rounded off the majority of the expenditure within budget with the exception of anything I earmarked as 'pickup later if you still want it' purchases. There would always be more tikis we wanted than we had room for. This was not really planned sequentially so I readied the room & picked up materials simultaneously - in fact an impending delivery of stuff hastened the preparation of the room so it wasn't a bad thing. |
|
A
AdOrAdam
Posted
posted
on
Sun, Mar 27, 2016 9:19 AM
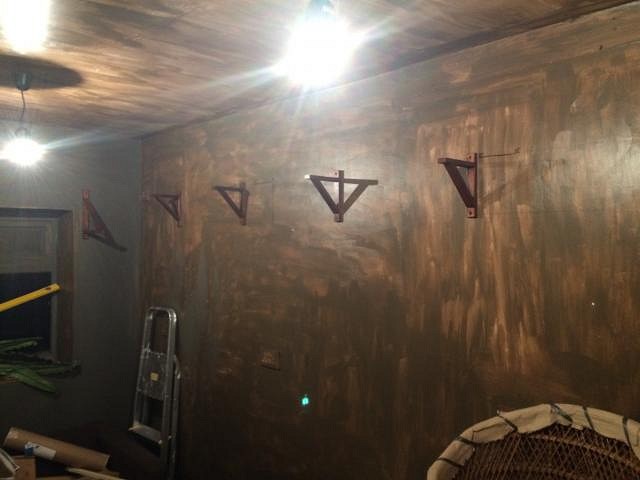
Latest stage: build The first thing I did was paint everything dark brown with cheap paint. I did this for 2 reasons:
I just went for all over dark (if a little patchy). I did coat some areas a few times that would be uncovered. I masked the white UPVC window frame up - it got painted the same colour. I brought some white blackout material for the external door curtain & painted that too. I tacked some wooden shelf supports to the wall with small nails & stained them while drips wouldn't matter. I predrilled holes in the wall for the shelves & the radiator cover too - I was pretty sure drilling thought rattan wouldn't be a problem but at least then it was another job out of the way. With the exception of the drilling, this was nice easy work I could do at times when Rosie was having a nap or in bed for the night without disturbing her. Jo occasionally stuck her head round the door & made comments about it looking dark. I've got to say, I really intended to post progress photos of the build but we really got stuck in & rushed through it at a lightening speed. I did contribute some tapa cloth tips to another thread. Jo really came to my aid spending the majority of a weekend helping me stick matting on the walls, cut & attach trim. Jo's brother Steven (known as Uncle Debben) helped with lots of bits including sticking the rattan to the ceiling & attaching higher up trim. There's not too many rules to sticking matting to the walls but I think I can summarise what I learnt in a few tips:
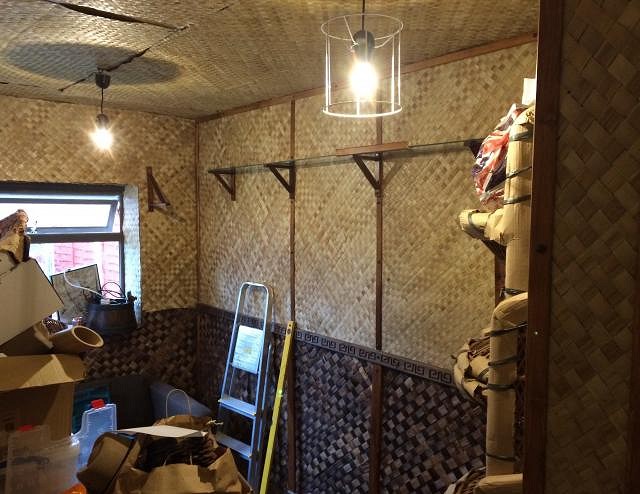
Here's a few photos I took during the process:
Here is where I posted the method I used to stick up the tapa cloth. Rosie (now a fair bit bigger than the previous photo & walking around everywhere) was always keen to help / interfere & was barricaded out:
Eventually we brought some cheap plastic tools & she came on in - unsurprisingly she banged the walls a lot & tried to pull on the matting. I took the view that it was going to happen so it was better she was used to it being there - it held up well & she paid it little attention after a day or so. NB: I wrote all these posts a while ago but never got round to making them. The room is now empty apart from its eventual furniture, full rattaned & trimmed. The next stage is probably the most exciting, it's deciding what goes where & the lighting. At the moment the room looks like most tiki rooms do underneath all the decoration. Having spent a fair amount of money & time recently, I'm going to take a little bit longer with this & will report back when I have more pictures. I'd love to hear people's thoughts on the inspirations, pictures I've posted & space that we have. Cheers! |
|
H

hiltiki
Posted
posted
on
Sun, Mar 27, 2016 11:27 AM
Adam, love what you are doing with your place. Seems like you did a lot of research and planning before starting and it is paying off. I wish I had done that before I started my tiki bar. I also like how you put up your tapa cloth it looks nice and clean. Put more pictures up as you progress we all love to see them. By the way your have the cutest daughter. |
|
HH

Hurricane Hayward
Posted
posted
on
Sun, Mar 27, 2016 2:00 PM
Adam, Great progress so far! You certainly have a vision for what you want. Good call on keeping the bar in the kitchen. Too bad you have to deal with that window. I suppose filling it in would be outside of your budget and means :>) Cheers! |
|
L

LoriLovesTiki
Posted
posted
on
Sun, Mar 27, 2016 6:28 PM
Looking good so far! Your planning was quite thorough and I think it's really paying off. I look forward to your progress pictures. |
|
M

MaukaHale
Posted
posted
on
Sun, Mar 27, 2016 6:54 PM
You're off to a good start. Half the fun is the journey getting to the destination. |
|
T

tikilongbeach
Posted
posted
on
Sun, Mar 27, 2016 6:59 PM
I like it. I can't wait to see more of the progress pics. |
|
B

bamalamalu
Posted
posted
on
Sun, Mar 27, 2016 7:23 PM
The room is really coming along nicely! Thanks for sharing the pictures. I always enjoy your posts in the "What are you drinking" thread. It'll be fun now being able to picture where you're enjoying them. Can't wait to see the remaining steps completed. Cheers! |
|
H

hang10tiki
Posted
posted
on
Sun, Mar 27, 2016 9:41 PM
All I have to say is "wow" |
|
A
AdOrAdam
Posted
posted
on
Mon, Mar 28, 2016 3:20 AM
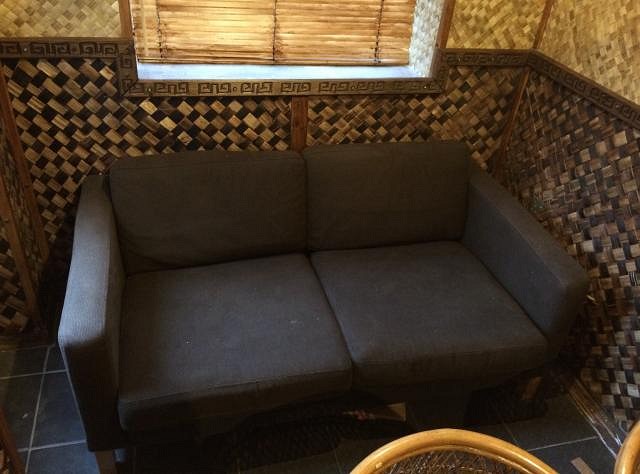
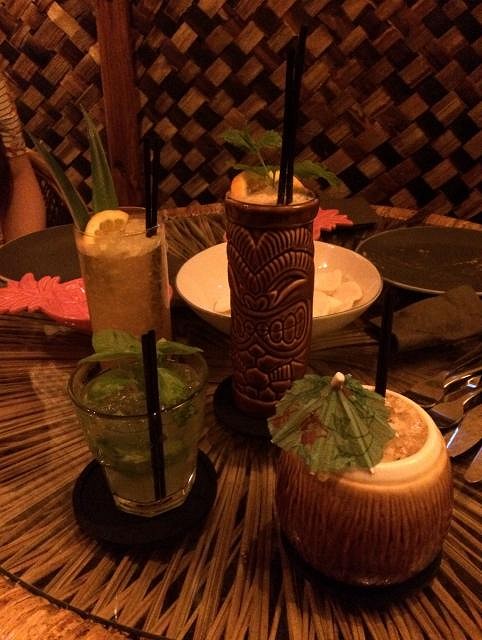
Thanks for your kind words all! I agree that 'Half the fun is the journey getting to the destination' - working the materials I've seen throughout the TC bar thread has been fun, I now know the frustration & feelings of accomplishment when it goes right. I don't mind the room being small - it's snug no doubt but so far we have had 5 people in there without problem - we think it's maximum occupancy of 6 adults (or 4 adults & 2/3 kids which is more likely!). I don't mind the window or the door - it'll be good to be able to access the garden in the summer or have a little breeze coming through from the window. Also the window sill is like a built in shelf on which to put some special tikis I am getting. I have put up some supports for the forthcoming thatch. I agree it's nice to have a 'dedicated drinking space' but we have issued a ban on hand held technology in the room - ie no looking at your iPhone. This will probably mean less TC surfing while enjoying a drink from me & Jo missing out on reading entertainment news but more conversation - a worthwhile trade. We have yet to work out 'proper rules' - for example where does guests taking pictures of drink sit? If I'm in there on my own can I read TC? I just figure anything that prevents another person communicating with you has to go! Rest assured we will be enjoying drinks in there but more than likely 'what you are drinking right now' will become 'what I drank last night' on my turns to get up early with Rosie. Here's a couple of pics to show you the furniture: An old IKEA couch
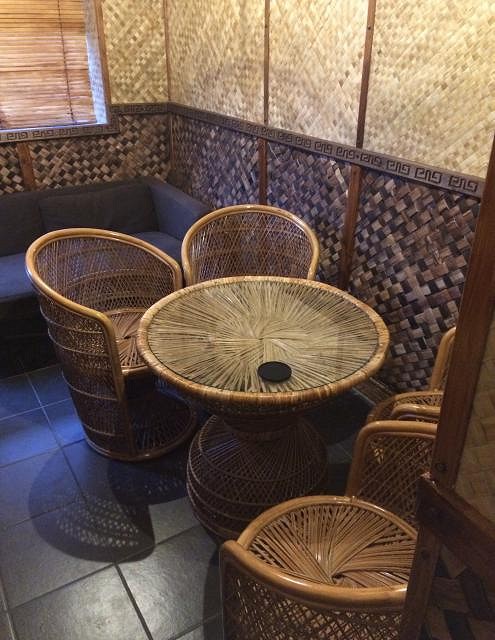
When I brought my first home 8 or 9 years ago I decorated it all myself - it was a smorgasbord of dark brown, imitation wood furniture & red. You may have seen this in the back ground of my older pics. Our new house's decoration now has a definite more female feel (& child feel). I had 2 couches there - this one was used far less than the other (mainly because the view of the TV wasn't as good) & has ended up here - it's nice to have a little something with me from my old home. If the couch isn't tiki, it is plain & dark so fits in. In comparison I wanted to have a full on 'tiki dining set'! When we visited Cheeky Tiki one thing I had in mind to purchase was a table & some chairs - I was sold on their buri buri set. Here's a pic of the set in situ:
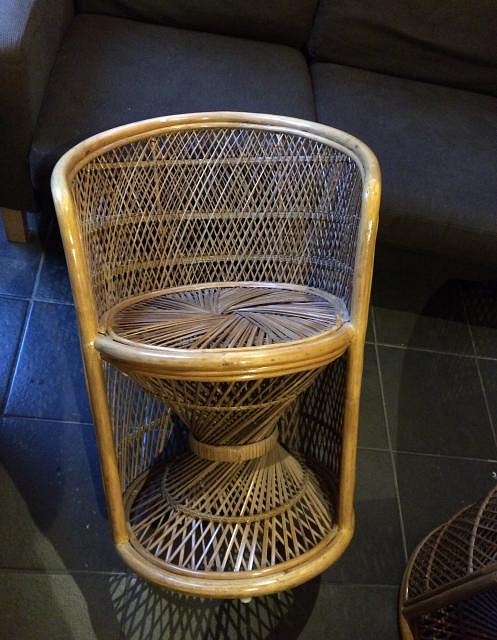
The chairs & table have a nice level of detail:
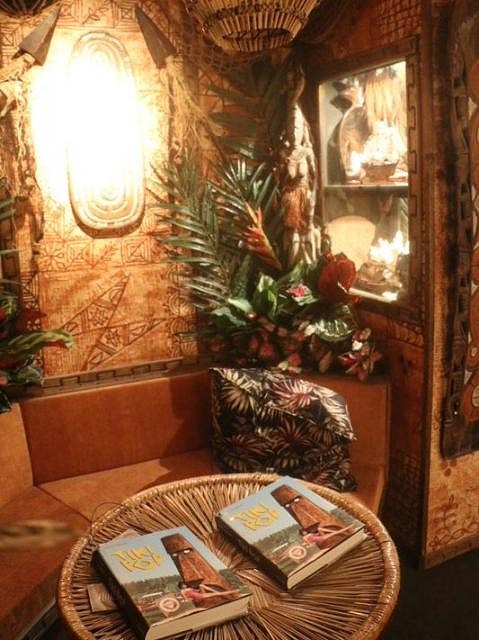
We will get some round seat pads & cushions for the chairs. It's a shame to cover up the nice circular pattern on the seats but they are a little bit hard on your bum after a while. It's nice that the top of the table repeats the pattern under the glass. I have got some black silicone drink mats to prevent drips on the glass (there is one in the pic). Also it's worth noting, Jo thinks the table is from the Mai Tai Room at the Tiki Pop exhibition. Cheeky Tiki gave me a 'display discount' so it's possible or at least the same model of table. Here's a pic of what she thinks it is from the exhibition (from the Critiki page):
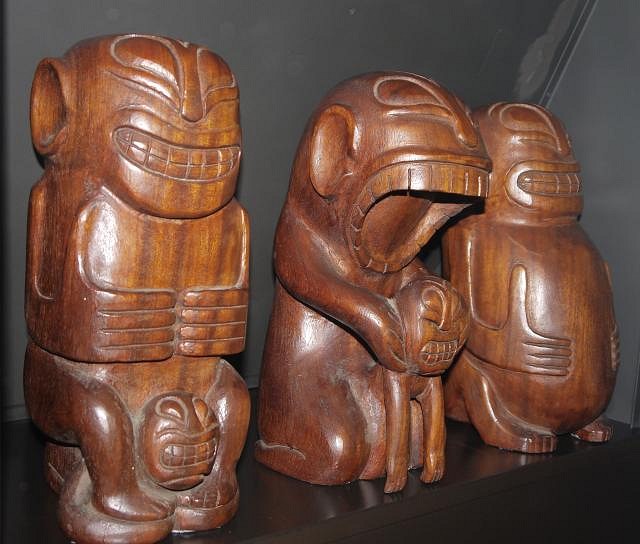
I do actually have a carving from the exhibition which I'll post later when I'm positioning the carvings. Cheers all! :) |
|
H
hang10tiki
Posted
posted
on
Mon, Mar 28, 2016 6:07 AM
More good pics I will admit that I'm reading your post on my phone in my tiki bar Nothing like a great home tiki bar to relax in Enjoy Bruddah |
|
L

lunavideogames
Posted
posted
on
Mon, Mar 28, 2016 4:01 PM
Great start, I like the look of the ceiling! You really have been researching this for a long time. I am glad you found a home with enough space to make your tiki bar. Looks like Cheeky Tiki is a pretty cool place, you are lucky to have it as an option when shopping for decor. Looking forward to more pictures. Please keep us updated. |
|
F

Fugu
Posted
posted
on
Tue, Mar 29, 2016 4:59 AM
Your room is really looking great so far! It's definitely motivating me to work on mine. Quick question...how did you attach the matting to the ceiling? |
|
A
AdOrAdam
Posted
posted
on
Tue, Mar 29, 2016 2:40 PM
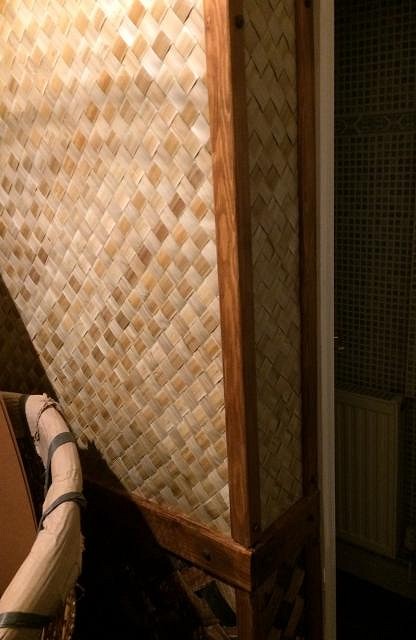
Thanks :) I would advise 2 people doing it. One person supports the rattan & sprays carpet adhesive, the other sticks the matting to the ceiling & uses an old paint roller to smooth it out. Spray the ceiling & the matting, wait the suggested time. Starting from the wall edges push & smooth inwards (it might 'bubble' so you just pull it off again when the adhesive is still not dry). Then use a old paint roller to push from the wall edges to the centre moving back & forth over the same spot several times. Here's a pic of a bit I actually did by myself, without trim:
Where it hung down a little bit, I peeled it down, sprayed a little more adhesive under the edge & used the paint roller again - the trim also holds the edges up. I cut the rattan into manageable pieces before starting - nothing too large! I started off lower down the walls to get my eye in - I did figure, at worst, I'd have to scrap the bit I was using & try again but managed all the bits in one go. I look forward to your own thread! |
|
THI

Thurston Howell IV
Posted
posted
on
Tue, Mar 29, 2016 5:32 PM
I admire your thoroughness in the planning process. The room is coming along nicely. Keep the pics coming. Where did the bar's name come from? |
|
A
AdOrAdam
Posted
posted
on
Wed, Mar 30, 2016 1:34 PM
Hi all The name The Cannibal Cove come from a few things. Jo & I went to the UK Rumfest in 2013, we went to a Martin Cate seminar. Martin told us about the cannibal trio that Smugglers Cove had (after the event, I believe this had been Tiki Kate's). He also told us they were going to the Tiki Pop exhibition in Paris... We (slightly drunkenly) made plans to go. We found out we were having Rosie a short time after but kept the plans. So the 3 of us (plus Jos father & sister Alice) went to the exhibition & had a long weekend in Paris. We all enjoyed it a lot. Here's a few of our pics from the trip:
Rosie also came with us to the Mai Kai in Florida - the cannibal logo was used there too once upon a time. Hands off the Jet Pilot!
It felt like cannibals just kept cropping up, even in rubbishy second hand sales we went to (but they weren't even close). We tossed about a few names around with 'Cannibal' in it - 'Cannibal Room' was too plain, 'Cannibal Lounge' already exists on TC... Jo suggested 'Cannibal Cove' & it just felt like a good fit. Number 1 on our bucket list is a visit to San Fran - for all the good tourist stuff like Golden Gate Bridge & Alcatraz but you can all guess where you'll find me a few nights on that trip. It's as good as 'second part of the name' as any :) There's no getting away from the fact cannabalism is eating people - that's a savage thought incompatible with modern life. Somehow mixing the word in a 'tiki environment' makes it sounds fun. I guess we'll explain it to Rosie as 'cannibals are people that eat you... NOM NOM!!', tickle her lots & nibble her :) she already says 'hello tiki' at some of our carvings & growls. Also, y'know, I think there's a good 'tiki pedigree' there :) |
|
HH
Hurricane Hayward
Posted
posted
on
Sun, Apr 3, 2016 10:44 AM
Great name! Love it. |
|
L

lavish88
Posted
posted
on
Mon, Apr 4, 2016 10:21 AM
Great stuff AdorAdam - I'm about to take delivery of timber tomorrow so I can start my Tiki bar down here in Weston super Mare - i went up to Cheeky Tiki last Friday and picked up wall / roof covering and thanks to your tips will be hopefully putting it up next week.Its outdoors so it will be a steep learning curve no doubt given the weather etc |
|
A
AdOrAdam
Posted
posted
on
Wed, Apr 6, 2016 2:53 AM
Glad you approve of the name Jim :)
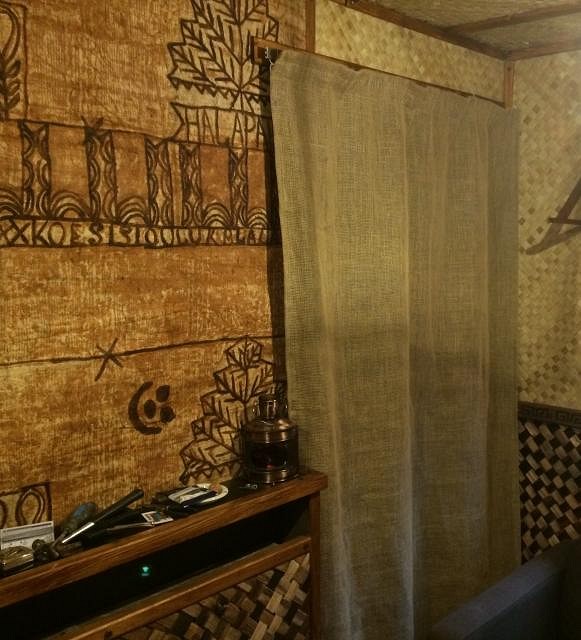
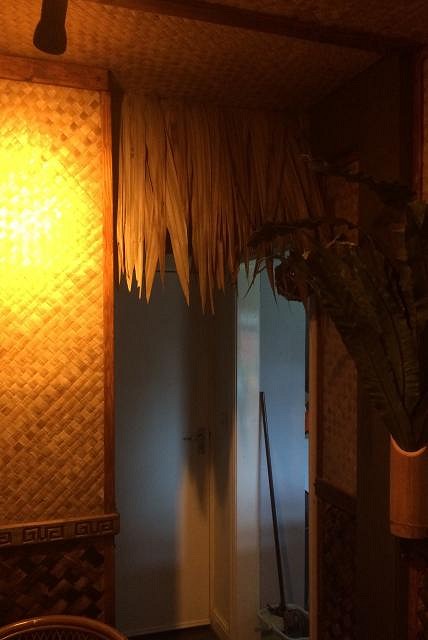
Thanks Lavish88, I look forward to your thread. Depending on the specifics of your space, it could go easy or hard! I'd imagine it's best to assume the weather is always going to worse than you expect it to be when deciding how to set things up. Two thing have been preventing me progressing the space much here:
But we have fixed up a curtain (it needs a little decoration, like ropes & nets strung across it):
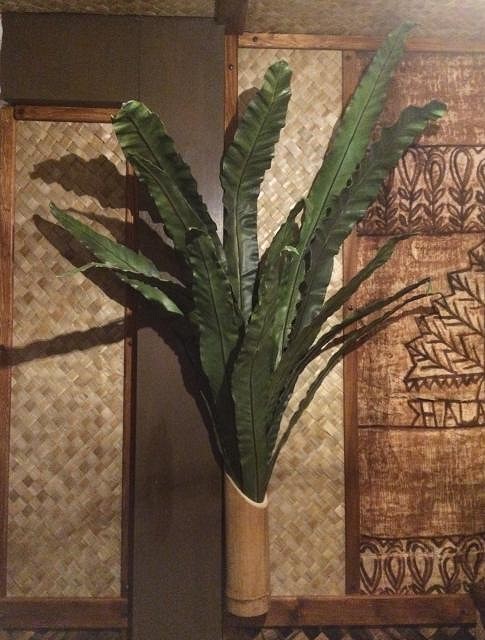
We have attached a bamboo wine cooler to the wall & put our banana leaves in there:
I made a bar out of 3 pieces of wood & attached it as you enter the room (about the same height as the top of a door) to hang a sign off:
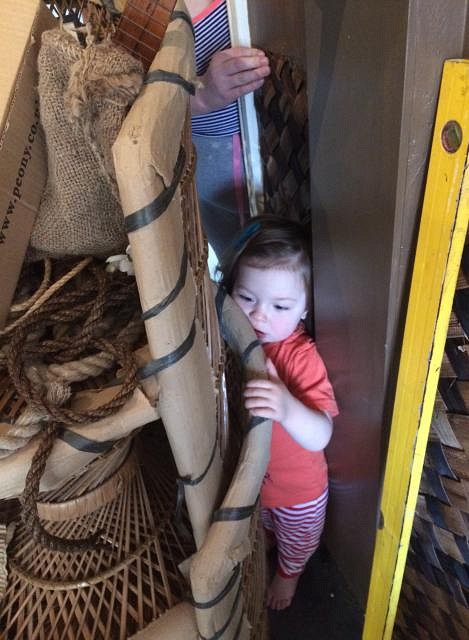
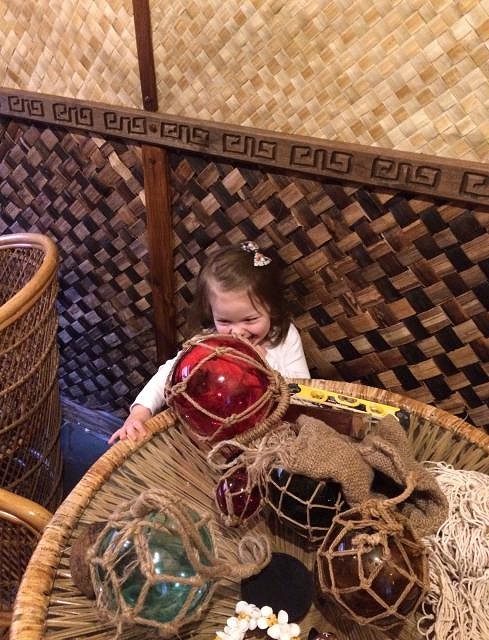
Rosie has been on hand to hinder me selecting where a few other items will go:
I also spoke to Cheeky Tiki, apparently the table & chairs I have were stock left over from fitting out Mahiki in London. Excitingly the thatch is on its way to us today! Cheers all |
|
A
AdOrAdam
Posted
posted
on
Sun, May 1, 2016 12:13 AM
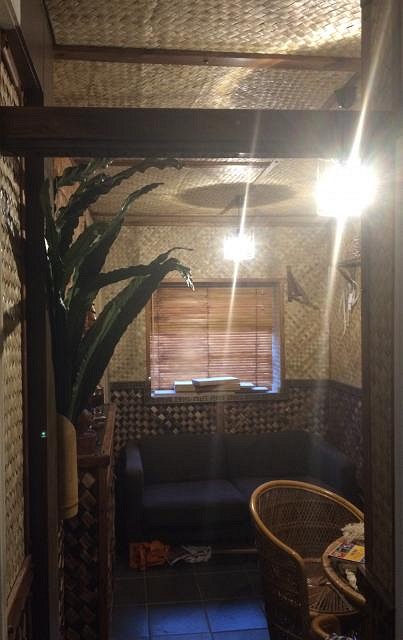
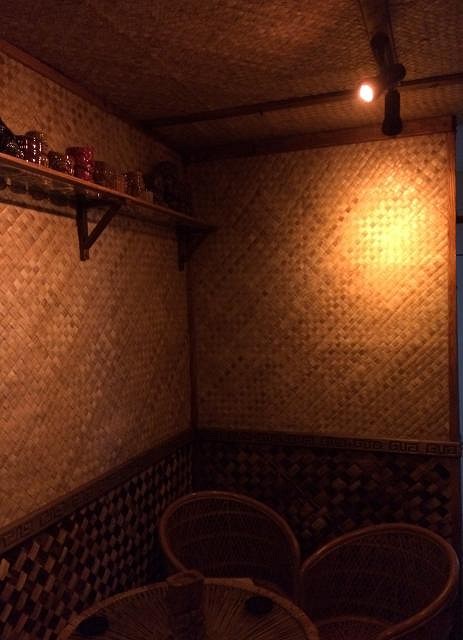
Hi all I've slowly been working on the tiki room - my main aim recently has been to tackle the lighting. We wanted to have 2 'lighting styles':
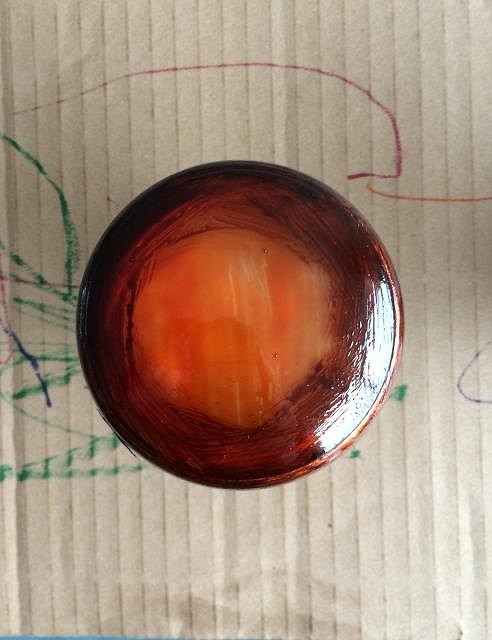
I had brought some really cheap light fittings to make shades out of spare tapa cloth - when I clipped the tapa cloth in place, this didn't look great. The shade cut out too much light & didn't create the light / dark I hoped for. So I decided to go another way, I brought some spotlights & attached them to a 'beam' on the ceiling. For the 'beam' v1 I had used a wooden edging strip which has been a bit too thin (& was slightly wonky) so 'beam' v2 was a nice solid looking (straight) improvement. It was also my first time changing a light fitting so I'm pleased (another thing I can do). There's now 2 sets of 2 spot lights (the main switch is a dimmer switch by the way). I put in some spotlights & was disappointed with the result - too much bright light! Here's a pic:
I looked round for coloured light bulbs in the required fitting (LED, dimmable, screw fit) but couldn't find any; I brought some brown & orange glass paint to paint some 'warm white' bulbs up:
This finally gave me the result I was looking for, nice spotlights with light & dark:
We had friends over for thai food in the tiki room - the 'main lighting' worked well:
Now (slowly) on to the relaxing lighting! Cheers all :) |
|
L
lavish88
Posted
posted
on
Sun, May 1, 2016 4:20 AM
Coming along nicely there AdOrAdam , I've just been sourcing lighting for my outdoor bar and found these at B&Q http://www.diy.com/departments/veezio-edison-screw-cap-e27-28w-led-gls-colour-changing-light-bulb/1007837_BQ.prd which may be ok but for my shelf and main under bar mood lighting have gone with these http://www.lightingever.co.uk/rgb-led-strip-light-waterproof.html . weather has been a main factor down here and trying to put up matting in last weeks hailstorms was impossible so I'm a bit behind.Keep posting as its inspiring to see others here in the UK doing it as well.Best. |
|
H
hiltiki
Posted
posted
on
Sun, May 1, 2016 8:36 AM
Your place is coming along just fine, Rosie is the cutie pie. |
|
V

VampiressRN
Posted
posted
on
Sun, May 1, 2016 11:03 AM
Wow I am truly impressed with your research and well thought out plans. Your lounge is looking great. Thanks for the link to the tapa application thread as I have future project in my lounge with a big piece. GREAT JOB!!! |
|
A
AdOrAdam
Posted
posted
on
Mon, May 9, 2016 3:13 AM
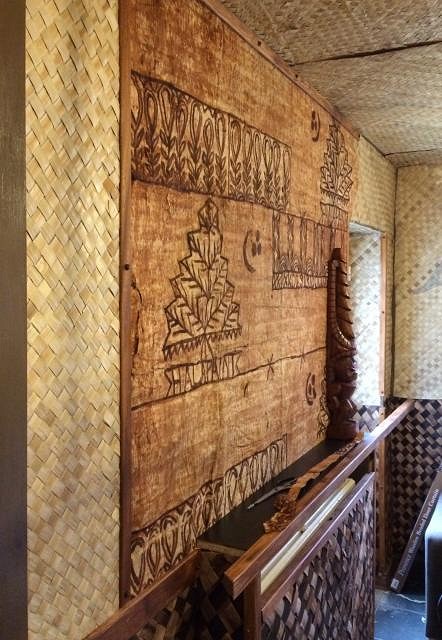
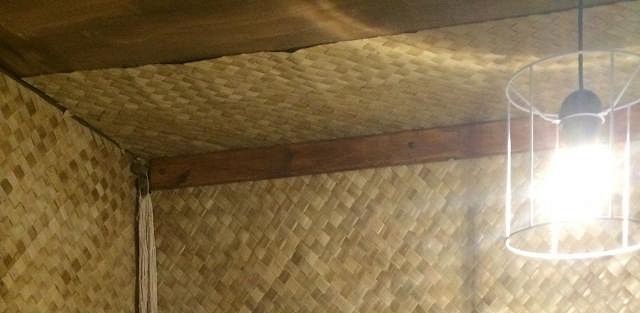
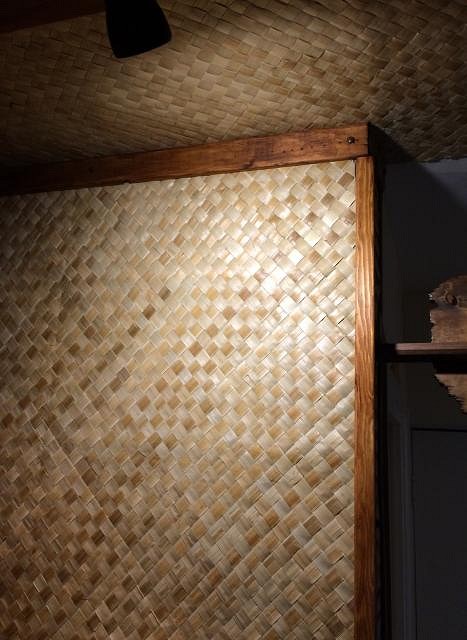
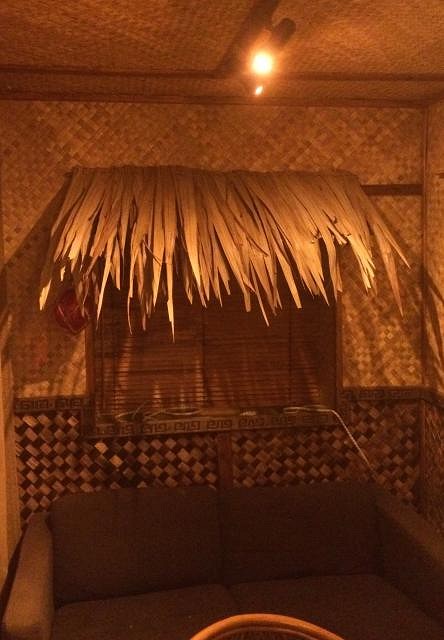
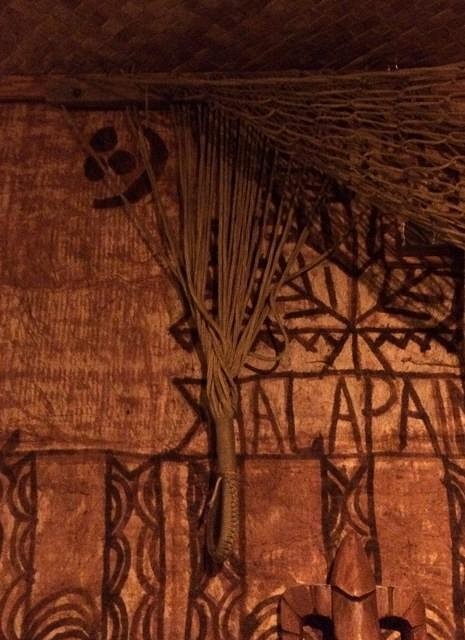
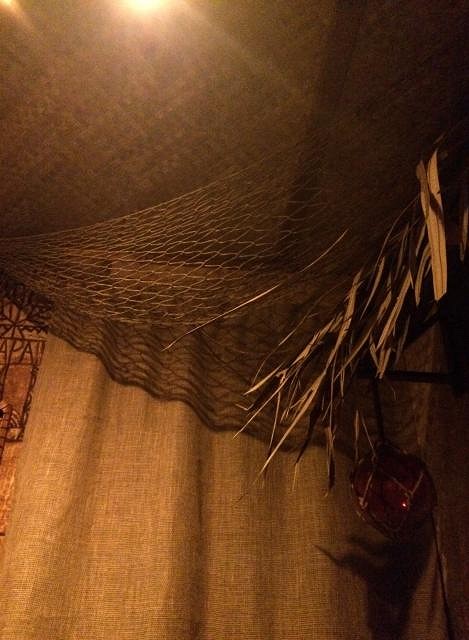
We've had a few developments here. Thatch: I've been looking forward to getting the thatch up in my home bar for a while - I ordered a bundle of nippa thatch way back in January, it was sent separately by Cheeky Tiki in April. First off I got their smallest pack, a relatively inexpensive £15 ($22) - laid out end to end about 6 meters x .50m (I needed about 1.25 meters). This was more than I needed. We removed the existing binding & slightly too short bamboo pole, we replaced the pole with a less flexible pole & re-attached the thatch with a brown leather cord. Not being one to waste the spare thatch I overlayed the thatch a little to make it a little denser (this used about 1.5 meters). I put a strip over the entrance door into the room to make people duck slightly as they enter - I'm 6 foot 3 inches & it just grazes my hair as I enter. All in all (with some throwing away the short or damaged bits) I had used about half the pack. Here's a couple of pics:
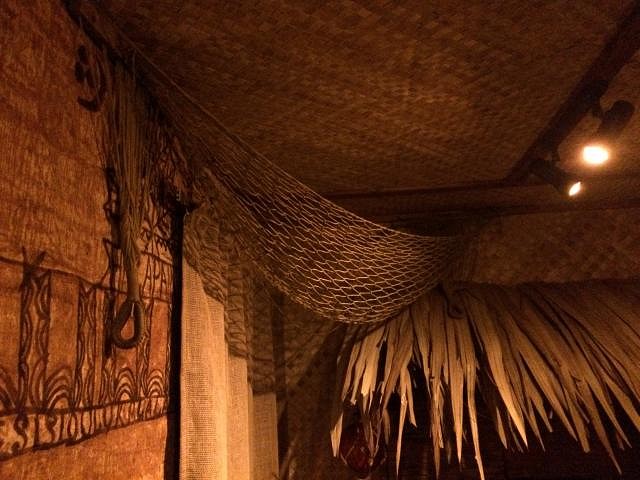
To any one unsure if they should get some thatch, thatch is well worth it! It adds a real 'over the top' element that has already amazed a few people, to quote a friend: "You've got a thatch indoors? No way!" :) A hammock: Jos father gave me an old hammock he has had for 20 years (& probably kept rolled up for about half of that in a leaky shed) - I hasn't been sure what to do with it but I strung it across a corner of the room & I'm really pleased with it. It creates great shadows & has a nice detail on the loop used for hanging - here's a couple of pics:
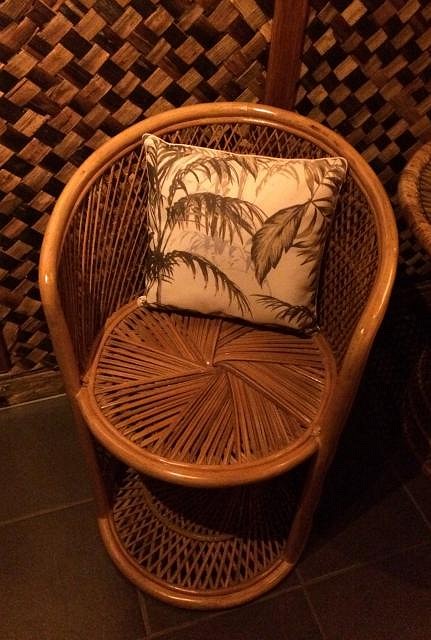
Cushions: After saying earlier in this thread I'm not a fan of Hawaiian floral prints, some tropical style print cushions turned up in a local supermarket so I got some - a couple is just right to add a little bit of pattern without adding too much chintz. Here's a pic:
|
|
H
hiltiki
Posted
posted
on
Mon, May 9, 2016 9:21 AM
I am loving everything you are doing with this place, keep us posted. |
|
L
lavish88
Posted
posted
on
Mon, May 9, 2016 11:58 AM
Great work , did you stain the matting below the dado rail as I'm in two minds with mine from cheeky Tiki , its very pale and I love the darker colour you have used. |
|
A
AdOrAdam
Posted
posted
on
Mon, May 9, 2016 1:27 PM
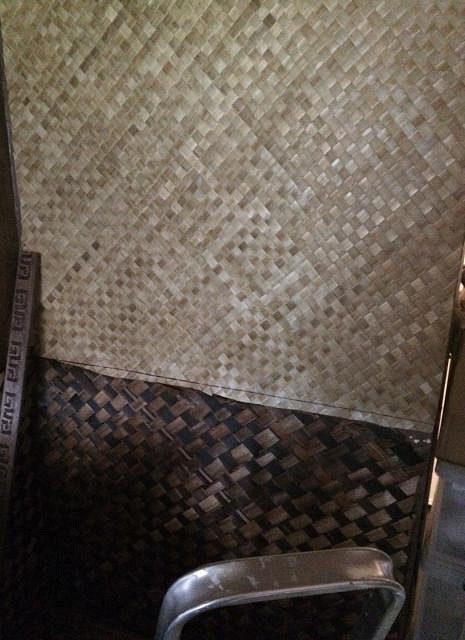
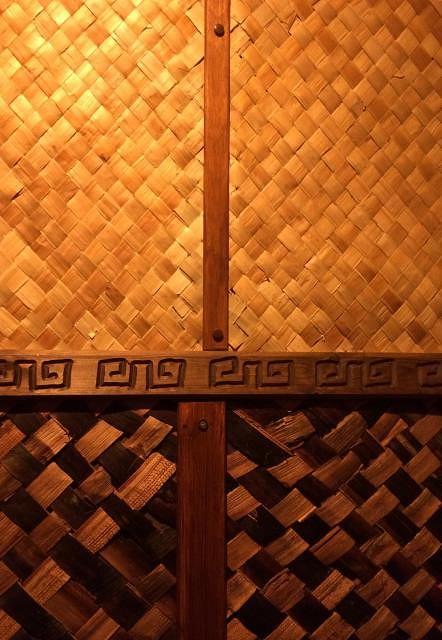
The mattings I used from Cheeky Tiki are:
Described as:
Described as: Both are found here. Considering both mattings used have the same description ("a little tougher but still manageable"), the Abaca matting was a real b*tch to cut & stick compared to the other - I cant recommend it from a practical point of view. It's comparable to wallpapering a wall with cardboard that seemingly wants to fall apart at the edges (the Abaca) to a thick lining paper that stretches slightly & can be folded to trim around the edges (the thick Lauhala). The Abaca pattern also 'warps' slightly as you pull it. Here's a pic show a bit of wall where I did repair work on both types of matting because they were cut a little too short:
You can judge for yourself where the repair has been more successful. But I figure you're going for an 'all over feel' so it doesn't bother me. I like the way it looks & did get it up ... Without it there would definitely be less texture in the room. After a few drinks in dim lighting it looks great :wink: Maybe consider it for a feature wall or section rather than a whole room, i would definitely avoid putting Abaca matting on the ceiling! |
|
L
lavish88
Posted
posted
on
Mon, May 9, 2016 3:28 PM
Thanks Ad , They only had the large Lauhala when i went and I needed to take it there and then .I guess spraying it would be the only way to colour change but a nightmare to do without the right kit and a spray booth ,not a windy garden. I found a good tip on here somewhere and thats to gaffer tape the back before you cut and I had no problems when using the contact adhesive and the gaffer tape and the wretched stuff didn't crumble at the edges and seemed to keep its shape better.I think your two tone looks stunning. |
|
A
AdOrAdam
Posted
posted
on
Fri, May 20, 2016 5:39 AM
I finally got the bar room sign up last weekend:
|
|
W

W8N2Surf
Posted
posted
on
Mon, May 30, 2016 11:23 AM
Really nice work, I especially love the way you put the banana leaves on the wall via the bamboo holder. Looking forward to more overall pictures! |
|
L
lavish88
Posted
posted
on
Mon, May 30, 2016 1:02 PM
Hi AdOrAdam , nice work , did you have the sign shot-blasted to get the weathering on the edges? |


Pages: 1 34 replies