Tiki Central / Home Tiki Bars
Ki'o wai Lounge (bar construction page 3)
Pages: 1 2 3 4 5 6 7 8 338 replies
|
J
jimsflies
Posted
posted
on
Thu, Jul 25, 2019 10:55 AM
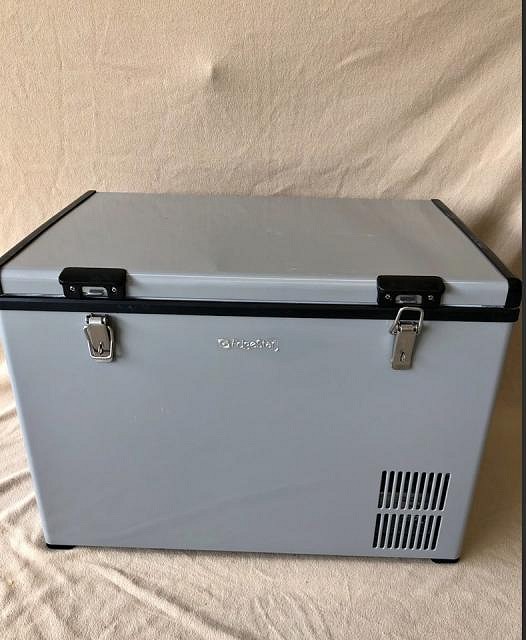
I may have solved my ice dilemma. I just negotiated for a portable freezer that I should be able to build a wood cabinet around similar to the cooler project I did. 63 qt capacity...would have liked the 80 qt. model but I think this should do the trick for daily consumption. Maybe even get some ice trays and make my own rather than going up to the gas station for ice.
|
|
L

littlegiles
Posted
posted
on
Fri, Jul 26, 2019 5:23 AM
Nice score! |
|
M
MaukaHale
Posted
posted
on
Fri, Jul 26, 2019 9:40 AM
Nice idea! |
|
H

Hamo
Posted
posted
on
Sun, Jul 28, 2019 2:18 PM
I'm enjoying your pictures, too, so thanks for keeping up with posting. That "aerial" shot of the bar and rearranged seating area is great. I'm looking forward to the upcoming freezer project. |
|
J
jimsflies
Posted
posted
on
Mon, Aug 12, 2019 7:51 PM
I ended up getting the freezer. Going to be awesome to have ice all the time. It gets down to -9-degrees outside. Will post some photos when I make the cabinet. I did a un-tiki thing and upgraded the TV in the bar. When football or movie night isn't on, it looks cool with erupting volcano playing.
I also like the rough seas and thunderstorm video with sound system on. [ Edited by: jimsflies 2019-08-12 21:45 ] |
|
T
tikiskip
Posted
posted
on
Tue, Aug 13, 2019 6:34 AM
Very cool! You could get some computer whiz to have the image flip to your drink menu and or logo as well during parties. Or even photos of your past parties, Hukilau ect... |
|
J
jimsflies
Posted
posted
on
Tue, Aug 13, 2019 6:46 AM
That's a great idea. |
|
T
tikiskip
Posted
posted
on
Tue, Aug 13, 2019 1:42 PM
A have a few friends that own bars. |
|
J
jimsflies
Posted
posted
on
Fri, Aug 16, 2019 8:57 PM
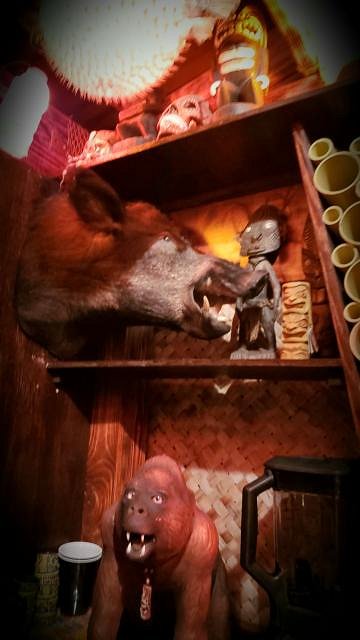
Question. Can a tiki bar have a mounted boars head? |
|
C
Commodore
Posted
posted
on
Sat, Aug 17, 2019 6:08 AM
only if he has a lei on! |
|
T
tikiskip
Posted
posted
on
Sat, Aug 17, 2019 2:18 PM
Mine does. |
|
J
jimsflies
Posted
posted
on
Sat, Aug 17, 2019 9:54 PM
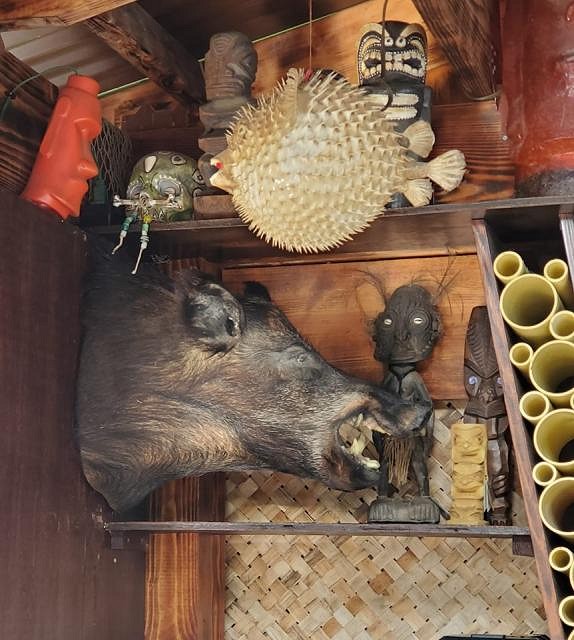
I've had this boar forever and most of the time its been stored in the closet (it didn;t fit well with our inside decor). The idea to put it in the bar popped into my head. I like Commodore's lei idea. Here's the first pics after hanging today. I think I will up-light the shelves...hopefully making it less boaring and more hog-wild. :)
[ Edited by: jimsflies 2019-08-18 09:35 ] |
|
H

Hearn
Posted
posted
on
Fri, Aug 23, 2019 5:55 AM
THat wild boar is disgusting. I LOVE IT! |
|
T
tikiskip
Posted
posted
on
Mon, Aug 26, 2019 10:13 AM
Cool! The yellow light bulb should not be able to be seen when you look at the boar. |
|
J
jimsflies
Posted
posted
on
Mon, Aug 26, 2019 5:20 PM
Is the yellow light facing toward the back of the boar or toward the back wall? |
|
T
tikiskip
Posted
posted
on
Tue, Aug 27, 2019 5:17 AM
All you would need is a bare bulb like even a C7 Christmas light will work, what you want to light with this bulb is the wall behind the Boar. Now you come in from the front with a darker color like red or blue and highlight the Boar. This will make the Boar pop a bunch more as you look at it, It's like painting with light. Look at the way Disney or even restaurants light the stuff they have for decoration and you will see tips on how to do this. Try different colors till you find what you like. But a darker color in the back may get washed out and not show up if you put a brighter color in the front. This is a good time to find a pin spot as Halloween is coming. You should use many pin spots in your bar they really work well in the tight spaces. PS I did start a new light you might like. |
|
T
tikiskip
Posted
posted
on
Tue, Aug 27, 2019 5:28 AM
See like this....
This is a pin spot, I found one at a thrift store for under ten bucks. [ Edited by: tikiskip 2019-08-27 05:41 ] |
|
J
jimsflies
Posted
posted
on
Tue, Aug 27, 2019 7:09 AM
Yeah that's cool. I've been thinking about tackling the lighting on the shelves so that would dove tail into it. Looking forward to seeing the light you are working on. |
|
T
tikiskip
Posted
posted
on
Sat, Sep 7, 2019 2:13 AM
"I've been thinking about tackling the lighting on the shelves" You know putting lighting under your booze bottle shelf would make a nice glow that would bleed into your space, and it would make finding your liquor needed for drinks more easy. Best to put dimmable lighting under plexi glass for booze shelf. |
|
J
jimsflies
Posted
posted
on
Sat, Sep 7, 2019 11:46 AM
Good idea! |
|
L

leevigraham
Posted
posted
on
Sun, Sep 8, 2019 3:53 PM
Here's my lighting setup:
If you want to go full custom here's a bunch of useful links for programmable LED's http://www.tikicentral.com/viewtopic.php?topic=53212&forum=20&vpost=796163 |
|
T
tikiskip
Posted
posted
on
Mon, Sep 9, 2019 3:49 AM
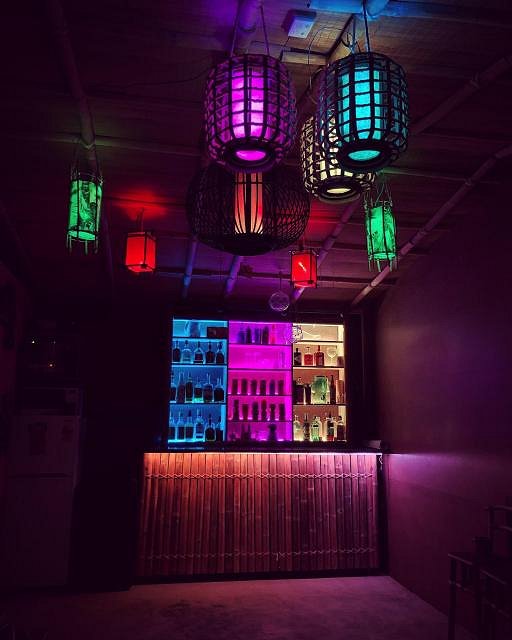
Looks good. Now if you had the bottles lit from below in say white or a yellow, and then the bottles lit from behind in say blue the bottles would pop more because of the different colors and the fact that the light from below would hit just the bottles mostly. Dimmers help you dial it all in so you don't get yer eyes blown out by too bright lighting. Wish you lived closer as I would love to come and help with the lighting as that is in my mind the fun part. But any lighting helps most of the time. The best décor is not so great in the dark as you can't see it. My brother used to joke that I had TONS of lights but you can't see a damn thing, dim and moody is where it's at for me. |
|
J
jimsflies
Posted
posted
on
Mon, Sep 9, 2019 11:54 AM
I've been admiring your colorful lighting on your thread. Your lighting has helped prompt me (along with Tikiskip) to go to the next phase...now I just need to get the stuff ordered and get on it. I like the colors as well as the mirroring of the colors between the back bar and hanging lights. My wife has been wanting me to get the underlit shelves for the booze bottles for a few years now. I'm working on sourcing someone to cut the acrylic. Hoping to just duplicate the existing wood shelves so I don't have to rework too much. [ Edited by: jimsflies 2019-09-09 12:18 ] |
|
T
tikiskip
Posted
posted
on
Mon, Sep 9, 2019 5:49 PM
"I'm working on sourcing someone to cut the acrylic" Just get a disk grinder bit for a Dremel and cut it your self. |
|
J
jimsflies
Posted
posted
on
Mon, Sep 9, 2019 6:49 PM
A question about the front edge of the shelf....I'm wondering if that should be visible? If I light with leds, the front edge is going to have a "neon" look to it I think. Might be better off to leave the visible front of the shelf wood. What are your thoughts on this? |
|
T
tikiskip
Posted
posted
on
Tue, Sep 10, 2019 4:46 AM
I say wood. But then I like a soft glow so others may have a different take on this. Just be sure to make the Plexi able to be lifted right out of the shelf frame because you will need to be able to clean this shelf often, and even change the lights every now and then. NOW you could have smallish holes in the front of the wood shelf part that would face people and even put resin tiki that would glow the same color as the lights under the bottles. That might be cool. |
|
J
jimsflies
Posted
posted
on
Tue, Sep 10, 2019 8:59 AM
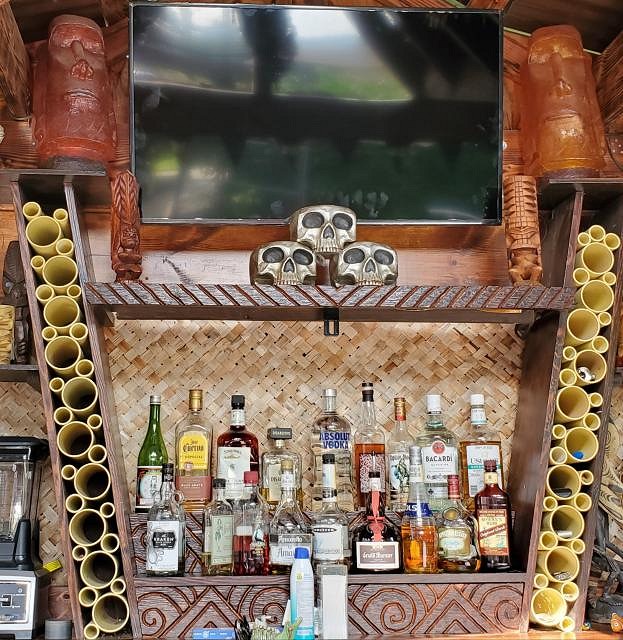
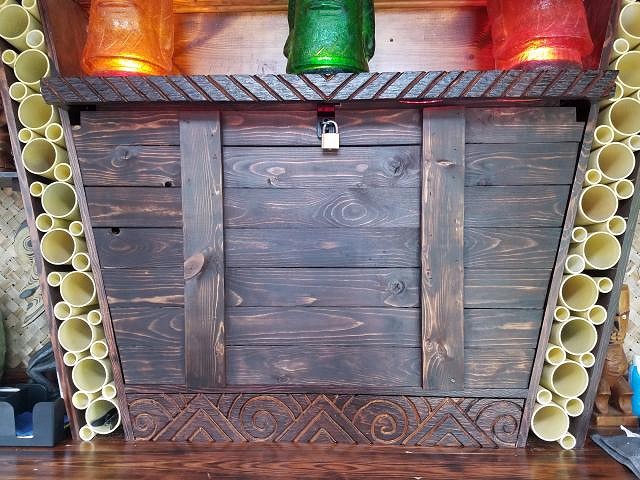
Here's a couple shots showing the existing booze shelves I have. There are two levels. The front carved panel easily pops out and provides storage for "junk" under the booze (its essentially the bar's junk drawer...I keep spare light bulbs, cigar cutter, lighters, and other nuts/bolts. It would also easily be able to house LED lights to up-light shelves). I made the booze shelves lockable since its an outside bar. There is a wood cover that has two wooden dowels on the bottom that fit into holes drilled in the bottom shelf so it has to lift up and out and when locked at the top its fairly secure. Hopefully, I can modify shelves without having to reinvent the wheel on my "booze safe".
|
|
T
tikiskip
Posted
posted
on
Tue, Sep 10, 2019 9:20 AM
That's great! |
|
M
MadDogMike
Posted
posted
on
Tue, Sep 10, 2019 10:35 AM
I have a project that needs some bamboo circles but it is such a pain in the butt to cut cleanly. I like your idea of using PVC for that! |
|
J
jimsflies
Posted
posted
on
Tue, Sep 10, 2019 11:48 AM
Similar to one of my ideas: cut out rectangle out of the center of the existing shelf and use a (rabbet?) router bit to form a lip so that a piece of plexi or will fit flush with the top of shelf. (The top shelf is different and I think will be easier since it isn't part of the booze safe.)
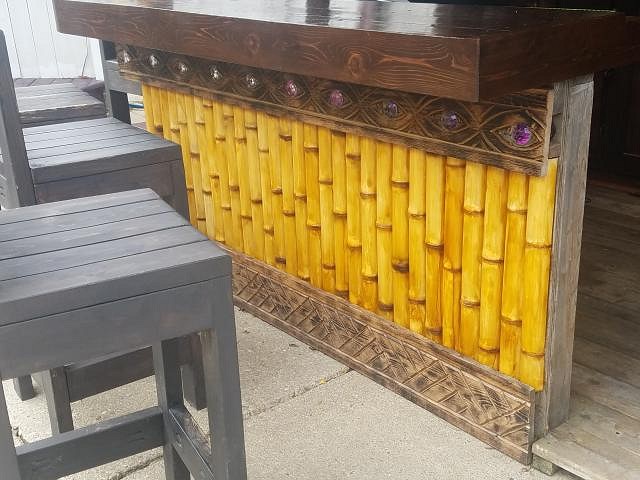
I just gave it a pale yellow spray paint to take the white out of the pvc. You could also use shellac like I did with the faux bamboo on the front of the bar. I think its a better result, but is more of a pita to work with and probably doesn't matter if you are just making short sections.
[ Edited by: jimsflies 2019-09-10 12:13 ] |
|
J
jimsflies
Posted
posted
on
Tue, Sep 10, 2019 11:59 AM
delete double post [ Edited by: jimsflies 2019-09-10 12:10 ] |
|
T
tikiskip
Posted
posted
on
Tue, Sep 10, 2019 4:10 PM
"use a (rabbet?) router bit to form a lip" Yeah that would work, a trim router for Formica would be best as the larger router will get in the way on the sides. Could also use a jig saw and just put small trim molding on the inside to make the Formica fit the same way. Jig saw would get close on the ends. |
|
T
tikiskip
Posted
posted
on
Wed, Sep 18, 2019 7:40 AM
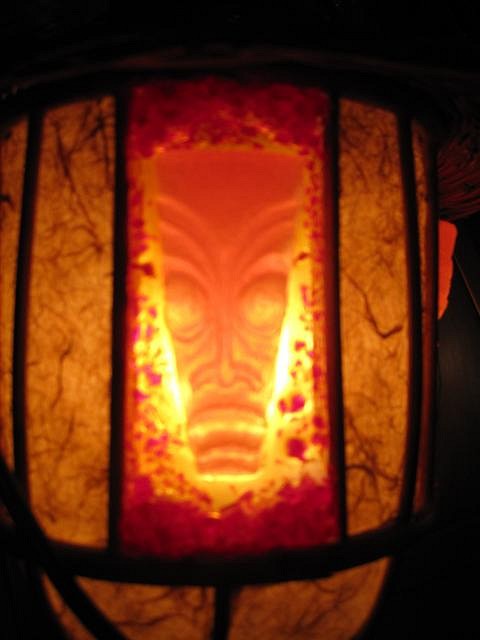
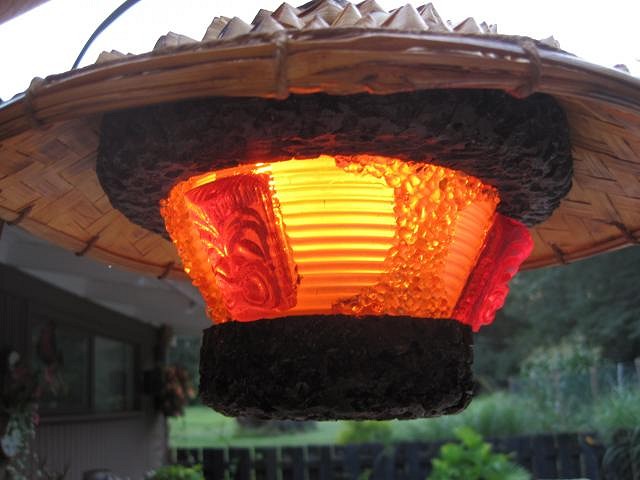
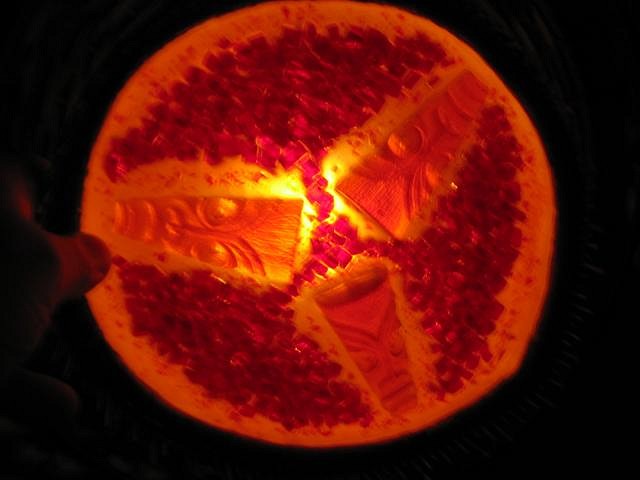
See make yer own resin tiki.
|
|
J
jimsflies
Posted
posted
on
Wed, Sep 18, 2019 8:33 AM
Cool. Did you make a mold of another tiki? |
|
T
tikiskip
Posted
posted
on
Wed, Sep 18, 2019 11:25 AM
Yes I did. But just buy the molding putty at Hobby lobby the kind in two parts you mix, then add resin you mix from the same place. Good luck! |
|
J
jimsflies
Posted
posted
on
Thu, Sep 19, 2019 8:25 PM
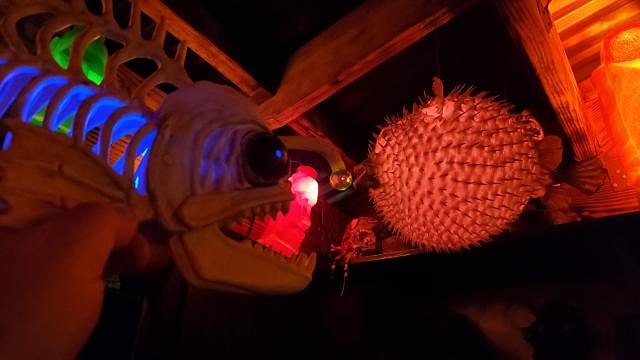
Love this time of year. Picked up this cool skeleton anglerfish.
|
|
L

leevigraham
Posted
posted
on
Thu, Sep 19, 2019 9:10 PM
Saw the exact same one in Australia! |
|
K
kala60
Posted
posted
on
Sat, Oct 12, 2019 9:50 AM
Awesome Build. Spent my whole morning reading and checking out the links. The roof is inspiring. I'm at a loss for a roof design but just started the bar anyway. Thanks for your sticking with the postings. |
|
J
jimsflies
Posted
posted
on
Mon, Oct 14, 2019 7:43 AM
Thanks for your kind words. The roof was a pita to build. Maybe a real carpenter would manage better than I did. Every angle on the roof supports was unique (even side to side they varied somewhat do to not being a great carpenter and slight curvature of boards). While it did turn out pretty cool, if I built another I would consider a level gable design rather than sloping. Though I do like the slope design because it has an exotic tiki look and also because it minimizes the overall profile of the bar near our property line. |
|
J
jimsflies
Posted
posted
on
Mon, Oct 14, 2019 8:12 AM
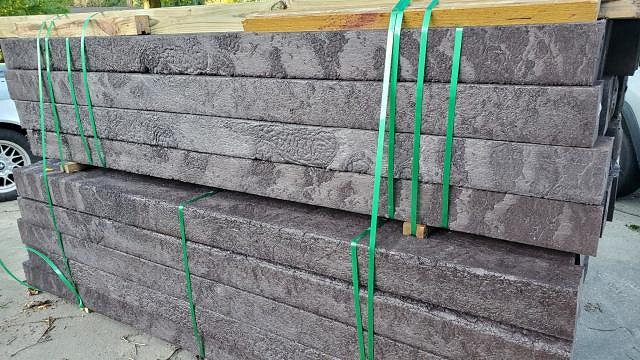
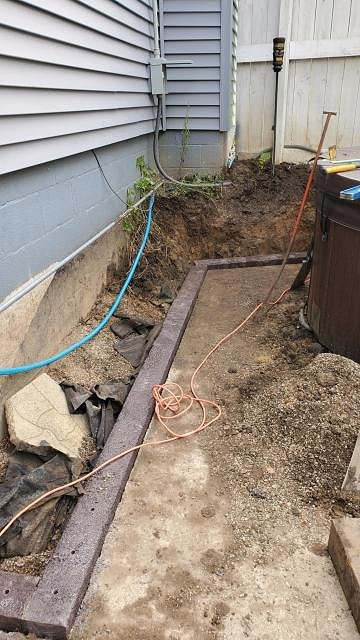
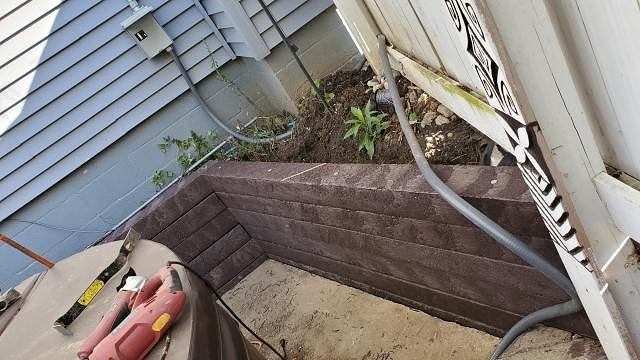
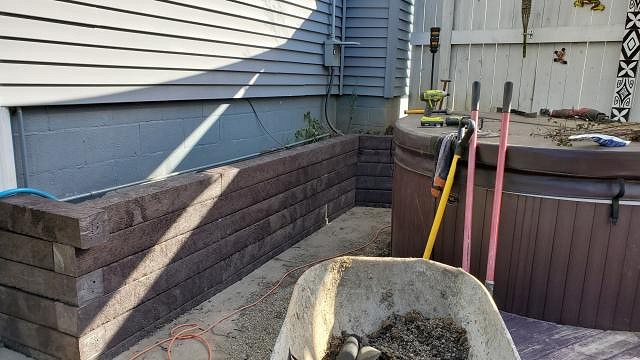
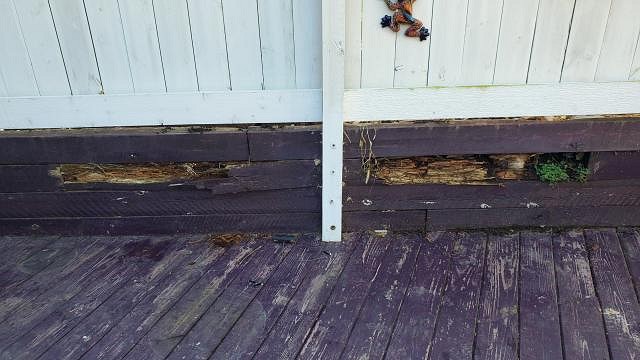
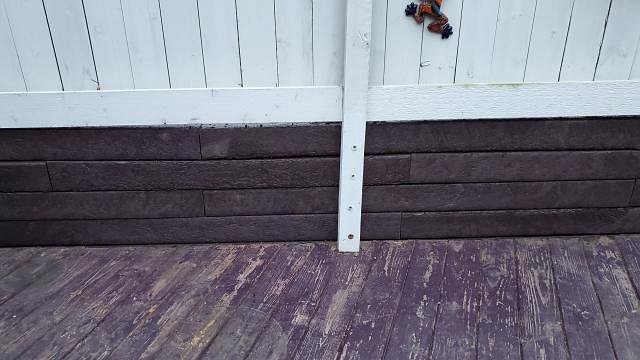
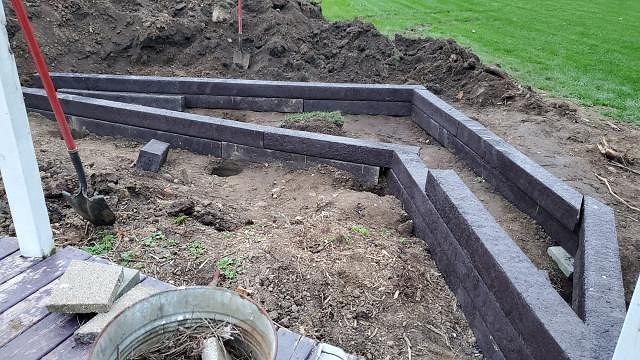
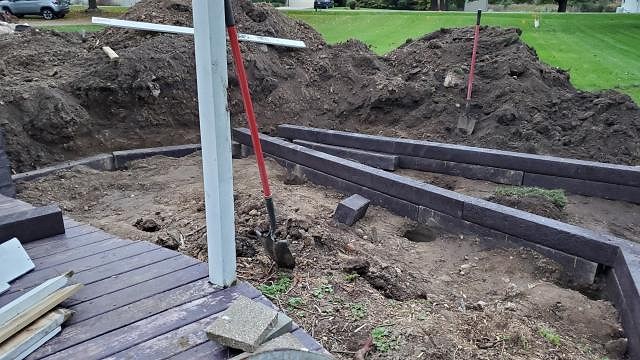
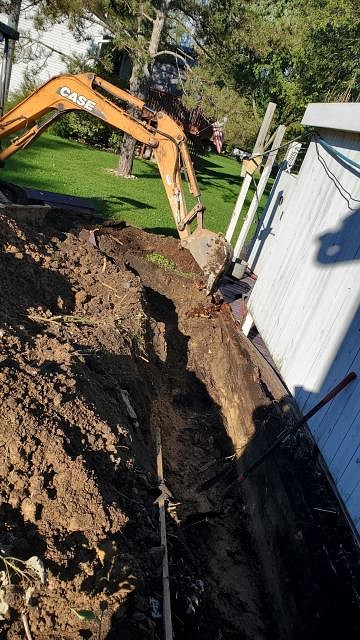
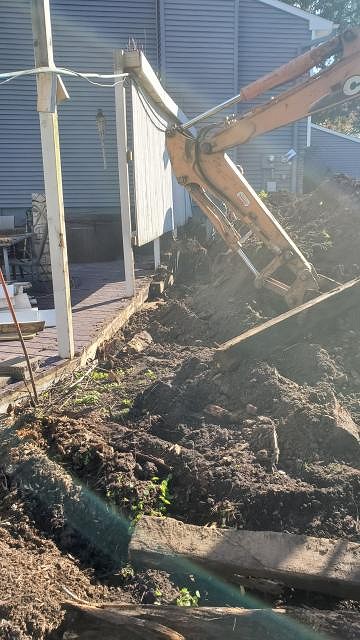
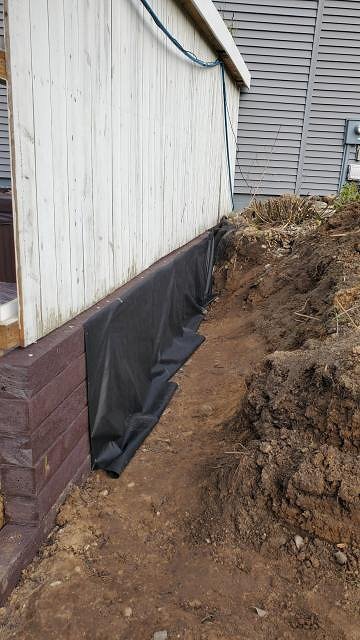
I'm currently working on rebuilding the retaining wall that winds around the side of the house and front of the lounge area. The retaining wall is only 10 years old. It was made from treated landscape timbers. I would never recommend using treated landscape timbers again for anything. The wall has been showing signs of rot for 3 years now. For the bottom row that was completely buried I used treated 4x6's and those held up very well. For the replacement I decided to try 6x6 solid recycled plastic timbers. I completed the section near the house and hot tub on Saturday. This section was a lot of hand removal and digging. All the dirt had to be removed next to the house because I had a layer of pea-stone for drainage that caused the dirt above it collapsed when working on the wall. I have a guy with a backhoe on line to work on the next section. If we can a few days without rain, I'm hoping to start that next weekend. Every week it rains an 1-inch on Friday! This job probably should have been done back in August when the conditions were dry. Though doing this work in cooler weather is more comfortable.
I hope these timbers last (and look good) forever (or at least till I'm not around to care)! This wall will not be as easy to remove as the rotten timber wall. Its got some serious spikes holding the boards together and the boards are very, very heavy...I'd guess 100 pounds each. So removing several spiked together at once would likely require equipment. Concrete retaining blocks would have some merit, but I didn't think it would look quite right with the deck and fence up against it. One cool thing about the plastic timbers is that I estimate my project will save over 30 cubic yards of landfill space (assuming the plastic would have ended up there) and 3/4 acre (every time the timbers needed to be replaced) of harvested forest. :) Also part of this project is an expansion of the decked area to include another entrance from the front yard. When I built the lounge area originally there was a large blue spruce which has since been removed due to a disease. My current front entrance is angled toward the neighbors house on the side of the deck. I'm planning to add an entrance facing our driveway so its more obvious where to enter. [ Edited by: jimsflies 2019-10-14 08:34 ] |
|
J
jimsflies
Posted
posted
on
Mon, Oct 21, 2019 8:44 AM
More progress on the retaining wall replacement and expanded entry to the Lounge. rotten wall new wall New entry beginning construction. Wishing that my chop saw could cut through in one pass. (I have to flip the timbers to cut through, doubling the cutting work.) Plus there are a lot of angle cuts making for a slow go on this section.
|
|
K
kala60
Posted
posted
on
Tue, Oct 22, 2019 5:36 AM
Awesome redo. The $$ of those has to be a bit?h. You'll be happy and proud when it's done. Nice Hot Tub area. Just say yes to the backhoe cost. Your Back is worth it. I'm feeling a bit Sloth-ish about my efforts. Keep posting your progress. |
|
T
tikiskip
Posted
posted
on
Thu, Oct 24, 2019 5:12 AM
"Awesome redo. The $$ of those has to be a bit?h." You know I come off as a downer when I tell people "don't put up thatch outdoors in this area" Doing it the way you are is so smart, sure it costs a lot at the start but those will be still there when you are dead unless somebody rips them out. It blows you away not to be able to do it, but it does happen. The fence we are building would cost every bit of ten thousand dollars or more if we had somebody else do it for us. So do it now while you can and enjoy it for the rest of time. Great job!! |
|
J
jimsflies
Posted
posted
on
Thu, Oct 24, 2019 12:19 PM
Thanks for the kind words guys. Tikiskip you are right about materials not lasting outdoors in our midwestern climate. 6x6 pressure treated landscape timbers began to show rot in 7 years...and near failure in 10. So strands of grass don't stand a chance if exposed to our climate. A little more background on the project. I got a quote from a guy earlier in the summer and he wanted $12,000 to replace and construct the retaining wall, including the new section. This did not include the fence and deck, and it was treated lumber not the solid plastic. While I think the quote was the "I don't really want this job, but if he pays me ridiculous money, I will do it"-quote, I was so put off by the price rather than get more quotes I decided to DIY it. After all, the entire thing is a DIY already...why stop now?! 68 plastic timbers cost $2500 at Mendards + $90 to deliver (delivery was totally worth it, the plastic timbers are heavier than heck and I don't have a truck). In addition, I also purchased and had them deliver with the timbers 15 bags of quickcrete for posts and (9) 14-foot long posts (~$400). I also have ~$200 into miscellaneous supplies including spikes, rebar (to pound through the first row into the ground), drill bits for spikes/rebar, landscape fabric to line the walls prior to backfilling to prevent dirt from escaping through any gaps. My wife wasn't too please about this project when she saw the dirt pile. While I told her what I wanted to do many times, I don't think she understood what it would take to accomplish it. But she was mostly upset because she's concerned I'm not in good enough shape to do it. Of course, I knew it was more digging than I want/could to with a shovel and hired the guy with a backhoe. He ended up charging $1000 (initial bid was $600), but him and his son worked almost all day Saturday and helped rebuild the second section of retaining wall, plus he's going to come back with equipment and fill the planter and level whatever is left of the dirt pile, the original bid was wishful thinking that it could be done in one weekend. Right now I have 4 days over 3 weekends of time into the project. Planning to hit it hard again this weekend, weather permitting. My goal for this season is to get the wall built, back-filled, and fence reconstructed before the snow flies (or its too cold to work outside). I'll get the steps and deck next spring. Here are a couple more action photos from last weekend:
[ Edited by: jimsflies 2019-10-24 12:23 ] |
|
T
tikiskip
Posted
posted
on
Mon, Jan 20, 2020 8:24 AM
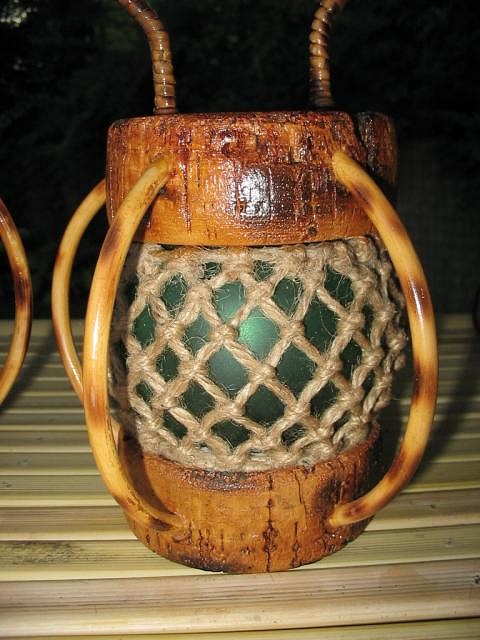
Thought of you this weekend as I found some cork floats, you had asked where I get them. Best answer is ya get em where you find em when you find em. BUT anymore these can be as much as $20.00 bucks each! Did ok on the price, but heck have been looking for YEARS. Good luck, lets see more this spring. |
|
J
jimsflies
Posted
posted
on
Mon, Jan 20, 2020 6:20 PM
Great! Can you make me one of those skip float lights with them?
|
|
T
tikiskip
Posted
posted
on
Tue, Jan 21, 2020 4:23 AM
Yes I can do that. BUT these are bigger corks so the light I can make could be bigger than that one. Will try to have a few ready to pick from before that party you were talking about. |
|
J
jimsflies
Posted
posted
on
Thu, Jan 23, 2020 7:20 AM
Its hard to tell what the size is. I'm not too picky...well I am, but I like your stuff. :) |

