Tiki Central / Other Crafts
Tiki Tiger Studios: Big long Egyptian trip report!
Pages: 1 2 3 4 5 6 7 288 replies
|
M

MadDogMike
Posted
posted
on
Thu, Feb 16, 2012 6:28 AM
Some interesting reading on the Irlen site. Hang in there Tiger! |
|
Z

zerostreet
Posted
posted
on
Thu, Feb 16, 2012 7:00 AM
Yeah, hand in there Tiger! I know that when one is down or sick, it is difficult to get some art down on paper. However, I've found that sometimes sitting somewhere, like a cafe or something and sketching/drawing people or the things around you actually can lift the spririt! Best of luck! |
|
D

danlovestikis
Posted
posted
on
Thu, Feb 16, 2012 8:15 AM
Hi Tiger, I'm sure we all wish we could give you a big hug and a smile. You have a vision glitch. It's so good to have a diagnosis. Even if there isn't a fix today there could be one tomorrow. MadDogMike is smart to say go to the site and read up. Pounding the pavement is better than sitting home because you will meet people and the right person is out there someplace. When you are home just start to doodle and then an idea will pop into your head and off you will go into your next project tiki or not. You are a fine artist. It's good to be in motion to cure depression. Remember it's a chemical imbalance triggered by circumstance and drinking enough water will help clean it out. Best Wishes and keep in touch, Wendy |
|
T

tigertail777
Posted
posted
on
Wed, Mar 28, 2012 6:38 PM
Just a quick update because I am sure by now you all think Tigertail fell off the face of the damned earth LOL. I have a new job doing janitorial at nights so will have a bit of income coming in, and I have done a major re-arrangement of my bedroom (and got rid of a lot of stuff) to install a mini art studio. I just got my new glass top drafting table put together and into the closet (I removed the closet doors to give me a little cubby hole to put the drafting table into). So, once the dust settles I will be back to making some Poly Pop art goodness. :) |
|
D
danlovestikis
Posted
posted
on
Wed, Mar 28, 2012 9:26 PM
Hey TT777 that all sounds great. Thank you for catching us up. You've been missed. Art will clear your head and feed your soul. You'll be smiling as you create. God Bless, Wendy |
|
M
MadDogMike
Posted
posted
on
Wed, Mar 28, 2012 9:40 PM
Tiger, congrats on the new job and the new "studio" |
|
V

VampiressRN
Posted
posted
on
Wed, Mar 28, 2012 9:43 PM
T777...you write very well and obviously have a lot of insight into yourself. That is more than many people have so feel proud to have that. As a nurse and an educator I know there are ways to be evaluated and obtain help with LD. I don't know if this website will help, but if you are already getting some help that is great. Your artwork is great...love the concepts and the energy you have. Keep up the great work!!! |
|
T
tigertail777
Posted
posted
on
Sat, Apr 28, 2012 6:21 PM
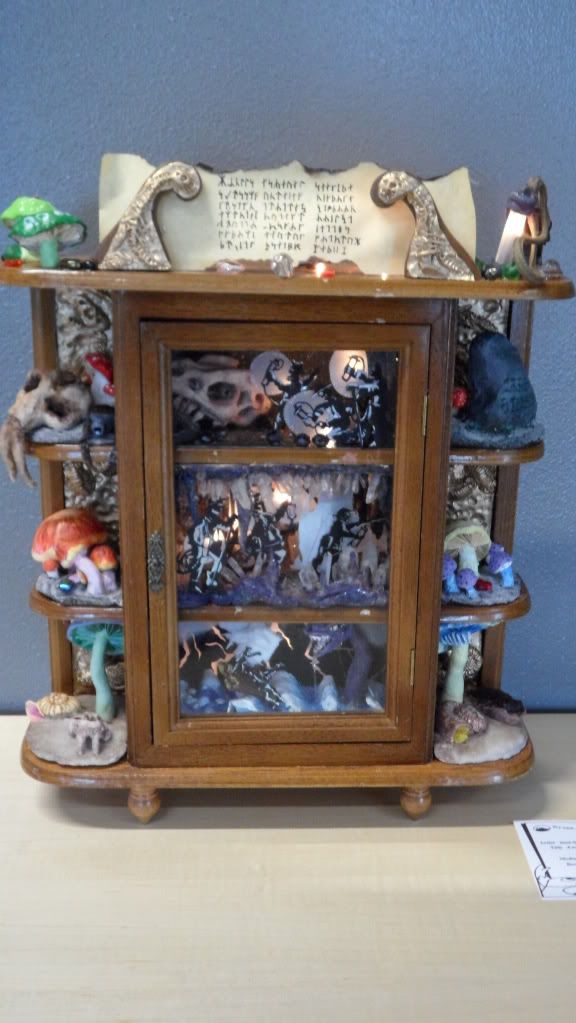
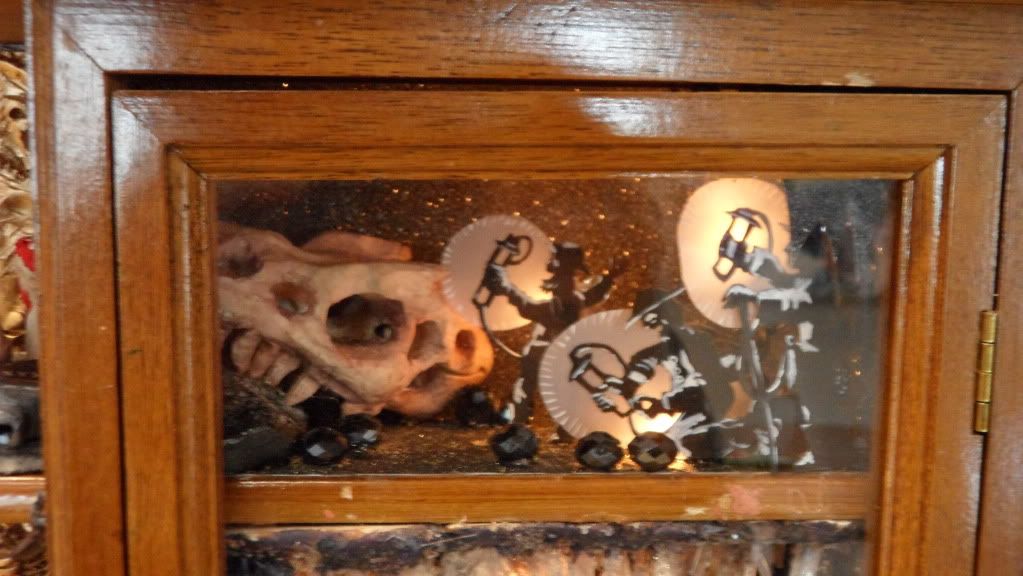
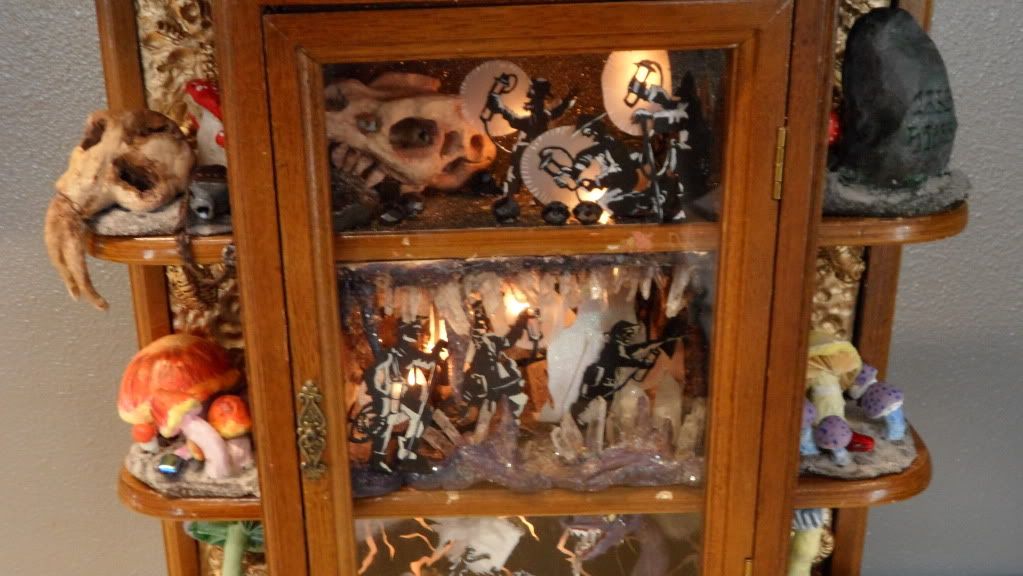
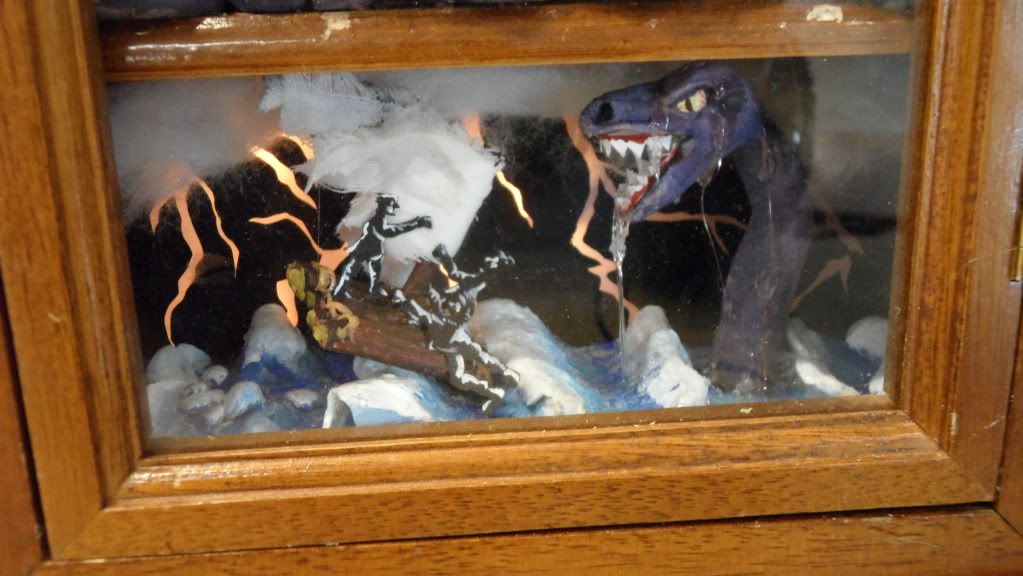
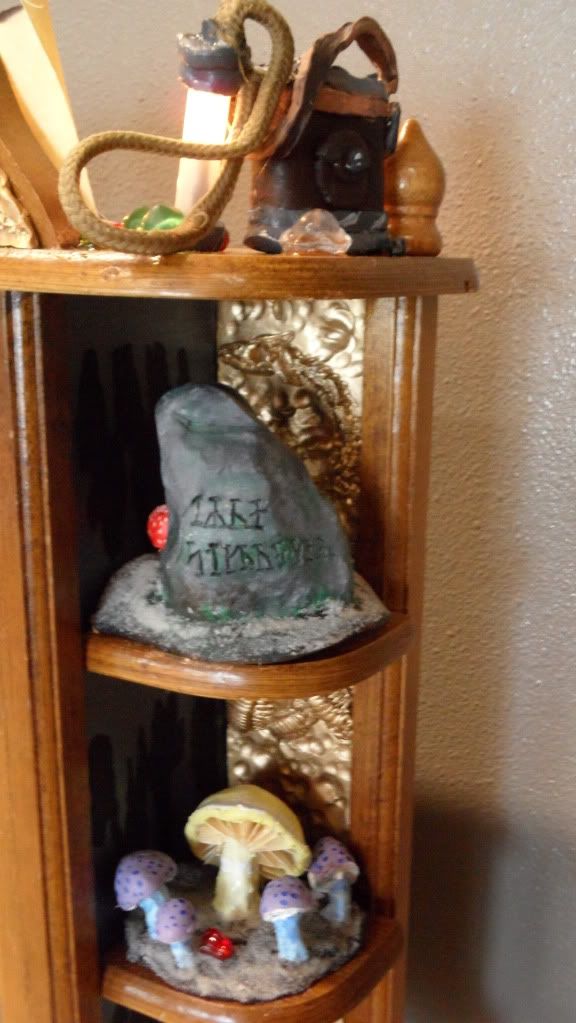
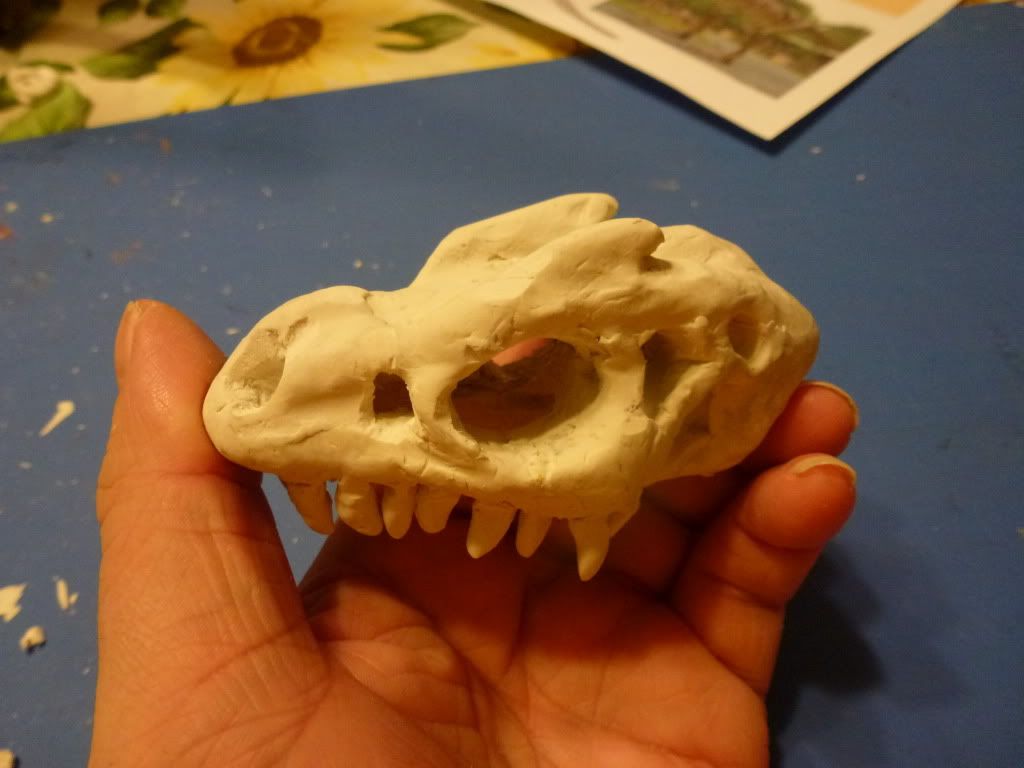
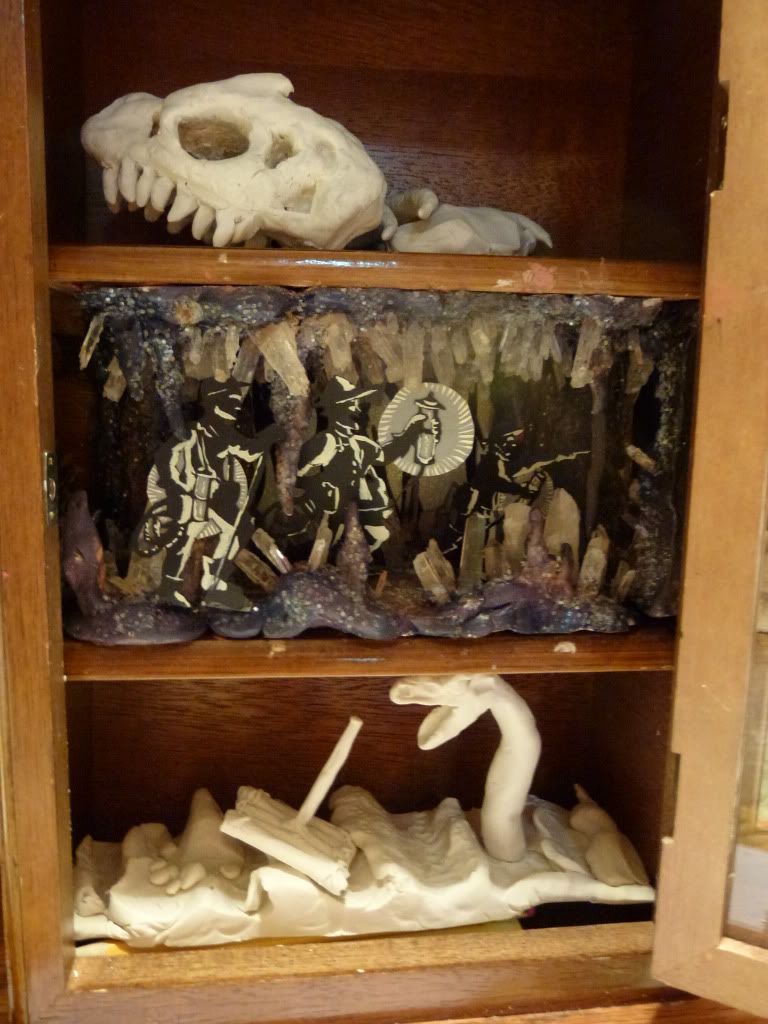
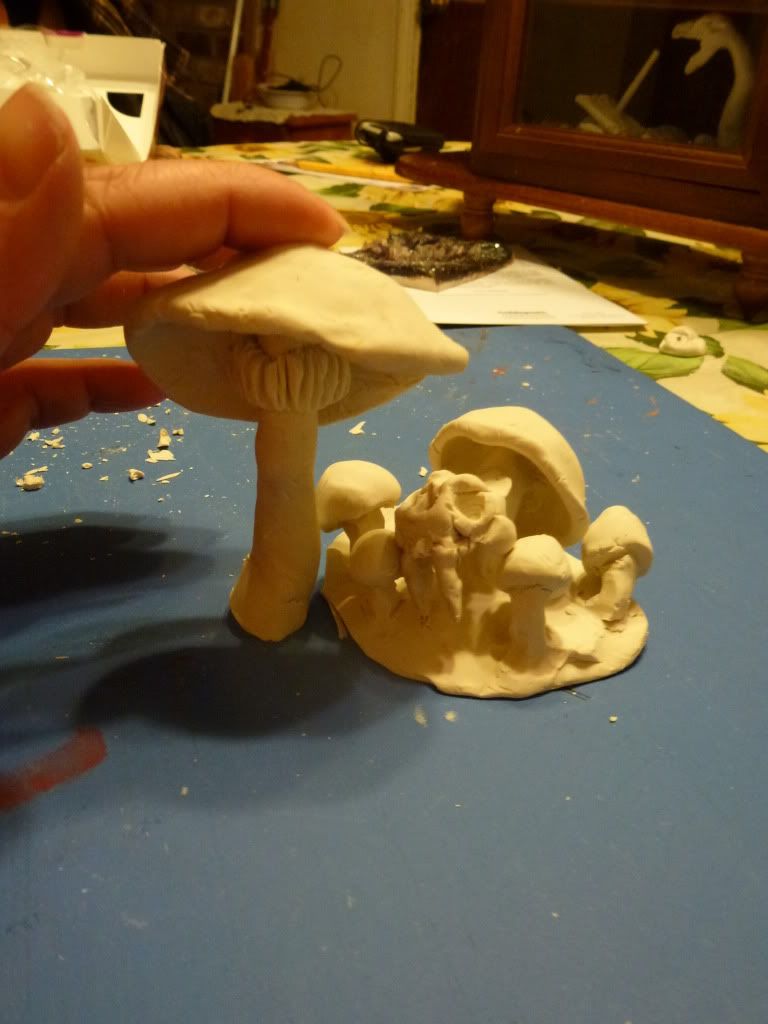
Been a while... first off thanks VampiressRN for taking the time to post and your thoughtful words. :) Now I know, I know it aint Tiki yet, and I am sorry but I wanted you to see the tiger hasn't been an artist SOB and not done any more art lately. This latest piece has got to be the most insanely detailed thing I have ever done: a three tier diorama of Jules Verne's "Journey to the Center of the Earth" for a art guild library show. I found an old curio cabinet and went to down packing it in with details. Most of it is sculpey sculptures, but there are other elements as well: the characters in the scenes are paper cut outs and the middle scene has real quartz crystals. The whole shebang is lit up inside with those tiny LED fairy lights, which is supposed to give the impression that the characters have Rumkopf coil lamps like in the book by positioning the lights behind frosted paper.The side outer shelves have artifacts pertaining to the book like dinosaur bones, an empty water bottle, a stone with ancient Icelandic writing on it, and lots of mushrooms because in the book they find a forest of giant mushrooms. Here is a overall view of the entire piece: http://i233.photobucket.com/albums/ee200/tigertail777/SAM_0420.jpg Now here is some close up details: A semi decent shot of the middle tier scene, where the characters discover a long passage of cave crystals. I used real quartz crystals because I wanted the shine and interplay of light reflection and refraction once I installed the LED lights. Unfortunately some of the beauty of it is blocked out by the long white shelf of stalagmites behind the Professor. I had to do this to hide the gaudy looking wires. The best executed scene I think is this one; the characters are on a raft trying to cross a large sea of water they find close to the center of the earth. The sea is very turbulent due to the strange electrical phenomena present in the vast cave space, and there are several dinosaur creatures that rise out of the depths such as this Pleiosaur. I stumbled on the idea accidentally of pouring E-6000 quick dry glue down him to look like water. A close up of the right hand open shelves: the top is a sculpted Rumkopf coil lamp and battery pack, the next one down is the ancient stone with the name "Arne Saknussem" in old Icelandic chiseled into it (he was the original person to journey to the center of the earth in the book, and left behind details of how to replicate his journey in a small piece of manuscript. This tiny manuscript is written backwards so people during his time don't accuse him of heresy and kill him, it is the sort of scrolled parchment seen being held by the golden fossil bones in the first picture. The next part is more mushrooms. The left open shelf side has a mastodon skull along with an empty water bottle to symbolize the chapter in the book where they run out of water.The bottom is another giant mushroom, with a fossilized shell and a sabre tooth tiger skull (naturally). And finally here is a nice close up of the T Rex skull before I painted it: http://i233.photobucket.com/albums/ee200/tigertail777/P1000469.jpg The tiers in transition with a lot not painted yet: http://i233.photobucket.com/albums/ee200/tigertail777/P1000485.jpg And part of the unpainted mushroom forest before I carefully hand glued cardstock "gills" into the undersides: http://i233.photobucket.com/albums/ee200/tigertail777/P1000479.jpg It's all very crazy I know, but "Journey to the Center of the Earth" is my favorite book, so I wanted to do it some justice. Hope you all pardon my non-tiki post I will try to get something tiki done soon to get things back on track, but hopefully you enjoy this as well. |
|
D
danlovestikis
Posted
posted
on
Sat, Apr 28, 2012 9:54 PM
I loved this journey. This is the most exciting project I've seen in a long time. So much to look at and think about. You are back! Thank you, Wendy |
|
T
tigertail777
Posted
posted
on
Mon, Apr 30, 2012 3:10 AM
Thanks Wendy I am very glad someone liked it. I suppose I may as well get all the non-tiki out of my system so to speak... I had thought I posted this before, but it doesn't look like it. This was for a art show previous to the current one, with the theme of "playing around". I decided it would be fun to paint a intricate 1800's ballgown and did some research, this one is mostly based on a dancing style gown, but with a few things thrown in like the roses on her shoulders. It is a bit of social commentary on the time period as well: if you look closely you will see that things are not quite "right" with the pinwheel so it kind of wraps around her ear making it so she cannot speak nor hear correctly, the place many women of that time period found themselves in. That is Oregon's Mt. Hood in the background, I wanted to try my hand at doing a diminishing atmosphere background like Leonardo Da Vinci is famous for... mixed results there mostly due I think to the too bright colors I will have to try it again sometime. Here is the really funny irony I did not realize until I was done: it greatly resembles in tone and style a certain stretching painting in Disneyland's Haunted Mansion attraction...completely unintentional, but somewhere in the back of my brain it must have been lurking. http://i233.photobucket.com/albums/ee200/tigertail777/high_society_silence.jpg |
|
M
MadDogMike
Posted
posted
on
Mon, Apr 30, 2012 6:06 AM
The "Voyage to the Centre of the Earth" conglomeration is very cool. Great concept and nicely done. Jules Verne was a favorite of mine years ago and I read everything of his I could get my hands on. |
|
T
tigertail777
Posted
posted
on
Tue, May 1, 2012 12:28 AM
Howdy Mike, thanks for taking a peek and commenting...been a while hasn't it? Yeah really Jules Verne is actually my favorite author, but I have to wonder what kind of horribly wrong versions I have been reading over the years. I found out the large majority of his books have suffered badly in translations, for instance unless you have the special edition of 20,000 Leagues that was re-translated in the 70's by a small publishing house, you are missing an entire chapter and quite a number of paragraph passages. This is mainly because the original translator had religious biases against some of what Verne wrote (specifically dealing with the Captain Nemo character) so he just left them out. Plus many of his lesser known works have either never had English translations, or only had one from the original print and never went back into print again. He wrote a lot more than most people realize, and not all of his books were "Les voyages fantastique". I came very close as a joke of sticking a primitive tiki idol in there, you know like it fell down into the bowels of the earth along with all the prehistoric fossils and such, but I knew I would get too many people asking about it and didn't want to ruin the theming. :wink: I guess the reason "Journey to the Center of the Earth" is my favorite book, is because it is so highly optimistic in attitude despite all the terrible misfortunes that happen the Professor never gives up. Plus it is the one book of the "Fantastiques" series, that really hasn't been fully proven wrong or right through actual real exploration. We know the kind of submarine Verne envisioned is mostly possible, same thing with traveling around the world in 80 days, and rockets to the moon. But we still have yet to have mankind make that real attempt at penetrating the mysteries of the deep earth in the same way envisioned by Verne. I suppose this book really is the reason that I came very close to trying to get an archaeologist degree, everyone presumes these days it's because of Indiana Jones but to me this book has one of the first pop culture archaeologist heroes. I have to wonder too if Spielberg and Lucas didn't have this in mind as well, especially in consideration of some scenes in the 1950's movie adaption. How they find the correct tunnel to go through with the marking of the sunrise is HIGHLY reminiscent of the map room scene in Raiders of the Lost Ark (even the music is VERY similar), and later on there is a scene where there is an underground earthquake and a rolling boulder chases our heroes down a tunnel very much like the opening of Raiders. Hmmmmm.... Alright now the next art piece should be something tiki, or poly pop to get things back on track so keep an eye out... well not literally that could hurt. :wink: |
|
T
tigertail777
Posted
posted
on
Tue, Jul 3, 2012 8:04 PM
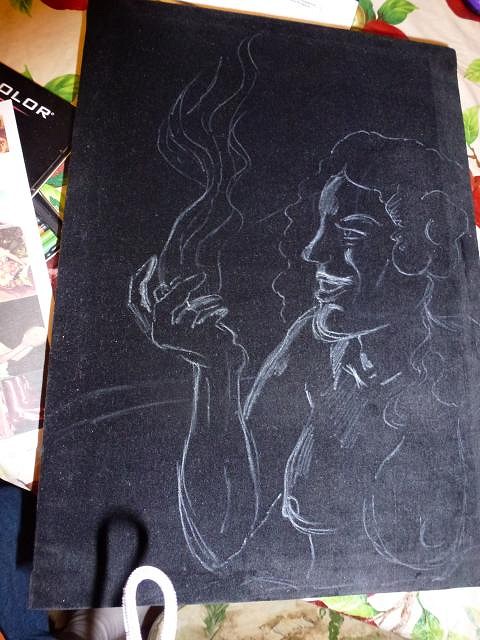
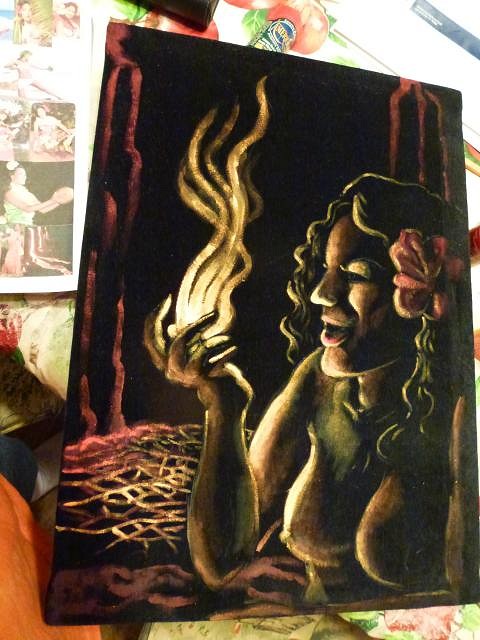
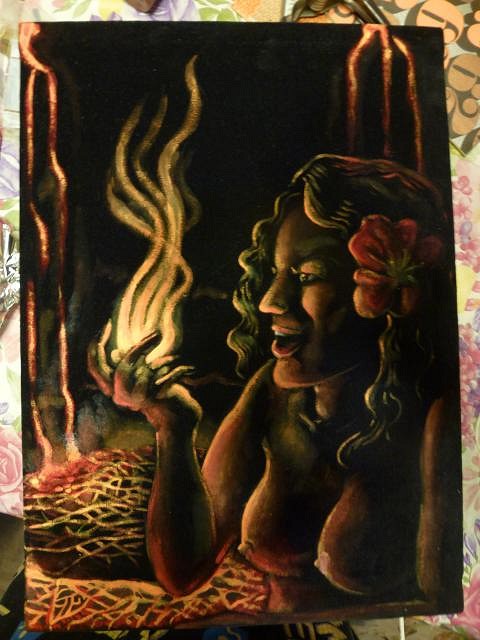
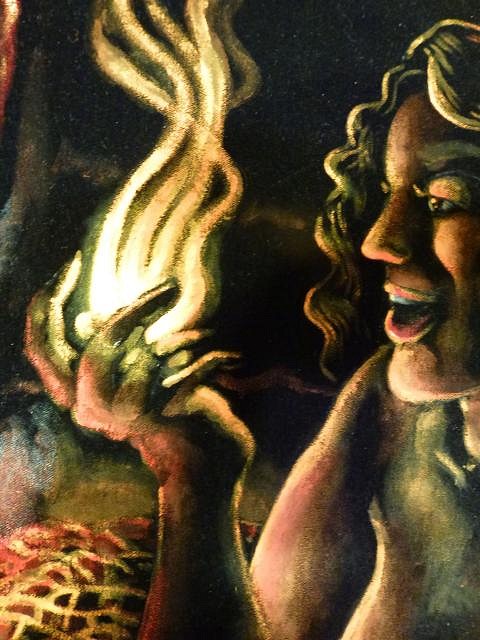
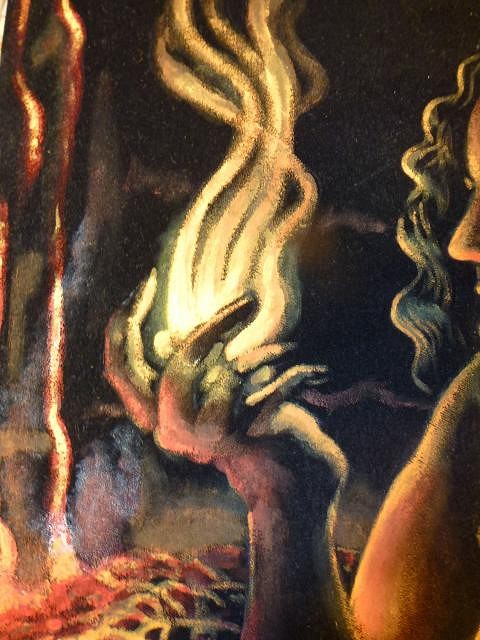
Well finally back to something tiki-ish, my entry into the art swap with a Pele/volcanoes theme. This is my first velvet painting attempt, and boy have I learned a lot. First off I had no idea the absolutely incredible subtleties you can get with shadowing on velvet. This experience really has caused me to re-think how I do my canvas paintings, I think I can do more realism and depth with shadows if I start with a darkly painted canvas and will try it out on the next canvas I paint. I have so far thoroughly enjoyed velvet painting even though it is one of the most unforgiving mediums I have worked with. I think even watercolor and pen and ink have a bit more leeway for mistakes than velvet does, at least you can go back and go over mistakes to some degree but not with velvet...no sir! I also was not prepared for the numerous layers you have to build up of the paint onto the velvet, nor the way you have to blend the paint into the fibers of the velvet. It's been a fun learning experience, and I am quite sure I will be doing more velvet in the future. First off, I got a bunch of photos together online for reference of magma, volcanoes and females (particularly female hands in the right pose) plus some hula dancers for good measure. Then I sketched it into my own composite in white pencil directly on the velvet. I re-sketched about 3 times, I found out you can "erase" the lines if you brush the velvet with a hair brush. Then came the first stage of painting. You really have to sort of work/rub the paint into the velvet on the first pass, more less putting down a workable layer for the darker/thicker areas of paint. Subtle blends can be gently rubbed with the brush into the velvet for softer shadows, but it is easy to overdo this and use too much paint. Once that paint is on there you have to work with it right away as it "sets" into the hair like fibers of the velvet and once it is on too long you really cannot rub it in any further. You have to work carefully with velvet; when I paint normally I invariably find I have dabbed an elbow or part of my hand in paint and accidentally dragged it on the canvas creating tiny blots or smears. I can take care of that pretty easily on canvas, but no way in hell can you do it on velvet unless you rework the composition. It is a very fun medium, but also a very exacting one. I am sure over time I will get better with it, and I guess for my first velvet painting this didn't turn out too bad. It is not quite finished yet, I have another photo I will post soon that shows I did a bit more on it already (such as putting in her eye and more shadowing etc). She's getting there. :wink: |
|
T
tigertail777
Posted
posted
on
Fri, Jul 27, 2012 6:17 AM
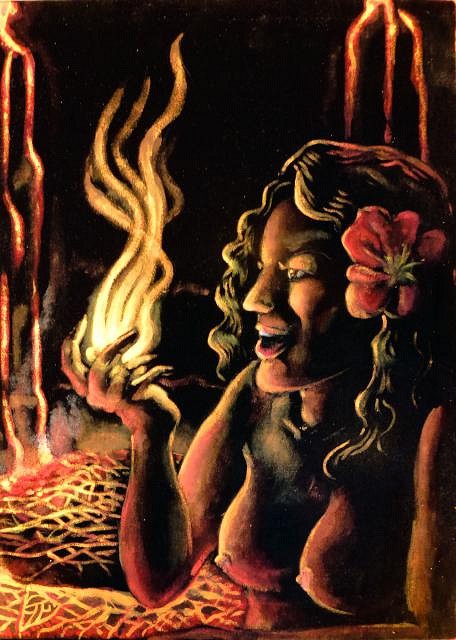
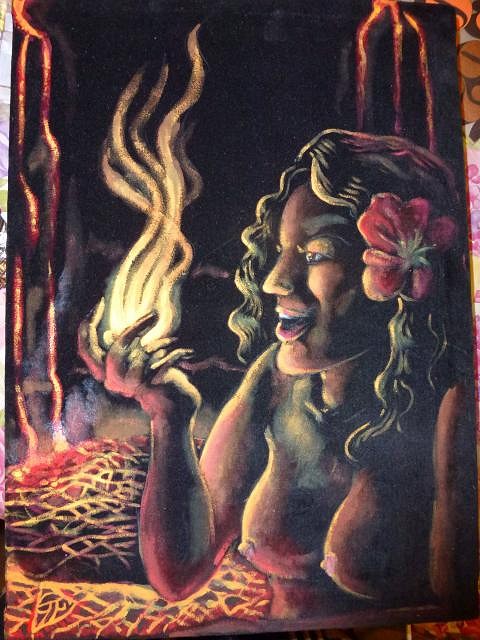
Well I finally finished Pele. Not entirely happy with all the anatomy, I see now the head is a bit too big for that body and something about the turn of the body and the breasts doesn't look right. However for my first black velvet painting, it's pretty good considering how unforgiving the medium is. I am very glad I got to to do a volcanic theme for my first one as I feel it really suits the black velvet well. I have learned a thing or two about making frames and stretching fabric over it so hopefully the next one should be a little less loose. Think I may have to invest in one of those canvas gripper tools if I keep doing these to make things easier. I have been thinking a lot about my next piece, and I keep coming back the idea that the old Mai Kai sign I wanted to paint all lit up would be perfect for velvet. I am halfway toying with the idea of doing the same thing in a regular painting as well so I can see them side by side, but I have never been one to want to repeat myself so I am not sure about that. I also could see painting some Poly pop matchcovers in velvet ( I collect matchbooks/matchcovers). Photographing or digitally documenting paintings is very hard to do, and black velvet makes it twice as hard. I have not yet figured out that magical way of capturing my paintings where they look at least pretty close to the original, even when I plop them on the scanner something just doesn't look right. So below you will see all my struggles with photographing this velvet Pele, granted I should have some kind of better lighting but ALL the lighting in our house has a horrible yellow tinge to it. One of these days I will figure something out to do this better, meanwhile on with the show... This first one I used photoshop to try and get the colors close as I could to the original, but I am not sure how well it worked out. Well kids, until next time under the pineapple sunshine it's time for the tiger to bid adieu. :wink: :tiki: |
|
M
MadDogMike
Posted
posted
on
Fri, Jul 27, 2012 10:04 AM
Congrats on the learning curve, I think it turned out very well - first velvet or not. Seems like photographing art is harder than creating it. Did you try full shade outside? I think I have heard cloudy days work well too but we only get about 5 cloudy days a year :lol: |
|
D
danlovestikis
Posted
posted
on
Fri, Jul 27, 2012 3:17 PM
You've done a really good job on this with detail and depth. Don't stop with one keep painting on velvet you've got the knack for it. Cheers, Wendy |
|
T
tigertail777
Posted
posted
on
Sat, Jul 28, 2012 12:33 AM
Thanks Mike and Wendy. I have not tried to do outside photographing yet, here in Oregon it is overcast most of the time, but quickly followed by rain. When the sun does come out it REALLY comes out so there is no inbetween. Actually I was wondering if I got one of those portable light photo box things I think I saw you using Wendy, if that might work out better? How much are they and where would I get one? Don't worry Wendy I am not going to stop at the one velvet piece, I think I am pretty set on doing the old Mai Kai billboard sign at night in velvet but I have to figure out a way to transfer complicated image outlines to velvet. On a normal canvas or wood panel I would use something like carbon paper and trace, but I am not sure what to do here. Sometimes it takes a while for me to figure out the mechanics of how to get something done. Case in point, I have another Poly pop project that I am starting to pick back up now which I previously abandoned (you might remember it: my table top miniature golf idea) because I could not figure out how to accomplish it (some of it I am still working out, but almost there). I'll be posting progress on that one soon as the real work starts again (I have to tear apart what I had already made, I was going to make a mold but its just too expensive for the size I need so I am just going to make original parts in sculpey and piece it together instead). |
|
M
MadDogMike
Posted
posted
on
Sat, Jul 28, 2012 6:10 AM
Those light boxes work real well for ceramics, they eliminate the shadows and the refections. But I don't know how well they would work for paintings. I really think you should try outside on a cloudy day (but not a rainy day :lol: ) I'm pretty sure I have seen white carbon paper, that might help you transfer your image? |
|
T
tigertail777
Posted
posted
on
Fri, Sep 28, 2012 1:22 AM
I just today got a studio art space where I can concentrate on doin' nothin' but art with no distractions. Been looking for months and finally landed a place that fits my needs, so that means more poly pop painting goodness will be happening shortly. I will start moving in next week! I am ecstatic with joy and cannot wait to blaze a trail of art. :D |
|
M
MadDogMike
Posted
posted
on
Fri, Sep 28, 2012 5:48 AM
WooHoo!!! Congratulations! We expect to see a lot more art from you now :D |
|
LLT

little lost tiki
Posted
posted
on
Fri, Sep 28, 2012 4:02 PM
Right on tigertail! |
|
C

cy
Posted
posted
on
Fri, Sep 28, 2012 5:01 PM
Congrats Tigertail. glad things are moving forward. Let me know if you need any help, I've got a van. |
|
T
tigertail777
Posted
posted
on
Sat, Sep 29, 2012 12:21 AM
Thanks everyone for the encouragement. :) Cy thanks for the offer. I might take you up on it if I can't get my dad's truck. |
|
T
tigertail777
Posted
posted
on
Thu, Oct 4, 2012 9:23 PM
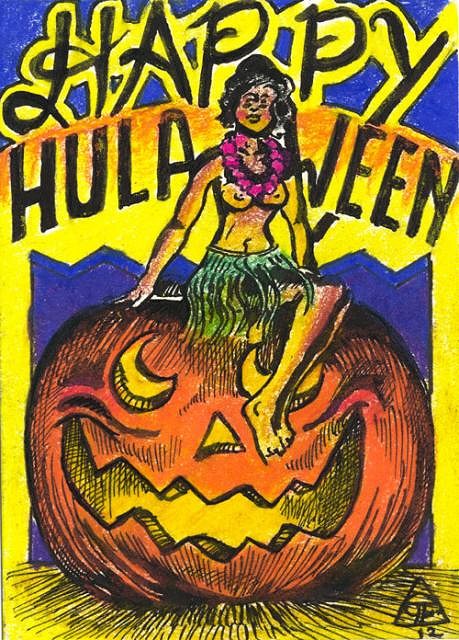
I am pretty much moved into the new art studio space thanks to my pop. It felt so strange to have a space devoted just for me to be doing art, a space that was deafening in it's silence. I kept feeling like this was just too weird and was somewhat "paralyzed" with what to do next, staring at the walls for a few hours. Finally I decided I should just do some piece of art to get used to the place and commemorate it's "opening". So I did a hula Halloween art card as the first piece of art in the new space. The piece is Pen and ink and colored pencil. Am thinking about making a bunch of these and selling them on ebay, I have never really tried to sell ACEO's much before (stands for "artist cards editions and originals", baseball card size pieces of original art. Evidently there are quite a number of collectors of these things out there.) Not sure how I like the colored pencil though, I think if I do more it will be pen and ink and watercolors.
|
|
T
tigertail777
Posted
posted
on
Wed, Oct 31, 2012 3:07 AM
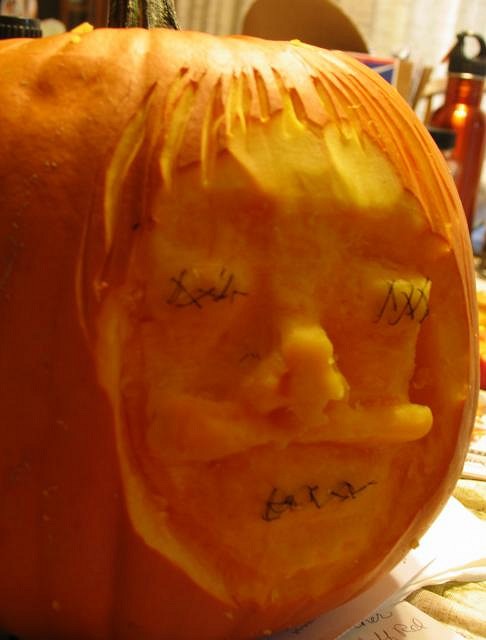
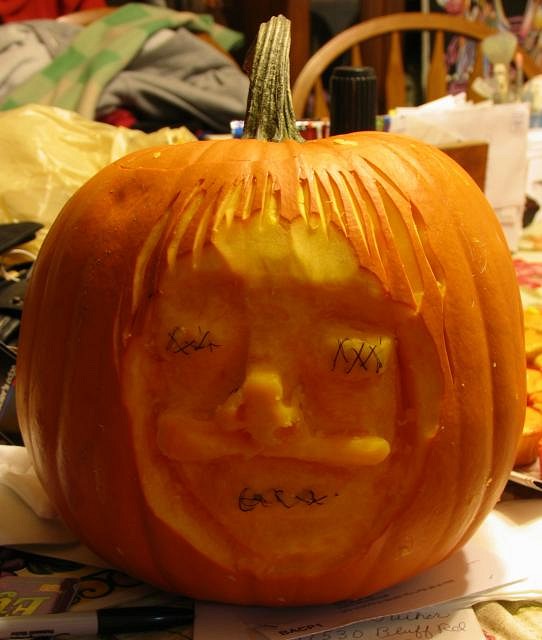
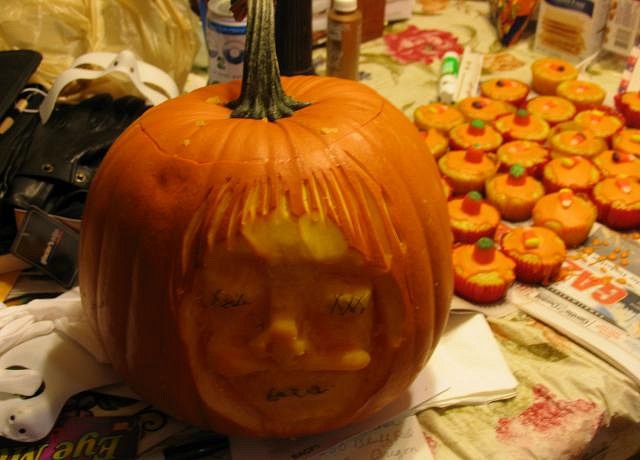
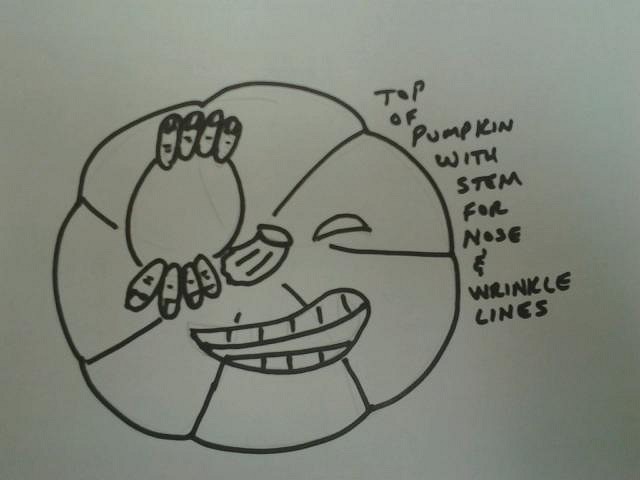
Happy All Hallows Eve my Tiki friends! I decided to try and do a relief carved jack o lantern this year, with something along the lines of poly pop. This fellow that turned up was on his way down a wrong path, I told him it was a dangerous place to be headed, but he had such a small mind I don't think he got the point until his cranium matched. :wink: This was kind of a challenge since I only had a fruit paring knife and minimal clay sculpting tools not intended for something this hard. I didn't think the sewing part was going to be so difficult, but it turned out to be the hardest part as I didn't leave much room to draw the needle and thread through. I cut my fingers quite a few times on that dang knife and stabbed myself with the needle, if blood ju ju will make this thing come to life I better watch out. :wink:
|
|
M
MadDogMike
Posted
posted
on
Wed, Oct 31, 2012 4:47 AM
Looks good Tiger, you and him are now blood brothers :lol: I tried out a pumpkin yesterday but it looks so much better in my head than it did in real life :D I envisioned one huge eye being stretched by 2 hands from the inside, like someone was trying to climb out. The other eye and the mouth grimacing in pain but I just didn't have the punkin carvin' skilz to pull it off :lol: |
|
D
danlovestikis
Posted
posted
on
Thu, Nov 1, 2012 7:20 AM
Hi tigertail777 your poster card Hulaween and your pumpkins are cool. Keep on creating, I'm having fun watching, Wendy |
|
AT

Alii Tiki
Posted
posted
on
Fri, Nov 2, 2012 2:37 PM
Aloha tigertail |
|
T
tigertail777
Posted
posted
on
Sat, Nov 3, 2012 5:35 AM
Howdy Mad dog, Wendy, and Alii Tiki thanks for the replies. Alii Tiki: It could be barely seen when lit up, if I do this again I will have to carefully carve the inner wall a bit thinner to let out the candle light. Yes, blood sacrifice is part of the ritual, but it was a bit more this year than I bargained for. That paring knife slipped and the blade went under my thumbnail...it still hurts. Mike: That looks like an awesome idea, I can't wait to see how you eventually make it work out next year. Wendy: no worries, I will continue to create but a large majority of my output will be going towards a online comic strip which I have been putting things together and preparing for almost 2 years now. I am not exactly a great writer so its taken me a while to find a groove I am comfortably with for the writing and for the art as well. It seems like pretty much every art project I do, I have to look up a ton of research to be comfortable enough in creating it, sometimes that makes me feel a little like a hack in that I think I should be able to create solely out of my head, but I can't. I know most artists do use reference, but I always have a voice in my head that says its cheating. To be honest, I am not sure where this voice comes from but it is difficult to fight it sometimes. I think pretty much all artists are neurotic or messed up in the head. :wink: Anyways, I will post links to my non-tiki stuff but I won't put actual pictures in the posts since TC should be about the Poly-pop stuff, and I will get back to creating some Poly pop soon as well. :) [ Edited by: tigertail777 2012-11-03 05:37 ] |
|
TSA
Tiki Shark Art
Posted
posted
on
Mon, Nov 5, 2012 6:28 PM
dig it!!!!! |
|
T
tigertail777
Posted
posted
on
Sun, Feb 10, 2013 2:55 AM
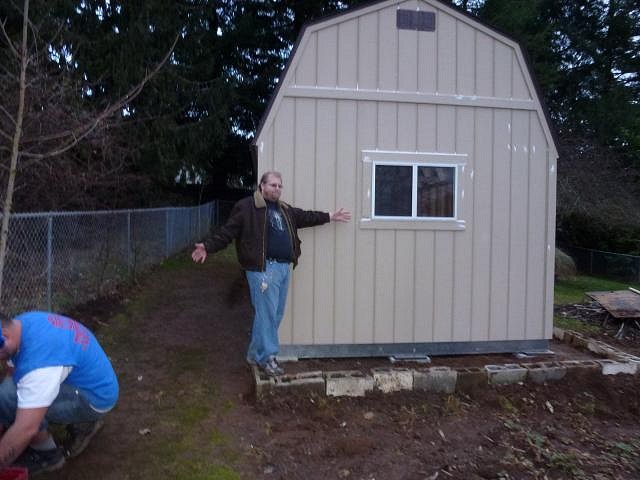
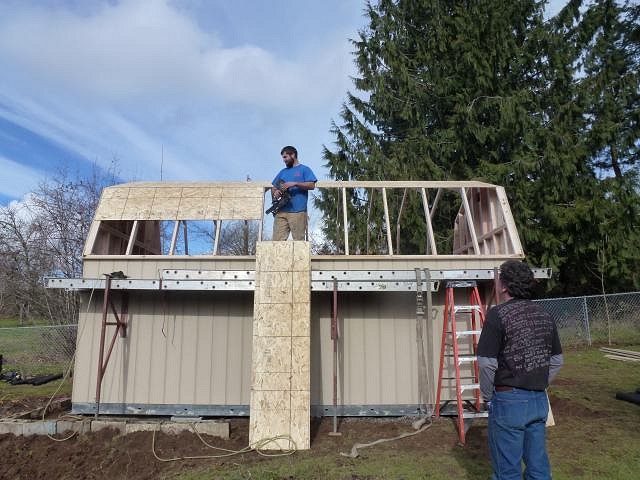
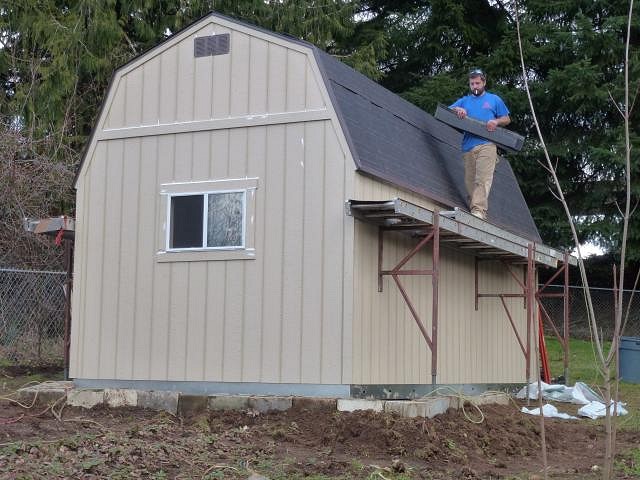
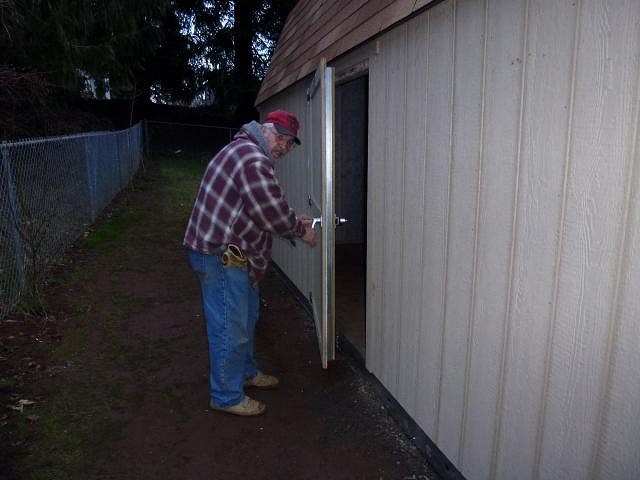
Well its been a danged long time since I posted. Finally I really got serious and had a pow wow with my pop, and together we decided this was nonsense when we could get a shed built in the backyard and eventually it would pay for itself. So we got a 200 square foot shop built, saving money by leveling the land and laying down the gravel ourselves (not easy since that dirt is close to 100% CLAY), as well as building the interior parts such as the overhead lofts for storage. My dad will have half the shed for what he wants, and I will have the other half. It is still bigger than the space was downtown, and warmer and one hell of a lot closer. Good news is the shed is built. We only need to build the interior parts now, and finish moving the rest of my stuff from downtown. The big main thing to do next is to run some electricity out there so I can do art in the dark. :wink: There is a skylight and a window, but its not quite enough light to paint by. I already warned dad the shed is going to be tiki-fied slowly over time. I want to eventually make it look like a cross between Disneyland's Tiki Room, and a 1940's detective office. :wink: Maybe some Art Deco tiki in there. Here are pics of the building so far (it just has primer on it right now, when it gets warmer we will paint it and you can bet its gonna have tiki's and tigers on it). YAY! MY OWN ART STUDIO!!!!! I have been wanting this since High School! Under construction: I tried to talk dad into putting tiki thatch on the roof, but he wasn't buying it. Well once we get the interior and electricity run out there I will be doing one hell of a lot more art, just you watch! I am so completely jazzed right now about this, it is a major dream come true for me! :D :drink: |
|
D
danlovestikis
Posted
posted
on
Sun, Feb 10, 2013 8:49 AM
Tiger I loved these photos and what is to happen in the future. You are inspired. Art gives us joy and you are stepping into a dream world of happiness. Congratulations. Wendy |
|
M
MadDogMike
Posted
posted
on
Sun, Feb 10, 2013 4:27 PM
Congrats again! I think this will work out much better in your own back yard, your own space and easier access |
|
T
tigertail777
Posted
posted
on
Sun, Mar 10, 2013 12:14 AM
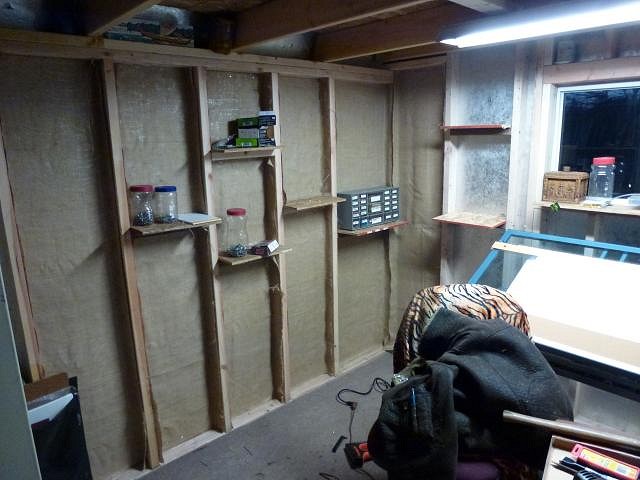
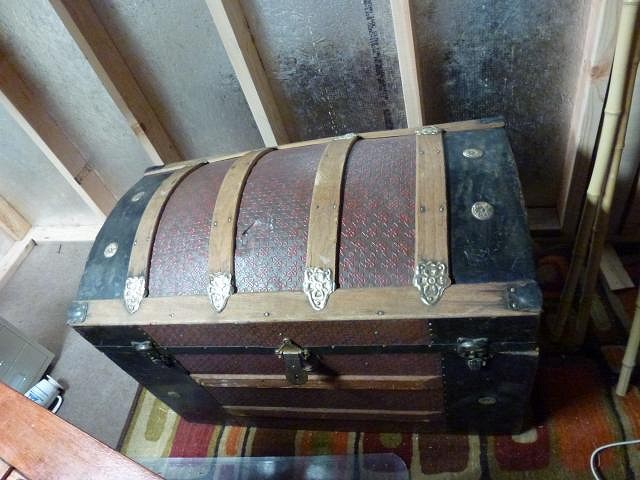
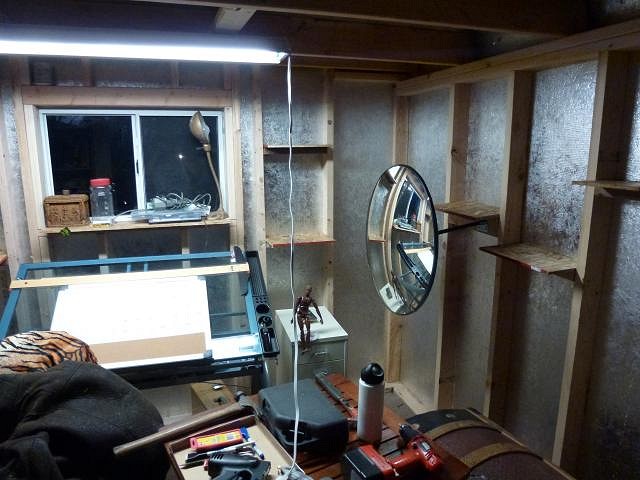
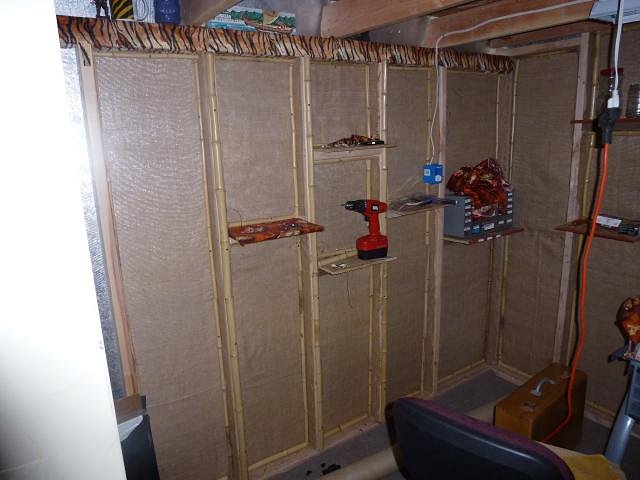
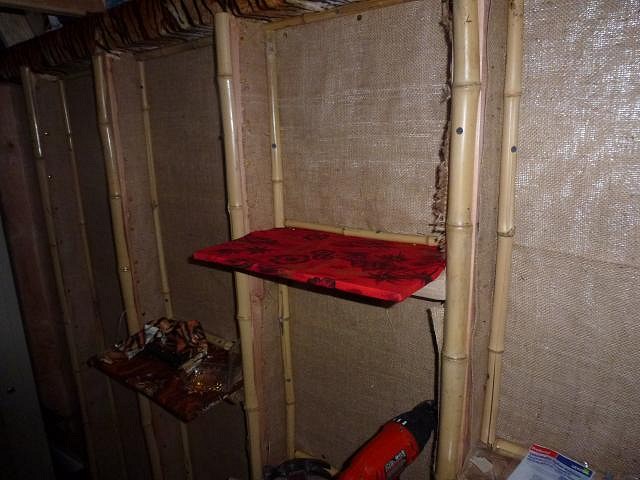
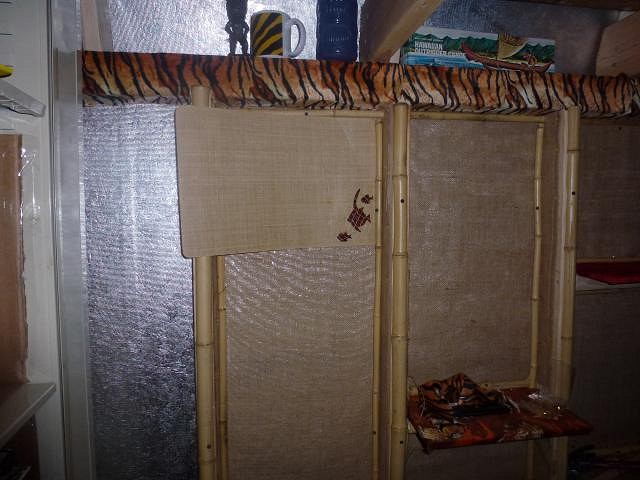
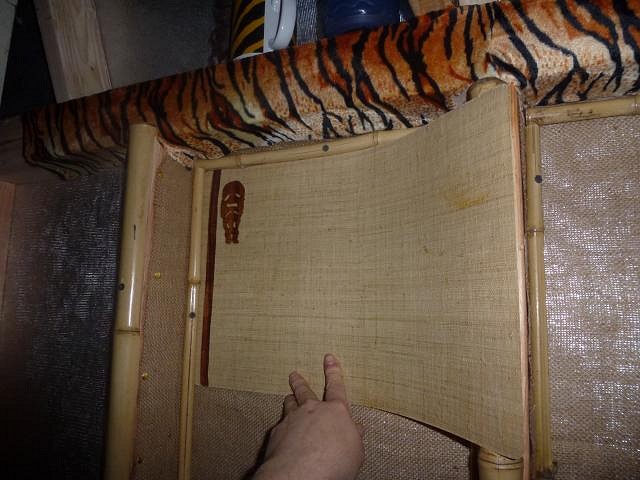
I guess right now my tiki work is getting the studio ship shape. The plan is for it to have a sort of Tiki room/Adventureland theme centered around the time period of the 1940's through the early 50's (with maybe a smattering of late 30's). Right now I and my dad are working on getting burlap covering the walls to cut down on that hideous silver foil insulation glare. I am on a majorly tight budget so am doing this as cheap as I can. Once the burlap covers the walls then I will put bamboo poles in the corners of each panels to stretch the burlap tighter and cover all of my dumb stapling mistakes. Also the ends of each of the 2X4's will have split bamboo. I found a very nice 1920ish camel back trunk off Craiglist cheap that will kind of go with the flotasm jetsom nautical stuff that will be in there, and serve the purpose of holding my completed paintings in one place away from sunlight. The tiger fur you see on the chair will be covering the upper 2X4's all around. You will also notice a huge ass convex mirror hanging off the wall... a good source to use for referencing body gestures and anatomy quickly, because it is convex I can see my whole body at once from head to toe. The glass top drawing desk you see also currently serves as my painting easel. Once I have some money saved I'd like to get some lahuala matting for trim and to cover the horrible ceiling. But you know, Rome wasn't built in a day it's going to take time for all the finishing touches. Meanwhile the goal is to get the studio in working condition before summer. |
|
M
MadDogMike
Posted
posted
on
Sun, Mar 10, 2013 8:52 AM
Take your time Tiger - it will never really be "finished". Convex mirror is a great idea. |
|
D
danlovestikis
Posted
posted
on
Sun, Mar 10, 2013 1:18 PM
Lots of fun ideas and touches. Good job, Wendy |
|
LLT
little lost tiki
Posted
posted
on
Tue, Mar 12, 2013 8:29 PM
Slow and Steady wins the race,Tigertail! |
|
T
tigertail777
Posted
posted
on
Wed, Mar 13, 2013 2:15 AM
Mahalo guys for the cheering and support. I now have the burlap covered up to the point behind the mirror in the photo. I am not sure how the pro's do it, but I have been stapling, then hammering the staples because they will not go all the way in, then to be double sure putting in hammered flat head thumbtacks. Only problem is my thumbs are still hurting from trying to push those suckers into the wood, half of them bent and I had to start all over again. I am getting low on burlap, I ordered 20 feet and it looks like it isn't going to quite make it so gotta order more. Meanwhile I found someone on Craigslist with 20 feet of bamboo fencing super cheap which I will cut apart and use for my bamboo accents on the 2X4's. I looked into getting full bamboo poles but it was crazy expensive, so thought this would work if I join the 3 foot pieces together.... you'll see what I mean. We are also looking into doing a buried electrical cord that will run from the house to the shed. MDM: Yeah I know it will never be finished, but it will be a relief to get it done to the point I can do some work. :wink: Wendy (& Dan): I already have planned a sort of "grand opening" on my birthday with friends and family. The final piece to be placed sort of like christening a ship, will be your wonderful "Tiger Bob". :) LLT: Yeah I know! I am super excited this is the culmination of many years of dreaming, I cannot wait to get down and do some serious painting and other art in this new space. I know its going to be incredibly inspiring! |
|
T
tigertail777
Posted
posted
on
Thu, Mar 28, 2013 11:48 PM
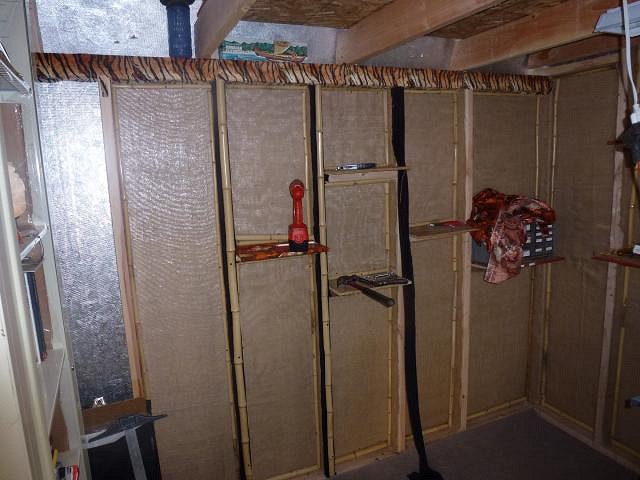
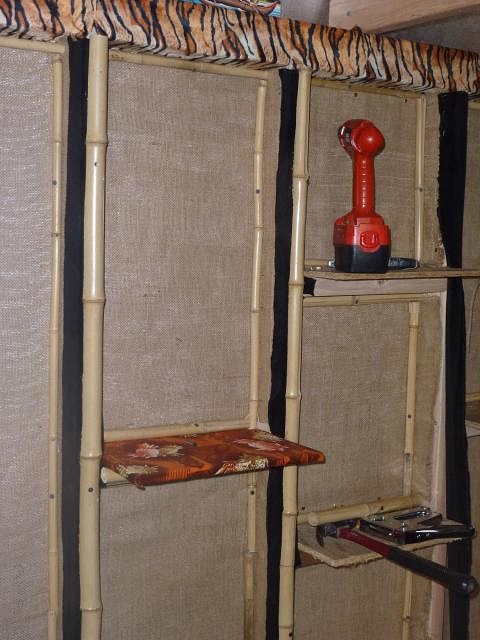
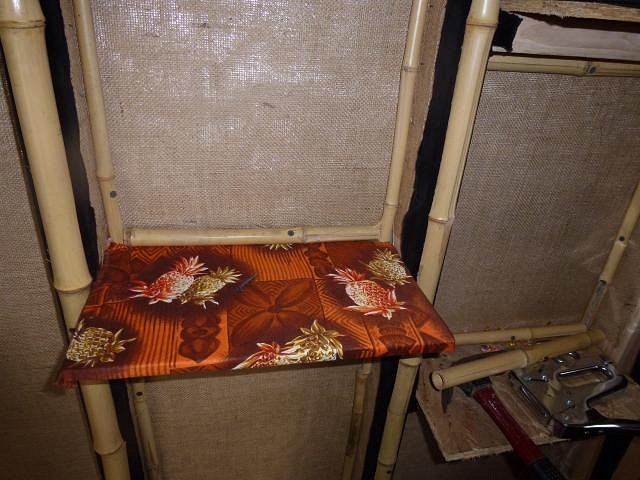
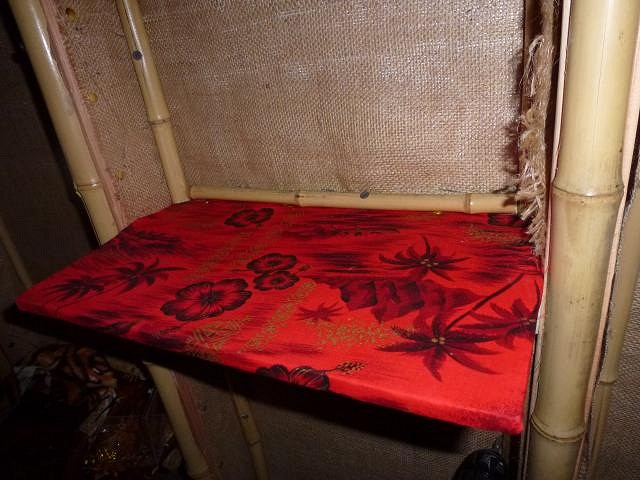
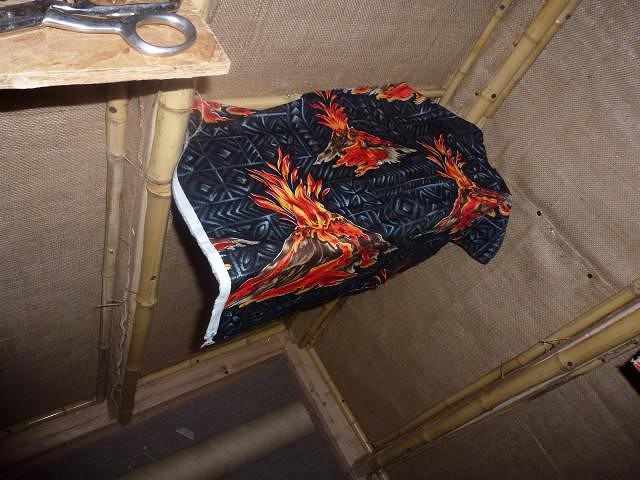
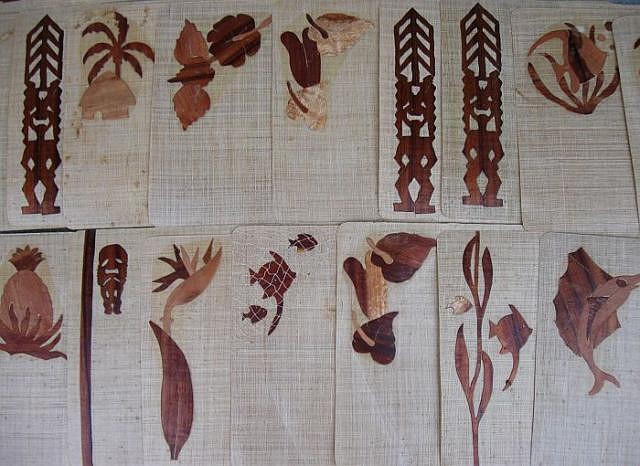
More progress on Tiki Tiger studio. I have most of the main bamboo up and am working on the outer bamboo trim on the 2X4's. The original plan was to put black velour cloth on the ends to make the bamboo stand out, and more importantly hide my cutting mistakes on the burlap. But I gotta say I am not feeling it with the black velour, and am not sure I will keep it now. I can't seem to cut straight to save my life so it has some uneven ragged edges I don't like, and just doesn't have a "finished" look. I am thinking of taking it down, and replacing it with small strips of wood that in the future when I have time I will get a dremel tool and carve tapa designs into. I would welcome any thoughts or ideas on this, as I am unsure what to do about it. I am doing this all as cheap as I can as I don't have much of a budget, so have had to get creative. For instance all that bamboo is a craigslist find: someone was selling 20 feet of 3 foot high bamboo fencing for $50 so I cleaned it up and cut apart the wiring holding the poles together. Turned out really well because I got some nice straight bamboo pieces with pre-drilled holes in them. The wood shelving sticking out is pretty crappy looking pressed wood so I am covering those with Hawaiian pattern cloth pieces that look like something from off Aloha shirts. I like this idea because it also makes for a softer surface for books and knick knacks, and the colors reflect the tiger faux fur on the upper beams. Plus it must be said, Aloha shirts hold a special place in my memories having grown up around them so much and being influenced by them artistically. I have learned all kinds of things about bamboo I never knew or thought of. Had no idea it cracked so easily, and finally figured out the strength lies in the nodes. I also never knew bamboo has this weird inner translucent "skin" when I first saw it I thought I had some kind of spider infestation with a ton of webbing inside every pole. And I learned you don't cut bamboo straight through like a piece of wood; you have to keep sawing around the edges evenly or it may splinter and crack the entire thing lengthwise. Finally I have learned staple guns are ridiculous unwieldy tools that take all the strength you can muster to push down the dang handle, and woe betide your poor fingers if they get caught underneath the handle when it snaps down.
That's it for now. Tune in next time as I turn the air blue with cursing when I once again hurt myself with one of many tools. :wink: |
|
D
danlovestikis
Posted
posted
on
Fri, Mar 29, 2013 1:47 PM
Wow wow wow, this is going great. Dan and I love animal prints and think of them as totally tiki. We like to mix them into our tiki rooms. Burlap is a perfect cover. You are really making this a terrific room. Wendy |
|
M
MadDogMike
Posted
posted
on
Mon, Apr 1, 2013 9:26 PM
The aloha shirt shelf idea is great! I think a variety of different prints would be better than all one design. |
|
T
tigertail777
Posted
posted
on
Tue, Apr 2, 2013 2:18 AM
Thanks for the feedback Wendy (Dan), and Mike! :) I had a thought the other day I am going to try out: taking down the black velour and replacing it with more of the tiger stripe velour and maybe making ragged edges on purpose like a real skin would be. I will have to order more if it looks good, but that's okay. I am also toying with the idea of ordering some fat quarters of Sophistatiki's cloth designs over on spoonflower, I have really liked her Hawaiian cloth designs for a while now and she uses the two colors I like the most: orange and aqua, plus her designs look very retro which would fit right into my 40's/50's theme. |
|
D
danlovestikis
Posted
posted
on
Wed, Apr 17, 2013 10:24 PM
Update please, Wendy |
|
T
tigertail777
Posted
posted
on
Thu, Apr 18, 2013 10:01 PM
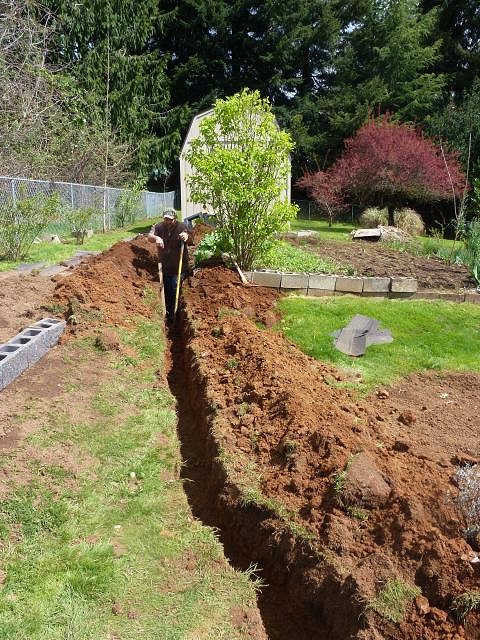
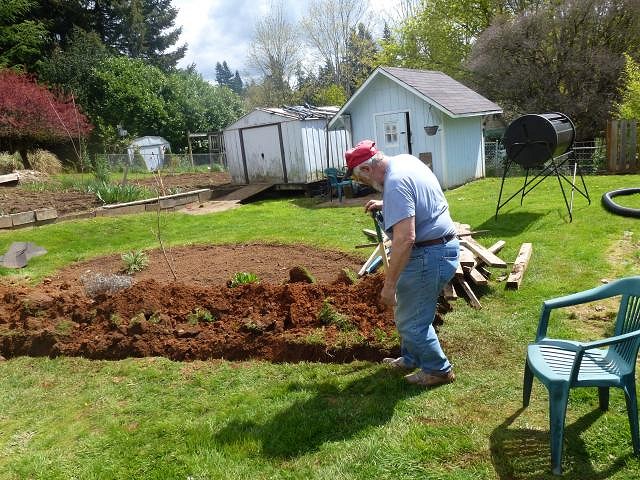
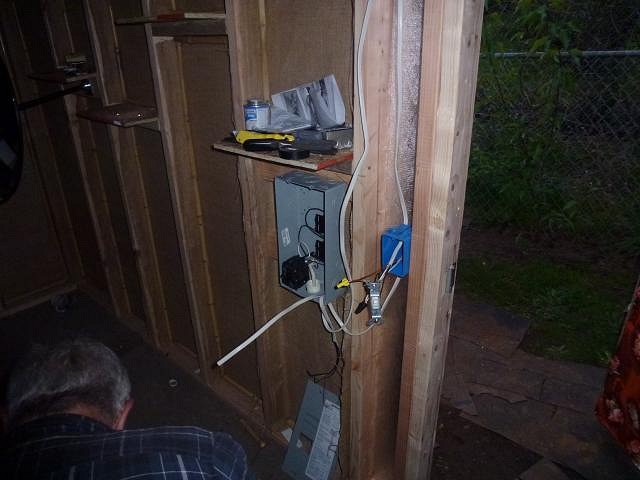
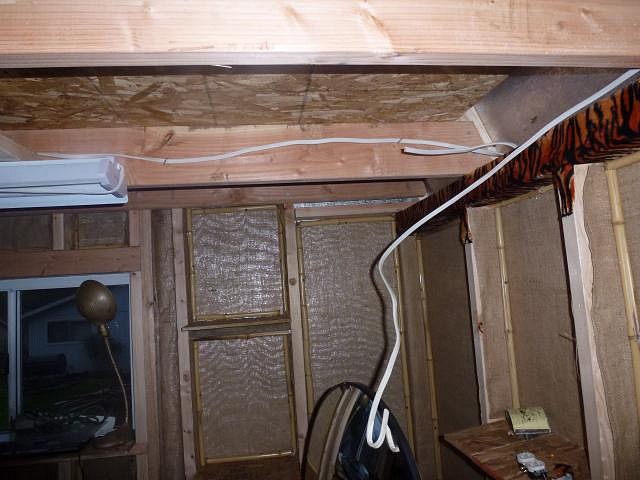
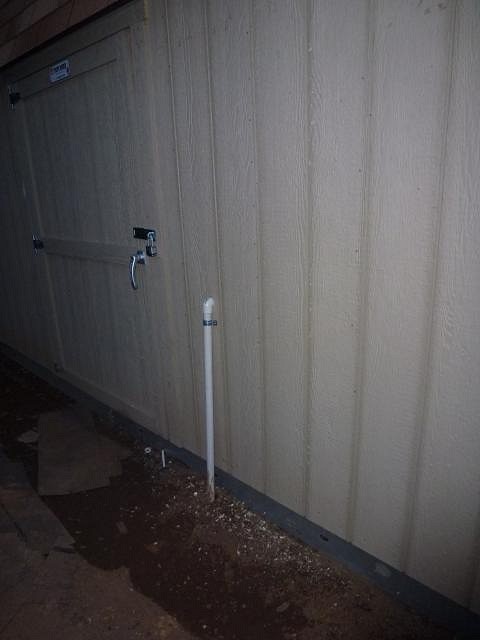
Thanks for asking about the status Wendy. :) I was going to update a few days ago but wanted to wait till I had more pics of what little there has been done. Okay I take that back a lot has been done, it just feels like I am spinning my wheels because it is not going fast enough to suit me and I feel like I keep getting blocked at every turn. Must keep telling myself that Rome was not built in a day. So the main progress that has been made is we have the electrical conduit laid and buried, and a lot of the electric boxes set up waiting for my Uncle to be able to take time out of his busy schedule to do all the proper hook ups and final stuff. As for the decor, I nixed the black velvet and the tiger fur under the bamboo. Felt like it was just too much and left it bare wood. The place where the burlap is frayed and meets the edges I am toying with either using more bamboo, or getting wood slats as I said before and eventually carving tapa designs into them. I found more vintage Hawaiian fabric on ebay I liked, and am also in the process of ordering some from Sophistatiki (Dawn) from her Spoonflower site. And I found a few things also on ebay that I got good deals on that I am excited to put into the Tiki Tiger studio which I will show below. First up: my brother in law, Mike helping dig the trench for laying the electrical conduit (it had to be 2 feet deep all the way). I helped dig too and had a pretty major asthma attack to the point of almost hallucinating. Had to have a lot of protein and sugar and cold water to get the attack calmed down and stop the dizziness. Our soil after the first foot or so is nearly pure clay and harder than heck to dig through. I learned that the hard way. |
|
M
MadDogMike
Posted
posted
on
Thu, Apr 18, 2013 10:15 PM
Power is a good thing, great progress. I love how your family is involved. If they are anything like my family they are thinking that you are crazy but they want to help anyway :) |
|
T
tigertail777
Posted
posted
on
Thu, Apr 18, 2013 10:23 PM
Mike that pretty much sums it up. :wink: Either that or point out my early obsession with Disneyland's Enchanted Tiki Room. :roll: |
|
D
danlovestikis
Posted
posted
on
Sun, Apr 21, 2013 9:40 AM
tigertail777 you and your family have really gone the mile to get this far. The Tiki Hut looks fabulous. I like all your decorations. Thank you for all the photos. I enjoyed them all. Cheers, Wendy |
|
T
tigertail777
Posted
posted
on
Fri, Apr 26, 2013 6:06 PM
Quick update: today my uncle came out and got the electric installed. So this will be the first weekend with power! Should get a lot done! |


