Pages: 1 2 3 4 5 6 7 8 9 10 11 12 13 14 15 16 17 18 19 20 21 22 23 24 25 26 27 28 29 30 31 32 33 34 35 36 37 38 39 40 41 42 43 44 45 46 47 48 49 50 51 52 53 54 55 56 57 58 59 60 61 62 63 64 65 66 67 68 3,217 replies
|
D
danlovestikis
Posted
posted
on
Mon, Feb 18, 2019 6:48 PM
You are super creative and sensitive and wonderful. You do everything so well. Those turned out so well I know your dad would be proud of his son. Hugs, Wendy |
|
H

Hamo
Posted
posted
on
Sun, Feb 24, 2019 4:53 PM
I see that San Francisco's Zombie Village has its own mug, but I like yours better.
|
|
D
danlovestikis
Posted
posted
on
Sun, Feb 24, 2019 7:25 PM
MadDogMike, I am so sad to hear that your mother has now passed. One day it will be our turn. I glad you have such a beautiful family and that you can all lean on each other during this time. I hope they are together in heaven. Love, Wendy and Dan |
|
M
MadDogMike
Posted
posted
on
Mon, Feb 25, 2019 2:43 PM
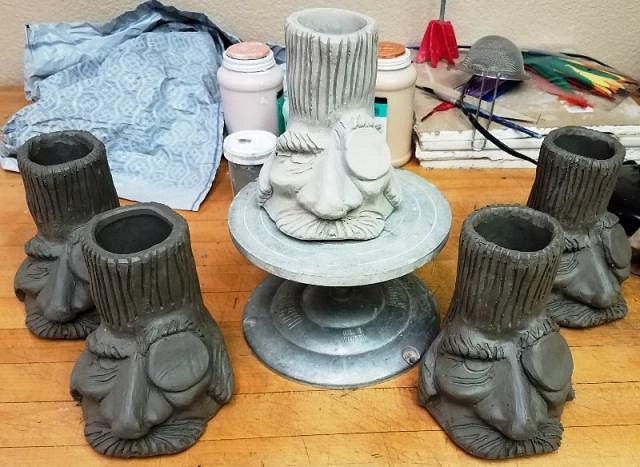
Thank you all very much for your kind words. Working on a small army of Jungle Explorer Sinking in Quicksand mugs, casting one a day. Trying to keep track of my time and material costs so I can come up with a fair price. I like creating much more than record keeping :lol:
|
|
H

hang10tiki
Posted
posted
on
Mon, Feb 25, 2019 4:45 PM
On fire |
|
WC
Will carve
Posted
posted
on
Tue, Feb 26, 2019 7:16 AM
I get depressed tracking hours. |
|
M
MadDogMike
Posted
posted
on
Sun, Mar 3, 2019 8:44 AM
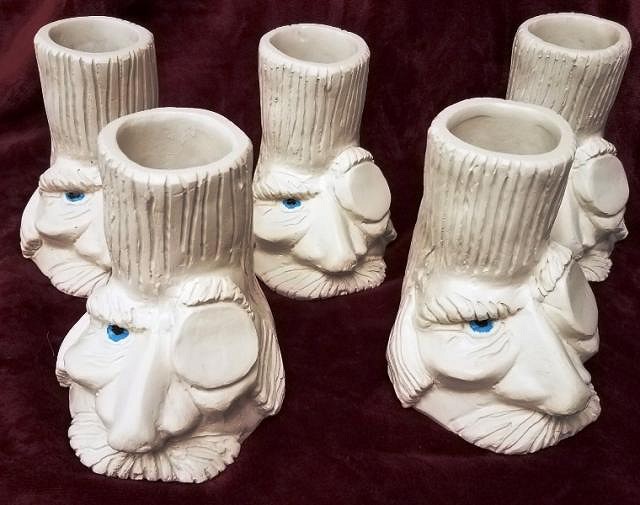
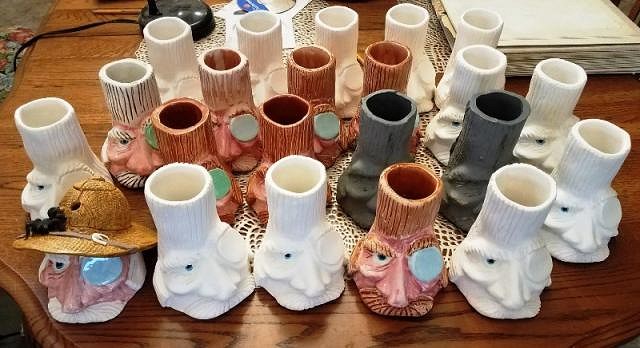
I feel your pain Will Another successful firing, my little army is growing Well, so far I've made about 10 of these guys. And I'm already getting bored :lol: So I customized one. Added a pith helmet complete with tarantula :D |
|
D
danlovestikis
Posted
posted
on
Sun, Mar 3, 2019 8:46 AM
Good Morning, it's so much fun watching you creating your art. Those blue eyes are popping out of the heads, intense. This glazing will be fun to watch. Wendy |
|
H

Hamo
Posted
posted
on
Mon, Mar 4, 2019 11:51 PM
Cool stuff, Mike. |
|
H

hang10tiki
Posted
posted
on
Tue, Mar 5, 2019 12:55 PM
Love it |
|
H

Hamo
Posted
posted
on
Tue, Apr 2, 2019 6:43 PM
You must be hard at work with the mugs, since you haven’t been around in a while.... |
|
M
MadDogMike
Posted
posted
on
Wed, Apr 3, 2019 9:12 AM
Hey Hamo! That and too many other things too! Am also working on some cast-in-place stepping stones for the outside Tiki area. I'll post some pics in Home Tiki Bars/Barefoot Bay soon I ruined 4 mugs over the weekend, I think they glaze fired a little too hot :( I've made a total of 23 (one not shown)so far but only have ONE finished :o I have a lot of glazing to do. |
|
H
hiltiki
Posted
posted
on
Wed, Apr 3, 2019 1:19 PM
Love the customized one, I can see how making a lot of mugs can get boring hehe. |
|
S

Sandbartender
Posted
posted
on
Wed, Apr 3, 2019 1:37 PM
The chappie with the pith and spider turned out fantastic! These are really looking great so far. |
|
H

Hamo
Posted
posted
on
Thu, Apr 4, 2019 5:40 PM
That's a nice expedition party you're forming there. |
|
D
danlovestikis
Posted
posted
on
Thu, Apr 4, 2019 7:22 PM
Wow that's a lot of work. So sorry to hear some didn't turn out. Did they melt? Wendy |
|
H

hang10tiki
Posted
posted
on
Thu, Apr 4, 2019 8:11 PM
Looks like a serious meeting Keep it up Mike |
|
M
MadDogMike
Posted
posted
on
Thu, Apr 4, 2019 9:12 PM
Thanks guys :D Wendy, they didn't melt but they had hundreds of glaze skips and boiled glaze inside the bottom. Not sure exactly what I did wrong but doing some experimentation. I poured the insides as I have 100 times before but I did a few things different, something cause a problem. I usually wet the inside before I pour glaze, this time I soaked them, maybe they were TOO wet? I also thinned my glaze some based on recommendations I had seen on the 'net, maybe too much? And they fired about 50 degrees too hot but that shouldn't be enough to cause a problem? I have few new ones going into the kiln Saturday, we'll know by Sunday morning if I found my problem :lol: |
|
D
danlovestikis
Posted
posted
on
Fri, Apr 5, 2019 7:52 AM
Not 100% dry does it every time. You had hidden water in there that boiled. To repair the skips and boil I scrub them really well and then let them dry in a dust free place. Then I re-glaze them, just enough on the inside to fill the pockets. Then I glaze the outside nice and thick with three layers ignoring the skips. I sure hope you can make it work. If not turn them into zombies. Wendy |
|
M
MadDogMike
Posted
posted
on
Thu, Apr 25, 2019 12:08 AM
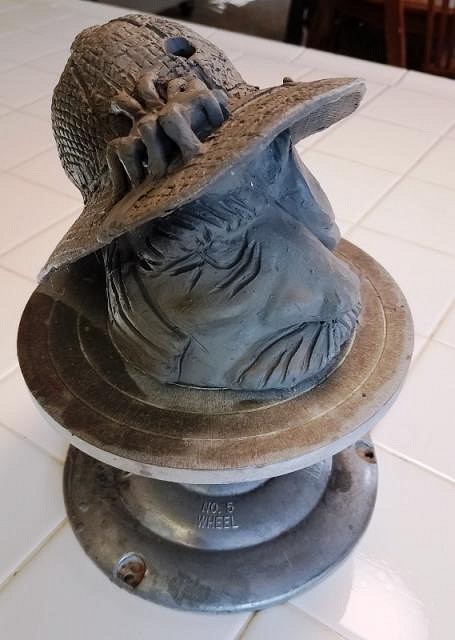
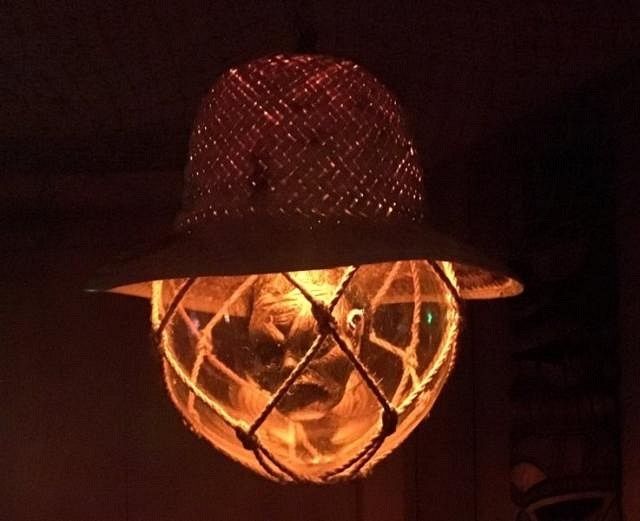
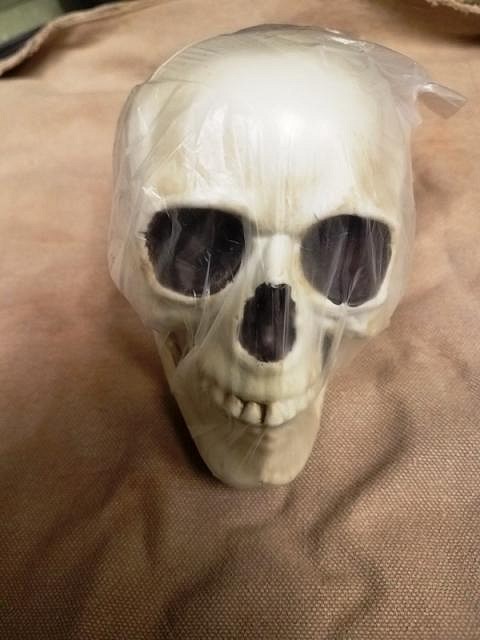
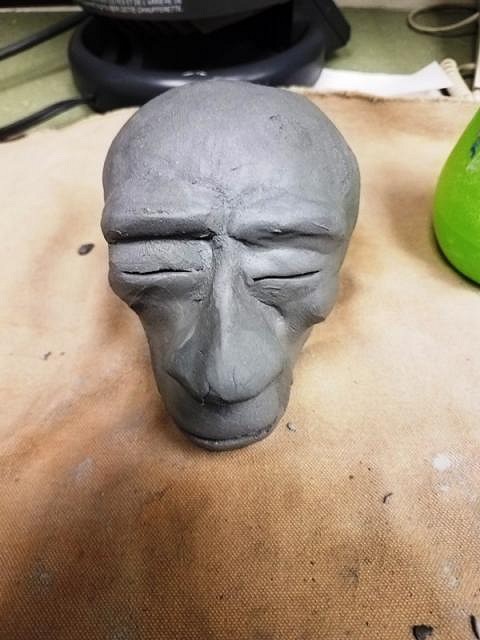
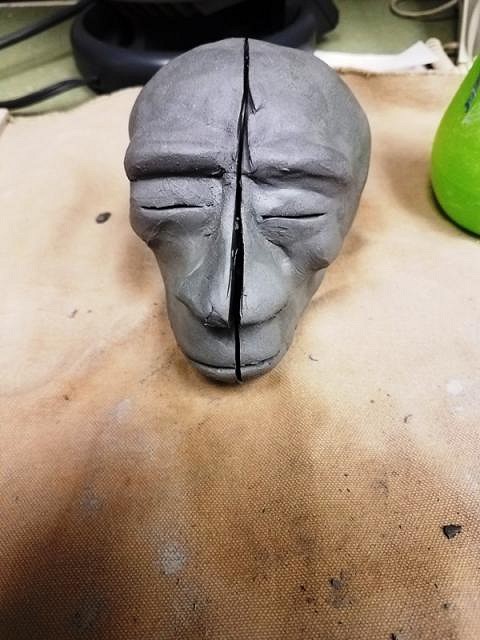
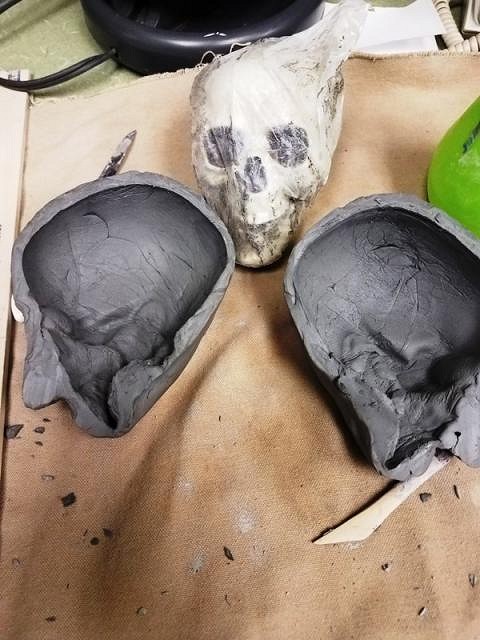
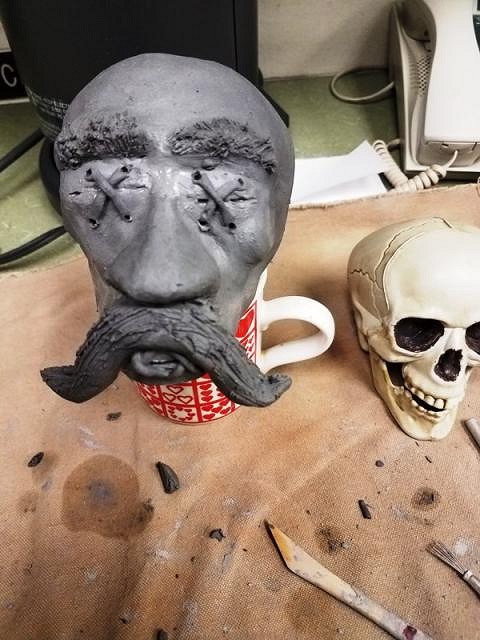
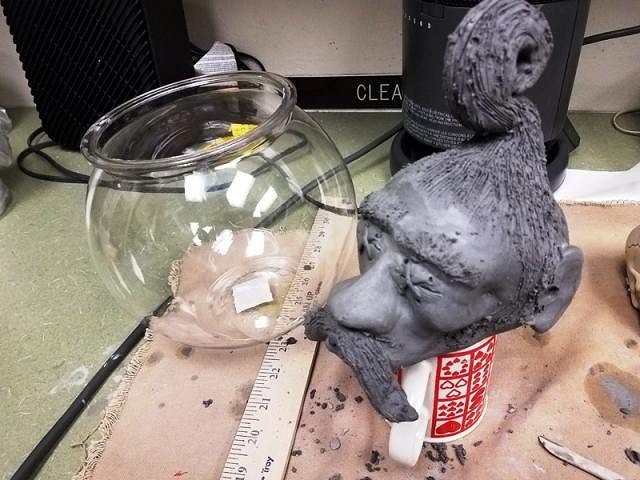
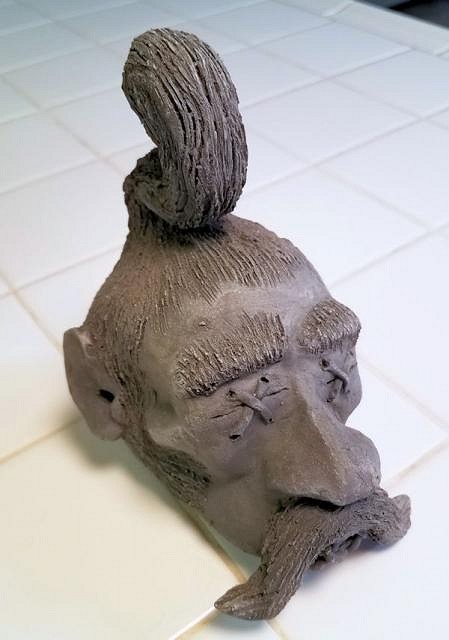
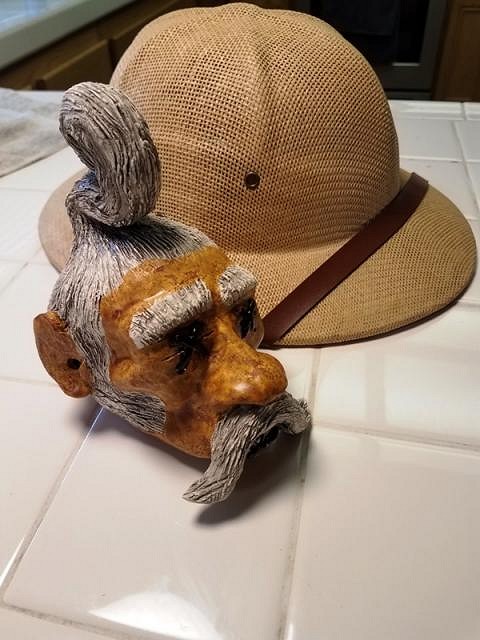
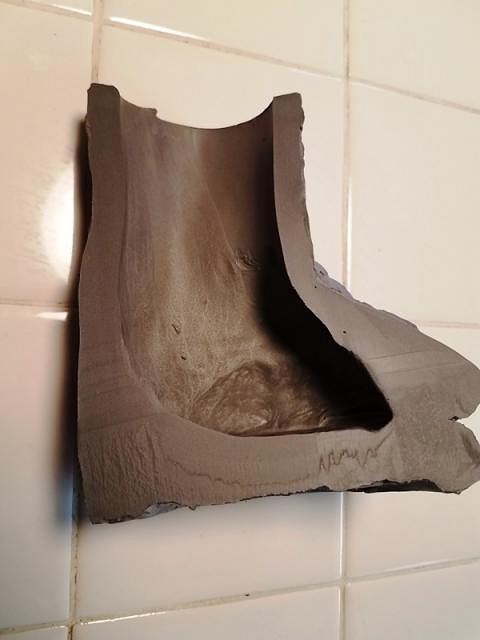
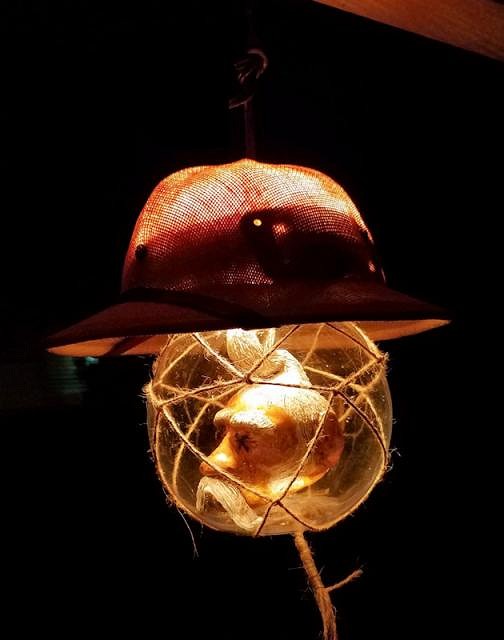
Snadbartender (TC)/Scott Huber on the Facebook Tiki Lamp group made this lamp he called The Unfortunate Tourist. It has a shrunken head in a netted globe with a safari hat as shade I thought it was really cool and decided to make one for myself. I'm not sure what Scott used for a shrunken head but I have clay so I set out to make a clay one. I started with a plastic skull and wrapped it in a plastic bag so I could get the skull out later. I covered the skull in slabbed clay and formed it to the skull, adding some basic features. I wanted it to be somewhat distorted because of the shrinking process After the clay had hardened some, I split it down the middle and removed the plastic skull I put the head back together without the plastic skull and started adding more details Now to let it slowly dry and continue to detail the hair. [ Edited by: maddogmike 2019-04-25 16:49 ] |
|
S

Sandbartender
Posted
posted
on
Thu, Apr 25, 2019 6:32 AM
Hey Mike- Looking great so far. Thanks for the shout-out. BTW: I found a source for decent acrylic globes with only a minimal seam line across the equator, a full round bottom, and minimal lip on top. I used the 8" version for the Unfortunate Tourist, but they make them in 6" all the way up to 18" or so. https://www.amazon.com/gp/product/B00435HKIS/ref=ppx_yo_dt_b_asin_title_o05_s00?ie=UTF8&psc=1 |
|
L

littlegiles
Posted
posted
on
Thu, Apr 25, 2019 6:36 AM
Scott, very cool lamp idea! Thanks for the link. Mike, as always you are too creative. Well done and can't wait to see more as this develops. |
|
T
tikiskip
Posted
posted
on
Thu, Apr 25, 2019 6:56 AM
Cool light Mike. "BTW: I found a source for decent acrylic globes" You can find these globes at a thrift store for lots less, it may take a few times to find one but I see them all the time for like $6.00 bucks for a 10 inch size. Never saw the Fakebook page before, but then I don't do Fakebook. |
|
WC
Will carve
Posted
posted
on
Thu, Apr 25, 2019 7:01 AM
Now this is cool. |
|
H

hang10tiki
Posted
posted
on
Thu, Apr 25, 2019 7:26 AM
Lookin good Mad Dog |
|
D
danlovestikis
Posted
posted
on
Thu, Apr 25, 2019 8:02 AM
Wow Mike, you have done an outstanding piece so far. I'm looking forward to all you pieces being glazed. Wendy |
|
M
MadDogMike
Posted
posted
on
Thu, Apr 25, 2019 5:36 PM
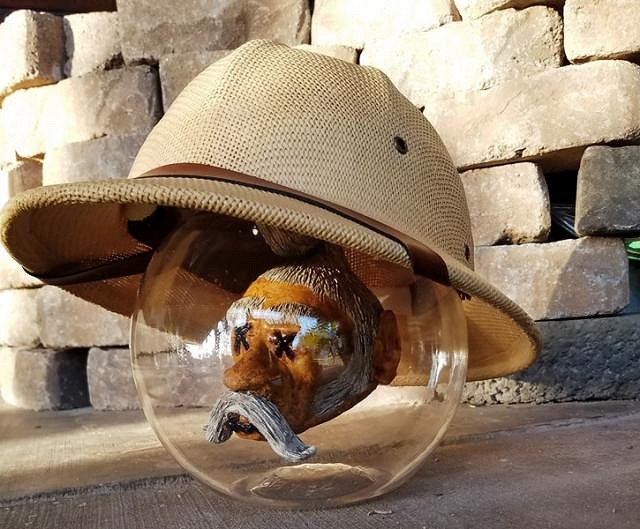
Thanks guys. Scott I ended up using a plastic fish bowl, it has a wide lip at the top but I think that will help me attach it to the hat. Here's a cleaned up photo |
|
H

hang10tiki
Posted
posted
on
Thu, Apr 25, 2019 6:31 PM
Rock star |
|
M
MadDogMike
Posted
posted
on
Thu, May 2, 2019 8:01 AM
Progress on my copy of Sandbartender's Shrunken Head Lamp. The head is all glazed and fired, now to figure out how it all goes together.
|
|
D
danlovestikis
Posted
posted
on
Thu, May 2, 2019 8:42 AM
wowowowoowoowowowoowo!!! That turned out beautifully. Good job MadDogMike. You are one skillful guy. I hope Sandbartender will post a photo once it is hung up. Wendy |
|
M
MadDogMike
Posted
posted
on
Thu, May 2, 2019 9:06 AM
Thank you Wendy. Just to clarify, this one is for me :lol: Sandbartender already made one (pic in the first post), I just stole his design and I'm making one for me :D |
|
L

littlegiles
Posted
posted
on
Thu, May 2, 2019 11:35 AM
:tiki: Winner Winner :tiki: |
|
D
danlovestikis
Posted
posted
on
Fri, May 3, 2019 9:33 AM
You are both wonderful. Wendy |
|
M
MadDogMike
Posted
posted
on
Mon, Jun 10, 2019 9:57 AM
Still working on my production run of Jungle Explorer Sinking in Quicksand mugs for a customer in Finland. I have sent 12 so far, he is happy with them and I am working on another dozen. I had left all of them in the mold for 90 minutes before pouring the excess slip out. The first ones had a nice wall thickness but some of the subsequent ones were not as thick as I wanted. I tried to compensate by leaving the slip in for 120 minutes and this is what happened- The mug walls are so thick that there isn't room for the drink :lol: |
|
D
danlovestikis
Posted
posted
on
Mon, Jun 10, 2019 8:00 PM
I sure do like to watch you work. Wendy |
|
H

hang10tiki
Posted
posted
on
Mon, Jun 10, 2019 8:45 PM
Mug above looks great Mike |
|
M
MadDogMike
Posted
posted
on
Fri, Jun 14, 2019 10:38 PM
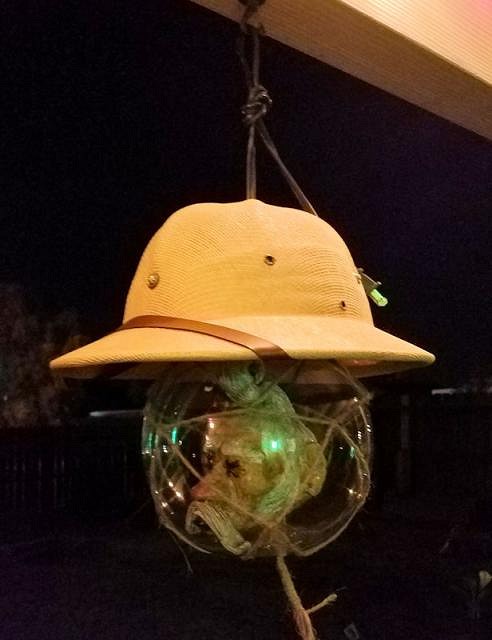
I finished up my version of Sandbartender's lamp, I'm happy with the way it turned out but it was a pain in the but to assemble :lol: |
|
M
MaukaHale
Posted
posted
on
Fri, Jun 14, 2019 10:43 PM
Well Done! |
|
D
danlovestikis
Posted
posted
on
Sat, Jun 15, 2019 9:37 AM
That is so creepy, in a good way. Excellent MDM, Wendy |
|
H

hang10tiki
Posted
posted
on
Sat, Jun 15, 2019 11:46 AM
Bravo sir |
|
S

Sandbartender
Posted
posted
on
Sat, Jun 15, 2019 12:20 PM
Well done, Mike! I really love the use of your explorer sculpt. One thing you might want to do (if you have the stomach to disassemble the thing, and, yes, mine was a PITA to put together as well. LOL) would be to use something translucent but light dimming to help cut some of the upward light into the safari helmet. Might put more focus on the wonderful shrunkie. “The Hitch-Hiker's Guide to the Galaxy also mentions alcohol. It says that the best drink in existence is the Pan Galactic Gargle Blaster, the effect of which is like having your brains smashed out with a slice of lemon wrapped round a large gold brick.” [ Edited by: Sandbartender 2019-06-15 12:21 ] |
|
M
MadDogMike
Posted
posted
on
Sun, Jun 16, 2019 5:49 AM
Thanks guys. Scott, I don't think I have the will to diassemble and re-assemble it - I would have to cut the netting and re-net it :lol: That being said, I may have to do that anyway, I thought I got an LED bulb but it may be incandescent, I'm worried about heat buildup. As far as the light shining through the hat, I kinda like it. I'll have to look at it when I get it mounted in it's final resting place. |
|
WC
Will carve
Posted
posted
on
Sun, Jun 16, 2019 6:40 AM
Mike, |
|
H
hiltiki
Posted
posted
on
Sun, Jun 16, 2019 2:21 PM
Nice job Mike, I love it as is. |
|
M
MadDogMike
Posted
posted
on
Fri, Aug 16, 2019 11:05 AM
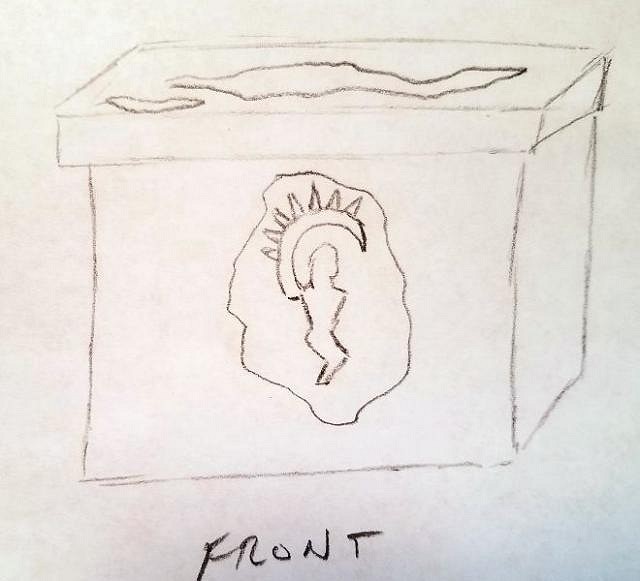
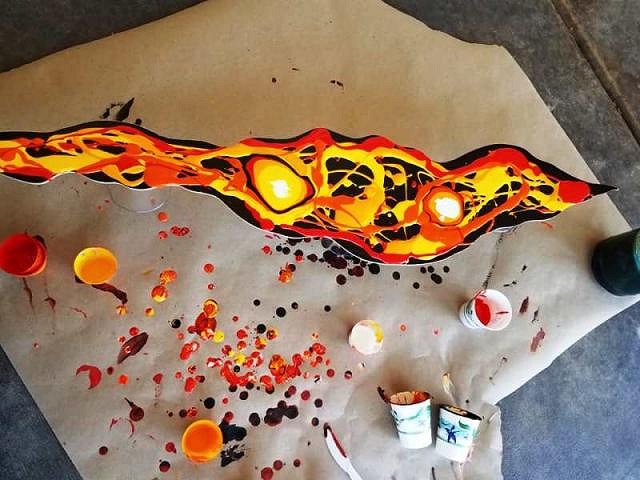
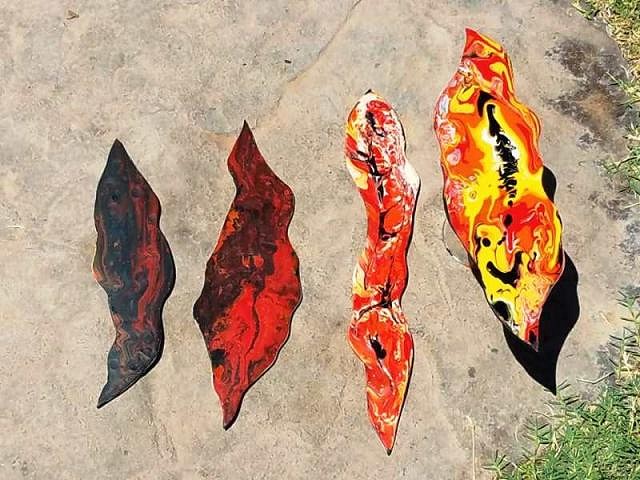
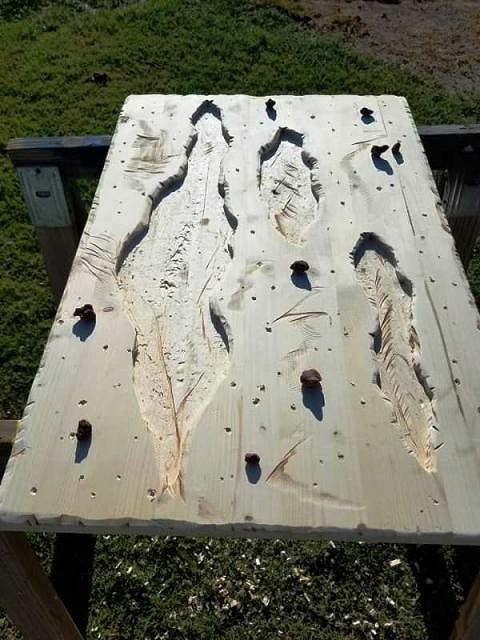
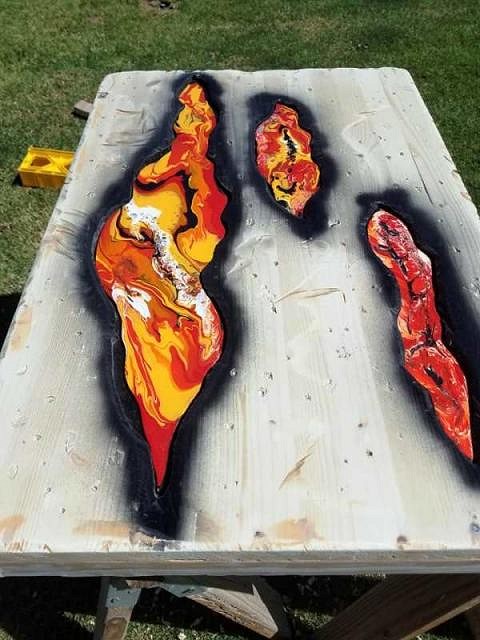
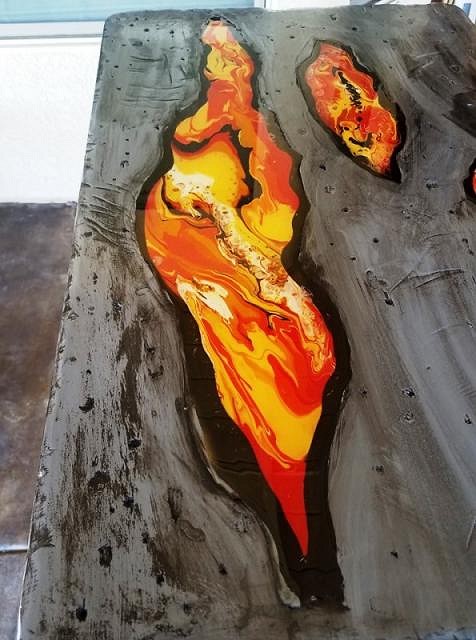
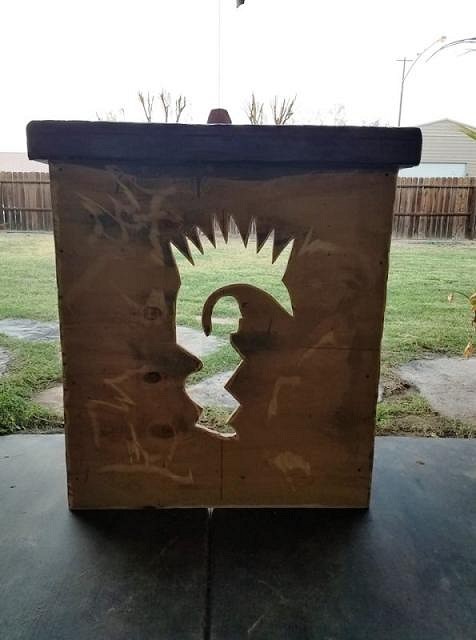
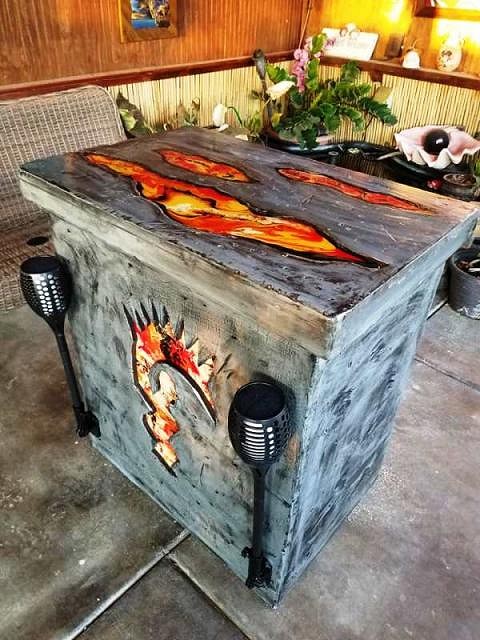
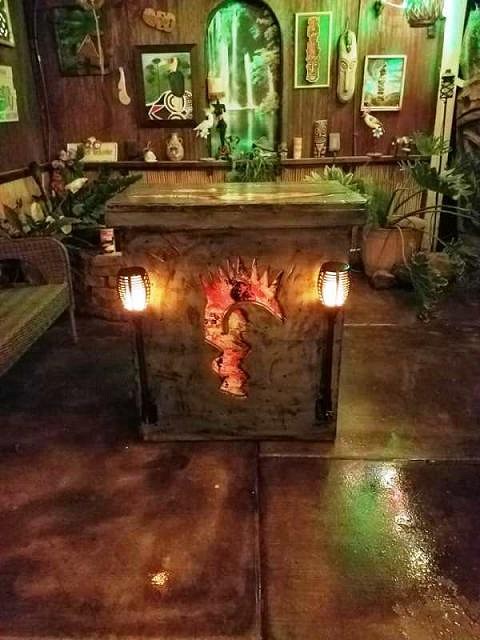
I decided I needed a bar on the patio. Not a seating area bar, just a place to mix drinks or use as a food serving table. I wanted it to have a Pele theme with lava, this was my concept drawing For the lava, I decided on a poured acrylic technique. You pour acrylic paint on your surface then swirl it around until you have the look you like. I cut some "lava fissure" shapes from black Masonite and poured the acrylic paint on them. This is after the paint was poured and before it was swirled. Here are a few panels, the first 2 are too dark so I added less black, more light yellow. I traced the lave fissures onto my 36x24x1 inch wooden top, routered them 1/2 deep, and then textured the wood via various methods including smashing lava rocks on the wood with a hammer :lol: I painted the edges of the holes black and fitted the lava panels inside. I filled in the depression over the lava with clear epoxy and painted the wood with oil based paint. I made the bar base and cut out the Pele silhouette Put another poured panel behind Pele, textured and painted the base, added two solar torches. I need to put a coat of epoxy to the Pele to protect it and make the colors pop. Nighttime glamour shot |
|
H
HopeChest
Posted
posted
on
Fri, Aug 16, 2019 12:23 PM
Oh my DAYS - that is immense. |
|
S

swizzle
Posted
posted
on
Fri, Aug 16, 2019 7:58 PM
You should have made it so the lava was flowing over the edges and then add a few drops on the ground but it still looks cool. Nice work MDM. |
|
D
danlovestikis
Posted
posted
on
Fri, Aug 16, 2019 8:28 PM
I am finding myself speechless. Dan would say that's not possible. All the unique steps that we've been invited to watch. MDM you are such a talented person. I'm so glad to know you exist. I'm ready for you to start your next project...please. Wonderful, Wendy |
Pages: 1 2 3 4 5 6 7 8 9 10 11 12 13 14 15 16 17 18 19 20 21 22 23 24 25 26 27 28 29 30 31 32 33 34 35 36 37 38 39 40 41 42 43 44 45 46 47 48 49 50 51 52 53 54 55 56 57 58 59 60 61 62 63 64 65 66 67 68 3217 replies

