Tiki Central / Other Crafts
MadDog Mike's Platterful of Pupule - Pupu Pufferfish
Pages: 1 2 3 4 5 6 7 8 9 10 11 12 13 14 15 16 17 18 19 20 21 22 23 24 25 26 27 28 29 30 31 32 33 34 35 36 37 38 39 40 41 42 43 44 45 46 47 48 49 50 51 52 53 54 55 56 57 58 59 60 61 62 63 64 65 66 67 68 3,225 replies
|
M

MadDogMike
Posted
posted
on
Tue, Mar 7, 2023 10:02 PM
danlovestikis thank you very much |
|
M
MadDogMike
Posted
posted
on
Sun, Mar 12, 2023 10:04 AM
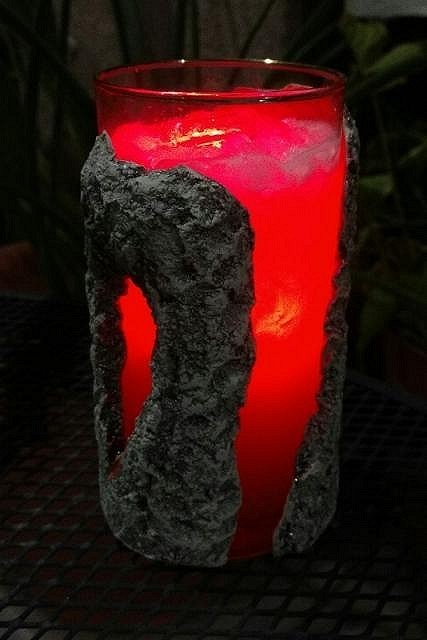
I had an idea to combine ceramic and glass into a mug several years ago. I tried a bunch of times but never was very happy with the results. This was the most recent attempt in 2017
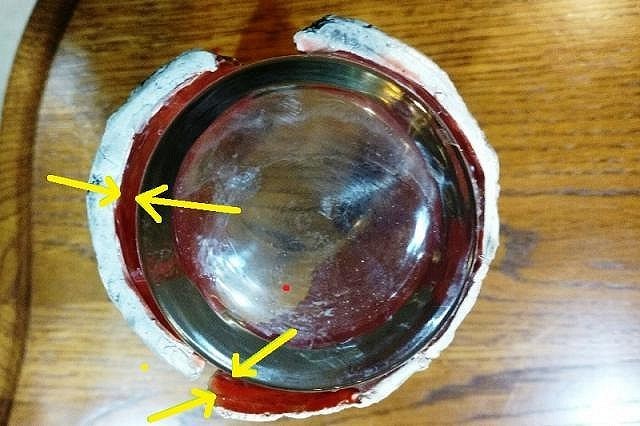
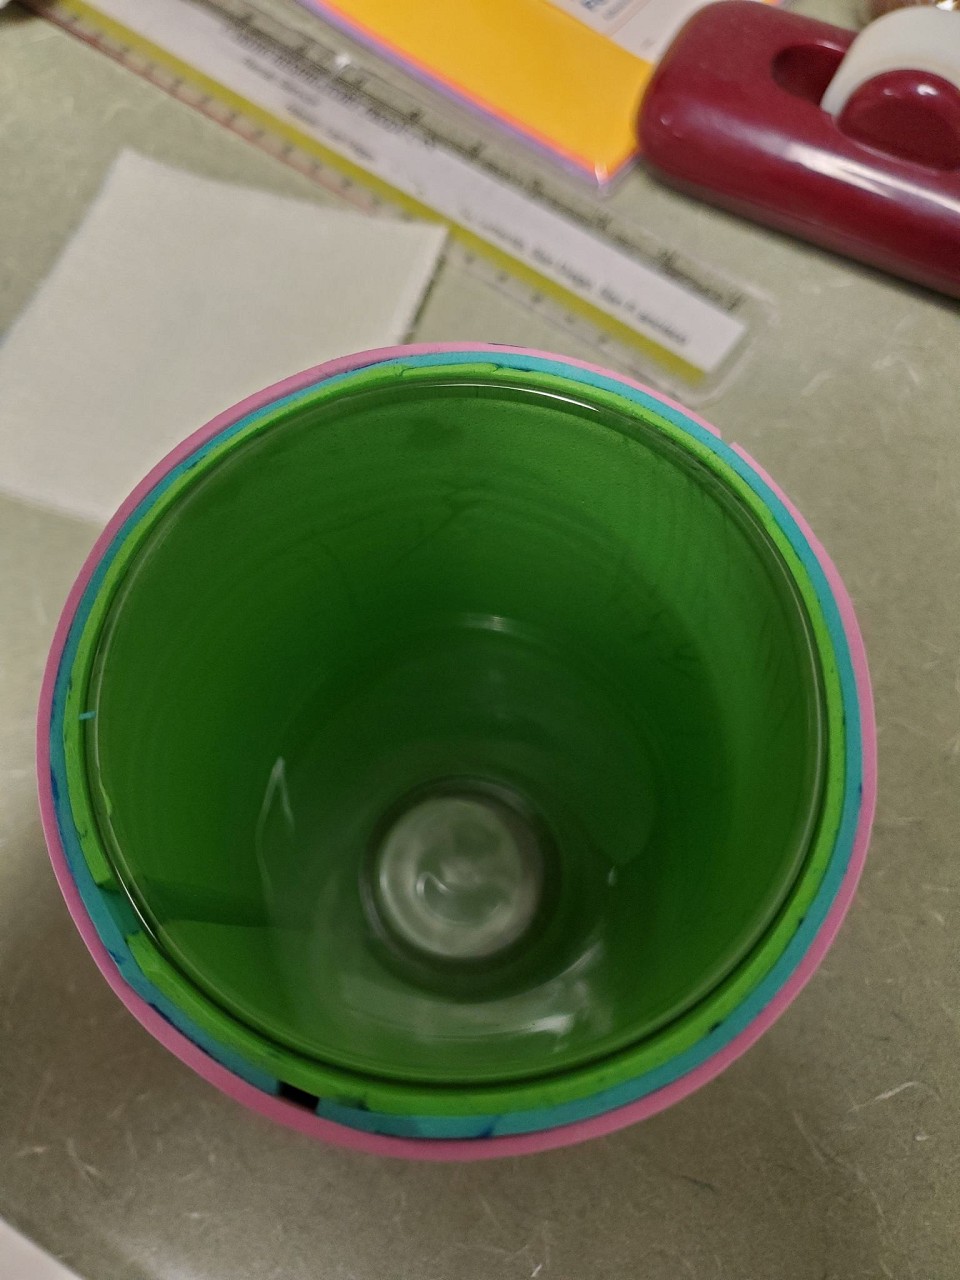
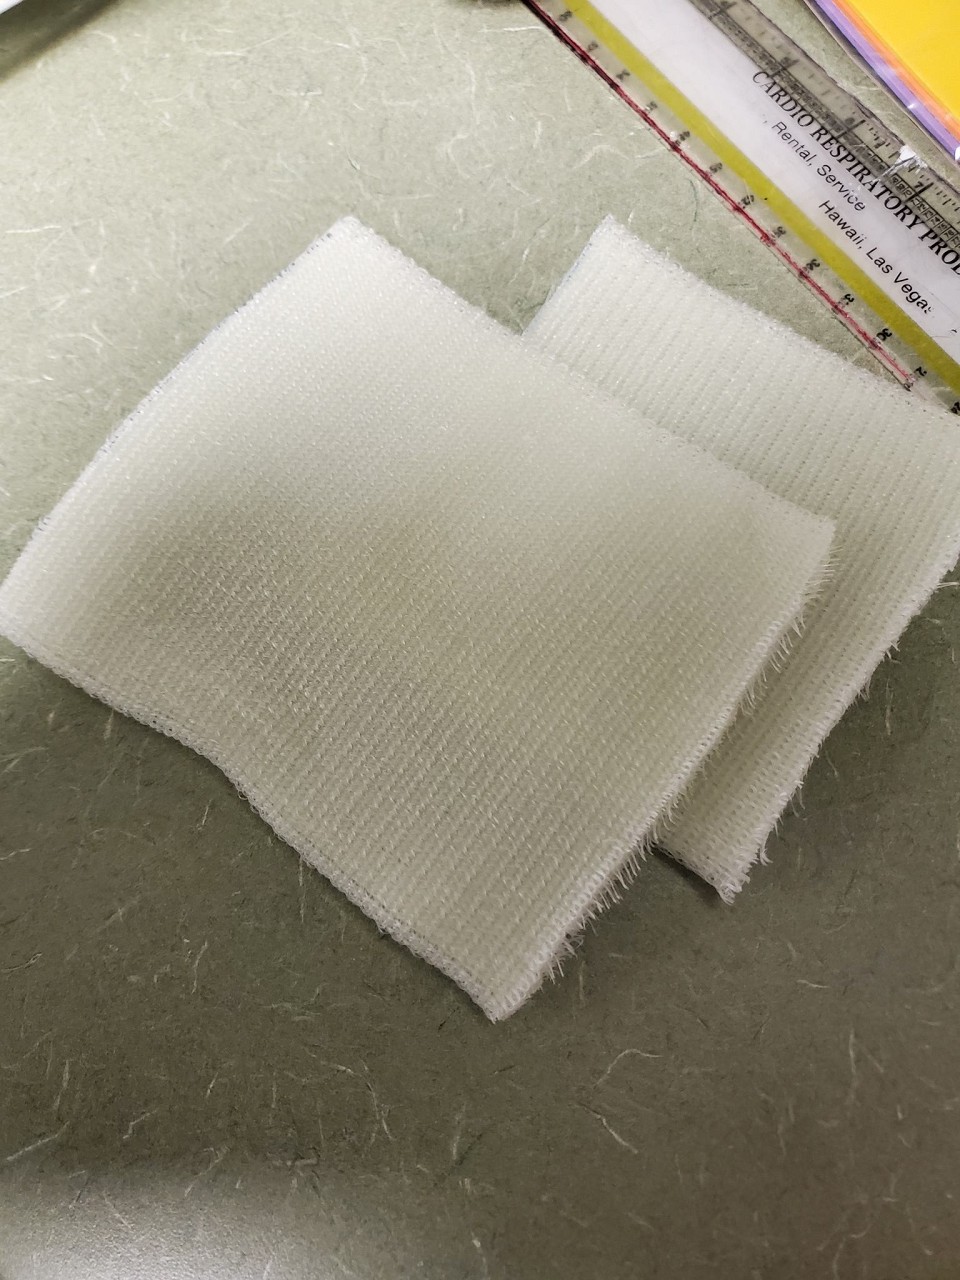
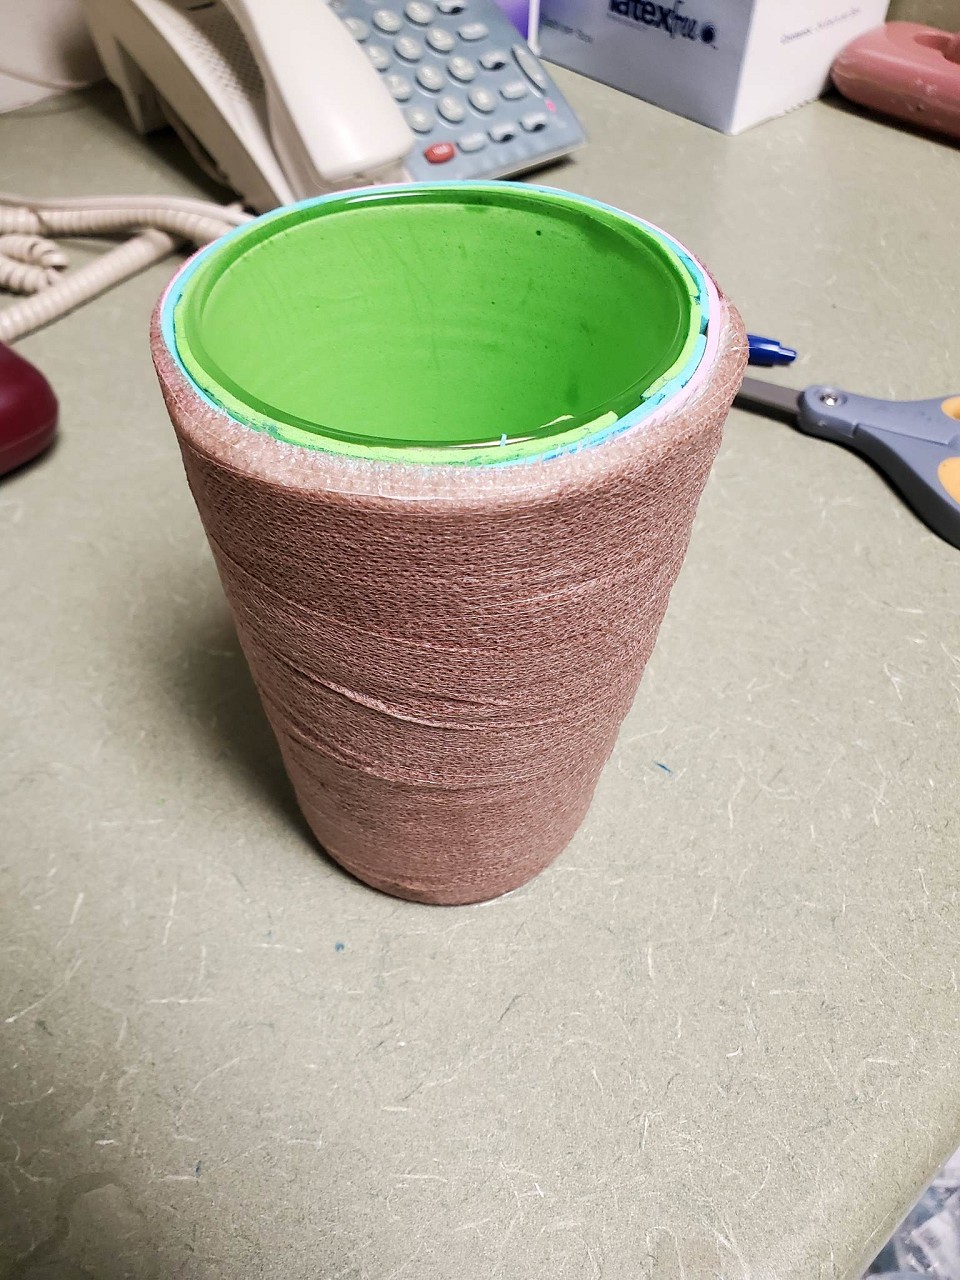
I like the effect with the ceramic "scales" on the outside, the gaps between them, and the red LED ice cube inside. But it's difficult to match the curve of the scales with the curve of the glass. You can see here where they don't match up. The problem is that the clay shrinks when fired (about 6% for my clay) so you have to start with it bigger than you want and hope it shrinks to the right size. I measured the circumference of my glass and added 6%, that gives me a target. I added 3 layers of sheet craft foam. It gave me a little more that 6% but I figured a little too big was better than a little too small. In theory I could lay my little slabs over the enlarged glass now and they would be the right sized. But if you take them off too soon they are soft and they warp or spread open a little. If you let them dry too long they harden and start to shrink, then the break against the glass. So a new plan. I have access to some fiberglass orthopedic splint material. It is water activated, you get it wet and in a few minutes it hardens. So I wet it and wrapped it around mu glass, securing it with elastic bandage material. Now I have a hard concave shell that is an exact match for the outside of my glass plus about 6.5%. I can cut and texture my scale, form it to the inside of the shell. As it dries and shrinks, it will pull away from the shell without deforming (I hope). [ Edited by MadDogMike on 2023-03-12 10:07:34 ] |
|
M
MadDogMike
Posted
posted
on
Sun, Mar 12, 2023 12:21 PM
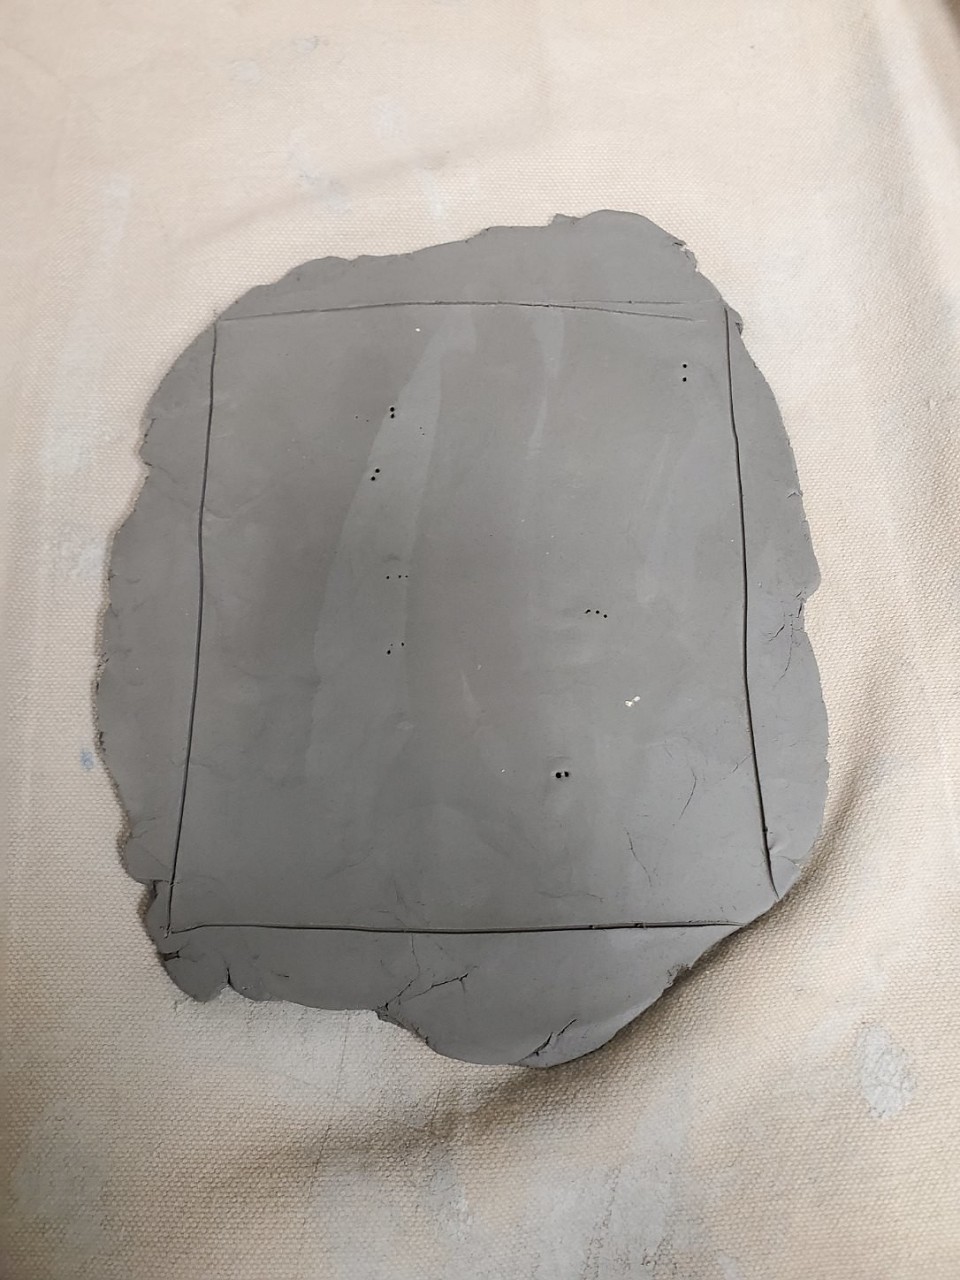
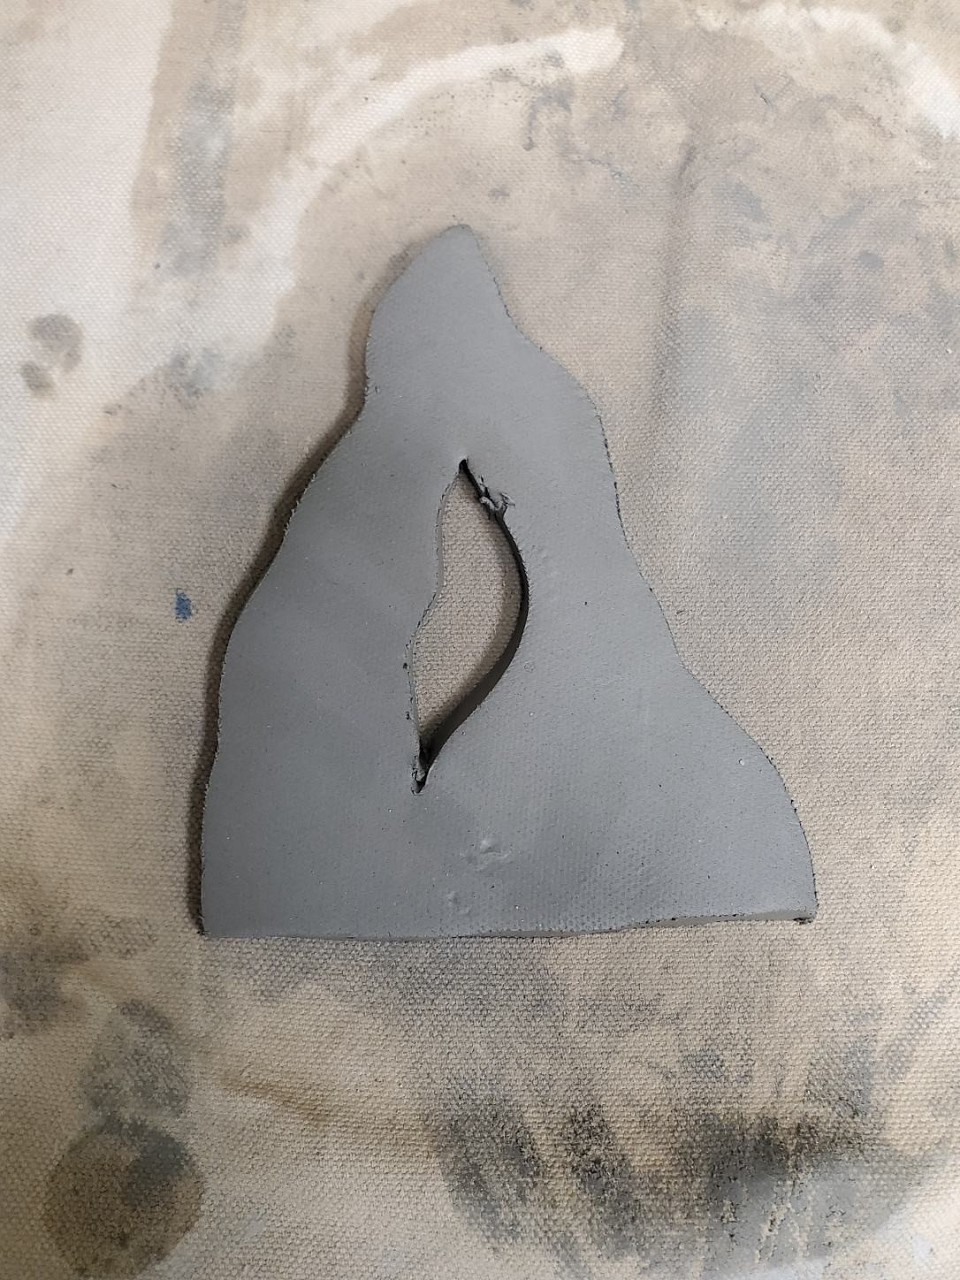
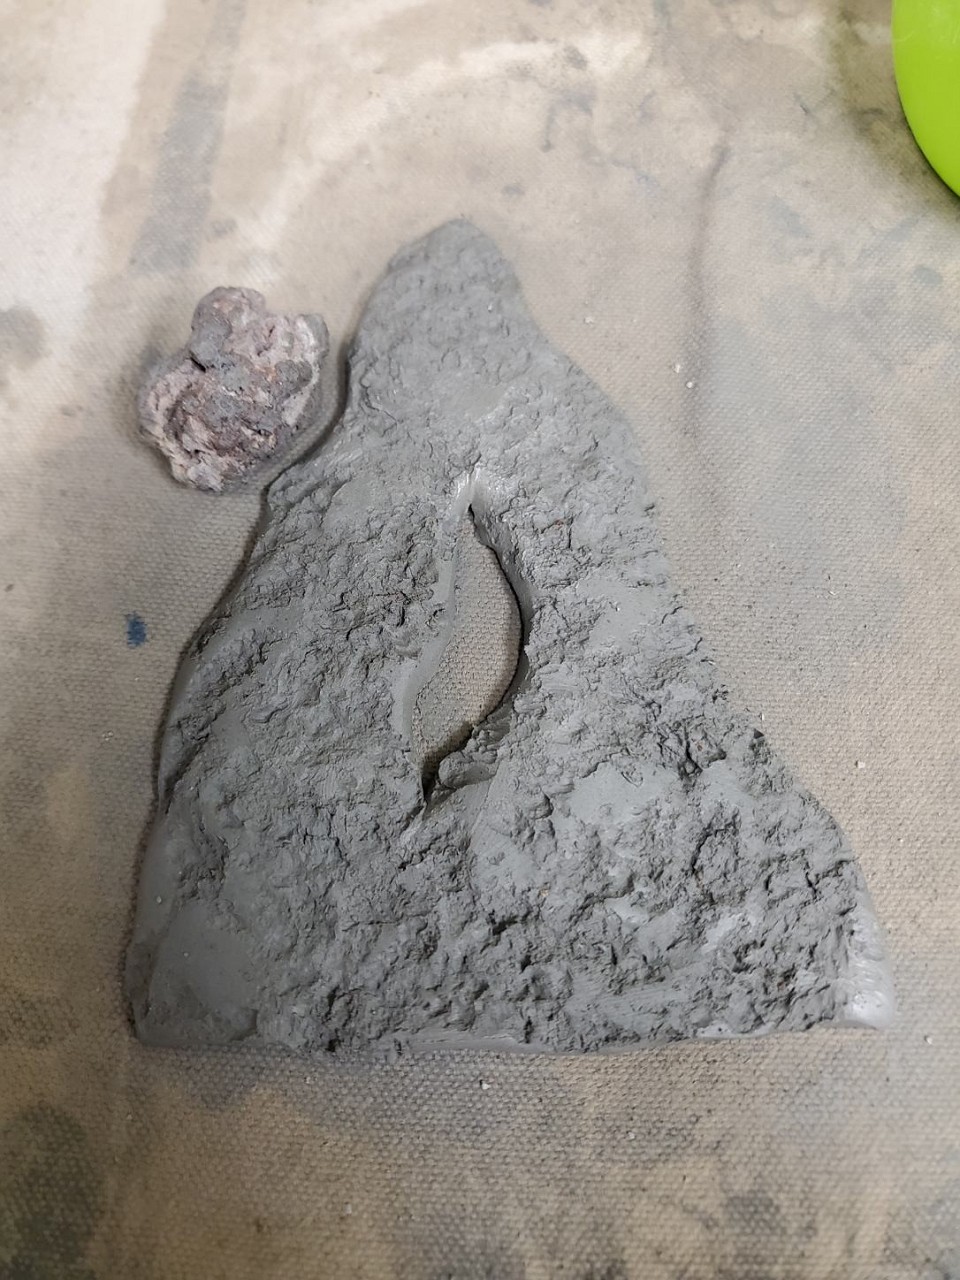
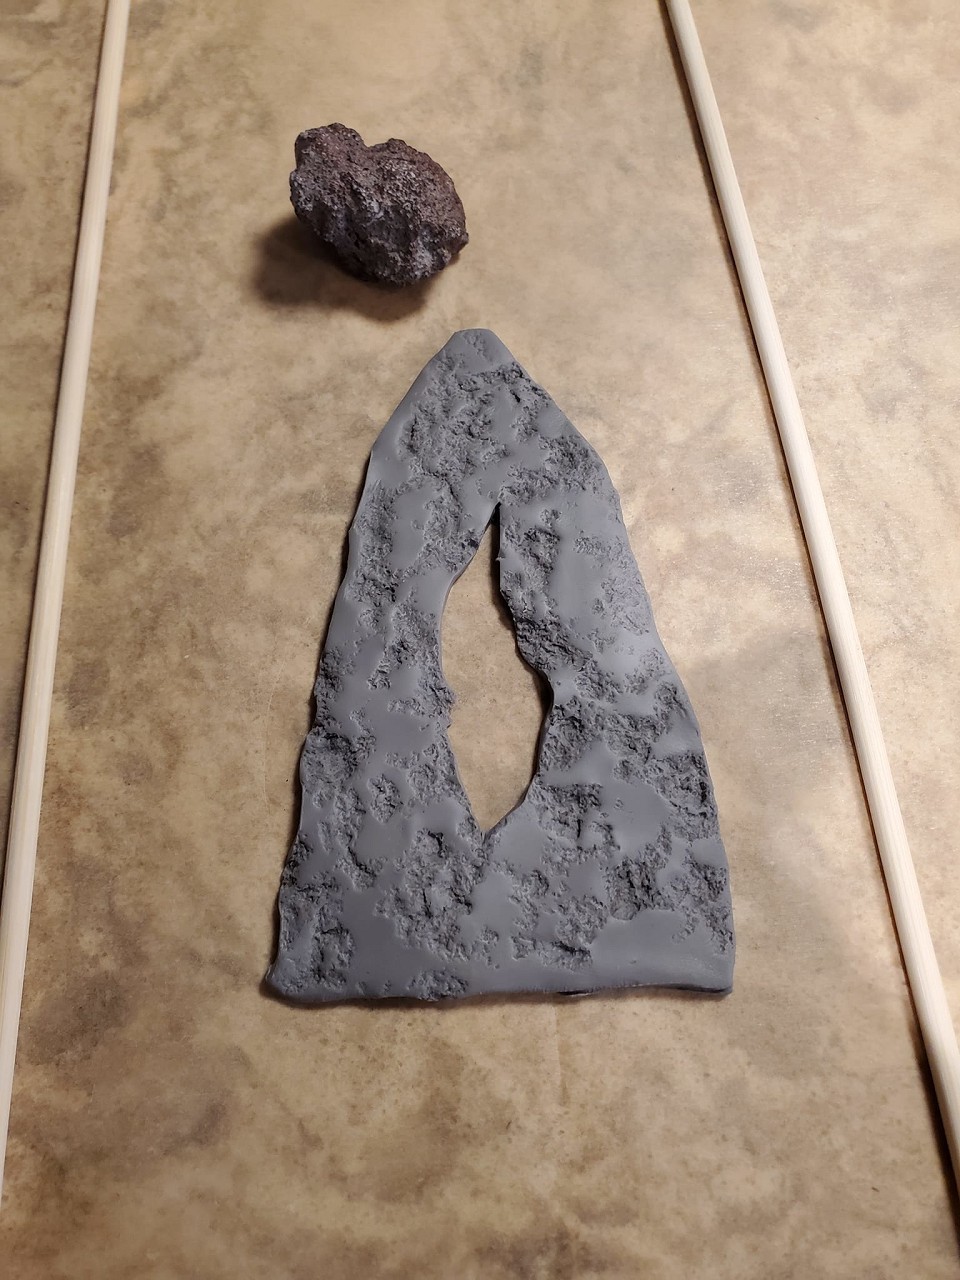
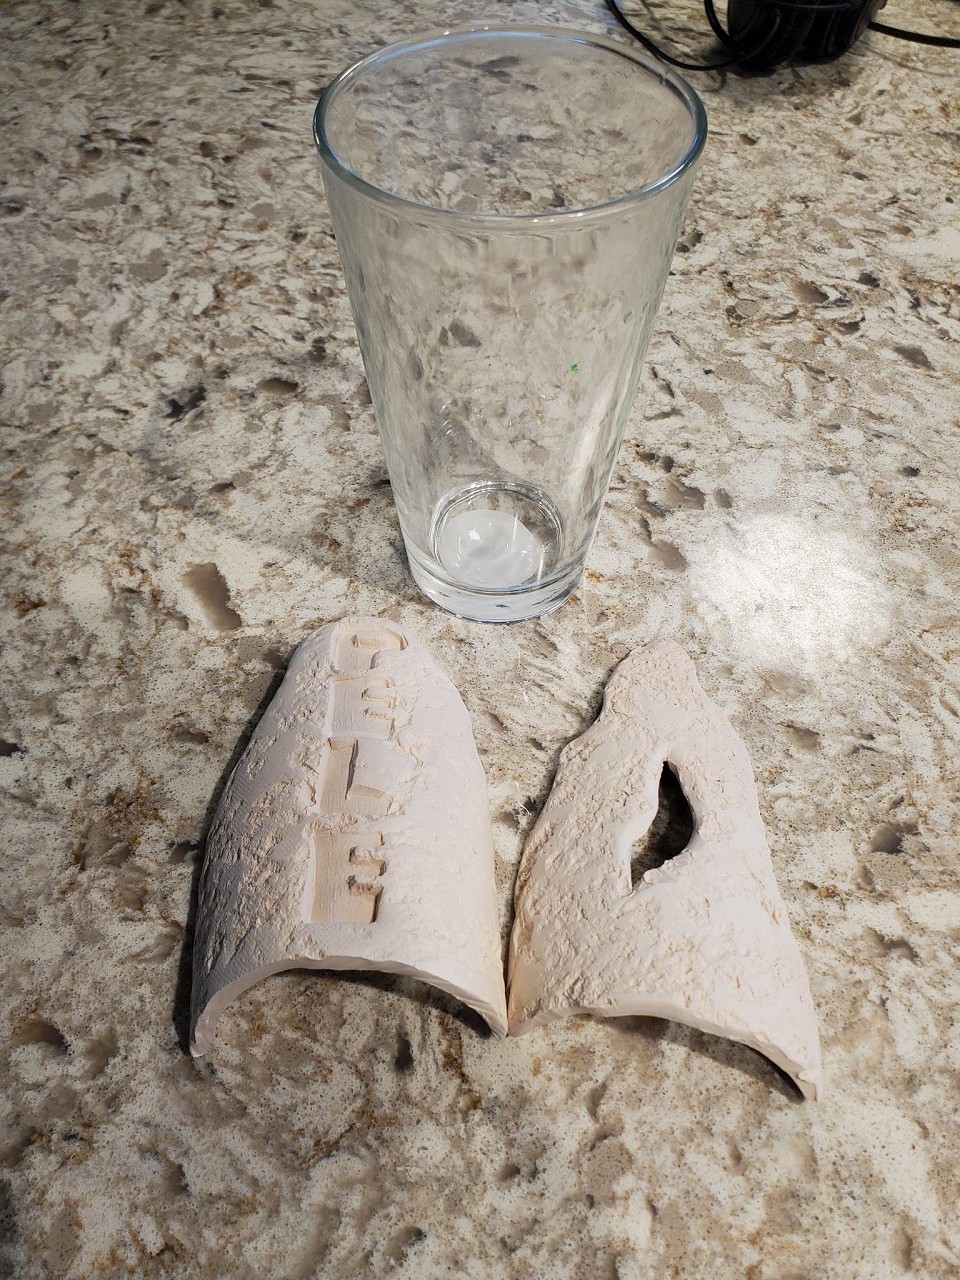
Next steps Rolled out some clay to a uniform 1/4 inch, then rolled it a bit thinner. Marked the maximum size of 4.5 x 5.5 inches. Cut out a free-form "lava" shape Tapered the edges a bit and textured it with a lave rock Into my shell on a piece of paper texture side down and pressed to conform to the shell. Allowed to dry Made a second one with "PELE" stamped into it. Because these are so thin, I can force dry them and fire them tonight. By tomorrow morning I should be able to see if they fit my glass. If so I'll make more. If not I can add or remove a sheet of foam and make a new shell. |
|
S

swizzle
Posted
posted
on
Sun, Mar 12, 2023 4:45 PM
Interesting idea Mike. I hope it works for you. Just one thought/observation though. From what i can see, and i could be wrong, but you didn't account for the thickness of the clay. The 'outside' of the clay that is touching the concave shape you made is going to have the same radius, but the 'inside', what is going up against the glass, is going to have a slightly smaller radius because you're building from the outside in. It might not be much, and your 6.5% allowance might make up for that after its shrunk and been fired, but if i'm correct with what i'm thinking, you'll have to add enough extra foam to the glass to make up the thickness of your clay before you make that fibreglass thingy. |
|
M
MadDogMike
Posted
posted
on
Sun, Mar 12, 2023 4:51 PM
in reply to swizzle
Swizz, I think you are right! Guess I'll find out tomorrow morning LOL |
|
S
swizzle
Posted
posted
on
Sun, Mar 12, 2023 4:53 PM
in reply to MadDogMike
Yes we will. Fingers crossed for you. |
|
D

danlovestikis
Posted
posted
on
Sun, Mar 12, 2023 8:09 PM
I'm always impressed with your ingenuity. Fingers crossed for you too. |
|
M
MadDogMike
Posted
posted
on
Sun, Mar 12, 2023 9:20 PM
Well swizzle and danlovestikis, we're not going to find out tomorrow LOL The last few times I've fired my kiln I had trouble with one of the control buttons. Tonight it wouldn't work at all. Looks like it's not expensive to repair but it's gonna be a couple weeks at least. You can uncross your fingers, don't want to cut off the blood supply ;) I'll keep you posted. Robbie right though, I miscalculated and they won't fit. Easy enough to fix but I'll wait until I fire these and see how far off I am |
|
D
danlovestikis
Posted
posted
on
Mon, Mar 13, 2023 3:36 PM
You saved my fingers just in time!!! I will patiently wait. I've been there too. |
|
M
MadDogMike
Posted
posted
on
Tue, Mar 14, 2023 8:53 AM
in reply to danlovestikis
LOL. Mailing my kiln controller out for repair today, will probably be a couple weeks before I'm up and running again :( |
|
T

TIKIGIKI
Posted
posted
on
Tue, Mar 14, 2023 4:10 PM
Does it have to be clay? Could you not achieve a similar effect with an airdrying "clay" polymer. It has far less shrinkage and could probably be made ON the glass and left there to harden. |
|
M
MadDogMike
Posted
posted
on
Tue, Mar 14, 2023 5:02 PM
in reply to TIKIGIKI
Good point TIKIGIKI! The air dry clays are not very durable but the oven bake polymer clay might just be the ticket. I think it does shrink a little when baked but not much |
|
T
TIKIGIKI
Posted
posted
on
Tue, Mar 14, 2023 5:05 PM
Yes, I considered that but it does shrink. Not as much a clay but probably enough to lift off the glass. Or back to the polymer, you could improve the durability with a light coat of epoxy? It should be slightly absorbed too! [ Edited by TIKIGIKI on 2023-03-14 17:07:00 ] |
|
M
MadDogMike
Posted
posted
on
Tue, Mar 14, 2023 5:09 PM
in reply to TIKIGIKI
Sounds like I need to make a trip to Michael's Crafts for some clay LOL |
|
H

hang10tiki
Posted
posted
on
Wed, Mar 15, 2023 6:55 PM
Get er done |
|
M
MadDogMike
Posted
posted
on
Thu, Mar 16, 2023 8:48 PM
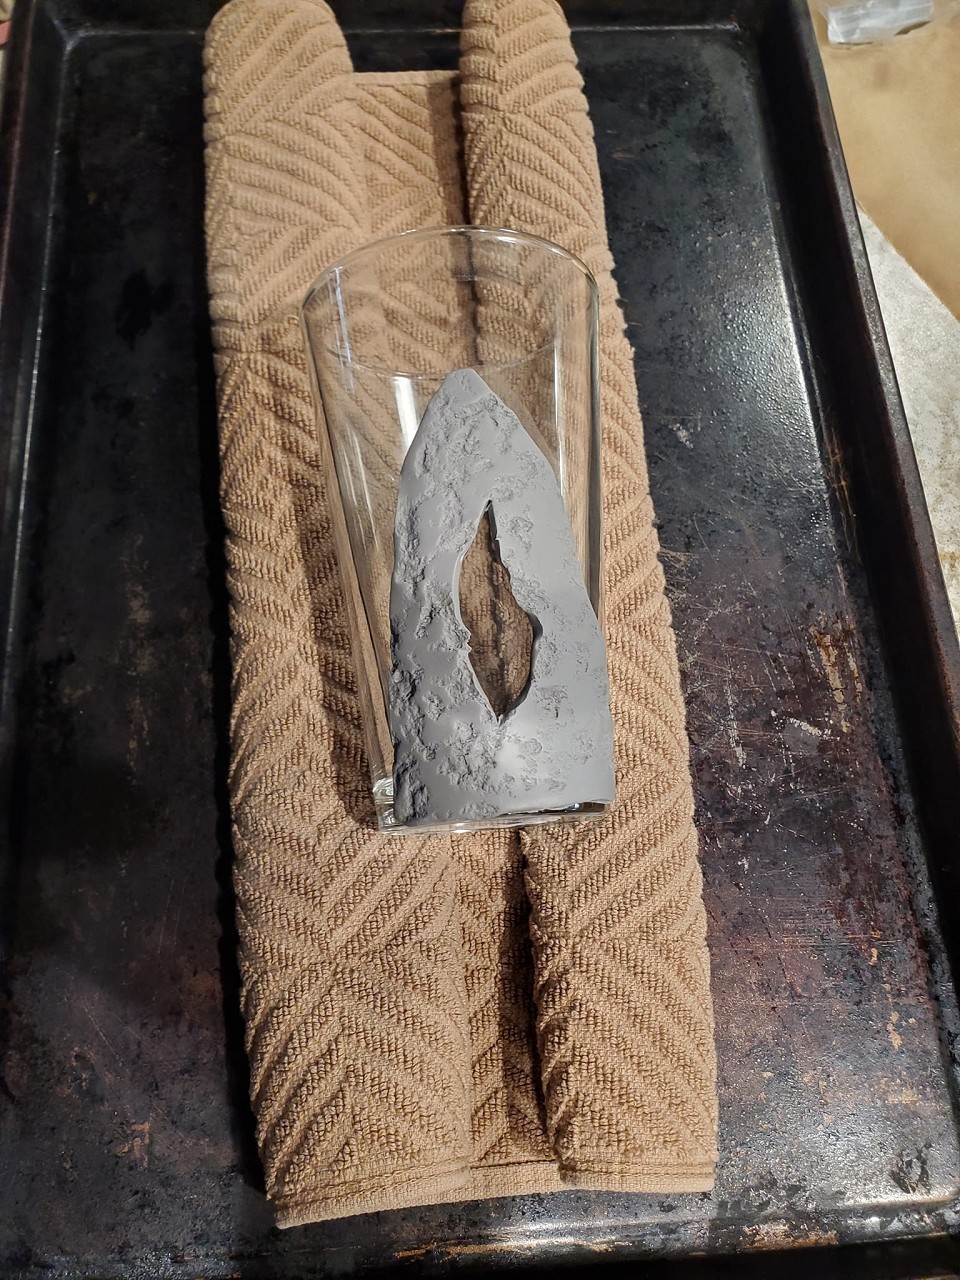
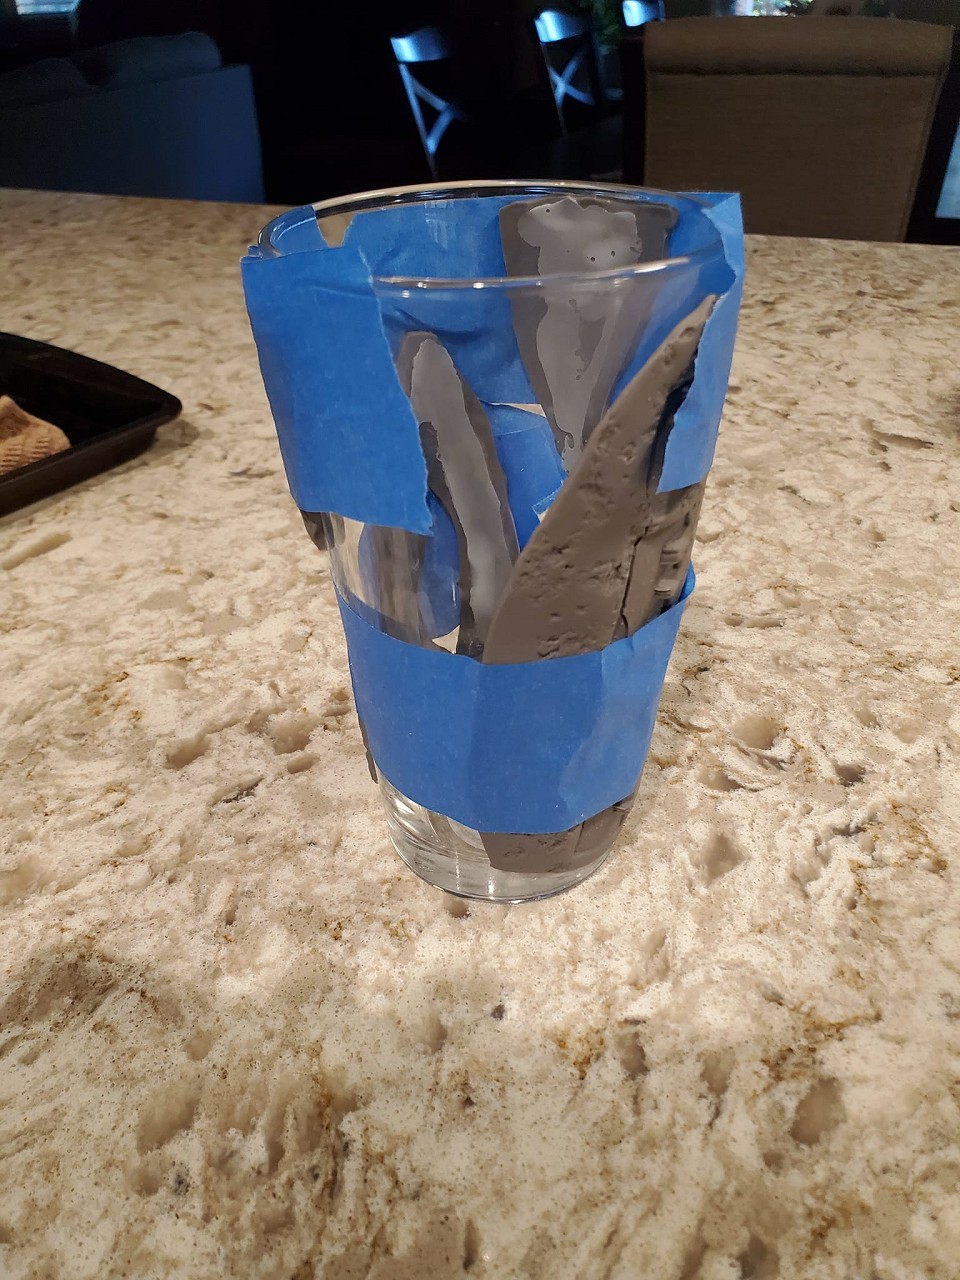
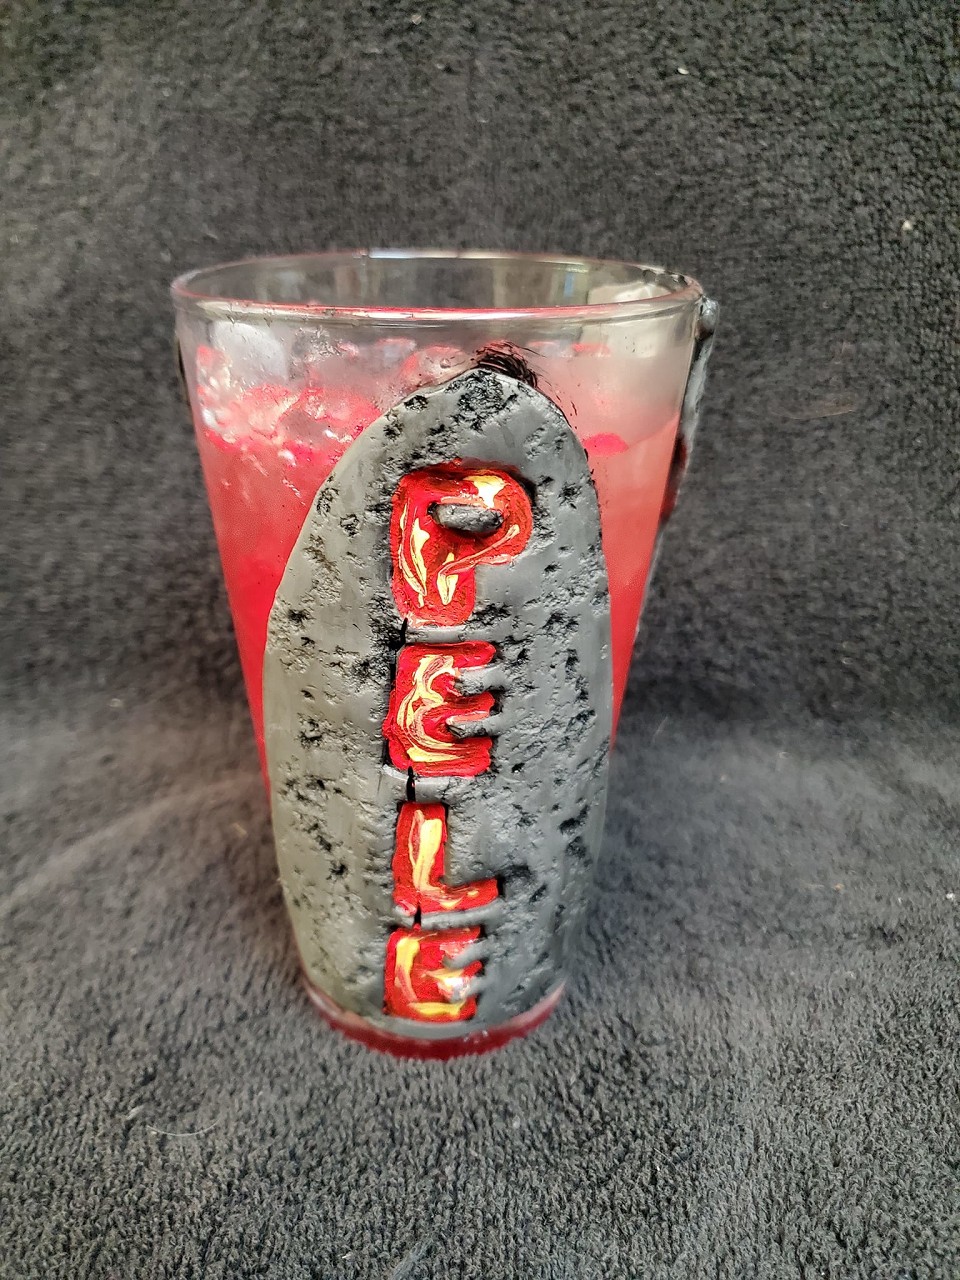
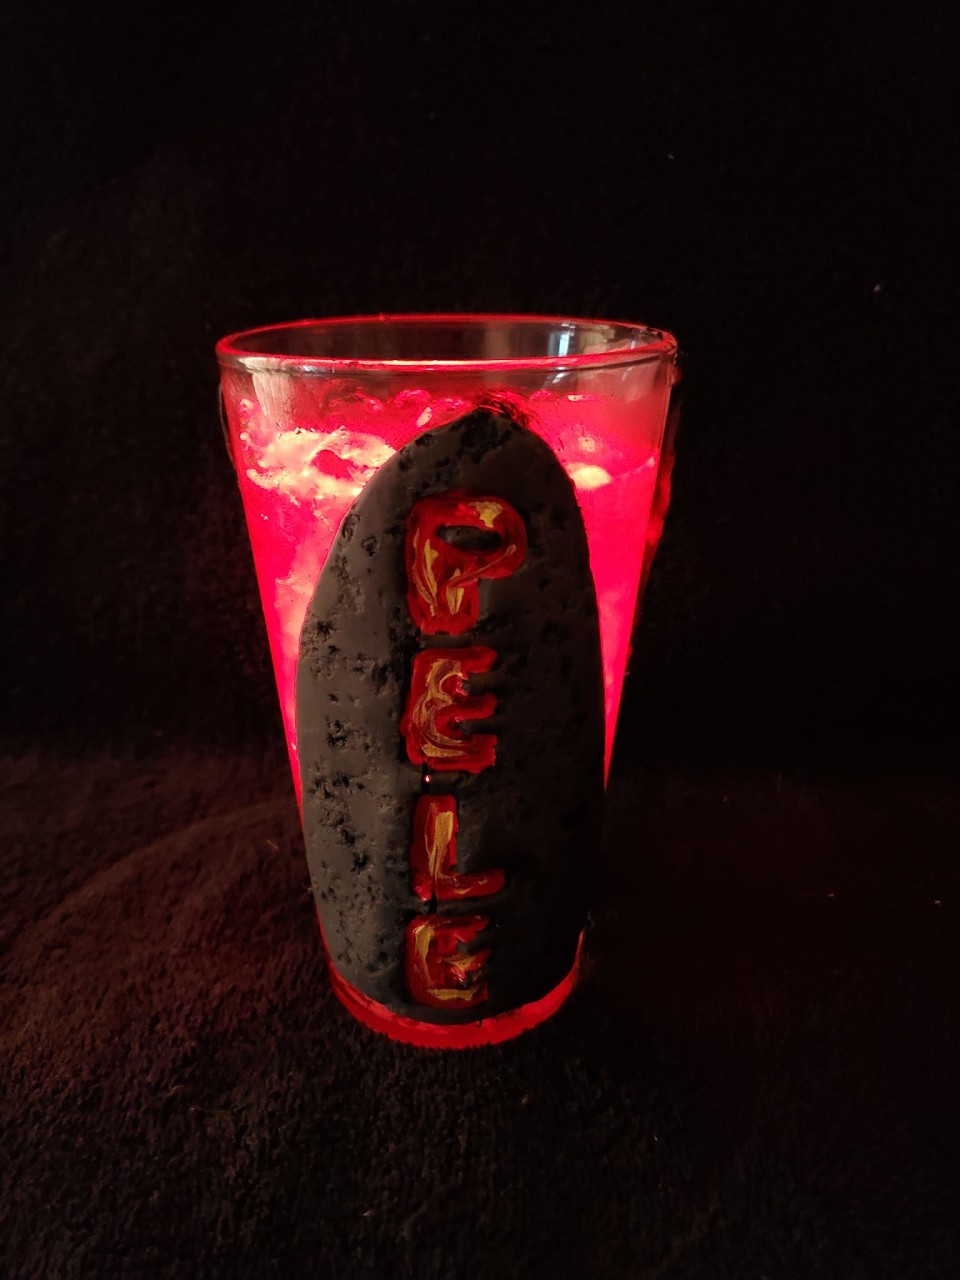
hang10tiki I have a plan! TIKIGIKI I ran with your idea I got a block of grey polymer clay for $2.50 (Hobby Lobby or Michael's) and a pint pub glass for $1.50 at Walmart. Using 2 thick bamboo skewers as a guide I rolled out half of the clay on a piece of parchment paper. I cut it into a random lava shape and textured it with a lava rock. I rolled up both ends of a kitchen towel, put it on a baking sheet. This keeps the glass from rolling around and pressed the clay piece onto the glass and put it into a 275° oven for 15 minutes. I rolled, cut, and textured another she. I made some block letters from more clay and baked them. Then used the letters to stamp PELE into the clay. Into the oven it went too. I used the scrap clay to make 2 more smaller pieces and baked them too. After all 4 pieces were baked and cooled, I glued them to the glass with clear E600 glue. I taped them for several hours to let the glue dry. Next step was to brush the clay pieces with black paint to highlight the texturing. I used an acrylic enamel that will eventually dry very hard and permanent. I brushed the black on then used a damp paper towel to take most of it off.
I wanted to add some color to the letters so I used red and yellow to give a molten lava look. Add a drink and a red LED ice cube, maybe a little dry ice, and you're good to go. |
|
T
TIKIGIKI
Posted
posted
on
Thu, Mar 16, 2023 8:57 PM
in reply to MadDogMike
Looks mighty good to me MDM! No issues with shrinkage? Maybe a coat of something clear and waterproof now to protect it during washing? |
|
M
MadDogMike
Posted
posted
on
Fri, Mar 17, 2023 9:46 AM
in reply to TIKIGIKI
Thanks TIKIGIKI! It will be fine for handwashing but I wouldn't put it in the dishwasher |
|
D
danlovestikis
Posted
posted
on
Fri, Mar 17, 2023 10:59 AM
in reply to MadDogMike
MadDogMIke that's so fun. It shows a kiln isn't needed for doing some fun projects. Keep them coming. |
|
M
MadDogMike
Posted
posted
on
Sat, Mar 18, 2023 10:52 PM
in reply to danlovestikis
Thank you Wendy <3 |
|
M

maulrat
Posted
posted
on
Thu, Mar 23, 2023 9:16 AM
Mad Dog, this is way cool! Nice work |
|
M
MadDogMike
Posted
posted
on
Thu, Mar 23, 2023 9:45 AM
in reply to maulrat
Thanks MaulRat :) |
|
M
MadDogMike
Posted
posted
on
Wed, Mar 29, 2023 6:00 PM
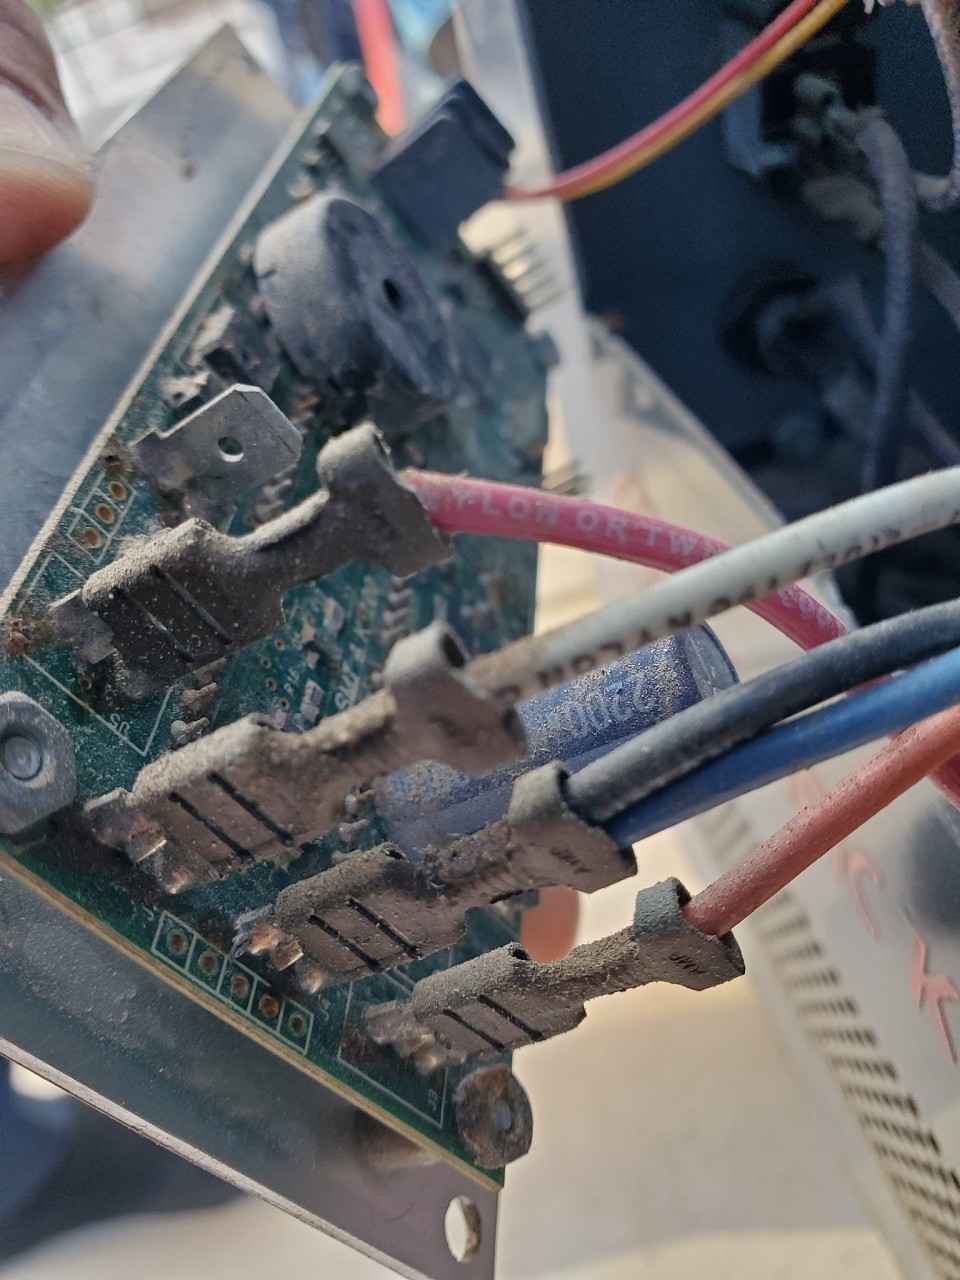
Kiln repair - Well, my controller had water damage from being rained on. So instead of a $150 repair I got a $250 new controller. C'est la vie. Just 4 screws and 6 wires, it went back together quite easy
I fired the lava side pieces I had made before the kiln broke down. I'll glaze them and see whether I like the ceramic clay or the polymer clay better. I suspect the polymer ones will work better as I can roll them thinner and the are a little flexible. swizzle your math was correct but for some reason the tiles still fit. May be because the glass is tapered and moving the tile up or down slightly changes the fit.
|
|
D
danlovestikis
Posted
posted
on
Sun, Apr 2, 2023 8:31 AM
Brilliant, I love the moving up and down comment. Sometimes things just align with the cosmos! |
|
M
MadDogMike
Posted
posted
on
Sun, Apr 2, 2023 11:54 AM
in reply to danlovestikis
Thanks Wendy :) Those pieces actually didn't work out, I think they spread open a little when I fired them. I'll stick with the polymer clay, it works better |
|
H

hiltiki
Posted
posted
on
Mon, Apr 24, 2023 1:45 PM
Mike you have the most interesting ideas at all times, nice work. |
|
M
MadDogMike
Posted
posted
on
Mon, Apr 24, 2023 8:44 PM
Hilda!!!! Thank you, good to hear from you |
|
D
danlovestikis
Posted
posted
on
Tue, Apr 25, 2023 12:12 PM
I've made a lot of tiki bowls with polymer clay, heads too. They do well in heat but if they get really cold, they crack up and the paint peels. You could use your refrigerator and do a test. |
|
M
MadDogMike
Posted
posted
on
Tue, Apr 25, 2023 6:04 PM
Thanks Wendy! They are on a sides of an iced glass so cold may be an issue. I'll test it out |
|
D
danlovestikis
Posted
posted
on
Thu, Apr 27, 2023 8:02 PM
It might take longer than one drink. I hope it doesn't happen. |
|
M
MadDogMike
Posted
posted
on
Mon, May 1, 2023 10:44 AM
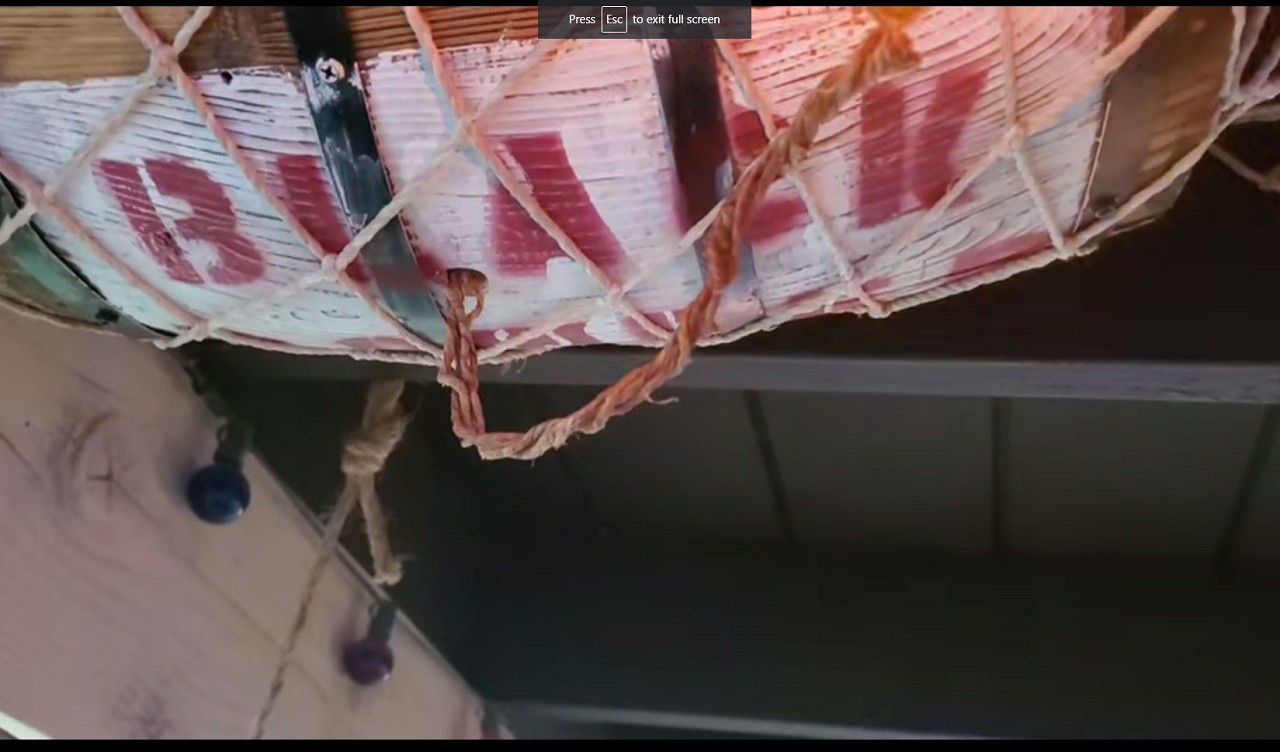
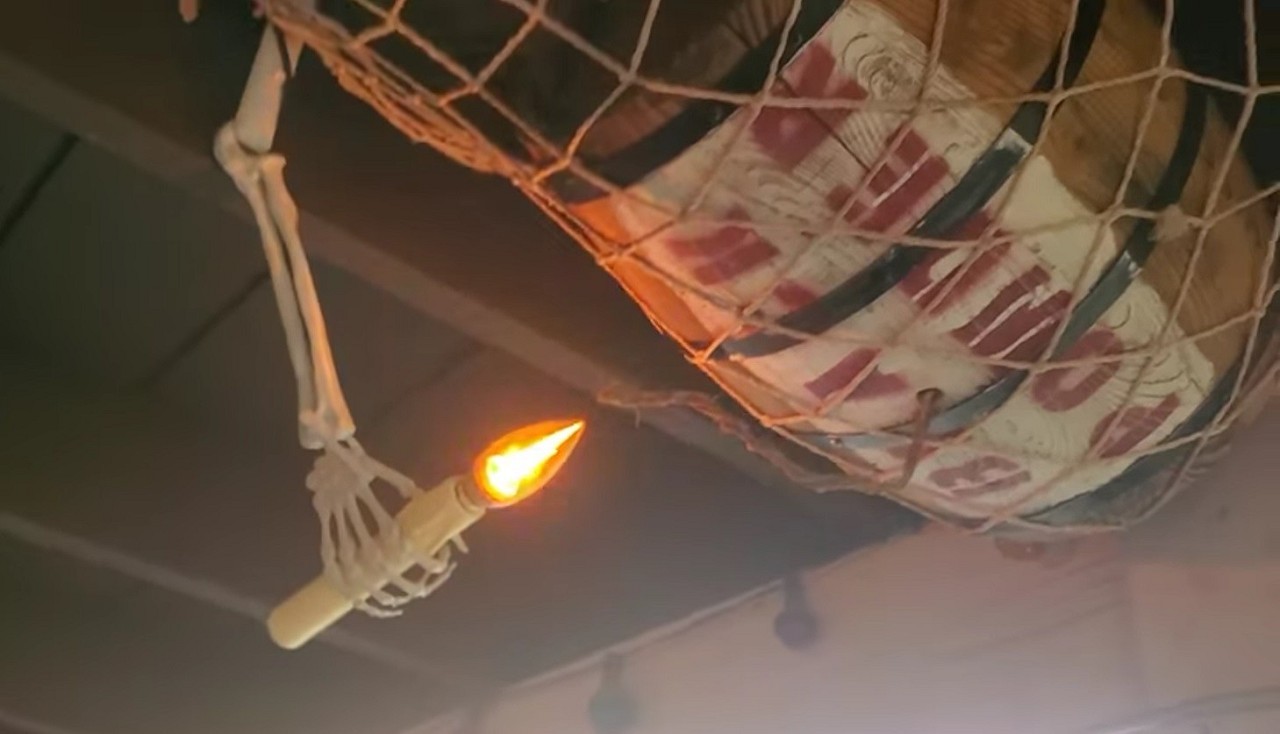
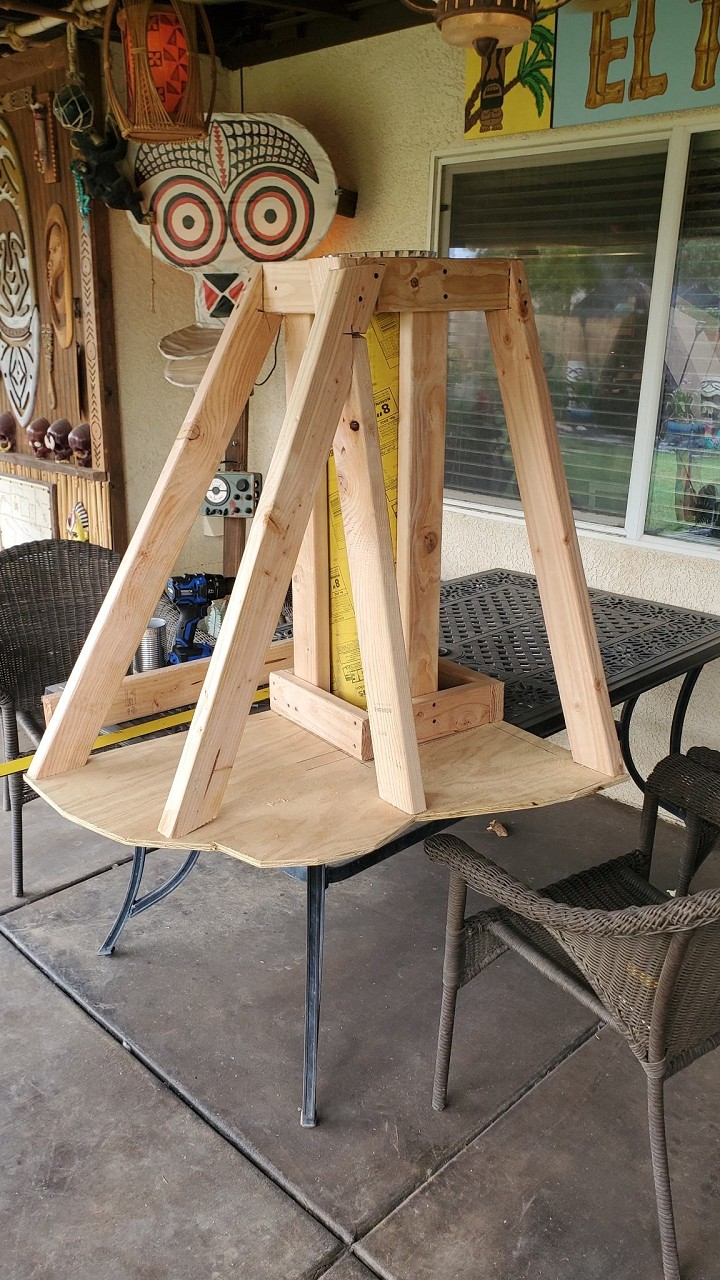
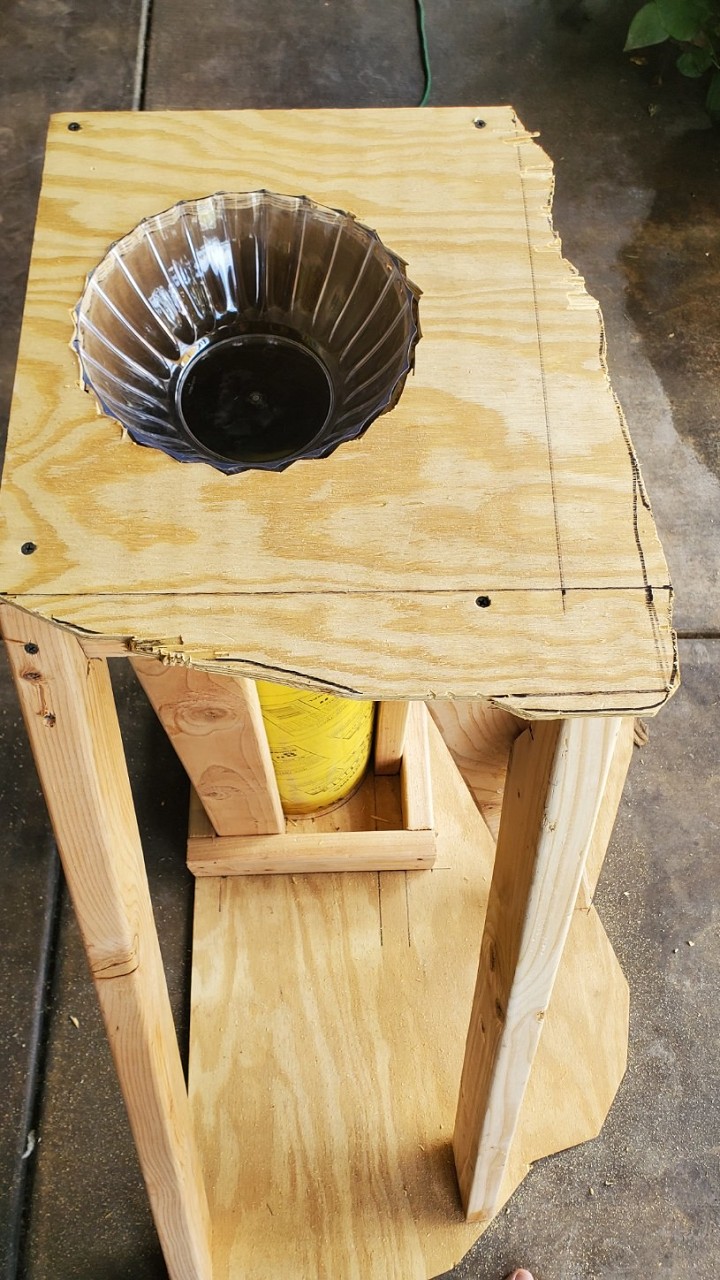
New project, Powder Keg! Picked up a wooden nail keg at the Temecula Farmers Market a while back, about 18 inches tall and 10 inches in diameter. I stenciled "BLACK POWDER" on the side, added a twisted twine-wrapped wire fuse, and hung it from the rafters with a net.
Then put a skeleton hand reaching down to light the fuse with a candle! The skeleton arm is plastic from Amazon. It only went to the elbow so I added a "humerus" made from a 1 inch wooden dowel. The candle is a piece of 3/4 inch PVC pipe that my candelabra fit in just right. I put some hot glue "wax drips" on the candle and spray painted it a yellowish tallow candle color. Completed the look with a flickering LED flame bulb Short video |
|
PP

Prikli Pear
Posted
posted
on
Mon, May 1, 2023 12:09 PM
That looks great (as always) Mike! The only suggestion I have is maybe blacken the end of your fuse to add a little intrigue. |
|
M
MadDogMike
Posted
posted
on
Mon, May 1, 2023 12:35 PM
Thanks Prickli Pear! I like the idea of blackening the end of the fuse. I have mixed feelings about the color of my fuse. I think this brown twine looks "authentic" to some degree but it is hard to see against the brown wood keg and the dark brown ceiling. This fuse also worked well because it has wire inside so it bends and stays where I want it. I may try a piece of natural fiber rope (jute, sisal, etc) or maybe natural/white cotton rope? |
|
D
danlovestikis
Posted
posted
on
Mon, May 1, 2023 7:52 PM
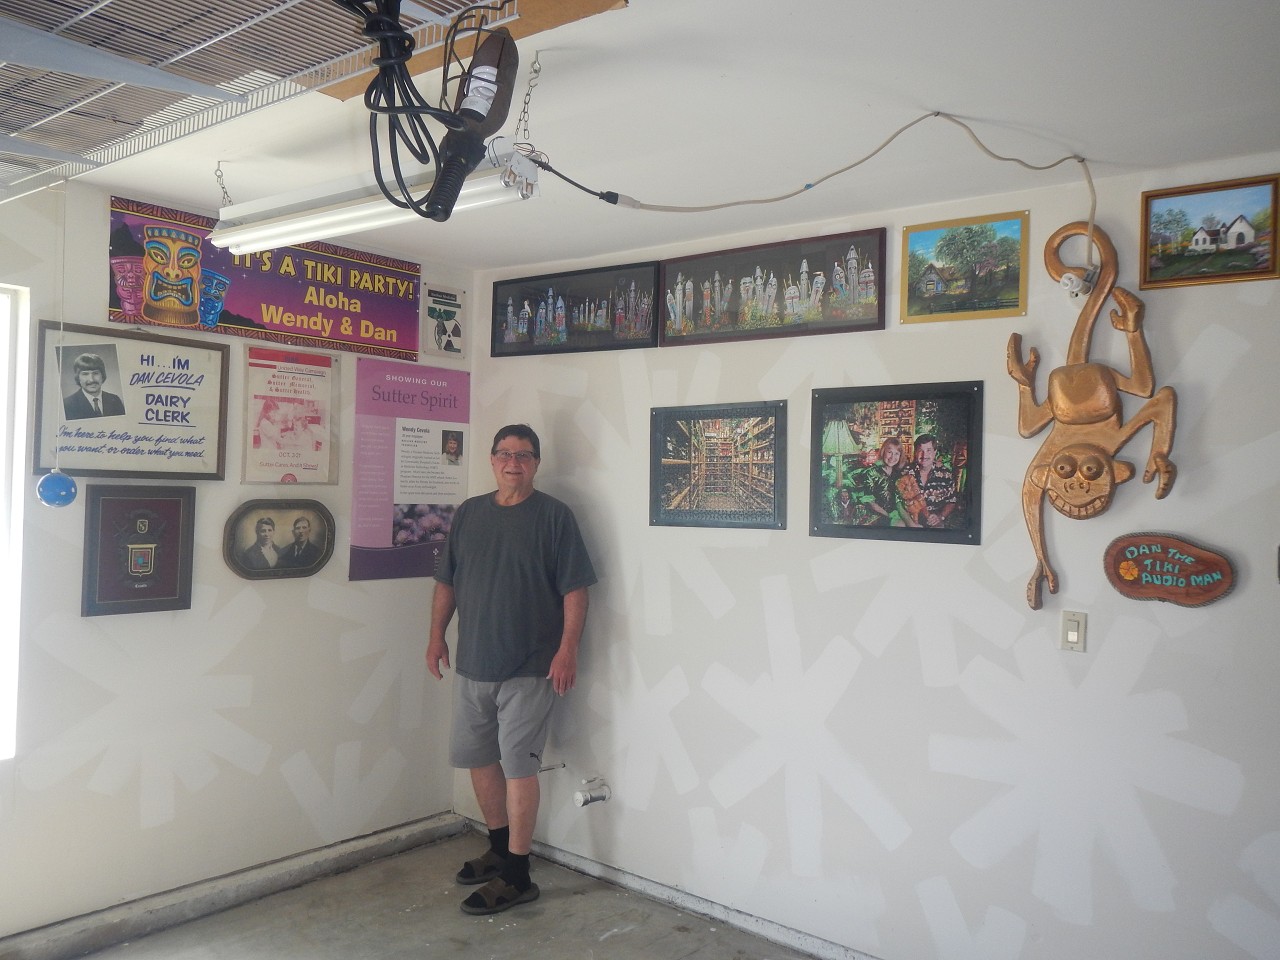
This looks wonderful. Your monkey is now in a new location. We still love him.
|
|
M
MadDogMike
Posted
posted
on
Tue, May 2, 2023 7:15 AM
in reply to danlovestikis
Thank you Wendy! I'm glad the gold monkey survived the purge LOL |
|
M
MadDogMike
Posted
posted
on
Sun, Jul 2, 2023 8:58 AM
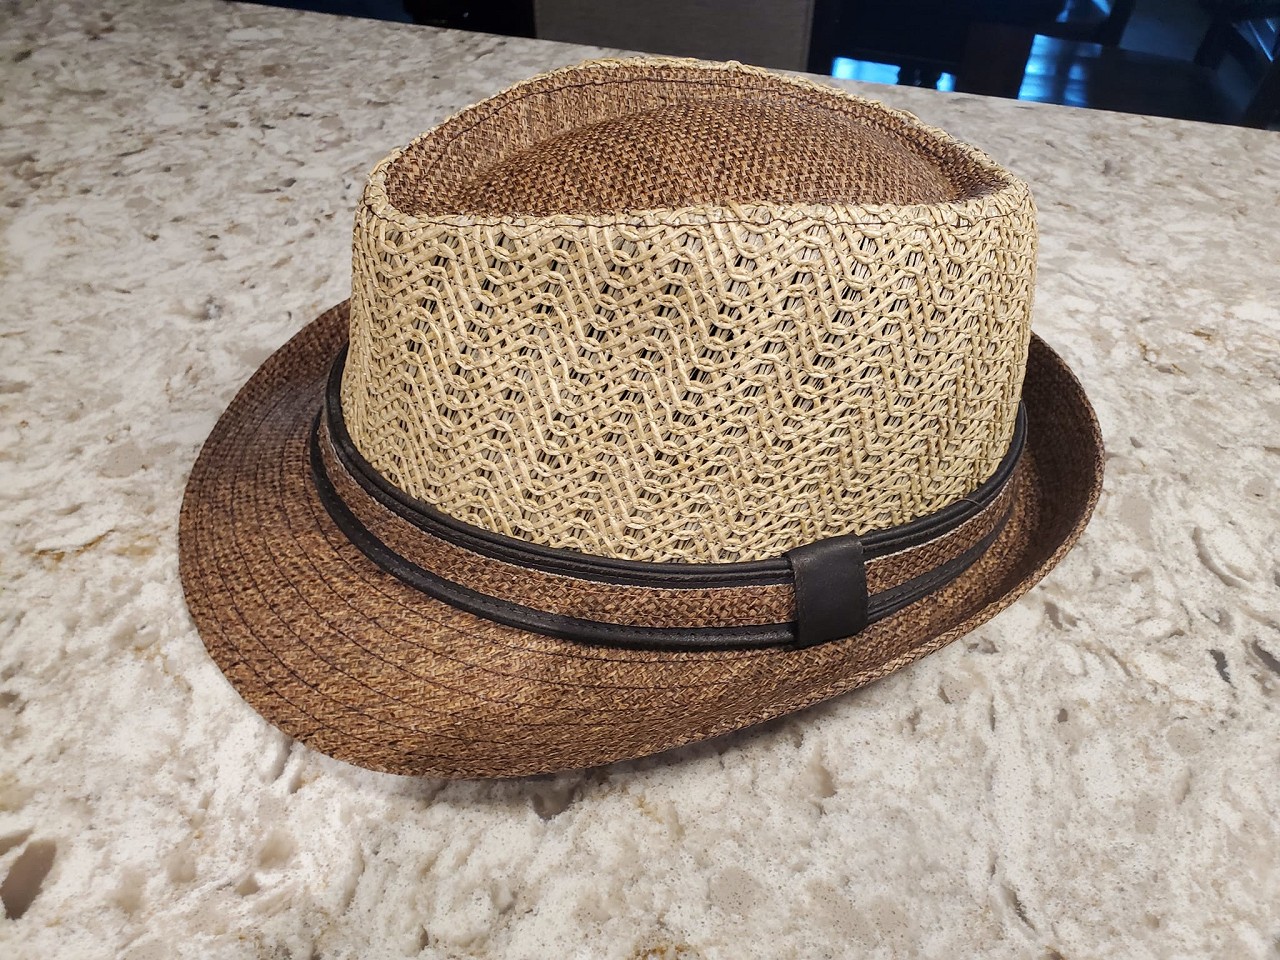
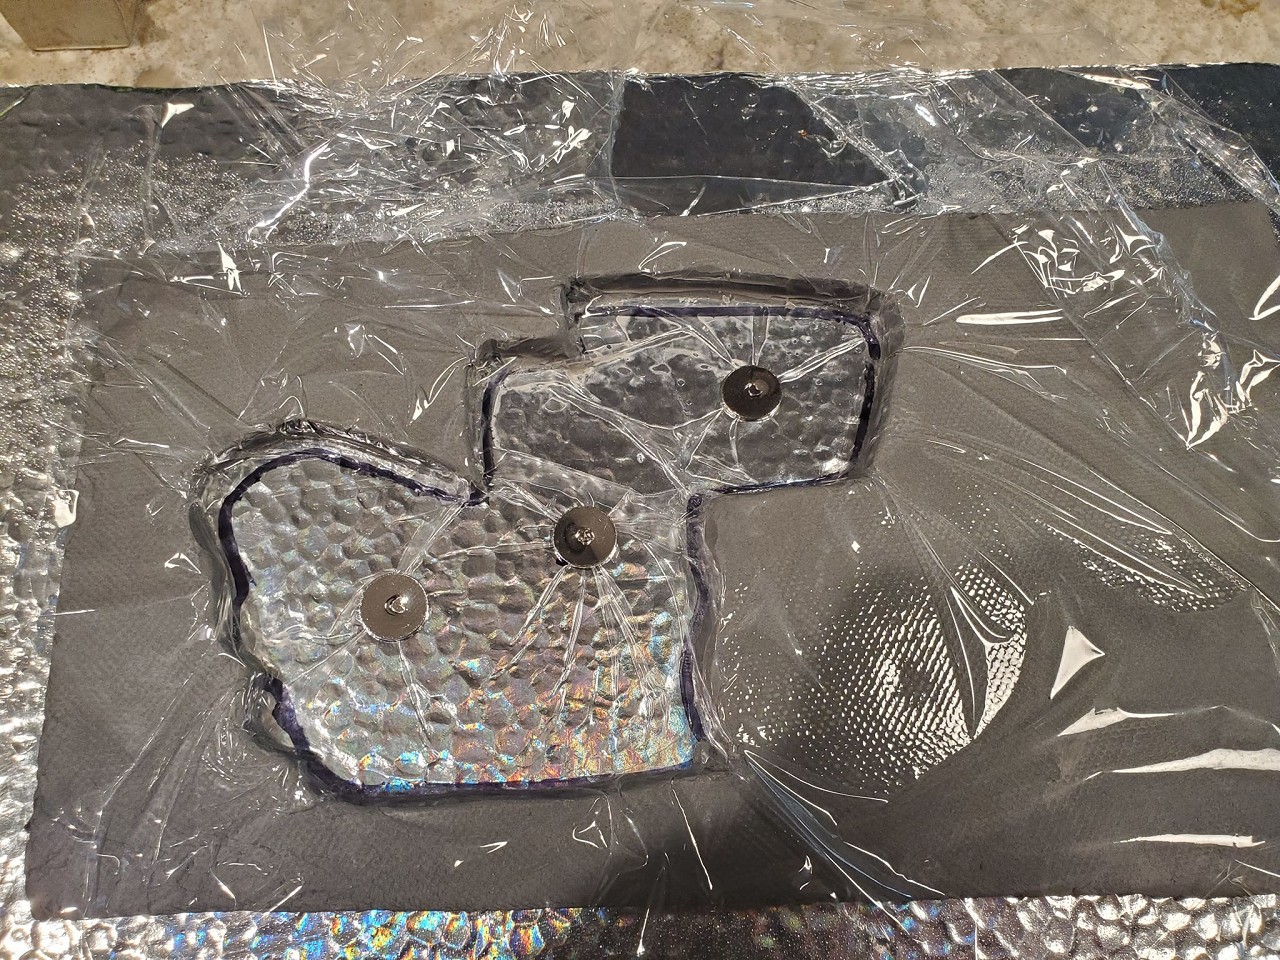
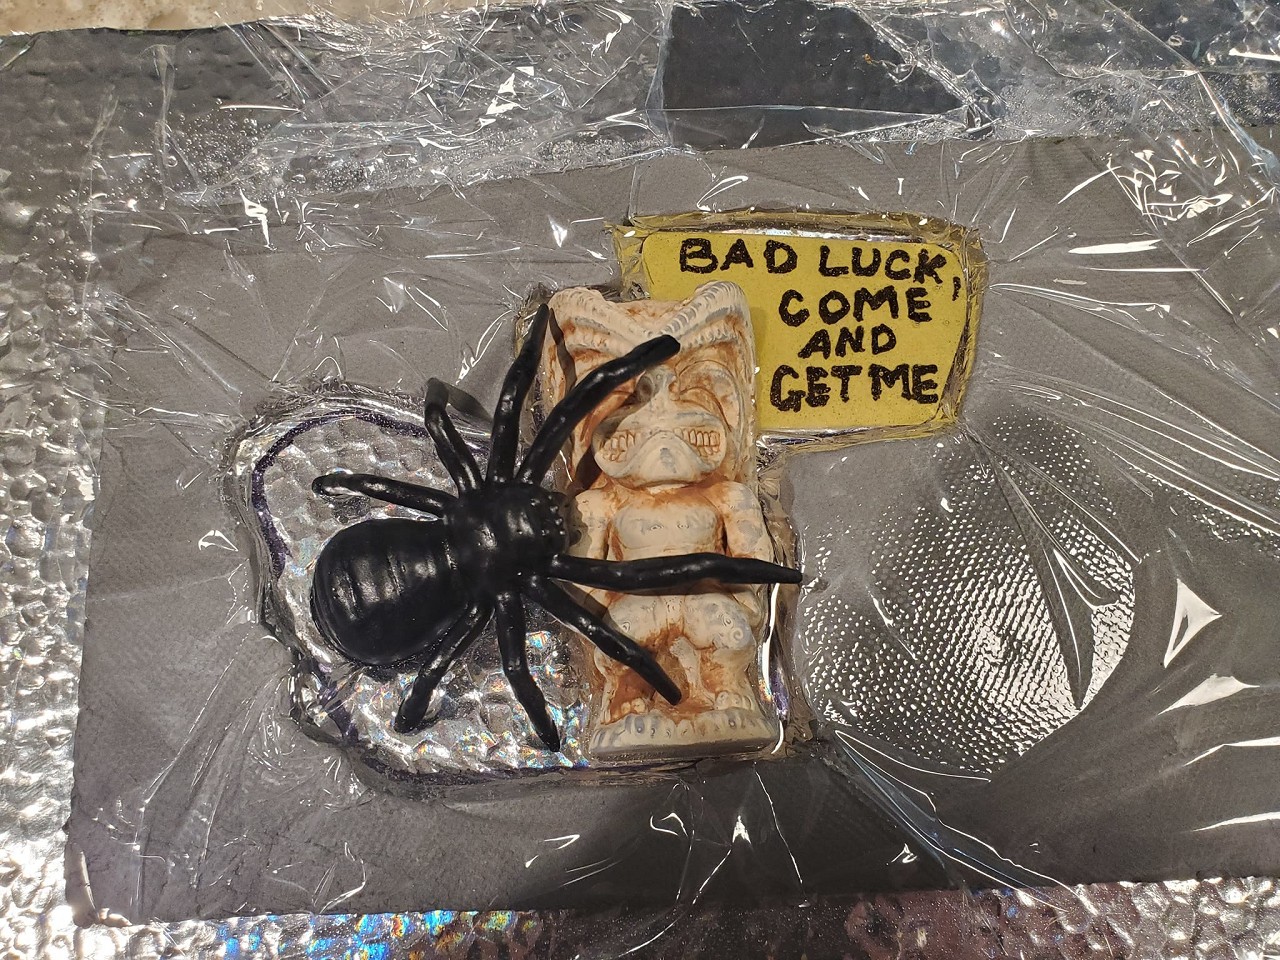
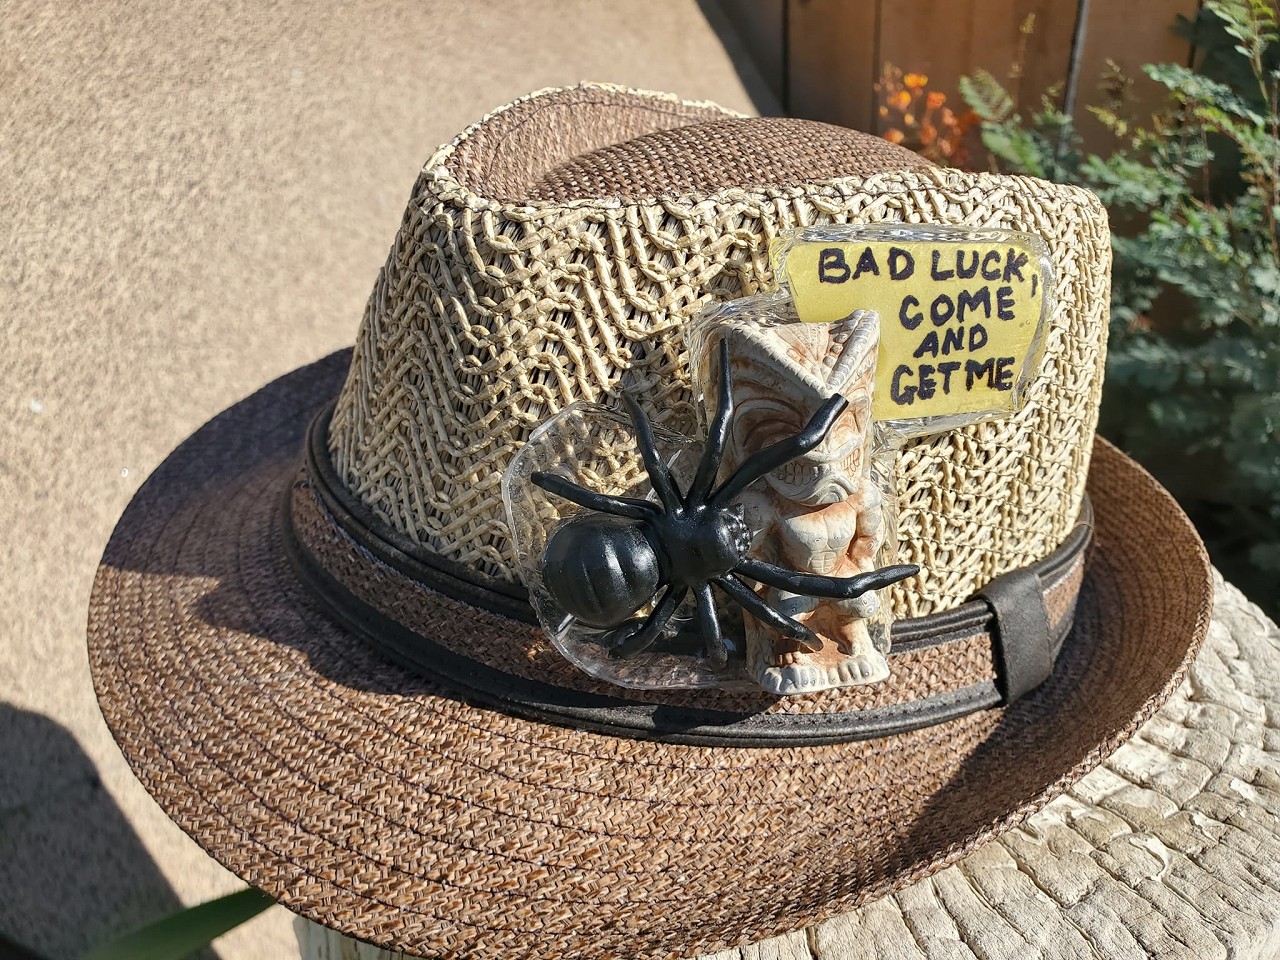
I bought a new hat but it was a little bland so I wanted to spice it up a bit with a "pin".
Decided to made a pin based on this scene from the Brady Bunch; https://www.youtube.com/watch?v=Kh9dRcga8YE Has a spider and Tiki 3D printed and painted them up. Arranged the pieces and drew an outline around them. I figured the best way was to embed the pieces in a clear resin base. I rolled a slab of ceramic clay (because that's what I had around and I am familiar with it) and cut a hole in it for the base. I put it on a sheet of Styrofoam, lined it with Saran Wrap and stuck 3 jewelry pins in it. Poured about 1/4" of clear resin in the "mold" and let it harden The resin base is a little more visible than I had hoped but I like it. |
|
WC

Will carve
Posted
posted
on
Sun, Jul 2, 2023 9:21 AM
Pretty sporty my friend. |
|
M
MadDogMike
Posted
posted
on
Thu, Jul 13, 2023 6:28 PM
in reply to Will carve
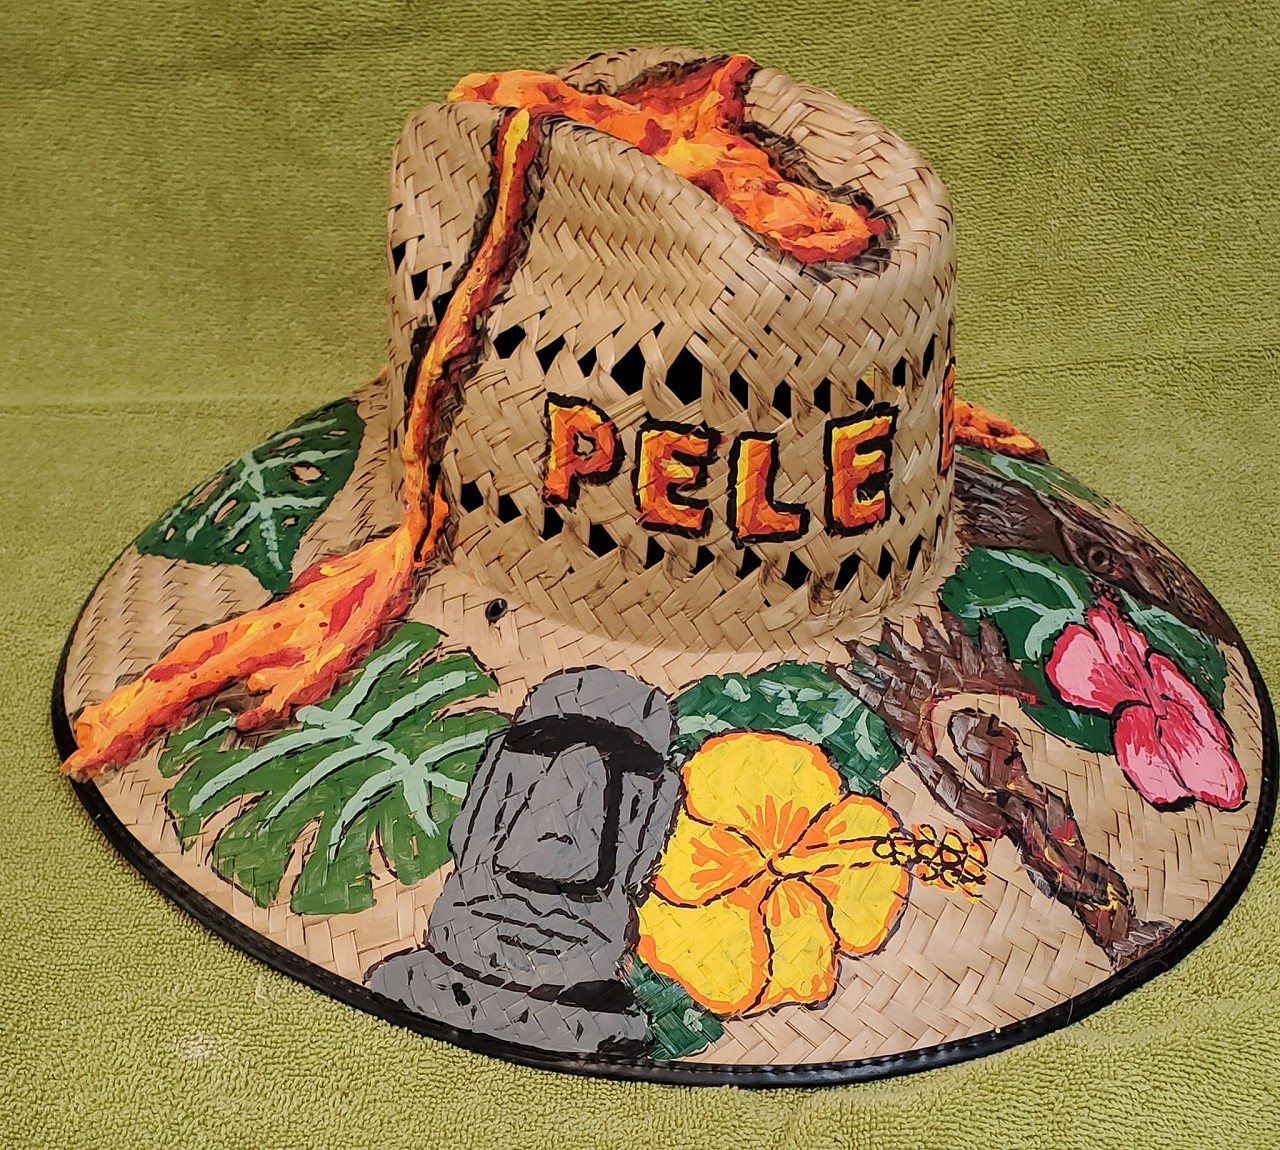
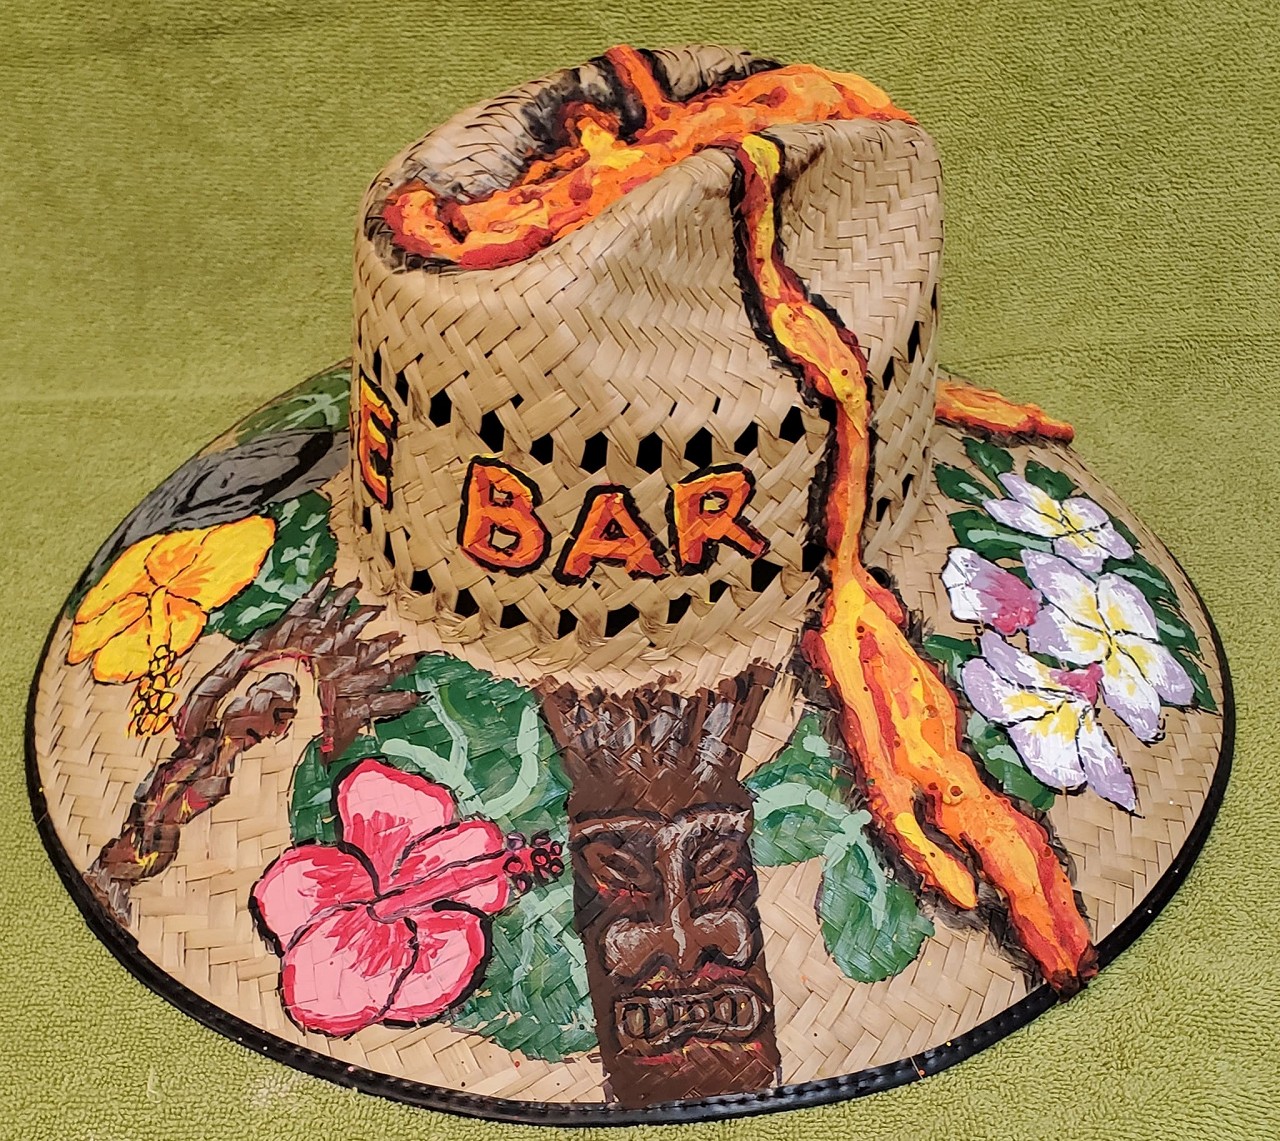
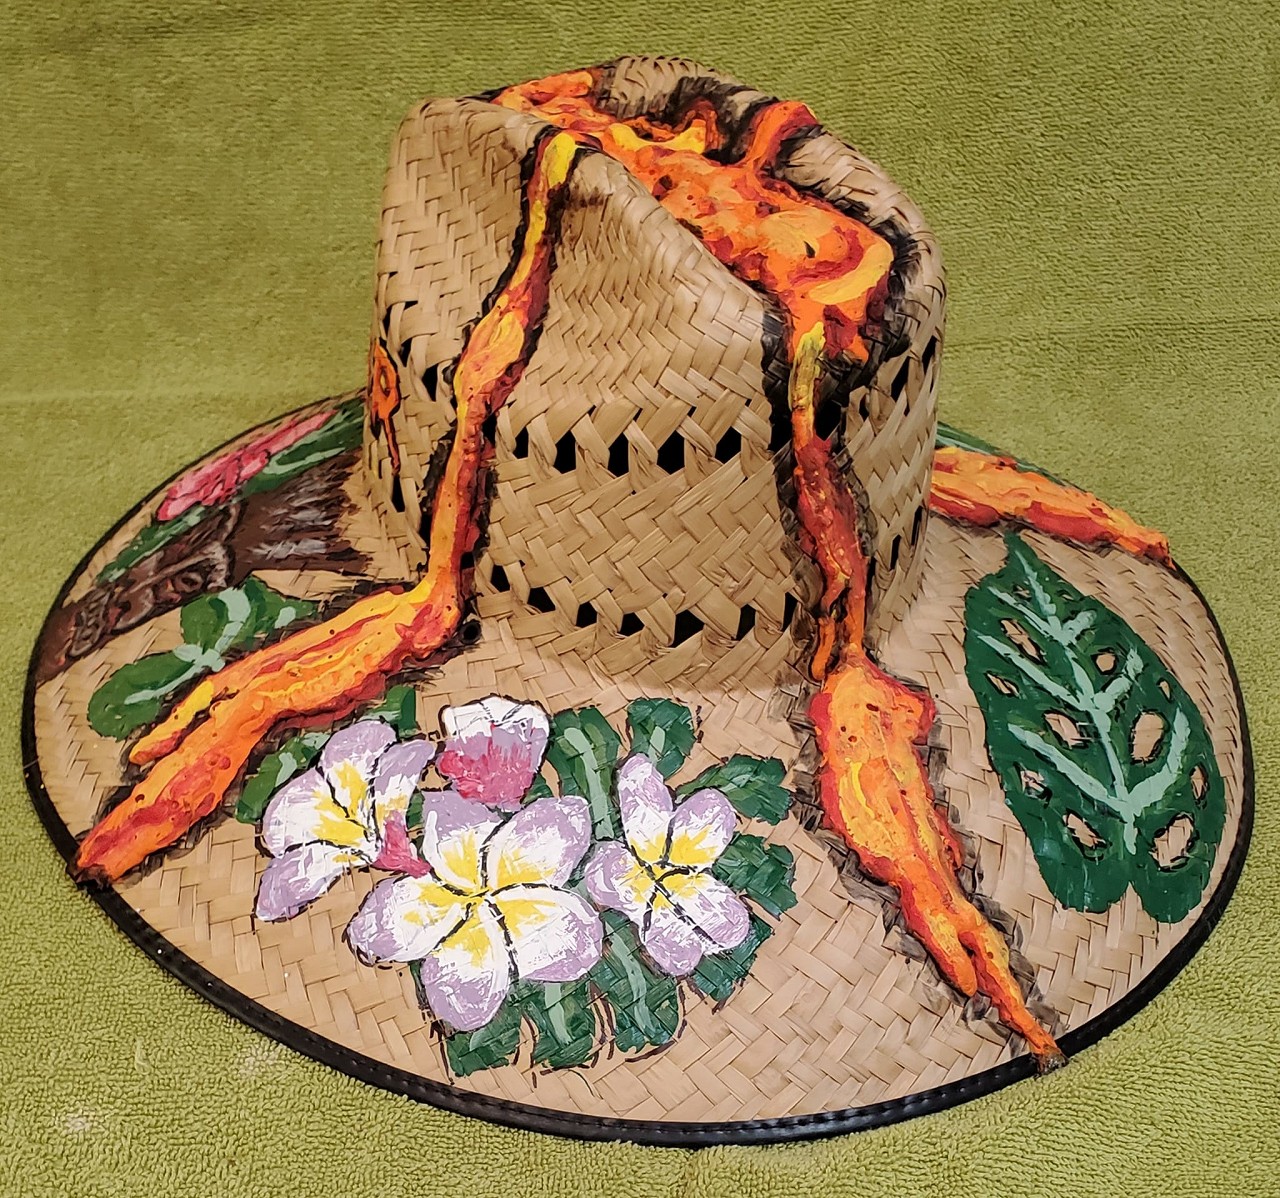
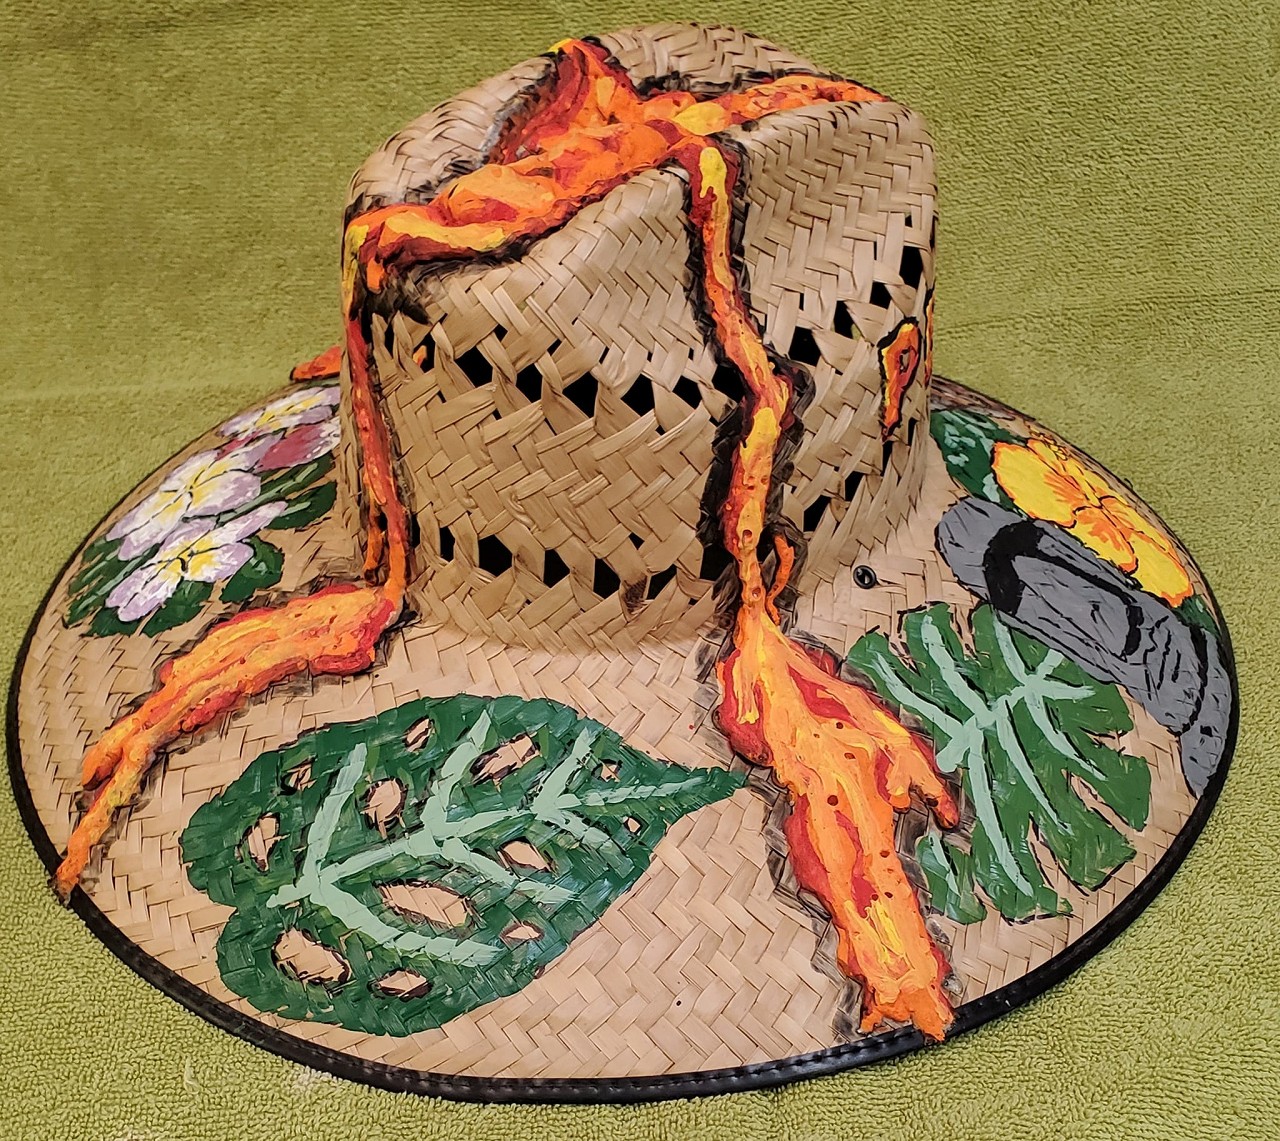
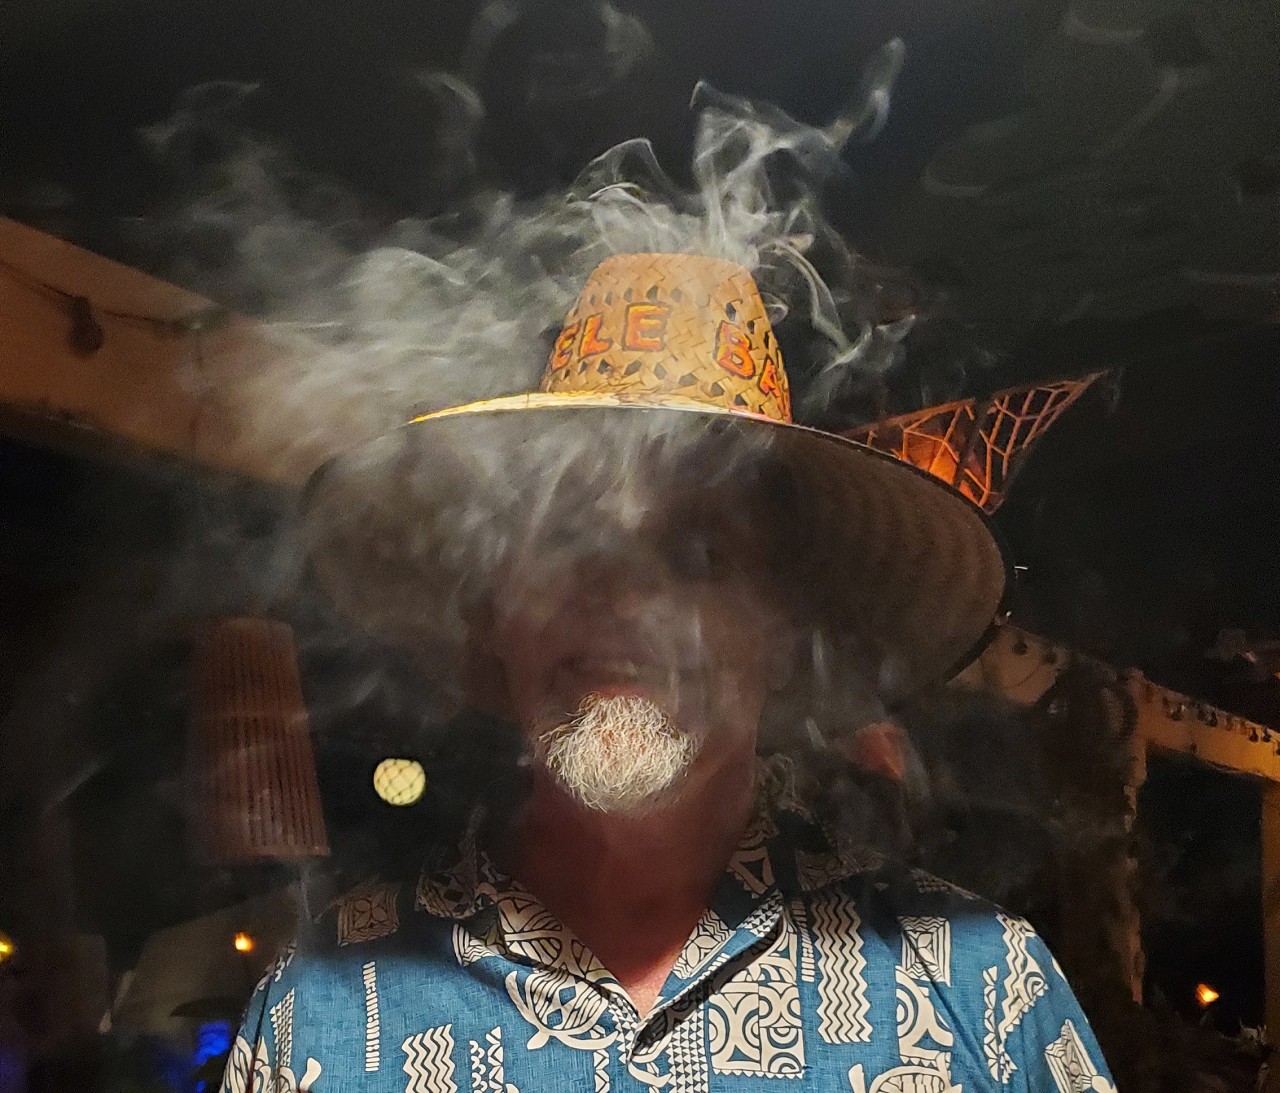
Thank you Will. Just made another hat but not quite as dapper. I started with water activated Gorilla Glue to make a dimensional lava. Then painted with acrylic paint. Incorporated some elements from the Pele Bar like the volcano goddess Pele, my giant rootball Tiki, a 6 foot Moai that I plan to build in the next year or so, and some of the plants and flowers that grow here. And just for a little over-the-top MadDog craziness, I ordered a battery operated mini fog machine that will hopefully pump smoke out of the holes around the brim LOL |
|
M
MadDogMike
Posted
posted
on
Wed, Jul 19, 2023 10:12 PM
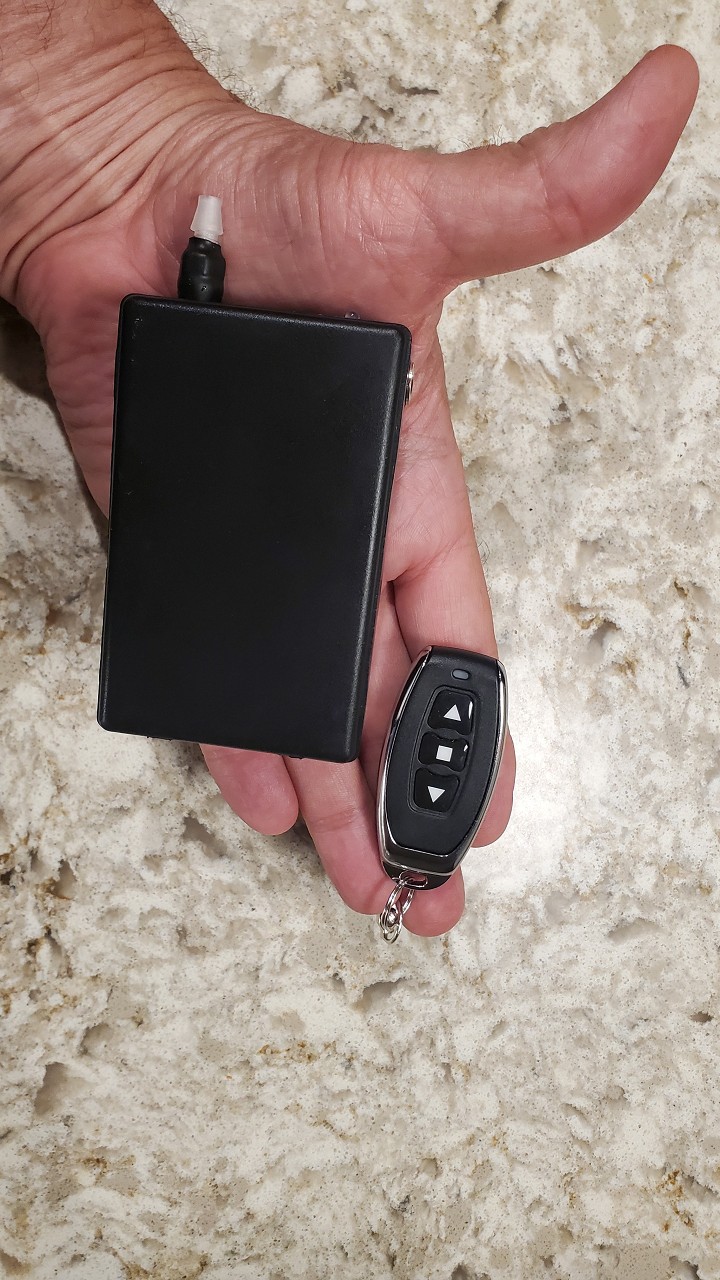
My mini fog machine came in! |
|
D
danlovestikis
Posted
posted
on
Fri, Jul 21, 2023 8:23 AM
You are the father of creation, wait that might make someone upset. You are the creator of tiki magic that brings smiles to all the tiki peeps! |
|
H

Hamo
Posted
posted
on
Fri, Jul 21, 2023 10:27 PM
Looks good. You could probably achieve the same effect if you wore the hat while enjoying a cigar.... |
|
H
hang10tiki
Posted
posted
on
Sat, Jul 22, 2023 7:29 AM
Love that hat PS Happy BDAY Mad Dog
|
|
D
danlovestikis
Posted
posted
on
Sat, Jul 22, 2023 9:19 AM
A cigar under your new hat could be like your birthday cake!!! Wishing you the very best day ever with Theresa. Many hugs from us. |
|
M
MadDogMike
Posted
posted
on
Sun, Jul 30, 2023 9:43 AM
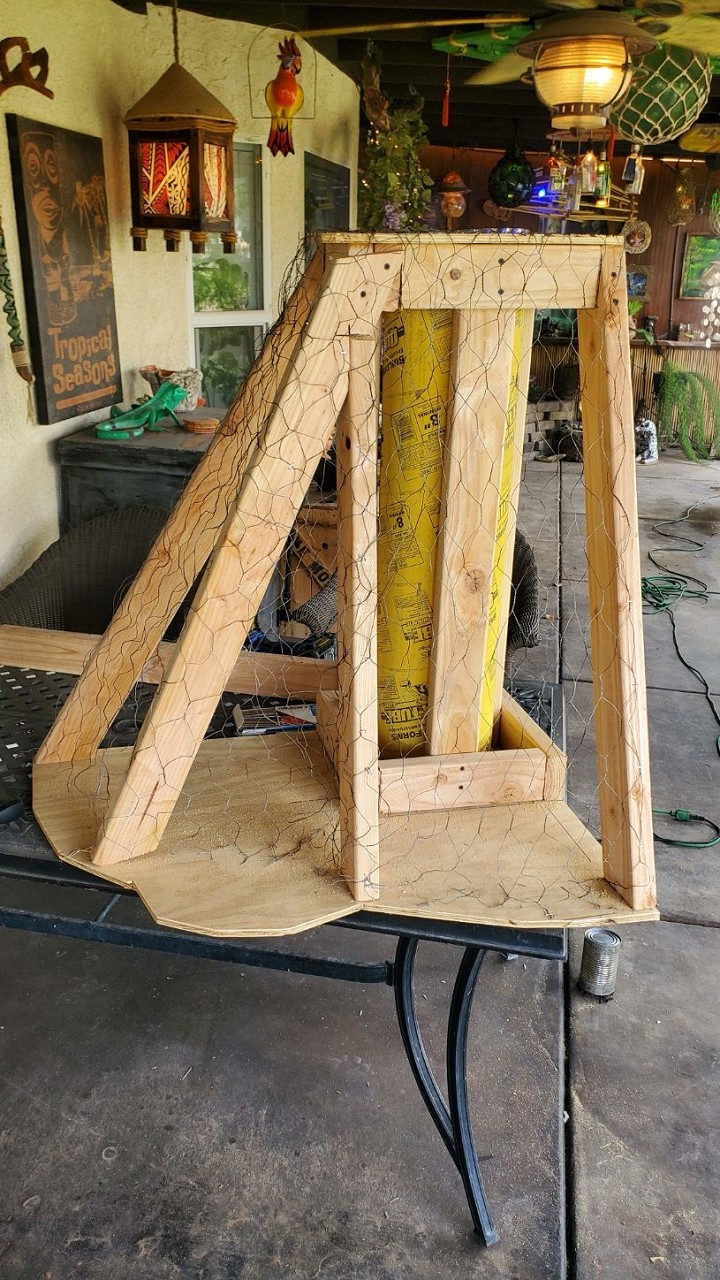
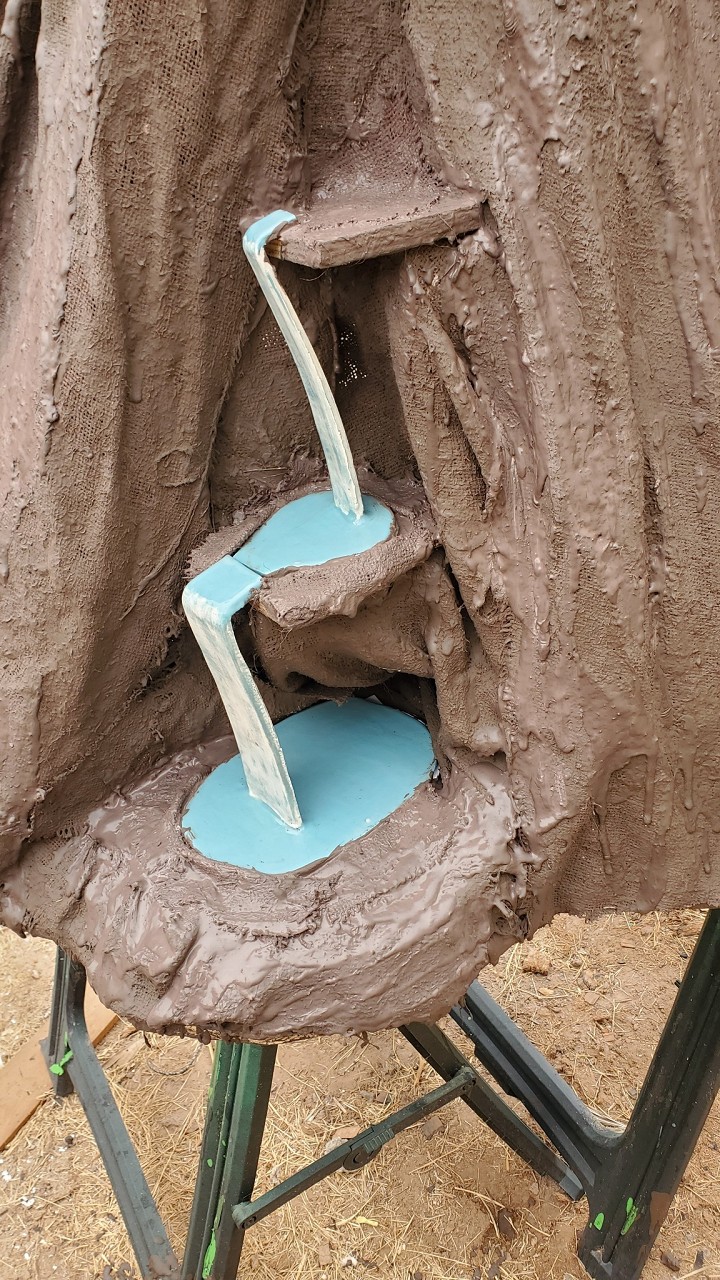
Thank you hang10tiki and danlovestikis for the birthday wishes! My sister in law is the librarian at a local elementary school, she has requested a volcano display so here we go!
|
|
M
MadDogMike
Posted
posted
on
Sun, Jul 30, 2023 5:17 PM
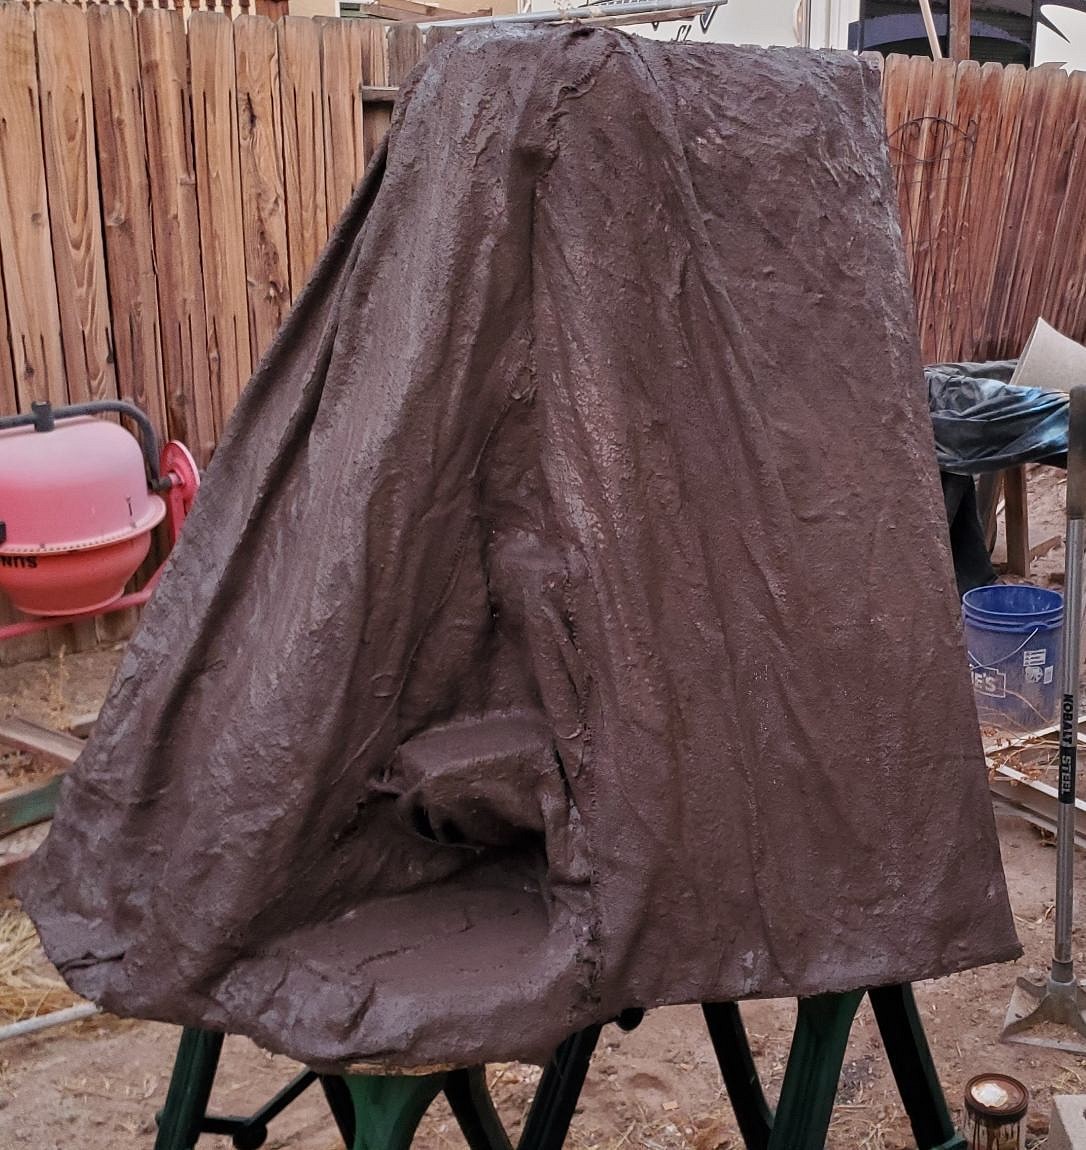
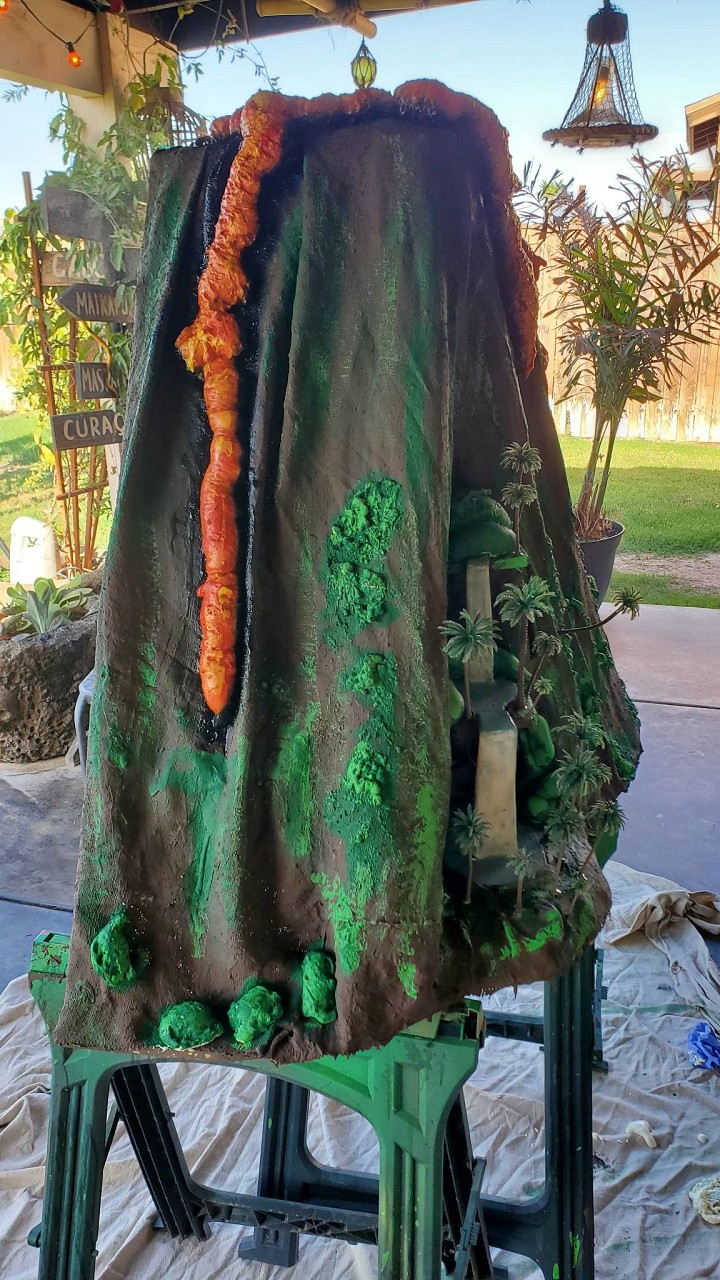
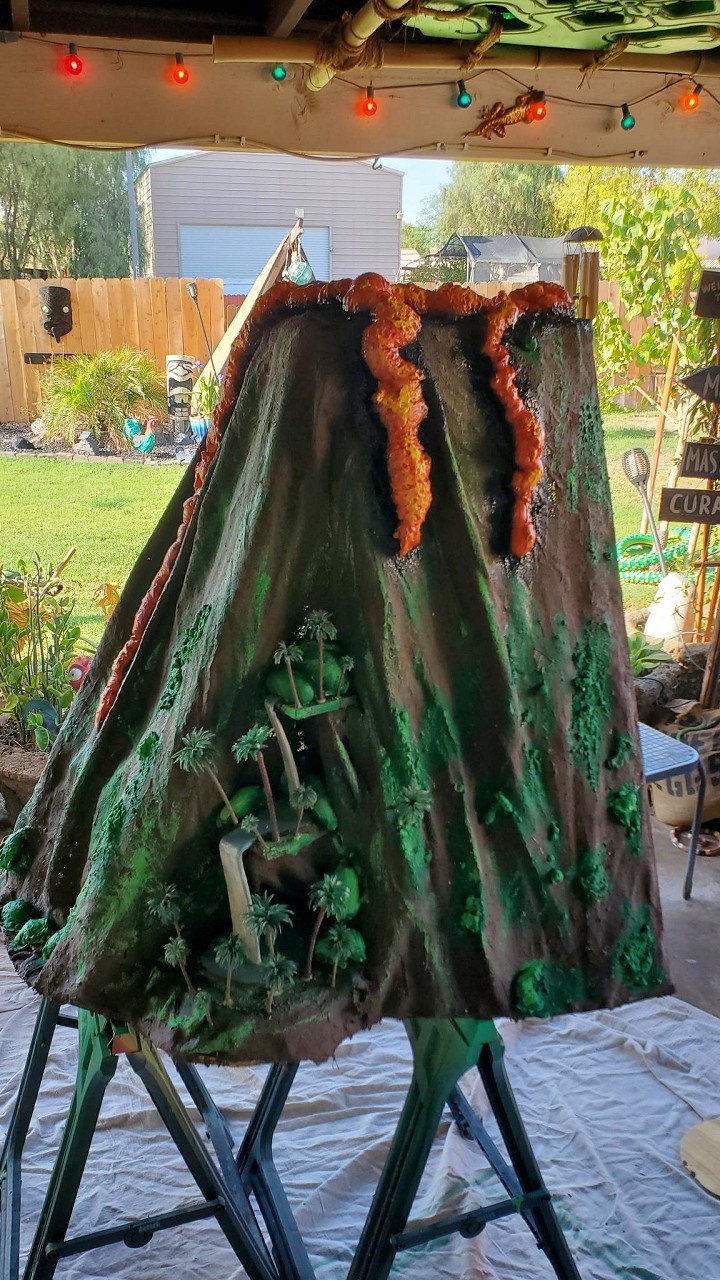
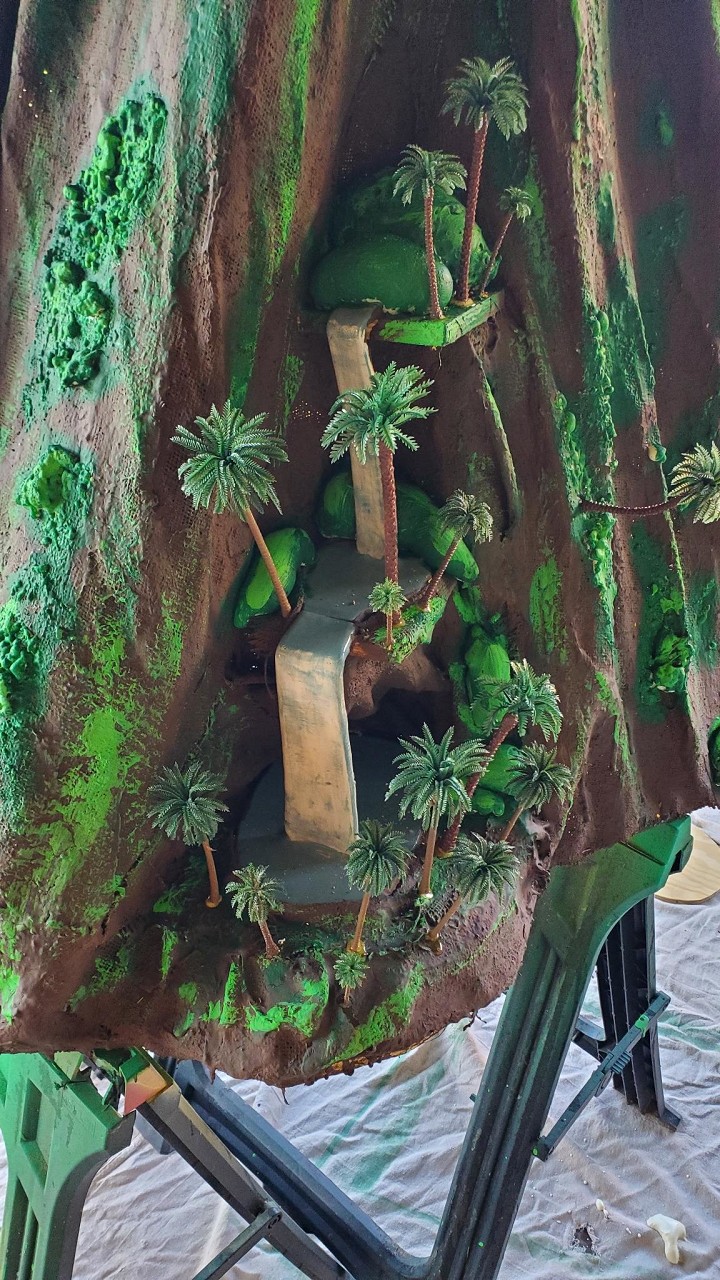
Some spray foam for lava and greenery, some paint, and some plastic palms Up next some electrical and caldera work |
|
B

BlackWater
Posted
posted
on
Sun, Jul 30, 2023 7:12 PM
in reply to MadDogMike
Looks good. Just needs vinegar and baking soda. |
|
M
MadDogMike
Posted
posted
on
Mon, Jul 31, 2023 9:47 AM
in reply to BlackWater
LOL BlackWater, or maybe some red Devil's Toothpaste! https://youtube.com/shorts/Qt4g46o3FJM?feature=share |
|
M
MadDogMike
Posted
posted
on
Sat, Aug 12, 2023 4:19 PM
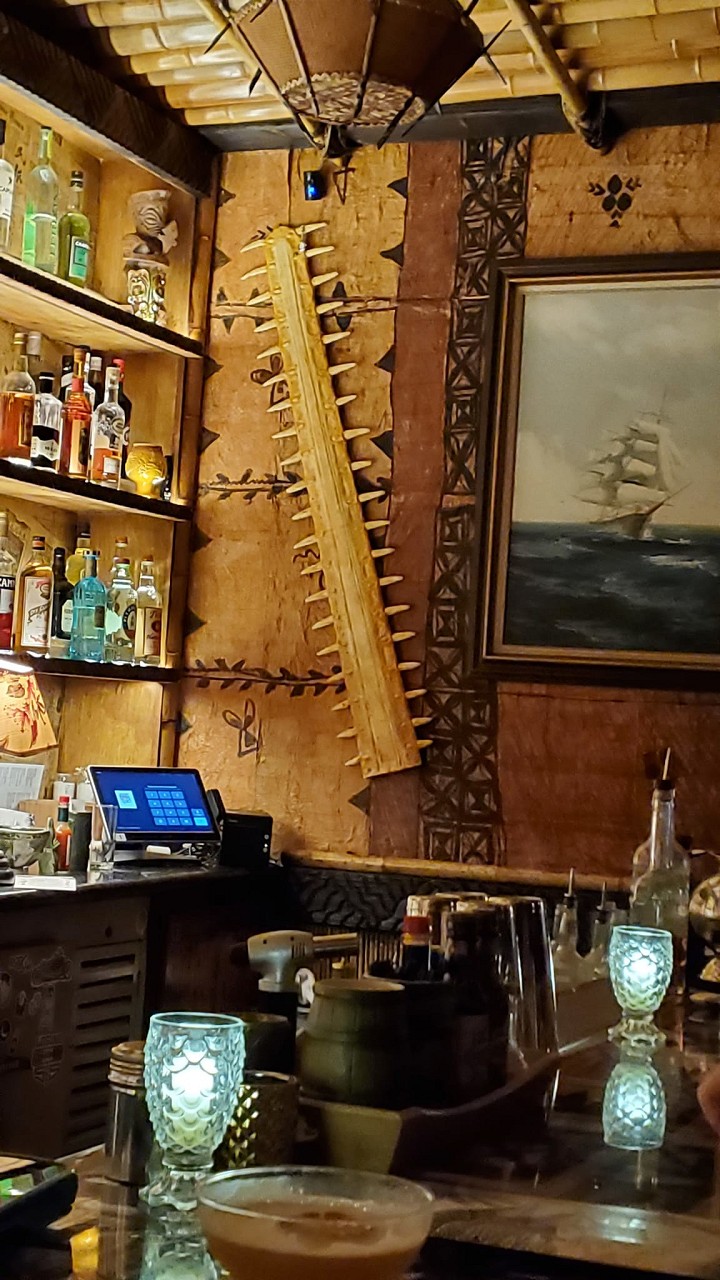
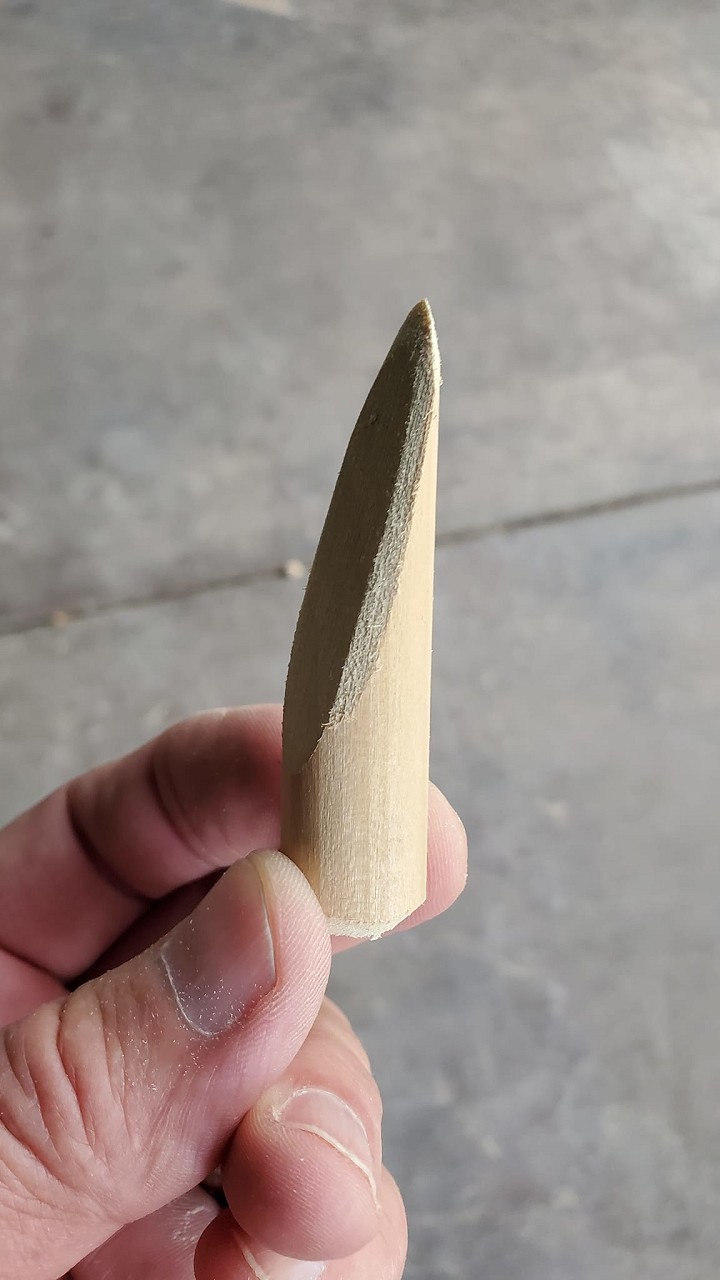
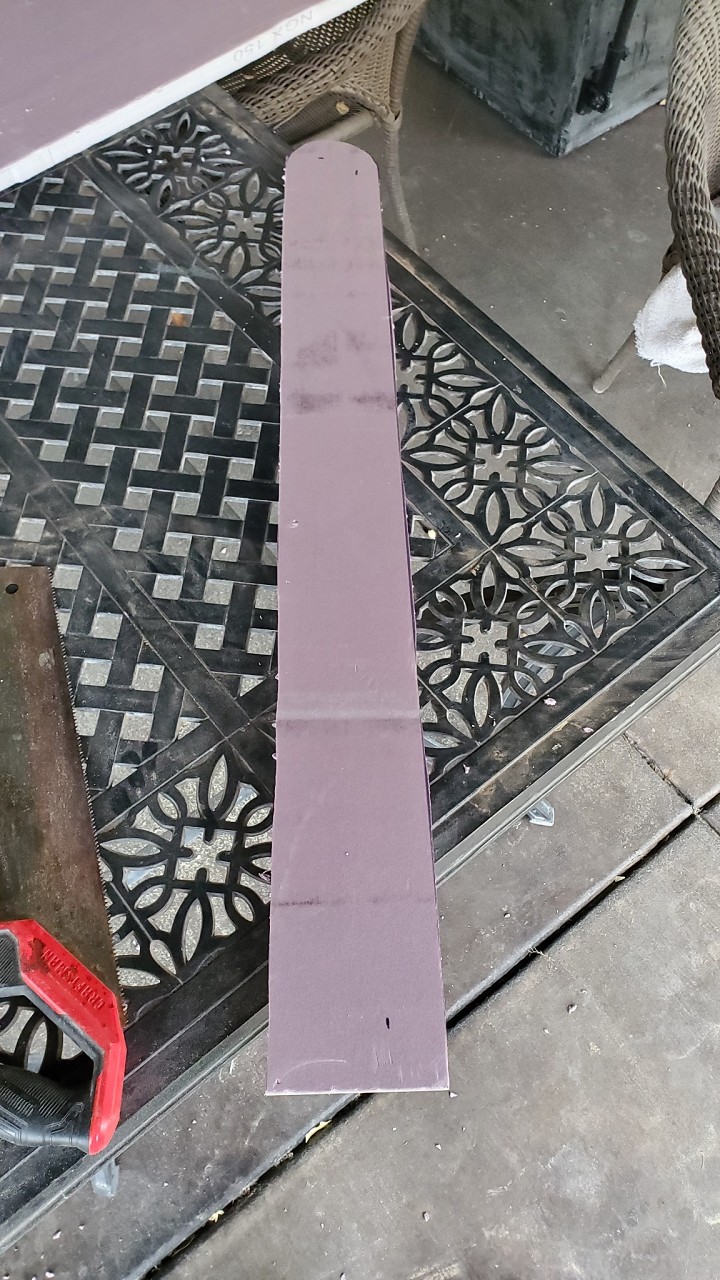
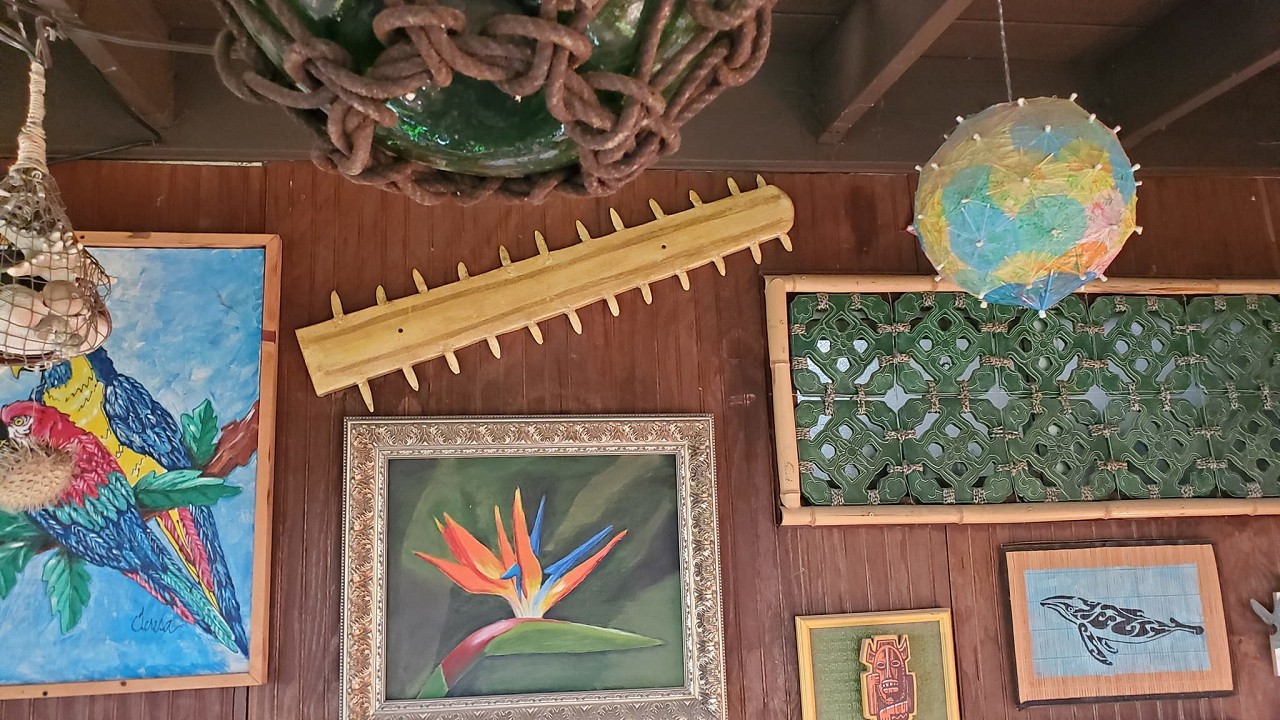
I recently went to the Royal Hawaiian in Laguna Beach, CA. Very cool place, one of the things that attracted me was a sawfish rostrum mounted on the bar wall. But real ones are $1,500-2,000 so I decided to make a fake one. I started with a bunch of teeth made from a 5/8 wooden dowel. I cut the body out of XPS foam Shaped the edges of the body with a ShurForm rasp and sandpaper. Drilled holes into the foam and glued the teeth in Painted a base coat of off white latex paint, the antiqued with browns and yellow ochre. Then a couple coats of clear gloss polyurethane and hung on the wall. |


Pages: 1 2 3 4 5 6 7 8 9 10 11 12 13 14 15 16 17 18 19 20 21 22 23 24 25 26 27 28 29 30 31 32 33 34 35 36 37 38 39 40 41 42 43 44 45 46 47 48 49 50 51 52 53 54 55 56 57 58 59 60 61 62 63 64 65 66 67 68 3225 replies