Tiki Central / Other Crafts
MadDog Mike's Platterful of Pupule - Pupu Pufferfish
Pages: 1 2 3 4 5 6 7 8 9 10 11 12 13 14 15 16 17 18 19 20 21 22 23 24 25 26 27 28 29 30 31 32 33 34 35 36 37 38 39 40 41 42 43 44 45 46 47 48 49 50 51 52 53 54 55 56 57 58 59 60 61 62 63 64 65 66 67 68 3,223 replies
|
D

danlovestikis
Posted
posted
on
Sat, Jan 4, 2025 9:09 AM
We need a video to see your home made heat knife in action. I've never heard of one. I have a soldering gun. Similar? The Moai style is modern. I can recognize it already. Well done. You are always young to me. |
|
M

MadDogMike
Posted
posted
on
Sat, Jan 4, 2025 1:38 PM
danlovestikis, TC doesn't have a good way to post video so I sent you 2 videos on Facebook. Time for a little break. I need a hot knife other than the ones I made. I ordered one on Amazon, should be here next week.in the meantime, I think this is where my Moai will sit. I'll build a block platform for it to sit on and a firepit.
|
|
M
MadDogMike
Posted
posted
on
Sat, Jan 4, 2025 3:06 PM
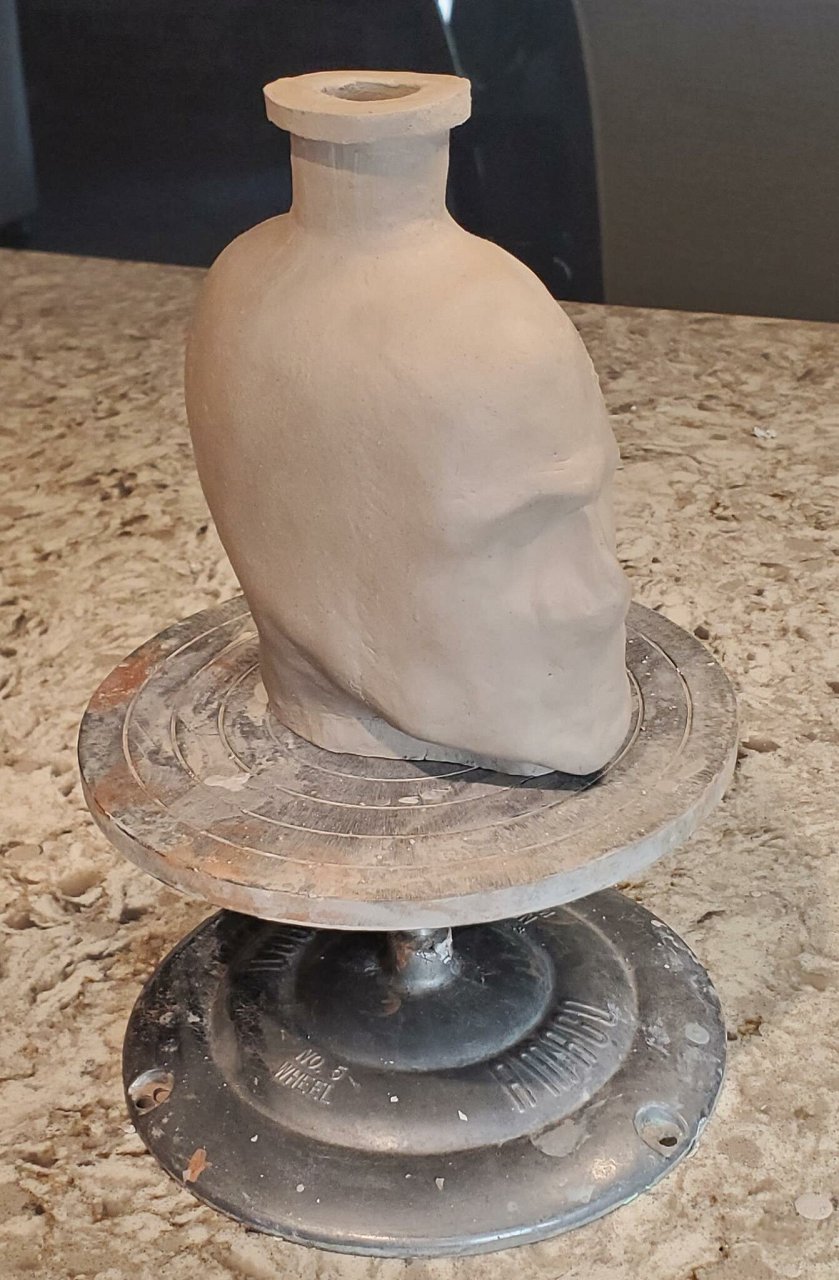
Early in my ceramics journey I learned to wrap clay around an existing form, let it dry a bit, cut it in pieces to remove the form in the middle, and put the pieces back together. Interesting shaped bottles work well. Or I have carved a piece of foam and used it. But now that I have a 3D printer, it opens a whole new realm of possibilities. I wanted to make an El Diablo bottle. Rather than sculpt it solid and hollow it out, I 3D printed a head form the size I wanted for $3 in material. Once I get the hollow clay form I should be able to add horns, ears, maybe a curled mustache and a pointed goatee. Then add a bottle neck to the top, we'll see how it works out. I calculate the volume to be about 20 ounces, a good volume for homemade chili liqueur. I could use the form to make a pirate, a Papua New Guinea tribesman, a jungle explorer, or whatever male figure I need.
|
|
M
MadDogMike
Posted
posted
on
Sun, Jan 5, 2025 1:17 PM
My 3D printed armature seems to be working out! Covered the 3D print in dampened tissue paper to the clay would not stick. Rolled out slabs of clay and placed over the tissue covered model and smoothed it out. The relief cuts allow the clay to shrink a bit as it dries without cracking. Once the clay has firmed up enough, the pieces were removed from the plastic model and re-assembled. The pieces merged back together, Smoothed out. The bottle neck and bottom added. Facial details added - horns, pointed ears, eyebrows, sharper nose, and goatee. Starting to look like a devil! Now it's time figure out how I want to finish it. Do I leave it a minimalist shape like it it now and go solid red glaze? Do I add a little more detail then glaze the eyebrows and goatee black? Do I add yellow eyes? |
|
M
MadDogMike
Posted
posted
on
Sun, Jan 5, 2025 2:53 PM
Oh! Oh! Oh! I'm excited about a new technique!!! I've always been jealous of danlovestikis and her raised letters on ceramics. But it's so much more work than just carving them in. So I came up with a new technique to try and it worked! Rolled out little clay snakes and stuck them to the tape in the shape of the letters I brushed clay slip on the surface where the letters were to go. I was able to lift the tape with the clay letters and transfer it to the bottle surface. As the letters dry, I can carve and refine them as I go. |
|
D
danlovestikis
Posted
posted
on
Sun, Jan 5, 2025 6:46 PM
Wowowowowowowoow! I love watching you work. This is really a fun project. I look forward to the next steps and glazing. |
|
G

GROG
Posted
posted
on
Sun, Jan 5, 2025 11:13 PM
The devil is in the details! lol |
|
M
MadDogMike
Posted
posted
on
Mon, Jan 6, 2025 11:58 AM
Thank you danlovestikis. Yes, you are right GROG LOL. Time to put that project away and let it dry a bit. My hot knife come in so I'm working on refining my Moai a bit. Had a few places where I was missing foam so I filled them in with spray foam. Once the foam cures I can carve it. It's getting there!. |
|
G
GROG
Posted
posted
on
Mon, Jan 6, 2025 1:01 PM
Carve that puppy, Maddoggy!! |
|
ATP

Atomic Tiki Punk
Posted
posted
on
Sun, Jan 12, 2025 4:01 PM
Still at it Mike! hope you and the family is rocking the New Year! |
|
M
MadDogMike
Posted
posted
on
Tue, Jan 14, 2025 8:19 AM
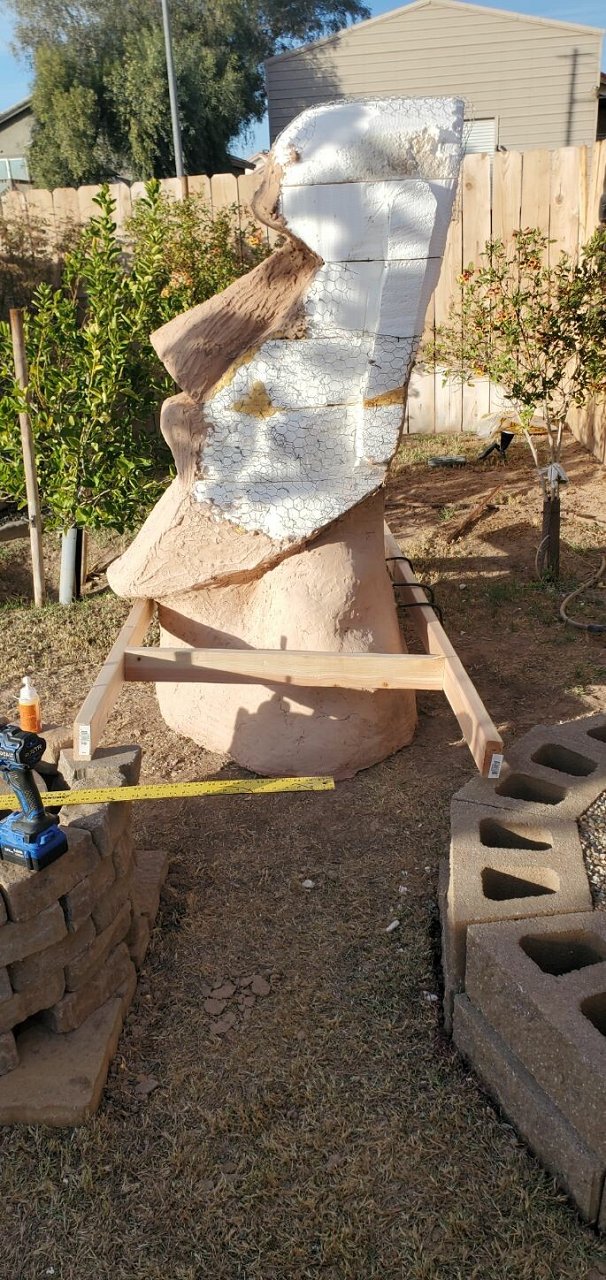
GROG I'm trying! Foam carving is done on the Moai. Working on firepit placement. Next big challenge will be tightly wrap him in chicken wire to support the concrete without changing the shape or requiring a ton of cement needed to cover the wire. [ Edited by MadDogMike on 2025-01-14 08:41:20 ] |
|
M
MadDogMike
Posted
posted
on
Wed, Jan 15, 2025 3:52 PM
I'm excited that my Moai wire wrapping seems to be working out. Made up a couple hundred clips from baling wire (I'm showing my age, they haven't used wire for baling in almost 50 years LOL) Wrapping in chicken wire, folded in the excess, then pinned into the foam with the wires. My 12 year old grandson wants to help me spread concrete on it so I'm hoping we do work on that this Saturday. |
|
M
MadDogMike
Posted
posted
on
Sat, Jan 18, 2025 6:30 PM
A little more Moai work today. My 12 year old grandson wanted to help, by all means! Any time a kid wants to do something creative, you make it happen. We had a great time. Got about a third of it covered with two 44 lb bags of polymer modified mortar mix. (Note to self - each bag takes 11 pints water and half a cup of La Habra Hatteras colorant). Up next, I'll move it to it's selected location and start to build a platform. |
|
M
MadDogMike
Posted
posted
on
Sun, Jan 19, 2025 8:03 PM
Some work on the base today. Moved the Moai to his location and spray painted the ground to mark the base. Dug out a footing, relocated a sprinkler, laid down some gravel, put in landscaping blocks and leveled them. Need to finish the back wall of the platform and backfill it with tamped earth and a topping of gravel. |
|
T

TikiAno
Posted
posted
on
Mon, Jan 20, 2025 9:57 AM
Holy moly, Mad Dog! It's been a heck of a long time since I've been here and just went down a Moai hole checking out what you've been creating. Incredible work all around, impressed as always. I see your posts on you and Teresa's travels on Facebook so impressive to see all of your recent and not so recent work. Cheers! |
|
M
MadDogMike
Posted
posted
on
Mon, Jan 20, 2025 4:58 PM
TikiAno!!! Thank you sir. I have SO MANY projects I want to do. I don't know how I managed when I was working???!!! LOL Finished pedestal, waiting for the Moai. Laid the Moai on his back and did the areas that would be upside down when he was standing - under the chin, under nose, eyebrows. Then used the rest of the bag of mortar on other parts of the face. Next - need to come up with a way to temporarily attach a couple of 2x4s for handles so that 2 guys can lift it and set him on the pedestal. |
|
D
danlovestikis
Posted
posted
on
Mon, Jan 20, 2025 8:23 PM
You live someplace really hot. The longer you keep the cement well the harder it will be and less cracking in the future. Or so I was taught. We are brick layers from way back. We used a hose to keep it wet as it set up. Incredible work from start to finish. I like devils in art too. So cool. I loved reading you have more projects in mind. I love to be entertained with your photos. |
|
M
MadDogMike
Posted
posted
on
Tue, Jan 21, 2025 7:02 PM
in reply to danlovestikis
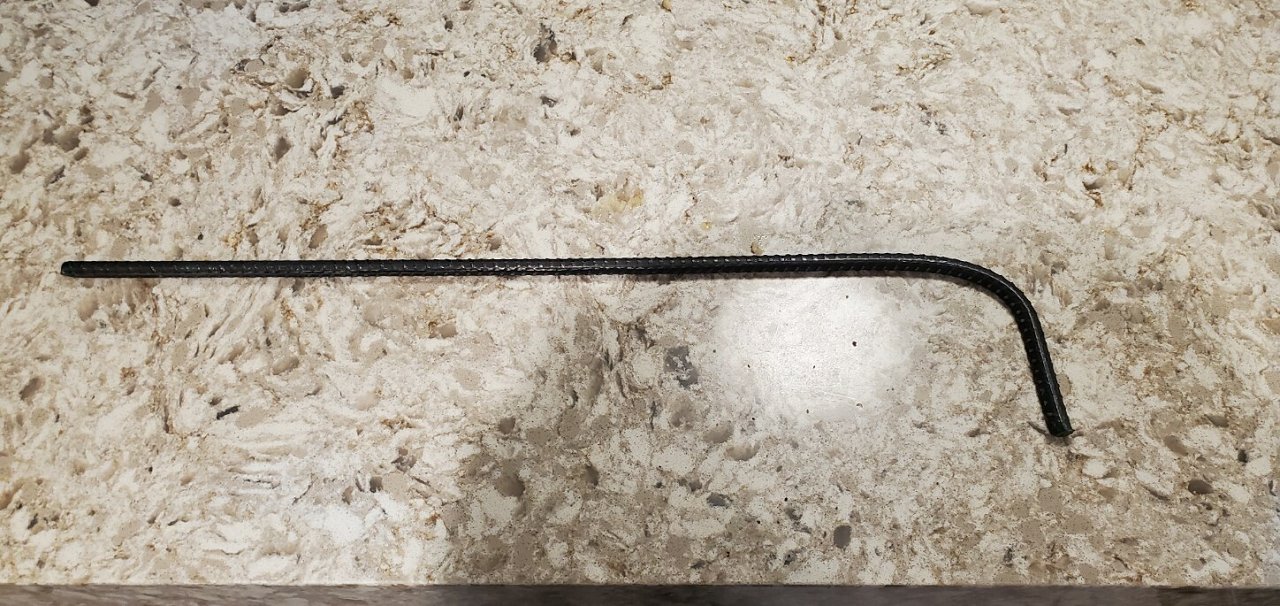
Wendy you are exactly right about drying too fast causing concrete to crack! Fortunately it's not too hot now (in the 60s today). It has developed some cracks moving it but it's OK as I still need a texture coat over it that will cover any cracks. Now that the face is covered, he's approaching 200 lbs and still needs to be set up on his pedestal. So I devised a plan. Got three 24 inch pieces of steel rebar and gave them a little bend. These bars were embedded in the back, 18 inches deep through the mortar and into the solid foam. The bars will remain stuck in his back but it's against the fence and won't show. Maybe when I'm gone and someone needs to move it, they will figure out what those are for. Then built a 2x4 cradle around the base of the Moai. One 2x4 went under the chin and one under the steel bars. Suckered my neighbor into lifting one end and I got the other. It lifted perfectly and we set it on the pedestal as if I knew what I was doing LOL Up next, finish covering with wire and mortar. [ Edited by MadDogMike on 2025-01-21 19:17:18 ] |
|
M
MadDogMike
Posted
posted
on
Thu, Jan 23, 2025 7:41 AM
Finished up chicken wire and mortar all the way around Up next, texture and coloring |
|
D
danlovestikis
Posted
posted
on
Thu, Jan 23, 2025 9:04 AM
That was the most perfect way to move the moai. Your neighbor was a very nice tool for you! This was a wonderful addition to your yard. Soon a 360-degree video will be needed for those of us who enjoy the view. I'm looking forward to the next steps. |
|
M
MadDogMike
Posted
posted
on
Fri, Jan 24, 2025 3:52 PM
in reply to danlovestikis
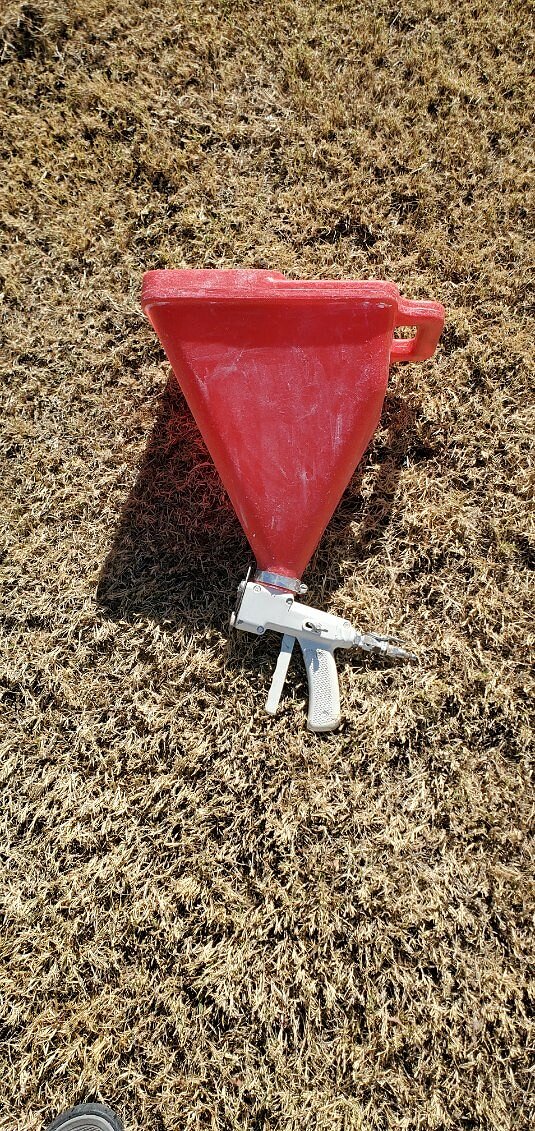
Wendy another 360 view will be due. But probably not until March or April after the grass turns green. The firepit was in the path of the sprinklers. So I put a removable top to protect it from rusting out. I'll go back and router some Rongorongo glyphs on it. A drywall hopper to add texture. I'm very happy with texture. It looks very rock-like, also covered the cracks and chicken wire well. Added some powder colorant while the mortar was wet. Much of this color will wash off later so this is just a first pass color. I can add more color later in the form of paint either sponged or sprayed on. Used a leaf blower and a brush to take off some of the excess powder colorant, then hosed it down. It softened the colors some. Then I lightly spayed some moss green to the north side [ Edited by MadDogMike on 2025-01-24 16:23:37 ] |
|
D
danlovestikis
Posted
posted
on
Sat, Jan 25, 2025 8:59 AM
Wow wow wow. The texturing really just made this so incredible. the coloring too. I should have known you would have more tricks up your sleevesssssssssss. Well done MadDogMike. |
|
M
MadDogMike
Posted
posted
on
Sun, Jan 26, 2025 6:36 PM
in reply to danlovestikis
Thank you Wendy. I'm calling him finished (at least for now LOL) Put a big concrete pot on each side with a Ponytail Palm (Beaucarnea recurvata) and some Pansies for a spot of color. And a Rapa Nui birdman on the firepit cover [ Edited by MadDogMike on 2025-01-26 18:42:26 ] |
|
D
danlovestikis
Posted
posted
on
Mon, Jan 27, 2025 7:10 PM
The only thing left is for birds to land on his head and relieve themselves. Looks terrific. |
|
M
MadDogMike
Posted
posted
on
Mon, Jan 27, 2025 9:25 PM
in reply to danlovestikis
LOL Wendy. Someone told me they often paint fake bird poop on faux rocks to make them more realistic :D |
|
D
danlovestikis
Posted
posted
on
Tue, Jan 28, 2025 8:18 AM
Well that's a new one! |
|
H

hang10tiki
Posted
posted
on
Sat, Feb 1, 2025 12:32 PM
Holy cow that came out amazing, just don’t let the wind blow that fire towards him 🗿 |
|
M
MadDogMike
Posted
posted
on
Sat, Feb 1, 2025 5:36 PM
danlovestikis LOL |
|
OGR

Or Got Rum?
Posted
posted
on
Mon, Feb 3, 2025 9:25 AM
Absolutely fantastic process and finished result...Mike, You never cease to amaze. |
|
M

maulrat
Posted
posted
on
Mon, Feb 3, 2025 11:56 AM
in reply to MadDogMike
You killed it again, Mad Dog. Fantastic foam shenanigans. |
|
M
MadDogMike
Posted
posted
on
Tue, Feb 4, 2025 11:36 AM
Or Got Rum? and maulrat thank you, you're gonna make me blush! 3D printer project up next. I make several cocktail syrups but I'm tired of my labels looking like this. I have been infatuated with Jade Tiles since 2011 There is a Jade Tile 3D model available so I thought I would use it for some bottle labels I may try to sell some if I can get everything worked out. |
|
A

arriano
Posted
posted
on
Tue, Feb 4, 2025 2:17 PM
Those jade tags are excellent! |
|
S

swizzle
Posted
posted
on
Tue, Feb 4, 2025 10:40 PM
in reply to MadDogMike
They look good Mike. I don't think you'd have any problem selling those. |
|
G
GROG
Posted
posted
on
Wed, Feb 5, 2025 3:10 AM
The Moai turned out awesome maddoggy! |
|
M
MadDogMike
Posted
posted
on
Thu, Feb 6, 2025 4:10 PM
arriano, swizzle, and GROG thank you very much. I have a table on the Tiki patio. It was a really nice cast aluminum decorative table, but I used it for a workbench for too long and thrashed the top LOL. I thought about covering it in some stone or ceramic tile but was concerned it would be too heavy. But I found some travertine vinyl tile mounted on some sort of thin board. It matches the Temple wall pretty well so I'm going for it. Started with a sheet of tempered hardboard (Masonite) with a 3 inch lip on the bottom to conceal the bottom of the table. I don't have a tablesaw some I rigged up a guide to cut bevel edges with a SkilSaw Started cutting tiles to size, beveling edges, gluing and weighting them down Top done. Now to start on the edges |
|
G
GROG
Posted
posted
on
Thu, Feb 6, 2025 4:23 PM
Lookin' good MadDoggy! |
|
D
danlovestikis
Posted
posted
on
Fri, Feb 7, 2025 9:53 AM
LOVE the name tags but we don't have bottles of alcohol. You could sell some with people's names on them??? It would be fun to wear. That table is beautiful. I always smile when I think of Teresa. She must really enjoy having such a creative husband to admire. From her posts on fb I know she does. You are a fun guy MDM. Hugs from Wendy, Smiles from Dan |
|
M
MadDogMike
Posted
posted
on
Thu, Feb 13, 2025 4:58 PM
in reply to danlovestikis
Thank you GROG :) Finished up my table. Got all the tiles on, repainted the legs. Routered a couple Mayan glyphs into it and colored them with exterior latex paint, I wanted to do a bunch of glyphs but sometimes I have to accept that "less is more". The new top matches well with the "stone" walls so I'm happy with it, goes with the patio much better than the cast aluminum scrollwork did. [ Edited by MadDogMike on 2025-02-13 17:02:00 ] |
|
G
GROG
Posted
posted
on
Thu, Feb 13, 2025 5:05 PM
GROG like! |
|
PP

Prikli Pear
Posted
posted
on
Fri, Feb 14, 2025 7:25 AM
That table turned out great! I started from the last post and read the thread backwards, so my first thought was "Oh, MDM has become a stonecutter now." No, wait, a vinyl cutter? Okay, you had me convinced--looks like the real deal!
|
|
D
danlovestikis
Posted
posted
on
Fri, Feb 14, 2025 6:42 PM
A wonderful table and a cool bowl at its back end. |
|
M
MadDogMike
Posted
posted
on
Sun, Feb 16, 2025 9:07 PM
GROG thank you sir A quick project today, Quicksand Quincy. As a kid I was convinced that quicksand was around every corner, waiting to swallow me up. As an adult though, I've never run into any quicksand LOL |
|
M
MadDogMike
Posted
posted
on
Thu, Feb 20, 2025 4:09 PM
Remember my Tahitian Cannibal teardrop trailer from 12 years ago? It's too small for Teresa and I so it's been sitting out in the weather for 10 years. There is a camping event coming up and Teresa doesn't really like to camp so I'm resurrecting the Cannibal and going by myself.
I brought it home and cleaned it up but it had some water damage. So I tore the back door apart and I'm rebuilding it. New side pieces. New sides attached to the top and bottom cross members. |
|
D
danlovestikis
Posted
posted
on
Thu, Feb 20, 2025 8:05 PM
Wow, I'm so glad you are fixing it. I've thought of it often. I remember you even made curtains for the inside. I hope you bring it back so it's just as cute as before. |
|
H

Hamo
Posted
posted
on
Mon, Mar 3, 2025 10:38 PM
MIKE!!! You are very busy in retirement. Love the Moai! Must have been nice to have some child labor to help put it together.... |
|
M
MadDogMike
Posted
posted
on
Wed, Mar 5, 2025 6:06 PM
in reply to danlovestikis
Thank you Wendy. I'm working at getting it back into shape. The "kitchen" was been repaired and ready to go camping this weekend! Hamo that Moai was a fun project! And free child labor is always a good thing LOL |
|
M
MadDogMike
Posted
posted
on
Thu, Jul 10, 2025 7:13 PM
I've been working on mostly 3D printed projects recently. this one was fun :) A friend of mine is working on a Nautilus/steampunk themed Tiki bar, I wanted to work on a mug for him. 3D printing would be fun but the main issue is finding food safe filament. I have some food safe PETG but it only comes in white and then you have a food safe paint issue. But I came up with a plan. Started with a solid cuboid, hollowed it and cut off the top. Resized it so that the inside would just fit a square glass sleeve. Now the drink doesn't touch the plastic. Downloaded some various submarine themed elements, resized them, and merged them with the hollow cuboid. One of those elements is a porthole. And since the glass inner liner holds the liquid and not the 3D print, I was able to leave the porthole open.
Printed it in a metallic gold filament, then gave it a blue green verdigris wash to look like corroded brass. I like it! Put a LED ice cube inside to really light up the porthole.
|
|
D
danlovestikis
Posted
posted
on
Thu, Jul 10, 2025 7:56 PM
Wow, where is the finished photo of the trailer fix? The sunken grotto and fish are interesting to say the least. I like them. |


Pages: 1 2 3 4 5 6 7 8 9 10 11 12 13 14 15 16 17 18 19 20 21 22 23 24 25 26 27 28 29 30 31 32 33 34 35 36 37 38 39 40 41 42 43 44 45 46 47 48 49 50 51 52 53 54 55 56 57 58 59 60 61 62 63 64 65 66 67 68 3223 replies