Tiki Central / Other Crafts
MadDog Mike's Platterful of Pupule - Pupu Pufferfish
Pages: 1 2 3 4 5 6 7 8 9 10 11 12 13 14 15 16 17 18 19 20 21 22 23 24 25 26 27 28 29 30 31 32 33 34 35 36 37 38 39 40 41 42 43 44 45 46 47 48 49 50 51 52 53 54 55 56 57 58 59 60 61 62 63 64 65 66 67 68 3,223 replies
|
H

hang10tiki
Posted
posted
on
Fri, Jul 11, 2025 9:21 AM
Wow. Very kool !!!! |
|
M

MadDogMike
Posted
posted
on
Fri, Jul 11, 2025 1:20 PM
in reply to danlovestikis
Thanks Wendy and Hang10Tiki. Wendy, I didn't take any more pics of the trailer. I finished the repairs and sold it. It was sad to see it go but it just wasn't big enough for Teresa and I |
|
D

danlovestikis
Posted
posted
on
Fri, Jul 11, 2025 8:20 PM
Trailor looks great. You are a handy man! |
|
M
MadDogMike
Posted
posted
on
Sat, Aug 2, 2025 4:50 PM
I liked the way the Sunken Grotto mug turned out so I made a Temple of the Jade Jaguar mug inspired by the Temple of the Jade Jaguar wall
[ Edited by MadDogMike on 2025-08-02 16:51:56 ] |
|
D
danlovestikis
Posted
posted
on
Sat, Aug 2, 2025 6:26 PM
We love our Swap Witco fountain mug so much we feel sorry for you that it's in our hands. This Jaguar mug is creepy cool. |
|
M
MadDogMike
Posted
posted
on
Sun, Aug 3, 2025 11:00 AM
in reply to danlovestikis
Wendy - "We love our Swap Witco fountain mug so much we feel sorry for you that it's in our hands." LOL I'm very glad you have it. I traded it for an AWESOME black velvet painting of the exact same fountain <3 |
|
M
MadDogMike
Posted
posted
on
Mon, Sep 1, 2025 4:12 PM
A few projects I've been working on. What do you make with a 3D printer and stl files for a skull, a set of boar tusks, a cowrie shell, and a cylinder? You slice, resize, re-arrange and make an Asmat Ndakus/Trophy Skull to float on your cocktail LOL Babalu had a Clay Jam at his studio a few weeks ago, I made a diving helmet mug.
[ Edited by MadDogMike on 2025-09-01 16:16:37 ] |
|
B

BlackWater
Posted
posted
on
Mon, Sep 1, 2025 4:21 PM
Crazy cool |
|
M
MadDogMike
Posted
posted
on
Mon, Sep 1, 2025 4:37 PM
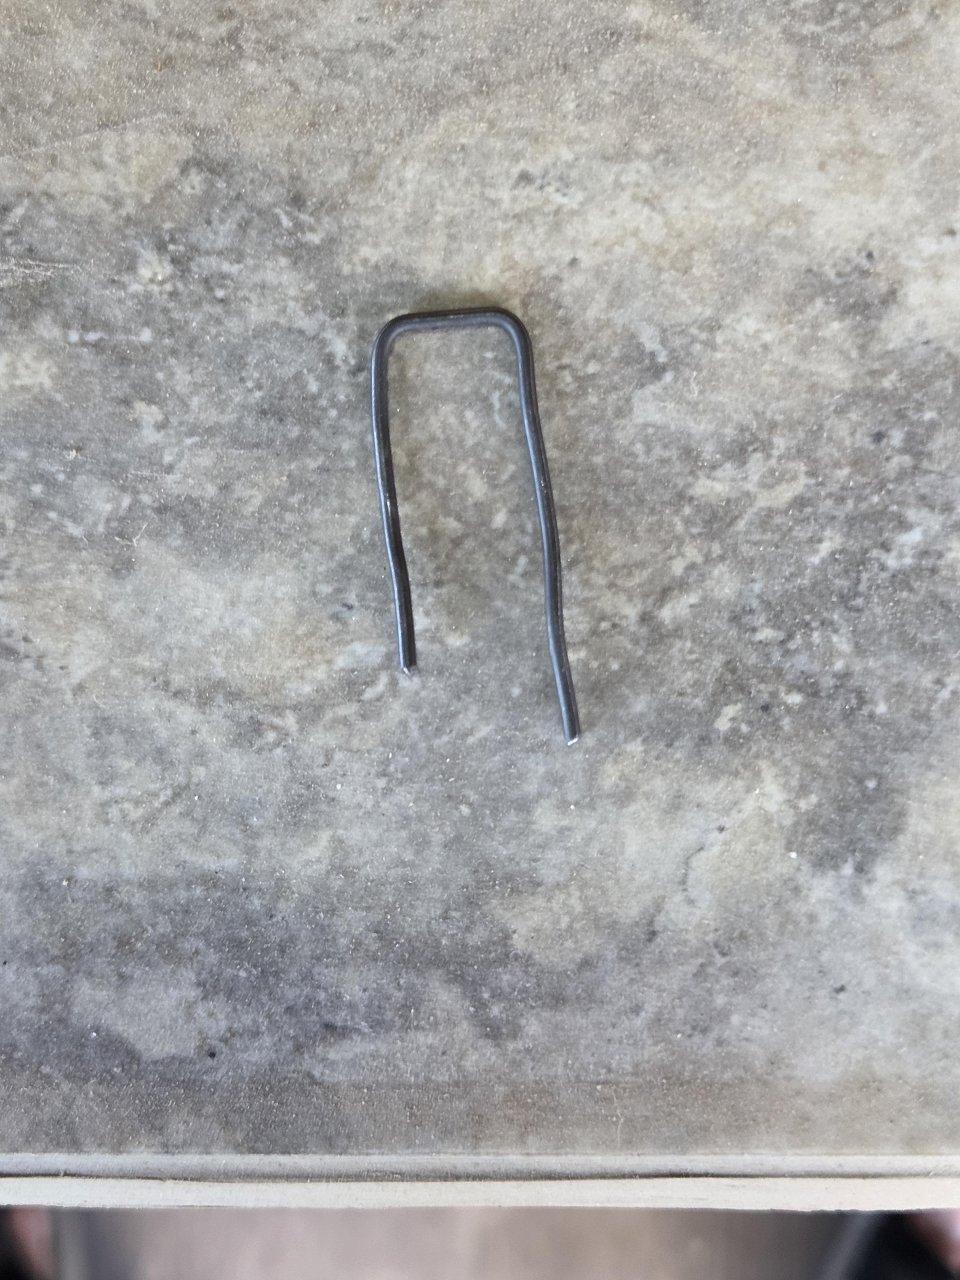
I had a plan for a Lava Tube Eternity Table. If it work, it will look like a glowing lava tube extends miles into the Earth. Started with a 5 gallon steel bucket. Painted the inside flat black. Broke up some Styrofoam into pieces and spray painted them black too. The solvent in the paint dissolves the foam a bit and creates a rock like texture. Placed a 12 inch acrylic mirror in the bottom of the bucket and glued the foam pieces to the side of the bucket. Left some space between the foam pieces to string red rope lights through. Spayed a little fluorescent orange to give a little color and contrast. Ran red rope lights in between the Styrofoam spacers and secured to lights to the foam with wire staples. Here's what I've got with the lights on. Next step is to cover most of the rope lights with bigger pieces of textured foam. Didn't get a good pic of this step but cut out some random rock shapes and spray painted them gray. Then brushed them with watered down black paint which settled in the textured areas of the foam. Then flipped them over and cut some kerfs into the foam so it would curve with the bucket. Glued and pinned these pieces to the first layer of foam support pieces. It's getting there. I found a round piece of 1/4 inch glass for 10 bucks. But it was 28 inches and I needed 16. The internet told me to cut it off in sections. Then cut off the "tabs" Not quite round, I was able to smooth it out some with a grinder and flapwheel. Some flat black paint on the outside and some brackets to support the glass. Next step is to put reflective film on the bottom of the glass, arriving in a couple days on Amazon [ Edited by MadDogMike on 2025-09-01 17:05:13 ] |
|
D
danlovestikis
Posted
posted
on
Tue, Sep 2, 2025 8:13 AM
I like seeing your brain working out these projects one step at a time. Go man go! |
|
M
MadDogMike
Posted
posted
on
Sun, Sep 7, 2025 4:30 PM
BlackWater and danlovestikis thank you very much The inside is done! It doesn't photograph very well and the smaller diameter of the bucket keeps the illusion for being perfect but it works for me. Next I may try to do a lightweight concrete stone on the outside with my leftover red ropelights |
|
D
danlovestikis
Posted
posted
on
Sun, Sep 7, 2025 7:14 PM
Are you sure this isn't a portal to hell? Looks pretty hot! |
|
C

coldwarspacemonkey
Posted
posted
on
Mon, Sep 8, 2025 3:24 AM
in reply to MadDogMike
Stunning! Great execution on a really unique idea! |
|
H
hang10tiki
Posted
posted
on
Fri, Oct 3, 2025 12:20 PM
Go Mike go Love the diver helmet Mug. This new table is very nice. 👍🏼 |
|
M
MadDogMike
Posted
posted
on
Tue, Oct 7, 2025 2:33 PM
in reply to danlovestikis
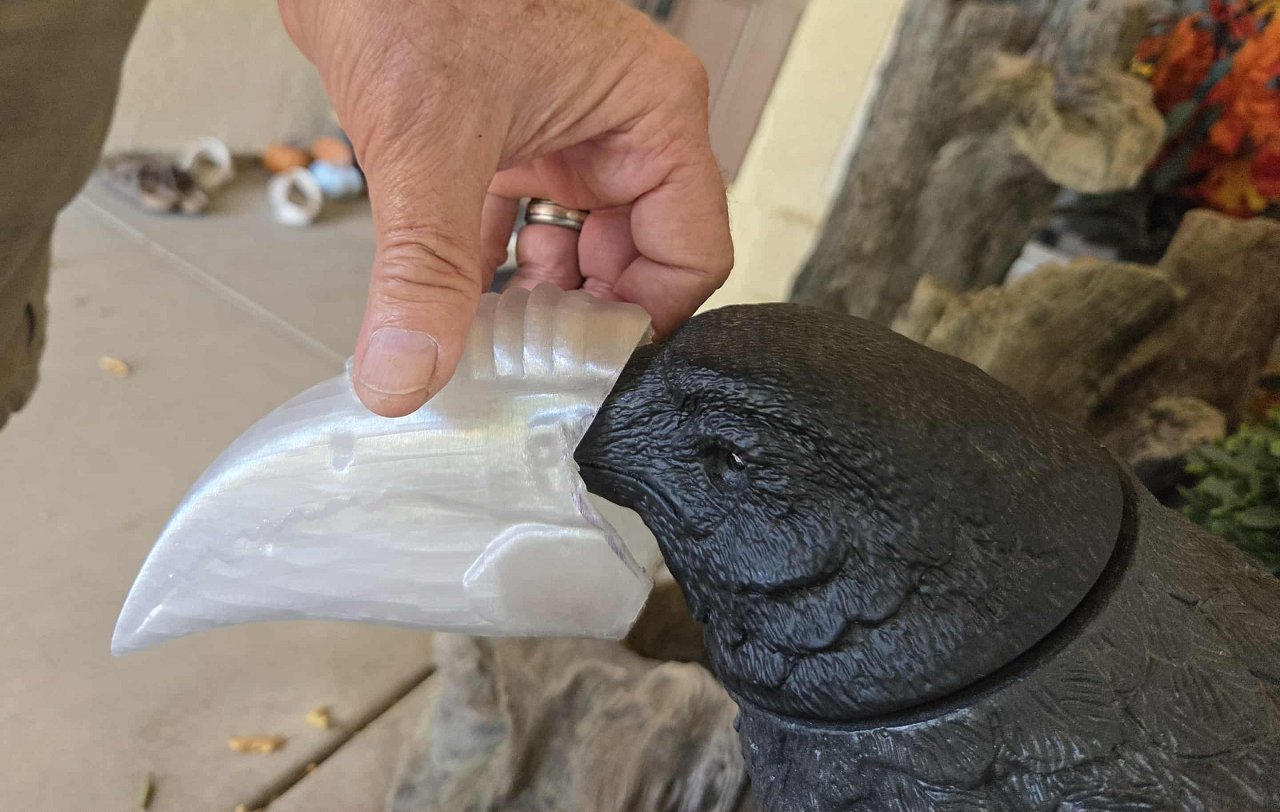
It just might be Wendy... LOL My wife had a Halloween raven for a few years that I wanted to transform into a hornbill. But she wasn't going for it. This year I found her a smaller but more detailed and more animated replacement. I 3D printed a beak for him And trimmed it to fit I picked up this foam putty to fill in the gaps. Never used it before but it's air dry, sandable, paintable, lightweight, non-shrinking. We'll see how it works Put a gob of putty inside the beak and shoved it on the raven's face Then smoothed out the putty While the putty was drying, I started painting the base and tail. I wanted the base to be brown instead of black so the bird would stand out better. I gave the tail a wash with grey and the base a wash of black to accentuate the texture. Now to wait for the putty to dry |
|
M
MadDogMike
Posted
posted
on
Tue, Oct 7, 2025 6:03 PM
First pass at painting the hornbill head. I'll hit it again tomorrow after this dries. |
|
M
MadDogMike
Posted
posted
on
Wed, Oct 8, 2025 8:29 AM
I'm calling it done! His head moves but TC doesn't support video |
|
D
danlovestikis
Posted
posted
on
Fri, Oct 10, 2025 9:58 AM
3D printers are sure fun to play with. This was a terrific project that you pulled together. Happy wife happy life! |
|
H
hang10tiki
Posted
posted
on
Fri, Oct 17, 2025 2:18 PM
Great transformation |
|
M
MadDogMike
Posted
posted
on
Sun, Oct 19, 2025 7:57 AM
in reply to hang10tiki
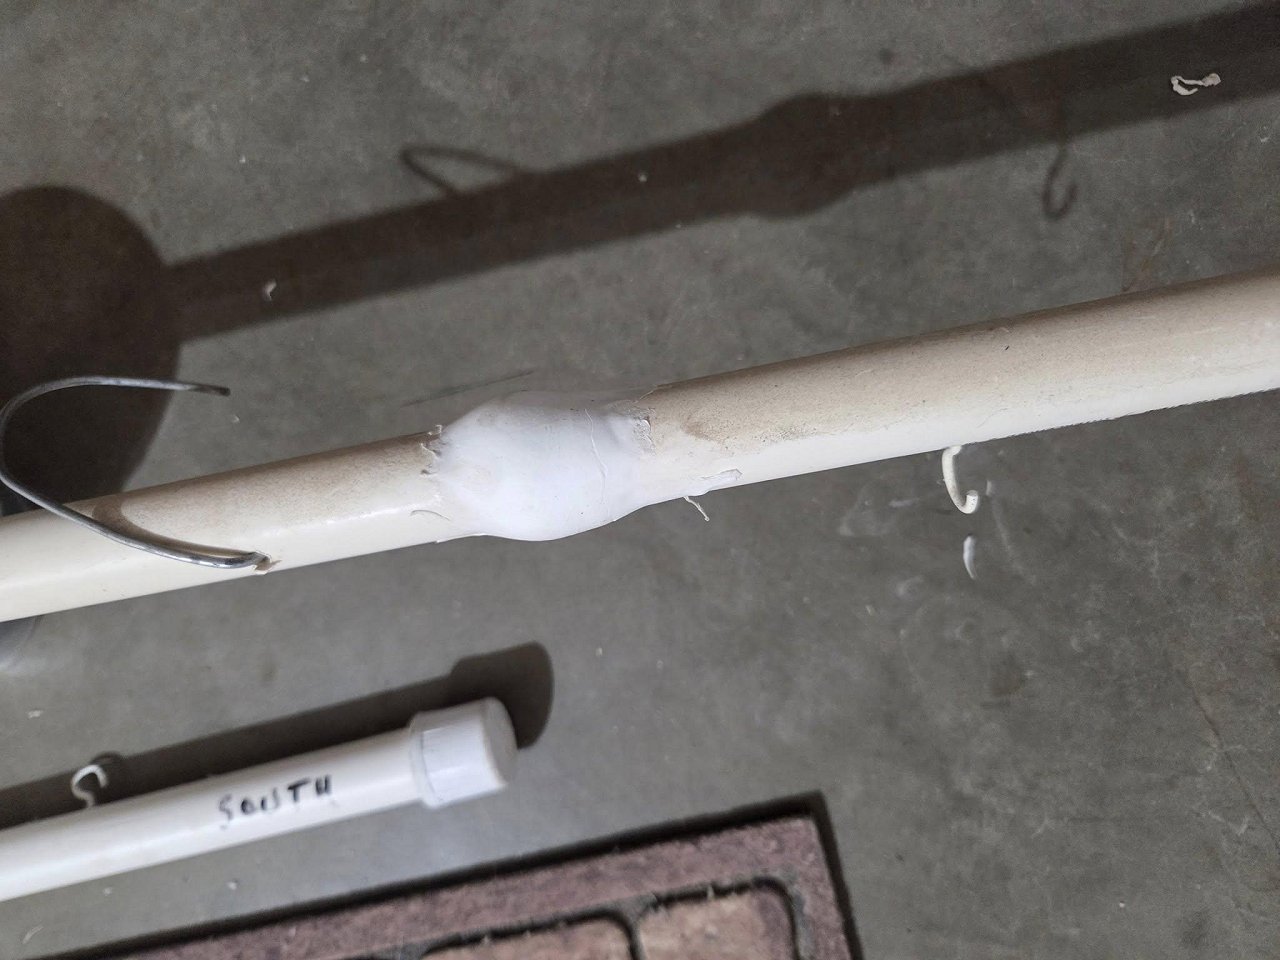
Thank you H10T! I had some putty left over from the hornbill project so I did another transformation. PVC pipe to bamboo This piece of PVC pipe hold my projection screen when we do movies on the patio. It was a bit ugly so I decided to bambooify it.
They are lots of ways to make PVC into bamboo but here's what I did, I'm happy with it. (PS, just the one lower piece of bamboo it mine. The bigger pieces were made by God I used this air dry foam clay to make nodes along the pipe. I pressed a groove into the node all the way around But as the clay dried, the groove went away. Not shown here, but after the clay dried (a few days) I cut the groove back with a Dremel The next few nodes a made the groove by tightening a zip tie around the clay while still wet and cutting it off when dry Be sure to wipe the letters off with acetone and a rag, yellow paint won't cover them After a base coat of dull yellow I randomly dusted it with some bright yellow and brown spray paint to give it a mottled effect. A small brush and brown paint in the node grooves. And some random brown steaks lengthwise on the pipe. |
|
D
danlovestikis
Posted
posted
on
Tue, Oct 21, 2025 4:48 AM
You made it invisible. Now it blends into your decor. Another MadDogMike success! |
|
H
hang10tiki
Posted
posted
on
Wed, Oct 22, 2025 2:31 PM
Good fix MacGyver |
|
M
MadDogMike
Posted
posted
on
Thu, Oct 23, 2025 9:22 AM
in reply to danlovestikis
Thank you Wendy and hang10tiki :) New project. I have a Papua New Guinea wall and one of the display items is an old French cartographer map of PNG. But it just didn't last outdoors and looked like this most of the time So I printed a 3D topographic map, mounted it to a blue stained board, and put it up instead. |
|
D
danlovestikis
Posted
posted
on
Fri, Oct 24, 2025 2:25 PM
That is so much better. Well done once again MadDogMike! |
|
H
hang10tiki
Posted
posted
on
Sat, Oct 25, 2025 7:29 AM
Nicely mapped out |
|
M
MadDogMike
Posted
posted
on
Mon, Oct 27, 2025 6:09 PM
in reply to danlovestikis
Thank you Wendy I blame my friend Joe Fellmeth actually. He has been telling me about his plans for drink activated special effects - you order a specific drink off the menu and it triggers a series of lights, sounds, smoke, pyrotechnics, etc.
|
|
D
danlovestikis
Posted
posted
on
Mon, Oct 27, 2025 7:17 PM
Ohhhhhhhhhhhh this is going to be a good video when it's up and running. I'm glad I watch you on fb too. |
|
H
hang10tiki
Posted
posted
on
Sat, Nov 8, 2025 7:51 AM
Oh my. Awesome 👍🏼👍🏼👍🏼👍🏼👍🏼 |
|
M
MadDogMike
Posted
posted
on
Sun, Nov 9, 2025 10:24 PM
in reply to danlovestikis
Wendy and Jon, here's the finished video ;) |
|
D
danlovestikis
Posted
posted
on
Mon, Nov 10, 2025 7:25 PM
LOVED the video on Utube. You are so much fun to know and watch. |
|
H
hang10tiki
Posted
posted
on
Sat, Nov 29, 2025 7:54 AM
Strong work sir |
|
M
MadDogMike
Posted
posted
on
Sat, Nov 29, 2025 5:40 PM
in reply to danlovestikis
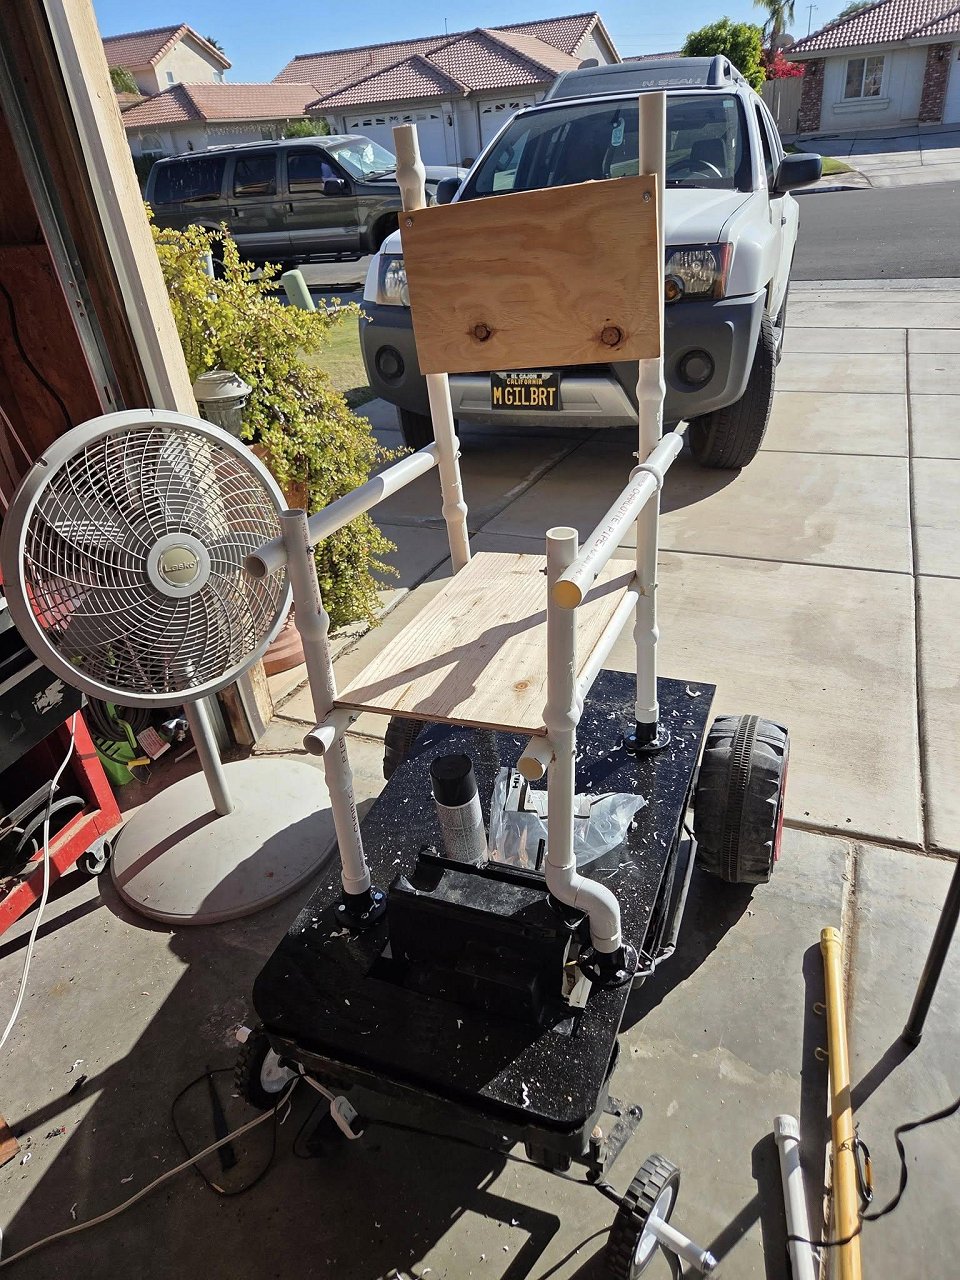
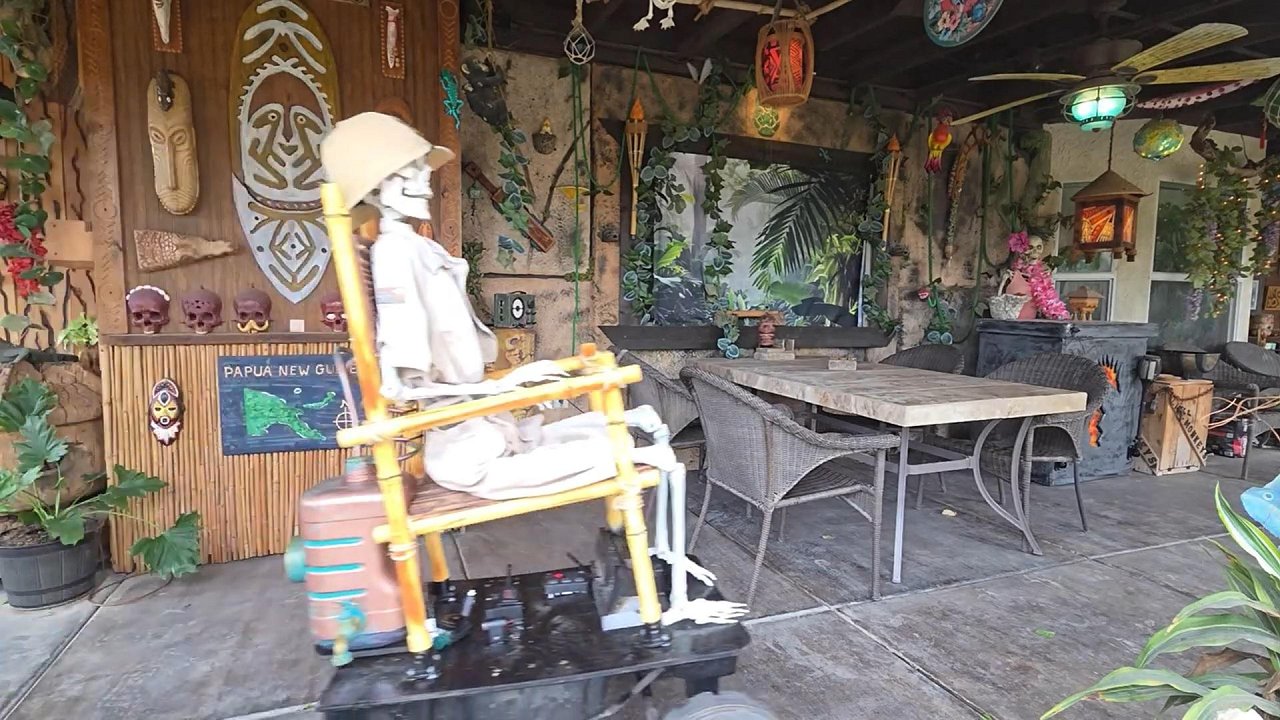
Wendy and hang10tiki, thank you. New project time. Many of you know my friend Phineas. He is getting kinda old, 205 years to be exact, and his knees aren't what they were in the 19th Century. So I'm working on a steam powered Gilligan's Island style remote control wheelchair for him.
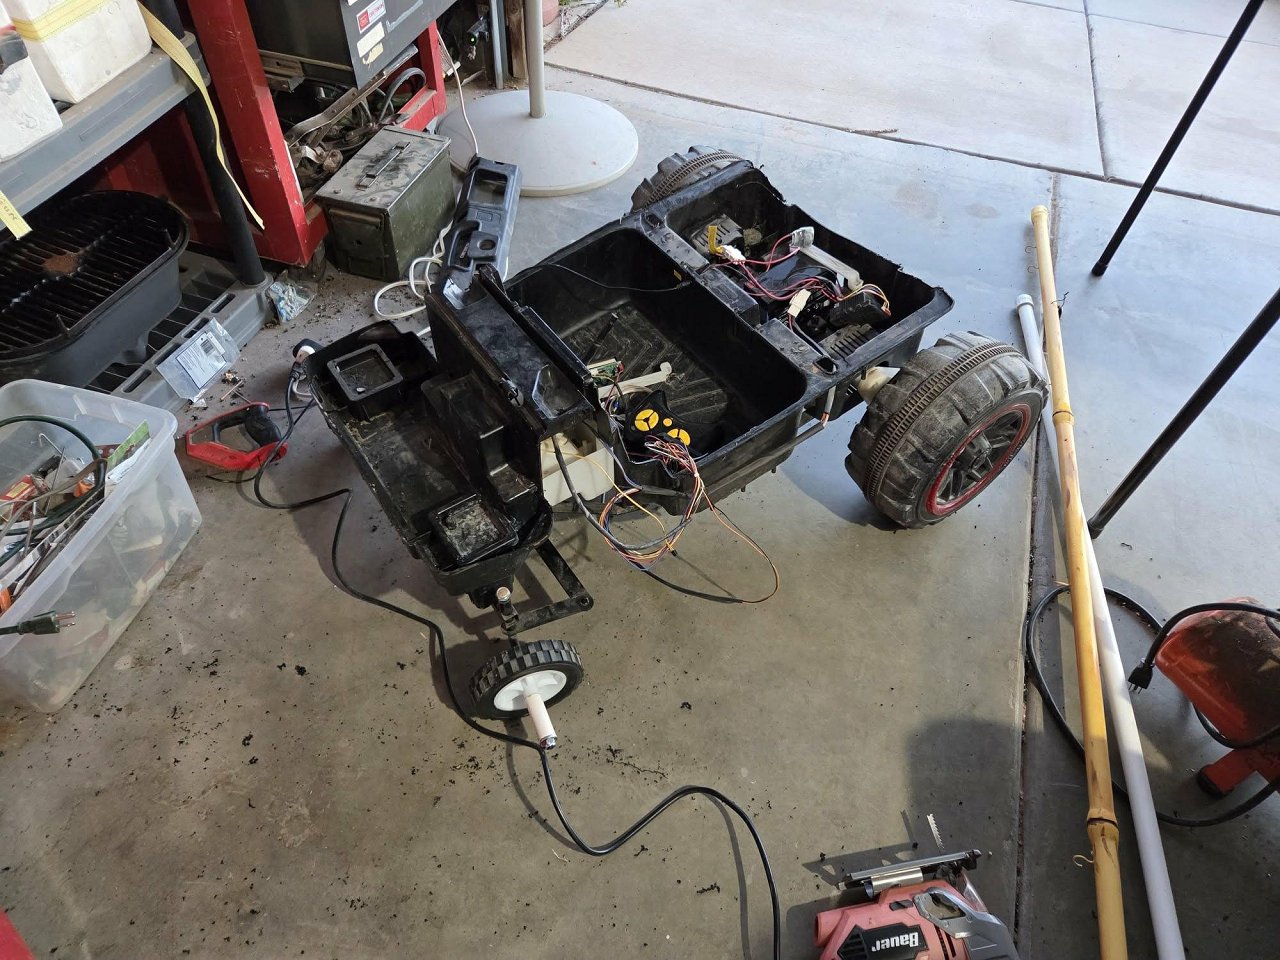
I started with a kid's Jeep that I picked up for 20 bucks not working. It has both the ability for a kid to drive it or (the part I was interested in) for an adult to drive it with a remote control.
I charged the battery and cleaned up various contacts and got it running. I was hoping to strip it down to a floor pan somewhat like an old VW Bug. This is the pile of parts that I took off.
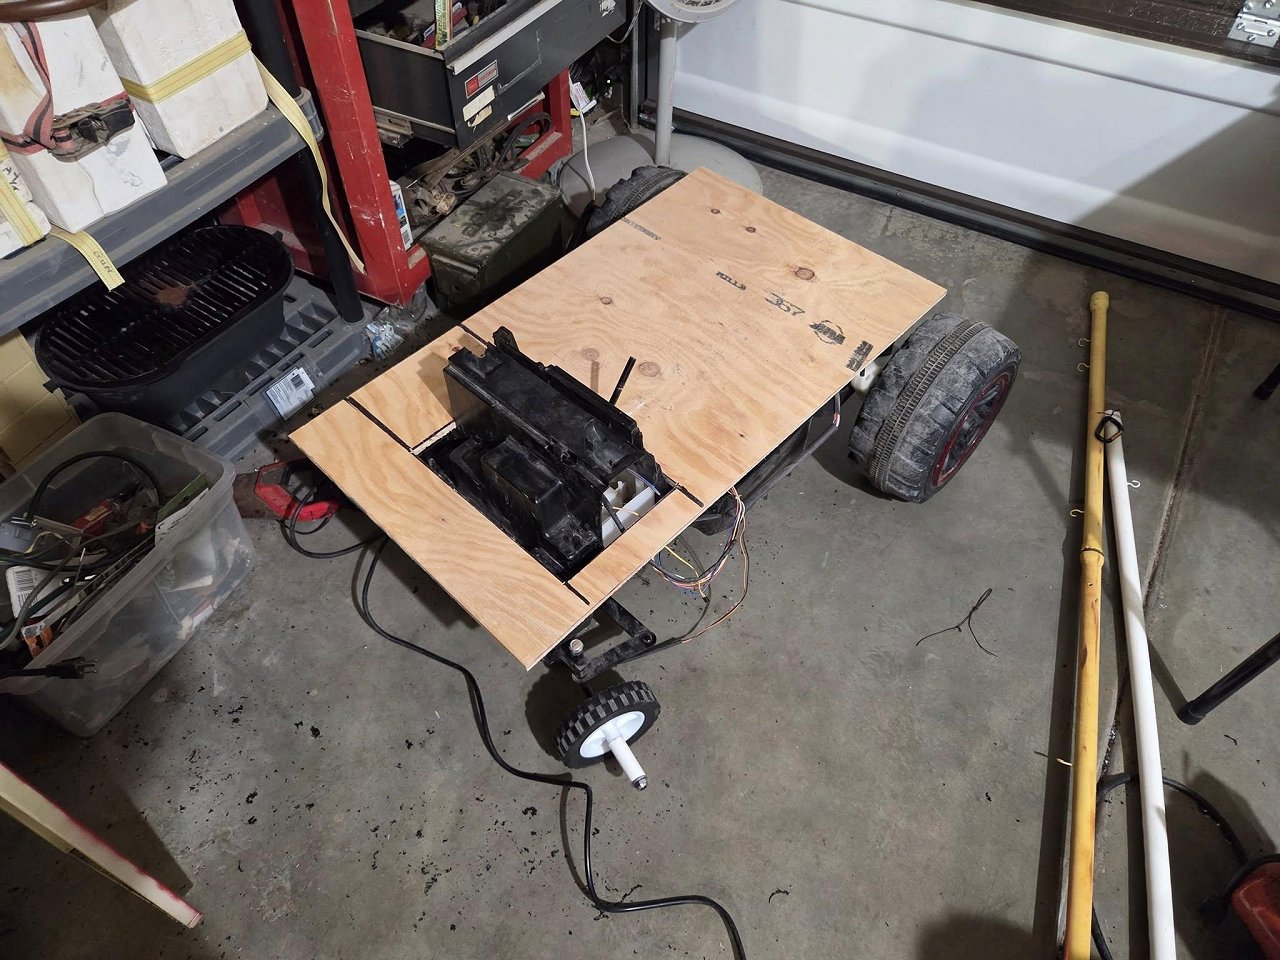
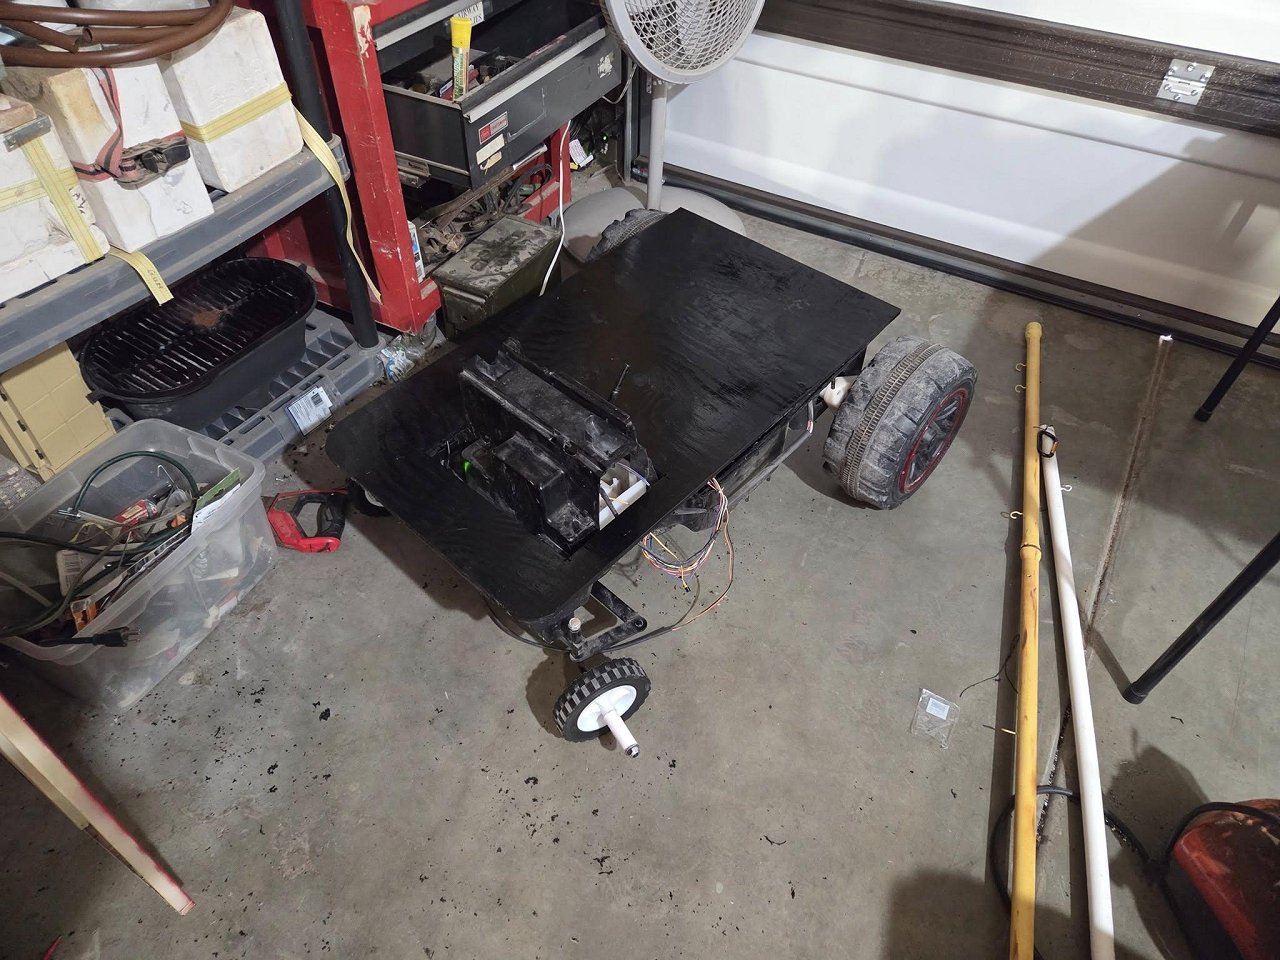
This is what's left, seems to me one piece molded plastic. Took off the big wheels from the front and replaced them with some smaller, more wheelchair-like ones. Remember Jack "Hacksaw" Reynolds from the early 70s? Had a lot of pent up frustration and cut a Jeep apart with a hacksaw one weekend after a particularly disappointing college football game loss. Next step will be to take various saws and cut off any extra plastic then build a bamboo chair on top of it.
[ Edited by MadDogMike on 2025-11-29 17:42:37 ] |
|
D
danlovestikis
Posted
posted
on
Sat, Nov 29, 2025 7:47 PM
This is already fun to watch! |
|
M
MadDogMike
Posted
posted
on
Fri, Dec 12, 2025 2:23 PM
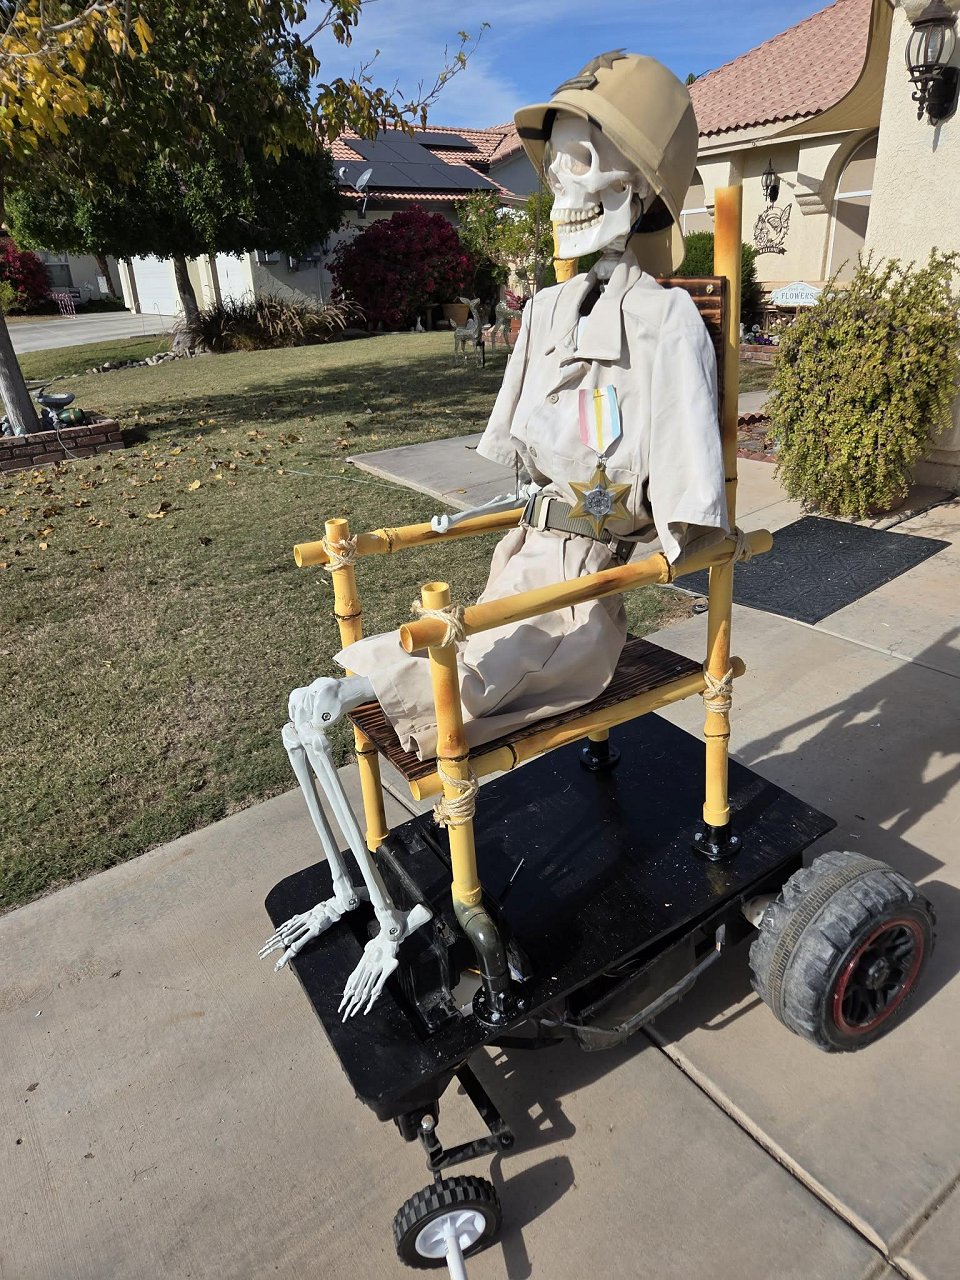
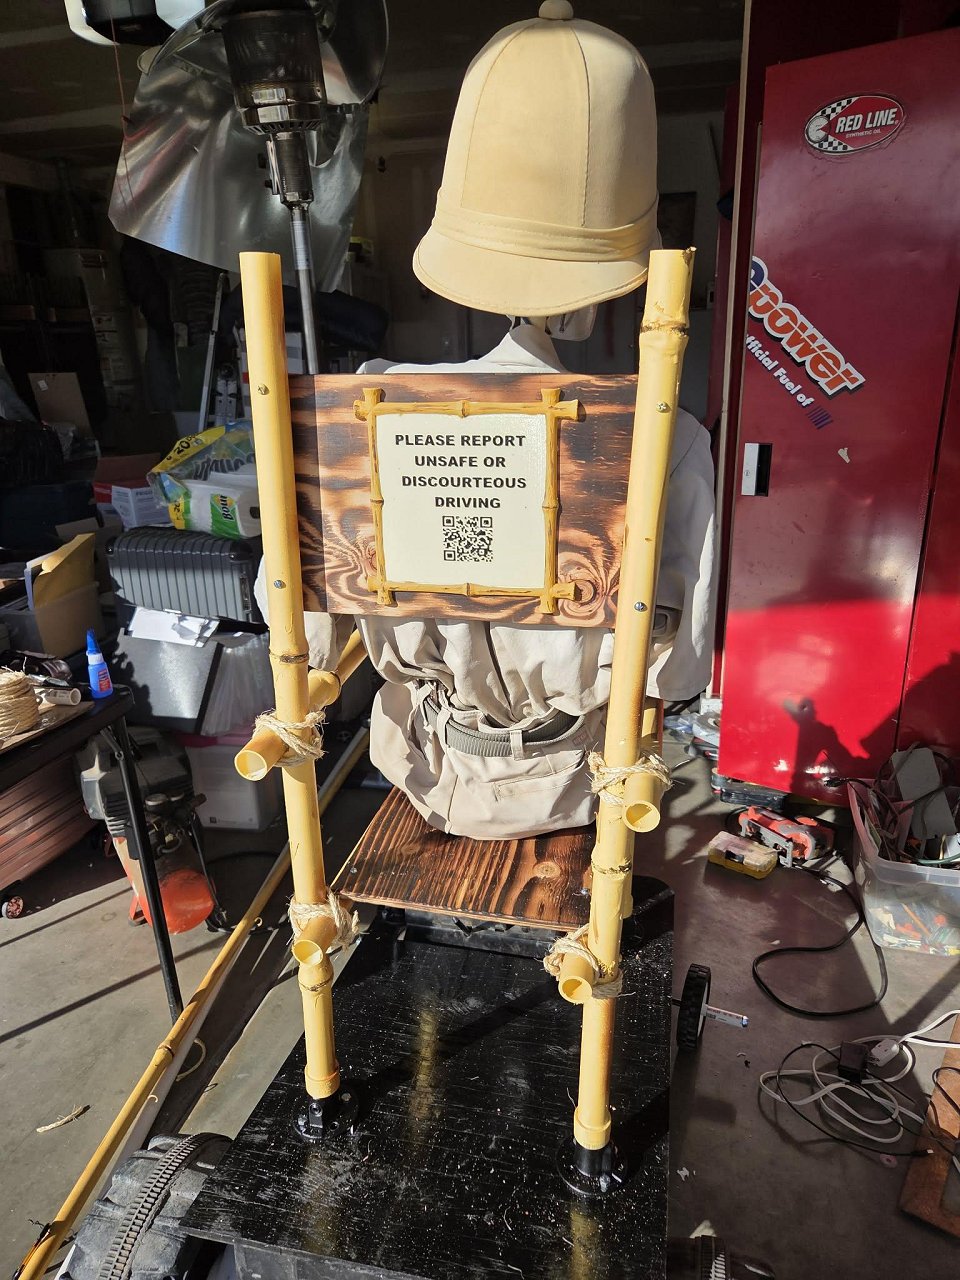
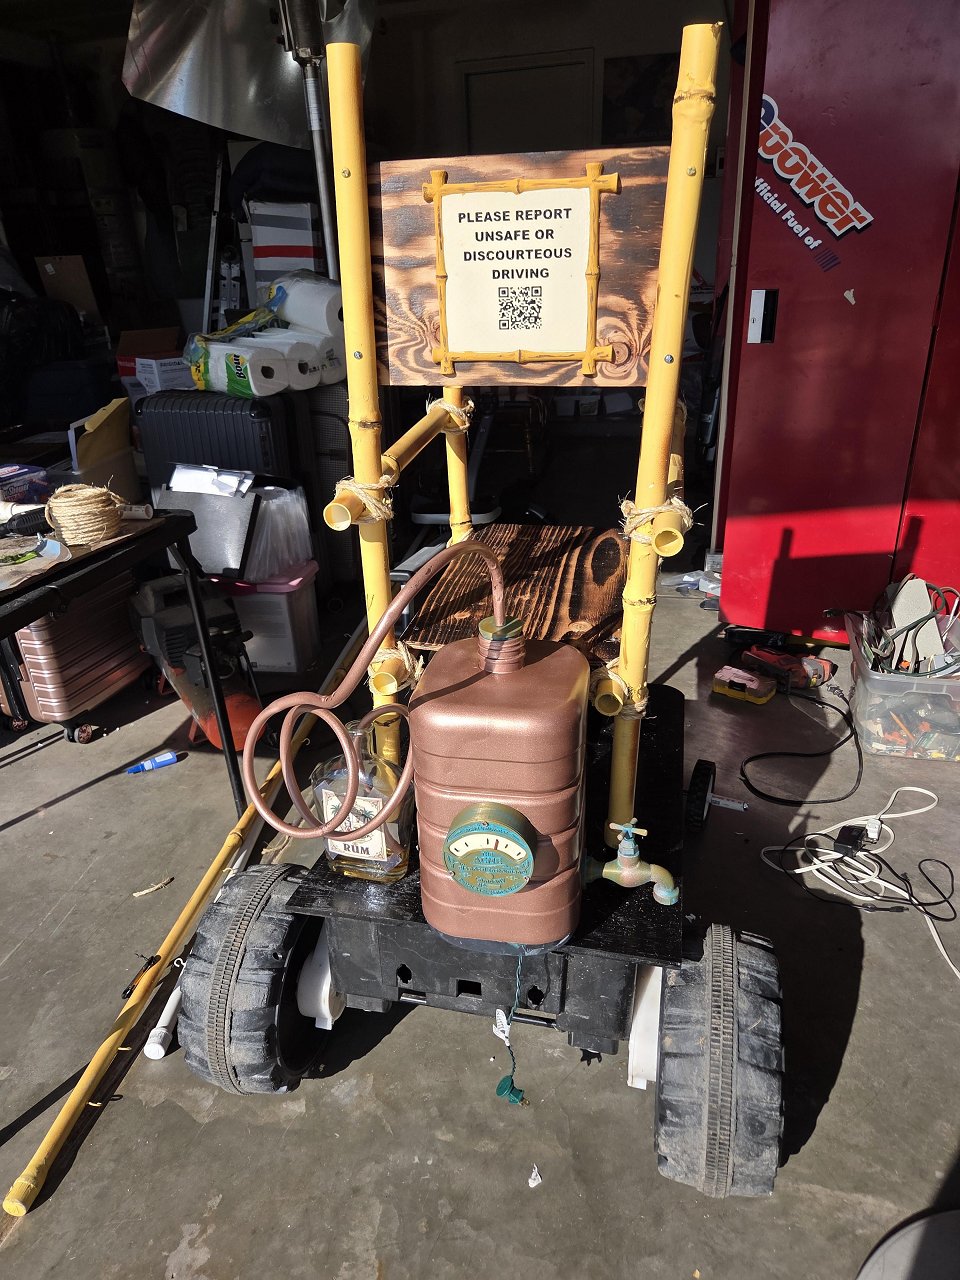
More wheelchair progress. Done with the demolition phase as I had cut off everything that isn't needed. Cut a plywood platform and painted it black Made a PVC chair frame and attached it to the platform with pipe flanges. The flanges have set screws so I can remove the chair for transport or storage. Notched the pipes and bolted together, added some air dry foam putty bamboo nodes. Added plywood seat and seat back Painted the bamboo pipes, lashed them together with some natural rope, burned the plywood seat parts. Phineas says it's quite comfy! Back. Do not scan the QR code if you have delicate sensibilities, Phineas is not known for his decorum LOL [ Edited by MadDogMike on 2025-12-12 14:27:01 ] |
|
D
danlovestikis
Posted
posted
on
Sat, Dec 13, 2025 9:10 AM
wendylovestikis and I danlovestikis continue to marvel at what you make. It sure is fun to watch you gogogo! |
|
M
MadDogMike
Posted
posted
on
Wed, Dec 17, 2025 1:23 PM
in reply to danlovestikis
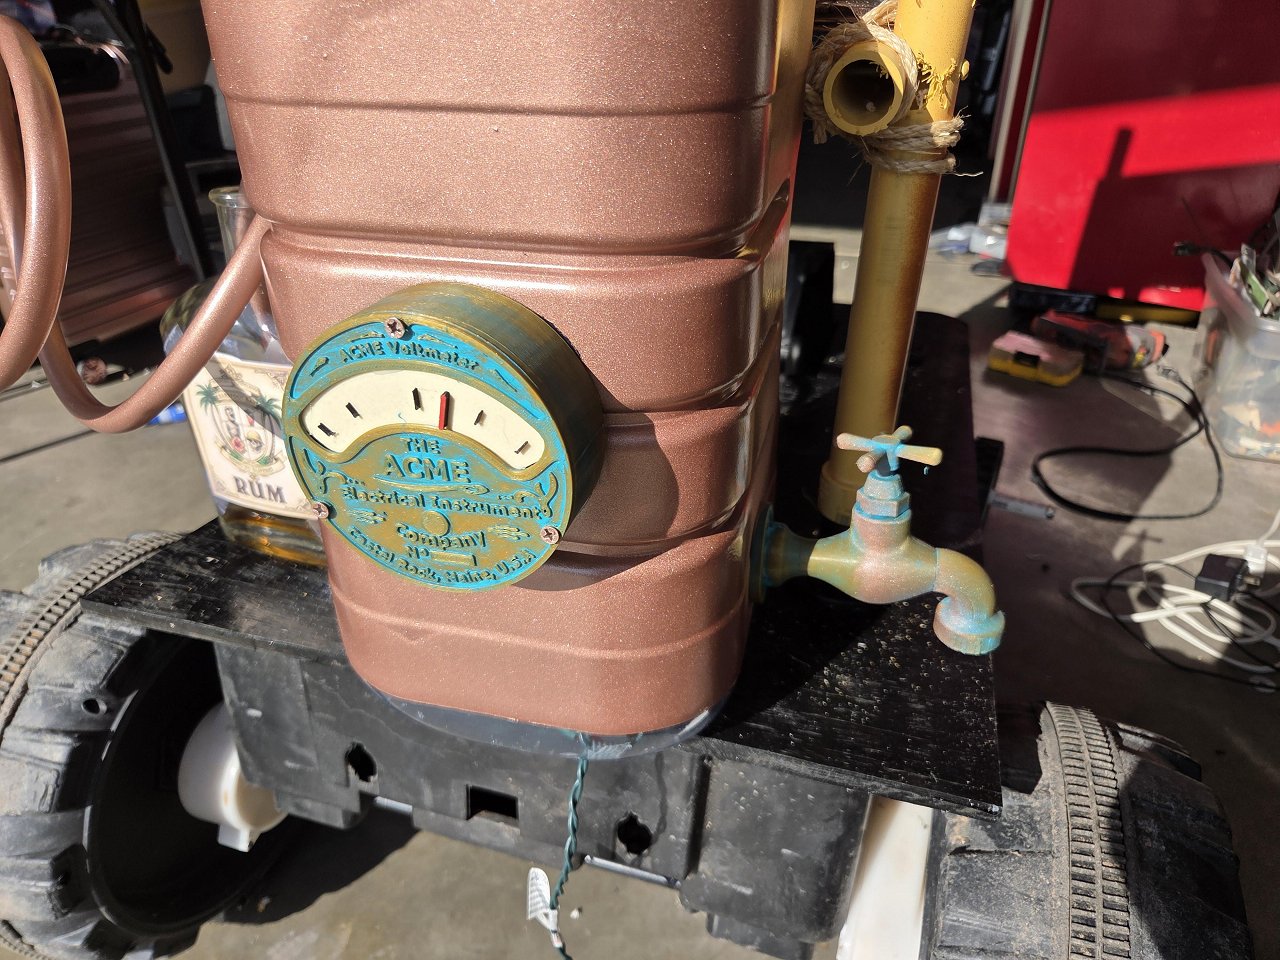
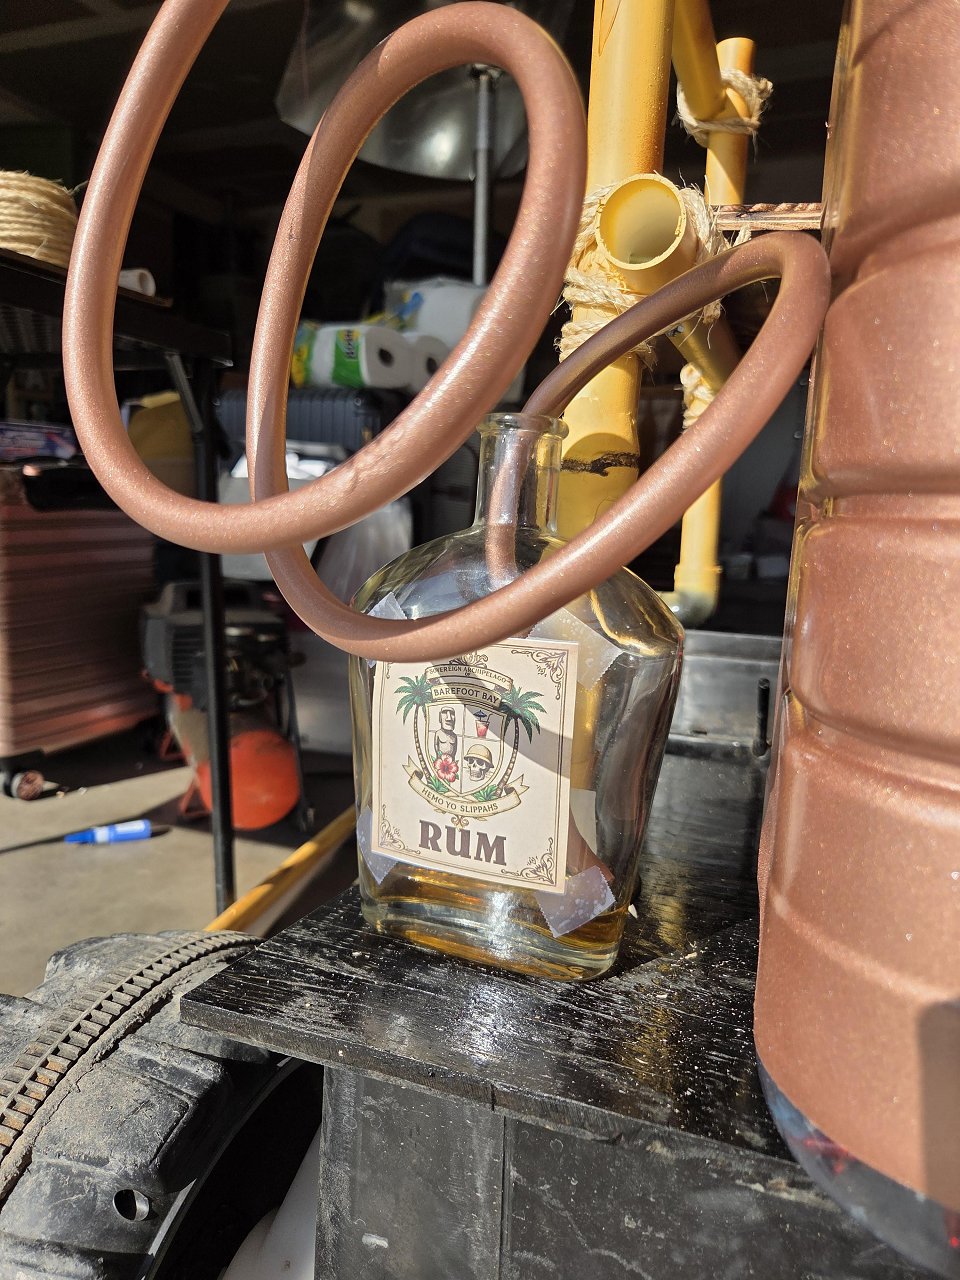
Thank you Wendy and Dan ❤️. New update. This is just a mock-up of the still for the back of his chair, not necessarily final configuration. Some red lights to simulate a heat source for distillation.
|
|
D
danlovestikis
Posted
posted
on
Wed, Dec 17, 2025 7:27 PM
I'm just laughing. You sure know how to be creative in your thinking and production. |
|
H
hang10tiki
Posted
posted
on
Thu, Dec 25, 2025 8:41 AM
Wow This is kool
|
|
M
MadDogMike
Posted
posted
on
Thu, Dec 25, 2025 9:12 PM
in reply to danlovestikis
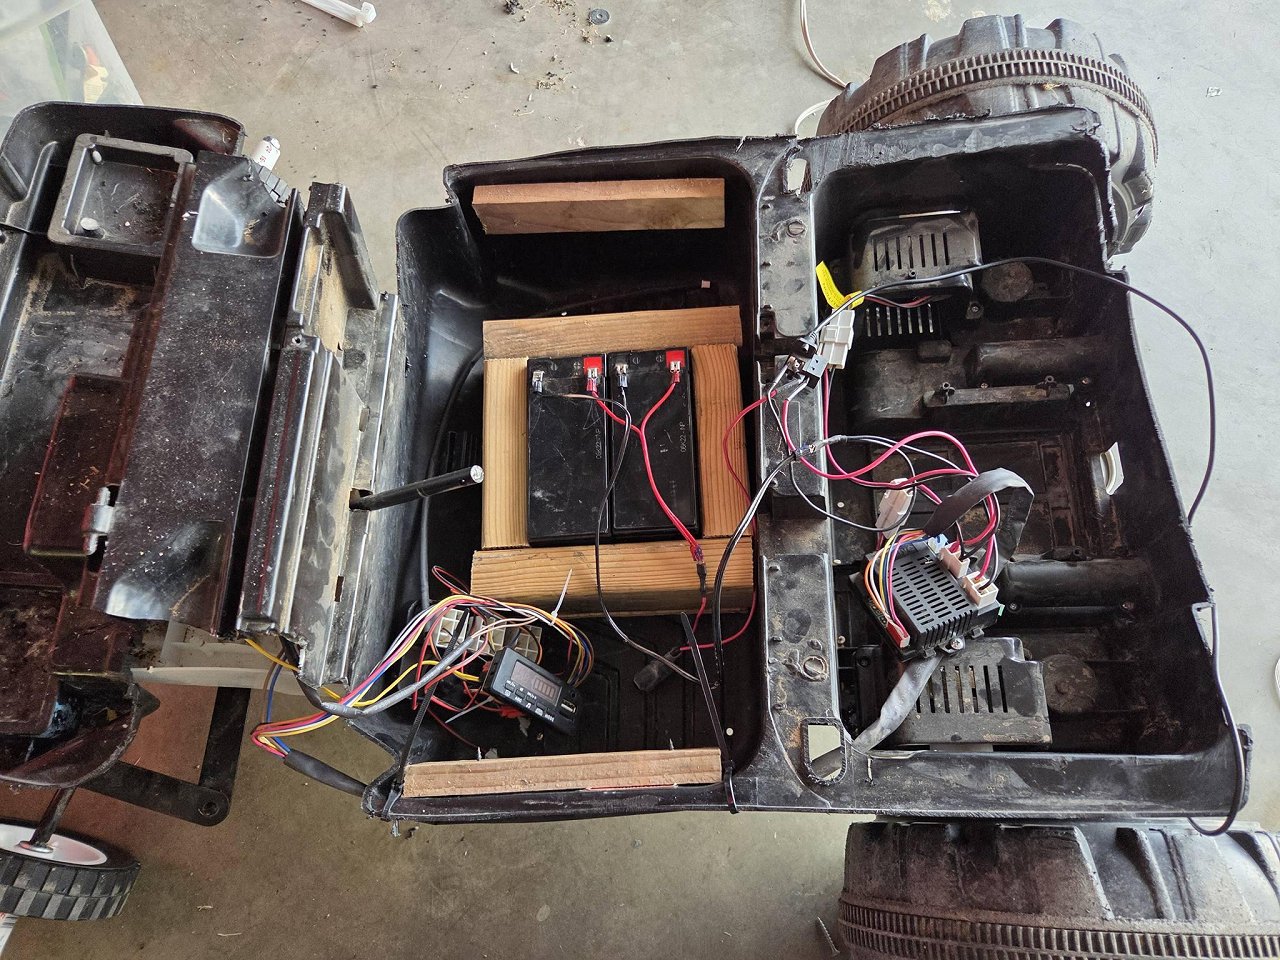
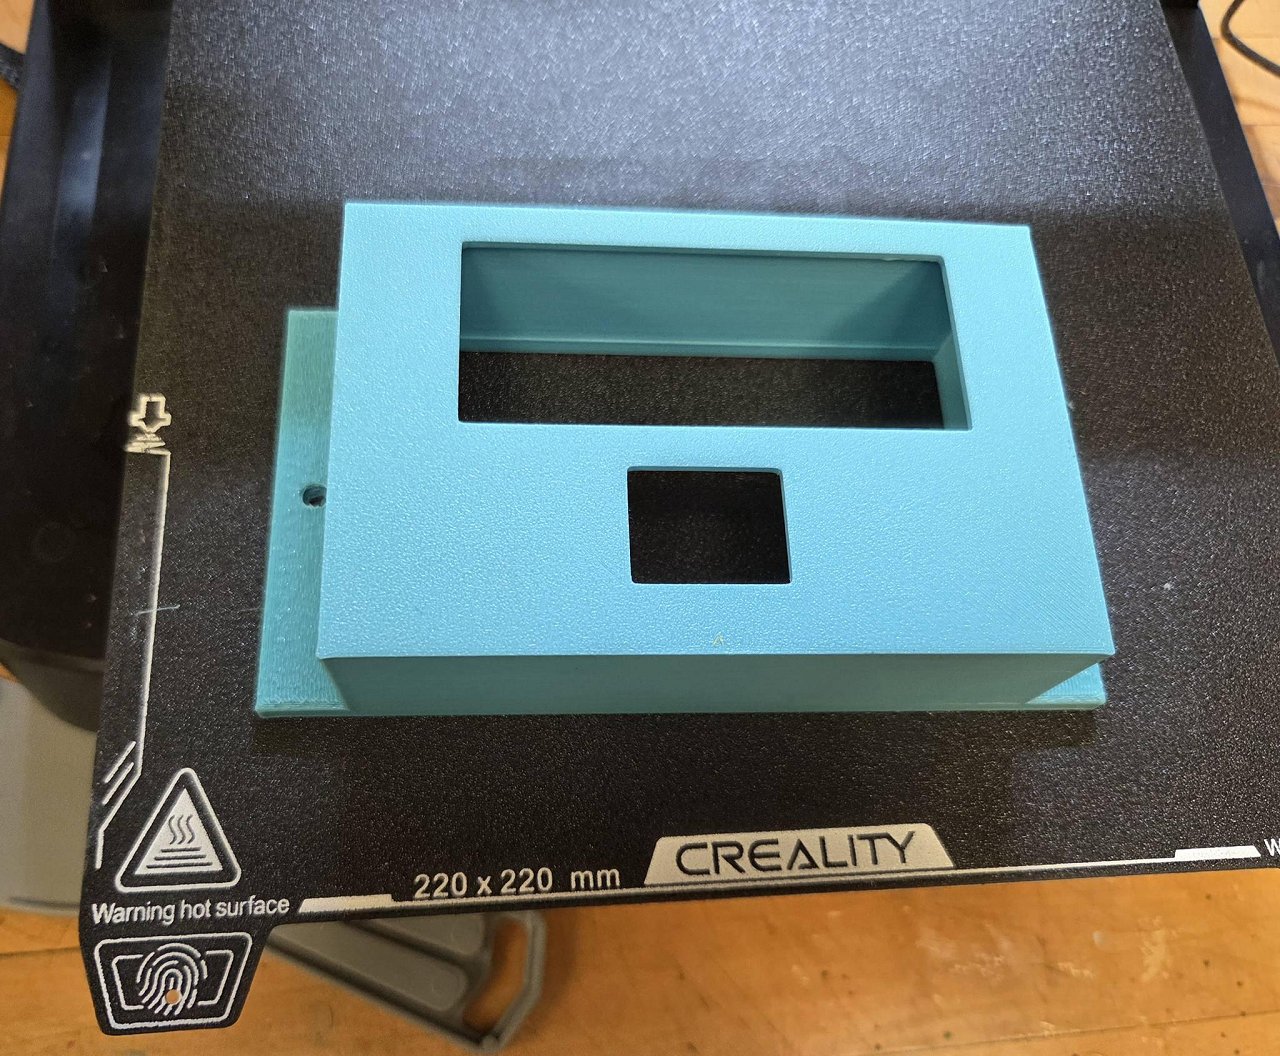
Thanks Wendy and hang10tiki! Jon, the same to ya but more of it LOL Some un-glamorous but necessary work on the Phineas chair. Created a double battery box, wired 2 batteries in parallel for increased capacity (thank you Joe for the technical assist), extended the wires to reach, secured some components that were flopping around, and added a couple wood anchor points to attach the plywood platform to The switches, charging port, and voltage meter display were mounted in the dash that no longer exists. I CAD designed and 3D printed a box to mount those in. I had excess blue filament but I'll paint it black to blend in |
|
H
hang10tiki
Posted
posted
on
Fri, Dec 26, 2025 6:06 AM
Dang, this is going to look great |
|
D
danlovestikis
Posted
posted
on
Fri, Dec 26, 2025 10:01 AM
My favorite color painted over in black, but that's ok black is my second favorite color!!! |
|
M
MadDogMike
Posted
posted
on
Tue, Dec 30, 2025 3:05 PM
in reply to danlovestikis
Thank you Wendy and hang10tiki :) Pretty much done with Phineas' chair. Just some touch-ups in a few places
[ Edited by MadDogMike on 2025-12-30 15:07:56 ] |
|
H
hang10tiki
Posted
posted
on
Sat, Jan 10, 2026 11:33 AM
Perfect, for a man in a funny colored shirt!!! |
|
D
danlovestikis
Posted
posted
on
Sat, Jan 17, 2026 9:27 AM
Loved the u-tube video. I want to know what was in your back pocket. |
|
M
MadDogMike
Posted
posted
on
Mon, Jan 19, 2026 8:52 AM
in reply to danlovestikis
Thank you hang10tiki! Wendy, I think I just had my hand in my back pocket, not sure why LOL New project, I need some sort of sturdy chair for my Moai firepit area. I saw these chairs, variously known as Viking chairs, X chairs, bog chairs, or African birthing chairs. Made from an 8 foot 2x10 or 2x12. I used a 2x10, cost about $15 to make and took about an hour and a half including routering the Rapanui god Uoke into the chair back and staining it ebony |
|
C
coldwarspacemonkey
Posted
posted
on
Tue, Jan 20, 2026 4:01 AM
Loved the video and Phineas' chair. Will he need one of those hi-vis flags to keep the cars from hitting him? New chair is perfect! |
|
M
MadDogMike
Posted
posted
on
Tue, Jan 20, 2026 8:35 AM
in reply to coldwarspacemonkey
Thank you CWSM! I don't think Phineas will ever be out on the street so he should be OK without a whip ;) |
|
H
hang10tiki
Posted
posted
on
Fri, Jan 30, 2026 1:17 PM
Lol |


 Wanted to pour the open window in the front with epoxy resin. After some experimentation, I covered the inside of the hole with Saran Wrap, packed the mug with sand and put a tape top on it, then poured the epoxy


 The QR code leads
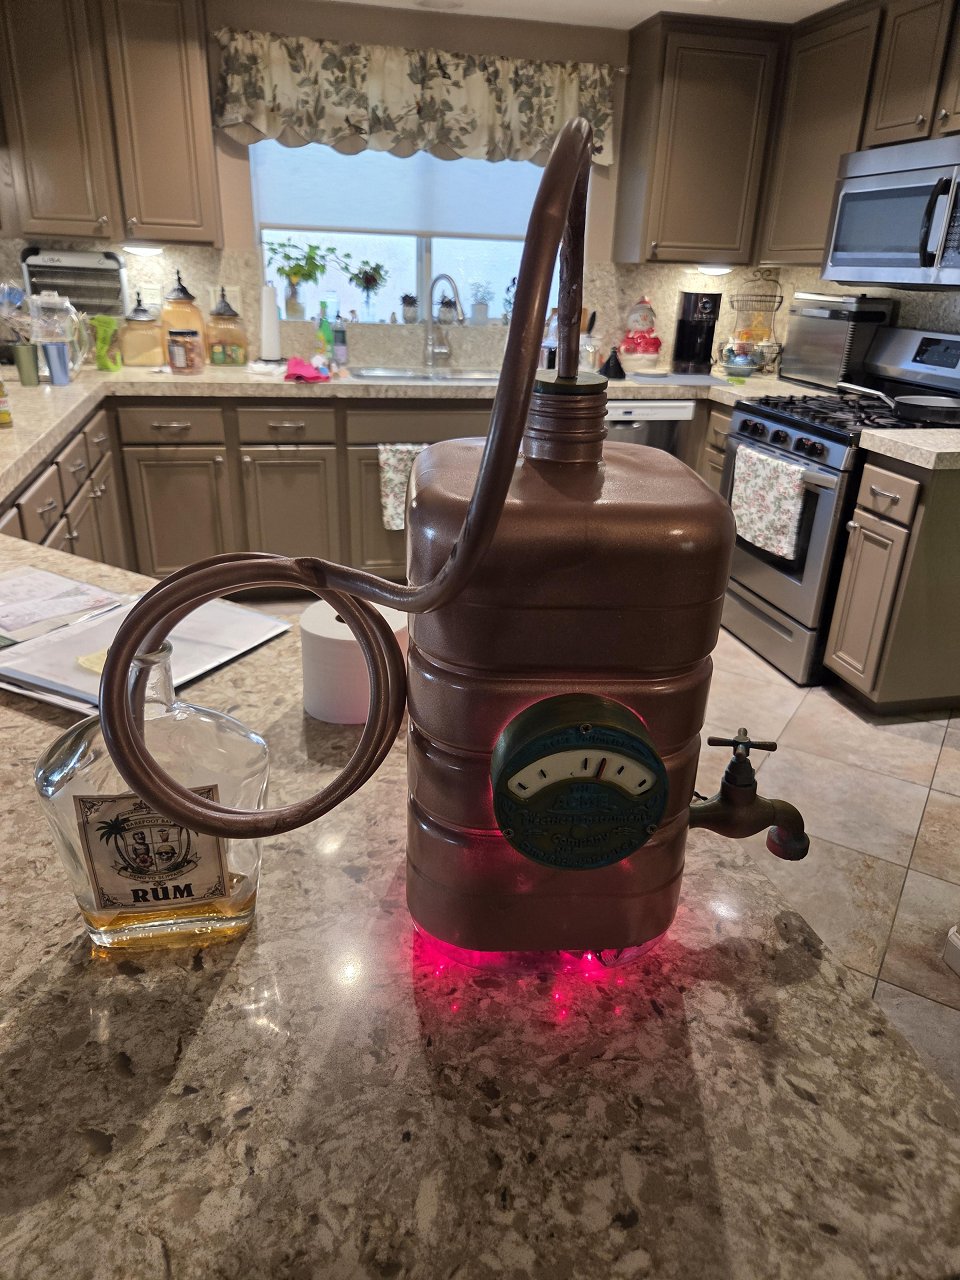


Pages: 1 2 3 4 5 6 7 8 9 10 11 12 13 14 15 16 17 18 19 20 21 22 23 24 25 26 27 28 29 30 31 32 33 34 35 36 37 38 39 40 41 42 43 44 45 46 47 48 49 50 51 52 53 54 55 56 57 58 59 60 61 62 63 64 65 66 67 68 3223 replies