Pages: 1 2 3 4 5 6 7 8 9 10 11 12 13 14 15 16 17 18 19 20 21 22 23 24 25 26 27 28 29 30 31 32 33 34 35 36 37 38 39 40 41 42 43 44 45 46 47 48 49 50 51 52 53 54 55 56 57 58 59 60 61 62 63 64 65 66 67 3,204 replies
|
M
MadDogMike
Posted
posted
on
Mon, Aug 25, 2008 4:16 PM
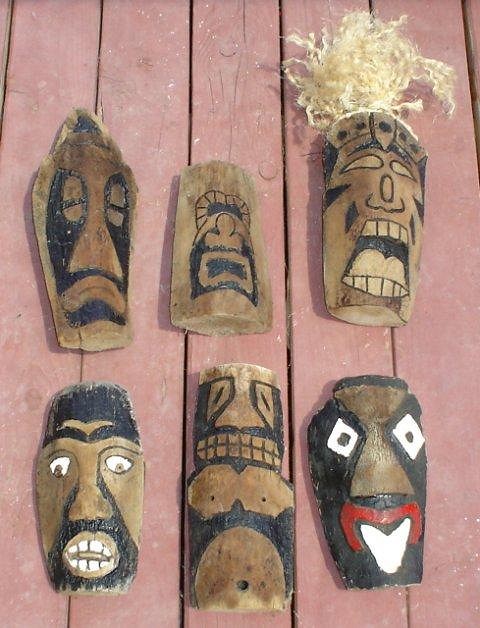
I have no delusions of grandeur, I don't consider myself to be an artist (not yet anyway) - especially in a community as artistic as Tiki Central. But I thought I would start my own thread of tiki related junk. Maybe it will inspire some other non-artist to take a shot at self expression, if nothing else I can always serve as a bad example :) I have already posted much of this cr&p, now it's just consolidated in one pile! I will see if I can start in chronological order. As a kid, we had some Canary Island Palms in the front yard that shed fronds perfect for carving Tiki masks. This was back in the days where every boy got a pocket knife for his 10th birthday, I guess that doesn't happen anymore. Here are some tiki masks I carved about 10 years ago and a few new ones. You'd think after 40 years of practice I'd be better :P Anything worth doing, is worth doing to the point of wretched excess. [ Edited by MadDogMike on 2025-11-29 17:44:20 ] |
|
M
MadDogMike
Posted
posted
on
Mon, Aug 25, 2008 4:17 PM
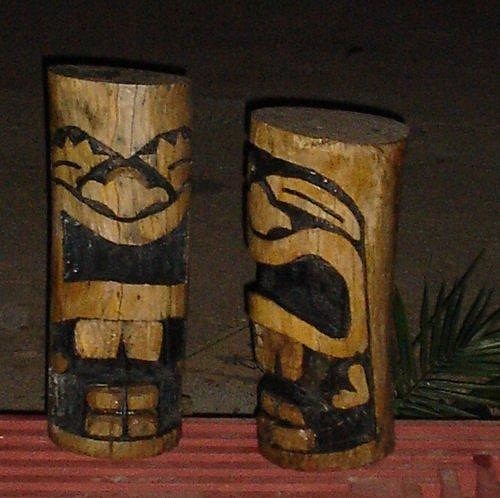
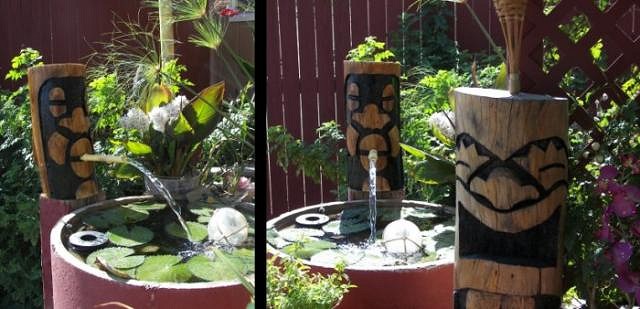
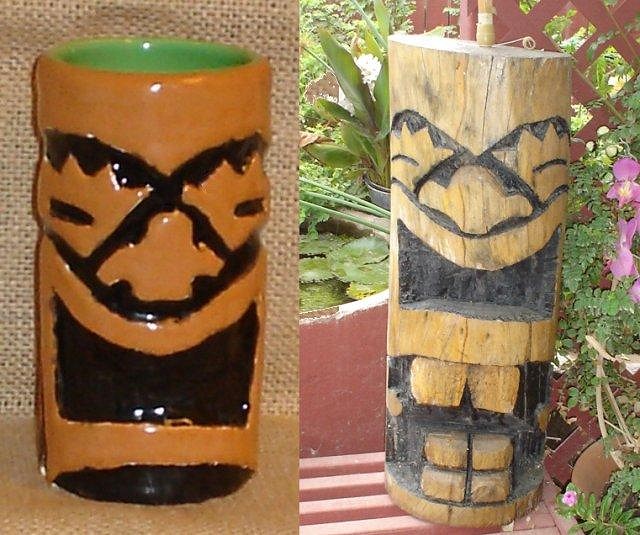
I took a vacation to Hawaii about 5 years ago and decided a needed a few tikis. Having never done anything like this and, not knowing any better, I took a Ficus log and carved away everything that didn't look like a tiki. They are kind of flat and 2 dimensional, but they're mine. A few months back I carved a matching Spitting Tiki for my fish pond. |
|
M
MadDogMike
Posted
posted
on
Mon, Aug 25, 2008 4:18 PM
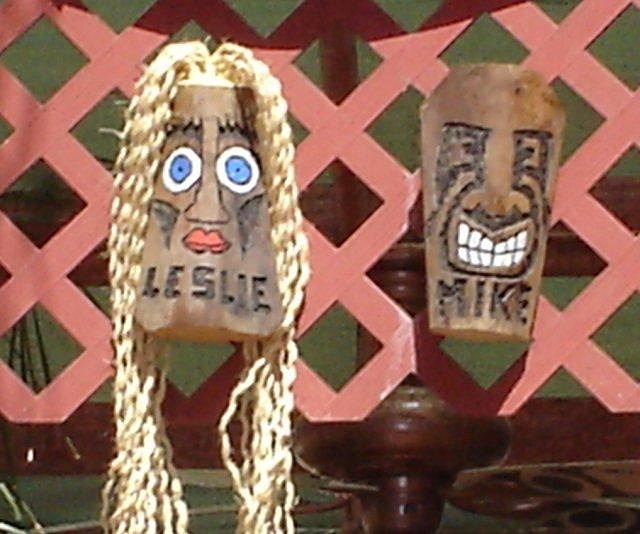
In January of this year, my beautiful wife was diagnosed with an aggressive cancer (she's in remission and doing well now, thank you :) ) I decided she needed a little piece of paradise to recuperate from surgery and chemotherapy, so I built Leslie's Lanai & Grill |
|
M
MadDogMike
Posted
posted
on
Mon, Aug 25, 2008 4:22 PM
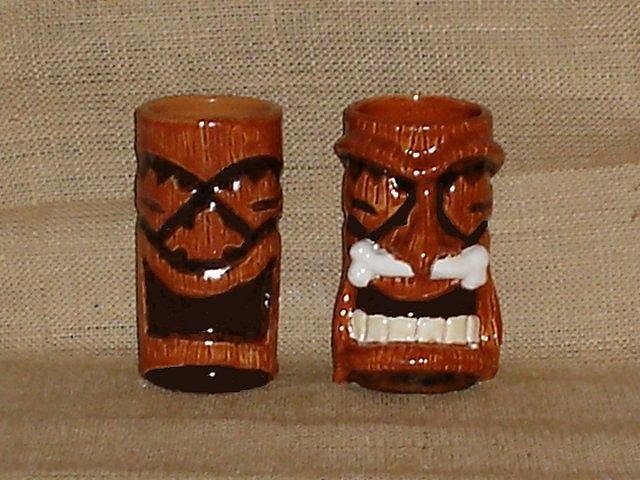
To have a proper tiki lanai, you need some tiki mugs. It was this quest that led me to Tiki Central where I found a great group a people. Babalu helped me get started in ceramics and tiki mug making. Please don't consider my lack of talant as a poor reflection on Babalu, He taught me most everything I know, but obviously he didn't teach me everything HE knows :) Here's my first try at a tiki mug. I wanted it to match my first carved tiki, sort of a mascot in the grand tradition of Mr Bali Hai. |
|
M
MadDogMike
Posted
posted
on
Mon, Aug 25, 2008 4:23 PM
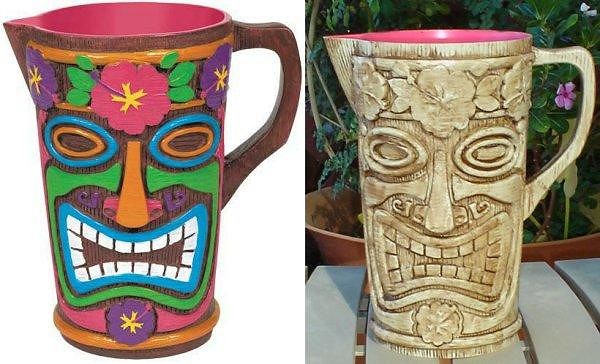
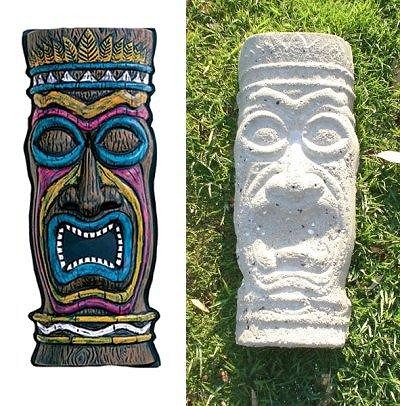
Generally, you can’t use anything from Party City without getting laughed off the board. But if you highly modify it and post it on the Tiki-on-a-Budget thread you can sometimes get away with it :lol: Here’s a very tacky PartyCity tiki pitcher that I painted with Krylon Plastic Fusion spray paint to make into a slightly less tacky tiki pitcher. I had the brilliant idea to make some cement tikis using a gaudy Party City wall decoration as a mold. Unfortunately, someone else already had that brilliant idea and had already posted them :) This seems to be a recurrent theme for me: everytime I think I have thought of something new and post it, I am embarassed to find out someone already did it. I am slowly learning to do a careful search to find out if it really is a brilliant new idea! |
|
M
MadDogMike
Posted
posted
on
Mon, Aug 25, 2008 4:24 PM
Another idea I thought was original, turns out everyone and their mother has already done it :( Inspired by Dani’s Deep Sea Rum Barrel http://www.tikicentral.com/viewtopic.php?topic=25817&forum=18 There are those few who learn from observation. The rest of us need to piss on the electric fence and find out for ourselves. [ Edited by: MadDogMike 2008-09-17 20:38 ] |
|
M
MadDogMike
Posted
posted
on
Mon, Aug 25, 2008 4:25 PM
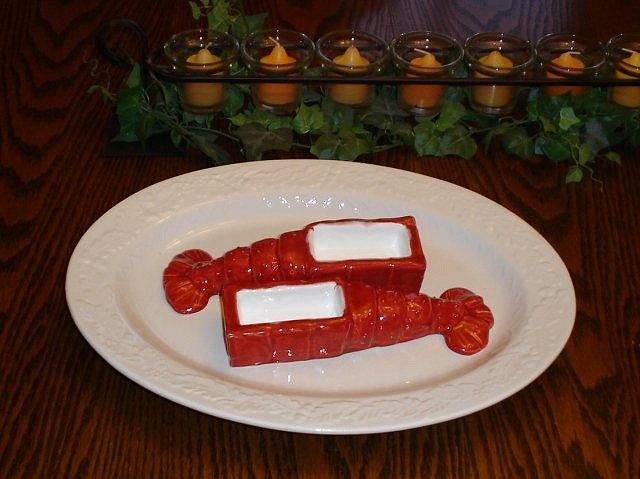
My daughter and I are both allegic to lobster (shrimp & crab too). Monkfish is supposed to be “poor man’s lobster” with the same taste and texture as lobster (although at $20/lb, I’m not sure how many poor men can afford it!). Since “you taste everything with your eyes first”, I made some lobster-tail shaped dishes to cook monkfish in. |
|
M
MadDogMike
Posted
posted
on
Mon, Aug 25, 2008 4:26 PM
I wanted a batik tiki shirt but Kirby was sold out http://www.tikicentral.com/viewtopic.php?topic=23785&forum=12 |
|
M
MadDogMike
Posted
posted
on
Mon, Aug 25, 2008 4:28 PM
Coming soon, another not-so-original mug project |
|
S

Staredge
Posted
posted
on
Mon, Aug 25, 2008 5:38 PM
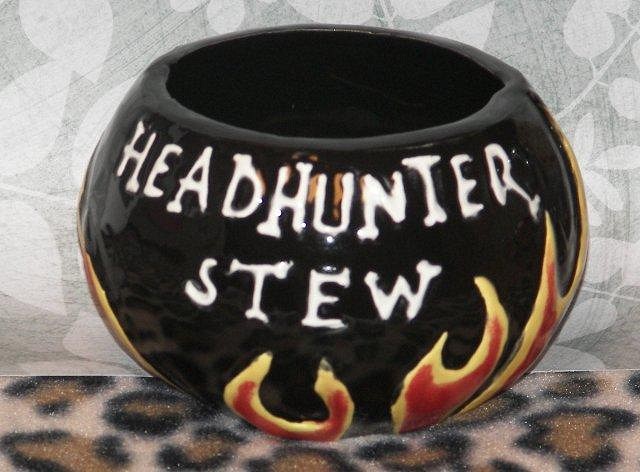
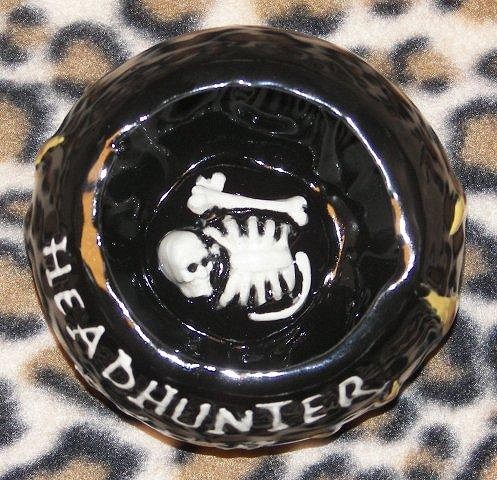
Dude!!! Love the mugs and the carved ficus. I'd like to make some of my own mugs. How did you do the stewpot?? |
|
T
TikiMango
Posted
posted
on
Mon, Aug 25, 2008 6:00 PM
Nice work gathering all your stuff together. I think your mugs look great, much better than my own non-existent mugs. |
|
C
Clarita
Posted
posted
on
Tue, Aug 26, 2008 8:20 AM
Oh! A lot of great stuff around here in all the mediums! You are a natural for shirts!! Keep up the great work! |
|
V
VampiressRN
Posted
posted
on
Tue, Aug 26, 2008 8:33 AM
Looking good MadDog....love the Lobster dish!!! :D |
|
T
tikiyaki
Posted
posted
on
Tue, Aug 26, 2008 8:44 AM
Kirby's Batik Shirts are now part of the Tikiyaki Orchestra wardrobe ... http://www.tikicentral.com/viewtopic.php?topic=28179&forum=1&hilite=Beachcomber%20in%20Malibu We love em' ! Kirby, please make more ! |
|
M
MadDogMike
Posted
posted
on
Tue, Aug 26, 2008 12:31 PM
Thank you all for your kind comments, part of what makes TC such a great place is support like this. Staredge I sent you a PM (the flashing icon at the top right of your screen) Thanks again |
|
M
MadDogMike
Posted
posted
on
Wed, Aug 27, 2008 8:40 AM
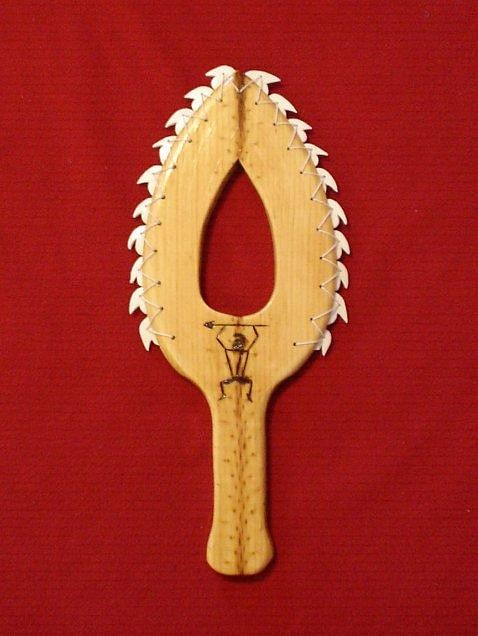
I wanted a Lei O Mano but didn't want to pay $300 for it so I made on yesterday. I had bought some shark teeth on eBay but didn't really like the size or shape so I decided to make so fake ones. After all, it's for show not for go - I won't be helping King Kamehameha battle King Kalanikupule. I debated between ceramic and polymer clay and chose the polymer. Polymer is a little more flexible and maybe less fragile than ceramic, besides I didn't have a kiln bead rack to glaze the ceramic. :music: I couldn't sleep at all last night. I was tossin' and turnin' :music: I signed up for a beginning ceramics class at the community college last night (my first art class ever :)) I was up all night thinking of mugs to make :lol: Anything worth doing, is worth doing to the point of wretched excess. [ Edited by: MadDogMike 2008-09-05 10:43 ] |
|
M
MadDogMike
Posted
posted
on
Fri, Sep 5, 2008 10:42 AM
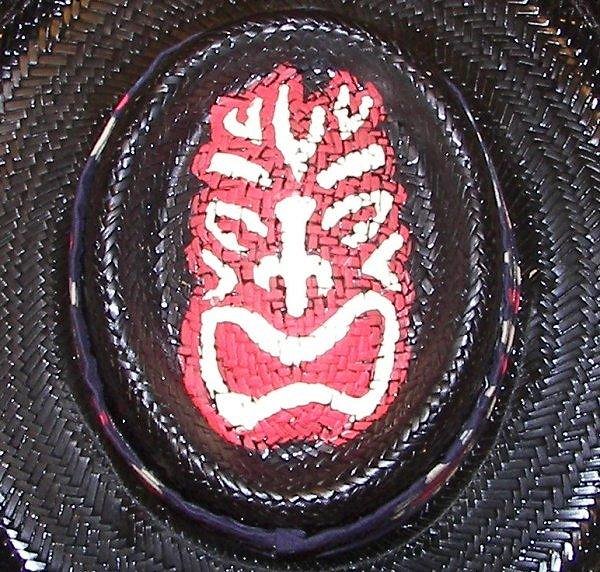
I had fun with this hat but obviously, Cammo is the master. |
|
M
MadDogMike
Posted
posted
on
Mon, Sep 8, 2008 7:44 AM
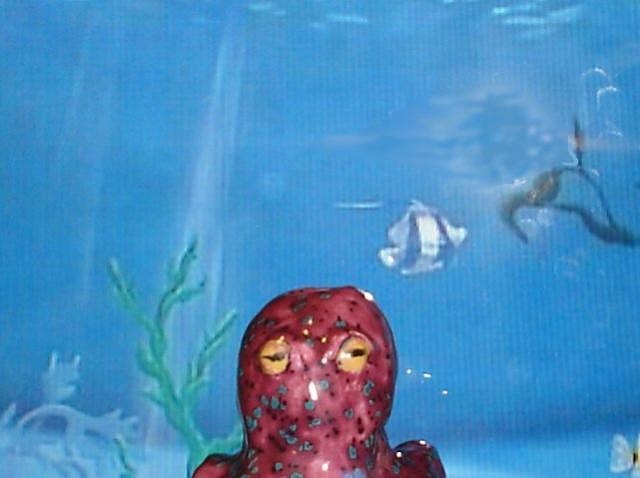
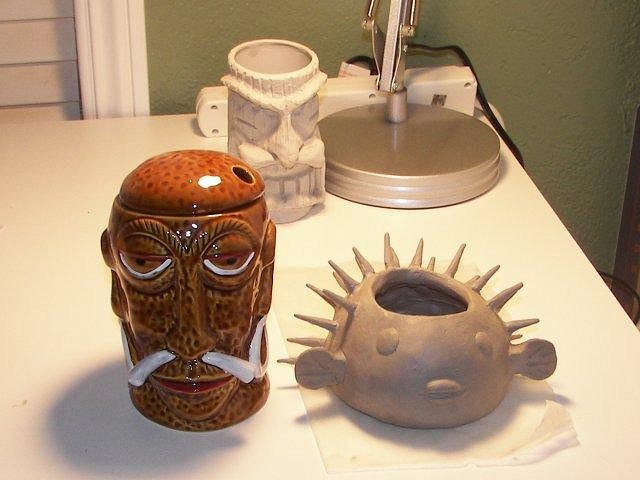
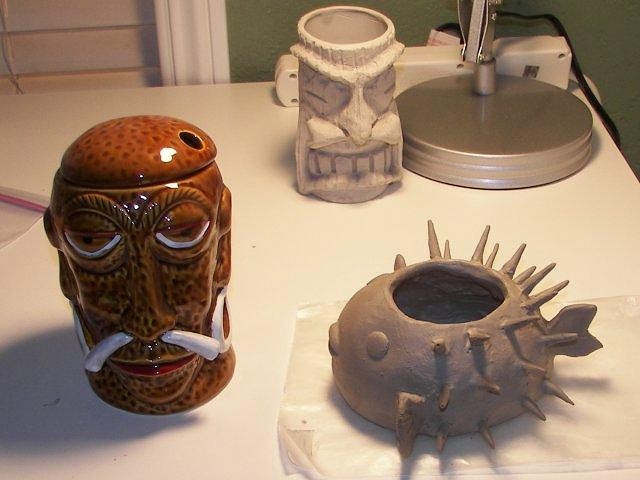
It's a foolhardy plan, but I'm just "mad" enough to try it! GoTiki posted a goldfish a few days ago that inspired me I thought it'd make a cool pufferfish with some spikes so I gave it a shot
Seems like everytime I try something, someone else has already done it first and BETTER :( We'll see if one this has already been done. Still needs some cleanup after it dries a bit. Can he survive the drying? Can he survive the kiln? Can he survive use without breaking off all his little spines? :lol: It's kinda small, maybe 8 or 10 ounces - I guest it will need a potent drink! |
|
B

Babalu
Posted
posted
on
Mon, Sep 8, 2008 8:01 AM
Brother Mad Dog, Your just blowing me away! Your just jumping out there and trying everything...no fear - no hesitation...way to go Mike! I thinks your fishy will make it fine. The hat, club, everything...damn nice! |
|
C
Cammo
Posted
posted
on
Mon, Sep 8, 2008 9:33 AM
Love da hat, bro. Wish more people would jump in and try it - it's like being in a giant pool all alone! Bong showed me a puffer fish he had made out of colorful drink umbrellas, all glued together to form a ball, cut up for the fins, and stuck outwards for the spines. It's the coolest thang.... |
|
RH
Robb Hamel
Posted
posted
on
Mon, Sep 15, 2008 10:43 AM
MadDog - this new stuff is mind-blowingly diverse! Wow! You are severely multitalented. |
|
M
MadDogMike
Posted
posted
on
Wed, Sep 17, 2008 8:05 PM
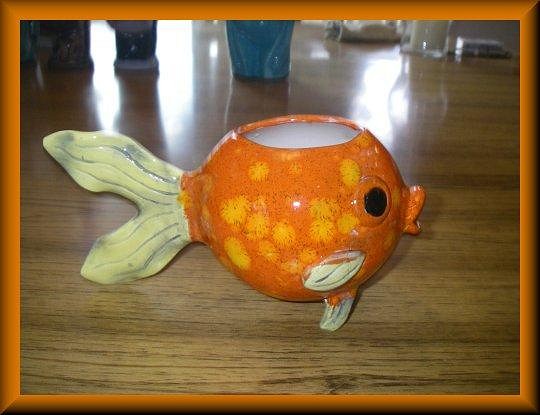
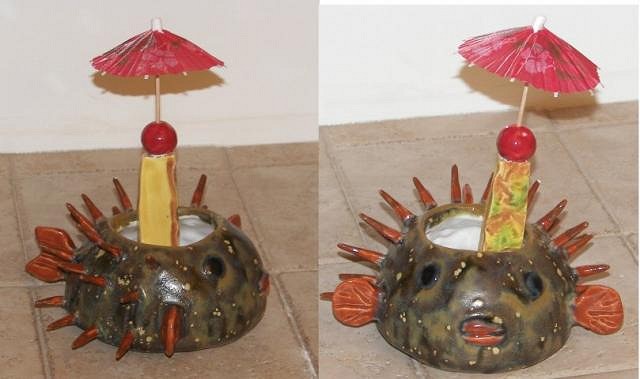
Babalu & Cammo, thanks for your kind words. Robb, I don't hardly think I qualify for "seriously multitalanted", I'm just trying to find my black velvet. Here's my glazed pufferfish. |
|
GT
GO TIKI
Posted
posted
on
Wed, Sep 17, 2008 9:20 PM
Very Cool, Keep it up!, Your on your way! |
|
C
Cammo
Posted
posted
on
Thu, Sep 18, 2008 8:27 AM
Hey Mad Dog - These are GREAT pieces. The ceramic pineapple spears & cherry are really cool, and you came up with a great glaze color for the pufferguy. It's just my opinion, but YOU ROCK! How did you attach the cherry to the (wooden?) skewer? Any plans to make ceramic umbrellas???? And screw what's been done before, just go and harpoon that idea! Listen to Babalu, he is the Great and Wise Teacher of Many Who Floats in the Sky Showering Wisdom Over All He Sees. |
|
TK
Tiki Kaimuki
Posted
posted
on
Thu, Sep 18, 2008 8:46 AM
MadDog, I'm really liking where your work is going. Those spikes on the puffer look deadly and the glaze fits perfectly! |
|
M
MadDogMike
Posted
posted
on
Thu, Sep 18, 2008 10:38 PM
Thanks guys. The glaze is a Mayco Chunkie, has the spots already built in. I was trying for a dried pufferfish look, I may try another to look like a live pufferfish - olive green with big white spots. Cammo, I poked a toothpick hole in the cherry before I bisqued it so the umbrella just sticks into the hole. I've got a second hole in the cherry that I'll put a piece of wire into for the stem. I've been reading about paperclay, clay with paper fibers mixed in. Because the fibers give the unfired clay strength, you can make very thin & delicate items with it. I thought about making some porcelain paperclay for an umbrella, the thin porcelain would be translucent like paper. We'll see. Say hello to the "Great and Wise Teacher of Many Who Floats in the Sky Showering Wisdom Over All He Sees" for me :lol: |
|
M
MadDogMike
Posted
posted
on
Sun, Sep 21, 2008 7:09 AM
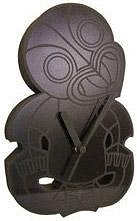
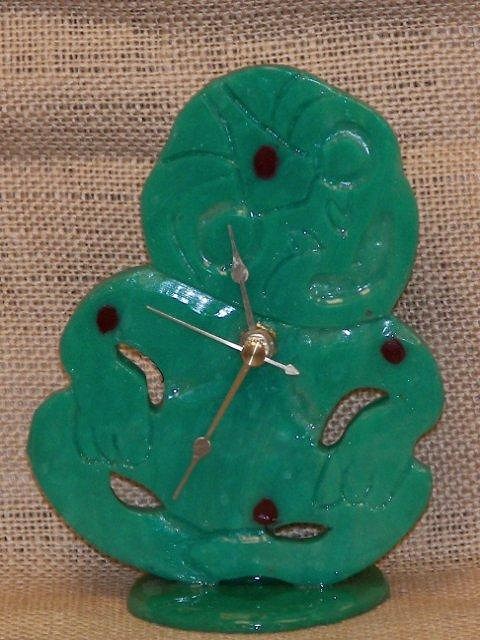
I was seaching the internet for a small tiki clock to put in my "clay studio" and found this posted on Hot Lava's TikiTalk site http://tikitalk.astropad.com/ It was too big and I didn't like the black color, so I made a smaller one out of faux jade polymer clay. Approx 5x6 inches, it fits nicely on the rack with my mugs |
|
B
Bowana
Posted
posted
on
Sun, Sep 21, 2008 8:10 PM
Mike, nice job on the Babalu mug. I saw it yesterday in person. Looks like it didn't take you long to get the hang of it all. Keep up the good work! |
|
M
MadDogMike
Posted
posted
on
Tue, Sep 23, 2008 7:19 AM
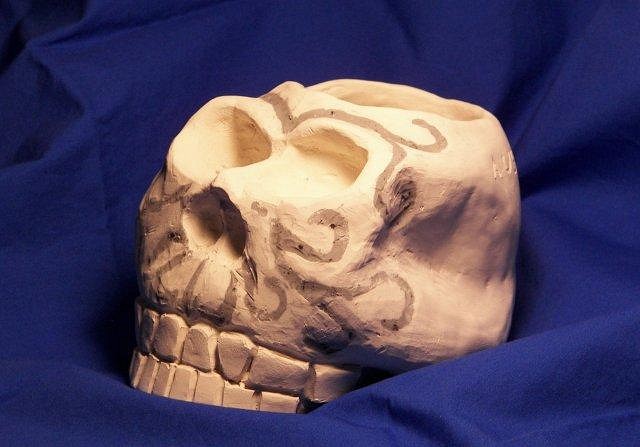
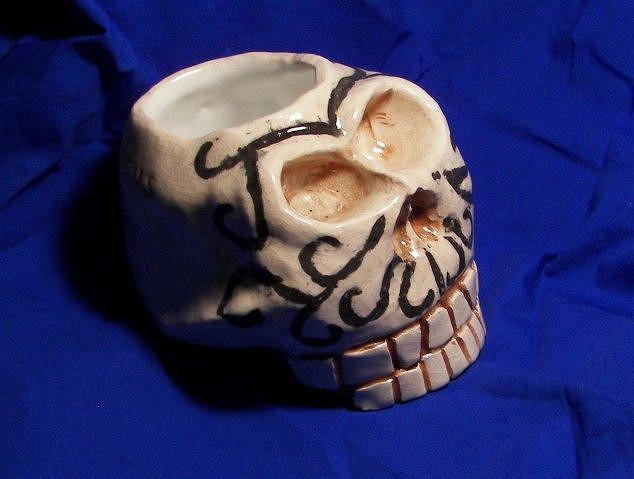
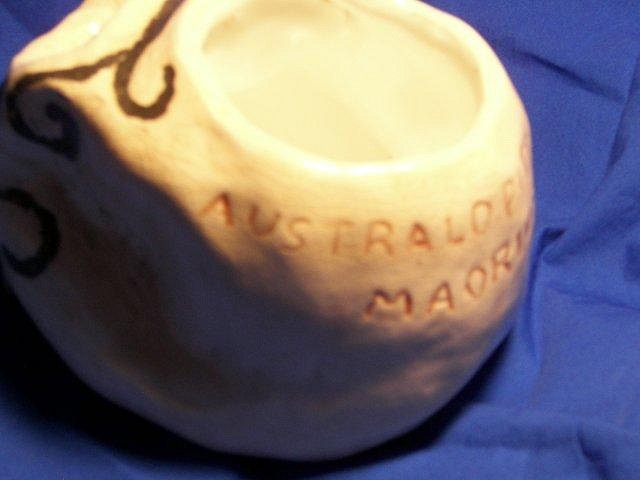
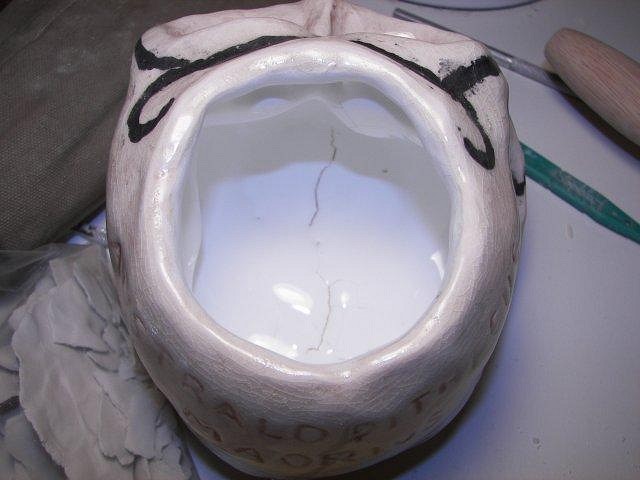
Thank you Bowana, I would have never done it without you and Babalu It is a little known fact that 3 million years ago, before the continents drifted apart, Australopithecus migrated across to New Zealand. There they developed an elaborate facial tattoo technique before they died out. This is a very rare Australopithecus Maorius skull still showing traces of the facial tattoos.
OK, people like Squid, Babalu, and VanTiki make it looks so easy to sculpt a skull but it ain't! This is my second attempt, it looks a little more humaniod than the first but not much. The "tattoo" is a technique called mishima where the design is carved into the clay then filled in with colored clay. Made of high-fire porcelain, I don't think he is going to survive :( Looks like I let him dry too fast and he is starting to develop a crack inside. Patience young grasshopper. There are those few who learn from observation. The rest of us need to piss on the electric fence and find out for ourselves. [ Edited by: MadDogMike 2008-09-23 07:23 ] |
|
O
octopussy
Posted
posted
on
Wed, Sep 24, 2008 6:38 AM
Hey Mad Dog, you're flowing with creativity! There's a Japanese expression: o moye kite it means "go for it without hesitation" I think that fits you. Have you sketched any skulls? It might help getting the contours down. I can sketch but putting it to 3D boggles my little brain. Great work on the puffer fish btw. o |
|
M
MadDogMike
Posted
posted
on
Wed, Sep 24, 2008 7:19 AM
Thanks Octopussy. It's sketching that boggles my little mind- I see things in 3D and when I try to convert them to 2D my brain melts down and gives me stick figures. I've been trying a modified closed object technique where you make an air-filled "clay balloon" and then form it to the desired shape but it's not working too well for a skull. I may have to try Babalu's method of sculpting it solid then hollowing it out. Edit - PS I like the "O moye kite", I may have to put it in my signature line when I get tired of the electric fence. There are those few who learn from observation. The rest of us need to piss on the electric fence and find out for ourselves. [ Edited by: MadDogMike 2008-09-24 07:53 ] |
|
M
MadDogMike
Posted
posted
on
Mon, Sep 29, 2008 8:54 PM
"Foreign Exchange Student Dies in Kiln Accident!" Well, my Australopithecus Maorius didn't exactly die, but he was mortally wounded :P He had started developing a crack inside while drying. I tried several things but couldn't seem to get it fixed. He didn't break completely in the bisque firing but the crack was there. I thought maybe a good thick coat of glaze would fix it but no such luck. Maybe I let him dry too fast? Also, he has a large flat base and I dried him on a tabletop; I hear that it's better to dry things on several layers of newspaper. The paper works as "ball bearings" and allows the clay to shrink without stressing it. Oh well, it was a fun project and I keep on learning!
|
|
C
Cammo
Posted
posted
on
Mon, Sep 29, 2008 10:14 PM
This skull way better than anything GROG do lately, crack or no crack. Keep going, MD! |
|
G
GROG
Posted
posted
on
Tue, Sep 30, 2008 1:15 AM
GROG no do crack. GROG only take blood pressure drugs. Sorry about the crack MadDoggy. Keep trying and keep learning, but most of all, have fun. Stay away from Cammo Toe.
[ Edited by: GROG 2008-09-30 01:16 ] |
|
C
Cammo
Posted
posted
on
Tue, Sep 30, 2008 6:38 AM
What the...? Does GROG do a search for "GROG" every day to see if anybody's been talking about him? Me hear GROG and his friendly caveman friend OG do cracks every day. Anyway, this skull still looks great, ferget the crack, that just makes it look antique and even cooler. Go Speed Dog, Go! |
|
B

Babalu
Posted
posted
on
Wed, Oct 1, 2008 10:27 PM
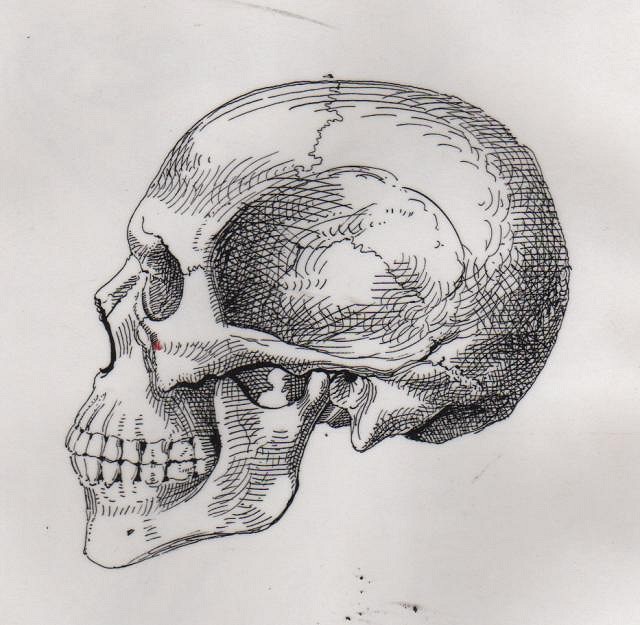
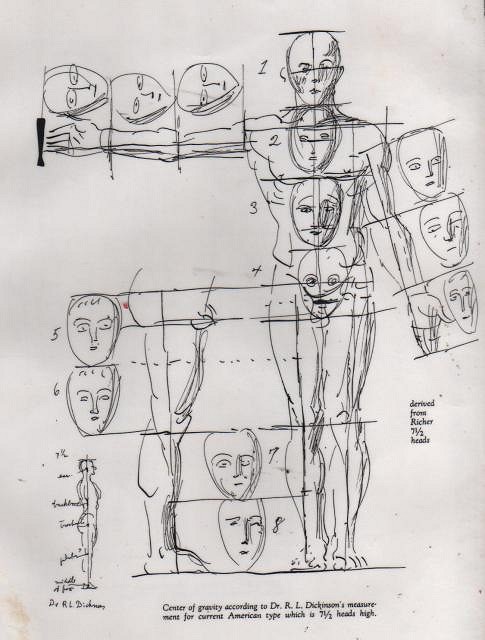
Hey Mike! If your mug holds liquid...it's fine. If you have cracks on the inside of a mug that you would like to try and cover, try using a opaque color instead of the clear the next time. Dude, I'm not much of a 2D guy either, but I will say this...it's the basis of everything. Try drawing for a least 15 mins a day...You will get better. Draw what you see, not what you know is there. Here are a couple of skull drawings for you...look at the distance from the center of the eyes to the top of the head. Look at the center of the eyes to the bottom of the jaw... Your doing FANTASTIC brother!
|
|
M
MadDogMike
Posted
posted
on
Thu, Oct 2, 2008 7:22 AM
Cammo and Grog, you make my day. Australopithecus Maorius is a fictitious character, any resemblance to Grog is purely coincidental! Babalu, thanks for the technical assist. I had a 3D skull for reference but it didn't seem to help :) Part of the problem was that my porcelain "balloon" was pretty stiff... I could tell the skull wasn't what I wanted but couldn't manipulate it much for fear of cracking it. Next class section is coil building, I'm determined to make a decent skull and I've drawn some grid lines on my reference skull to help. We'll see how a coiled skull turns out :lol: |
|
C
Clarita
Posted
posted
on
Fri, Oct 3, 2008 8:55 AM
Nice! keep going! :) |
|
V
VanTiki
Posted
posted
on
Fri, Oct 3, 2008 11:40 AM
Oh man - I've been there more times than I want to remember! The dreaded crack. I've got one now on my big Gold Eater mug - I didn't reinforce the join on the interior chamber well enough and it has a hairline crack in it after the bisque firing. I'm also gonna try the "glaze is glue" patch - but it has never worked for me in the past! The good news for you is your skull is still awesome and will make a great tabletop vessel for non-liquid kine stuffs. You also get major bonus points for sculpting in porcelain, which I find to be quite the pain in the okole. Sticky to work with, can't support itself very well when wet, major warping when in the kiln, etc. Does look great, though! Henrik |
|
M
MadDogMike
Posted
posted
on
Fri, Oct 3, 2008 6:01 PM
Thanks Clara. It's soon to be Spring in Buenas Aires, are you excited?! Any new mugs? Henrik, muchos mahalos! I've been working with Babalu's Laguna E347 and Soldate 60, the porcelain does seem harder to work with. The Coleman is supposed to be a good porcelain but I've never worked any other porcelain so I have no point of reference. The "glaze is glue" theory didn't work, next step is finely powdered bisqued porcelain mixed with just enough glaze to make a thick paste. We'll see if that works :) |
|
B

Babalu
Posted
posted
on
Fri, Oct 3, 2008 10:47 PM
Hey Mike and Henrick...Using this low fire clay, I've have had a few pieces lately form hairline cracks during dry out...mostly on the inside of the mugs that don't go all the way through. Lucky, none of these hairline cracks seemed to grow during the bisque firing. The cone 06 glaze used on them seemed to cover the cracks to the point that you couldn't even tell they were there. I'm guessing that some of this is due to the low fire. Henrick, I'll bet the cone 5 clay you are using still goes thorough quite a bit of shrinkage in the glaze firing? This clay I'm using right now really does not shrink anymore in the glaze firing. CRACKS SUCKS!! I have a few mugs with these cracks in them now which I am candling at 200 degrees all night tonight in the kiln...I'll ramp the kiln up in the morning. Cross your fingers, I would really like to see this kiln load turn out well. Mike did you mug have the crack in it's greenware sate, or did it become present after the bisque firing? Can you show a picture maybe? |
|
M
MadDogMike
Posted
posted
on
Sat, Oct 4, 2008 8:00 AM
The crack started in the greenware, no I don't have any pictures. It wasn't bone dry when it developed so I tried brushing slip into the crack by that didn't work. I even tried digging the crack out and backfilling it with thick slip like Mishima. I hear adding vinegar and/or baking soda to the slip helps? I think I know of 2 reasons why it cracked; Good thing I low fire glazed it or it probably would have been a disaster! Drying more slowly is gonna kill me! I want to fire NOW! I'm working on a decorated peep hole plug that will be somewhat thick, I guess I'll have to try the "turn the bag insideout everyday" technique. At least this is a mold, if I screw up it's easier to start again. CRACKS SUCK!!! If I liked crack I would have been a plumber :lol: EDIT: I don't have a pre-glaze pic but I guess I can post a post-glaze pic. It doesn't seem to leak, but since it's low fired and not vitrified, it isn't safe for food consumption as is. There are those few who learn from observation. The rest of us need to piss on the electric fence and find out for ourselves. [ Edited by: MadDogMike 2008-10-04 08:29 ] |
|
B

Babalu
Posted
posted
on
Sat, Oct 4, 2008 8:22 AM
Morning Mike, I have not tried this yet, but I've heard if you powder up some dried out clay and mix it with a little vinegar - paste like - carve out the crack in the greenware - fill with the paste - fire...this is suppose to work well. I will have to try it Like I said, this kiln load I'm firing today has some mugs that have like issues to your mug. Should be interesting. Like I mention in some past post somewhere, the Japanese have long elaborated on cracks that have happened on prize tea cups by filling the crack with silver. I really would like to try this a some point...ok something, go ahead...crack! :-) |
|
B
BeezleBug
Posted
posted
on
Sat, Oct 4, 2008 8:35 AM
Hey guys, what's the ideal way to dry out a slipcast piece? I've just been plopping the greenware on a countertop. I'll try the newspaper trick, but would you recommend something more cautionary? I'm in Nevada, where the humidity is practically zero year-round, so stuff dries pretty fast. The only cracks I've had thus far on my first and second batch of mugs are those that I accidentally caused by manhandling the wet greenware - but it couldn't hurt to be more careful. |
|
M
MadDogMike
Posted
posted
on
Sat, Oct 4, 2008 8:46 AM
BeezleBug, I think drying is less critical on slipcast because it's thin and has an even wall thickness. Seems like the thicker handbuilt stuff is more of a problem. Drying on paper would be a safe practice, you can also cover loosely with plastic to slow down the drying a little. Hopefully someone with more experience than I will pop in too. Babalu, what about the Precious Metal Clay, have you looked at that? About 80% microcrystilline silver powder and 20% binder. It work like clay then you fire it in the kiln, the binder burns out leaving pure silver (also available in gold and bronze) But it shrinks 20%, probably wouldn't work for a crack repair. |
|
B
Bowana
Posted
posted
on
Sat, Oct 4, 2008 9:30 AM
MadDog, I have a crack like that on the bottom of one of my hand built pieces too. It hasn't been fired yet, so hopefully it's not going to get any bigger. CRACKS SUCK! Being 100 feet from hell, I can see why you have a problem with stuff drying out too fast. :) Beezlebug, pour some plaster into a small mixing bucket (3/4"-1" thick) to make a shallow disk. Pop it out after it has set and you'll have a nice little bat you can set your castings on to dry. Plaster is porous and will help pull away moisture from the casting and it won't get soaked like newspaper. You might not want to leave it on the bat for too long though given the 0 humidity. I've left castings sitting on them for a few days and have never had a problem with cracking from drying too fast, but the weather is different here in SD. You may have to experiment with your dry time. Good luck! |
|
B
BeezleBug
Posted
posted
on
Sat, Oct 4, 2008 12:11 PM
Thanks. I'll give the plaster bats a try. |
|
RH
Robb Hamel
Posted
posted
on
Sun, Oct 5, 2008 7:40 AM
Seeing good work damaged makes my skin crawl. |
Pages: 1 2 3 4 5 6 7 8 9 10 11 12 13 14 15 16 17 18 19 20 21 22 23 24 25 26 27 28 29 30 31 32 33 34 35 36 37 38 39 40 41 42 43 44 45 46 47 48 49 50 51 52 53 54 55 56 57 58 59 60 61 62 63 64 65 66 67 3204 replies

