Pages: 1 2 3 4 5 6 7 8 9 10 11 12 13 14 15 16 17 18 19 20 21 22 23 24 25 26 27 28 29 30 31 32 33 34 35 36 37 38 39 40 41 42 43 44 45 46 47 48 49 50 51 52 53 54 55 56 57 58 59 60 61 62 63 64 65 66 67 68 3,217 replies
|
GT
GO TIKI
Posted
posted
on
Mon, Nov 17, 2008 2:40 PM
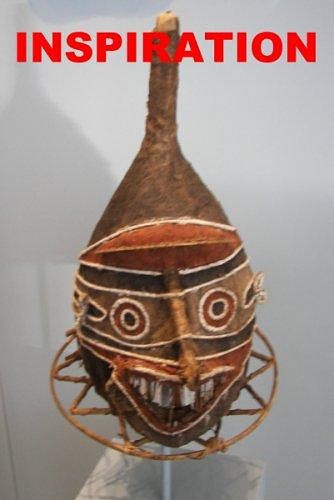
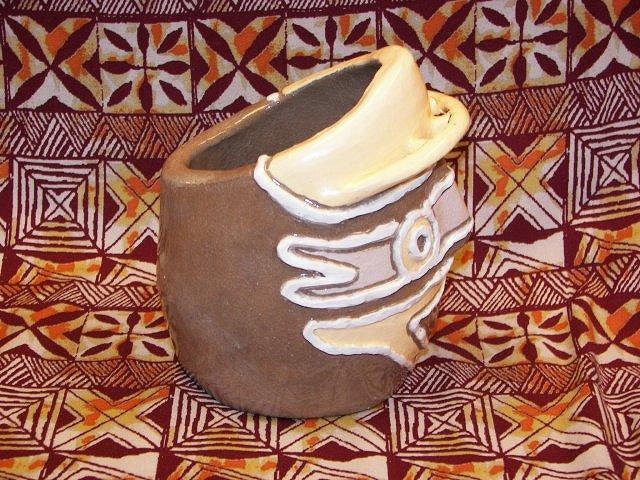
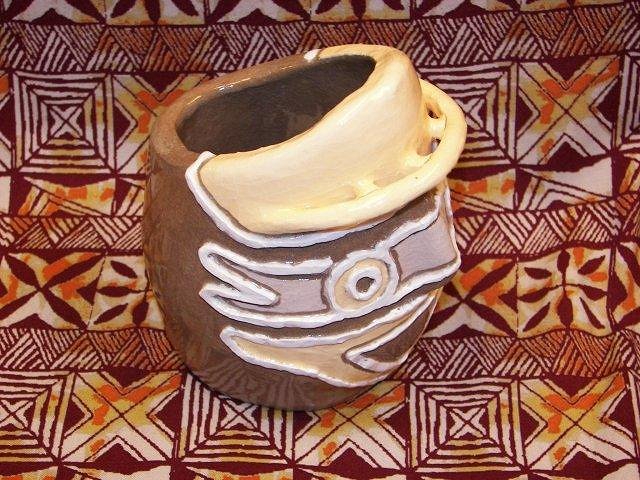
Very Cool Mike, The Monkey and The Torch mug, "You didn't rip me off!" All artist are inspired by what they have seen in life, That's not a rip off! If that's the case We All are rip offs! On the other hand a direct copy of someones work would be! Which yours is not, Keep up the cool art, Mahalo Bro!, Gogo |
|
L
Liana
Posted
posted
on
Mon, Nov 17, 2008 4:34 PM
I agree, that monkey mug is soooooo cute! Cute was what you were going for right? :P Liana. |
|
M
MadDogMike
Posted
posted
on
Wed, Nov 19, 2008 8:50 AM
Thank you Liana and Gogo. And yes, Liana, cute is what I was aiming for :) |
|
M
MadDogMike
Posted
posted
on
Fri, Nov 28, 2008 8:06 AM
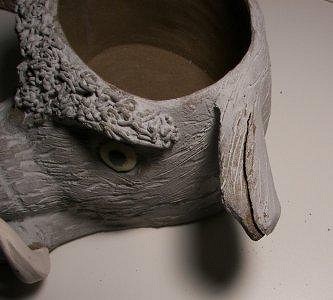
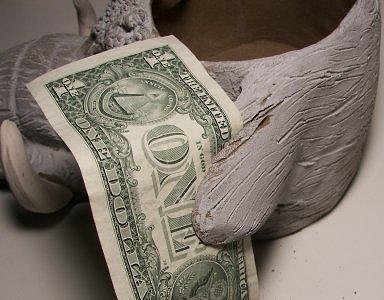
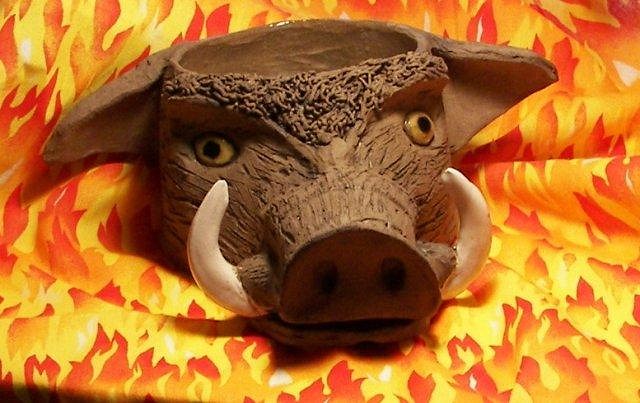
While making this "mug" (40+ ounces!), I removed the handle and re-enforced the ears to make them be the handles. But I didn't attach one ear re-enforcement well enough and left a nasty crack between the two ear slabs Calcined clay repair to the rescue. In case you missed it in the previous post, take some of your raw clay, pinch it into little patties and let it dry. After dry, roll it into fine powder, place it into an unglazed ceramic container and bisque the powder. After firing, fine screen and mix with a little glaze to make a paste. Push this paste into the crack and the glaze over the patch if desired and fire. I could have finished this crack a lttle smoother, but wanted to keep the rough look to match the rest of the boar. Finished "mug" in high fired WC373. I brushed on Envision Courtyard Semi-Opague Lava Slate and wiped most of it off (is that considered a wash? An underglaze?) I glazed the eyes, clear glazed the tusks, the inside of the mug and the outside edge of the drinking rim, leaving the rest of the head unglazed. I may spray the unglazed areas with a clear matte finish just for a little protection. |
|
Y
yumyumkid
Posted
posted
on
Wed, Dec 3, 2008 10:08 PM
This guy is cool. Really like how the eyes turned out. Monkey mug turned out fantastic with the glaze and all. Really clean lines. Have you thought about doing any "traditional" style tikis using the slab layered method? |
|
M
MadDogMike
Posted
posted
on
Thu, Dec 4, 2008 8:19 AM
Thanks YumYum. I haven't tried a slab-formed traditional tiki but I think there's some potential there. Have you checked out VanTiki's work? http://www.tikicentral.com/viewtopic.php?topic=18911&forum=18 |
|
B

Babalu
Posted
posted
on
Thu, Dec 4, 2008 9:06 AM
Very nice piggy there Mad Doggie! Nice size...nice eyes :-) |
|
N
nuKKe
Posted
posted
on
Sat, Dec 6, 2008 12:40 AM
The boar screams for a strong, strong cocktail, MadDogMike! Great work - my favourite being the lobster dishes and the puffer. nuKKe |
|
M
MadDogMike
Posted
posted
on
Thu, Dec 11, 2008 10:47 PM
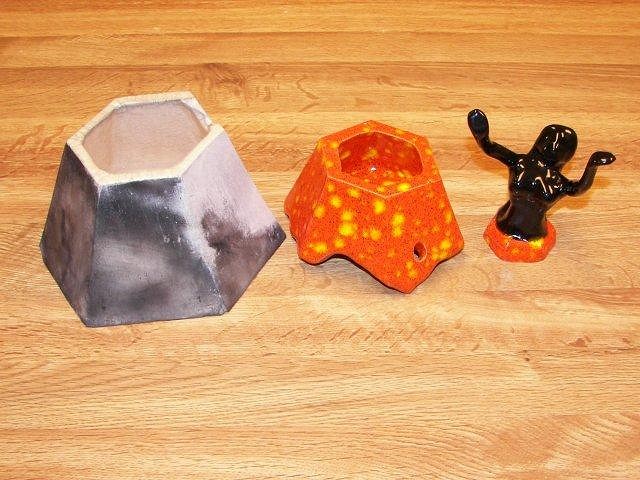
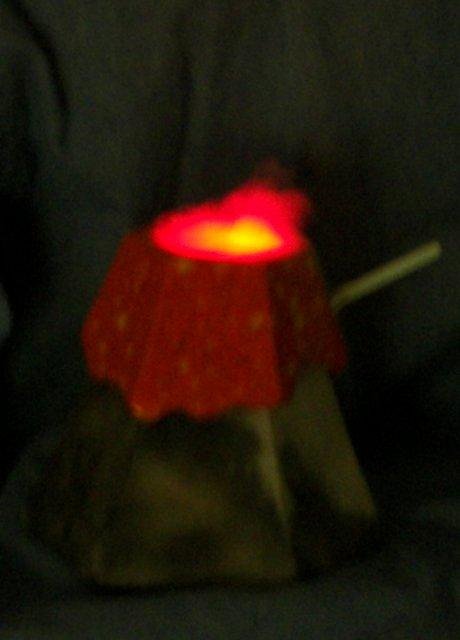
Thank you Babalu and NuKKe. Here is the last project for my ceramics course. I needed a hard-edged slab form - the clay is rolled out, allowed to dry partially, then pieces are miter-cut and joined together. I had originally planned the volcano then saw Jim Warren's painting "Pele Rising" and decided to add the woman. This was my first attempt at human form sculpture, I'm no certainly Bowana but it turned out fair. The bottom of the volcano is smoke-fired to give the swirled smoke coloring. The bottom holds the drink, the removable lid holds dry ice. |
|
RH
Robb Hamel
Posted
posted
on
Fri, Dec 12, 2008 5:41 AM
Great stuff, Mike. You are the Leatherman/Martha Stewart of Tiki!! What next - are you going to do blown-glass tikis? Or maybe you'll discover a way to make oysters culture pearls in the shape of moai? |
|
N
nuKKe
Posted
posted
on
Fri, Dec 12, 2008 7:26 AM
It's beautiful! Could you please post a picture of the mug uncovered? |
|
M
MadDogMike
Posted
posted
on
Fri, Dec 12, 2008 4:27 PM
I just might! :lol: Thanks Robb. nuKKe, here's a picture of the 3 pieces separated. Also a picture of the mug with dry ice and a red LED light |
|
O

OceaOtica
Posted
posted
on
Fri, Dec 12, 2008 4:45 PM
MD, |
|
N
nuKKe
Posted
posted
on
Sat, Dec 13, 2008 12:52 AM
Very, very cool! I think I'm gonna borrow your idea :) |
|
M
MadDogMike
Posted
posted
on
Sat, Dec 13, 2008 10:49 AM
nuKKe, have at it. If you want to do hard edge slab like that and have any technique questions, PM me. Cass, that is just too funny that we both did 2 takes on the same theme :lol: Here's a pic of his awesome "Pele Awakens" bowl in case you didn't see it in the California Events forum or at the "Tis the Season to be Tiki" show in Hollywood last night. |
|
O

OceaOtica
Posted
posted
on
Sat, Dec 13, 2008 11:43 AM
Mad Dog, p.s. stop raising the bar for the earliest scoop on new Ocea Otica works http://junkhaulersjunk.blogspot.com/ [ Edited by: OceaOtica 2008-12-13 11:49 ] |
|
M
MadDogMike
Posted
posted
on
Sat, Dec 13, 2008 1:21 PM
Stop it Cass! You're making me blush! :blush: (thanks) I'm being bombarded with ideas for my next piece, I can't tell which one you are sending :lol: I've got a piece I'll post in the First Ever Worldwide Online Tiki Artshow on Monday evening. |
|
M
MadDogMike
Posted
posted
on
Mon, Dec 15, 2008 8:46 PM
Posted this mug in the First Ever Worldwide Online Tiki Artshow |
|
M
MadDogMike
Posted
posted
on
Tue, Dec 16, 2008 7:36 PM
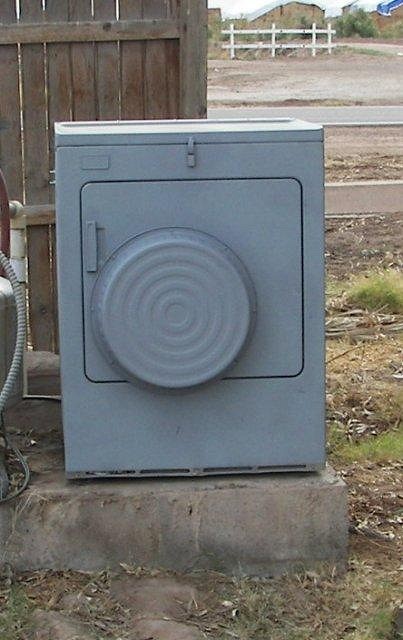
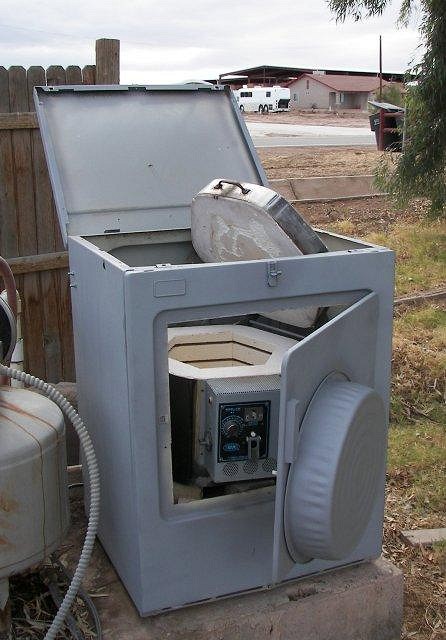
I don't have a garage and needed an enclosure for my kiln. It needed to be fireproof and semi-weatherproof, it needed front access for the controls and top access to load & unload the kiln. So I custom built one. Now, I know what you're thinking - you're thinking that looks like some sort of redneck gutted out clothes dryer. Well it is a gutted out clothes dryer and I am a redneck! :lol: :lol: :lol: :lol: :lol: :lol: :lol: :lol: :lol: |
|
BPB
Bay Park Buzzy
Posted
posted
on
Tue, Dec 16, 2008 7:49 PM
Right on Maddog! Power to ya! Looks like you work IN your yard, instead of working ON your yard. That's the true sign of a real Tiki Guy. Buzzy Out! |
|
T
TikiMango
Posted
posted
on
Tue, Dec 16, 2008 8:49 PM
Plato must have been a redneck too, "The true creator is necessity, who is the mother of our invention." |
|
C
Clarita
Posted
posted
on
Wed, Dec 17, 2008 10:10 AM
Oh super wow!! that bowl it's sooooo amazing! and it totally save my heart too, thanks soooo much ocea otica, for having a vision of woman (or goddess) that don't involve innocent half naked young girls or powerful sexual pin ups.... I'm so sick of that! it makes me not want to be a woman in this Tiki world... |
|
LL

Limbo Lizard
Posted
posted
on
Wed, Dec 17, 2008 10:58 AM
MDM, you certainly have the redneck gift of inventing alternate uses for crapped-out appliances (typically, motivated by the redneck desire to avoid the work of hauling it to the dump). |
|
R
RevBambooBen
Posted
posted
on
Wed, Dec 17, 2008 8:59 PM
Did you ever cook the pig in it?? |
|
M
MadDogMike
Posted
posted
on
Wed, Dec 17, 2008 9:35 PM
I assume you mean the backyard imu and not the redneck clothesdryer kiln enclosure. I use it a couple of times a year, it will hold about 50 lbs of meat max but I've never done a whole pig in this one. My prevous pit was square and I did a small whole pig in it. Measured corner-to-corner, then went to the pig farmer and told him I wanted a pig 34" long from snout to tail :wink: |
|
B
Bowana
Posted
posted
on
Thu, Dec 25, 2008 10:14 PM
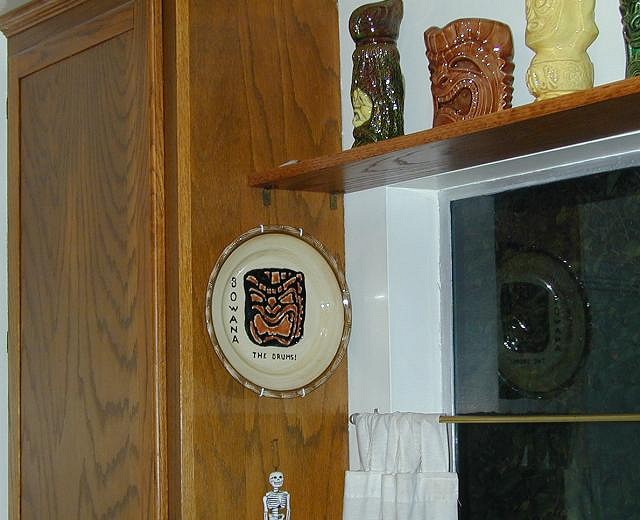
For Christmas, Santa brought me a nail.
I decided to use my Christmas nail to hang my Bowana plate that was custom glazed and given to me by MadDogMike! Thanks Santa! |
|
B

Babalu
Posted
posted
on
Fri, Dec 26, 2008 12:44 PM
Mad Doggie - I love the way you think brother! Keep it comin'! Hope you had a GREAT Xmas. |
|
M
MadDogMike
Posted
posted
on
Sat, Dec 27, 2008 10:17 AM
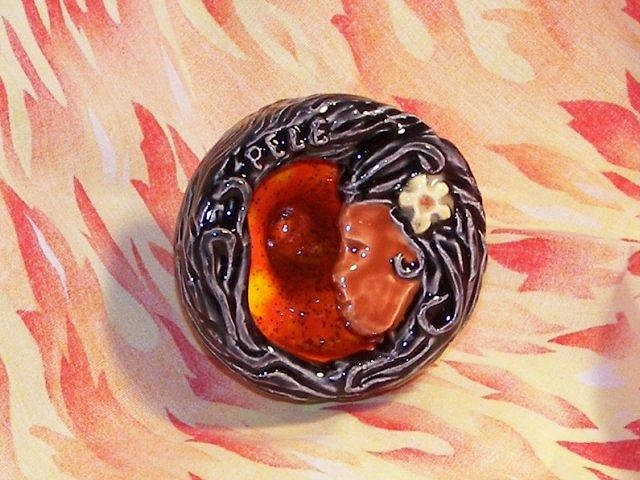
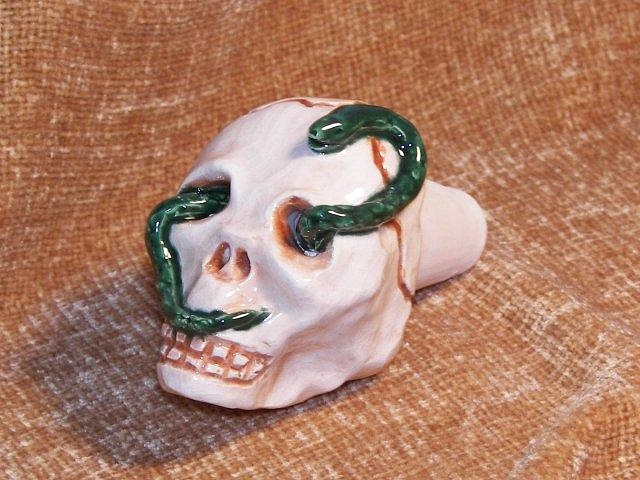
Thank you Babalu. Bowana, nice looking Christmas nail you got there, that plate looks very nice in your collection if I do say so myself :lol: Since I made push molds for the back of the kiln plug, the Pele front and the boar front - I though I might as well made a few more plugs. I got the Pele glazed right this time and finally got a skull that looks somewhat human (my previous tries looked more simian or Neanderthal) Not sure what I'll do with all these kiln plugs, my kiln only uses one!
|
|
RH
Robb Hamel
Posted
posted
on
Mon, Dec 29, 2008 1:25 PM
Fun stuff, Mike. As always. |
|
C
Clarita
Posted
posted
on
Wed, Dec 31, 2008 8:26 AM
Cool new ones! you got totally hooked hm? i love to watch your creativity in all the mediums! and I read you have a sort of student too, cool! keep up the great work and the mind freedom! :) |
|
M
MadDogMike
Posted
posted
on
Fri, Jan 2, 2009 4:32 PM
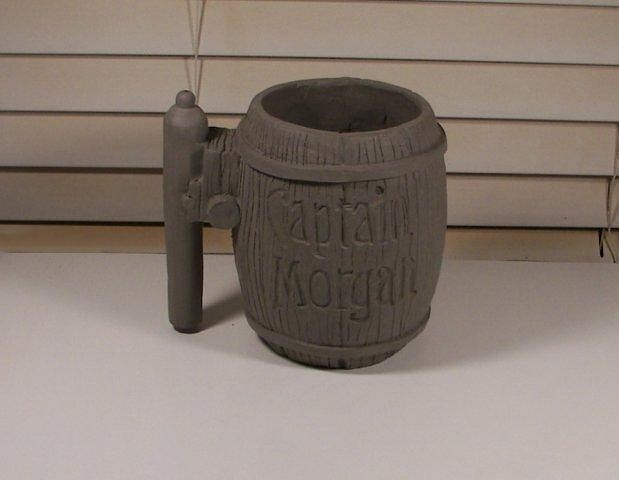
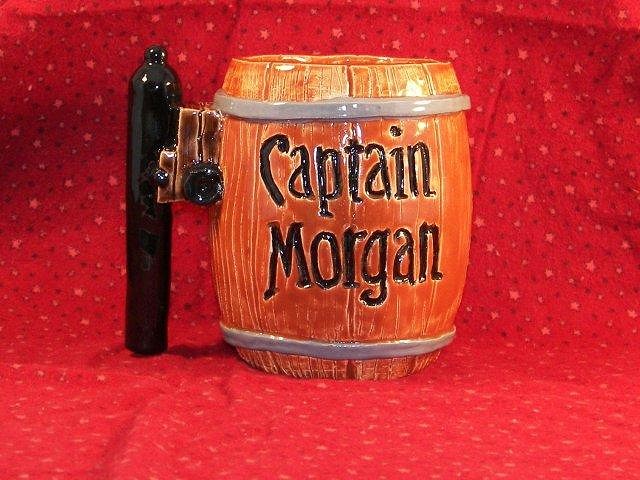
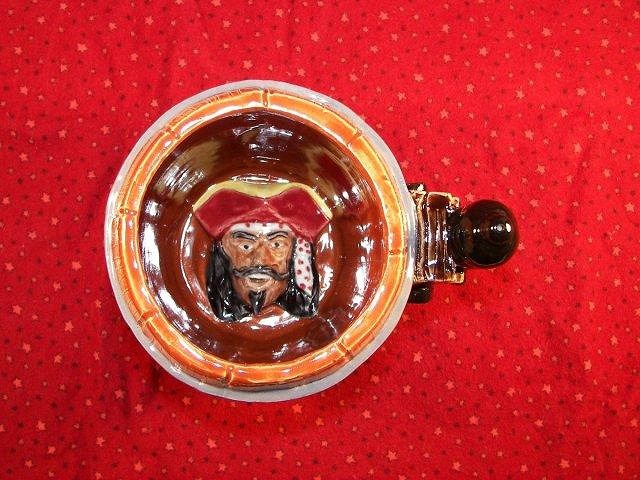
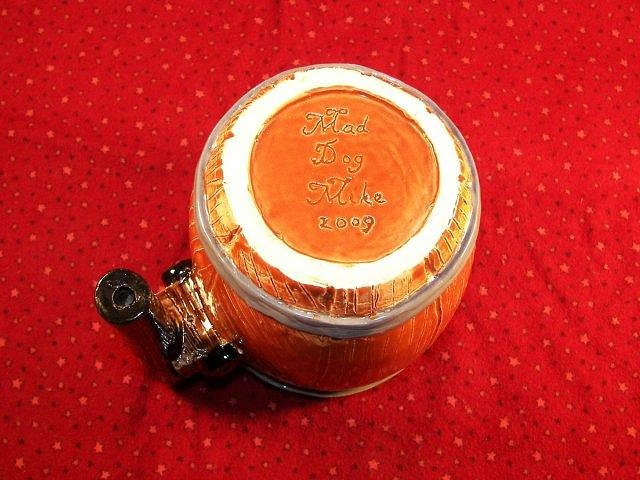
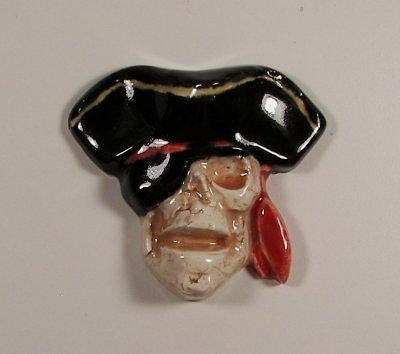
Thanks Clarita & Robb. Yep Clarita, I'm hooked - I'm lovin' this clay stuff! I work 12 hr. shifts so I don't do much else on the days I work, but I play in the mud almost every day I'm off. My family is infatuated with Captain Morgan. Not his rum, mind you, but the Captain himself. It's not a family vacation unless we take a picture in front of some tourist attraction in the famous "Captain Morgan pose". So it came as no surprize that I opened a pair of CM lounge pants for Christmas. The PJs are cool but, more importantly, they came in a rum barrel shaped tin. I rolled out some clay, wrapped it around the tin, and let it harden a bit. Then I cut it down both sides, seperated the halves, removed the tin, and rejoined the halves (a trick I learned from Babalu, the TC Clay Mentor). I have some cleanup and detail work to do after it hardens some, then pray to the clay gods as it dries - it's pretty thick in parts of the cannon handle so it'll have to dry slowly. It's a big one, 6 inches tall and about 40 ounces. Working on a Captain Morgan face medallion to go inside the bottom of the mug. Blurring the fine line between art and crap. [ Edited by: MadDogMike 2009-01-02 18:25 ] |
|
M
MadDogMike
Posted
posted
on
Mon, Jan 12, 2009 6:56 AM
Finished with my Captain Morgan mug with the Capt Morgan face in the bottom of the mug |
|
B

Babalu
Posted
posted
on
Mon, Jan 12, 2009 7:49 AM
Wow Mike! I didn't see your greenware post of this mug before. Dang Sir, your starting to get really good at here clay stuff aren't you! In the future, If you wrap paper around the tin first, prior to rolling on the slab, you can easily pull the tin out, and then the paper and you won't have to cut the mug in half. Great job man! |
|
LLT
little lost tiki
Posted
posted
on
Mon, Jan 12, 2009 8:04 AM
LOVE that cannon handle Mike! |
|
M
MadDogMike
Posted
posted
on
Mon, Jan 12, 2009 10:31 AM
Thank you gentlemen. Rick, the tin is barrel shaped, fatter in the middle, so it wouldn't slide off. Ken, it does look just like Crazy Al! :lol: |
|
A
AlohaStation
Posted
posted
on
Tue, Jan 13, 2009 6:28 AM
I drink the Capt. and love the mug! |
|
M
MadDogMike
Posted
posted
on
Tue, Jan 13, 2009 12:24 PM
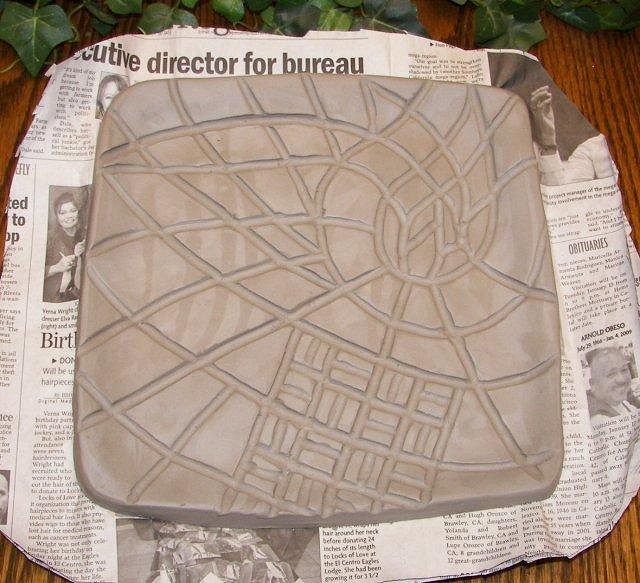
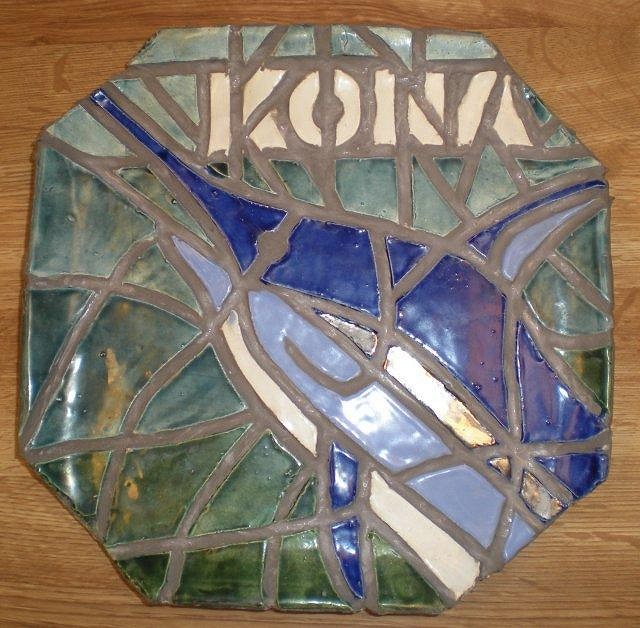
Thanks Aloha! I love the mosaic artwork posted here by Cheeky Half and other artist but it looks like so much work! Especially cutting and shaping the pieces out of hard, brittle ceramic tile. Then I thought, why not cut the pieces to shape out of a slab of clay then fire and glaze them? But how would you fit that jigsaw puzzle back together again, you can’t number all the pieces. That’s when I came up with the idea for Faux-Zaic: Roll out a thick slab of clay and draw your design into it. Using a clay tool, cut channels into the clay between each individual “tile” of the faux-zaic. After the clay is dried and bisque fired, glaze the tops only of the “tiles” and fire the glaze. Fill the channels with grout and you have a faux-zaic that is practically indistinguishable from a real mosaic. I must admit that this idea was conceived in a sleep-deprived state, but what do you think? Has it already been done? Would it work? Does it undermine the value of real mosaic? |
|
V
VanTiki
Posted
posted
on
Tue, Jan 13, 2009 1:15 PM
You are on a ceramic roll! I've been wanting to give this a try for a long time. Read about it in one of my clay tile books. The folks in the book do actually number the pieces - once the clay is leather hard they pick up the pieces and scratch a number into the back of the tile. The cool thing is you draw out your design on a slab, use a needle tool to cut out your pattern, and the shrinking of the clay is what gives you your grout spacing! Too cool. You should try both methods and give us a report! The kiln plugs are AWESOME. What a great idea! Henrik Edit - Wanted to add (after pondering the "Faux-Zaic" that you may be entering a world of pain making a large flat piece in clay that has a bunch of lines scribed in it. In my experience flat surfaces have a very hard time dealing with the stresses of firing, and warping/cracking is a big issue. I'm thinking you may get cracks along your faux grout spaces. My dad did a spectacular 16" octagonal tile with a breadfruit leaf relief pattern on it. He knew he was pushing the limits of scale for one-piece tiles, but hey, that's the way he rolls! :) Things looked great till the last stage of cooling. We were ooo-ing and aah-ing over the tile when we heard an ominous "ping!". Went to lift the tile out of the kiln, and were sad to see it had cracked in half! [ Edited by: VanTiki 2009-01-13 13:21 ] |
|
RH
Robb Hamel
Posted
posted
on
Tue, Jan 13, 2009 4:40 PM
I gotta agree with llt: the handle is real standout design work. If you invented that yourself you've got the real touch of genius flowing through your synapses. Keep CRANKIN'! |
|
G
GROG
Posted
posted
on
Tue, Jan 13, 2009 10:36 PM
MOST EXCELLENT!! GROG like. |
|
B
Bowana
Posted
posted
on
Wed, Jan 14, 2009 7:05 AM
That's a mighty fine design, Captain Maddog! |
|
B

Babalu
Posted
posted
on
Wed, Jan 14, 2009 7:11 AM
Captain MadDog :lol: |
|
M
MadDogMike
Posted
posted
on
Wed, Jan 14, 2009 8:15 AM
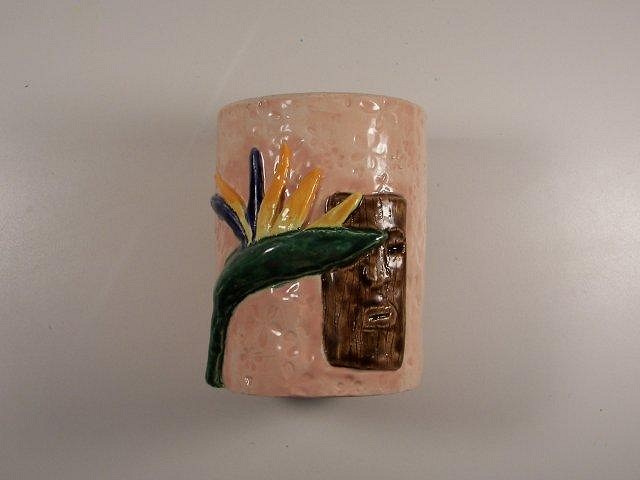
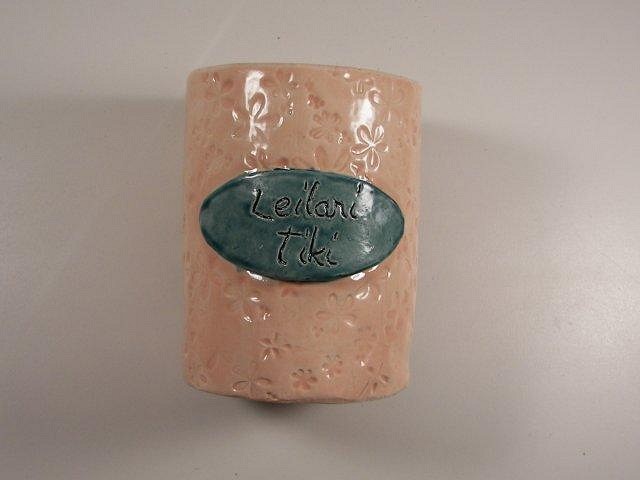
Well shiver me timbers! I've been promoted ta Captain! Thanks for the kind works all. Robb, as for as I know, the cannon is my design. I was looking for something both "handle-ish" & "piratey" and came up with either the cannon or a sword grip and basket hilt. I was worried that it would not be strong enough with just a top attachment so I made it thick and then I was worried about it cracking while it dried. One thing I can't take complete credit for is the Captain Morgan at the bottom of the mug. He started out as a pirate skull candy mold, I added "skin" to him. Now on to my next project; I see plenty of bold, masculine mugs - skulls and headhunters with bones in their noses. I thought it was time for something for the wahines. This mug is kind of a failure, a test tile of sorts. As I started to build it, I realized it should be more elegant - tall and slender instead of short and fat. But I went ahead anyway just to practice. I hope to do a 4 mug series of "Leilani Tiki" (Leilani = Flowers from Heaven) with 4 different tropical flowers. Other than short and squat, I don't like the color; not pink enough and the "n" in Leilani" looks like an "r". I'm still struggling with getting the glaze even and defining the borders between colors better. Any other comments, things I can fix before I start the real thing? |
|
M
MadDogMike
Posted
posted
on
Thu, Jan 15, 2009 4:02 PM
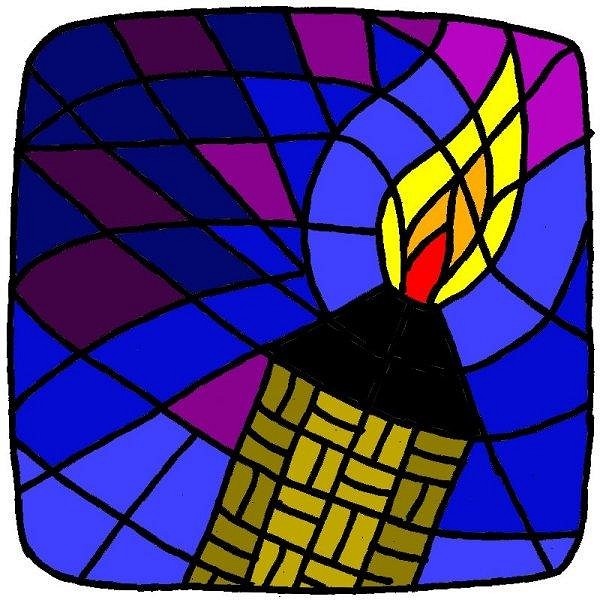
Progress shot on my Faux Mosaic platter theory. Next - dry, bisque, glaze, & grout. Here is the coloring scheme |
|
IK
Iokona Ki'i
Posted
posted
on
Tue, Jan 27, 2009 12:38 PM
Great work! I have really enjoyed your thread so far. |
|
M
MadDogMike
Posted
posted
on
Fri, Jan 30, 2009 9:03 AM
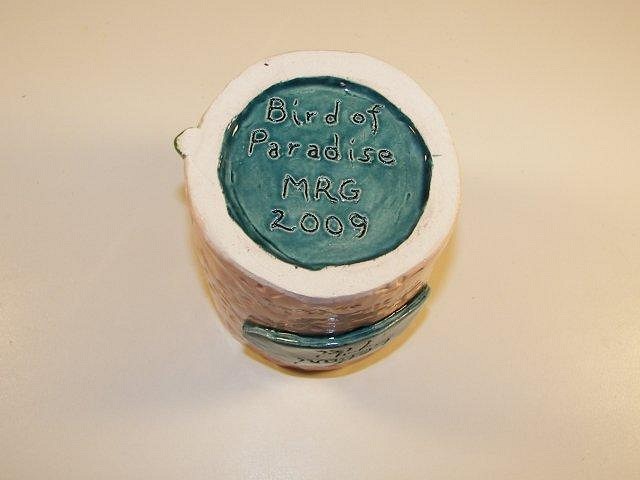
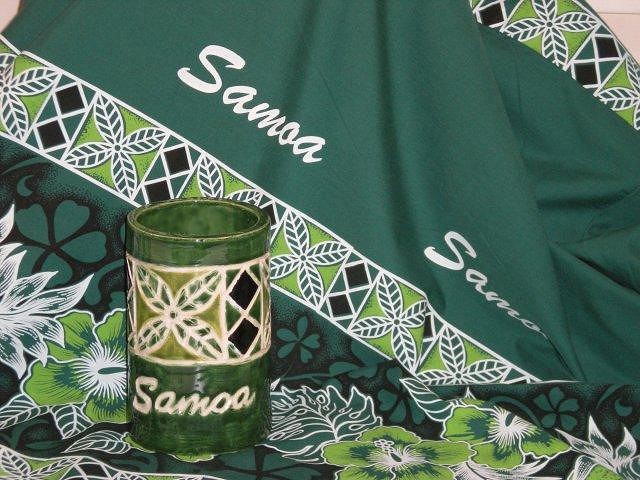
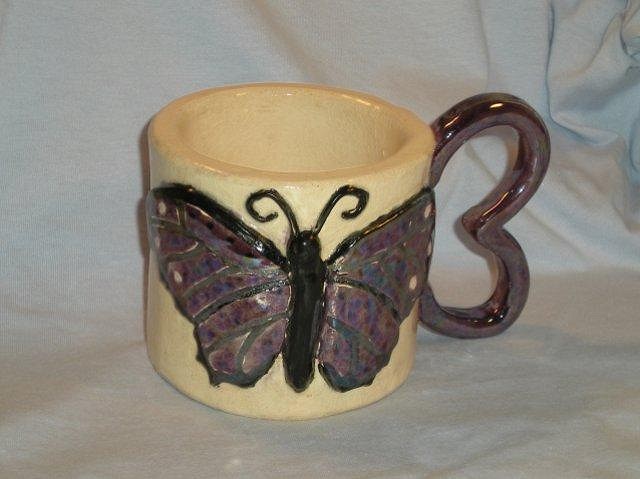
Thank you Iokona :) I tried to use this shirt/mug combo to get Buzzy's Certificate of Tiki Guy Authenticity but failed miserably :lol: About a month ago, one of Buzzy's posts inspired me to make a matching shirt/mug combo so I started looking for an appropriate shirt and found this on eBay for $5. The colors on the mug are off a little, but I guess that's a good thing, otherwise the mug would disappear into the shirt. Also, I was commissioned to make a Bora Bora Butterfly coffee mug - glazed with Mother of Pearl luster over Royal Purple. |
|
S
Sophista-tiki
Posted
posted
on
Fri, Jan 30, 2009 9:20 AM
The matching thing is pretty cool. I'm all for matching , that's pretty much my motto. Just ask anyone who's seen me in one of my tiki grrranimal outfits that matches my car! that matches my house that matches my tiki radio flyer that matches my vintage canoe that matches my bike. and if I could get my dog to match I would! |
|
M
MadDogMike
Posted
posted
on
Fri, Feb 6, 2009 10:43 AM
Thank you Sophista-Tiki :) I wasn't part of the Kona Swordfish Tribute but wanted to make something as a personal challenge. I wasn't "fishing" for an invitation (pun intended) so I wasn't going to post it until after the show, but now it looks like there isn't going to be a show :( I have been experimenting with a faux mosaic technique, this was a test. It was supposed to be a square platter but it was too big to fit into my kiln, I had a couple of options to fire it but both require waiting and I don't wait well. When one of the corners of the platter slumped during drying, I took a knife and whacked it down to fit my kiln. Voila! No more waiting! I fired and glazed it then filled the gaps with sanded acrylic grout. I really wanted black but the acrylic grout came in gray. Turned out OK, all things considered. EDIT - Spelling Blurring the fine line between art and crap. [ Edited by: MadDogMike 2009-02-06 10:47 ] |
Pages: 1 2 3 4 5 6 7 8 9 10 11 12 13 14 15 16 17 18 19 20 21 22 23 24 25 26 27 28 29 30 31 32 33 34 35 36 37 38 39 40 41 42 43 44 45 46 47 48 49 50 51 52 53 54 55 56 57 58 59 60 61 62 63 64 65 66 67 68 3217 replies

