Pages: 1 2 3 4 5 6 7 8 9 10 11 12 13 14 15 16 17 18 19 20 21 22 23 24 25 26 27 28 29 30 31 32 33 34 35 36 37 38 39 40 41 42 43 44 45 46 47 48 49 50 51 52 53 54 55 56 57 58 59 60 61 62 63 64 65 66 67 68 3,217 replies
|
M
MadDogMike
Posted
posted
on
Mon, Jun 10, 2013 6:35 PM
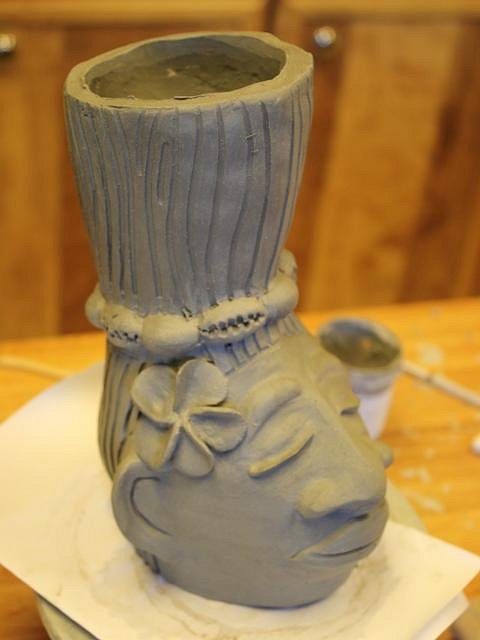
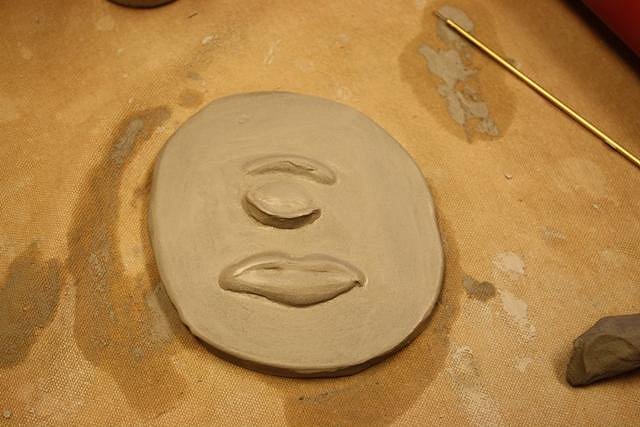
Thank you my friends, entertaining you entertains me :D With a cowrie hairtie and a frangipani, Hippolyta it starting to look quite fetching :lol: While she dries and gets refined, it's time for some glaze testing to see if underglaze will make suitable lipstick and eye shadow over Duncan Courtyard Molasses. EDIT - the test tile in questions looks remarkably like Salvador Dali's mistress Clay, the oldest and most divine art media; [ Edited by: MadDogMike 2013-06-10 19:08 ] |
|
D
danlovestikis
Posted
posted
on
Mon, Jun 10, 2013 10:51 PM
I especially like how you formed the flower. You are delicate with a gentle hand when working with a woman. Wendy |
|
T
TikiAno
Posted
posted
on
Tue, Jun 11, 2013 8:52 AM
Mike, looking great! The plumeria looks amazing, glad it didn't shrink (and shrivel up) along w/ the head. :) Looking forward to seeing this progress! |
|
W
Woodtiki
Posted
posted
on
Tue, Jun 11, 2013 8:59 AM
This is looking awesome Mike! I love the flower. |
|
M
MadDogMike
Posted
posted
on
Fri, Jun 21, 2013 5:21 PM
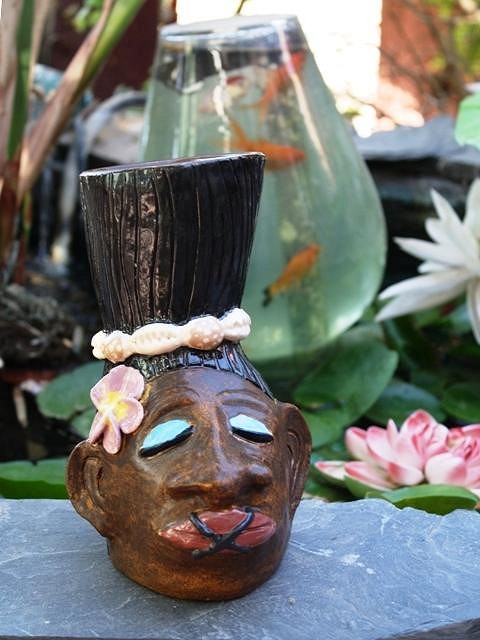
Isn't she beautiful? :lol: |
|
E
ebtiki
Posted
posted
on
Fri, Jun 21, 2013 6:15 PM
Yes, she is! |
|
V
VanTiki
Posted
posted
on
Fri, Jun 21, 2013 7:00 PM
|
|
D
danlovestikis
Posted
posted
on
Fri, Jun 21, 2013 8:18 PM
Hey were are her toes??? Inside joke! She looks sweet. Wendy |
|
H
hiltiki
Posted
posted
on
Sat, Jun 22, 2013 8:39 AM
She is beautiful Mike, I like.:) |
|
M
MadDogMike
Posted
posted
on
Sat, Jun 22, 2013 8:55 AM
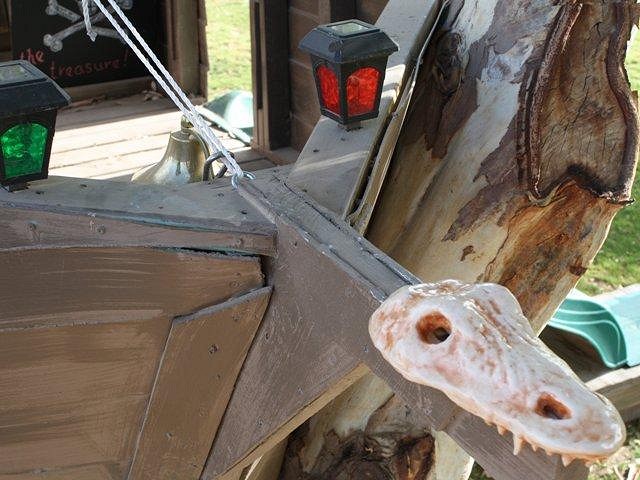
EB & Hilda - thank you I used my croc head mold to make a nice thick skull (about 3/4 inch) out of some B Mix Paper Clay and just threw it out in the sun to dry - none of this slow drying to prevent cracks needed for paper clay. It is now the figurehead on the pirate ship bow. I think that just about completes my Pirate Ship Tree House, at least for now. As the boys get a little older I will add things like an oversize pirate version of "You sunk my battleship!" with various wooden pirate ships and golf tees for pegs. Clay, the oldest and most divine art media; [ Edited by: MadDogMike 2013-06-22 08:57 ] |
|
L

littlegiles
Posted
posted
on
Sat, Jun 22, 2013 10:31 PM
Mike, I knew if anyone could combine beauty and shrunken heads, it would be you. #6 turned out great. Love the new figurehead on the pirate ship. That still ranks as one of my favorite build projects on here. What lucky grandkids to have such a cool grandpa. :)
|
|
LLT
little lost tiki
Posted
posted
on
Tue, Jun 25, 2013 7:17 PM
Number Six IS a Beauty,Mike! you are an unstoppable creature... |
|
H

hang10tiki
Posted
posted
on
Tue, Jun 25, 2013 7:53 PM
El número 6 |
|
H

hang10tiki
Posted
posted
on
Wed, Jul 24, 2013 7:01 AM
Happy Bday (old man) :) Sorry I'm 2 days late Jon |
|
M
MadDogMike
Posted
posted
on
Thu, Aug 1, 2013 8:55 PM
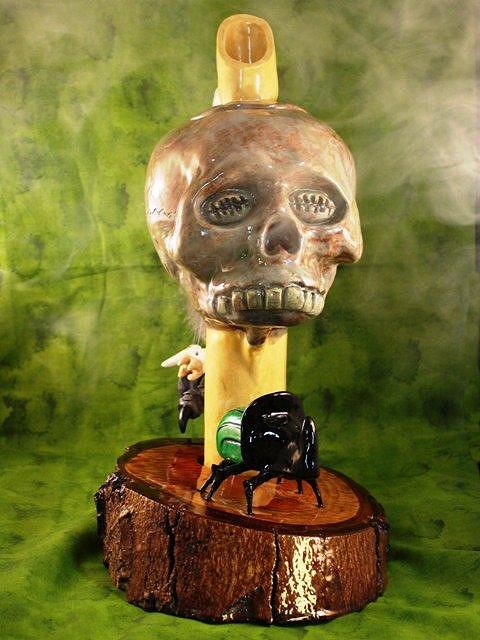
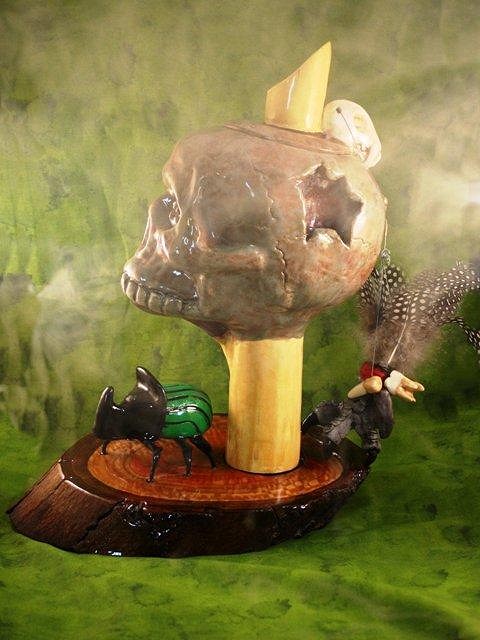
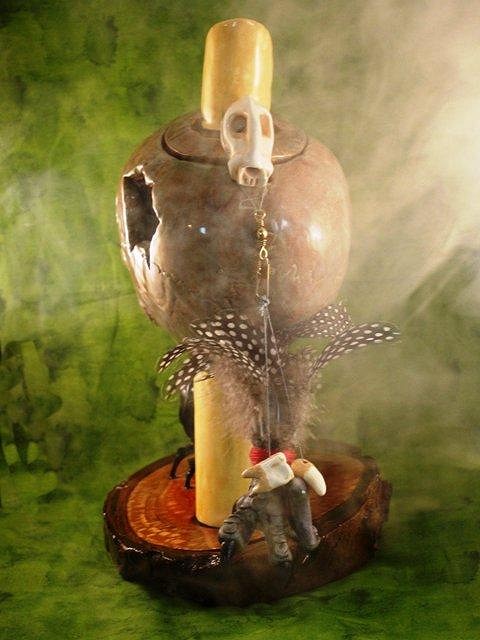
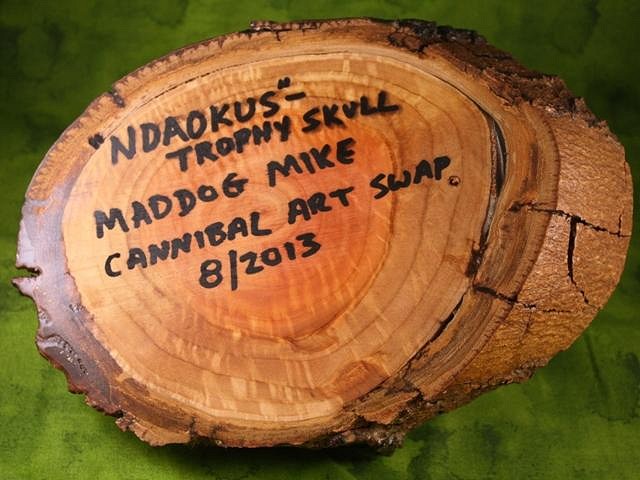
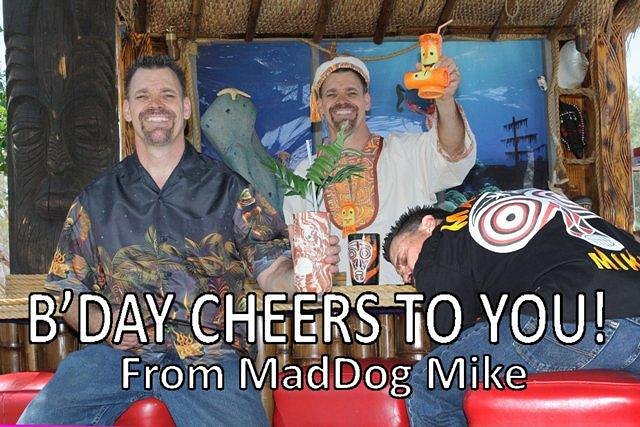
Dale, Kinny, & Jon - thank you so much. Here is the "Ndaokus" Trophy Skull Mug for the Cannibal Art Swap which ends next week. The Asmat people of Papua New Guinea collected 2 types of skulls; the “Ndambirkus” or ancestral skull and the "Ndaokus" of trophy skull. The ancestral skulls were treated with respect and were carried or worn for protection, they were often used as a headrest or pillow so the protection would extend while sleeping. They had the lower jaw attached with twine. The trophy skulls were from vanquished enemies and were kept in the men's house, they had a hole in the side of the skull where the brain was removed and eaten. The lower jaw was removed from the skull and given to the women to wear as a necklace. It was considered the ultimate insult and humiliation to have your jawbone worn as a necklace! This mug was inspired by PopTiki's Headhunter Chalice and is made from a slipcast skull with a ceramic "bamboo" pole extending up through the skull. There is a bat skull mounted on the back of the lid, the straw hole is inside the bamboo pole. Hanging from the back is a polymer clay talon with guinea fowl feathers and ceramic molar, incisor, and claw. The base is made from a slab of Eucalyptus wood coated with 2 part epoxy resin and a polymer clay rhinoceros beetle. The base had a large dowel on it which goes inside of the bamboo pole to secure the mug to the base. The mug lifts off the base like a chalice and the pole serves as a handle but you can't get too far from the base as the mug won't stand on it's own Over the past year I have sent out MadDog birthday cards to several TC folks. A new card has been made and the old one is being retired, thought I would share it with you. |
|
H

hang10tiki
Posted
posted
on
Thu, Aug 1, 2013 9:24 PM
Dude, u are the bomb... Jon |
|
T
tigertail777
Posted
posted
on
Thu, Aug 1, 2013 9:37 PM
That is just over the top insane. Leave it to you, MDM. :) Love all the little touches. |
|
P
poptiki
Posted
posted
on
Fri, Aug 2, 2013 4:42 AM
W [ Edited by poptiki on 2022-10-12 02:57:06 ] |
|
S

swizzle
Posted
posted
on
Fri, Aug 2, 2013 5:08 AM
Really great work on that piece Mike. |
|
WC
Will carve
Posted
posted
on
Fri, Aug 2, 2013 5:13 AM
Over the top Mike. |
|
T
tikiskip
Posted
posted
on
Fri, Aug 2, 2013 6:08 AM
Wow! Mike! |
|
C
cy
Posted
posted
on
Fri, Aug 2, 2013 8:13 AM
Love all the multi media stuff going on in the trophy skull piece Mike, it really looks great! Your time lapse Birthday card is a gem. |
|
BT
Badd Tiki
Posted
posted
on
Fri, Aug 2, 2013 8:22 AM
Wow, you went all out on that piece MDM. Great stuff! |
|
D
danlovestikis
Posted
posted
on
Fri, Aug 2, 2013 8:51 AM
You are a creative genius and smart too! What a work of art. It should be on display in a museum. This is a great swap Mike. We all try harder because of you. Wendy |
|
T
TikiAno
Posted
posted
on
Fri, Aug 2, 2013 10:26 AM
Ditto what Wendy (and everyone else) said. Amazeballs. Love the Bday card, too! |
|
M
MadDogMike
Posted
posted
on
Sun, Aug 4, 2013 9:56 AM
Jon, Tiger, PopTiki, Swizz, Will, Skip, Cy, Badd, Wendy & TikiAno ~ thank you all so much for your kind words, you really know how to make a guy feel loved :blush: I had a great time making that skull, I may have to make one for me now :lol: I finally got a display box made for my Headhunter Harbor mugs. Probably could have used 3/4 inch pine instead of 1 1/2 inch fir lumber, it's a bit more substantial than it needs to be. Since I live in earthquake country I need to add a safety wire across the front of the mugs. |
|
D
danlovestikis
Posted
posted
on
Sun, Aug 4, 2013 10:29 AM
Cool. That's a great display. Where is it, backyard or at the pirate ship? Do they stay out all the time or only out for a party. Nosey huh? Wendy |
|
M
MadDogMike
Posted
posted
on
Sun, Aug 4, 2013 12:37 PM
Not nosey, it's just that inquiring minds NEED to know :lol: |
|
T
TikiAno
Posted
posted
on
Mon, Aug 5, 2013 4:03 PM
Mike, the rack looks great- think the thicker stock will come in handy when the shrunken heads learn to work together and try to escape. Sorry, shouldn't drink during the day. Dang it. |
|
JG
John Galt
Posted
posted
on
Mon, Aug 5, 2013 6:24 PM
He said.....rack |
|
H

hang10tiki
Posted
posted
on
Mon, Aug 5, 2013 7:13 PM
Awesome |
|
L

LoriLovesTiki
Posted
posted
on
Sat, Aug 10, 2013 5:44 AM
Love the rack!!!! You do great work my friend. |
|
G
GROG
Posted
posted
on
Sat, Aug 10, 2013 9:30 AM
Usually don't say this to guys, but nice rack. |
|
D
danlovestikis
Posted
posted
on
Sat, Aug 10, 2013 9:50 AM
Now I can't resist. As GROG said, nice rack! Wendy |
|
M
MadDogMike
Posted
posted
on
Sun, Aug 18, 2013 11:05 AM
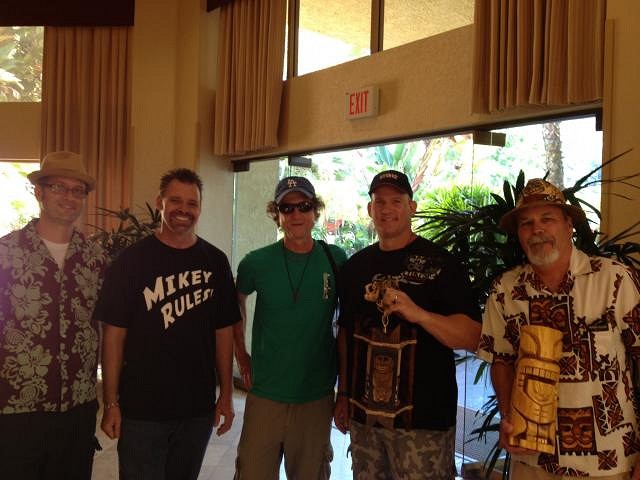
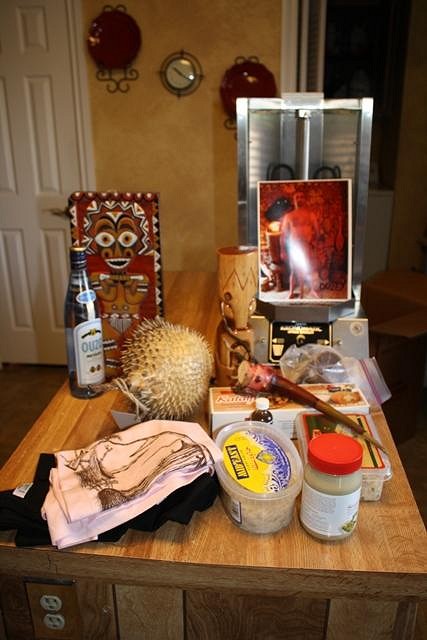
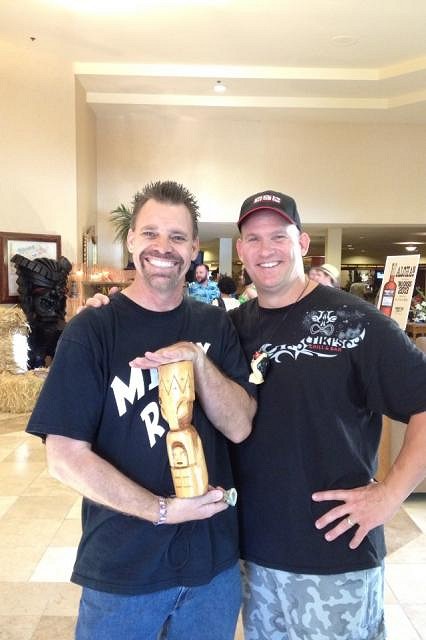
Thank you guys for your kind comments, so good to see so many of you at OASIS!!!! I left early from Oasis and have been home for a few hours, trying to get everything put away before work tomorrow morning. Had a chance to visit with so many people, don't want to try listing them for fear of missing someone. But did want to give a special shout-out to the Swap crew who made it - Jon & Janelle, Cy, Wendy, TikiPops, TikiAno, Kinny. So good to meet up with. Jon thank you for the extra cannibal which I was honored to win. TikiAno thank you for the black clay, can't wait to try that out. Always great to visit with Dan & Wendy, thank you for dinner. Got to catch up with Buzzy and Christina, thank you for the Buzzy pinup poster (I think :roll: ) Got to spend some quality time with Nui Umi'umi, Tiki Vato and their wives, thank you for your hospitality and the MaiTai. You are a true gentleman and a gracious host David. I did a little to support the Oasis and San Diego economies. I'm not a collector so I ate and drank most of my purchases. |
|
H

hang10tiki
Posted
posted
on
Sun, Aug 18, 2013 8:02 PM
Great to see u Mike
Jon |
|
D
danlovestikis
Posted
posted
on
Sun, Aug 18, 2013 8:19 PM
Mike, Dan and I thank you for dinner too. Your post and photos are terrific. I'm so happy you won hang10tikis second marvelous carving. You worked hard for all of us during the swap and its great to see you rewarded. Slowly your digs are turning more tiki. Watch out Teresa! We loved seeing everyone and tomorrow we will unload and post some photos. Tonight after 9.5 hours in the car we rest. Love you Mike, Wendy |
|
M
MadDogMike
Posted
posted
on
Sun, Aug 18, 2013 10:37 PM
And I forgot to thank HB Tiki for the cool custom drink umbrella, thanks Roger :) |
|
M
MadDogMike
Posted
posted
on
Sat, Sep 14, 2013 12:41 PM
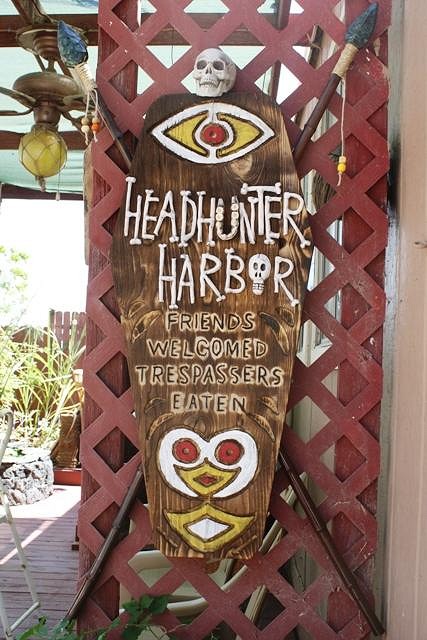
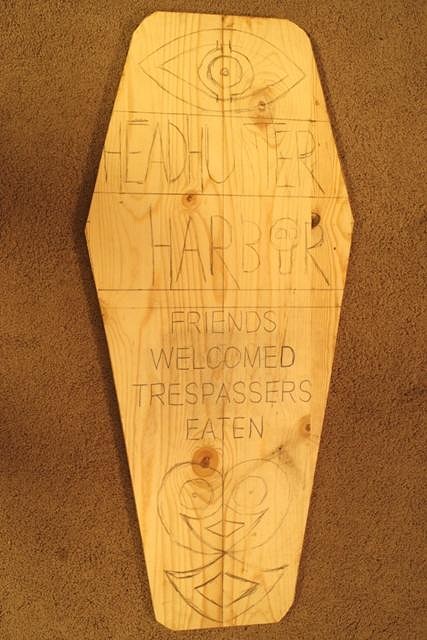
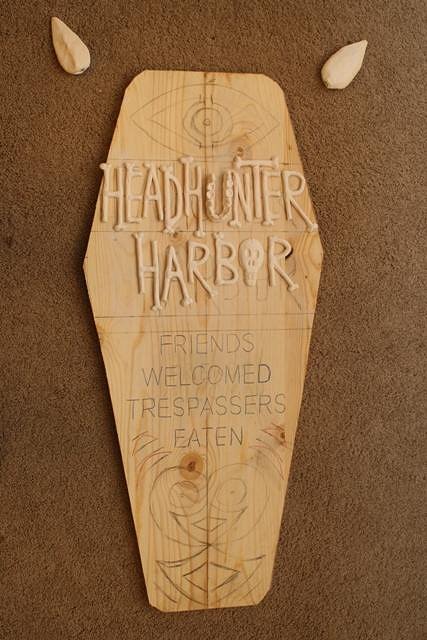
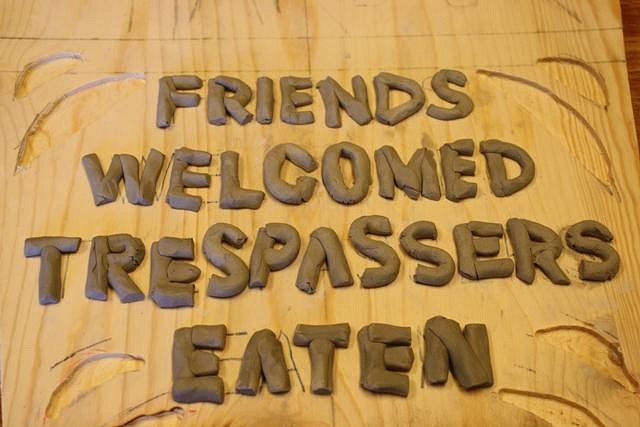
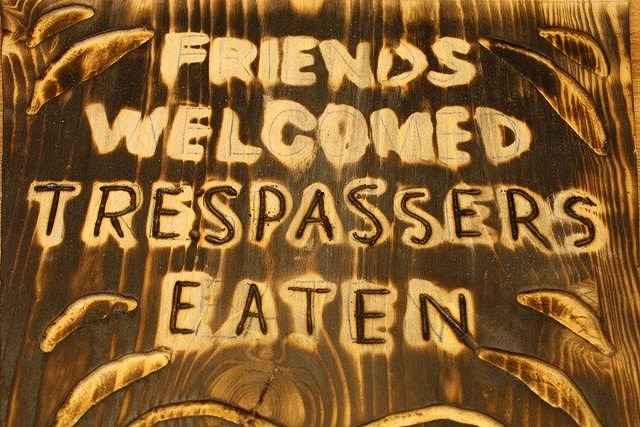
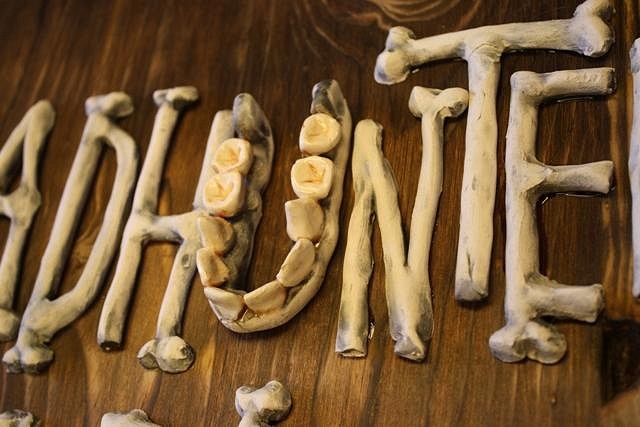
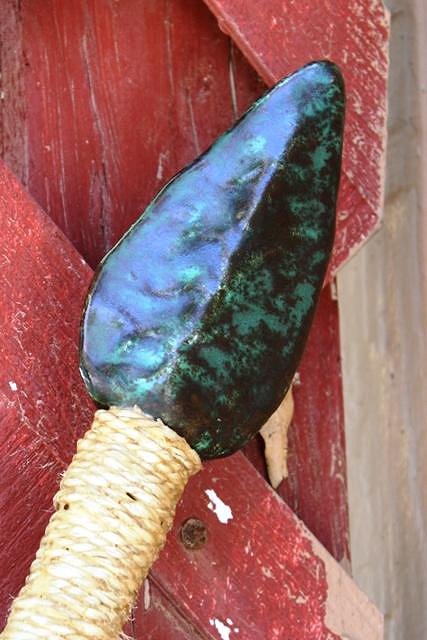
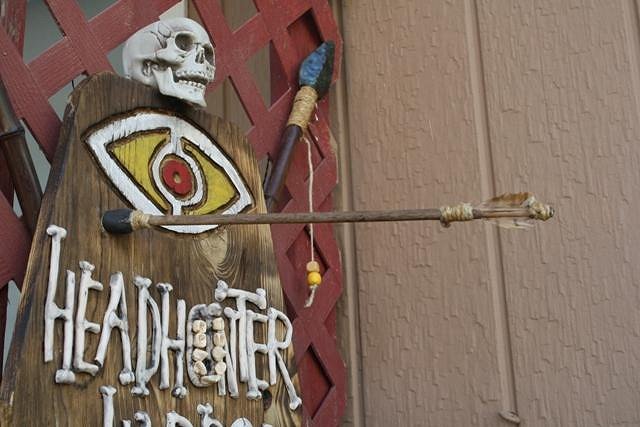
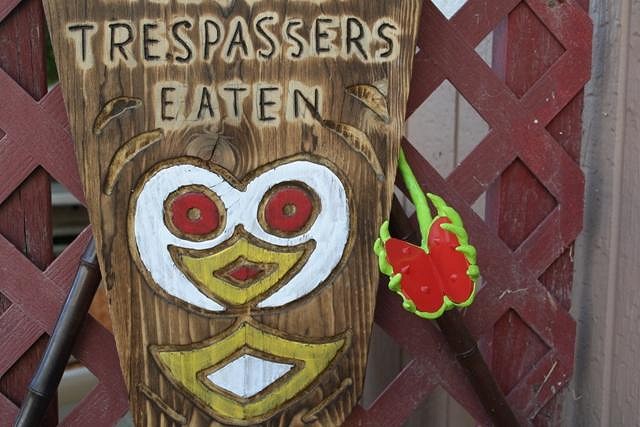
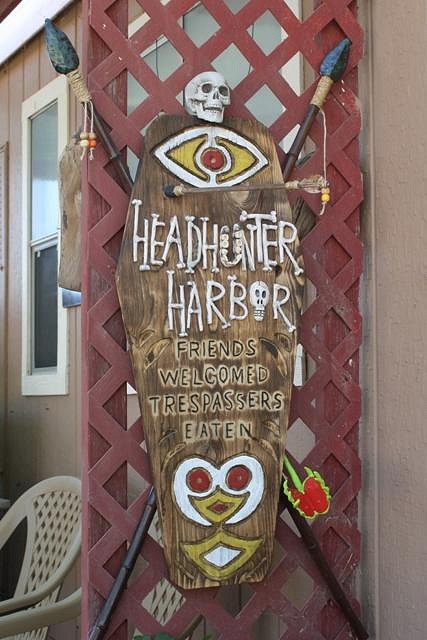
Hospitality is key in any society, even cannibals. So I decided the Headhunter Harbor needed a welcome sign :D Here's some progress pics if you're interested. New "clay resist" burning technique in steps #4 & 5 Step #2 - Form bone letters and spear heads from paper clay. Step #3 - Fire and glaze the letters and spear heads. Router designs in the wood. Step #4 - "Clay resist" burning technique. Form letters out of clay onto the wooden shield, press them down to make good contact. while the clay is still well, burn the wood around the letters with a torch. Step #5 - Remove and discard the clay letters, leaving an unburned area below them. Take a wood burner and define the letters. Step #6 - Burn and brush the wood. Glue the fired and glazed bone letters to the shield. In my first Headhunter Harbor sign, I made the "U" from little individual vertebrae. This time I tried a jawbone with teeth. Step #7 - Paint accents, make and attach spears, skull, beads, etc. I tried a new glaze for the spear heads; Malachite. Malachite is my favorite semi-precious stone but the effect is a bit subtle, I don't see that I will be using this glaze much. |
|
H
hiltiki
Posted
posted
on
Sat, Sep 14, 2013 6:34 PM
love it, very clever. |
|
V
VampiressRN
Posted
posted
on
Sat, Sep 14, 2013 6:58 PM
Great job Mike...I'll be sure to get an invite if in the area!!! |
|
D
danlovestikis
Posted
posted
on
Sat, Sep 14, 2013 7:59 PM
We need to one day visit you to see all this fun stuff you make. Will there be more for the pirate ship? Wendy |
|
H

hang10tiki
Posted
posted
on
Sun, Sep 15, 2013 6:55 AM
Awesome mike |
|
T
TikiAno
Posted
posted
on
Sun, Sep 15, 2013 3:00 PM
Mike, looks awesome- love combining fired clay and wood, great idea- and execution. What kind of glue did you use to attach the clay to the wood? I ditto Wendy, what's new w/ the pirate ship? (Btw, friends and neighbors are digging the crocodile on the front lawn, thanks once again!) |
|
ATP

Atomic Tiki Punk
Posted
posted
on
Sun, Sep 15, 2013 3:03 PM
Who's teeth did you use? |
|
H

hang10tiki
Posted
posted
on
Sun, Sep 15, 2013 5:23 PM
ATP- I know where he gets them
But Mike, come on, there has to be an easier way...
Then again, you are MAD DOG... |
|
PG
Professor G
Posted
posted
on
Sun, Sep 15, 2013 6:30 PM
Hospitable, yet ferocious. Nice work, MDM. |
|
M
MadDogMike
Posted
posted
on
Sat, Sep 28, 2013 9:22 AM
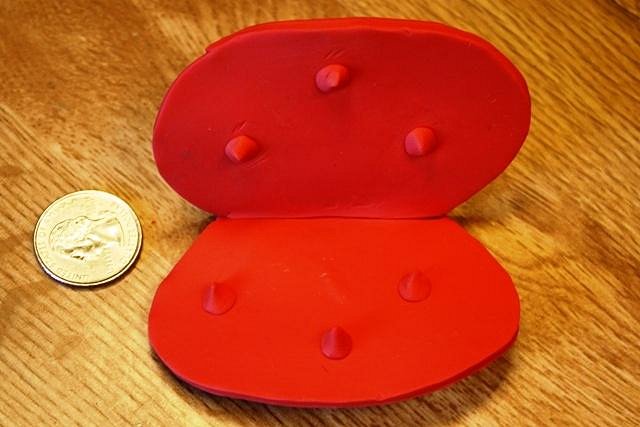
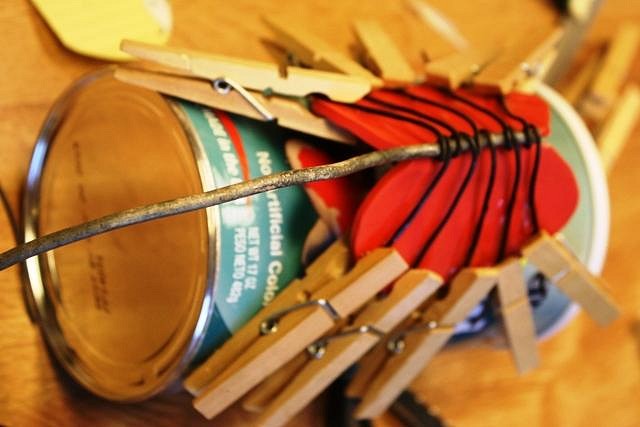
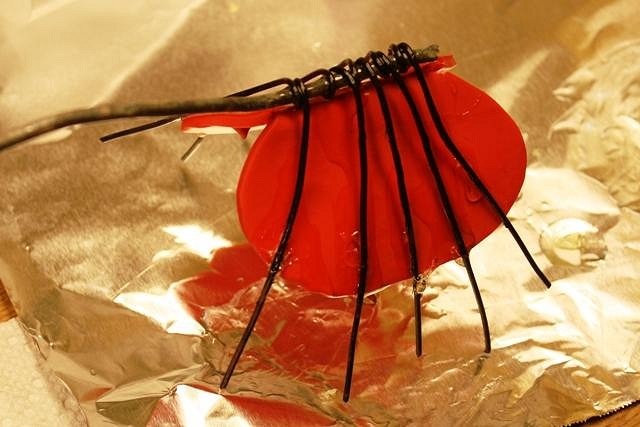
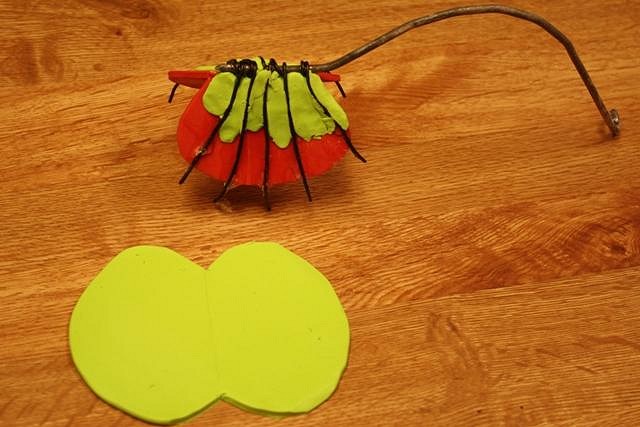
Hilda, Marlene, Wendy, Jon, David, Lance, & Greg ~ Thanks you very much, you are all friends and always welcome. I will keep the natives at bay and promise you won't be eaten! Been busy with a "commercial" Tiki project that I can't post yet but did add a little embellishment to my "welcome sign" including this arrow stuck in the wooden shield. I bought a Venus Flytrap at Home Depot the other day to plant in my tropical garden (I didn't know they are from the swamps of South Carolina!), we'll see how it does. I decided it must be the most "headhunter" of all plants so I decided to add a polymer clay version to my sign too Here's some step-by-step. I made the red inner "flower" part and baked it. Quarter to size comparison I made a wire armature for the stem and the "teeth", epoxied it on and held it with clothes pins After the first batch of epoxy dried, I removed the clamps and really gobbed on more epoxy. It was going to be covered so neatness did not matter, only strength. Filled in the gaps around the wire and rolled out and cut the green underside part of the Fly Trap. Clipped the "tooth" wires Then I pressed the green underside to the flower, covered the stem and teeth with more polymer clay and baked it in the oven. |
Pages: 1 2 3 4 5 6 7 8 9 10 11 12 13 14 15 16 17 18 19 20 21 22 23 24 25 26 27 28 29 30 31 32 33 34 35 36 37 38 39 40 41 42 43 44 45 46 47 48 49 50 51 52 53 54 55 56 57 58 59 60 61 62 63 64 65 66 67 68 3217 replies

