Pages: 1 2 3 4 5 6 7 8 9 10 11 12 13 14 15 16 17 18 19 20 21 22 23 24 25 26 27 28 29 30 31 32 33 34 35 36 37 38 39 40 41 42 43 44 45 46 47 48 49 50 51 52 53 54 55 56 57 58 59 60 61 62 63 64 65 66 67 68 3,217 replies
|
UT
uncle trav
Posted
posted
on
Sun, Mar 17, 2013 4:53 PM
Awesome job Mike, those are some lucky pirates! |
|
M
MadDogMike
Posted
posted
on
Sun, Mar 17, 2013 8:32 PM
Thank you Cass & Trav
|
|
LLT
little lost tiki
Posted
posted
on
Sun, Mar 17, 2013 11:46 PM
lol nice Tick Tock there! |
|
L

LoriLovesTiki
Posted
posted
on
Mon, Mar 18, 2013 4:37 PM
Hope everything goes smoothly at your brother's wedding and have fun! And if i don't talk to you before that, enjoy Mexico as well. It's lightly snowing here as I type so Mexico sounds especially appealing! I just can't wait for spring weather. Btw, you're brave hosting 250 guests! We considered having our 50 person wedding in our backyard but chickened out and had it on the beach! |
|
RH
Robb Hamel
Posted
posted
on
Mon, Mar 18, 2013 7:48 PM
Mike, there is simply nothing you cannot do. |
|
S
Sophista-tiki
Posted
posted
on
Mon, Mar 18, 2013 9:32 PM
catching up on your latest escapades, Croc-o-stimpy in the grass! thats pretty cool, Have a great time on your vacation. |
|
H

hang10tiki
Posted
posted
on
Tue, Mar 19, 2013 12:08 AM
I remember you being taller.. jon |
|
M
MadDogMike
Posted
posted
on
Mon, Apr 1, 2013 8:02 PM
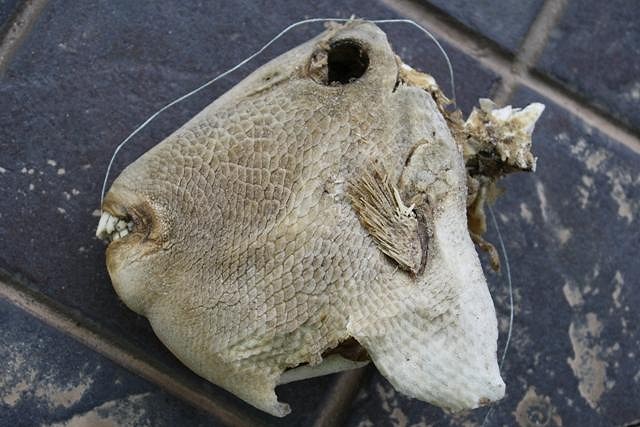
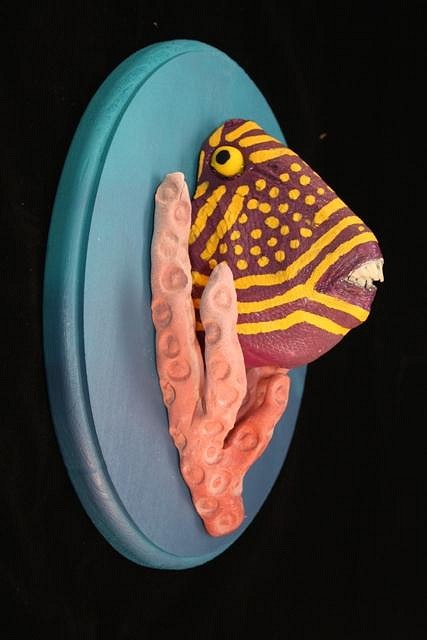
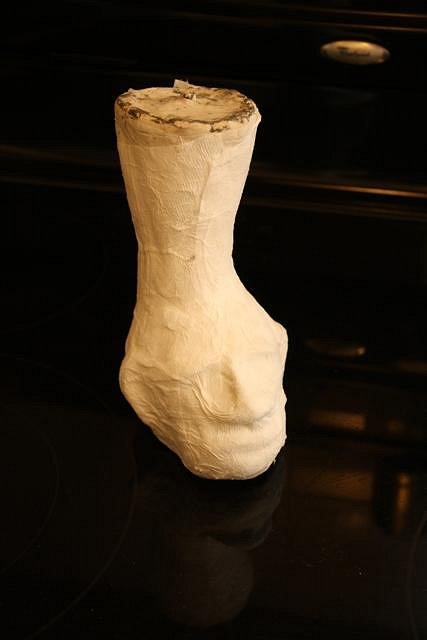
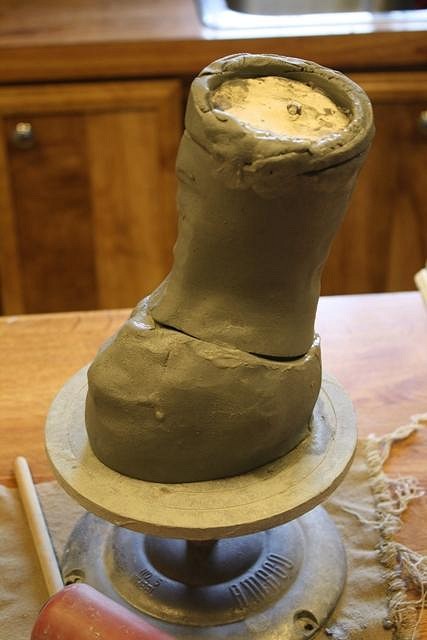
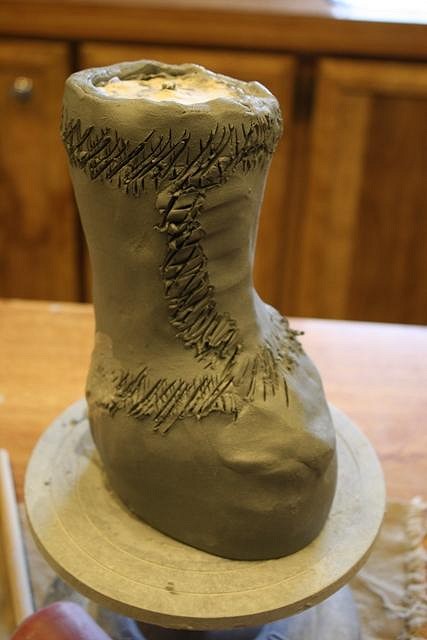
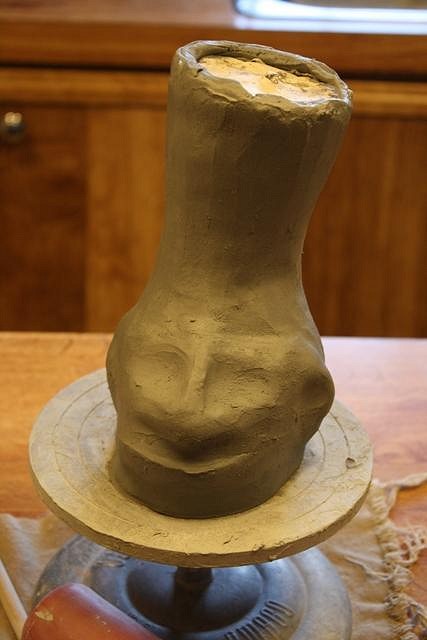
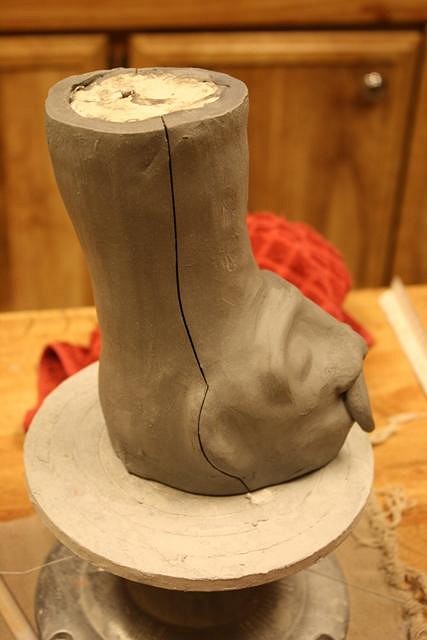
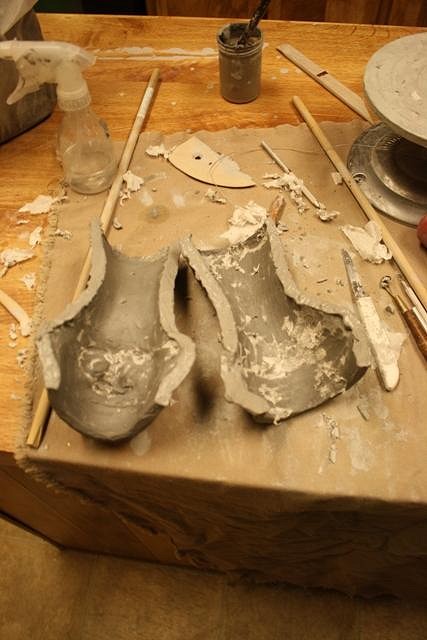
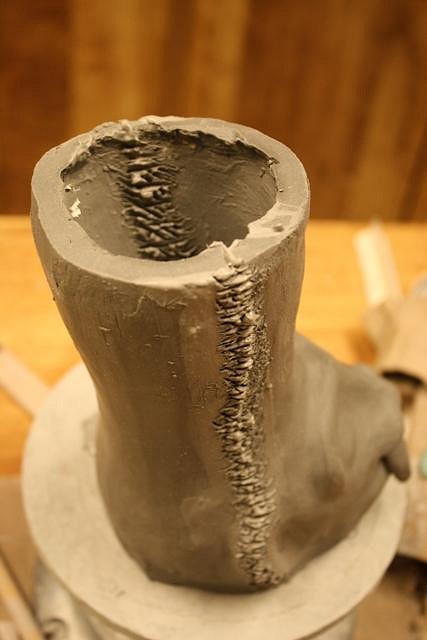
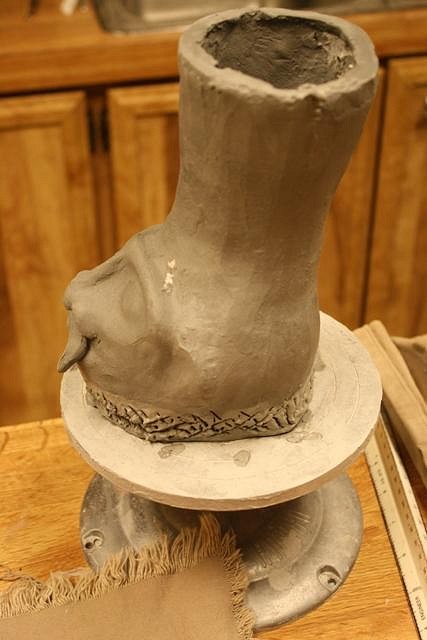
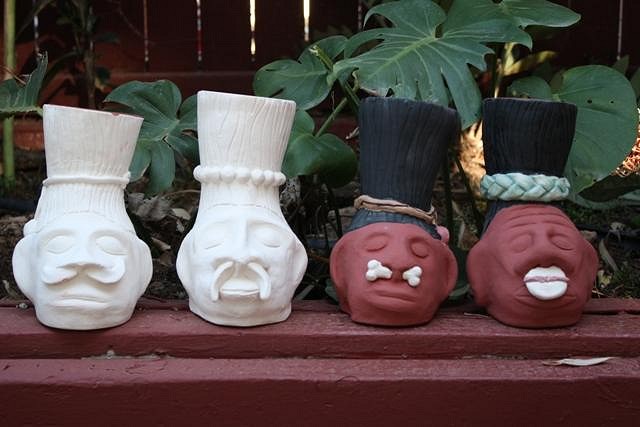
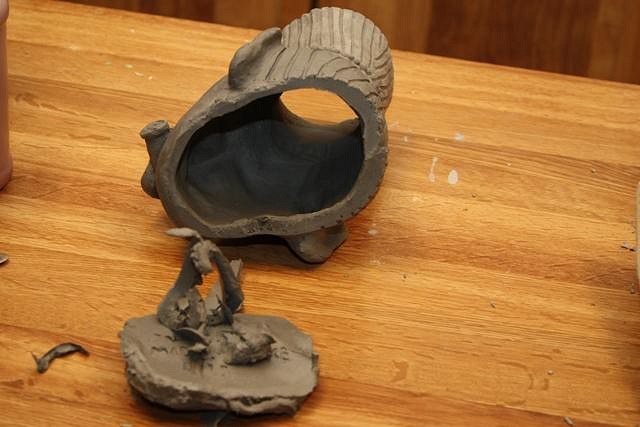
The wedding was beautiful and everyone had a great time. There is room in my lawn for 250 people seating AND dancing - good thing I water my grass with unmetered water :lol: I posted this in the Art Swap thread but don't think I posted it here: On my last trip to Mexico I brought back a beach find ~ a dead fish head. As more of a joke than a real Swap piece, I turned it into "art" with a plaque, polymer clay, ceramic clay and paint. Just got back from another 5 day trip to Mex, the eastern coast of the Sea of Cortez this time. I knew I would have plenty of downtime and wanted a clay project to work on. But it had to be done with minimal supplies since I was camping. I wanted a set of shrunken head mugs so some sort of mold/form was in order. But I was out of casting slip and didn't have time to make a plaster mold anyway. So I tried a new technique; I made a basic form out of Crayola Air Dry clay (40% off coupon at Michael's), let it dry for a day then covered it with wet tissue paper so the ceramic clay wouldn't stick to it. (I didn't take a camera to Mex so there are no pics of me "mudding" on the beach. But I know how Wendy loves progress pics so I started another mug when I home today :) ) I rolled out some clay and started slabbing it over the form. This gives me a basic size and shape, then everything else is just old fashioned sculpting. Nice thing about shrunken heads is that they are natually a bit misshapen so the sculpting doesn't have to be too exact. After it dries just enough to start to get firm, I slice the clay along both sides. This allows the gap to widen as it dries and shrinks so that it does not crack.
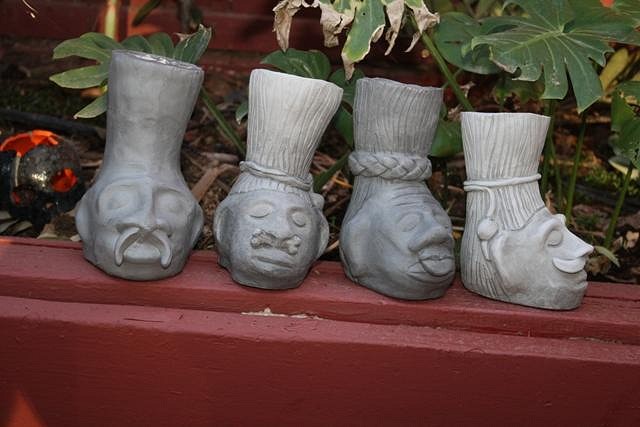
It occurred to me that only the losers in a battle get the dubious honor of having their heads shrunk, so I named the "Lil Loser #1" and so forth :D |
|
H

hang10tiki
Posted
posted
on
Mon, Apr 1, 2013 8:15 PM
Mike Jon |
|
L

littlegiles
Posted
posted
on
Mon, Apr 1, 2013 8:21 PM
Mike, you never cease to amaze me with you talent. You have an inner vision that is just exceptional. I can't wait to see these things finished and thanks for the "in progress" photos. Dale |
|
M
MadDogMike
Posted
posted
on
Mon, Apr 1, 2013 9:20 PM
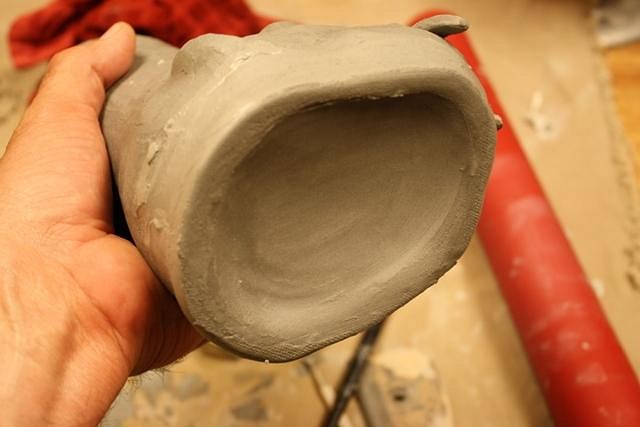
Thank you very much Jon & Dale :) No trick photography :lol: they are about 8 inches tall. I held one next to a beer can on the beach and estimate they will hold 15+ ounces :D A little more progress for the night; the 2 halves are pulled from the form and most of the tissue paper removed from the clay. The remaining tissue will fire out in the kiln. Note the depressions on the back side of the ears, nose and mouth, this keeps the clay from being so thick there that it has to dry very slowly. The mating surfaces are well mudded with slip and joined together inside and out. A thick slab bottom is added. The bottom is dimpled in to create a "foot" Now off to a plastic bag until next time. |
|
G
GROG
Posted
posted
on
Tue, Apr 2, 2013 3:21 AM
You're having too much fun! :) |
|
L

LoriLovesTiki
Posted
posted
on
Tue, Apr 2, 2013 2:59 PM
This is the first tale I have heard of someone doing clay work on vacation! Amazing! I like to read when I have down time on vacation. Or drink...... Never thought about bringing along some clay! |
|
D
danlovestikis
Posted
posted
on
Tue, Apr 2, 2013 3:29 PM
Thank you so much. I loved the photo step by steps. I've never tried this but someday I will. Very nice shrunken heads with lots of character. Fun and more fun. I guess it's OK for you to go on vacation when you come back with such cool things. Wendy |
|
T
tigertail777
Posted
posted
on
Tue, Apr 2, 2013 4:31 PM
I loved the step by steps too Mike, looks like yer having a blast. :) |
|
QK
Queen Kamehameha
Posted
posted
on
Thu, Apr 4, 2013 2:15 PM
Nice!!!! I love em!!!!!!!!!! |
|
L

littlegiles
Posted
posted
on
Thu, Apr 4, 2013 4:42 PM
I love the step by step pics. I doubt I will ever make a mug, but you never know. I really just enjoy watching projects progress. Ok, enough small talk. Were is the update? :) Dale |
|
S

swizzle
Posted
posted
on
Fri, Apr 5, 2013 12:28 AM
It's a good thing you already have the word 'Mad' in your name, because Crazy is already taken. :D |
|
M
MadDogMike
Posted
posted
on
Sat, Apr 6, 2013 5:07 PM
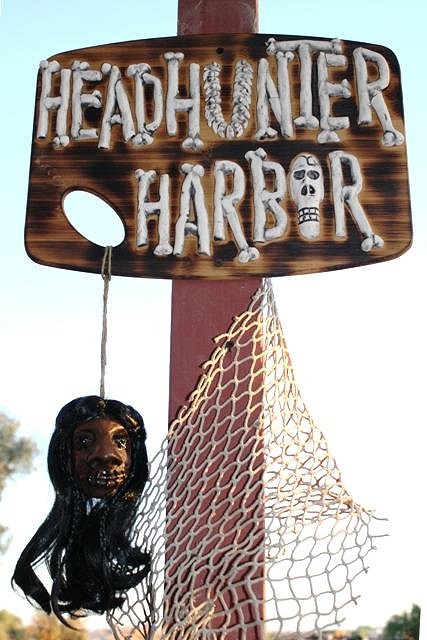
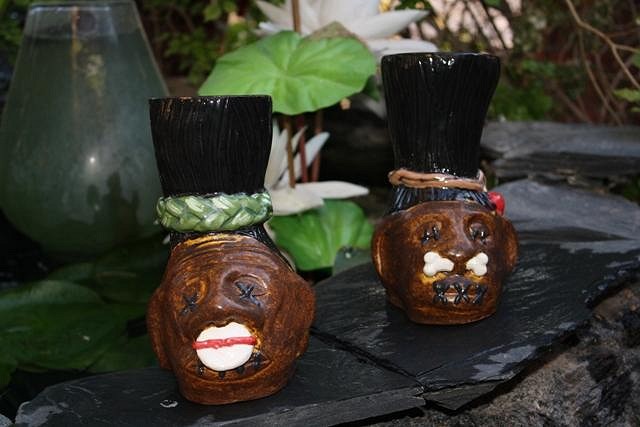
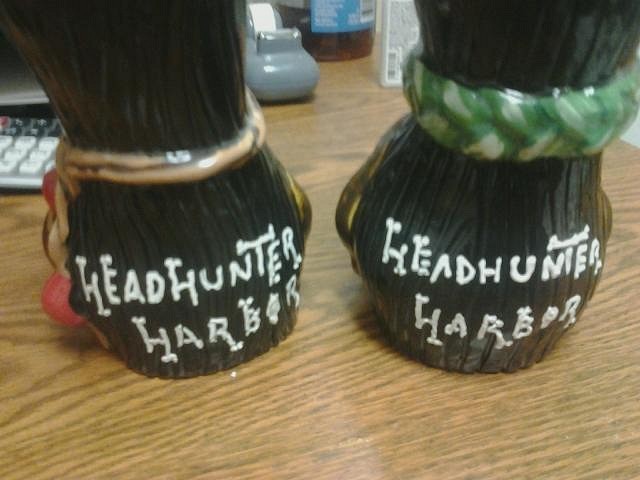
I am having too much fun! :D Dale, here's your update - Thanks to Capt R.H. Falernum's Tiki Bar Name Generator, I have a new name for my Tiki Deck: Headhunter Harbor. It goes well with the several Polynesian weapons that decorate the deck. It also goes well with the pirate ship anchored in the harbor. The mugs go with the theme, as does the new sign. |
|
C
cy
Posted
posted
on
Sat, Apr 6, 2013 5:52 PM
Creepy-Cool new work MDM, especially like the multi-creative boney sign! |
|
H

hang10tiki
Posted
posted
on
Sat, Apr 6, 2013 6:55 PM
Genius |
|
L

littlegiles
Posted
posted
on
Sat, Apr 6, 2013 7:44 PM
Ahhhhhh...I feel much better now. Thanks Mike. Love what you have done with the shrunken heads so far. I was wondering why they mugs will take so many firings. Could you fill us in on what you have planned? Inquiring minds want to know. :) I love the new sign and the spinal "u" is really clever. Did you do some work to that shrunken head on the sign? I went and looked and what they have on their site doesn't look nearly as good as what you having hanging from the sign. Dale |
|
M
MadDogMike
Posted
posted
on
Sun, Apr 7, 2013 8:50 AM
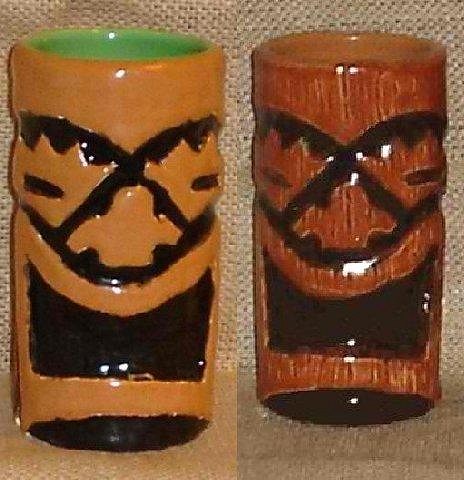
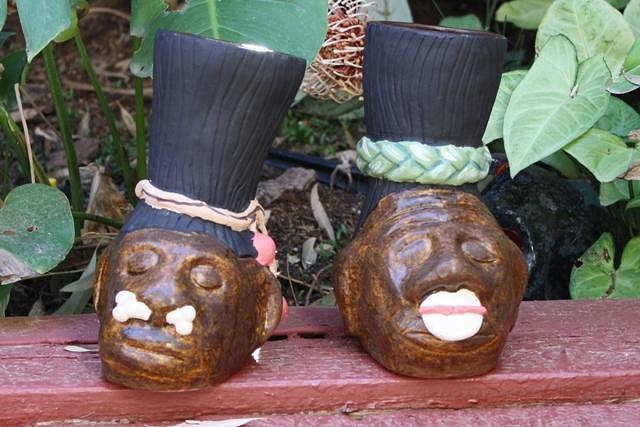
Cy, Jon & Dale – Thank you :) As far as the firings, I’ll see if I can’t explain that without getting too technical and boring. Different types of glazes have different characteristics, pros and cons. Regular glazes go on with 2 or 3 coats, when they fire they come out shiny and glossy. They range from transparent to opaque. Transparent glazes pool in the recessed areas so they are darker there and “break” or get thinner and lighter over higher spots. They automatically give shadows and highlights, color variations. The more opaque glazes are solid colors with little variation, they cover up texture and detail. Here’s a good example (my first ceramic project) of the difference between opaque glaze on the left and transparent glazes on the right. The transparent glaze accents the wood grain texture while the opaque completely covers it. Regular glazes also “move” or spread a little when they are fired and bleed into each other. I don’t like the available black transparent glazes and the opaque would cover the hair detail so I needed to use black underglaze for the hair. Underglazes come out of the kiln with dull colors and a matte finish, you need to put a coat of clear over them to make them shiny and make the colors vivid. But they don’t “move” and can be used to paint tiny details. The mugs get fired once without any glaze to harden the ceramic. I brushed a semi-transparent on the face, the black underglaze on the hair, and did the accents (hair ties, beads, etc) with underglaze so the colors won’t spread. Then I fired them a second time. Next, I’ll brush glossy clear glaze over the underglaze and fire them a third time. As long as there are no glaze skips or pinholes they will be done. Except the one on the right with the shell disk nose ornament. I will brush mother-of-pearl luster on the shell and fire it one more time at a lower temp (about 1000F instead of 1800F) to give the shell an iridescent look. |
|
L

littlegiles
Posted
posted
on
Mon, Apr 8, 2013 7:18 PM
Thanks Mike, that really helped me a lot. The only kiln experience I have is applying china paints to porcelain pieces and I would sometimes do multiple firings to build up shading and color. I have never worked with glazes and such and your explanation was super! Thanks. I'm hoping once the move into the new home is complete I can break out my kiln again and play around. It is a really small kiln, but might be fun to experiment with. The shrunken heads are looking great. I was wondering what the white item was on the one skull and just couldn't tell from the pics until you said the "disc ornament" and now it is really clear. Dale |
|
L

LoriLovesTiki
Posted
posted
on
Mon, Apr 8, 2013 7:31 PM
Mike, Thanks to your post I just realized I need a transparent glaze for a project I'm working on. It's a plate with an overall pattern pressed into it. I'm looking for a monochromatic look wasn't sure what to use for a glaze. So thanks for that info, Mike! Off to search the art room for transparent glaze. Fingers crossed I can find some! |
|
M
MadDogMike
Posted
posted
on
Tue, Apr 9, 2013 10:06 AM
Glad to help Dale & Lori :)
|
|
L

littlegiles
Posted
posted
on
Wed, Apr 10, 2013 5:32 PM
Honest Mike, not procrastinating, just can't do much in the fun, crafty way until i actually get finished working on the new house and get moved in. I get a severe tongue lashing if I stop construction. HAHA Those severed heads looks so different with the transparent glazes on them. WOW! Love the bone lettering on the back. Dale ps: dont encourage me too much to start doing things with the kiln because you will get really sick of all the questions. :) |
|
RH
Robb Hamel
Posted
posted
on
Thu, Apr 11, 2013 8:19 PM
The mugs are flippin' awesome!! |
|
D
danlovestikis
Posted
posted
on
Thu, Apr 11, 2013 9:01 PM
Mike you do so much fun stuff. I think I recognized the CY glaze on the faces. Today I learned from both GROG and you. It never ends. I'm counting the days, Wendy |
|
T
TikiAno
Posted
posted
on
Fri, Apr 12, 2013 11:31 PM
Mike, love these pieces, and always great to read (and see) your step by steps. I love the glaze on the faces of the shrunken heads- while Wendy can (of course) recognize it, I sure didn't. But I sure did like it- it sort of looks like a matte Temmoku? Great name for the bar-, too. I love playing with that name generator. Thanks for posting, and look forward to more! Okay, I just went back and realized the faces were fired a few times, thus I retract my glaze prediction, and am once again bewildered. :) In a good way, that is. [ Edited by: TikiAno 2013-04-12 23:33 ] |
|
Z
zerostreet
Posted
posted
on
Sat, Apr 13, 2013 5:14 PM
Awesome work on that shrunken head mug! The thought of cutting the sculpt in half and putting it back together frightens me! :o |
|
M
MadDogMike
Posted
posted
on
Sun, Apr 14, 2013 1:39 PM
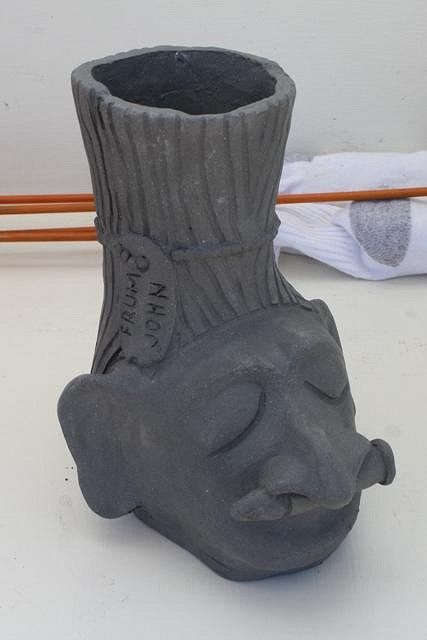
Dale, the clear glaze really brings out the colors on the underglazes. You know I'll give you all the free advise (and woth the price) you want when you are ready to start firing up. Had a great and relaxing time at Mojave Oasis, got to catch up with some old friends and meet some new ones. I took some clay to play with and made Lil Loser #5, John Frum. He has some Cargo Cult influence including the M1 30-06 shell as a nose ornament and the dog tag hair tie. John Frum is a name associated with the Cargo Cult. His dog tag chain is made from tiny clay balls that do not have a lot of surface area and a few are starting to pop off it it dries. That may prove to be problematic :) |
|
L

littlegiles
Posted
posted
on
Sun, Apr 14, 2013 4:16 PM
Loving the new guy! Very creative with the shell through the nose and the dog tags. Hope you can keep the "chain" from falling off as it dries. Was wondering if perhaps instead of applying all those individual balls it might be easier to press something into the clay to simulate it? Could you use a small pen cap or pour spout to create bumps? Just thinking off the top of my head. Dale |
|
C
Canvas
Posted
posted
on
Sun, Apr 14, 2013 5:30 PM
John Frum is adorable! Is he named after the Cargo Cult messiah? |
|
M
MadDogMike
Posted
posted
on
Sun, Apr 14, 2013 9:00 PM
Dale that would have been a great technique for the chain, just put a small coil around the head and press it with a tool. Not only would they have stuck better, they also would have been very uniform in size. Unfortunately I was camping so it would been difficult to find just the right tool. |
|
M
MadDogMike
Posted
posted
on
Mon, Apr 15, 2013 10:47 AM
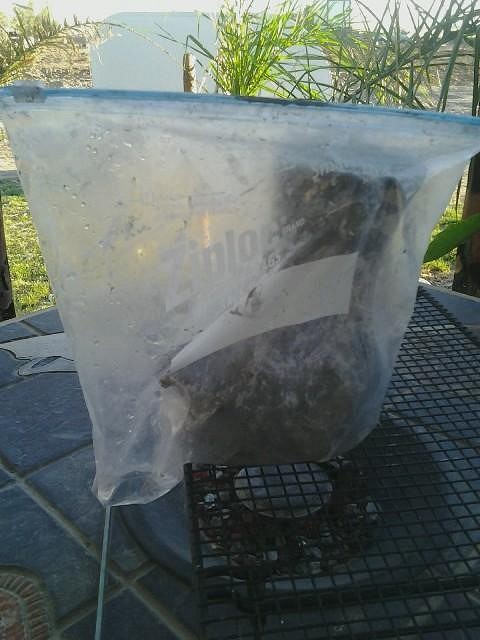
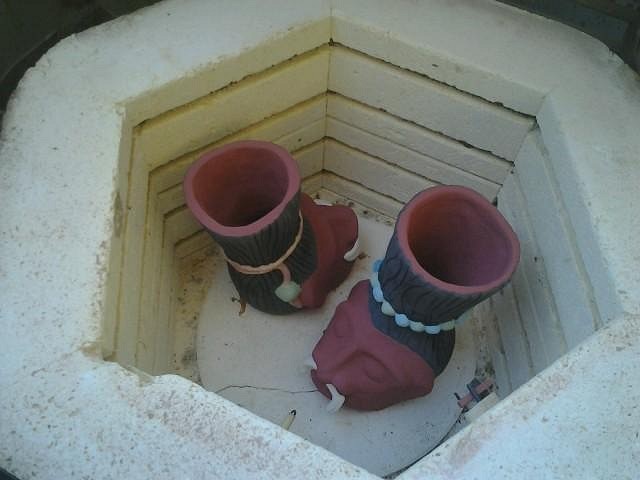
I let John Frum dry too fast and he has developed a death-crack below his chin. I dug out the crack and I am trying something new; I sealed him in a bag with some excess water and set it so he wasn't sitting in the water (in the bottom left corner of the bag) I set it outside where it will be nice and warm today (in the 90s) The plan is that it will get nice and steamy in the bag and re-hydrate the clay. Hopefully I will be able to save him. Lil Losers #2&4 went into the kiln today:) |
|
G
GROG
Posted
posted
on
Mon, Apr 15, 2013 11:25 AM
Paperclay!! Has been lifesaver for GROG. |
|
G
GROG
Posted
posted
on
Mon, Apr 15, 2013 11:26 AM
Damned Tiki Central double post! [ Edited by: GROG 2013-04-15 11:58 ] |
|
L

littlegiles
Posted
posted
on
Mon, Apr 15, 2013 11:44 AM
Hate to hear about the issue with John. Hope your trick works. The other two look very happy sitting in the kiln. Can't wait to see them come out. Dale |
|
D
danlovestikis
Posted
posted
on
Mon, Apr 15, 2013 11:48 AM
I did this and then filled it with your Magic Mend. It worked half the time. Good luck, best wishes, fingers are crossed! Wendy |
|
M
MadDogMike
Posted
posted
on
Mon, Apr 15, 2013 8:55 PM
Well I'm not a complete failure, I can always serve as a bad example :lol: The water in the bag experiment was an utter failure. Even though the pool of water was away from the clay, the condensation ran down the bag and soaked the bottom of the mug to a soggy mess. I did surgery on John Frum and removed his bottom (the medical term is "buttectomy") then replaced it with a complete new one. Now I'll tuck it away in a bag for several days to see if the moisture will equalize
|
|
UT
uncle trav
Posted
posted
on
Tue, Apr 16, 2013 3:57 AM
Keep us posted doc. Keep up the good work. |
|
L

littlegiles
Posted
posted
on
Tue, Apr 16, 2013 7:10 AM
I hope the buttectomy is a success. :) Dale |
|
T
TikiAno
Posted
posted
on
Tue, Apr 16, 2013 10:27 AM
Mike, a wet sponge might work as well, with a little less water and might create a small ecosystem in there, helping out the repair? |
|
H

hang10tiki
Posted
posted
on
Tue, Apr 16, 2013 10:34 AM
Time to suture the ars back on with twine Nevermind :) |
|
M
MadDogMike
Posted
posted
on
Thu, Apr 18, 2013 9:03 AM
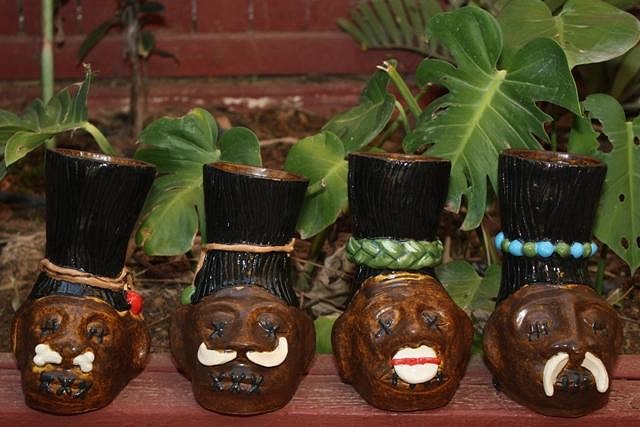
Thanks to your well-wishes, John Frum looks like he may be recovering after his arse transplant. Letting him dry ever so slowly. Lil Losers #1-4 are finished I decided since #5 was named, the rest should have names too. Left to right: |
|
L

littlegiles
Posted
posted
on
Thu, Apr 18, 2013 7:12 PM
SWEET!! Perfect mugs for your lounge area. Still keeping my fingers crossed for John Frum. Dale |
|
T
tigertail777
Posted
posted
on
Thu, Apr 18, 2013 10:41 PM
There was once a head named John Come on Mike you can give a snake in a basket mouth to mouth resuscitation, surely you can do surgery on an ass. :wink: Love how the rest of the little tribe turned out, I gotta see a picture of someone drinking out of one. :) |
Pages: 1 2 3 4 5 6 7 8 9 10 11 12 13 14 15 16 17 18 19 20 21 22 23 24 25 26 27 28 29 30 31 32 33 34 35 36 37 38 39 40 41 42 43 44 45 46 47 48 49 50 51 52 53 54 55 56 57 58 59 60 61 62 63 64 65 66 67 68 3217 replies

