Tiki Central / Other Crafts
Wendy Cevola - NEW: Frankoma Widow Maker for sale.
Pages: 1 2 3 4 5 6 7 8 9 10 11 12 13 14 15 16 17 18 19 20 21 22 23 24 25 26 27 28 29 30 31 32 33 34 35 36 37 38 39 40 41 42 43 44 45 46 47 48 49 50 51 52 53 54 55 56 57 58 59 60 61 62 63 64 65 66 67 68 69 70 71 72 73 74 75 76 77 78 79 80 81 82 83 84 85 86 87 88 89 90 91 92 93 94 95 96 97 98 99 100 101 102 103 104 105 106 107 108 109 110 111 112 113 114 115 116 117 118 119 120 121 122 123 124 125 126 127 128 129 130 131 132 133 134 135 136 137 138 139 140 141 142 143 144 145 146 147 148 149 150 151 152 153 154 155 156 157 158 159 160 161 162 163 164 165 166 167 168 169 170 171 172 173 174 175 176 177 178 179 180 181 182 183 184 185 186 187 188 189 190 191 192 193 194 195 196 197 198 199 200 201 202 203 204 205 206 207 208 209 210 211 212 213 214 215 216 217 218 219 220 221 222 223 224 225 226 227 228 229 230 231 232 233 234 235 11,234 replies
|
D

danlovestikis
Posted
posted
on
Thu, Feb 15, 2018 8:19 AM
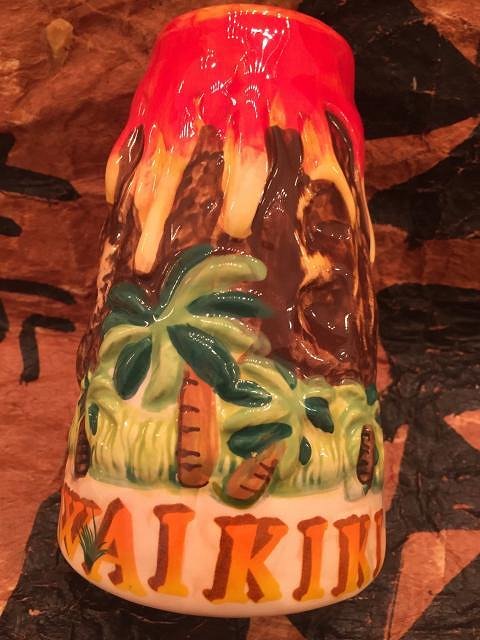
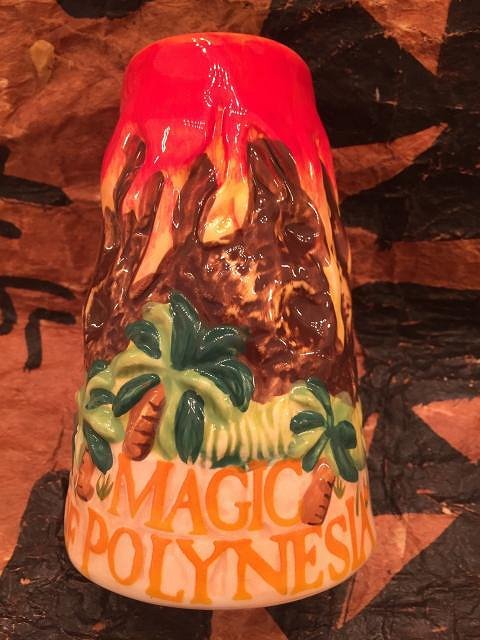
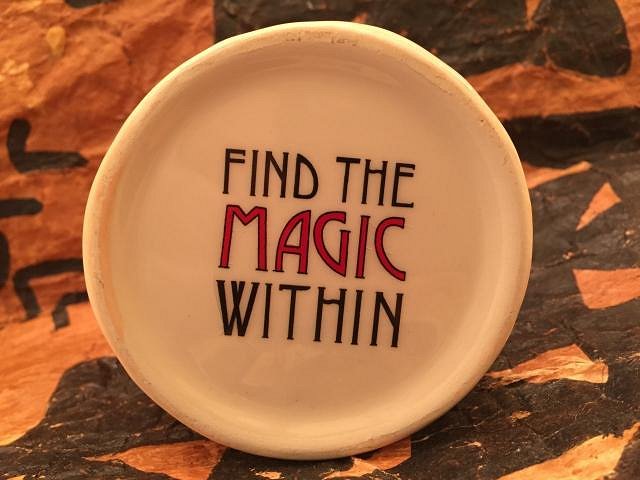
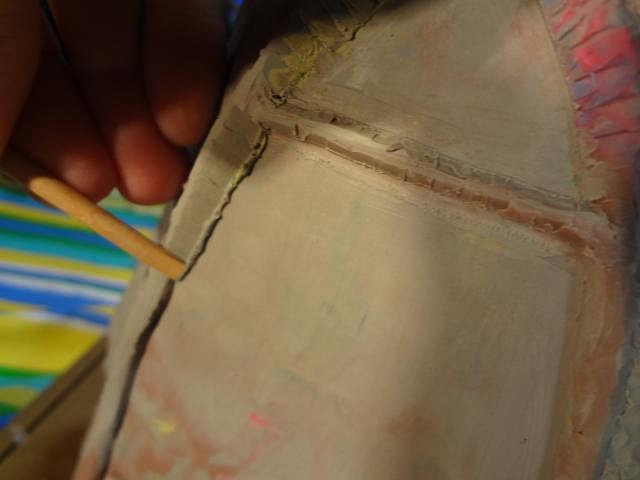
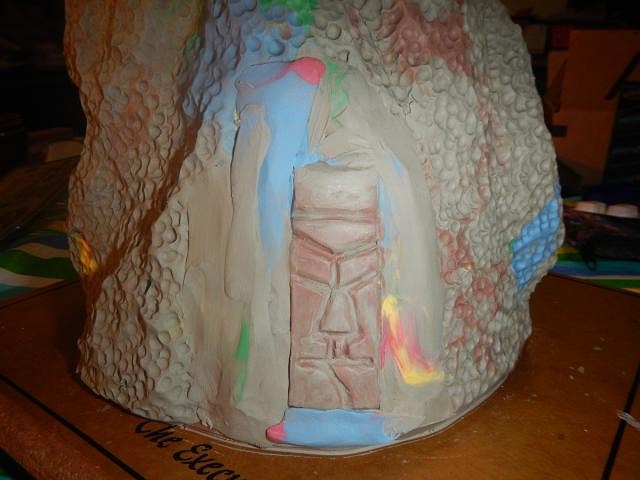
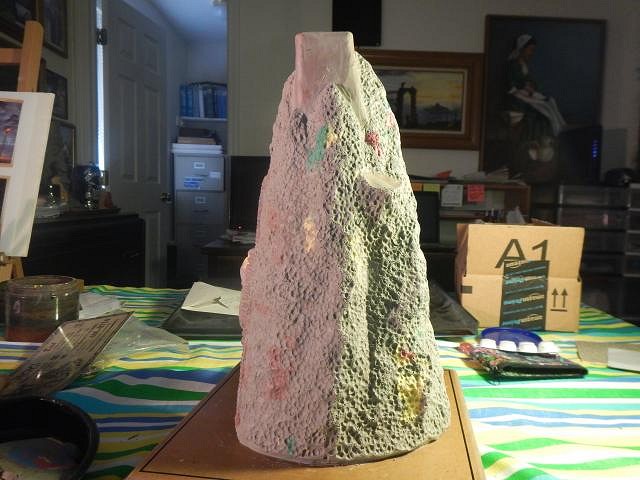
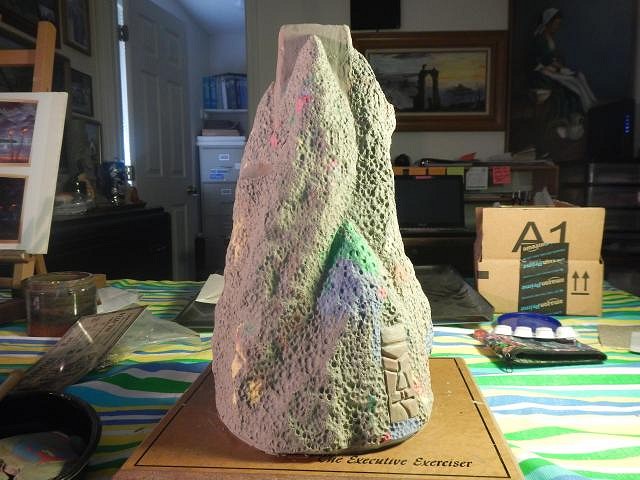
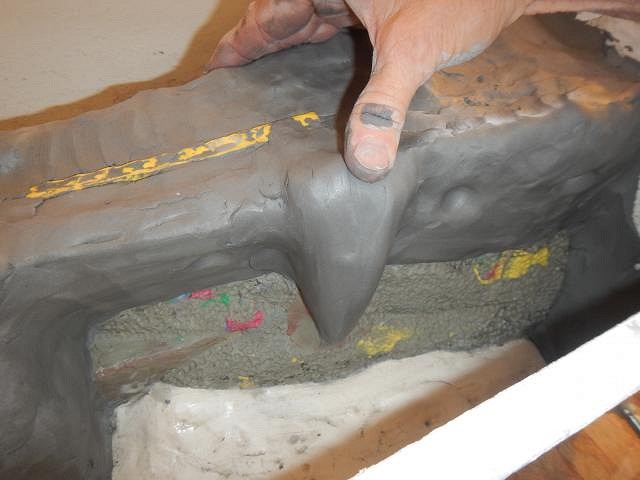
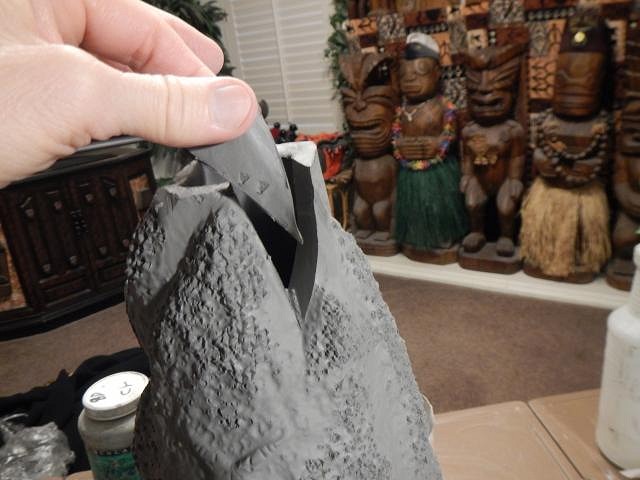
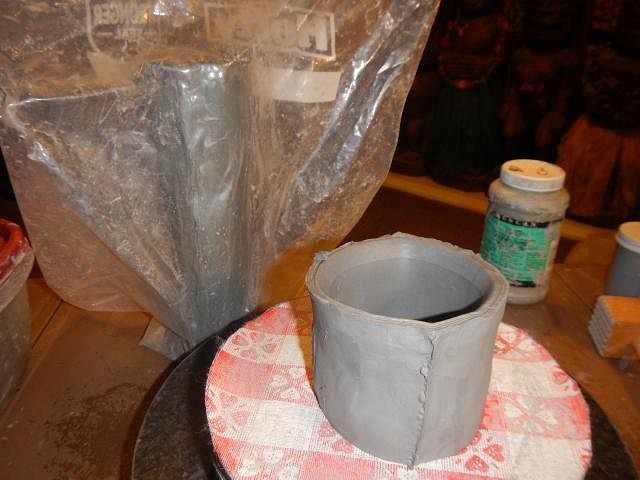
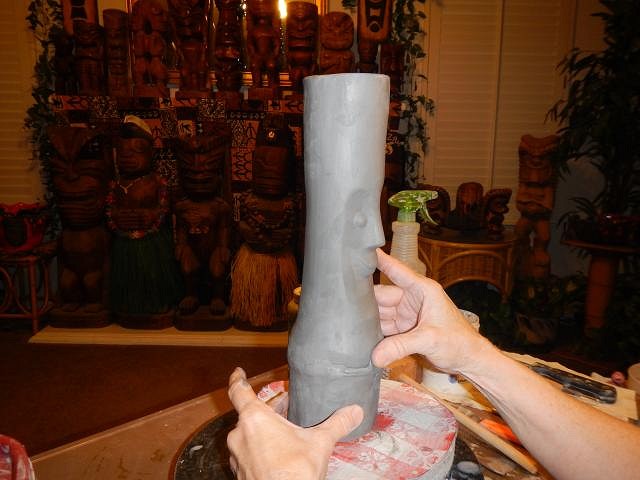
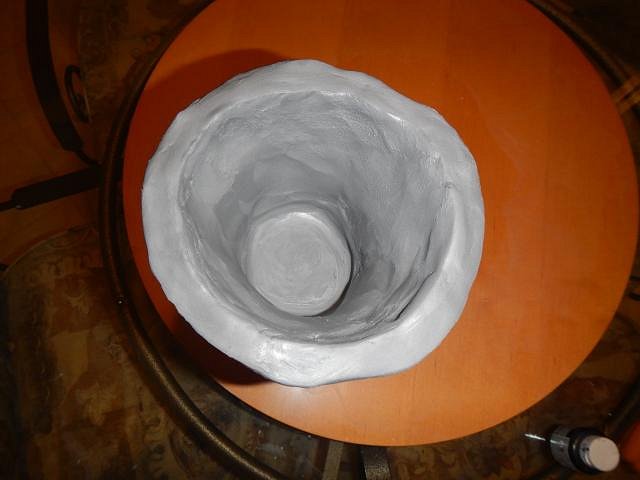
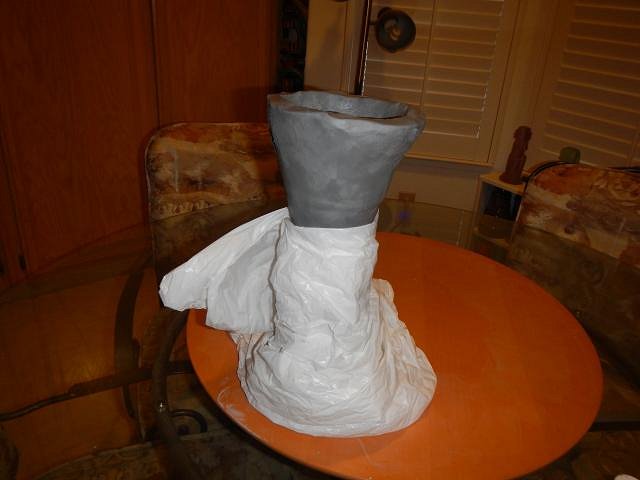
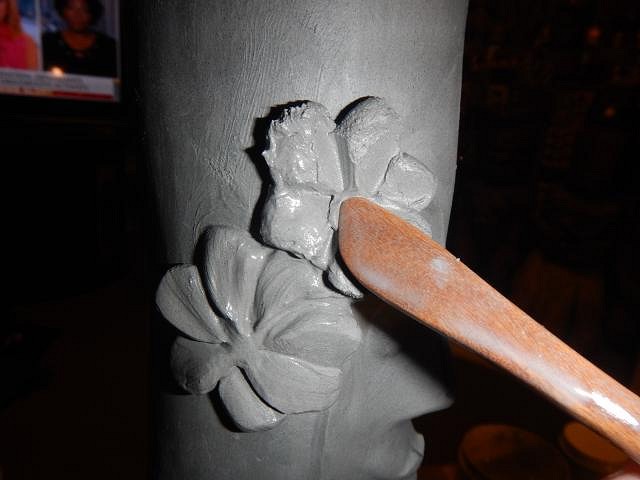
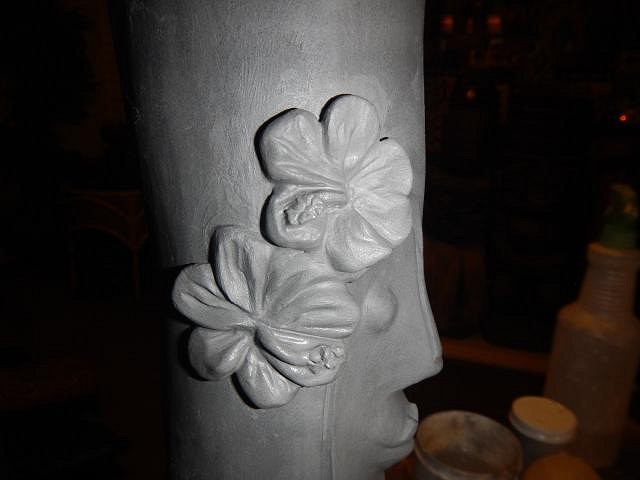
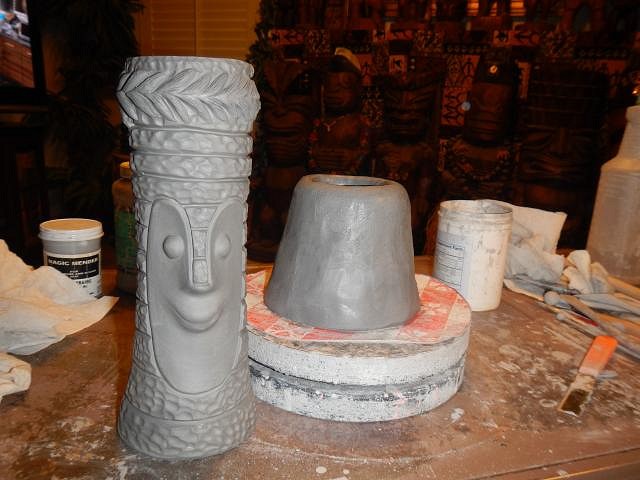
hang10tiki thank you for checking. It is a mystery place but great for the mug. ================================== Sacramento Crawl mug 2018. The photos I am posting now are months old. I've actually cast 55 mugs that I will be sharing. hang10tiki just went to Oahu and one of his "Tiki Finds" was this mug. Such a shock for me. I'm so relieved that I didn't put trees around the bottom of my mug because I'd thought about doing that. I've never seen this mug in the past, does anyone know if it's vintage? The bottom makes it look like a new mug. Horrors! Every piece of this mug has to be free of undercuts for molding. I keep this in mind as I attach the snakes of clay to the volcano. I cleaned it up and did some minor decorations. Close up. ======================================================= Back to my original mug for the crawl. Wherever I add clay I have to attach it so that there are no undercuts or molding it will not work. The plaster breaks off if it is trapped. I cleaned it up and added decorations around the raised part. Close up. At this point I was still thinking about what I would put in the center so I just moved on to fine tuning the surface. I also thought about how is would look when the top was trimmed and that caused me to add more clay and to form it and to add to the detail. I also decided that this tiki was sticking out too far from the volcano's surface so I added clay around him and then did the detailing. This just shows how things evolve over time. Cheers, Wendy PS hang0tiki when I make next years mugs no vacation for you |
|
H

hang10tiki
Posted
posted
on
Thu, Feb 15, 2018 11:21 AM
Hi Wendy This volcano shaped mug was made for the Cheers No vacations during your next mug masterpiece |
|
H

Hamo
Posted
posted
on
Thu, Feb 15, 2018 9:50 PM
Oh, Wendy, you have nothing to worry about; even in its early stages, your mug is far better quality and more artistic than that other Waikiki mug. |
|
D
danlovestikis
Posted
posted
on
Fri, Feb 16, 2018 3:27 PM
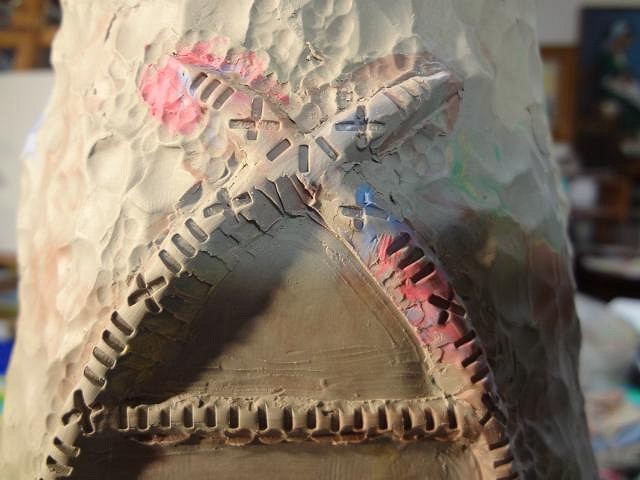
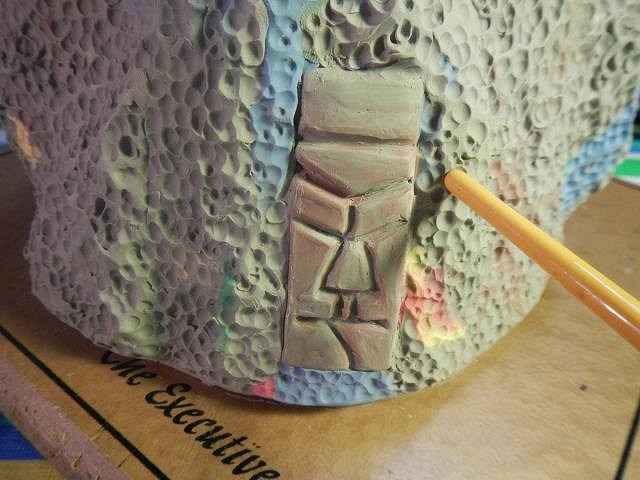
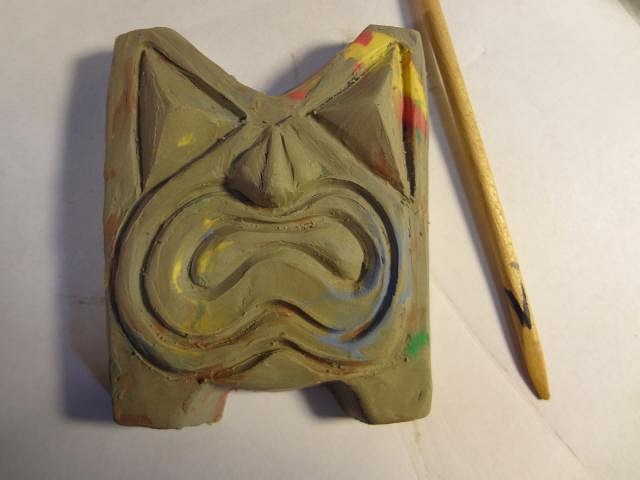
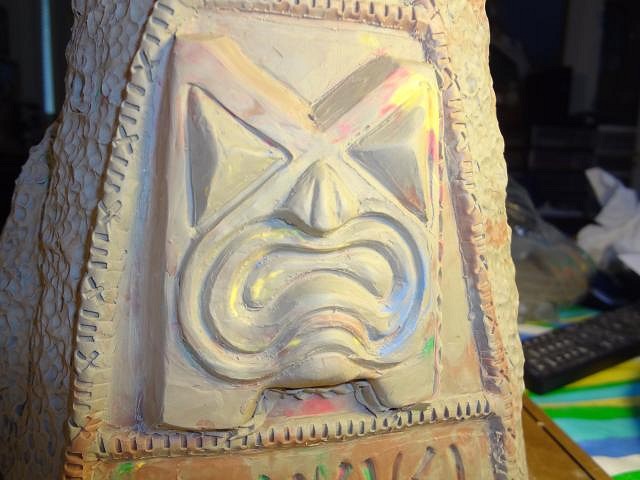
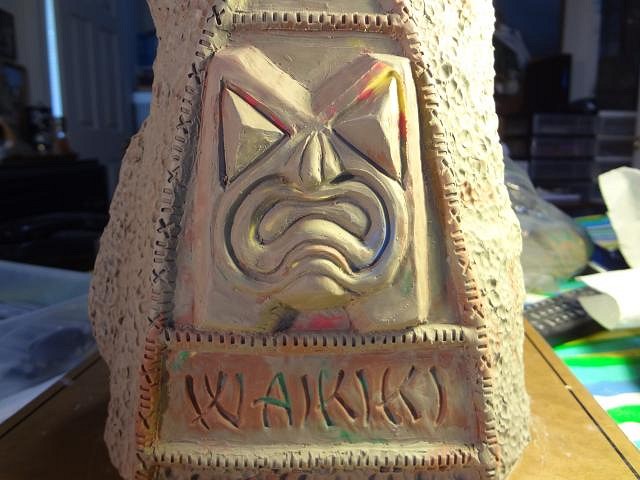
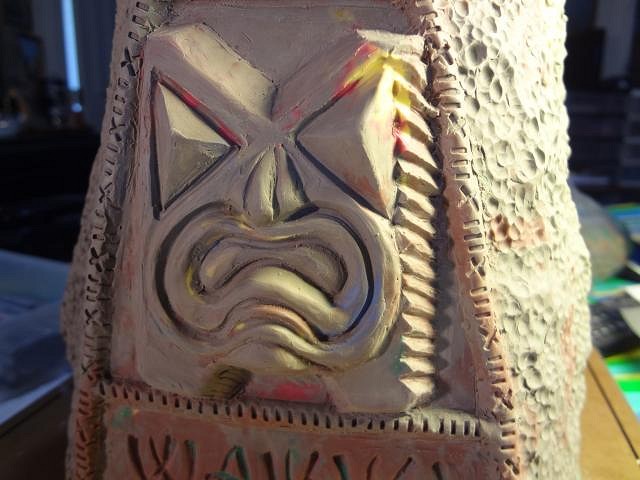
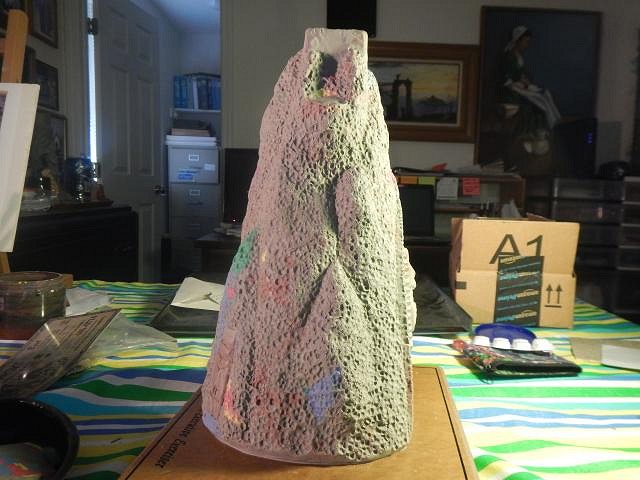
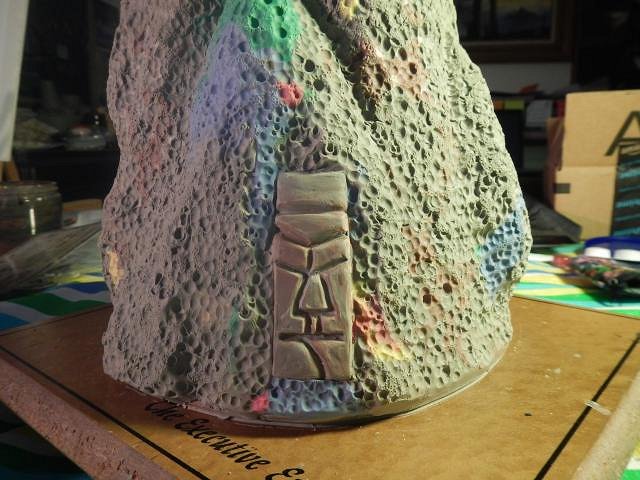
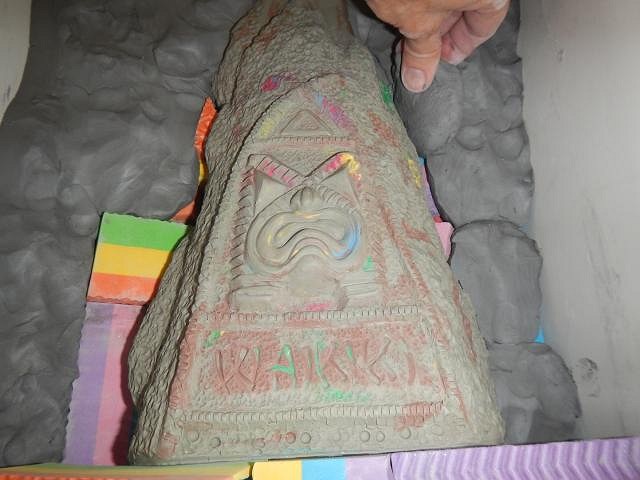
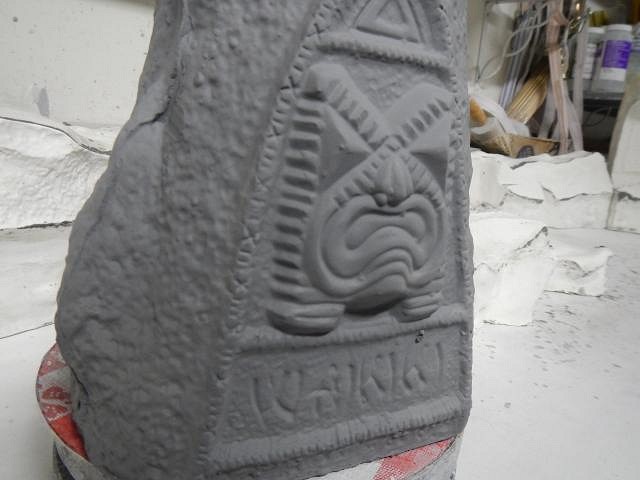
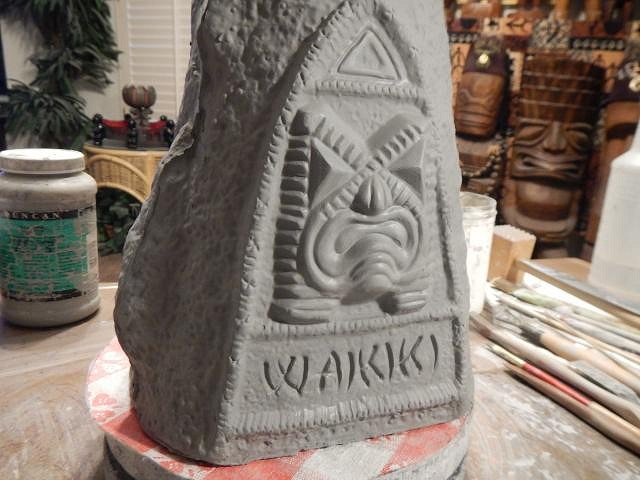
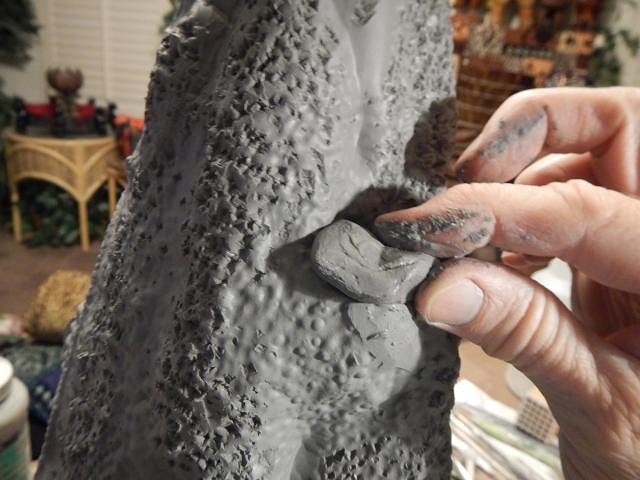
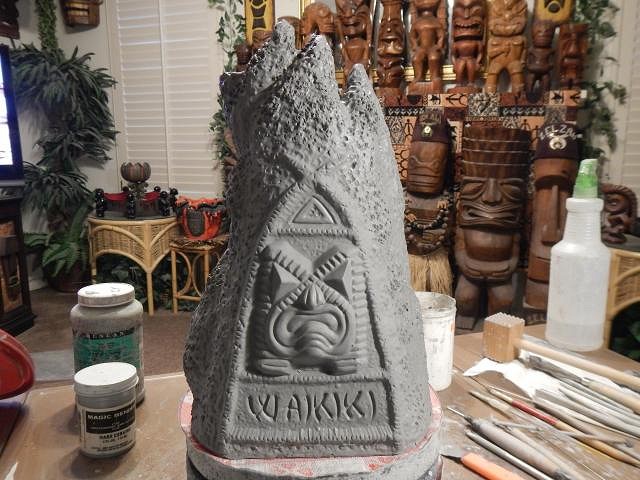
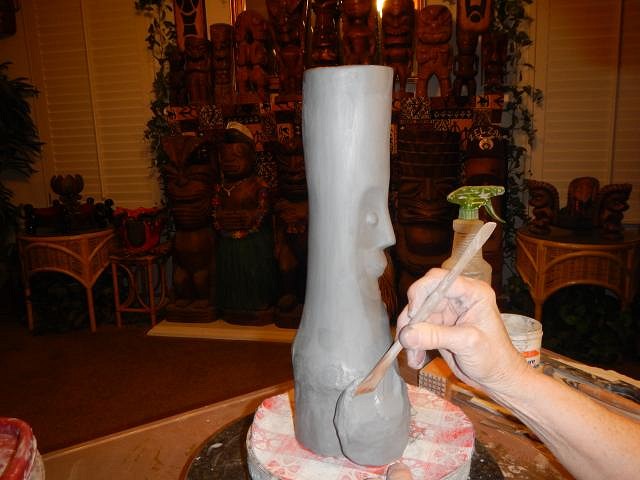
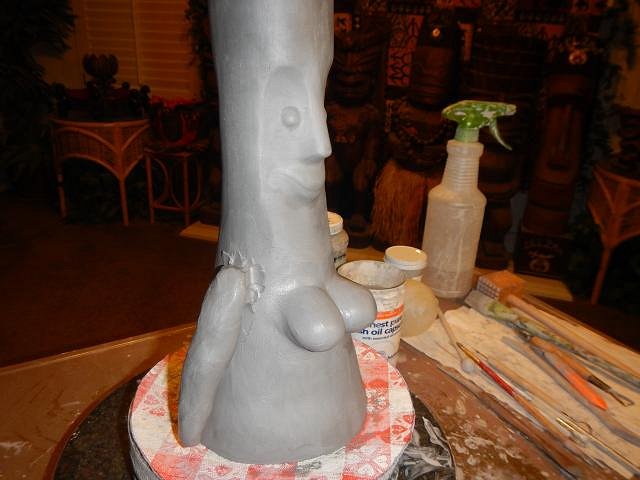
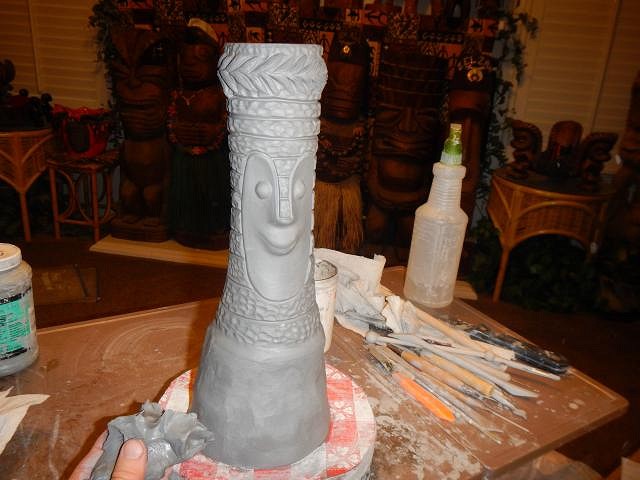
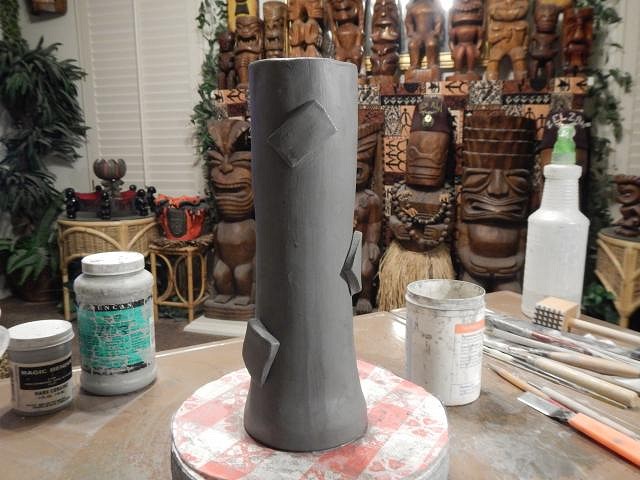
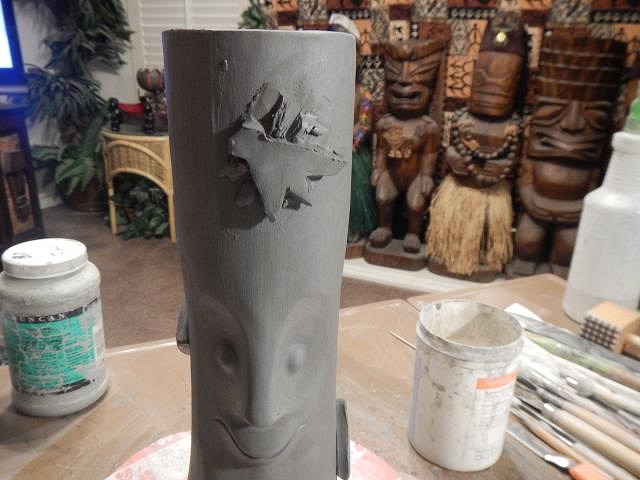
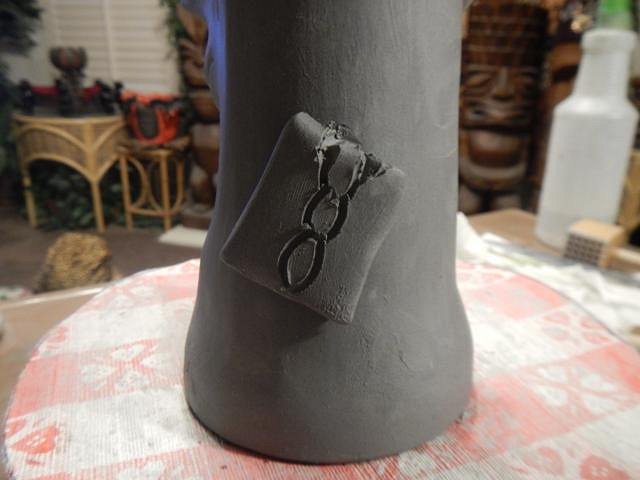
hang10tiki that's a lot of years to have that mug in production and I've still only seen yours. Thank you for finding that out. Hamo thank you that's so very nice to hear. Mine will at least be much larger. It's just a bummer that I thought my volcano would be the first with Waikiki on the front bottom. Oh well. ===================================== Sacramento Crawl mug for 2018 more steps. I wandered around the house looking for the tiki that would look good on the front of the volcano. I found it. Freddie Coester made this cast and gave it to us as a gift many years ago. I think it's impressive and it has a great feel. Thank you Freddie. So first I cut out a piece of clay just the right size to fit in the arch. Then I began to add clay. I think it is now ready to put on the volcano. Just right. When I do the mold I can't let any plaster get behind the pieces so I'll have to seal this tiki in place. I made little snakes and pressed them into place. Then I begin to clean it all up. Done and ready for more detail. I wasn't looking straight on as I carved the side. It became slanted. This will not work for a mold that has to be pulled straight off. Time to smooth it out and to start over. Cheers, Wendy [ Edited by: danlovestikis 2018-02-16 15:29 ] |
|
D
danlovestikis
Posted
posted
on
Sat, Feb 17, 2018 8:59 AM
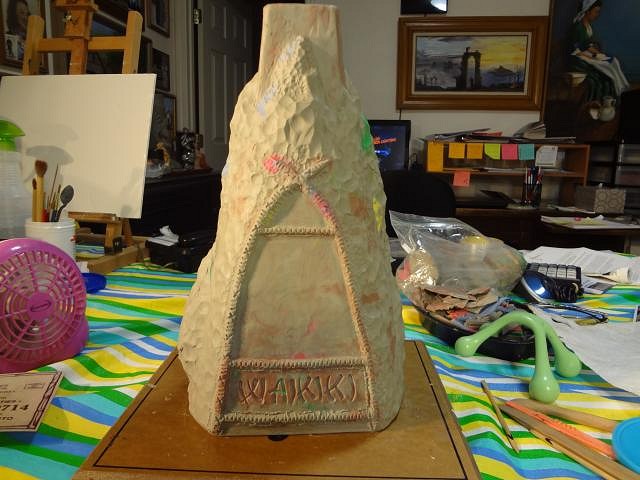
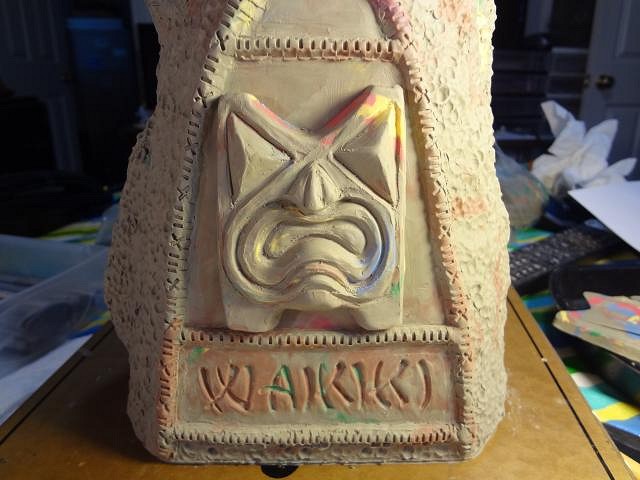
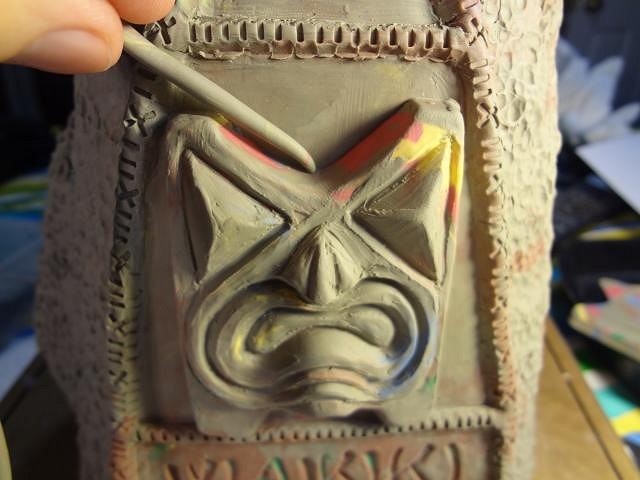
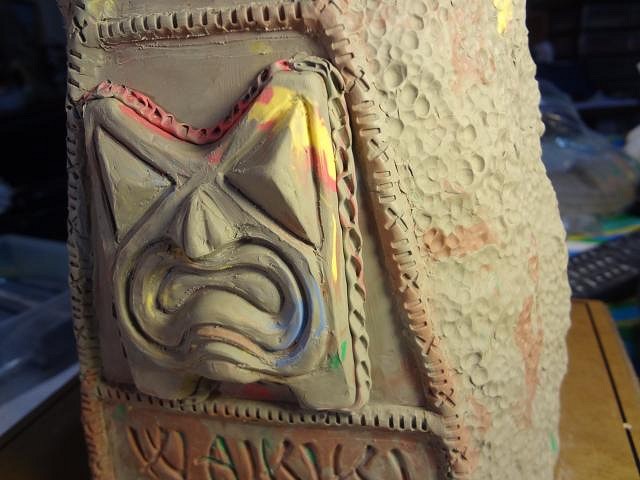
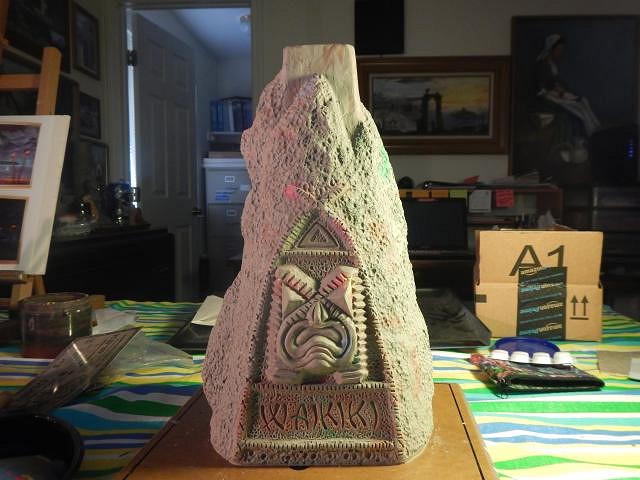
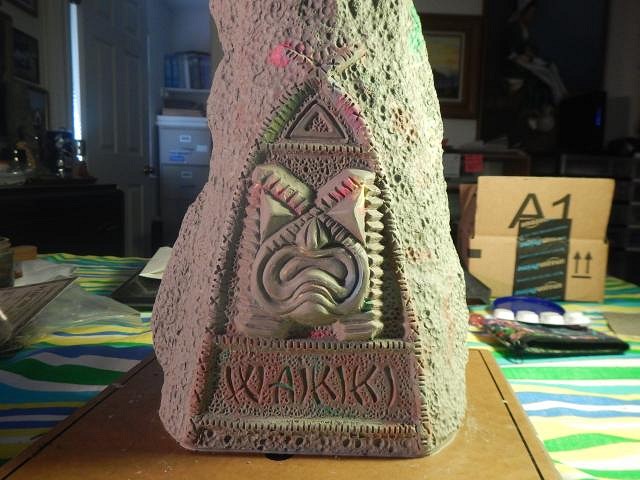
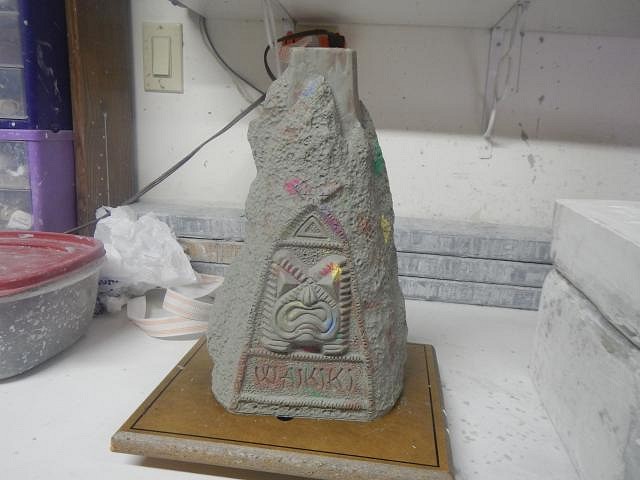
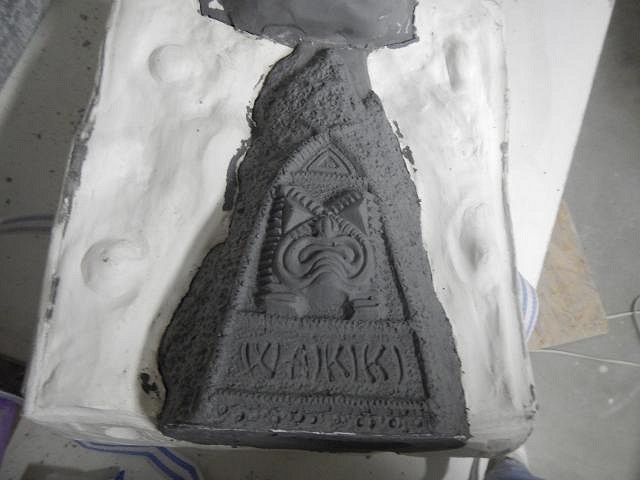
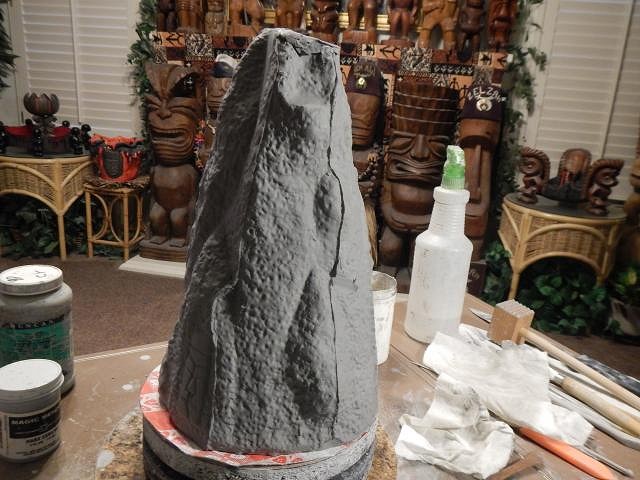
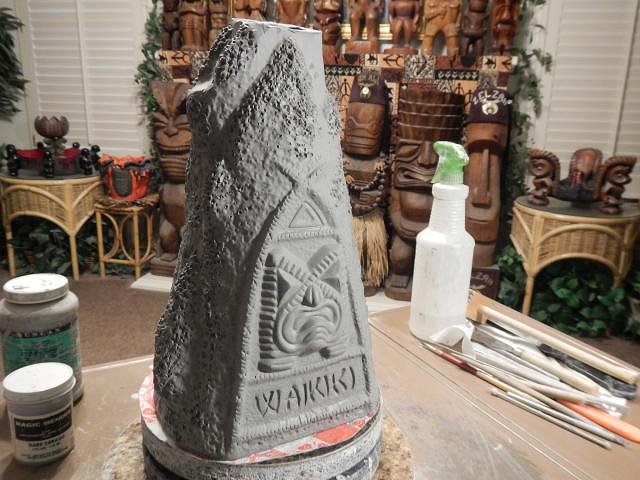
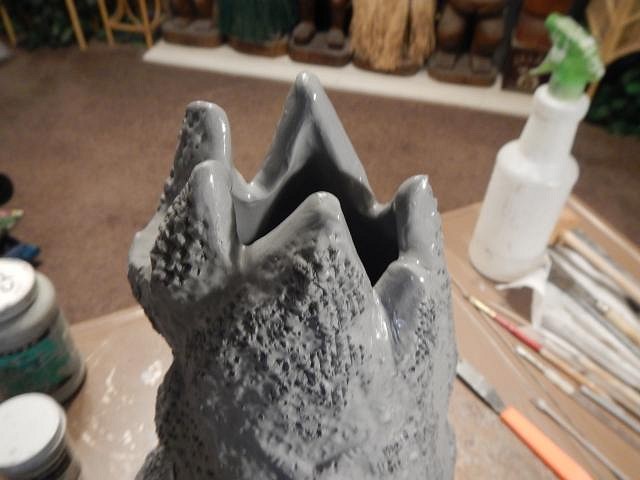
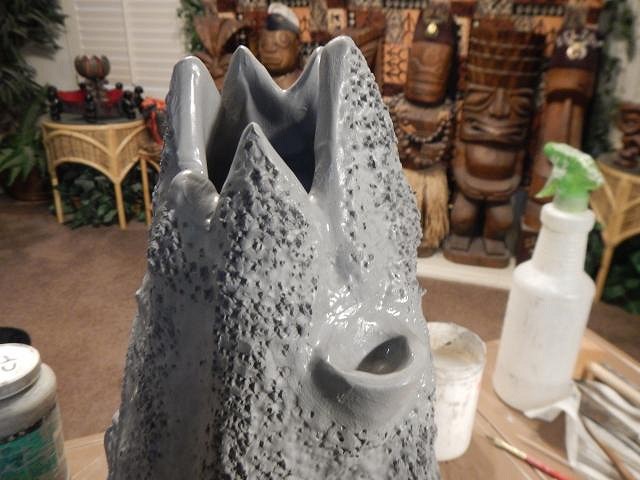
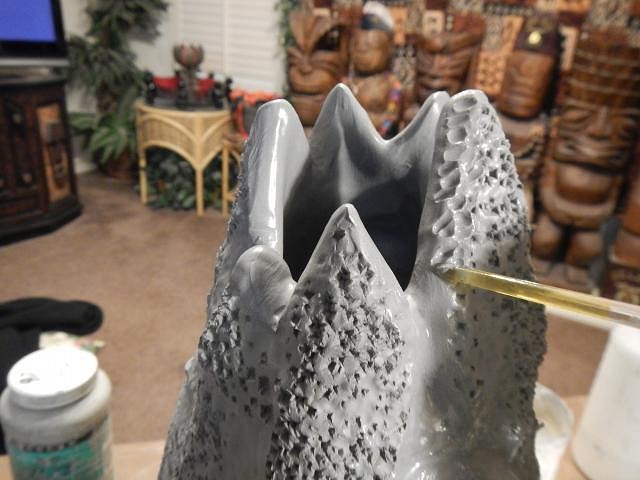
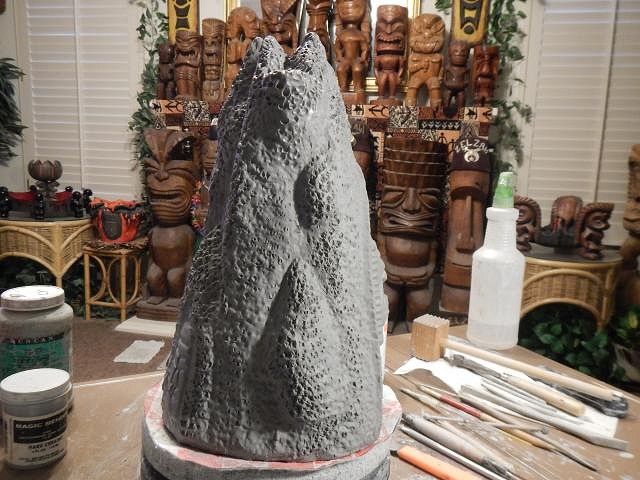
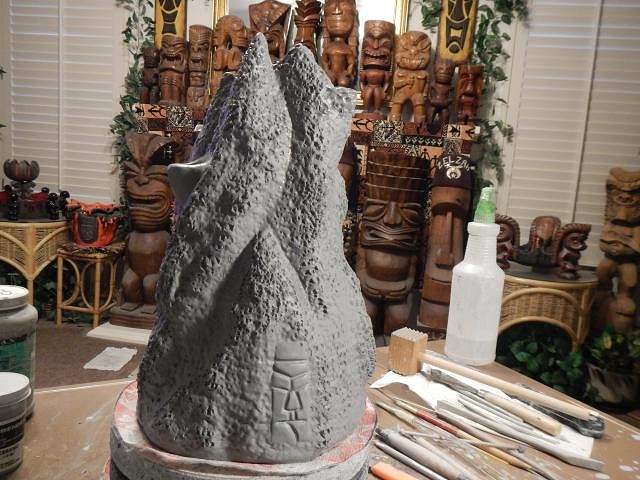
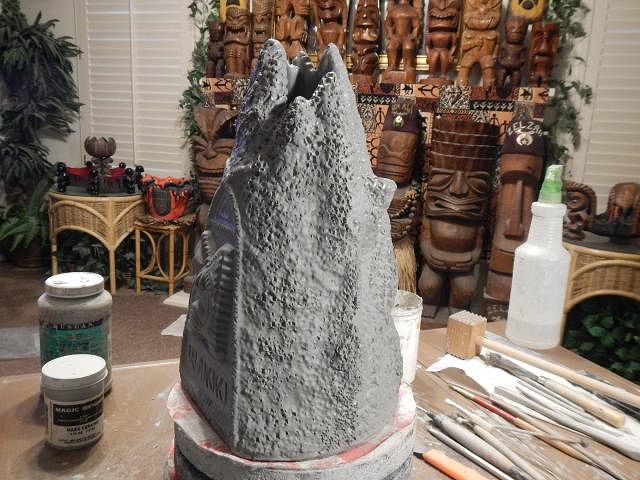
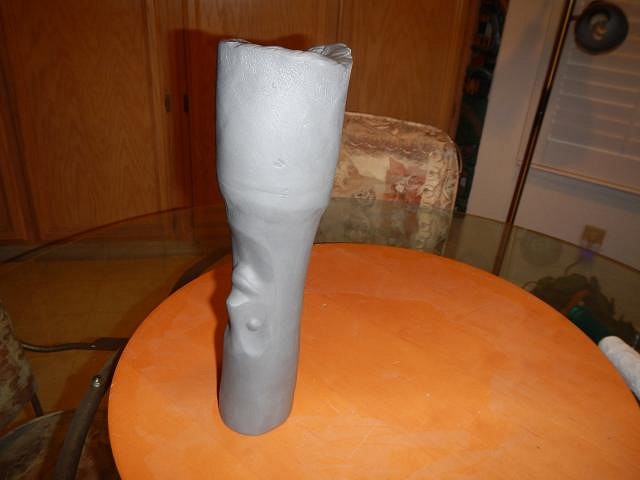
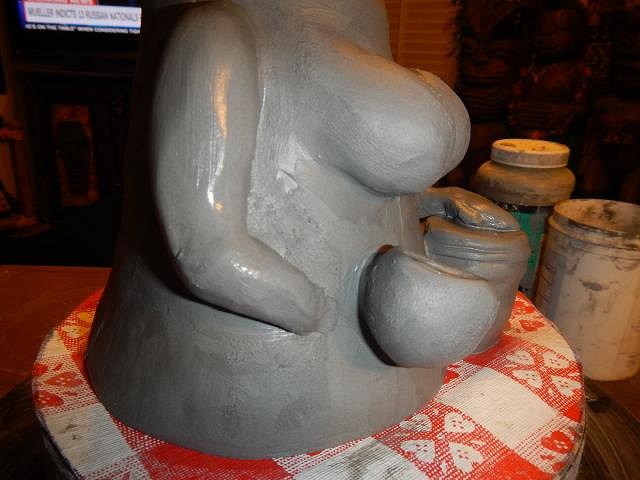
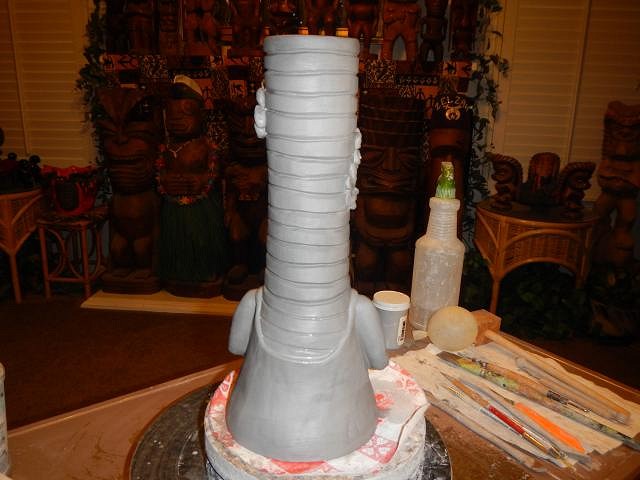
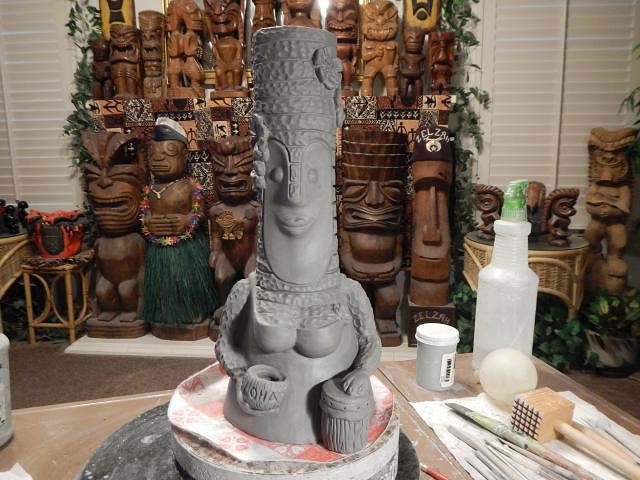
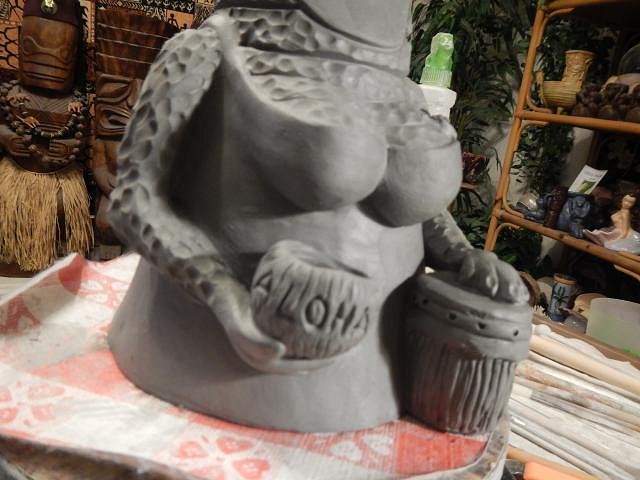
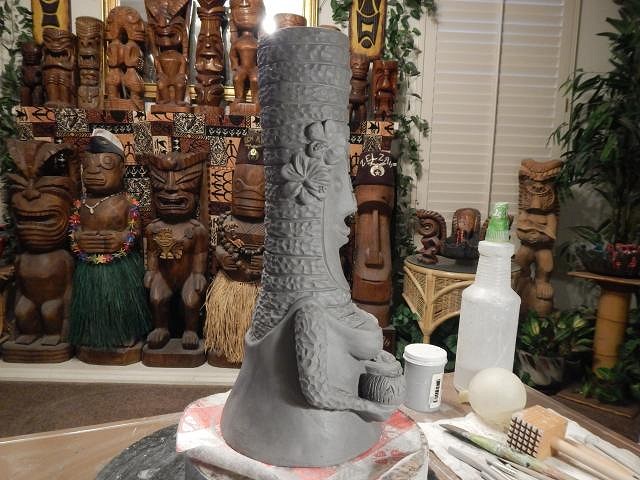
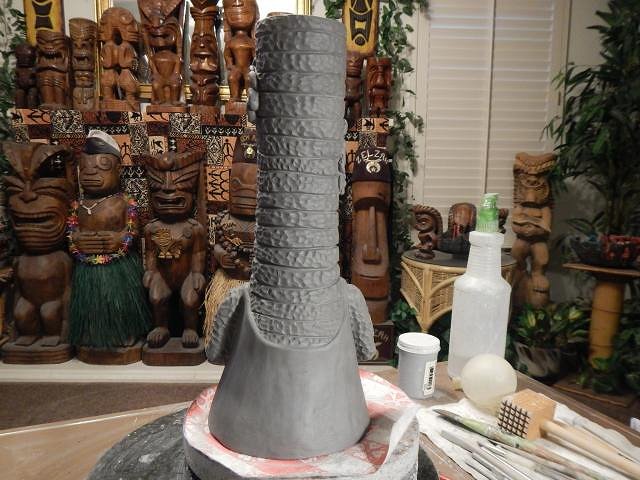
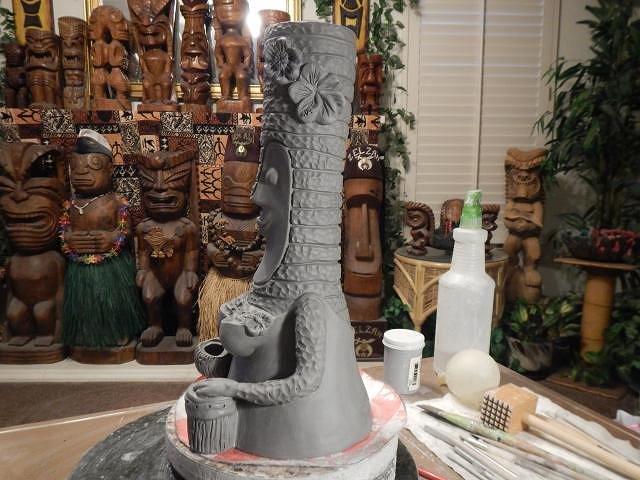
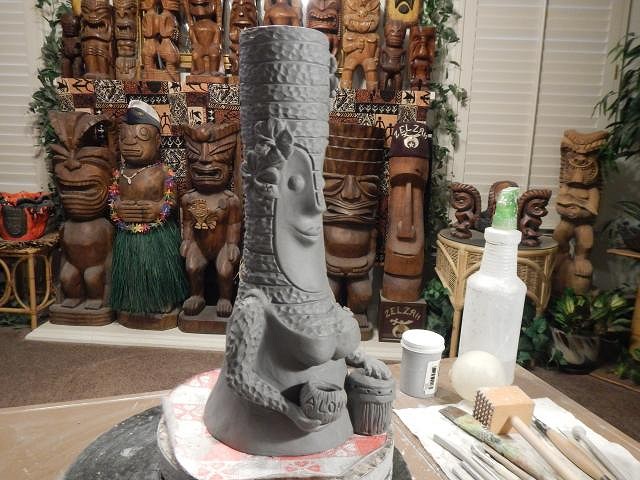
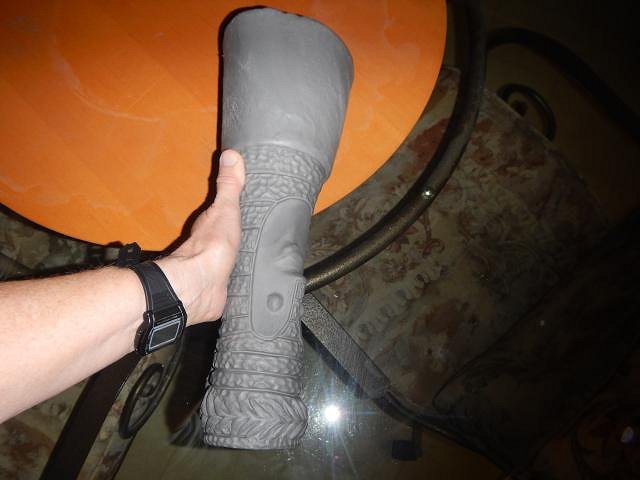
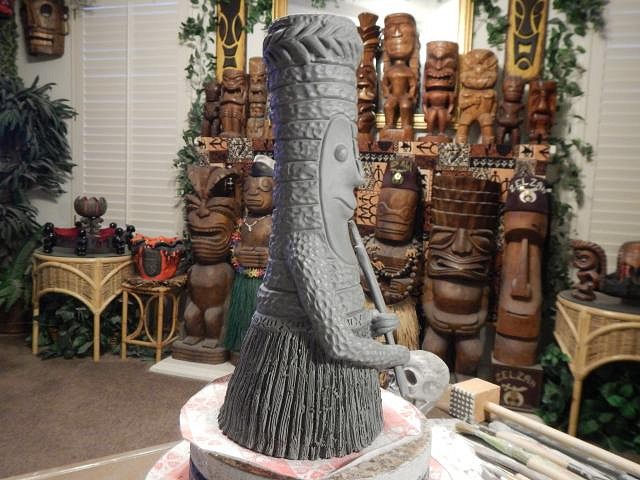
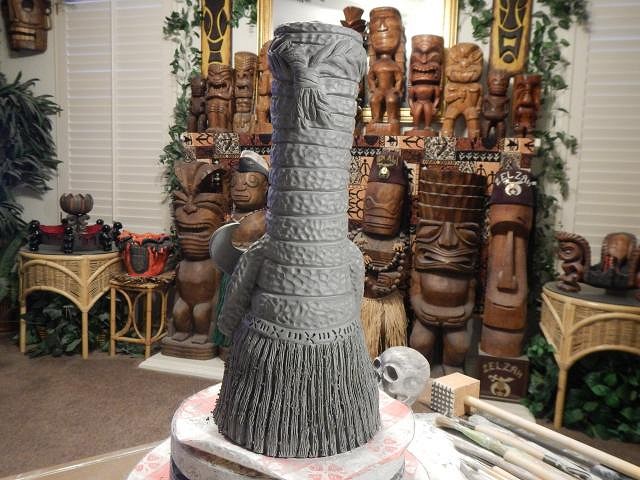
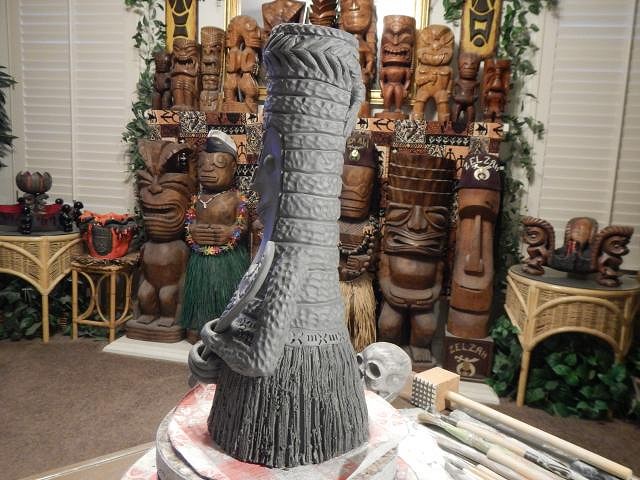
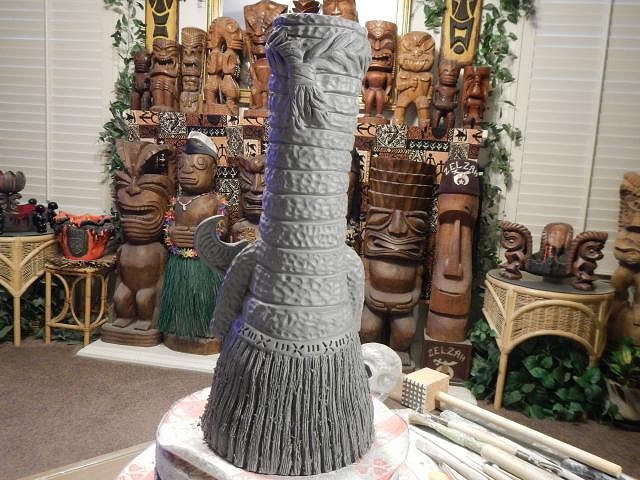
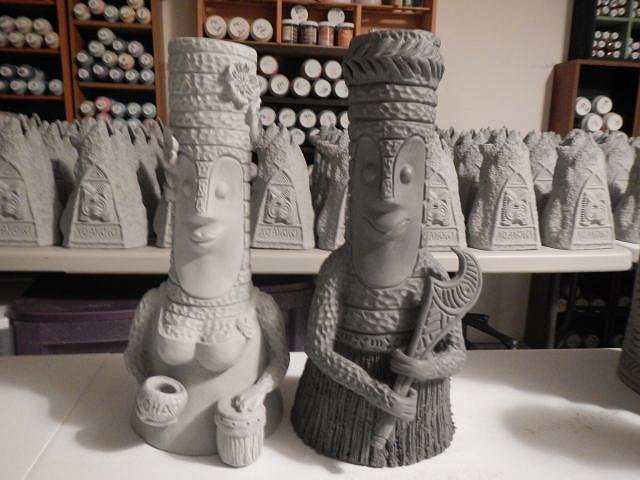
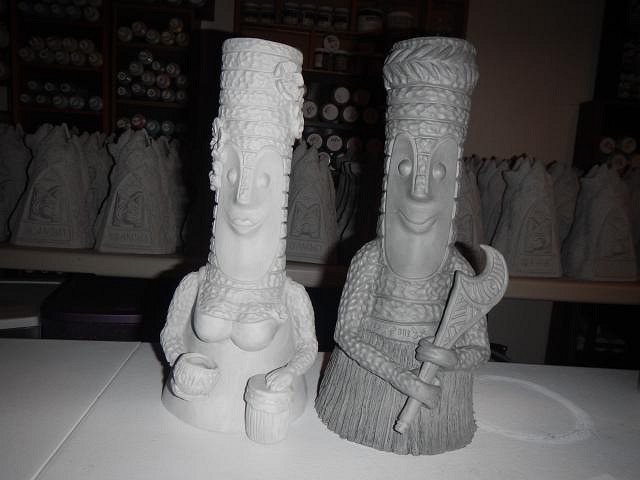
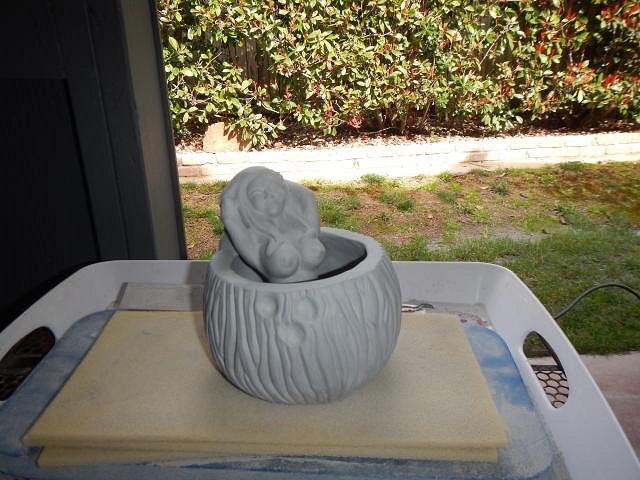
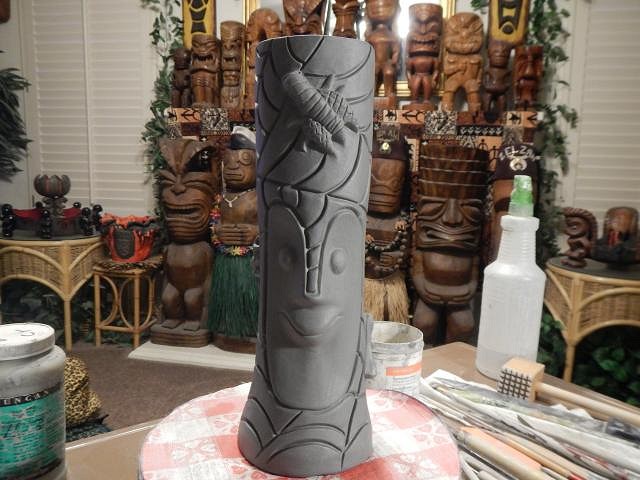
PART FIVE: the finished sculpt for the Sacramento Crawl mug 2018. Jeremy Sherlock asked for a volcano. Dan and I located an old closed tiki restaurant the Waikiki to commemorate and I used Freddie Coester's tiki on the front. Here's the outcome. Next up will be how to mold this huge mug.
Cheers, Wendy |
|
H

HopeChest
Posted
posted
on
Sat, Feb 17, 2018 11:19 AM
Your ability to faithfully reproduce fonts and wording - free hand, no stencil - never ceases to amaze me. I cannae draw two stick figures the same. |
|
H
Hamo
Posted
posted
on
Sat, Feb 17, 2018 10:08 PM
Wow; that mug looks like it’s the size of a gallon milk jug. Does the texture of the volcano cause any undercuts? |
|
D
danlovestikis
Posted
posted
on
Sun, Feb 18, 2018 9:54 AM
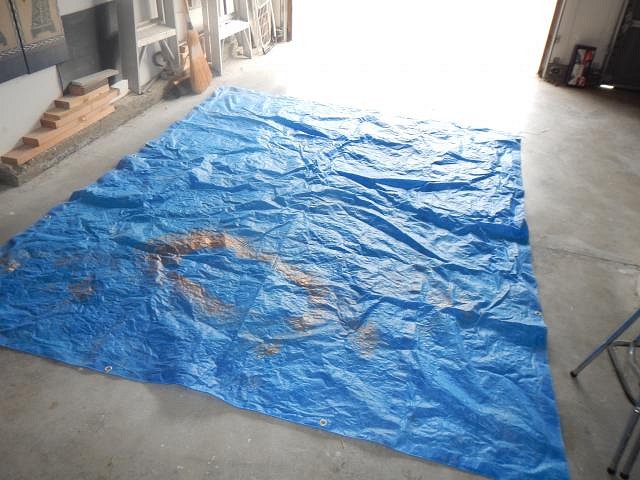
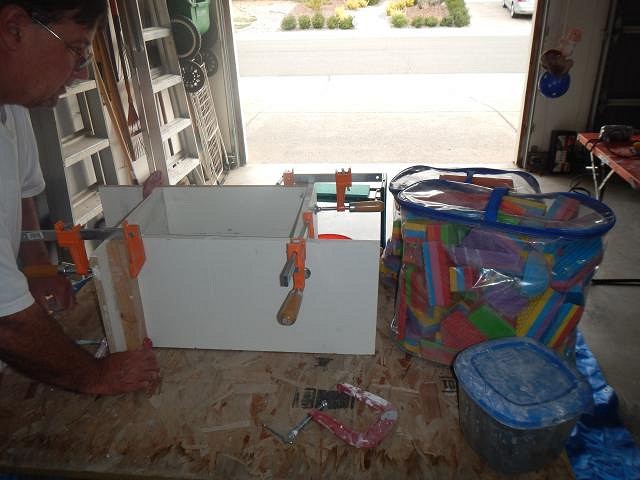
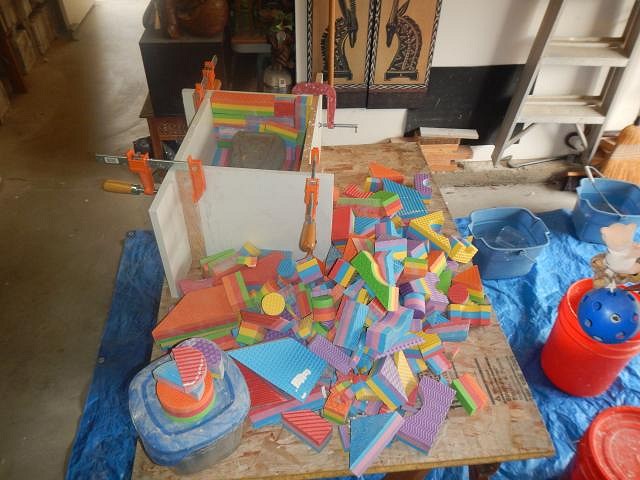
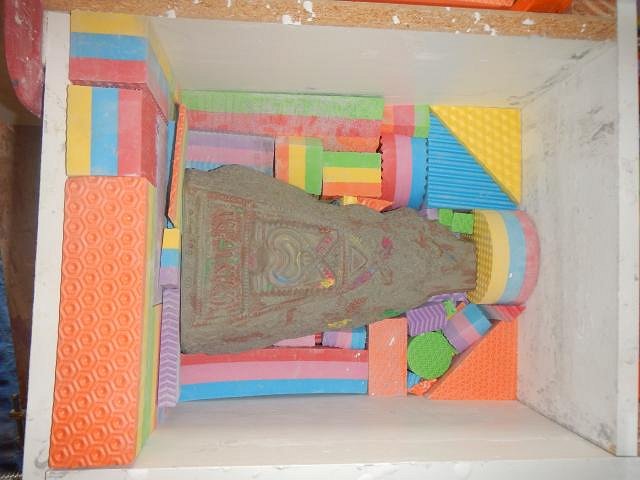
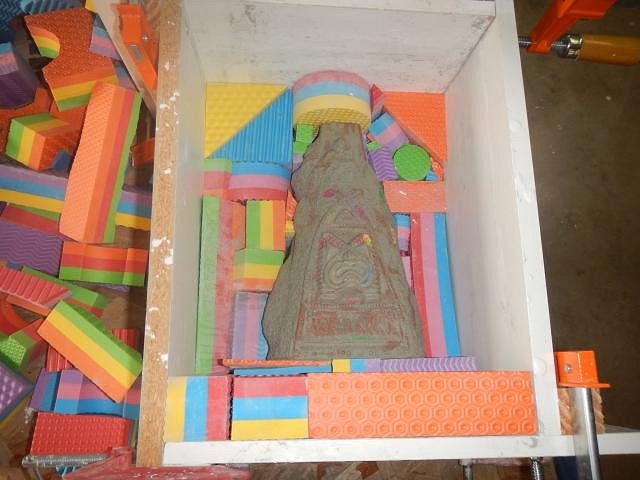
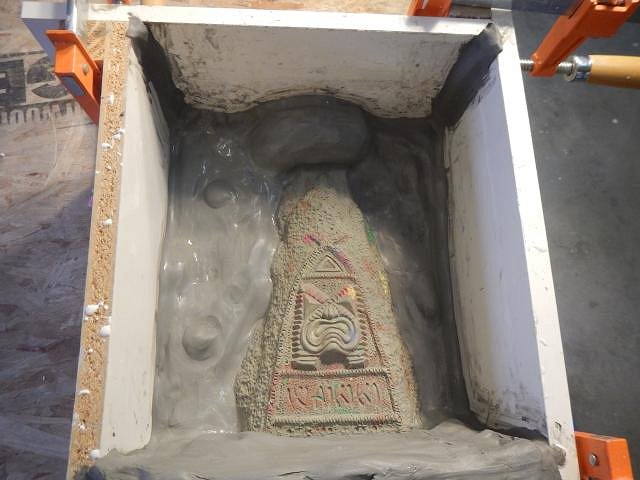
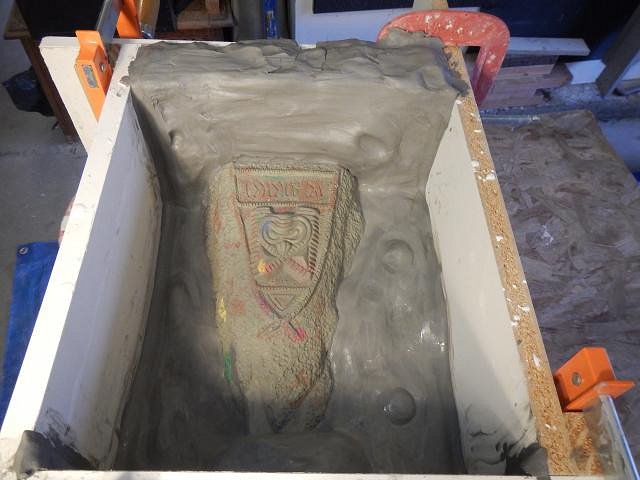
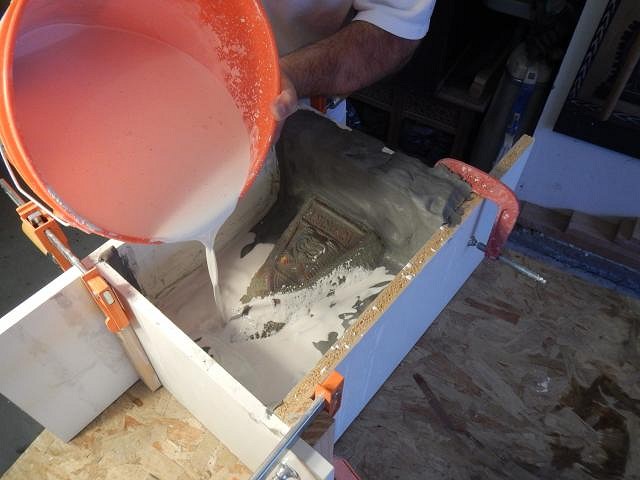
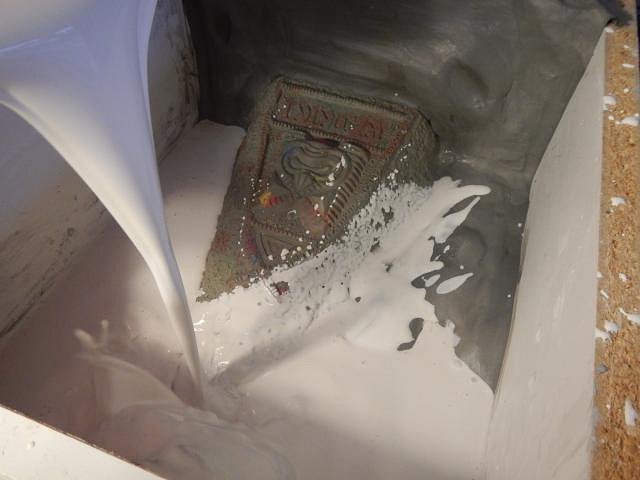
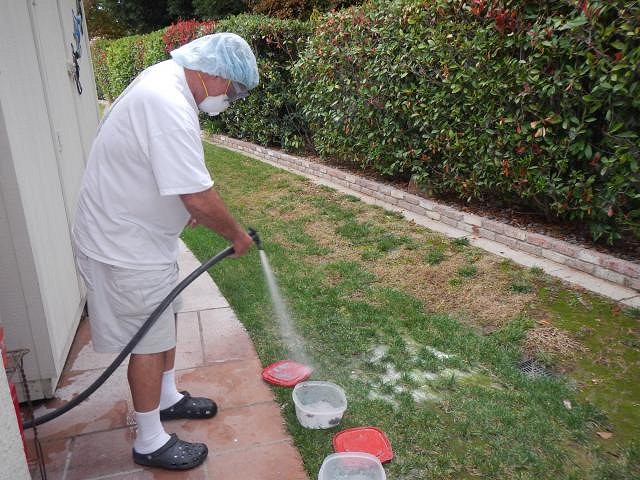
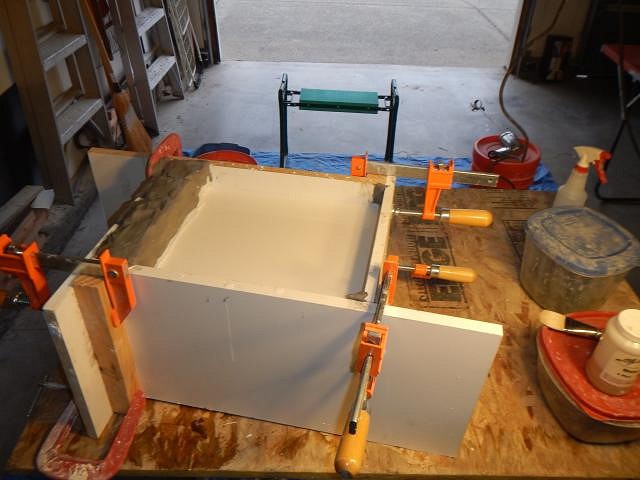
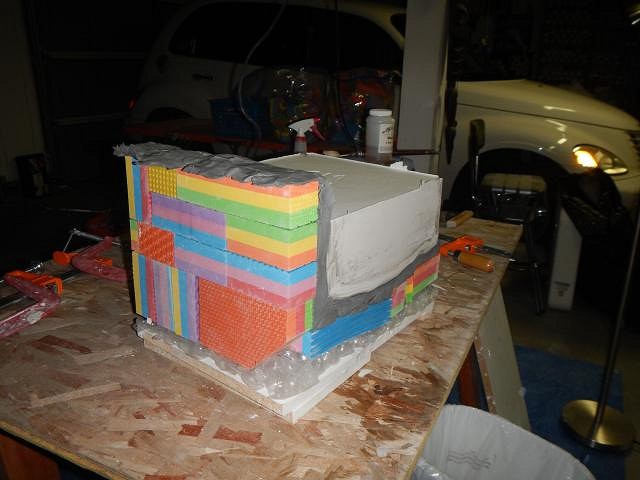
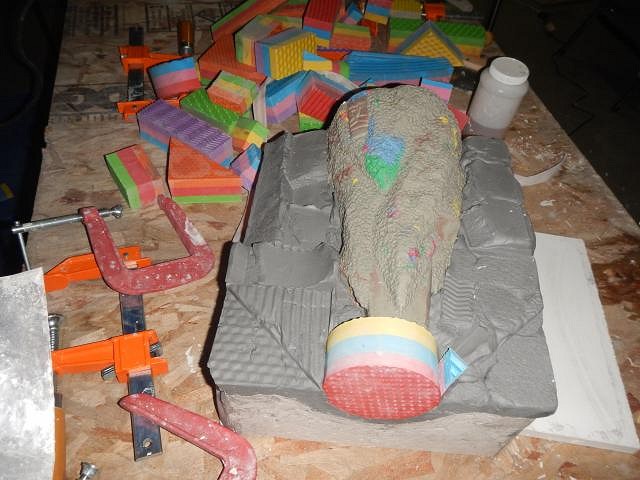
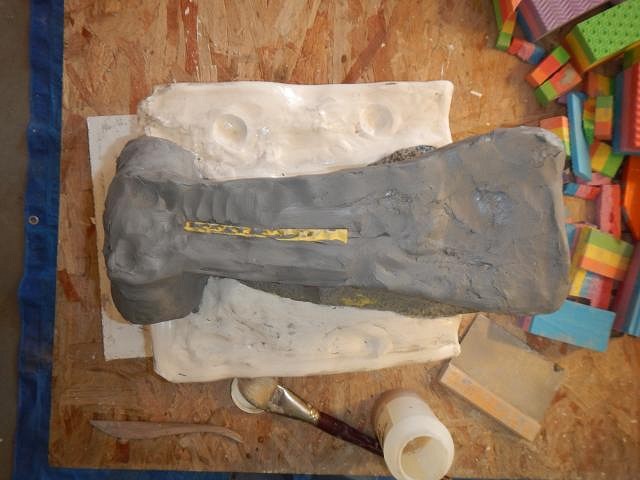
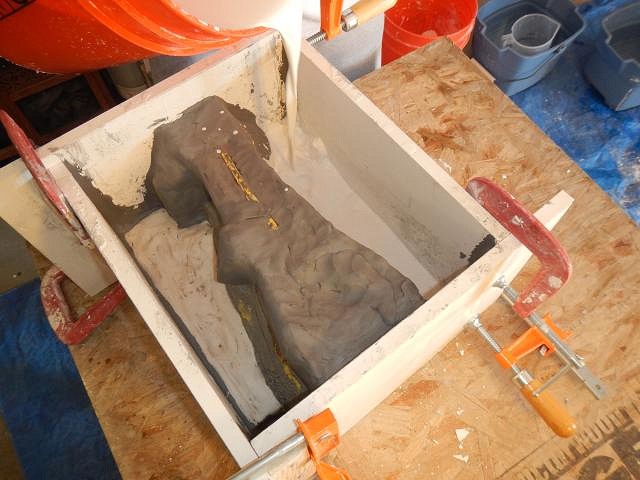
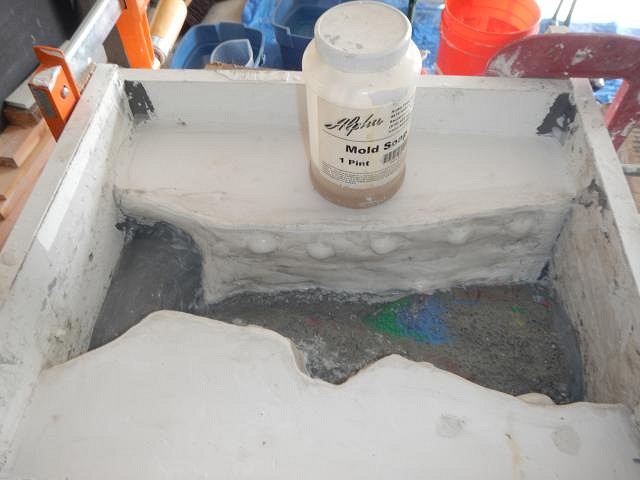
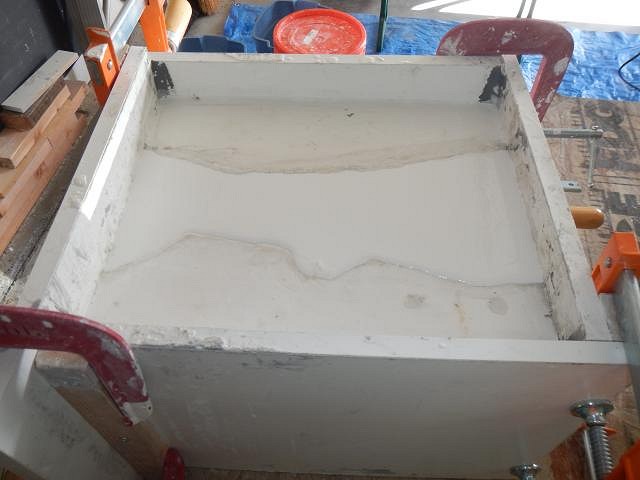
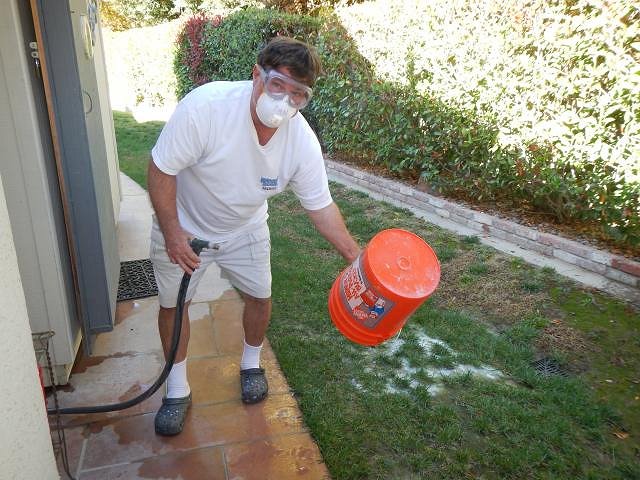
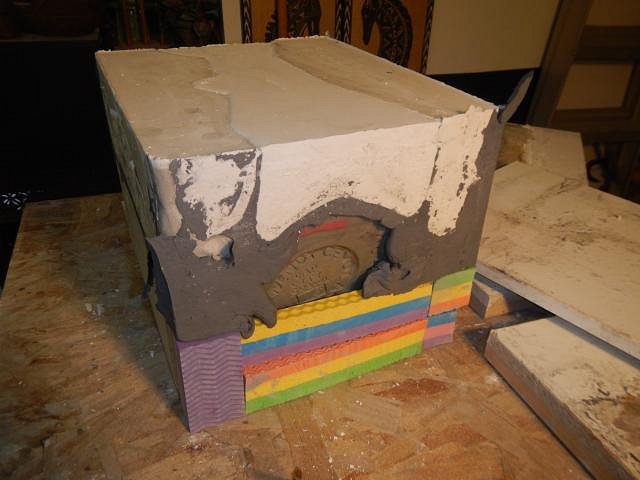
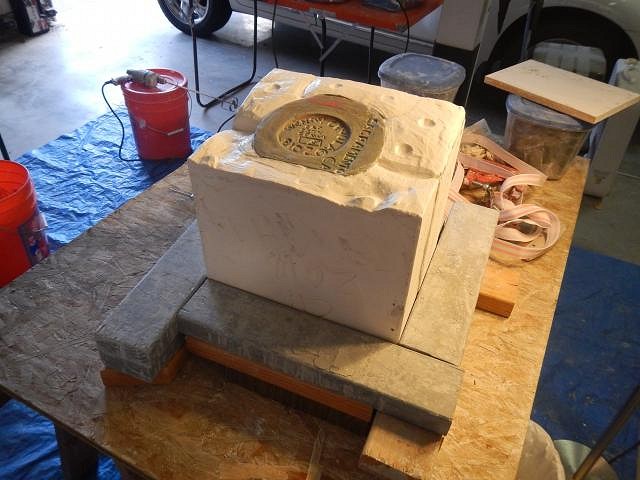
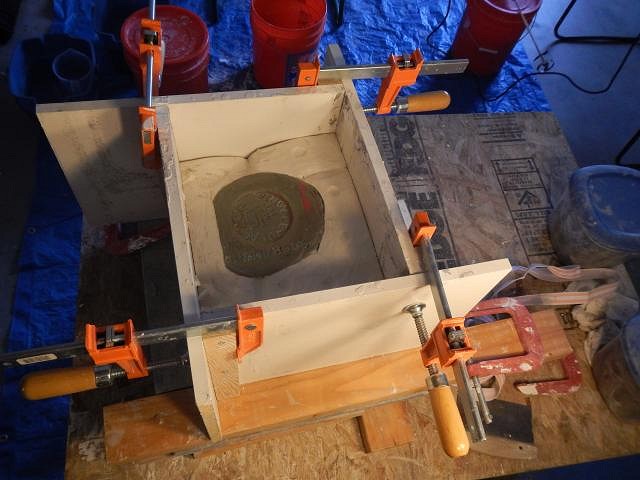
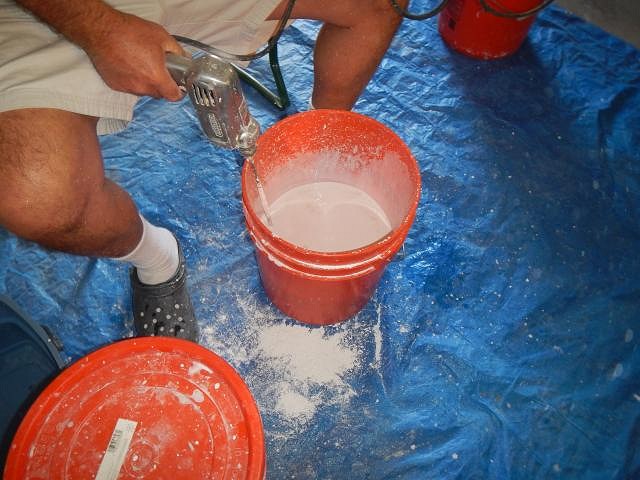
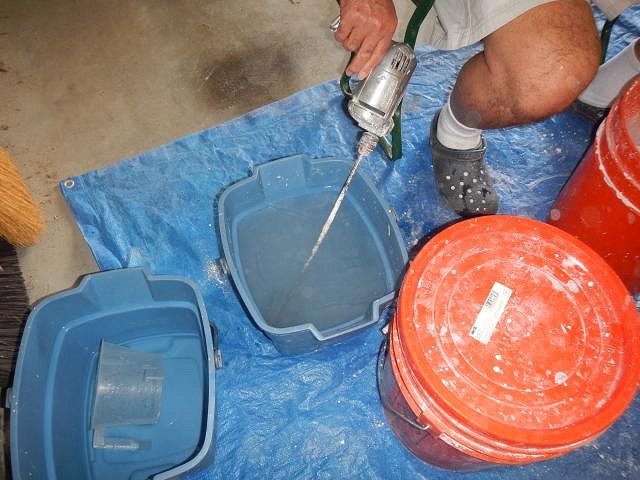
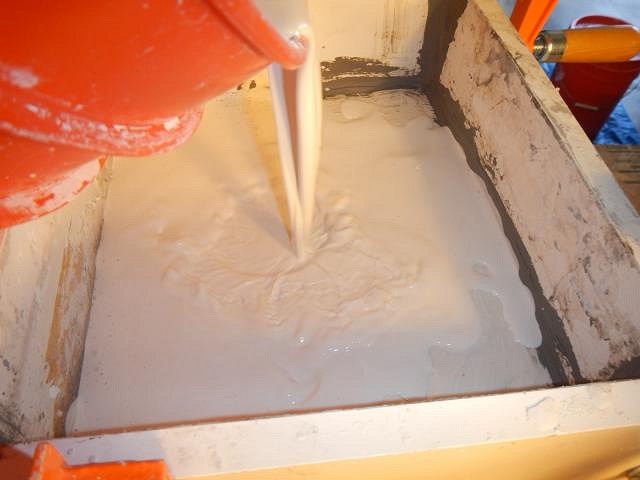
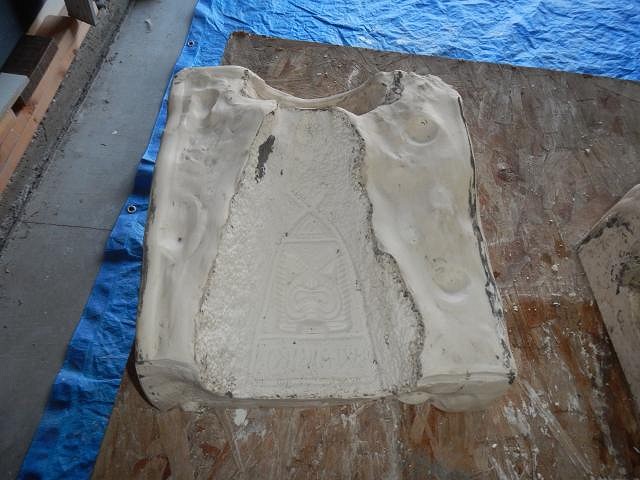
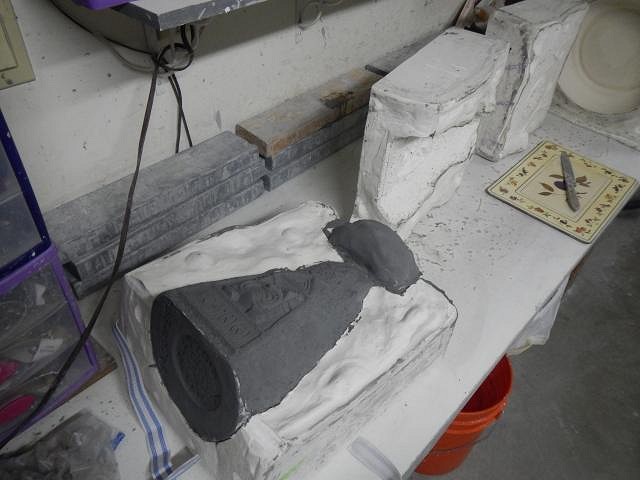
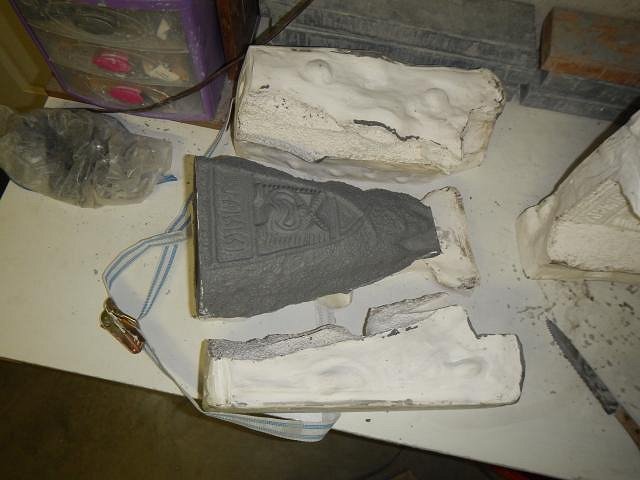
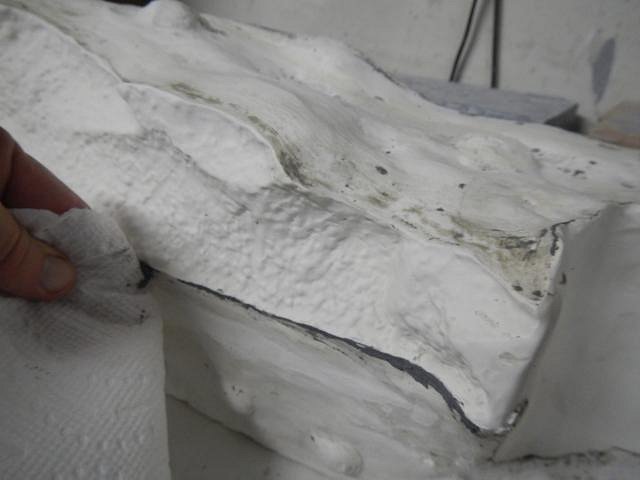
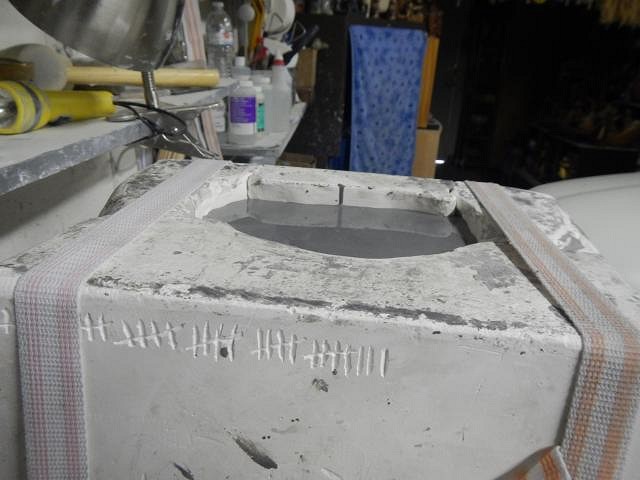
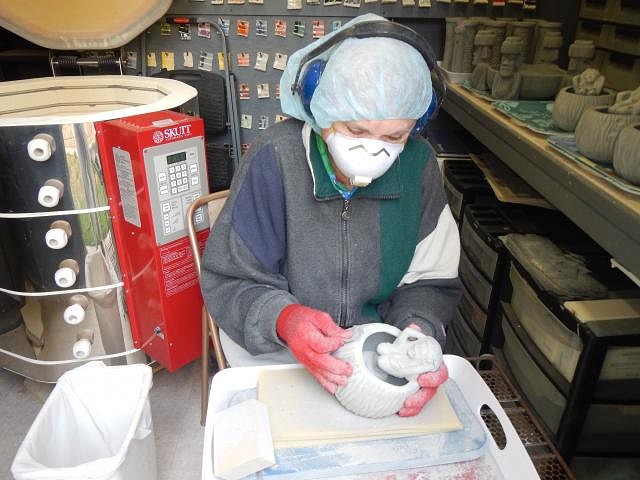
HopeChest it just takes practice. Each time I do one the next one is easier. I'm so happy that I have done enough projects that I can remember how I did the last one. Hamo and almost that heavy. That will change as they dry out. The texture is so shallow that there's no problem as long as I put the mold piece straight off. If I rounded a corner they that would all smear off. =============================================== Here is my favorite part to share, the making of the mold for the Sacramento Crawl mug for 2018. This will take a number of days to post each part. There are so many steps and I want to teach everyone how to do it without making all the mistakes I have made. I've had one lesson in mold making and that's all it took to figure the rest out. That lesson and all the steps are on page one of this thread. Plaster sticks and is hard to remove so we always use a tarp on the floor. I measured the height of the volcano to determine the height and width of the floor of the mold box that I will need. At least two inches on the sides and four at the top. I'll show you that as we proceed. This shows the wooden sides and the c-clamps that we use to make the box. Years ago I found these foam blocks at TRUs. I can cut them with a saw knife as needed. They save me a lot of time. First I put a layer under the volcano. I also raised the top end so that it is level. Then I fill in at the bottom where another mold piece will be made. At the top I am making an opening where the slip will pour into the mold. Here's another view. I cut up a bunch of clay to use next. I press the clay on top of all the blocks. I cover all of the blocks and bring the clay right up to the volcano. I also pressed snakes of clay along all the seams of the box. Once this is done I run a wet paper towel along the seams and any place that the clay touches the box or the volcano. This make the connection less likely to leak. Here is another view. The dents in the clay become locks between pieces of the mold so that they hold in place. AS SOON AS YOU BRING OUT THE BAG OF PLASTER BE SURE TO HAVE YOUR FACE MASK IN PLACE. DO NOT REMOVE IT FOR THE REST OF THE TIME YOU ARE IN THE GARAGE OR WORKING WITH THE PLASTER. IT WILL ENTER YOUR LUNGS AND HARDEN NEVER TO COME BACK OUT AGAIN. COPD IS NOT JUST FROM SMOKING. I love watching the sculpture disappear under the plaster. I am always aware of where the plaster is hitting. You don't want the stream to break loose any connections between soft clay and the sculpture. Almost gone. This top slab should be at least 2 inches thick. I checked the thickness and noticed that I hadn't gotten the mix just right between water and plaster. It should be a tiny bit thicker on my hand. We call it the buttermilk test. But since I'm making the slab so thick it will most likely be just fine. Dan cleans the mixer and all the buckets as fast as each step is completed. Wearing his mask and I am too. It takes around 45 minutes for the plaster to set up in the summer, a little longer in the winter. Once it is set I carve the name of the piece and the date. I do this on each piece. We did this first piece on one day because it is the hardest piece to do and then we went to work very early the next day. So imagine us cleaning up and watching TV for the night. One piece done and four more to go. Wendy [ Edited by: danlovestikis 2018-02-18 10:28 ] |
|
D
danlovestikis
Posted
posted
on
Mon, Feb 19, 2018 8:49 AM
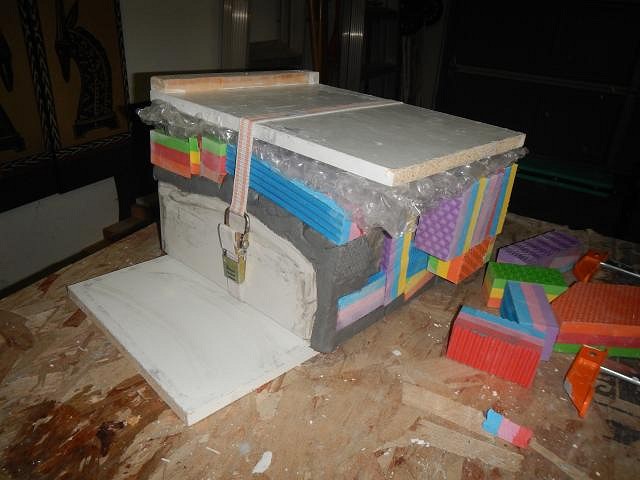
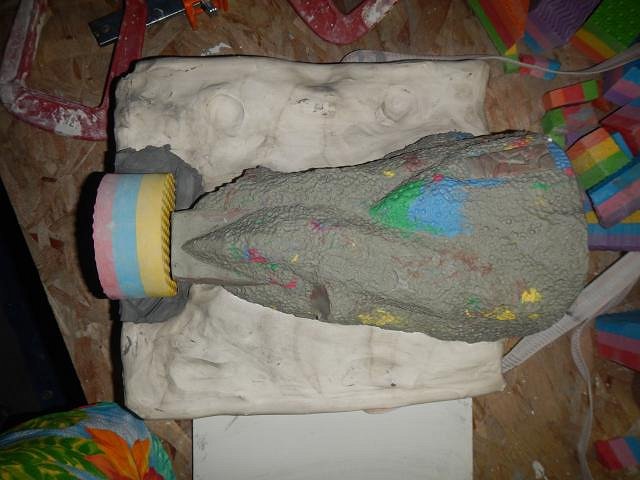
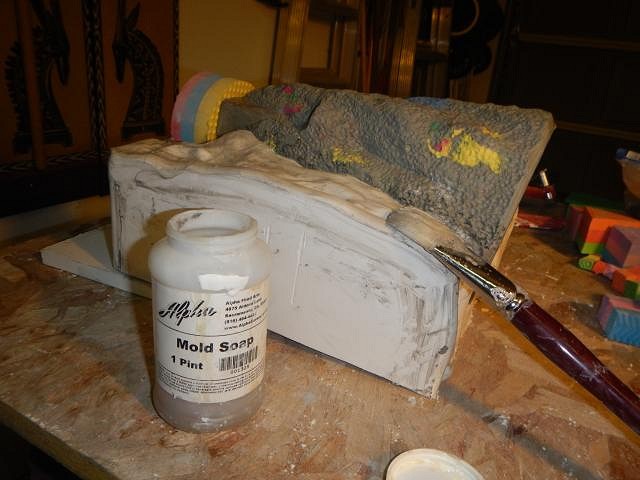
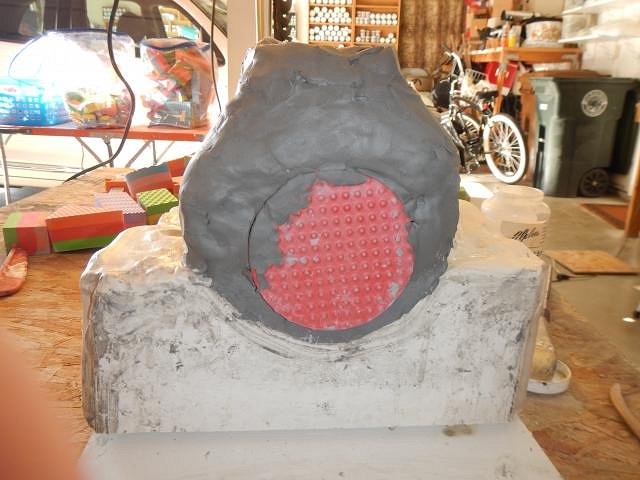
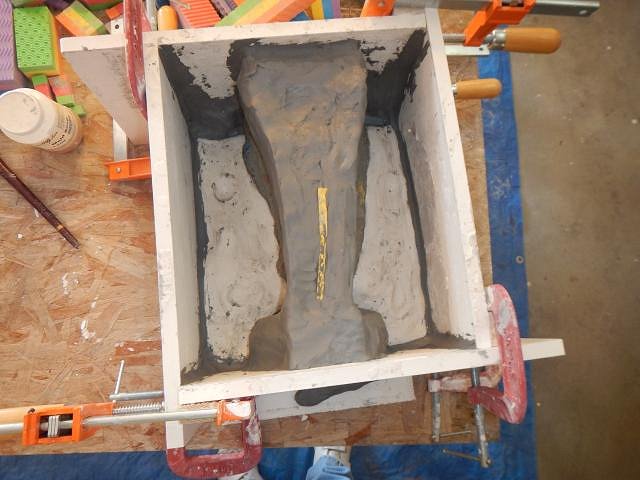
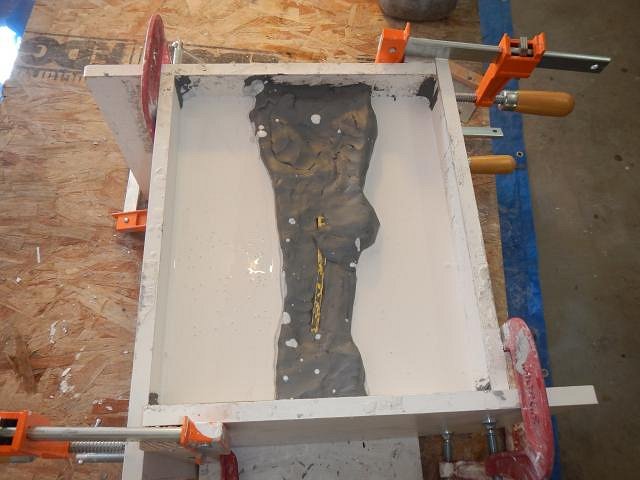
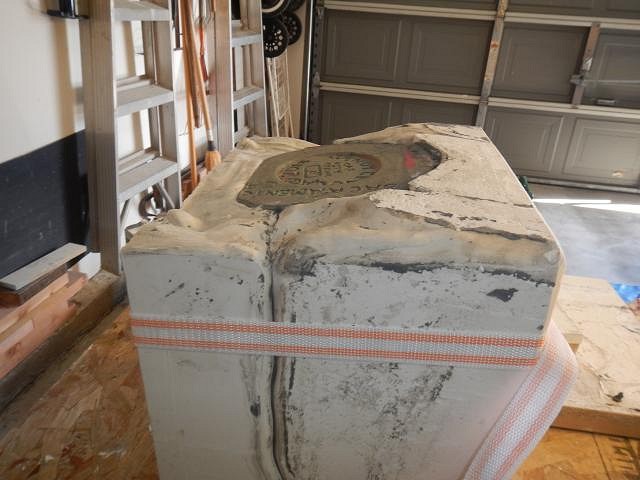
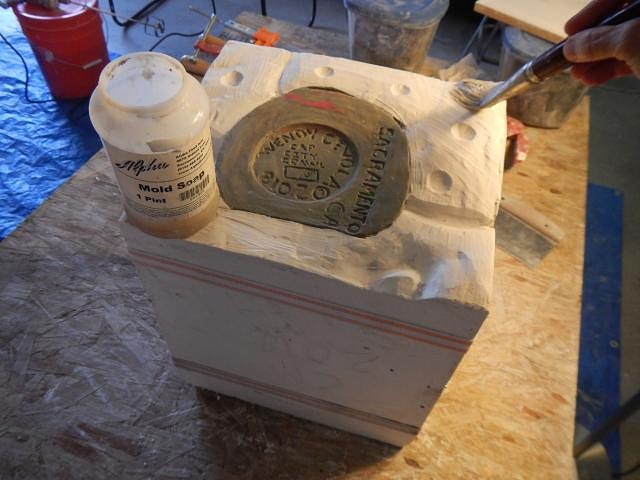
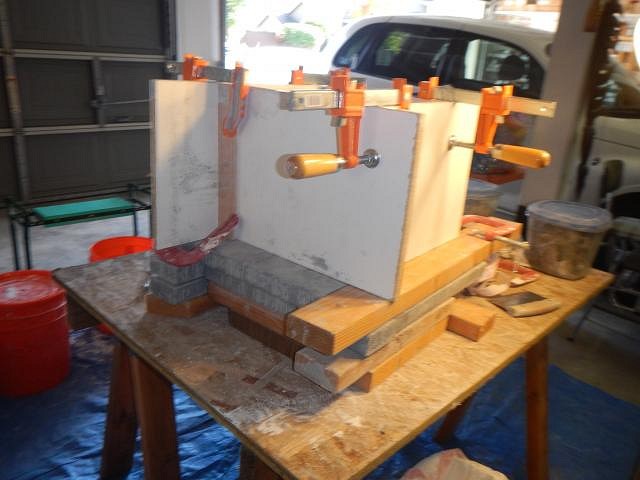
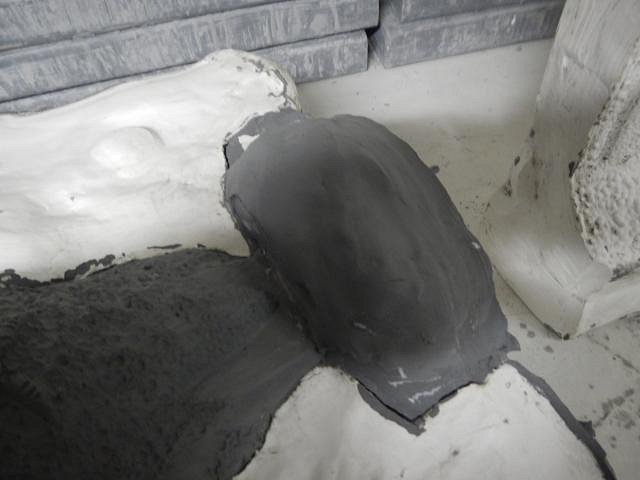
Part Two of making the mold for the Sacramento Crawl mug 2018. The box has been removed. We put on a strap so that we can flip it over onto the mold piece we cast the day before. You don't want the sculpt to ever come loose from the mold pieces until the mold is finished. Next I remove all the blocks. I had a piece of bubble wrap under the mug to prevent losing any detail. Then I pulled off the clay except under the top block. This stays put and will be covered in clay. This is the opening into the mold where the slip is poured into the mold. Ready to go with the next mold pieces. With all of the blocks and clay removed it's time to use mold soap. I always do four layers. Each one soaks in and then I blot with a paper towel and do it again. This is poison so wear gloves and of course we haven't ever taken off our masks. Now I begin to build the dam. I want to pour plaster to make two pieces at the same time. The Dam is designed so that these two pieces will be able to pull straight off. Ariel view! Looking at the other side. Here is the bottom of the mug. Here is the top of the mug. Next I added the snakes at all the seams and sealed them with a wet paper towel. Also note that the mold piece is now the bottom of the box. I started to worry that this piece might not pull straight off without damaging the texture so I began to build up some clay to block the plaster from going on this area. Mold pieces can be any shape you want, think puzzle. Once this area was built up to the top we mixed the plaster and poured in in on both sides. Now it firms up over 45 minutes. Two pieces left to go. Wendy |
|
D
danlovestikis
Posted
posted
on
Tue, Feb 20, 2018 9:00 AM
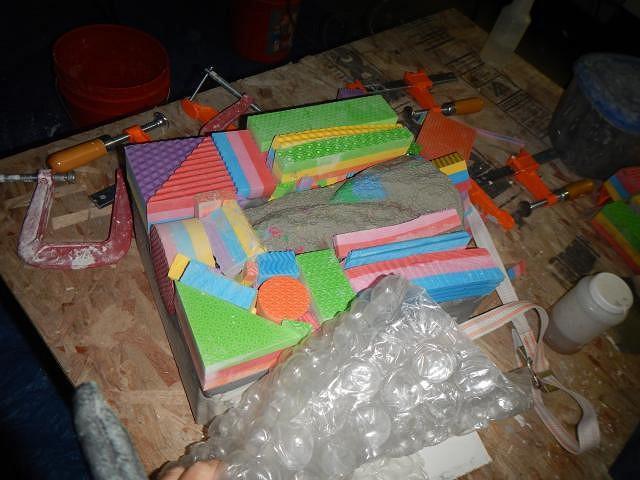
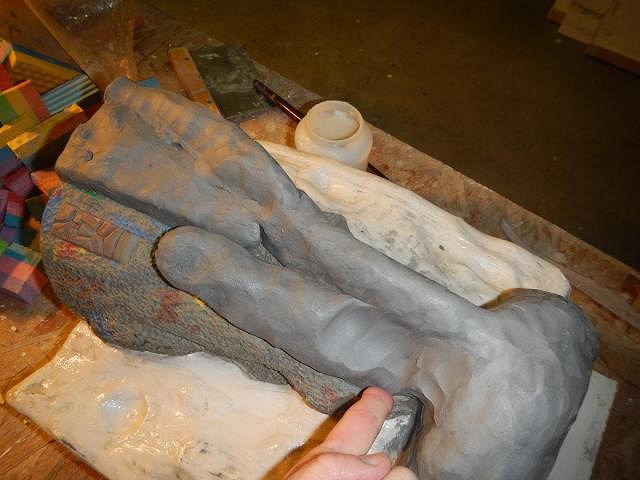
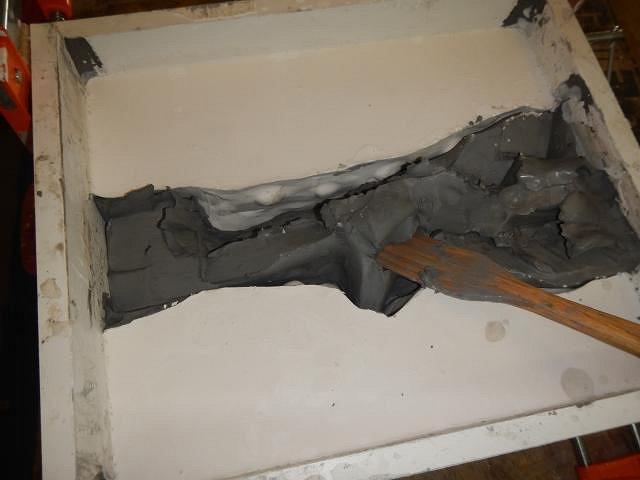
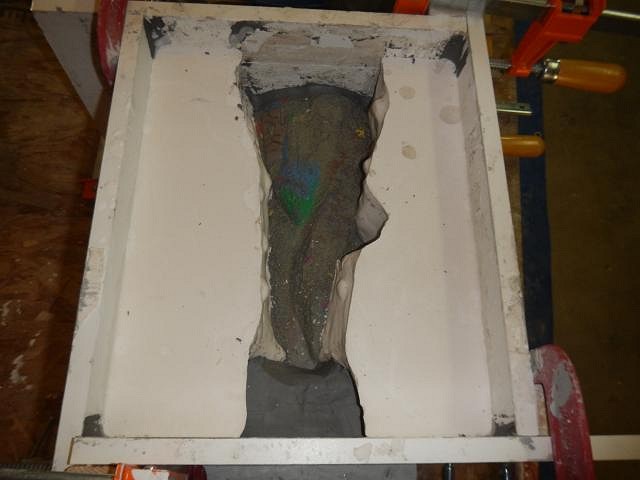
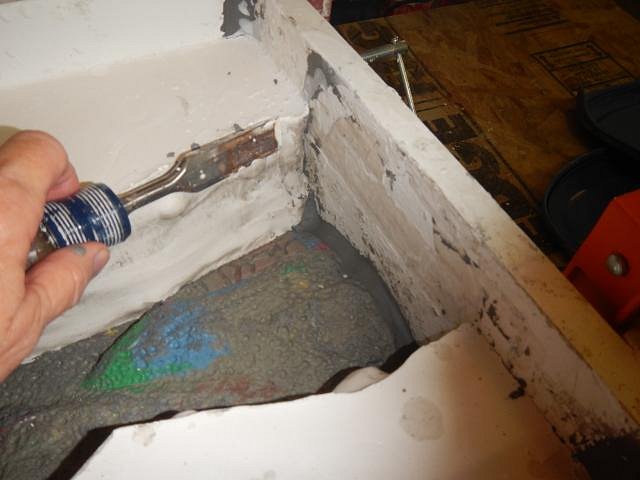
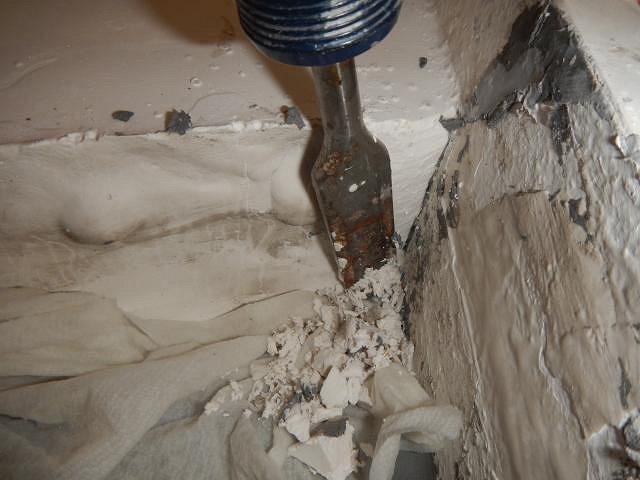
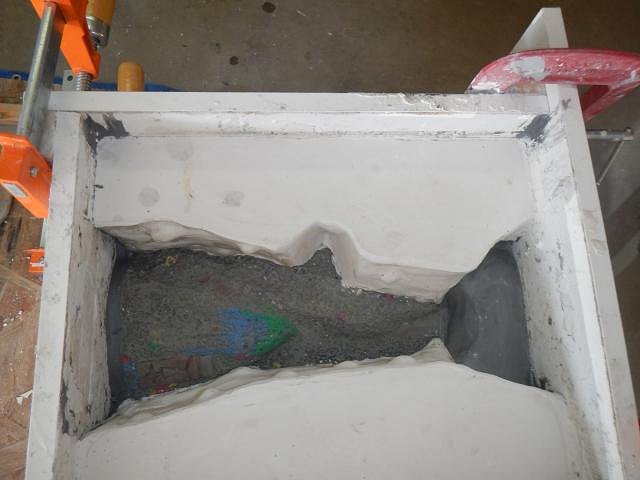
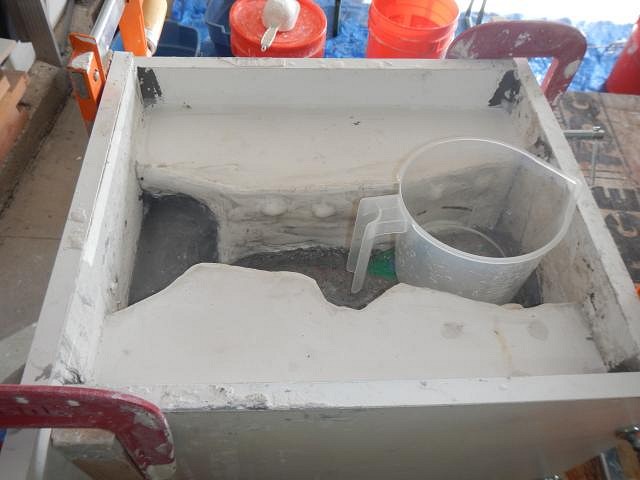
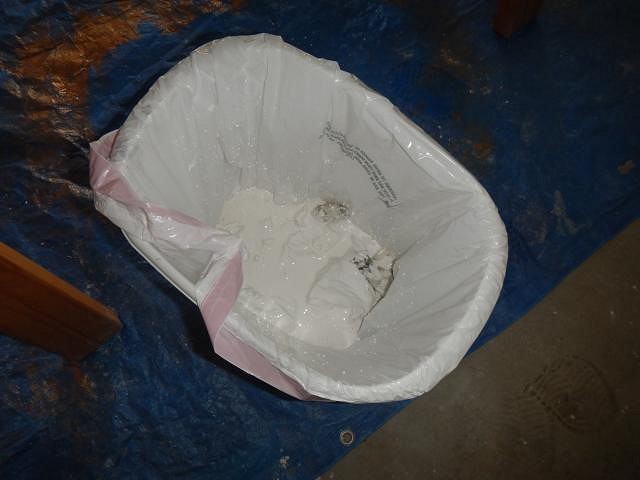
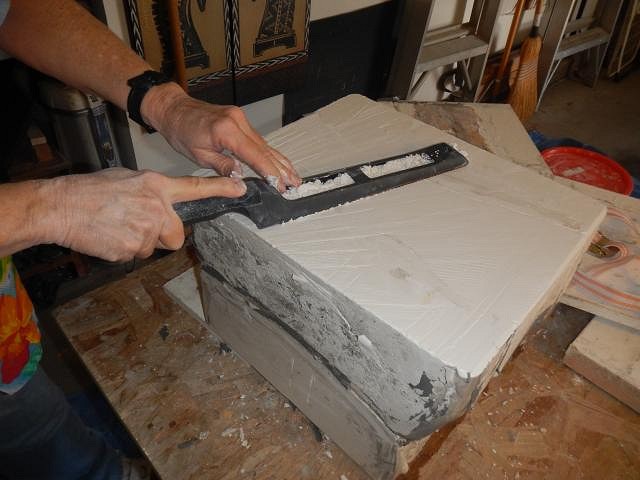
PART THREE OF MAKING THE MOLD FOR THE SACRAMENTO CRAWL 2018 Once the two side pieces are hard I am able to dig out the soft clay dam. Now the mug is again exposed and ready for the fine tuning. I use a chisel to sharpen up the edges so that the next piece won't have any thin spots. I first put a wet paper towel down to catch the plaster pieces that come off. All cleaned up and ready to have 4 layers of mold soap applied and the plaster so that the piece in-between will not stick. Next I use this 2 cup container to figure out how much plaster to mix. It is close to 1 of water to 2 of plaster. I put all the water into the bucket and then as Dan mixes I slowly sprinkle in the plaster. Every so often he turns off the mixer and I stick in my hand to check to see if the consistency is that of butter milk. I also squish up any lumps I feel. Now it's time to pour it into the crevasse. I always have a plastic bag ready in which to pour any excess. Now I wait for it to harden while Dan cleans up the mess. When it is hard we remove the box and I use a rasp to round the edges and to flatten this side that has three pieces. One more piece to go. Cheers, Wendy |
|
H
hang10tiki
Posted
posted
on
Tue, Feb 20, 2018 8:03 PM
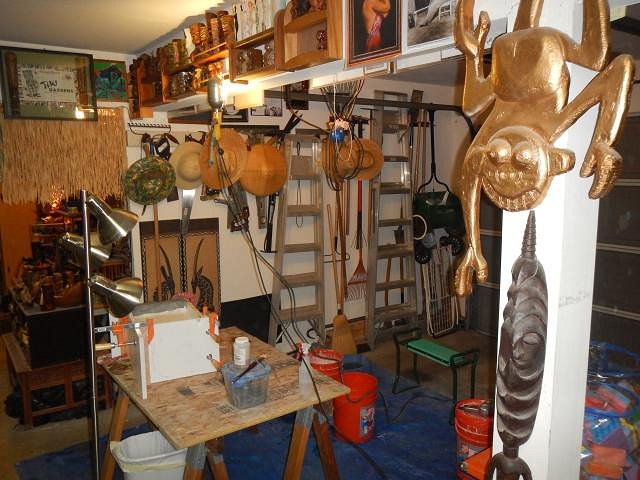
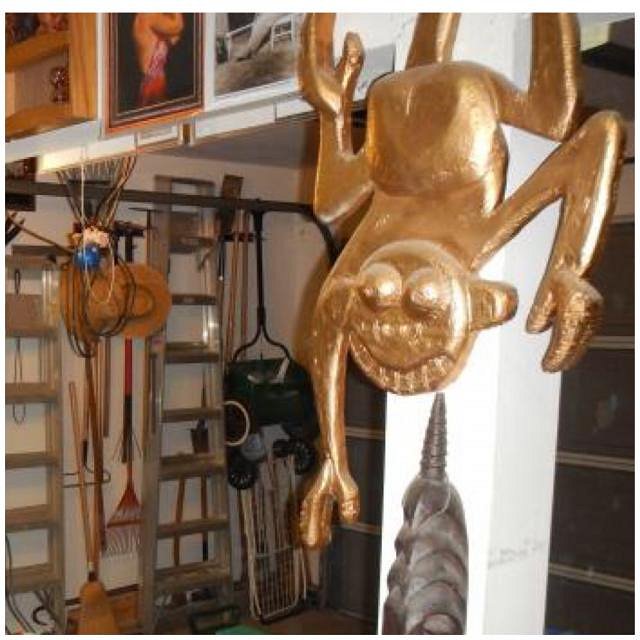
Dang What’s the story with that downward climbing monkey?
[ Edited by: hang10tiki 2018-02-20 20:08 ] |
|
D
danlovestikis
Posted
posted
on
Wed, Feb 21, 2018 7:01 PM
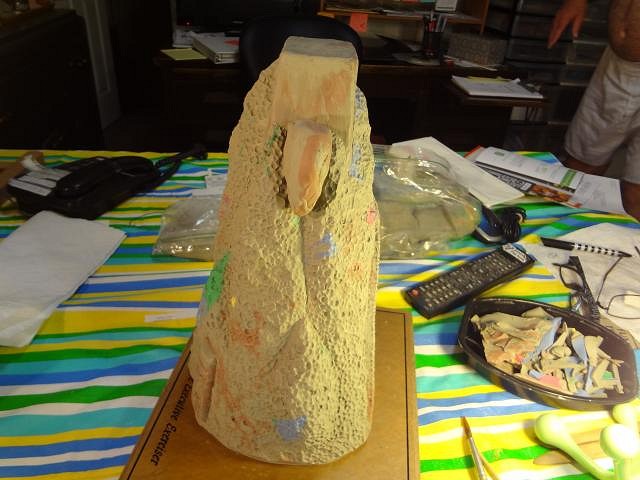
hang10tiki you are so right. No one enjoys making molds. The monkey was made by MadDogMike to decorate VampiressRN's room at Tiki Oasis a few years ago. He also made a plane. We got to bring them both home to decorate our garage and man cave. ============================ PART FOUR making the mold for the Sacramento Crawl 2018 in October. First I remove the soft clay that formed the opening for the mold. I make this opening large so that I can have it hold a lost of extra slip that will disappear inside as the mold sucks out the water. This way I don't have to keep returning to top off the slip. The first mold pieces are held together with a strap. When the last (bottom) piece is poured it will level out so the mold won't look so wonky. I use a cantaloupe scoop to make more locks that will keep the last piece from slipping. I coat the plaster with four layers of mold soap and blot between. This is poison so gloves should be worn if you think you might touch it. Also a mask should be worn but we never take ours off on a mold day. My wooden mold sides are not tall enough to this last piece so I took wood and placed it around the mold to support the sides. I put the box together on top of the wood supports. Here's how it looks. We mix the plaster together. I measure the water and then slowly sprinkle in the plaster until it's just like buttermilk. We have two buckets one with water that is for mixing the plaster and one that I use to wash my hands and Dan runs the mixer in to clean off the plaster before it hardens. In this photo you can see the clay snakes I put at all the seams and around the edges where the mold is against the wooden box. This prevents leaks which are a nightmare. I also run a wet paper towel along this clay to make it seal better. 45 minutes and the 5 piece mold will be finished. Cheers, Wendy [ Edited by: danlovestikis 2018-02-21 19:02 ] |
|
D
danlovestikis
Posted
posted
on
Thu, Feb 22, 2018 4:04 PM
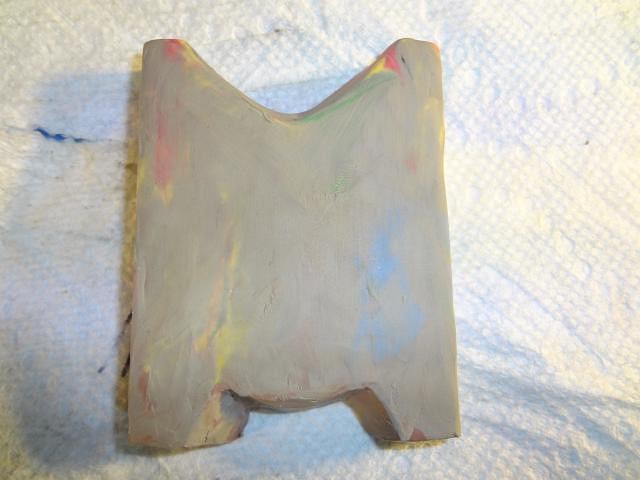
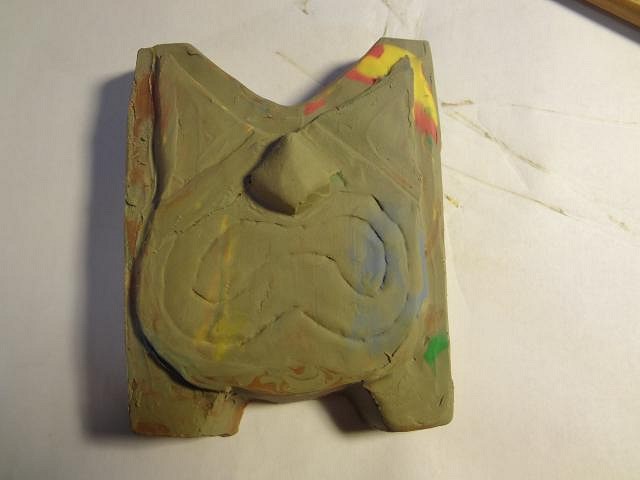
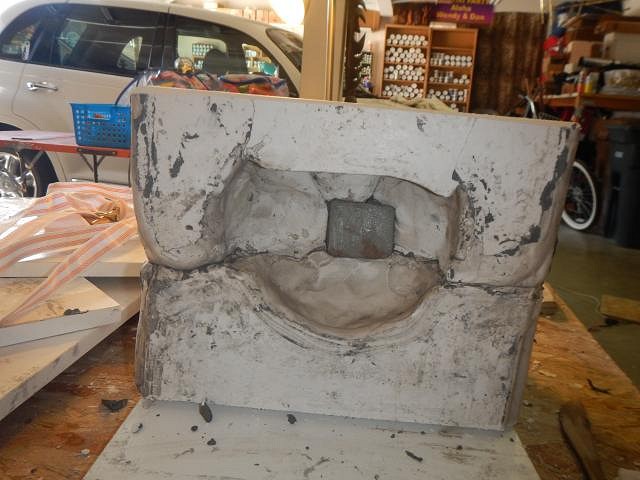
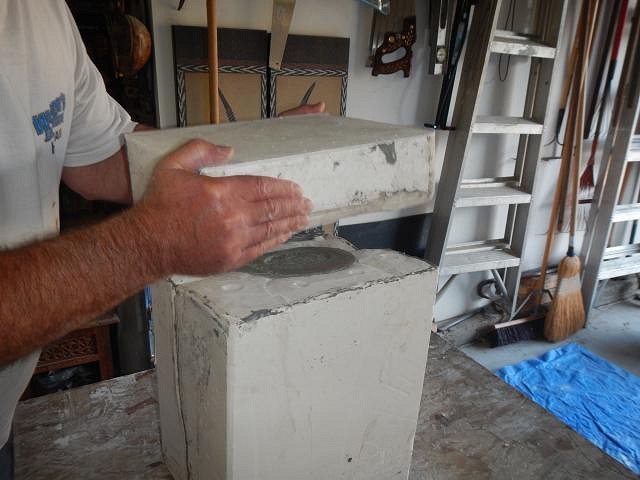
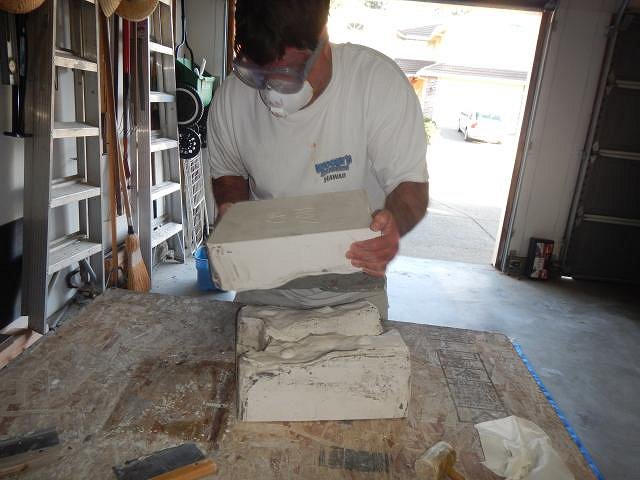
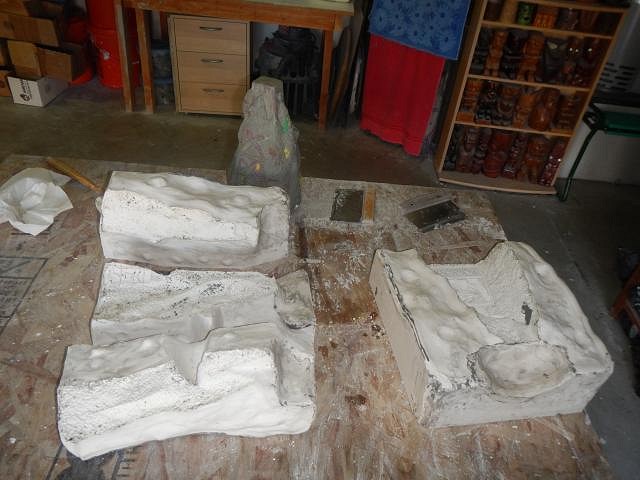
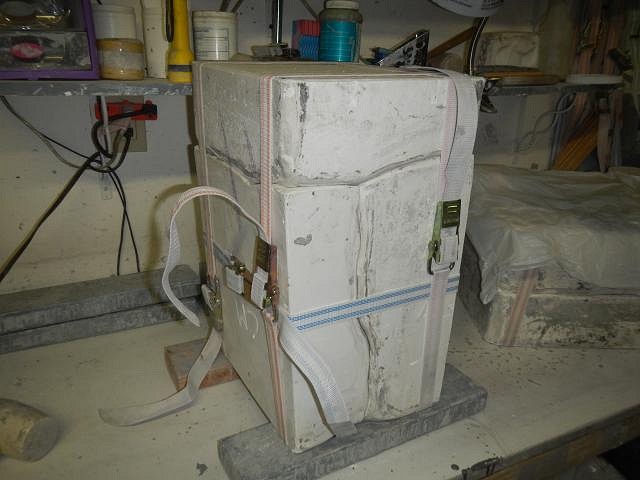
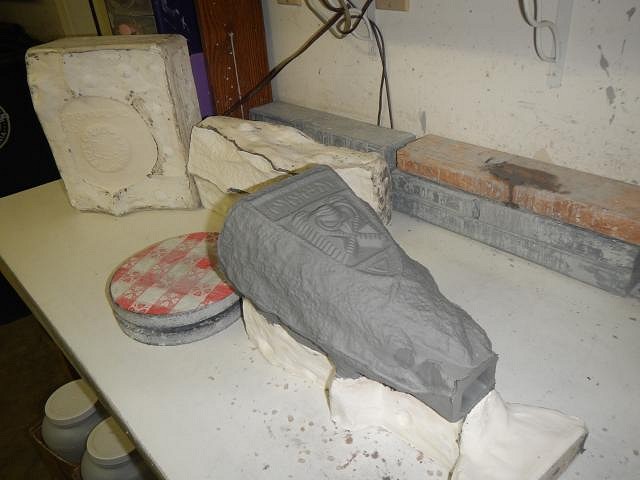
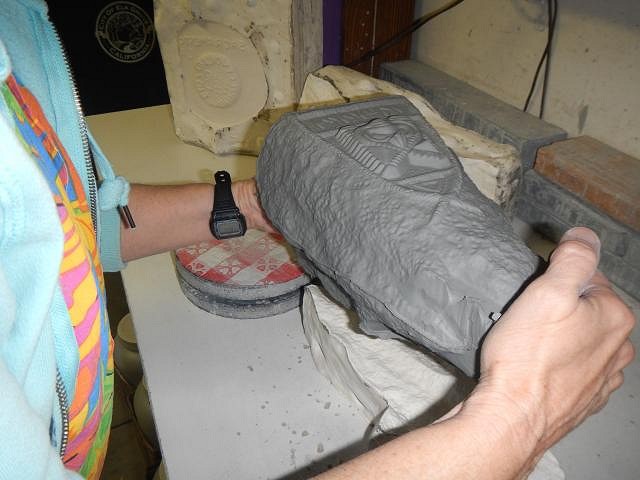
PART FIVE of making the Sacramento Crawl mug mold for 2018. If the time comes when Dan refuses to lift the molds for me I'll have to retire from clay. But so far he is willing to help. I make big thick molds. He removes the first slab from the bottom. Turned on the side he lifts off the next slab and the volcano went with it! I pulled it loose and all was fine. I strip of clay pulled off the sculpt but it was easily removed. Not due to an undercut. Every piece turned out just fine. I have a good mold for the crawl mug. For two weeks I ran two fans 24/7 and the mold pieces remained wet even though I also rotated the sides closest to the fans each day. So I took the mold inside where it's much warmer. A week later the mold was dry. Molds must completely dry before they are used. This "cures" the mold so that it is strong and will last a long time when casting. |
|
H
hang10tiki
Posted
posted
on
Thu, Feb 22, 2018 7:52 PM
Thought that monkey looked like Mike You might need a wind storm to dry that |
|
D
danlovestikis
Posted
posted
on
Fri, Feb 23, 2018 7:29 AM
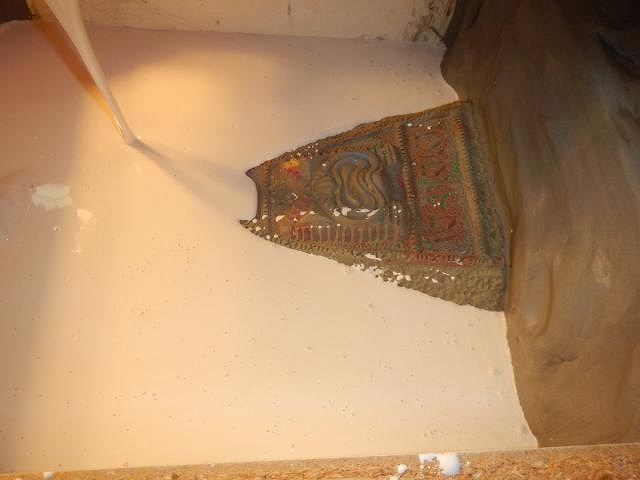
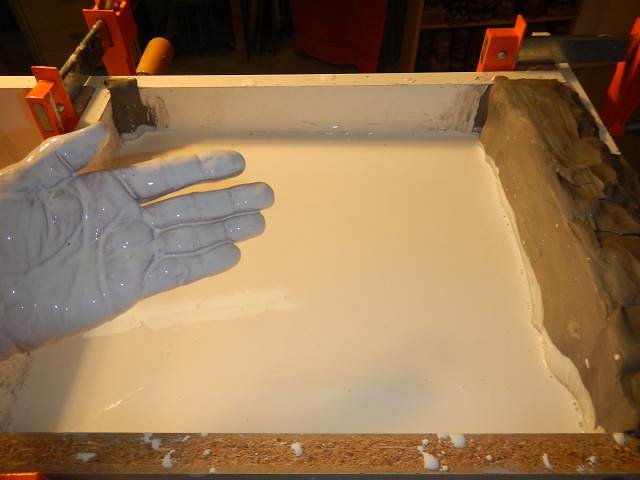
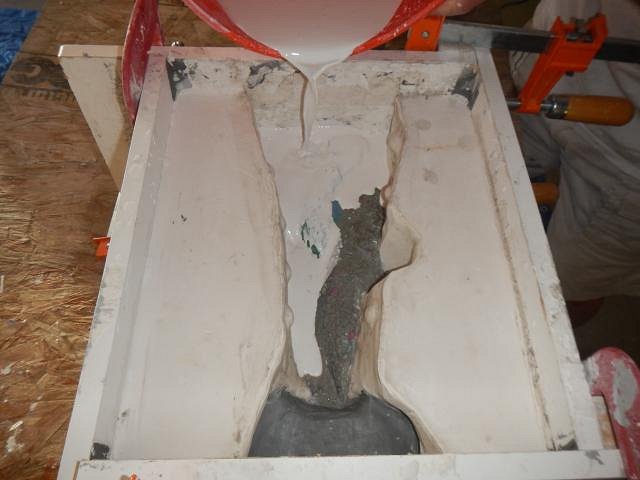
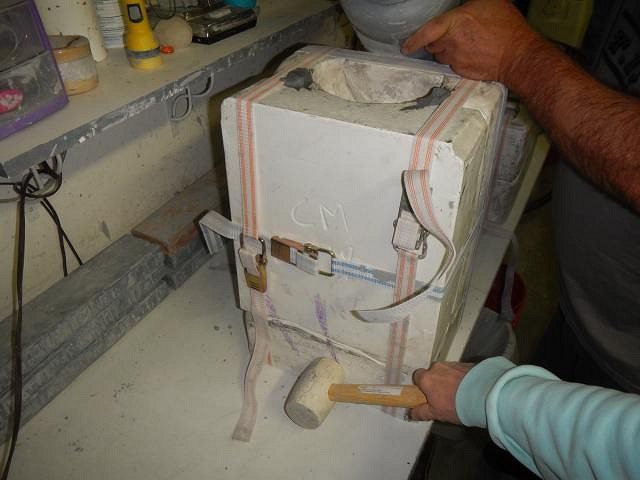
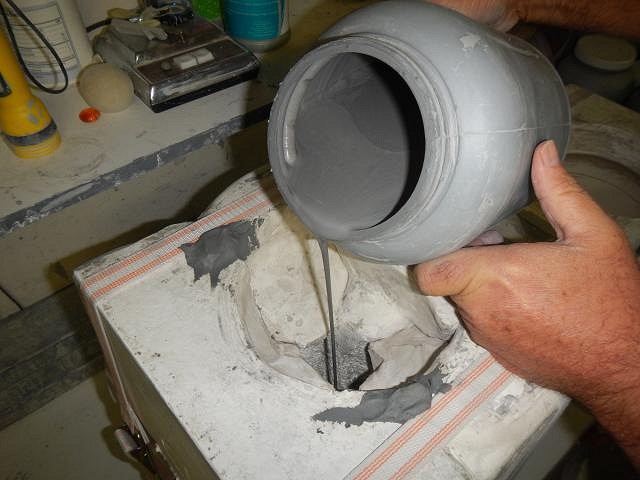
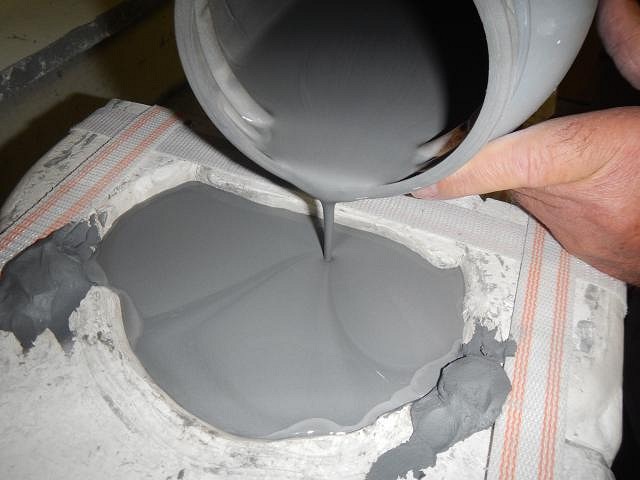
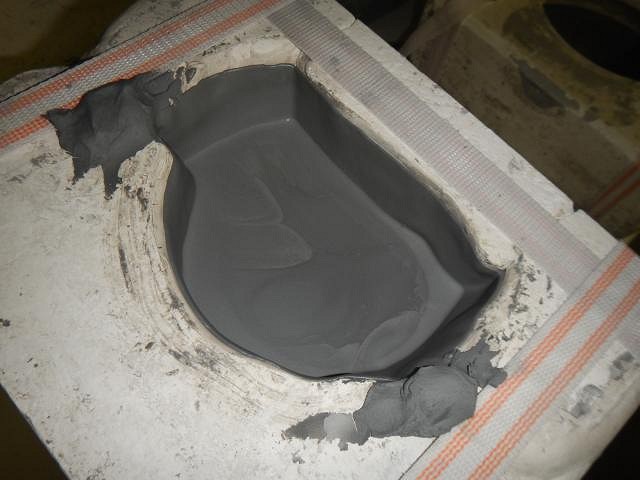
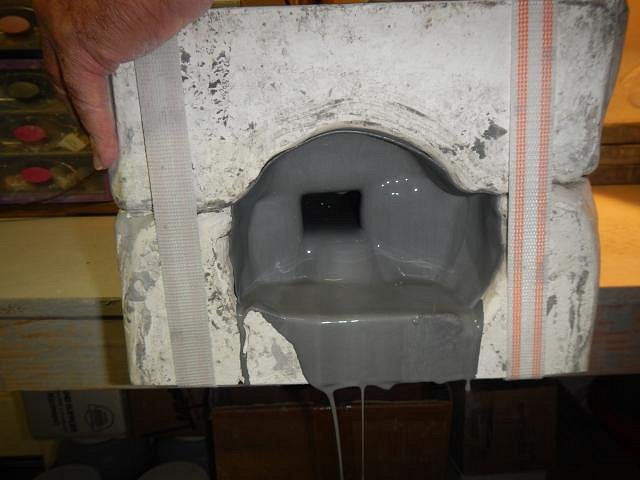
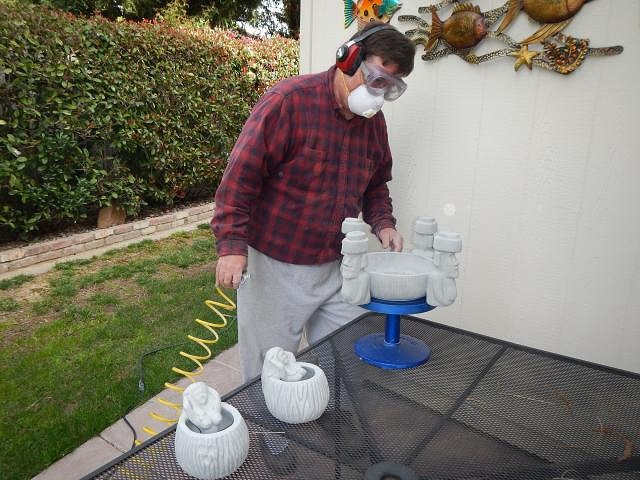
hang10tiki I think Mike would laugh and take acceptation to your comment! ======================================== The mold for the Sacramento Crawl mug is finished and it is time to pour the first volcano mug. The straps have been placed to hold all the pieces together. Dan is about to pour in the slip and I'm going to pound the mold so that there will not be any trapped air bubbles. Air Bubbles can crack your mug when it fires. Another good way to prevent trapping air is to pour it in slowly. Once he gets it to the top he can pour faster just to fill up the large opening. I made this large area to hold slip so that I don't have to top it off as water is sucked out by the mold. I want the entire volcano to be the same thickness so the slip level must always be higher than the sides of the mug. I have little clay dams at the sides where the mold pieces come together. They didn't meet up well at the top. I fix that with a bit of clay. After on hour it has lowered this much. I keep the slip in this mug for three hours. My mugs are thick and heavy and meant to last. When Dan pours out the excess slip he is careful not to fill up the entire opening. If it fills it makes a suction that collapses the mug inside. I call that the glug glug because that's what you hear if it starts. So it's good to have someone watching when you lower the heavy mold. For this thick mug I will leave the mold upside down for at least four hours before I open it. This is when the fun begins. We try to do one mug every day when we will be home for those hours of pouring to emptying. Thank you for watching, Wendy |
|
H
hang10tiki
Posted
posted
on
Fri, Feb 23, 2018 8:06 AM
Time for the Dan-0 workout show |
|
Z

zerostreet
Posted
posted
on
Sat, Feb 24, 2018 9:34 AM
Awesome process pics, as always, Wendy! |
|
H
Hamo
Posted
posted
on
Sat, Feb 24, 2018 10:27 PM
Wow, those “before and after” pictures of the slip reservoir really shows how much moisture the mold absorbs. That seems to work much better than adding a funnel and clay dams like you’d done in the past.
Maybe before retiring completely, you could try smaller mugs requiring smaller, more manageable molds? :) |
|
D
danlovestikis
Posted
posted
on
Sun, Feb 25, 2018 7:34 AM
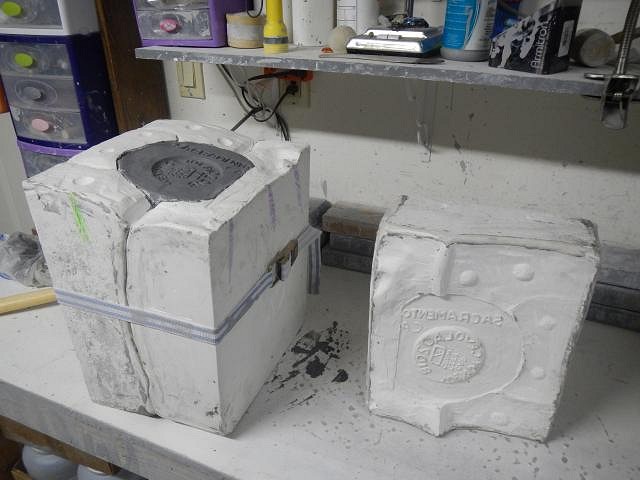
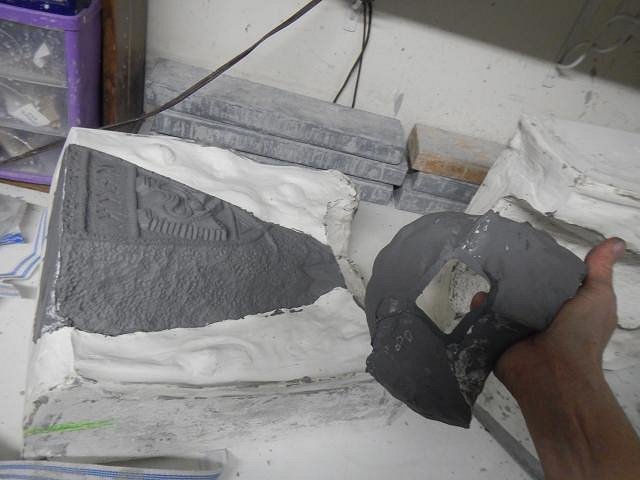
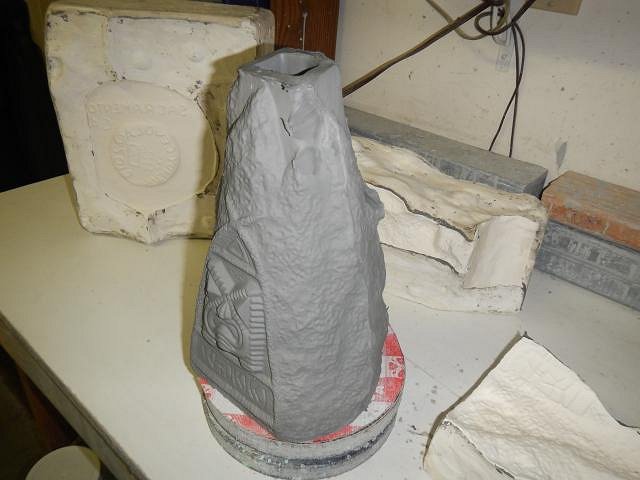
hang10tiki I have reached the max in mug size for the crawl. Then next one will have to start the way to downsizing. Poor Dan! zerostreet your page is the same as mine. We both love to share what we work on. Your deck of cards is beautiful. Hamo the funnel system is for really tiny molds that were made by Gecko. I try to always make this large reservoir on my large molds. ================================= Part Seven for the Sacramento Crawl mug for 2018. Opening the mold is tricky. I have to figure out the best order for removing the pieces because there are locks that hold them together. The first piece we removed was the bottom. This was easy to choose. The cast looks fine. The first mugs out will have plaster residue which will eventually go away. Next we lay the mold down on the three piece side and Dan lifted, straight off, the next large slab and exposed the front of the mug. No undercuts. I do see where there are clay lumps on the face I will have to clean off. This happens when there are air bubbles in the plaster. Now it's time to deal with the reservoir at the top. I use a sharp knife and cut it off. Later when plaster residue is no longer sticking I will save this clay for my Wish List projects. Next I just pulled the two side pieces away from the middle. Looks like the mold is a success. No undercuts. There are a couple of ways to remove the mug from this last piece. I forgot to take photos so I'll do that today. We cast a mug at 6 am each morning. Sometimes later. Then after a day working on the Wish List we open the mold and I clean the mug. If I keep going at one per day I will have all the mugs cast in around 85 days. This year I may have to make a few more. Cheers, Wendy |
|
D
danlovestikis
Posted
posted
on
Sun, Feb 25, 2018 8:14 AM
hang10tiki made a video for us and it's time for a re-run. Thank you hang10tiki this is so much fun for us. Wendy and Dan https://www.youtube.com/watch?v=MAwfpXLiU1E&feature=youtu.be |
|
H
hang10tiki
Posted
posted
on
Sun, Feb 25, 2018 4:49 PM
Mug looks great |
|
D
danlovestikis
Posted
posted
on
Mon, Feb 26, 2018 11:18 AM
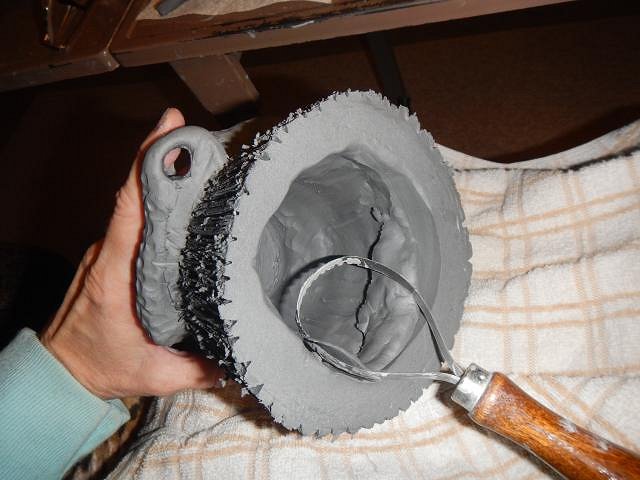
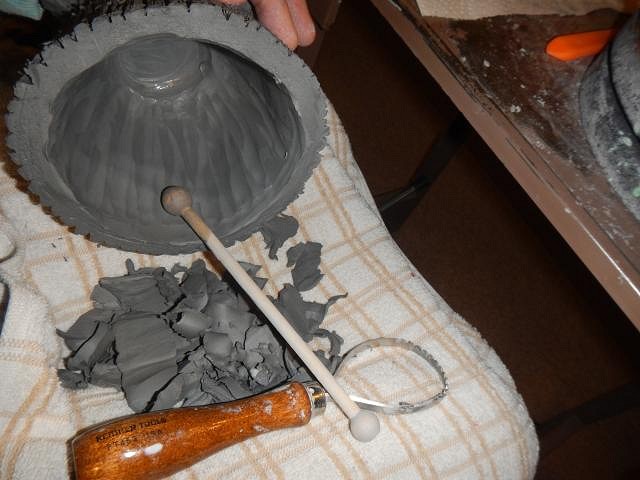
hang10tiki the video was one of the nicest gifts we have ever received. Glad you like the mug. =================================== The next steps for the Sacramento Crawl mug 2018 due the first weekend in October. Now it's time to remove the mug from the last mold piece. At the top there are a few rubbed areas because the mold piece wasn't pulled straight up to take it off. We didn't make that mistake again and this is an easy fix. This mug is still soft so I cover the end to trap air. This helps keep the sides from collapsing I put it on the turn table that I use when cleaning up the mug. If my system didn't work I would attempt to just put the turn table on the end of the mug and tip the mold piece to seat it. But if it slipped it could remove detail and this would take two people. When the top was removed I carefully squished the clay flat without trapping any air bubbles. Then I saved it for future projects. All of this will turn into Wishes. I use a dry paper towel to remove the slip that has stuck on the mold. Then I run these two fans on the mold pieces so that they will be dry the next morning so we can pour the next mug. Ceramics take a very long time to produce but it is so worth it. Wendy |
|
D
danlovestikis
Posted
posted
on
Tue, Feb 27, 2018 9:10 AM
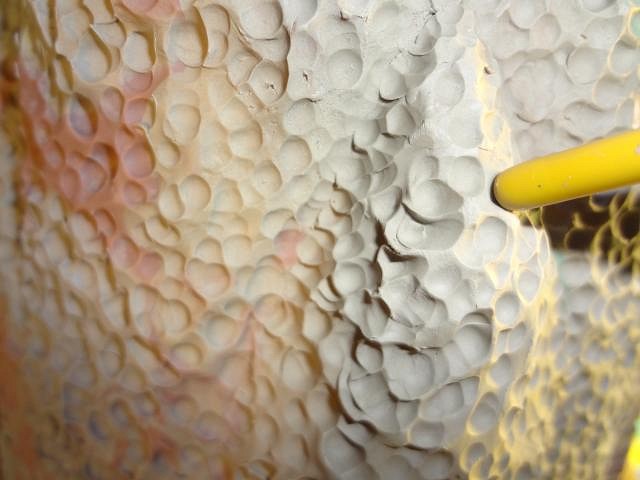
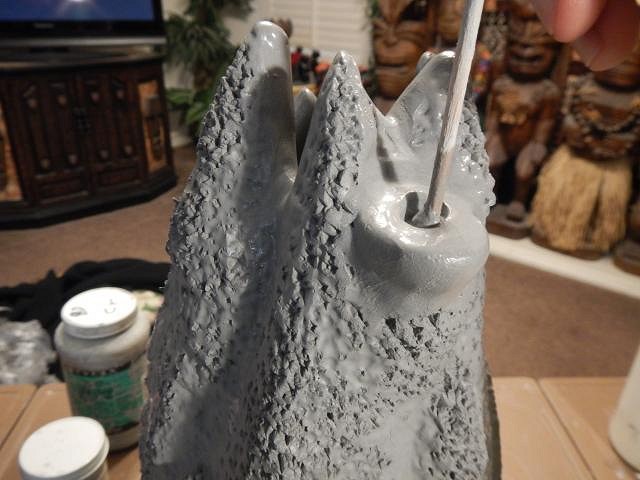
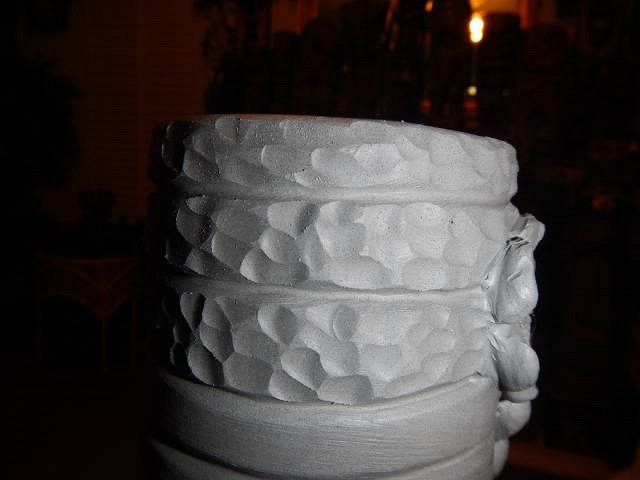
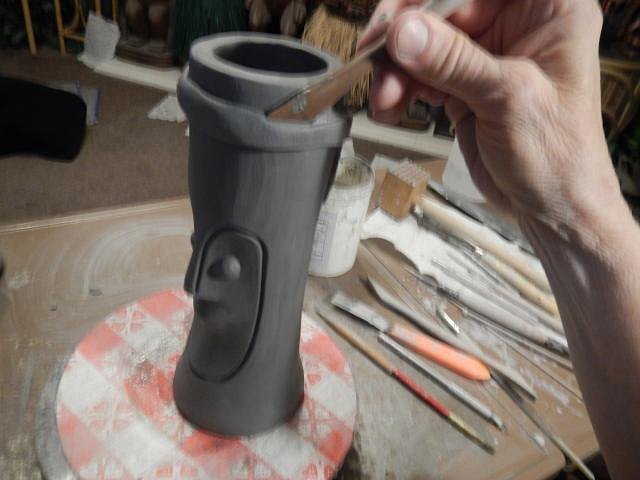
PART NINE the making of the Sacramento Crawl mug for October 2018. Once the mold is open and the mug is removed there is a lot of clean up and fine tuning to make the mug. First I scrap off all of the mold lines. There are always defects in a mold. The bumps of clay that result have to be removed. Also the lettering didn't come out as deep as I wanted. Here is after the tiki is cleaned up and the lettering is recurved. I will do these steps on every mug. I made a video that I can't post here but I put it on facebook. It shows how I used a meat tenderizer mallet to add more volcanic texture to the surface. I just pounded the heck out of the mug. Now a far view shows the new surface. Next I remove the excess clay from the top. This mug has to have a tall straw if you want to drink from it. Holds enough for 6 people! I clean it up with water and make the peaks just right. The dry ice/ rum sugar cube pockets were not cast I have to build them. There are two. After I place some clay I use a round ball tool to start to form the pocket. All done, now onto the second one. Now I go to all the areas such as the peaks and pockets and add the volcanic texture. One a day until I have around 85. Cheers, Wendy |
|
D
danlovestikis
Posted
posted
on
Tue, Feb 27, 2018 7:38 PM
Here is the facebook link to watch the beating of the volcano with a meat tenderizer tool. It will only be visible if you are a "friend" on facebook. My page there is not public. https://www.facebook.com/wendy.cevola/videos/pcb.2312951722064330/2312945955398240/?type=3&theater Fun to do. Wendy [ Edited by: danlovestikis 2018-02-28 08:10 ] |
|
H
hang10tiki
Posted
posted
on
Tue, Feb 27, 2018 7:53 PM
The giant volcano is cleaning up good Can’t see video |
|
D
danlovestikis
Posted
posted
on
Wed, Feb 28, 2018 8:26 AM
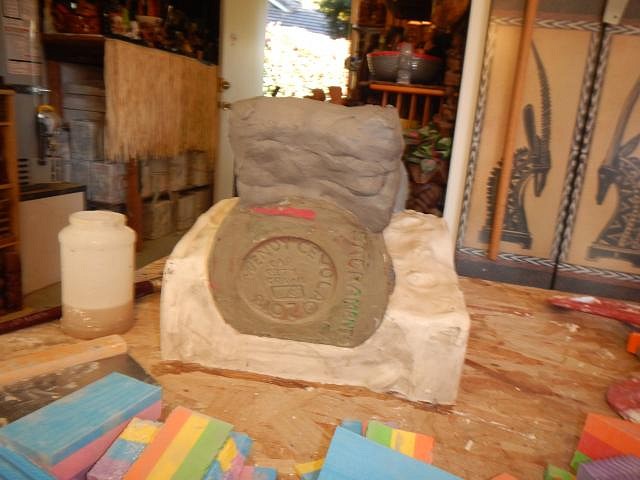
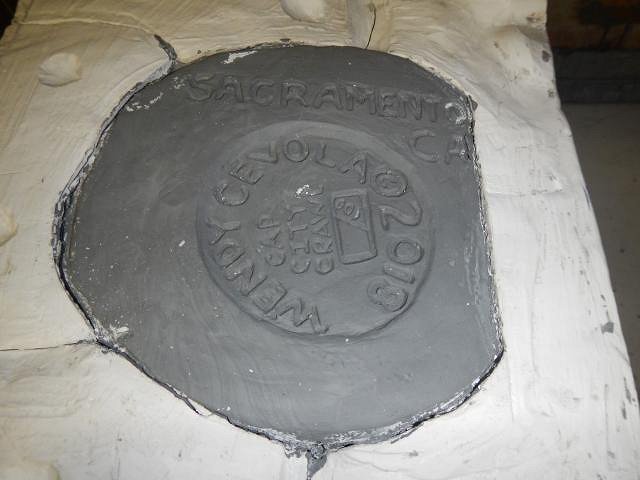
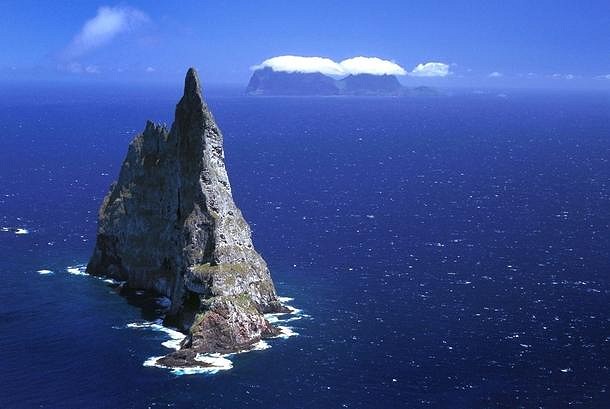
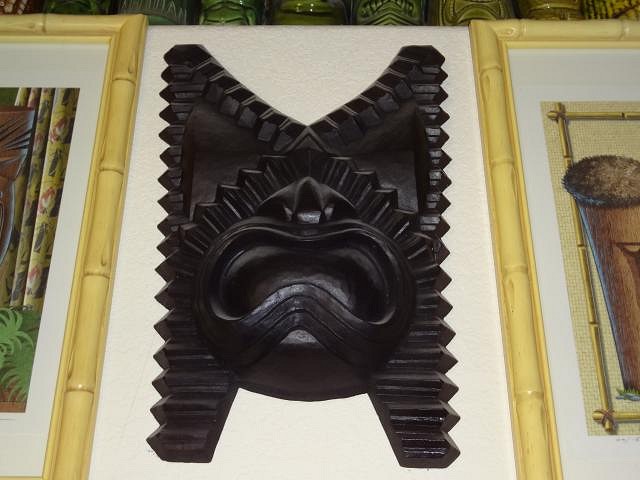
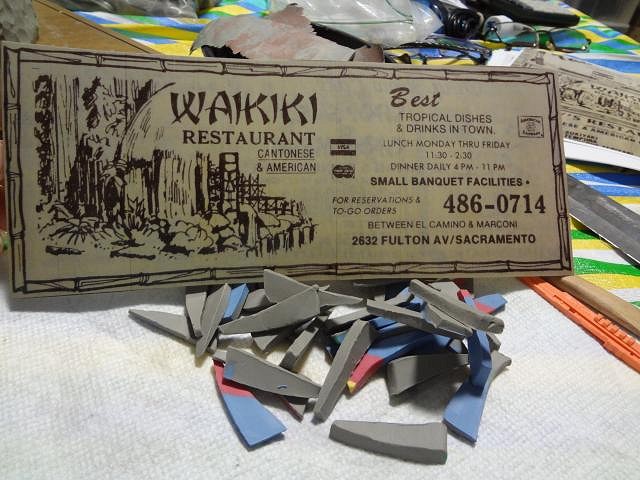
hang10tiki I just found out that since my fb page is not public that only friends can see my posts. Sorry. ============================== The final version (prior to drying and glazing) of the Sacramento Crawl mug for October 2018. My mug's inspiration for shape. The inspiration for the tiki came from Freddie Coester. He made this tiki and gave it to us as a gift. The Sacramento tiki place for the name. Only the foundation still exists. A cleaned up mug. The first of two pockets for dry ice/ rum sugar cube at the top. Oops! I took this photo before adding the volcanic surface to the dry ice/rum sugar cube cup on the left. The tiki at the bottom comes from the phone book ad from an old telephone book. Here it has been done.
With one mold it will be one mug cast each day possible and cleaned up. Cheers, Wendy |
|
PP

Prikli Pear
Posted
posted
on
Wed, Feb 28, 2018 10:19 AM
Wendy, that is utterly insane! I mean that in a good way, but still, utterly insane! |
|
P

Piddersthecat
Posted
posted
on
Wed, Feb 28, 2018 9:25 PM
That is a behemoth mug or jug or bucket!! :) It's going to be awesome glazed. |
|
G

GROG
Posted
posted
on
Thu, Mar 1, 2018 8:02 AM
You're working too hard. That thing's huge. Do people have shelves big enough to hold that thing? You're going to have to pour smaller molds. GROG' molds an inch or so thick, not 2 inches. Dan going to throw out Dan' back lifting those molds. Looking good. You're crazy. (come glaze GROG' ceramics so GROG not have to do damned glazing) |
|
D
danlovestikis
Posted
posted
on
Thu, Mar 1, 2018 10:10 AM
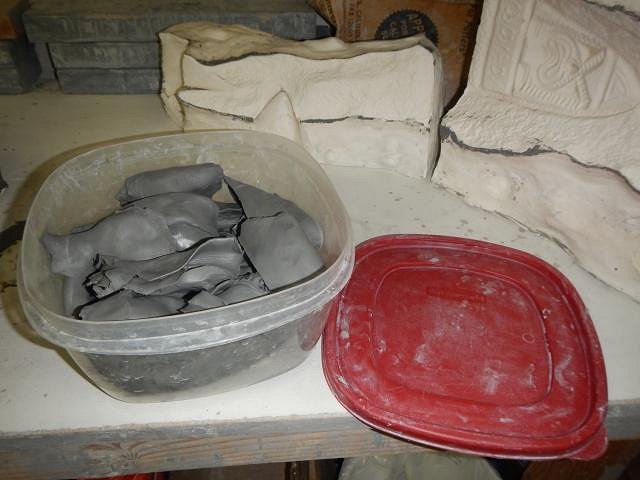
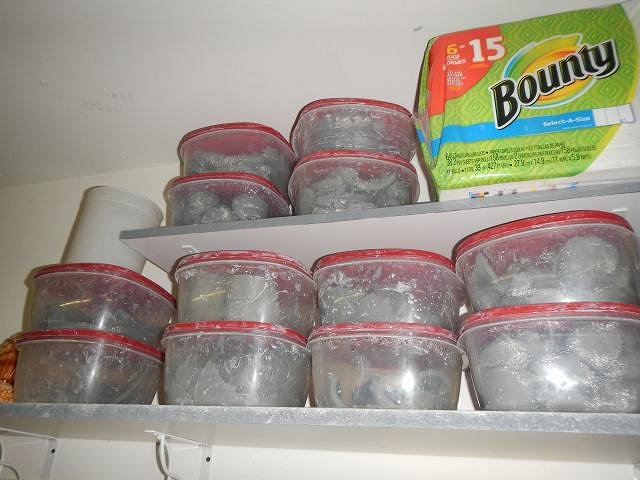
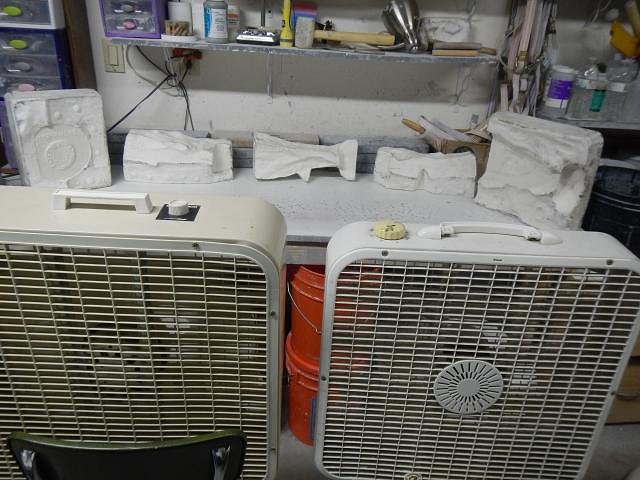
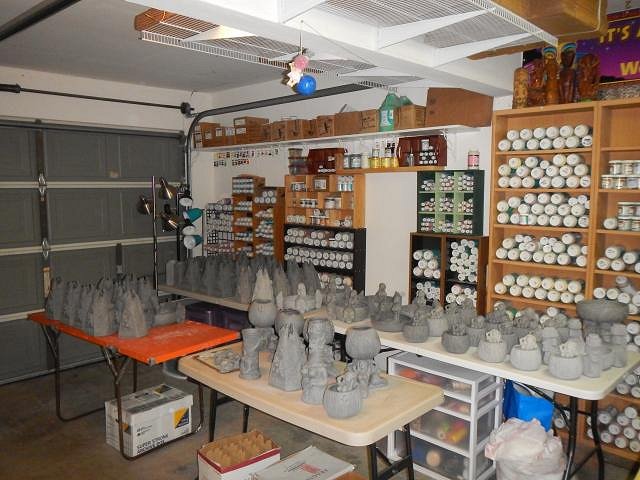
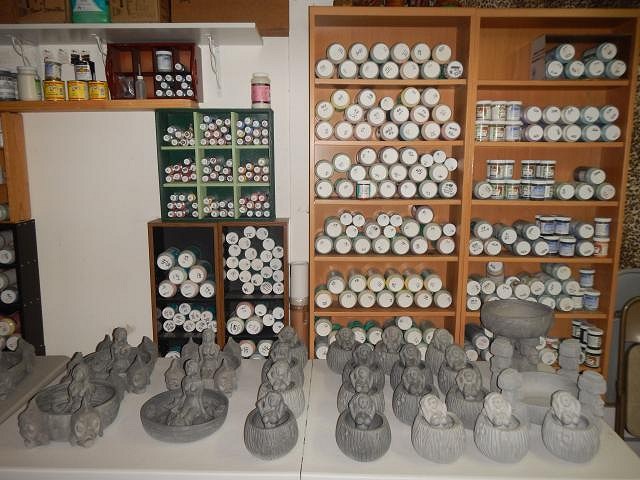
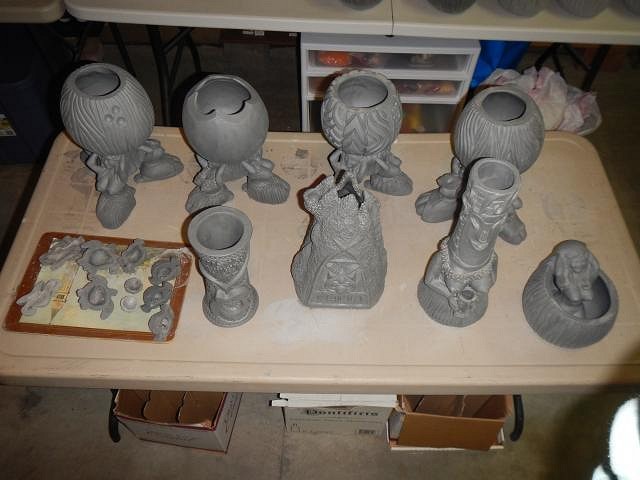
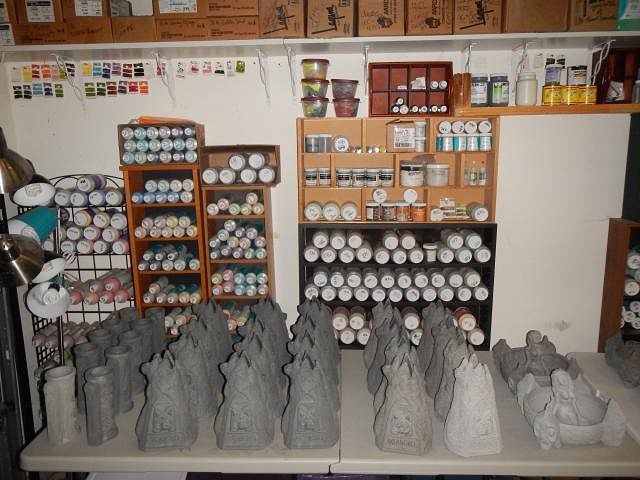
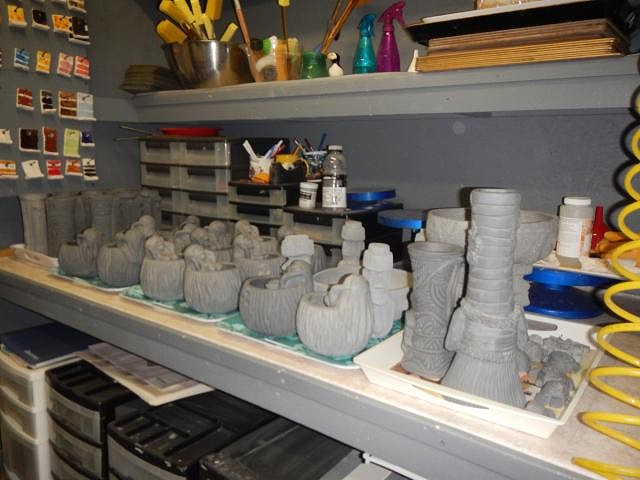
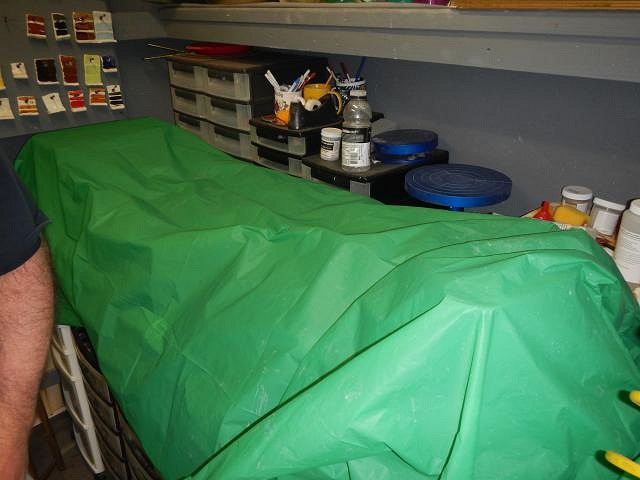
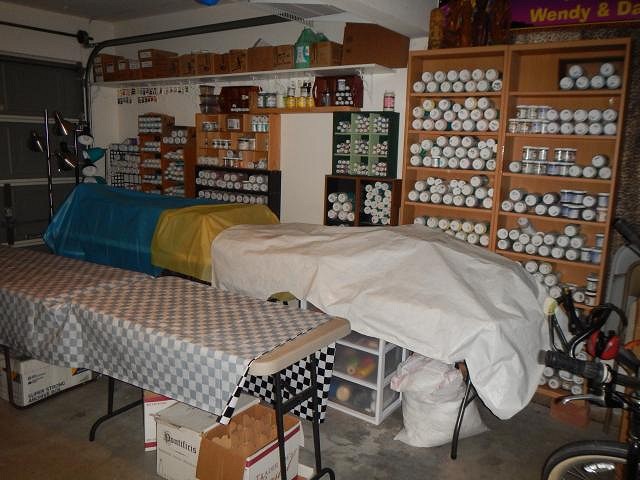
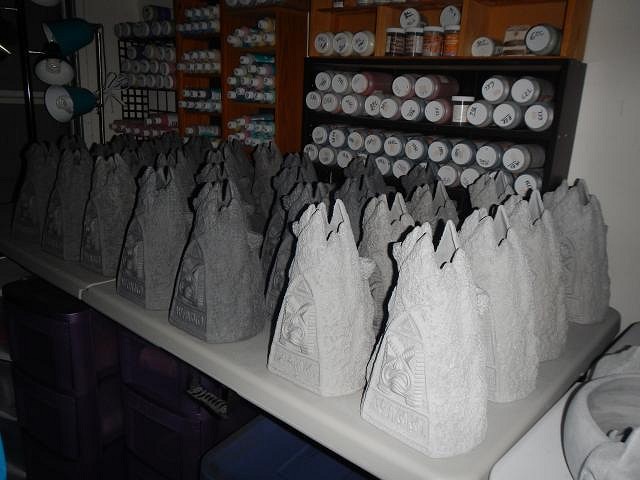
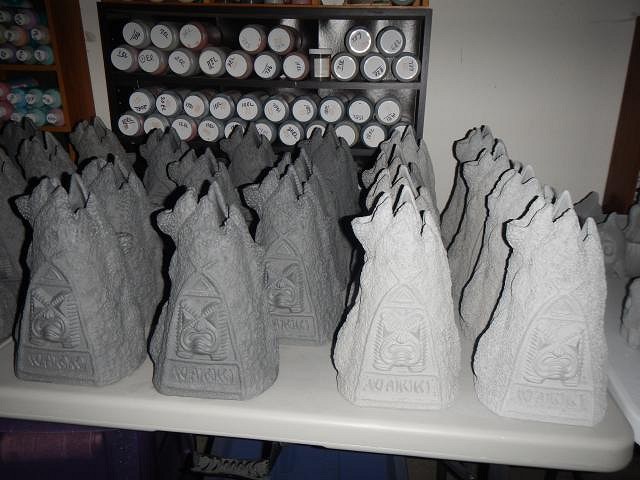
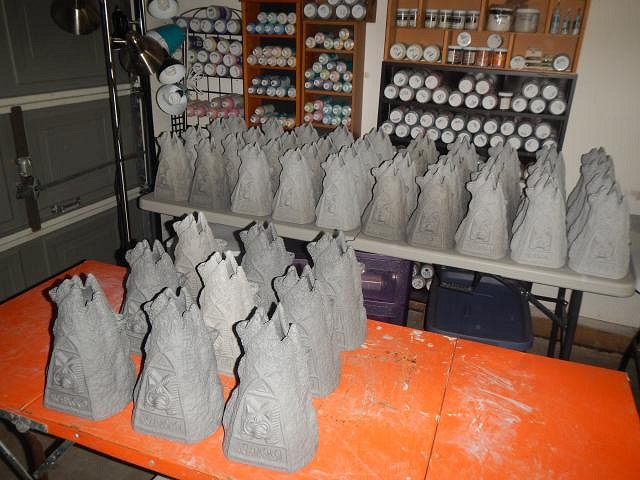
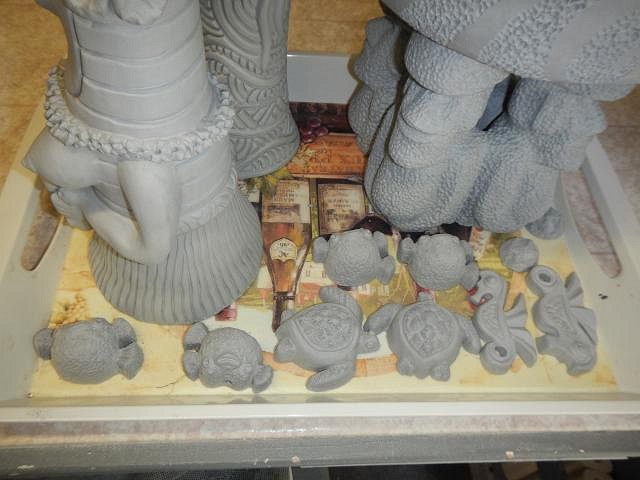
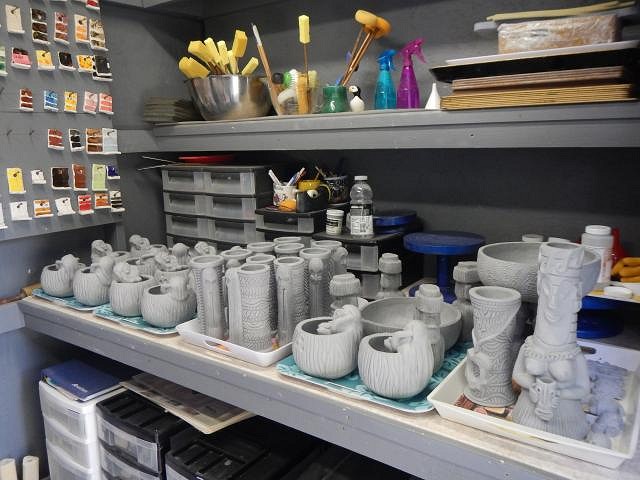
Prikli Pear that's what Dan says as he lifts the mold. That's what I'll say when it takes gallons of glaze to cover it. Piddersthecat I'm looking forward to the day the glazing starts. So many projects my head is spinning. I could star on the Exorcist. GROG I'm waiting for my round trip ticket to spend a day glazing with you! Would I have to live off road kill? ================================ Progress Report on the Sacramento Crawl mug and Wish List #8. Here are more photos than you could possible want. Thank you for the visit. This is how I keep track of how many I pour from a mold. I can do one volcano a day as long as we are home long enough to wait to pour out the slip 3 hours after pouring it in. We try to do this at 6:00am. Today it was at 8:00am so we have to be here at 11:00 am to pour it out. I started both the Wish List and Crawl mug in October. That's five months ago. Many Wishes have been shipped. I rotate the work. Clay, black velvet paintings round and round. All of it is enjoyable for me.
To make room in the garage I had to move projects that were drying to the kiln shed. Now each day we have two areas to remember to cover and in-cover so that they will dry slowly. Now I have more space to hold projects. Even when drying projects slowly they can still crack and need to be fixed. As the clay dries it becomes a lighter shade of grey.
The tables are filling up again!
May your day be wonderful and full of smiles. Wendy |
|
H
Hamo
Posted
posted
on
Thu, Mar 1, 2018 11:35 PM
Wow, look at all those volcanoes. Dan must eat a lot of Wheaties at 6 AM. |
|
D
danlovestikis
Posted
posted
on
Fri, Mar 2, 2018 9:26 AM
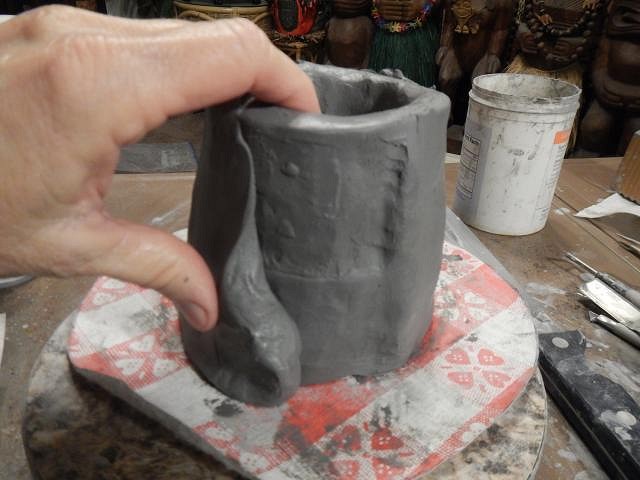
Hamo the volcanos are almost too heavy for me to lift before they dry so when he dumps the mold he is lifting around 60 pounds. I'm so lucky to have him. =========================== While working on the Sacramento Crawl mug I've also been working on the Wish List #8. Here is a wish for Jimmy White which is a Tiki Bobette. She will have a brightly colored moo moo on while partying. She can drink from a coconut and play a drum at the same time. Cheers! I save the tops I cut off of mugs so that I can use them later to make my Tiki Bob's taller. I put them on the bottoms with sticky clay (clay mixed with slip). Then I build out the skirt I have a huge what do you call it? It turns around. I was going to use it to make huge bowls but I never did. Now I use it on these additions of clay. As I roll the tiki it turns so I never have to lift the tiki until it is done. Using my fingers I pull out the bottom to Here's how it turned out. Now I wrap the top and let the bottom firm up for a few hours. Then I lightly cover the mug overnight. It's time to make the mug a woman. Then I add arms and a coconut. I sculpted flowers on both sides of the head. Here's one side done. Here I've carved the rings and a dress. Then on all exposed flesh I did texturing. The finished photos tomorrow. Wendy |
|
H
hang10tiki
Posted
posted
on
Sat, Mar 3, 2018 7:51 AM
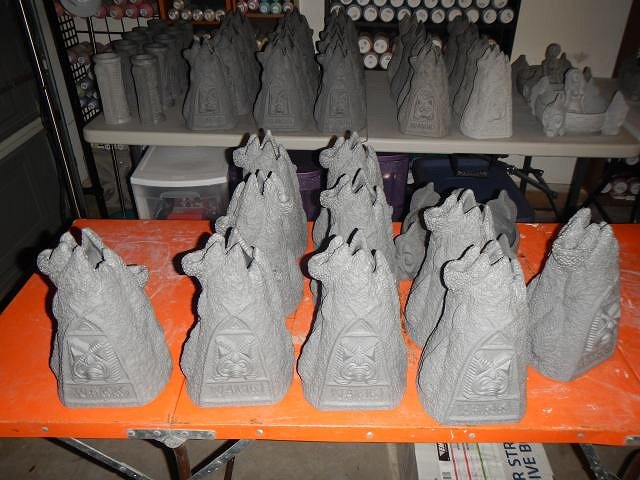
That volcano lineup is very impressive |
|
D
danlovestikis
Posted
posted
on
Sat, Mar 3, 2018 8:39 AM
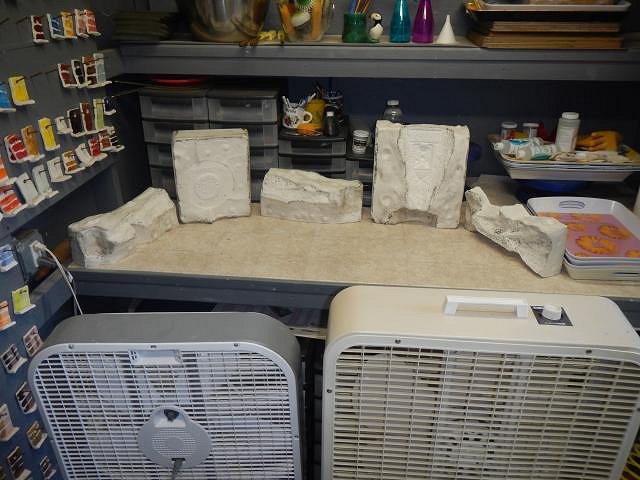
hang10tiki I hope when glazed it will look as good as it does in grey. Thank you. ===================================== Progress Report Wish List #4 The Tiki Bobbette is finished being sculpted.
With a brightly colored moo moo I think Tiki Bob will not be able to pull his eyes away from her! Cheers, Wendy |
|
G
GROG
Posted
posted
on
Sat, Mar 3, 2018 10:42 AM
You're working way too hard for a retired person! You've inspired GROG------to take a nap. |
|
D
danlovestikis
Posted
posted
on
Sun, Mar 4, 2018 9:25 AM
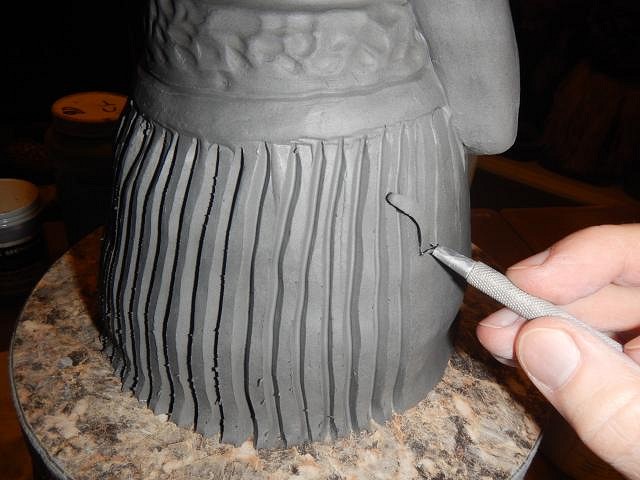
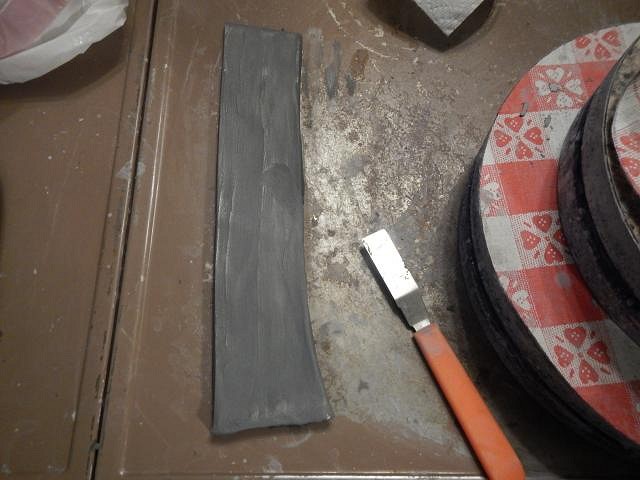
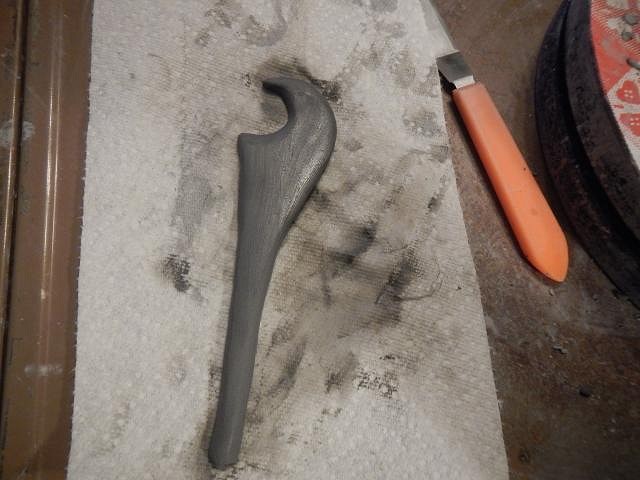
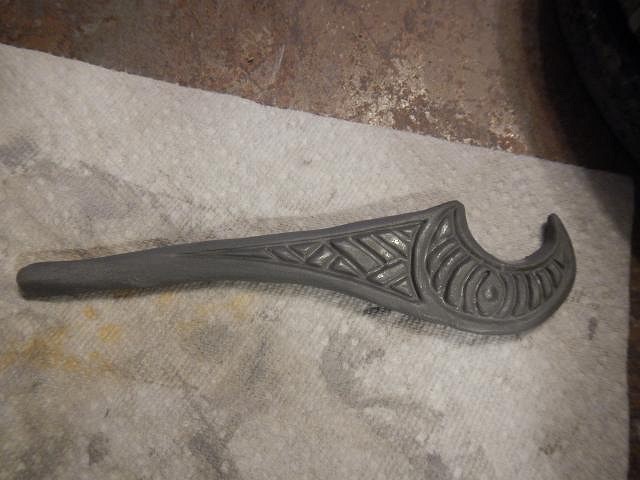
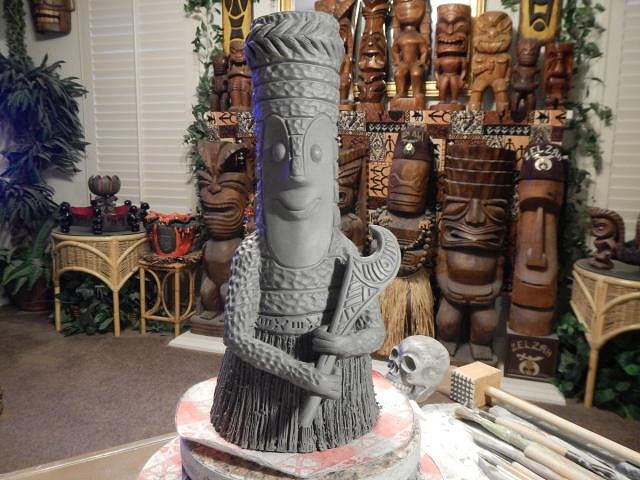
GROG wake up you have glazing to do! ===================================== As I progress through making the Sacramento Crawl mug and Wish List #8 I relax by making Tiki Bob's. Here are some step by steps on my most recent one. He is Warrior Hula Bob. I start off with clay I have cut off from a prior mug. It is actually a cast of the area where the slip is poured into the mold. I just add clay to it to build out the hula skirt. I let the skirt sit while I add a ring of clay and I carve it into leaves on the Tiki Bob mug. Day two I finished the rings and texture on Bob. The grass skirt is ready to add. I put sticky clay on top of the skirt and then stuck him on. I rolled him on the turn wheel to make the skirt longer. I will need to trim the bottom because it will be uneven. Day three I added arms that will hold his club. Not only will I use this tool for the grass I will use a wire brush. Day four I made his war club. I cut the shape. Day Five the club is firm enough to carve. I did both sides the same. Day six the skirt is now hard enough that I can carve out clay from inside. If I left it this thick it would crack. After carving out the clay I smoothed it with a wet ball tool. Later I will carve my name and copy write in this area. Thank you for the visit, Wendy |
|
D
danlovestikis
Posted
posted
on
Mon, Mar 5, 2018 7:44 AM
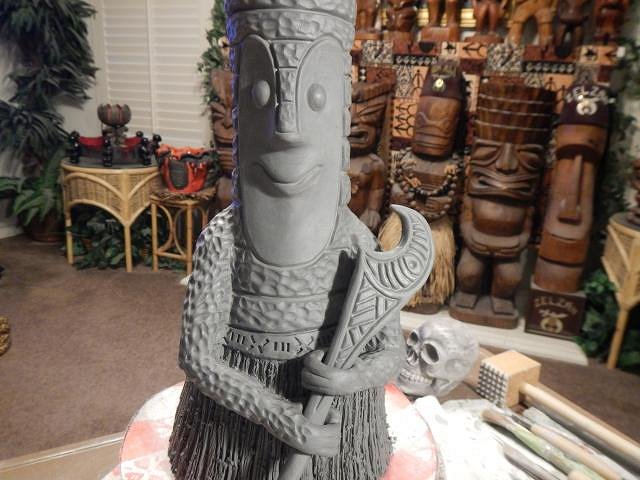
Progress Report on Wish List #8 The finished photos of Warrior Hula Bob
Without a flash. The difference in color is that the one on the left is almost dry and the other one has a long way to go. Tiki Bob is my playmate. Together we do dress up days. Wendy |
|
D
danlovestikis
Posted
posted
on
Wed, Mar 7, 2018 8:54 AM
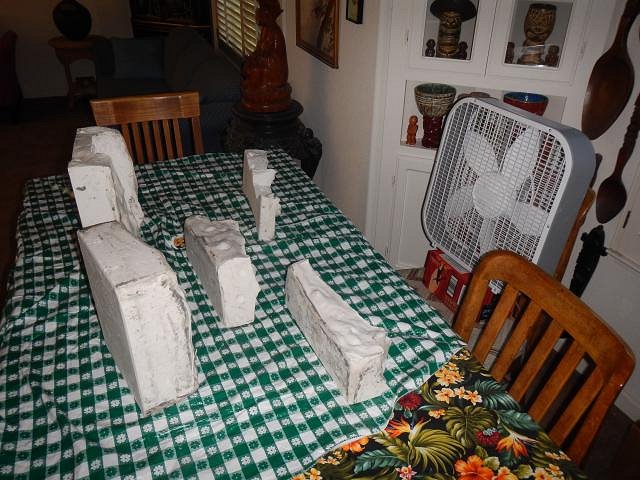
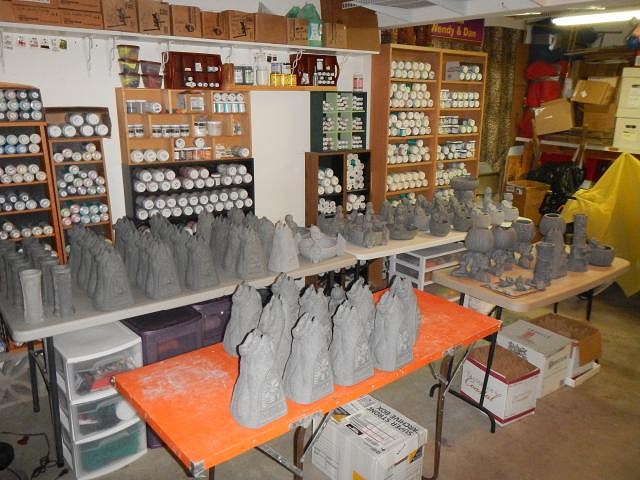
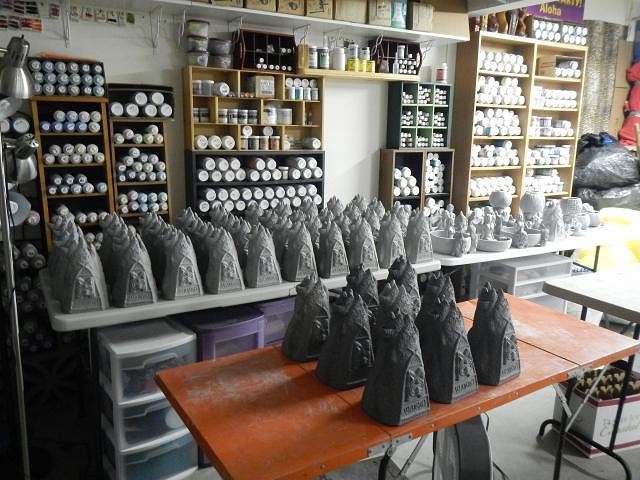
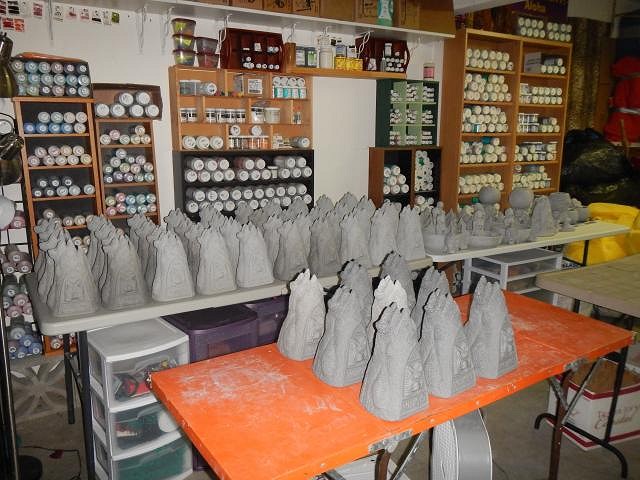
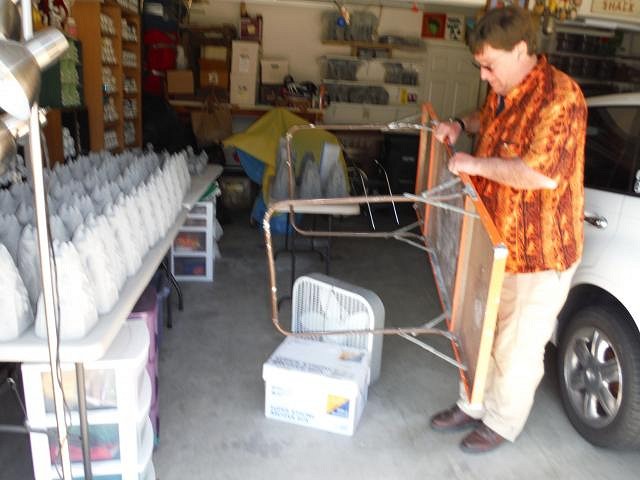
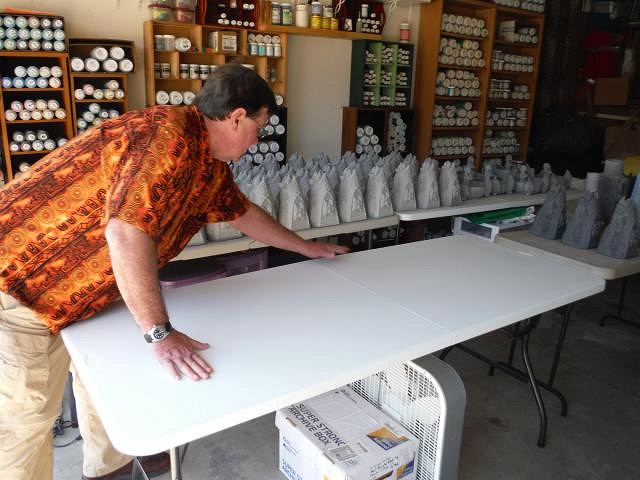
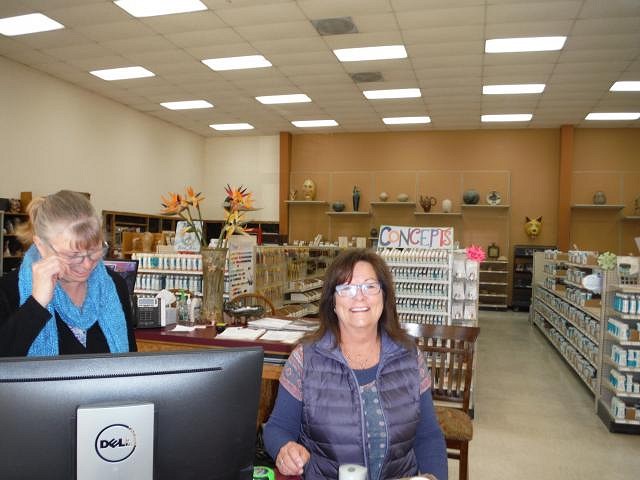
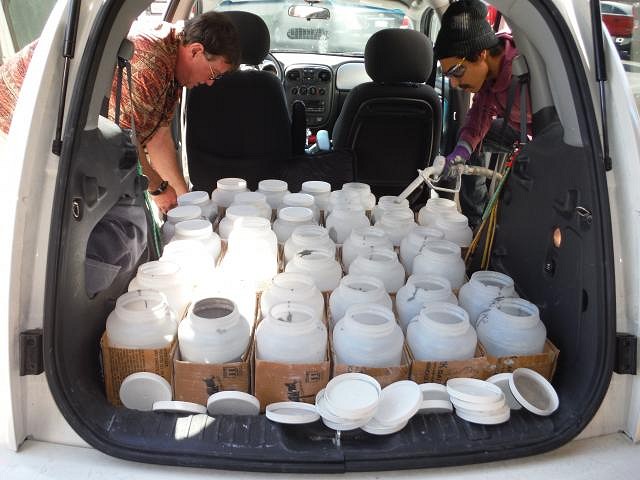
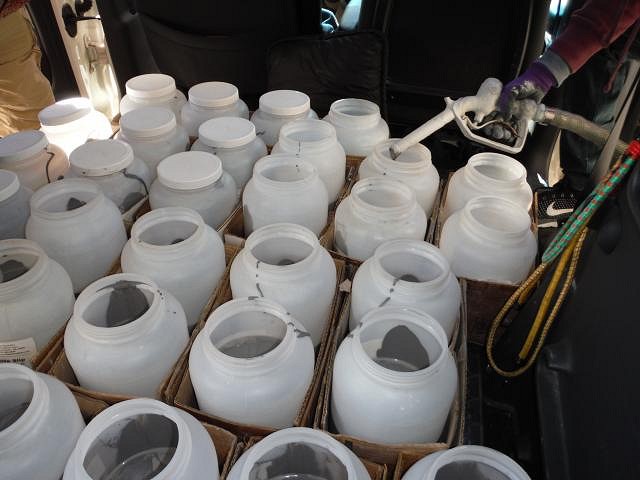
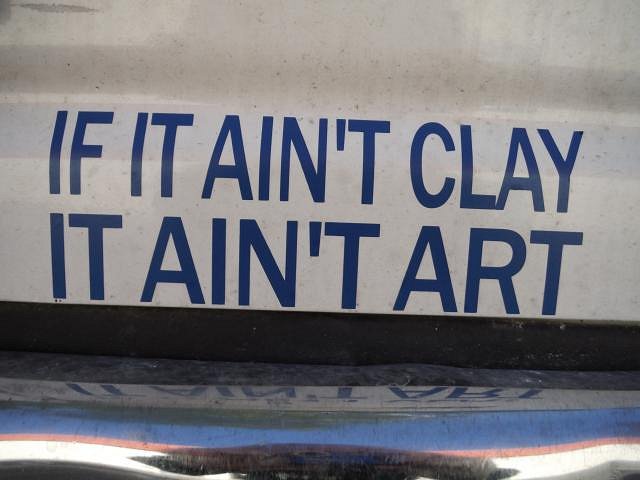
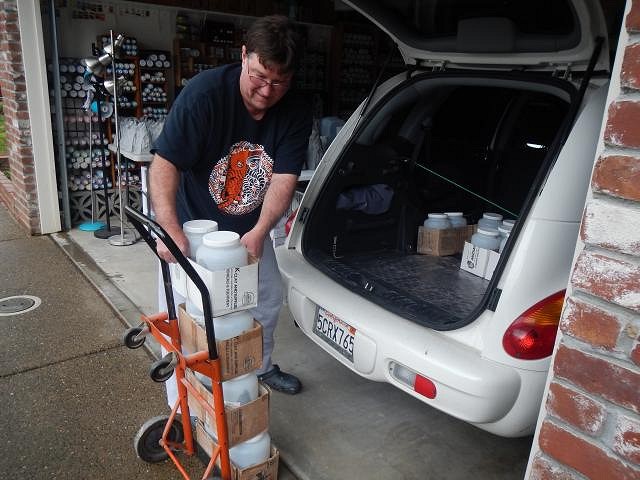
Today was a day of clay chores. This table wasn't strong enough to hold more than 9 volcanos. They are so large and heavy. So Dan folded it up and we went and bought another table. Large and strong. It will hold 200 pounds like my other tables. Then it was off to Alpha Fired Arts. I buy glaze and Dan goes to the back to get slip added to our jars. We have them half way filled to leave room for adding water and for shaking them up. It means more trips but it's worth it. Some artists use a mixer but that adds more cleanup when you are just pouring one mug a day. This was on a van in the parking lot at Alpha! I disagree but it was fun to read. Then at home Dan unloaded the car. There's always something to do. Cheers, Wendy |
|
H
hang10tiki
Posted
posted
on
Wed, Mar 7, 2018 10:27 AM
Warrior bob, great idea Easy on the back Dan-0 |
|
D
danlovestikis
Posted
posted
on
Thu, Mar 8, 2018 8:45 AM
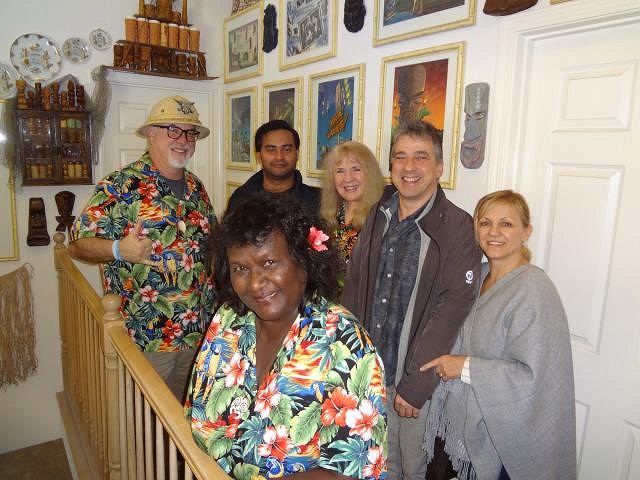
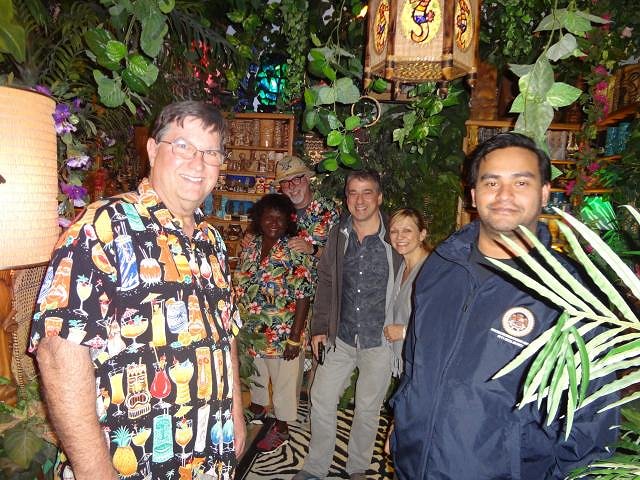
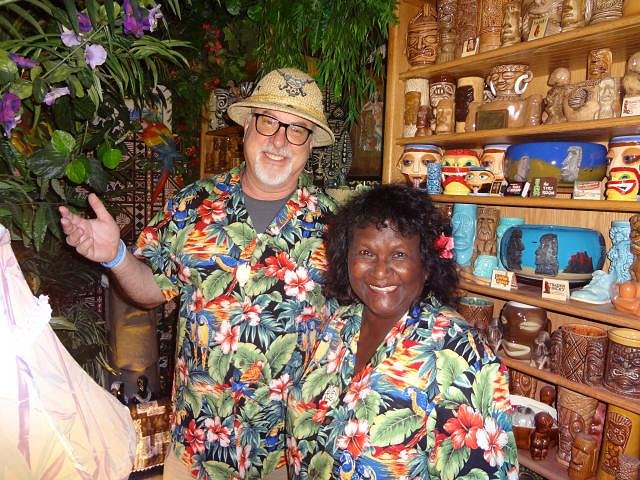
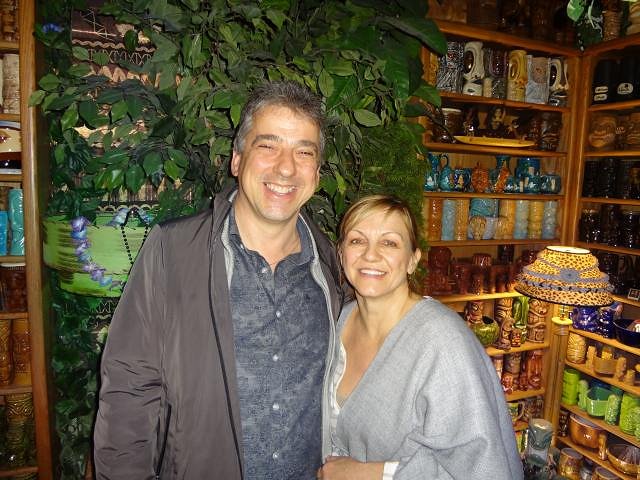
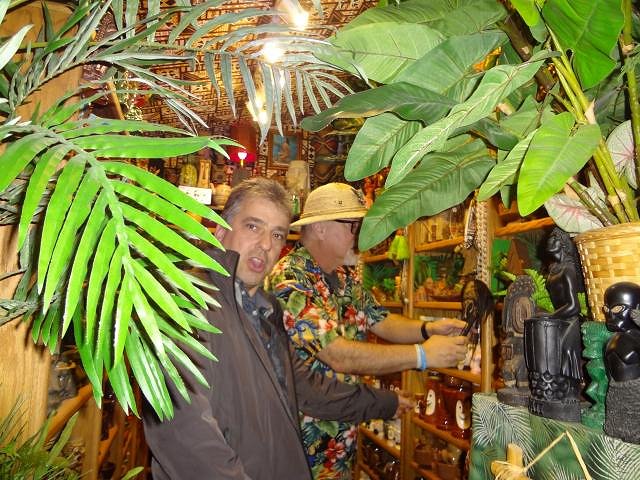
hang10tiki I really enjoyed making that small club. I even carved it on both sides. Tell SewTiki I sent her a message under the PM's that she should join the swap again. ======================================== I'm always behind in posting so the visit shown here was a few weeks ago. Our guests on this day came to pick up their tiki art. We gave them a tour. This is the upstairs hallway. Then into the tiki jungle room. Roger and June in matching shirts. Eric and Veronique. I think he said this is a @#$!load of tikis! Just kidding. He ended up taking the last of my tiki art I had in the closet. Dan wrapped up everyone's art and off they went. It was a really fun day. Cheers, Wendy [ Edited by: danlovestikis 2018-03-08 08:47 ] |
|
E

EnchantedTikiGoth
Posted
posted
on
Thu, Mar 8, 2018 12:52 PM
Oh my gosh, I love all the foliage in your jungle room! That's amazing!! |
|
H
hang10tiki
Posted
posted
on
Thu, Mar 8, 2018 1:01 PM
HAPPY BDAY DAN-0
[ Edited by: hang10tiki 2018-03-08 13:07 ] |
|
H
Hamo
Posted
posted
on
Thu, Mar 8, 2018 7:30 PM
Happy birthday, Dan! I hope you didn’t have to lift any molds today. |
|
D
danlovestikis
Posted
posted
on
Fri, Mar 9, 2018 9:40 AM
EnchantedTikiGoth that's five years of 40% off coupons and year end close outs at Michael's. He re-created the Rain Forest Café. hang10tiki that's sure a cut photo of you. He liked that very much. Hamo not only did he lift the mold I sanded 32 mugs and he blew off all the dust and loaded the kiln! But then I took him out to a very late lunch. I had one present for him that I found at Goodwill for $2.19. Super heavy and carved out of lava. He needs to wash it, the dust is very thick. He says thank you for the birthday greeting. Here's Dan mimicking the tiki!
========================================================================= Back later with more photos. |
|
D
danlovestikis
Posted
posted
on
Fri, Mar 9, 2018 10:09 AM
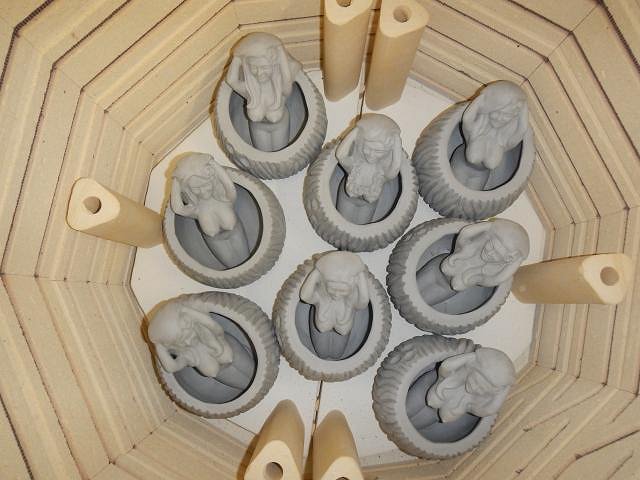
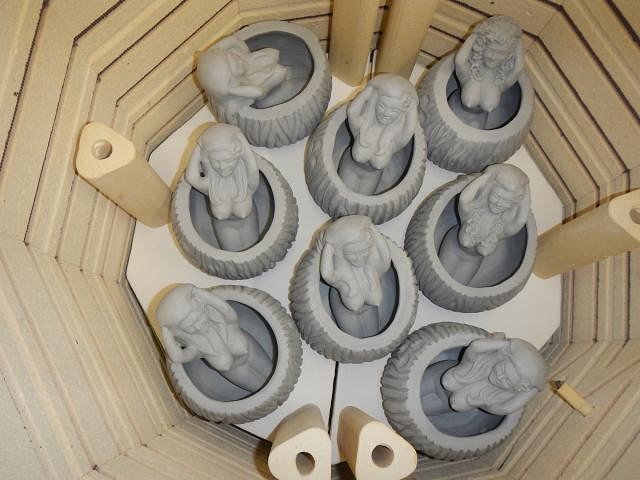
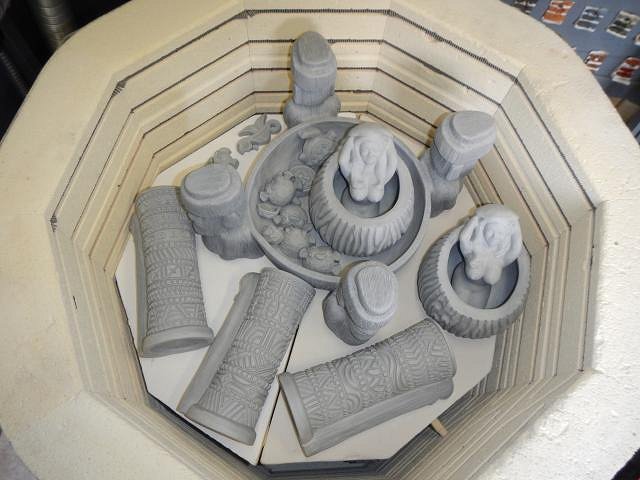
Progress Report for Wish List #8. To celebrate Dan's birthday we poured a crawl mug and then I sanded and he used the air compressor and loaded the kiln. Even though I think these are all completely dry it's hard to know in cold weather. It's been months since I made them so what I will do is preheat the kiln for 10 hours with them inside to dry them out for sure. I so all the sanding and then Dan takes them out to use the air compressor on them to keep dust out of the kiln. One at a time. After Dan dusts them he loads the kiln. Here is the first layer. Second Layer. Third layer. This is the bisque fire to shrink the clay as much as possible so that when you glaze and the mug cools the glaze doesn't pop off. For this load I did a 10 hour preheat and a 13.5 hour slow ramp. This helps to prevent cracking. Then the kiln cools down in 24 hours and when it is below 130 degrees it can be opened. However I prefer to wait until it is the same temperature as the outside. Again this helps prevent cracking. His birthday is over and it's time to go back to work! Wendy |
|
T

TikiAno
Posted
posted
on
Fri, Mar 9, 2018 12:15 PM
Belated Happy Birthday Dan!!! Wendy, wow those new Bobs are wowzers! :) |
|
D
danlovestikis
Posted
posted
on
Sat, Mar 10, 2018 8:08 AM
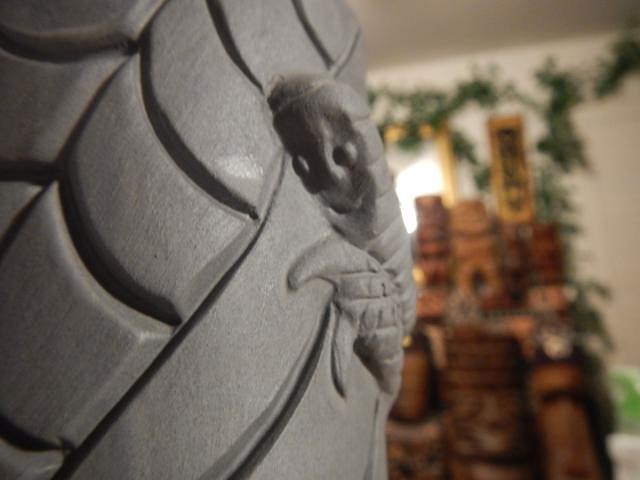
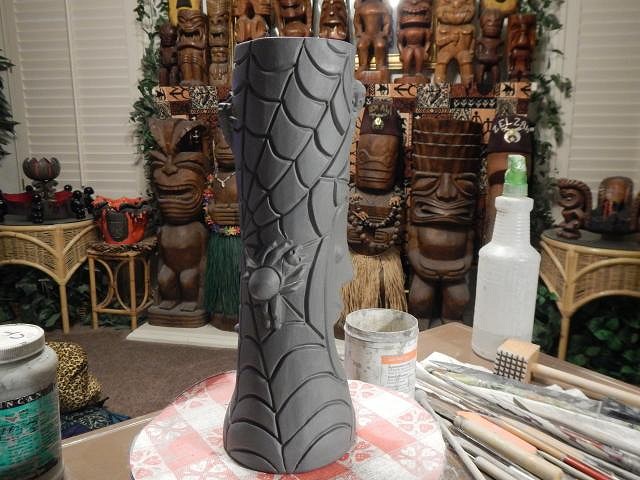
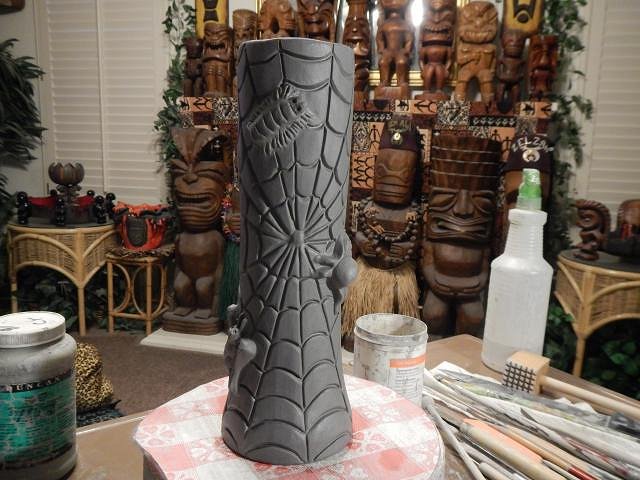
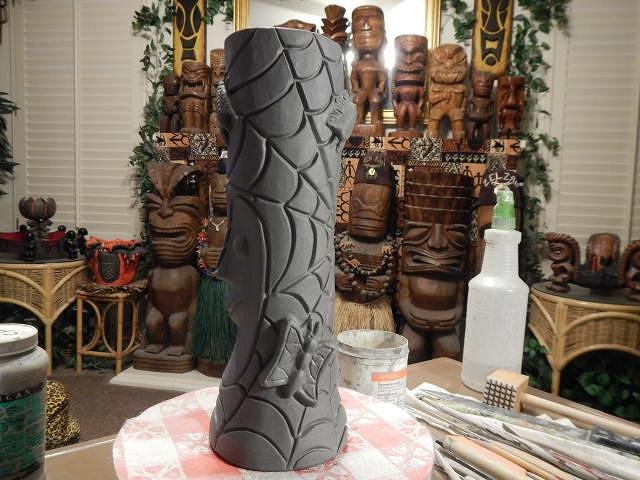
TikiAno both Dan and I thank you for your message. ====================================== Progress Report on Wish List #8 As you have heard in the past Dan works for tikis. To keep him going I made a requested Tiki Bob for him. It's buggy and Sci Fy. I start with a Tiki Bob cast and then I clean off the mold lines. I cut out some squares of clay that will become the bugs and put them on the mug. I began to carve this one into a fly and this one into my version of a butterfly. Next I covered the entire mug with a spider web. The bugs are caught. For the Sci Fy look the fly has the face of a Tiki Bob. Next a big spider and the centipede and a butterfly. I have fun doing Tiki Bob conversions. I wish you all a great weekend. Wendy [ Edited by: danlovestikis 2018-03-10 08:10 ] |
|
G
GROG
Posted
posted
on
Sat, Mar 10, 2018 9:04 AM
What a fun and unique BOB. GROG like. |


Pages: 1 2 3 4 5 6 7 8 9 10 11 12 13 14 15 16 17 18 19 20 21 22 23 24 25 26 27 28 29 30 31 32 33 34 35 36 37 38 39 40 41 42 43 44 45 46 47 48 49 50 51 52 53 54 55 56 57 58 59 60 61 62 63 64 65 66 67 68 69 70 71 72 73 74 75 76 77 78 79 80 81 82 83 84 85 86 87 88 89 90 91 92 93 94 95 96 97 98 99 100 101 102 103 104 105 106 107 108 109 110 111 112 113 114 115 116 117 118 119 120 121 122 123 124 125 126 127 128 129 130 131 132 133 134 135 136 137 138 139 140 141 142 143 144 145 146 147 148 149 150 151 152 153 154 155 156 157 158 159 160 161 162 163 164 165 166 167 168 169 170 171 172 173 174 175 176 177 178 179 180 181 182 183 184 185 186 187 188 189 190 191 192 193 194 195 196 197 198 199 200 201 202 203 204 205 206 207 208 209 210 211 212 213 214 215 216 217 218 219 220 221 222 223 224 225 226 227 228 229 230 231 232 233 234 235 11234 replies