Pages: 1 2 3 4 5 6 7 8 9 10 11 12 13 14 15 16 17 18 19 20 21 22 23 24 25 26 27 28 29 30 31 32 33 34 35 36 37 38 39 40 41 42 43 44 45 46 47 48 49 50 51 52 53 54 55 56 57 58 59 60 61 62 63 64 65 66 67 68 69 70 71 72 73 74 75 76 77 78 79 80 81 82 83 84 85 86 87 88 89 90 91 92 93 94 95 96 97 98 99 100 101 102 103 104 105 106 107 108 109 110 111 112 113 114 115 116 117 118 119 120 121 122 123 124 125 126 127 128 129 130 131 132 133 134 135 136 137 138 139 140 141 142 143 144 145 146 147 148 149 150 151 152 153 154 155 156 157 158 159 160 161 162 163 164 165 166 167 168 169 170 171 172 173 174 175 176 177 178 179 180 181 182 183 184 185 186 187 188 189 190 191 192 193 194 195 196 197 198 199 200 201 202 203 204 205 206 207 208 209 210 211 212 213 214 215 216 217 218 219 220 221 222 223 224 225 226 227 228 229 230 231 232 233 234 235 11,239 replies
|
D

danlovestikis
Posted
posted
on
Sun, Mar 24, 2019 7:30 PM
hang10tiki this has the string in the eyes and mouth but they are made of clay. I will glaze them to show up. It's a good idea to do them with string in the future. It would be faster too. Brown it is for all three. Wendy |
|
S

Sandbartender
Posted
posted
on
Sun, Mar 24, 2019 8:05 PM
If anyone defaults on their hot tub hula girl I have an idea for one. Or it may need to wait until the next wish list. |
|
H

hang10tiki
Posted
posted
on
Sun, Mar 24, 2019 8:19 PM
Funny |
|
D
danlovestikis
Posted
posted
on
Mon, Mar 25, 2019 8:26 AM
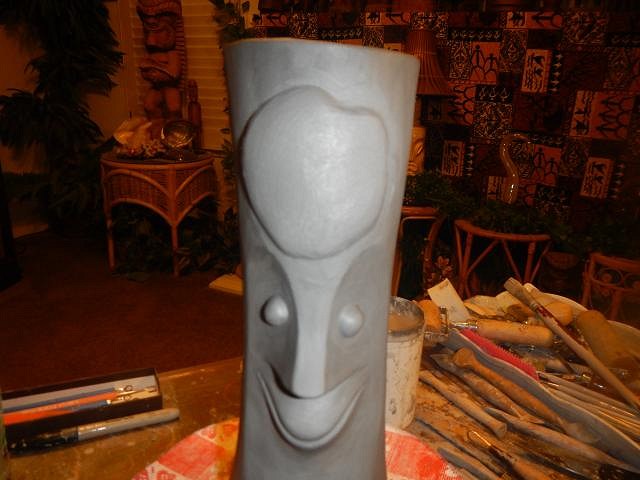
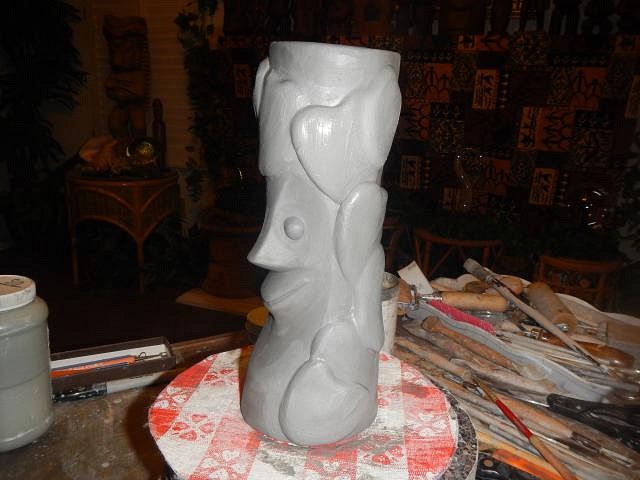
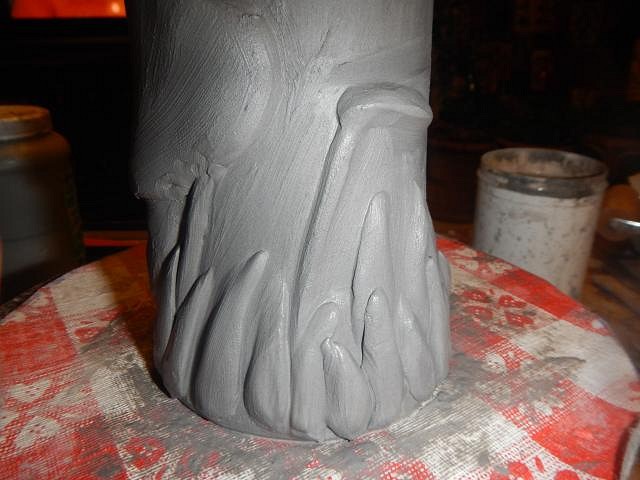
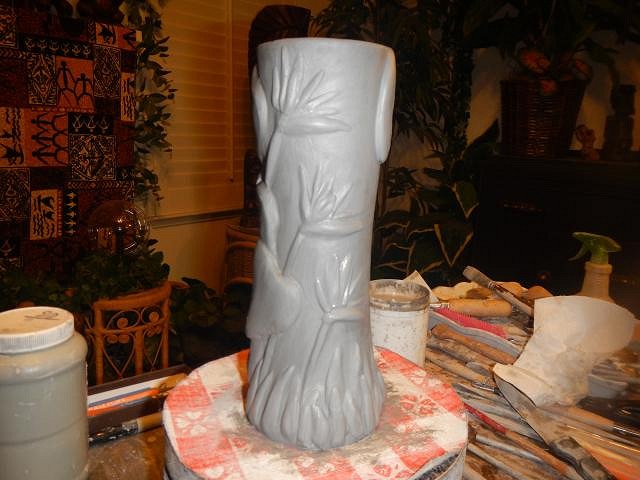
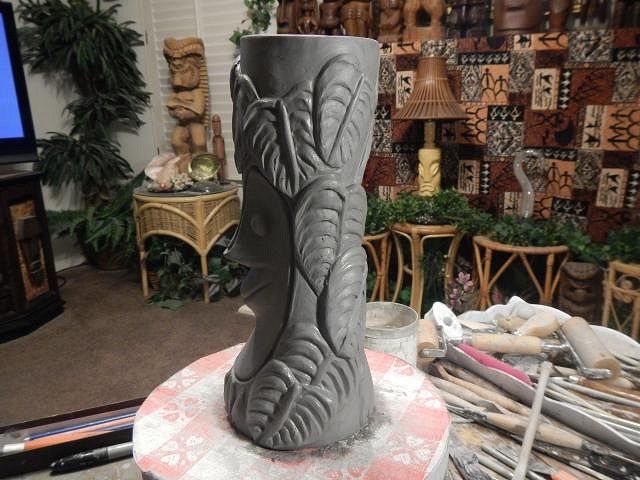
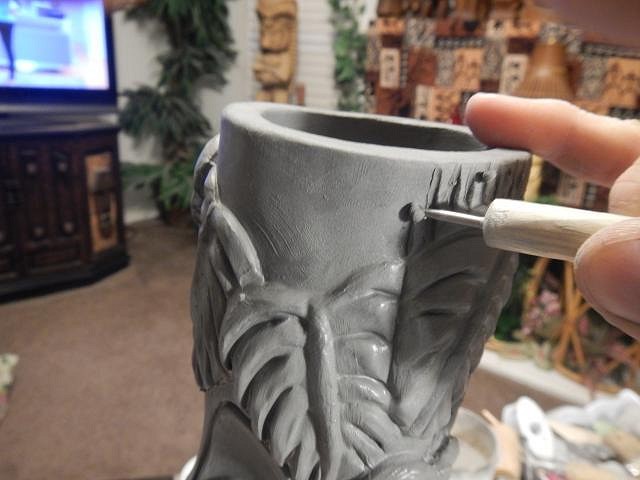
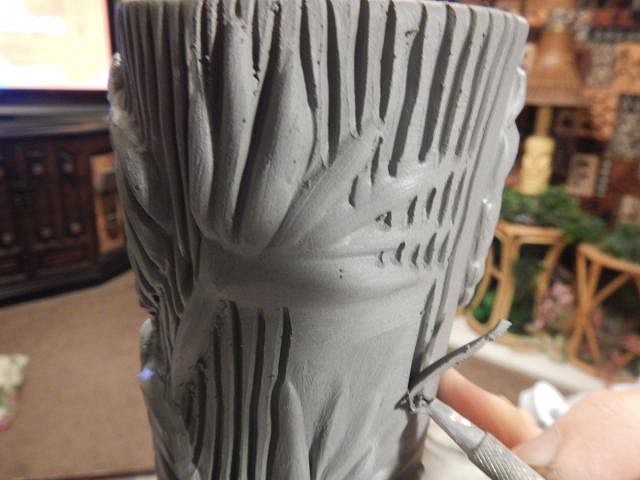
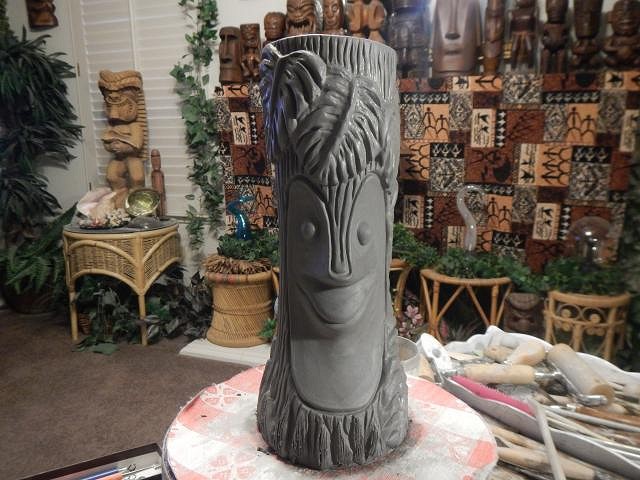
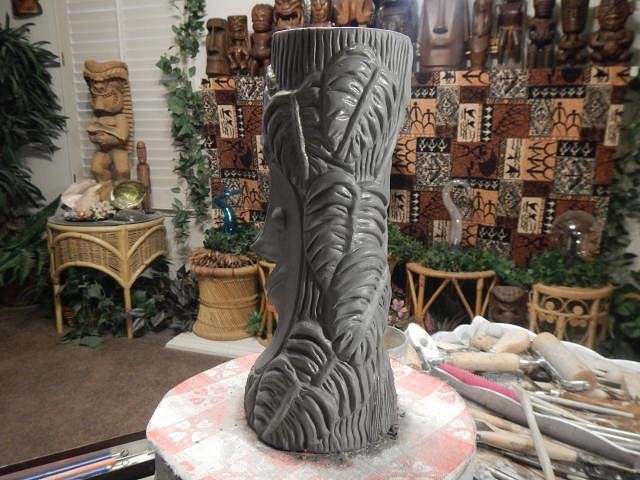
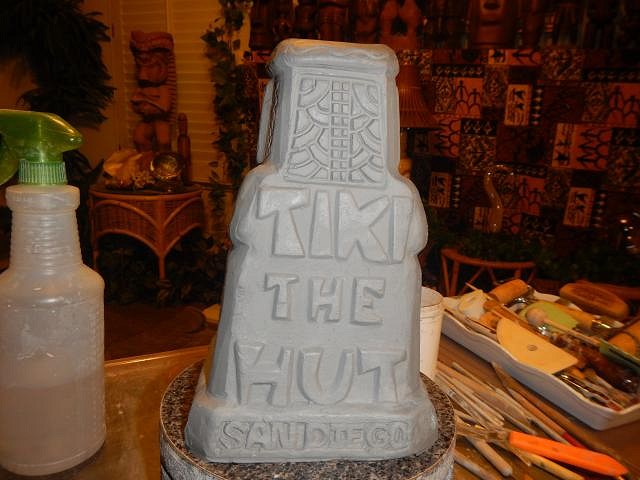
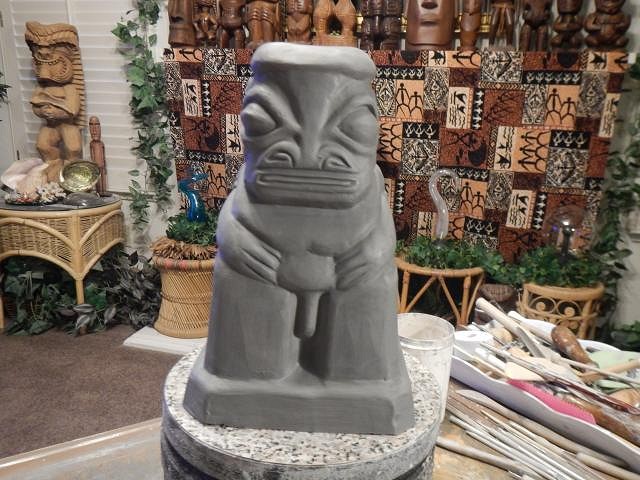
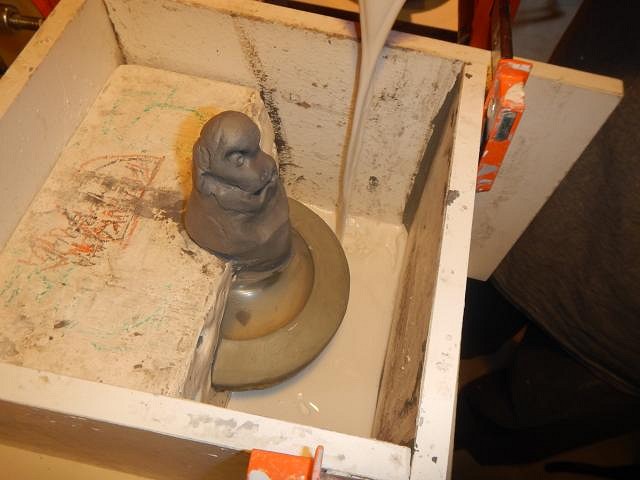
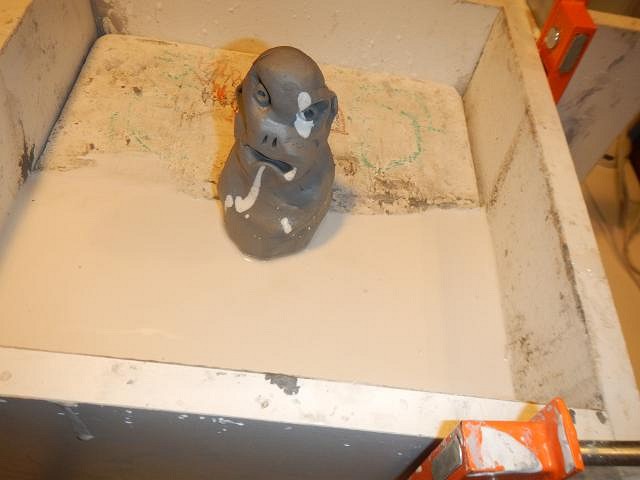
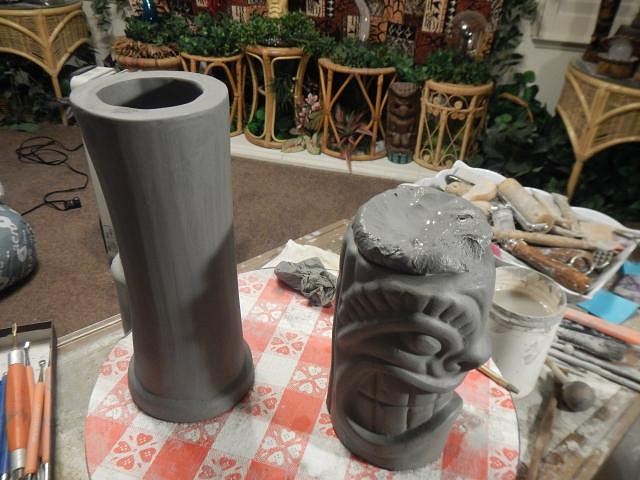
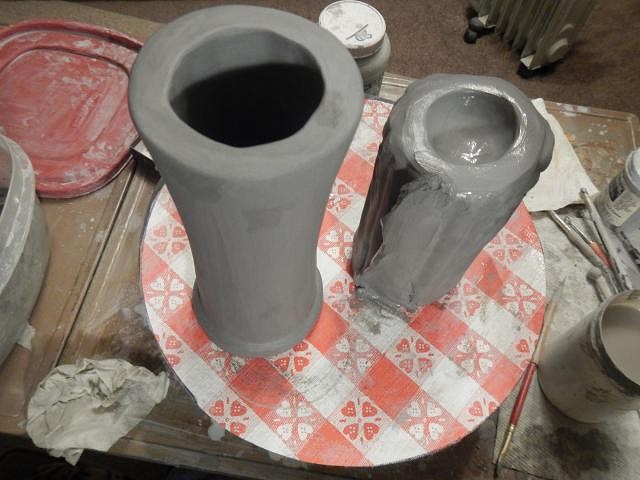
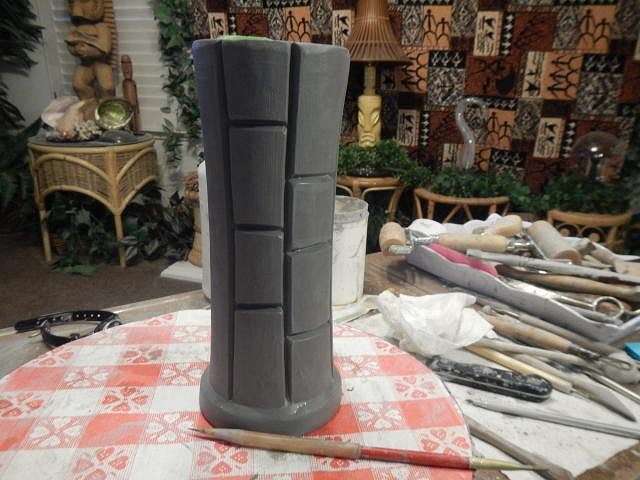
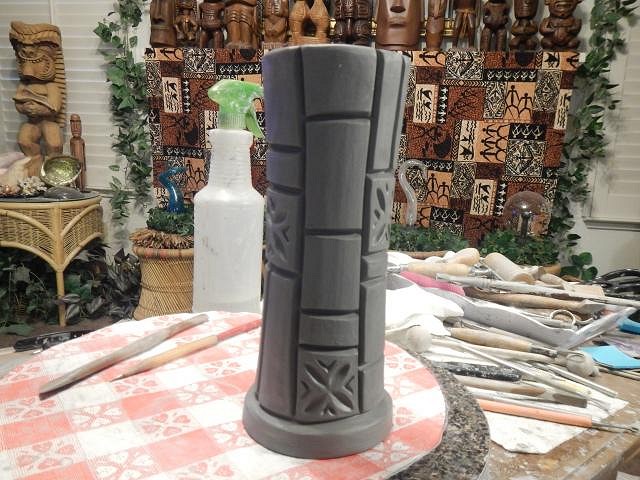
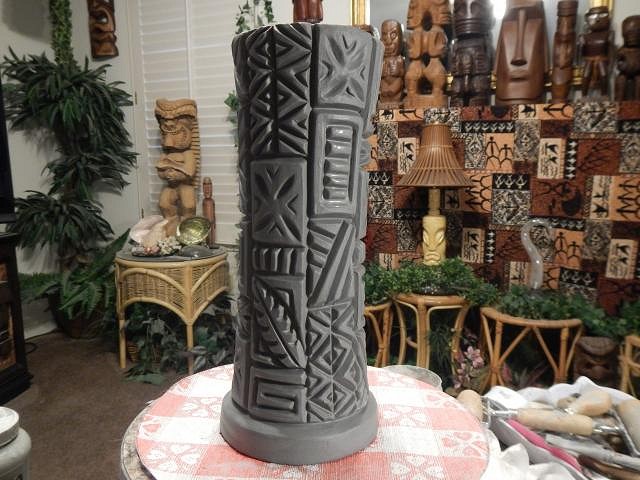
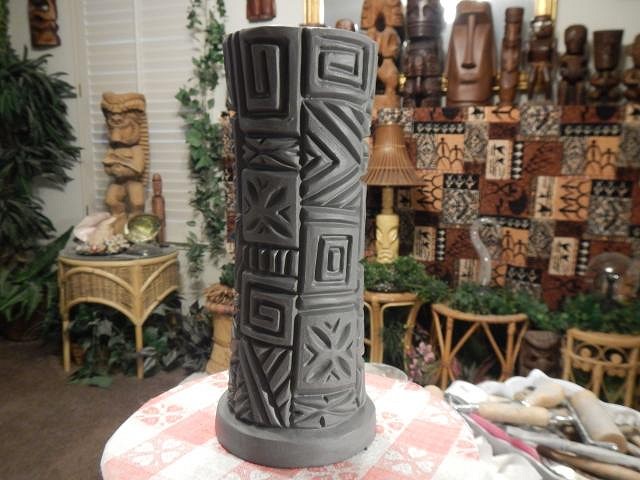
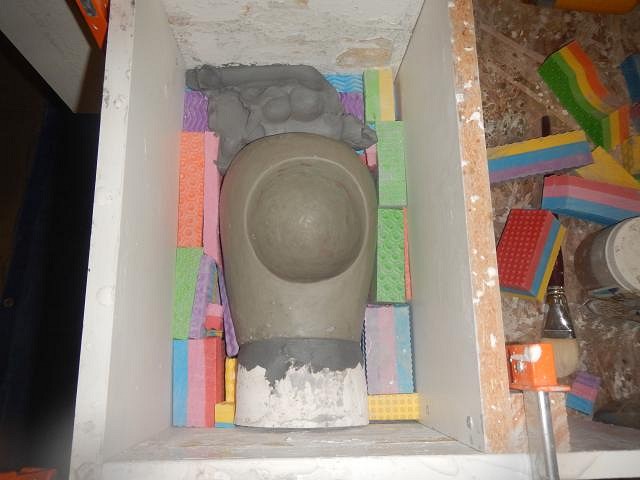
Sandbartender I do small runs of the HTHG's. If something is changed other than hair and eye color then it does become a Wish List item and costs more for the extra work. This year I checked to see if my mermaid would fit into the coconut. Not even close. I did alter one in the past for Marina the fire eating mermaid. hang10tiki ahhhhhh cell phones. Yes it would be hard to see detail with a small screen. Time magazine had an article this week that shows a connection between social media and depression in children. That would be easy to guess with all the bullies out there. ==================================== Wish List #8. Another wish has been sculpted. I did this mug for Tiki Bongos many years ago and I received a request for one similar. Here goes. Sculpting from 3/1 to 3/2/19. This is the mug I made years ago. Here are steps I take to make another one. This is for Mark Hooper.
All done and ready to slowly dry.
Glazing will be a challenge. Wendy [ Edited by: danlovestikis 2019-03-25 08:43 ] |
|
H
hang10tiki
Posted
posted
on
Mon, Mar 25, 2019 11:38 AM
Dang |
|
H
hang10tiki
Posted
posted
on
Mon, Mar 25, 2019 6:52 PM
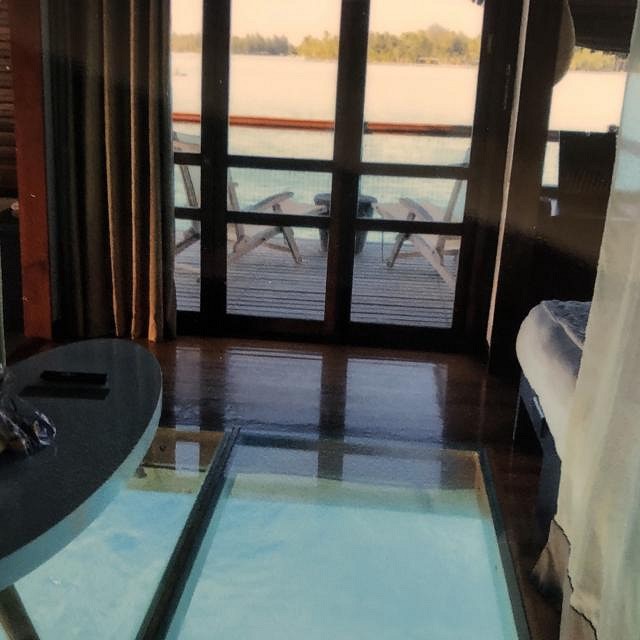
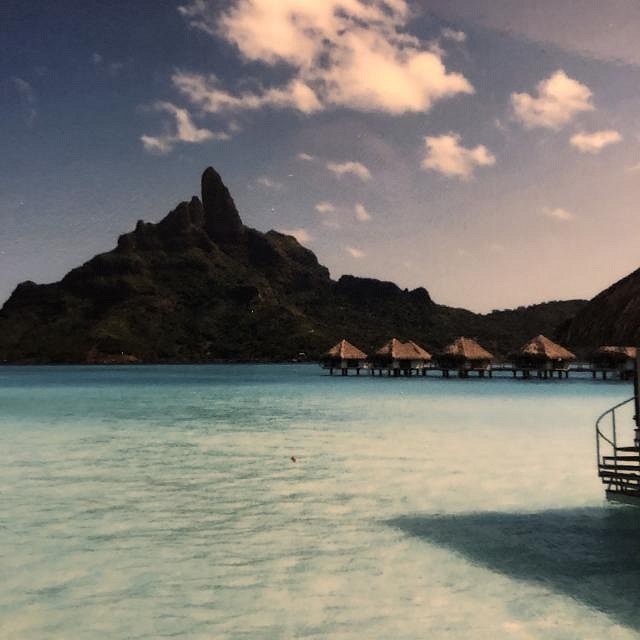
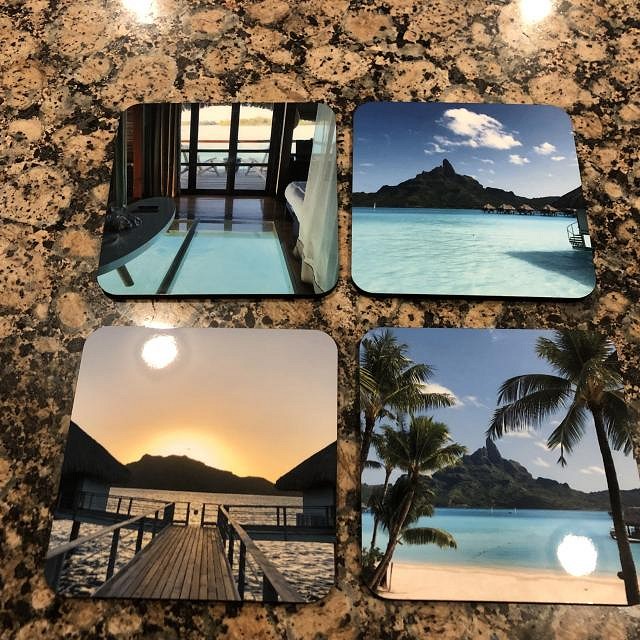
Had some coasters made
Worst sound ever, slurp of an empty tiki mug through my straw!!! [ Edited by: hang10tiki 2019-03-25 18:53 ] |
|
D
danlovestikis
Posted
posted
on
Mon, Mar 25, 2019 7:03 PM
hang10tiki all the practice over the years is helping. hang10tiki those are so beautiful. I don't think I would want to set a glass on one. Wendy |
|
M

MaukaHale
Posted
posted
on
Tue, Mar 26, 2019 4:19 AM
A nice idea making coasters out of trip photos. |
|
D
danlovestikis
Posted
posted
on
Tue, Mar 26, 2019 9:34 AM
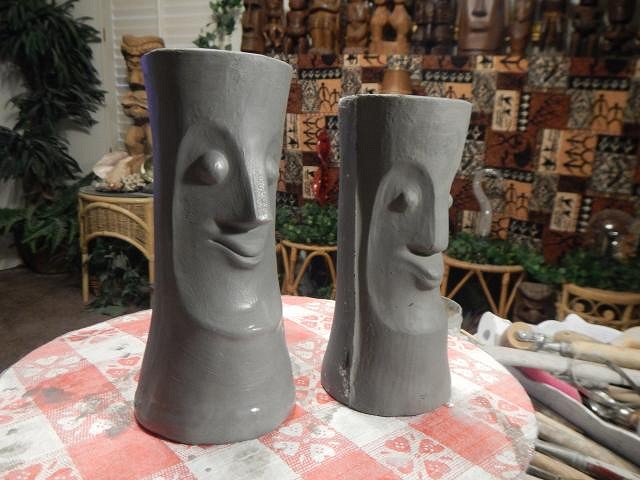
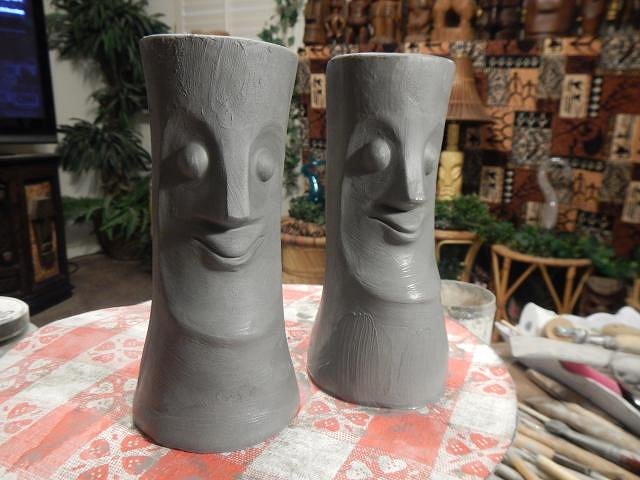
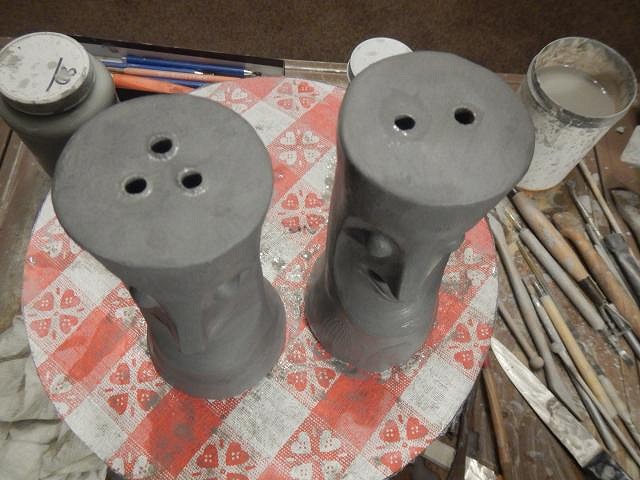
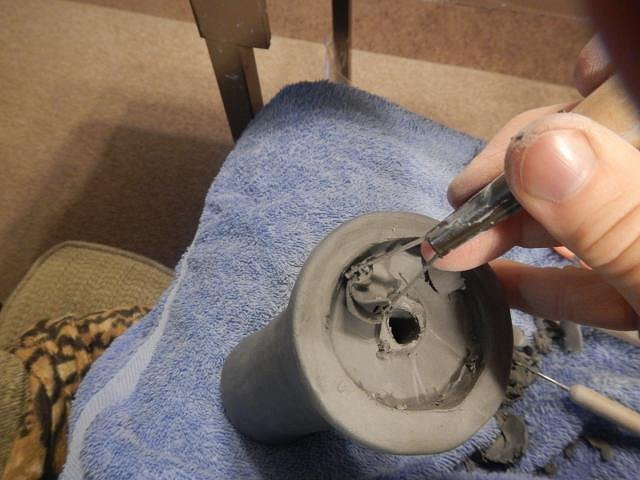
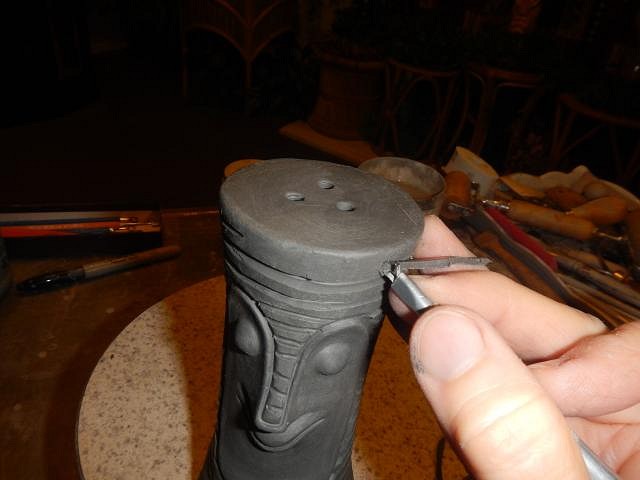
MaukaHale yes but what about my mug????????????????? =========================== To keep Dan working for me I need to bribe him. He still collects Tiki Salt and Pepper shakers. I have made him a set of Tiki Bob's in the past but now I wanted to alter the face and texture and do it again. Here's one I have altered and one right out of the mold. So first I did the faces. Next the holes on top. I cast them thick so I could carve out the bottom. I do this so that the cork in the hole will be recessed. Then I did the traditional texture. All done and ready to dry. Just keeping my man happy. Wendy |
|
H
hang10tiki
Posted
posted
on
Tue, Mar 26, 2019 12:37 PM
Bob SnP |
|
M
MaukaHale
Posted
posted
on
Tue, Mar 26, 2019 9:42 PM
Did you make a mug? It goes without saying, nobody does what you do. You amaze me with each new project, how you can grasp the concept of the wish list request and bring each piece to an amazing finish. |
|
H

Hamo
Posted
posted
on
Tue, Mar 26, 2019 9:46 PM
I like the new nose on the Tiny Bob shakers. The unaltered one's looked a little smashed and sad, like he'd been hit by a coconut. Did you also add to the bottom to make it a bit taller? |
|
D
danlovestikis
Posted
posted
on
Wed, Mar 27, 2019 7:39 AM
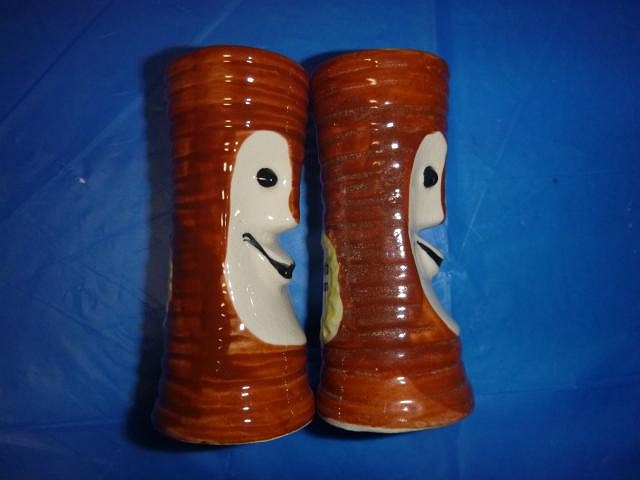
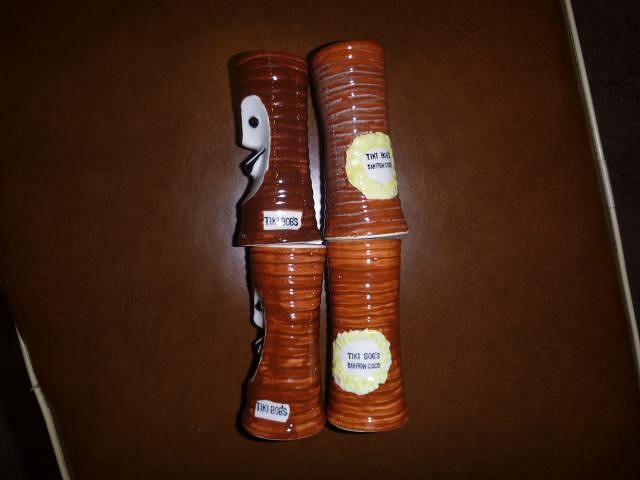
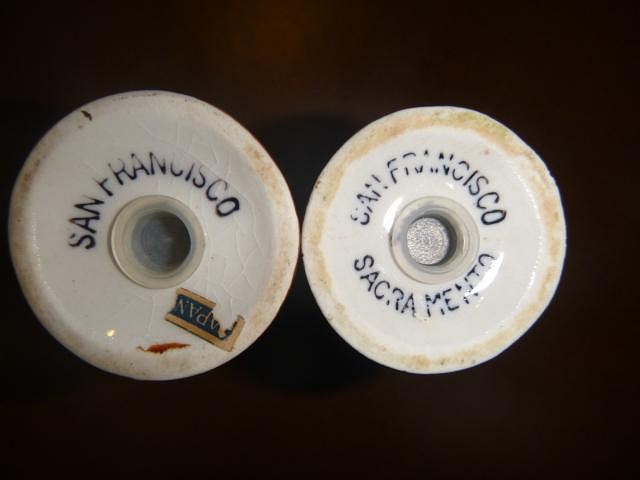
hang10tiki they are so cute. MaukaHale ahhhhhhhhhhh that felt so good. Thank you! Hamo you got me wondering. It was so many years ago I made the shaker sculpt and molds. So I took some photos. Here is a set from my sculpt and mold that I made for Dan. Here is the original showing the smashed in noses! There are two vintage styles. One with flowers around Tiki Bob San Francisco. Then Tiki Bob on the side in a white box and Then on the bottom it says San Francisco and one says Sacramento. These are two different sizes and the color is not a match either. One says S and one says P. I'm not sure if this is a real set done this way or if I have half from two different sets. I like my new nose that looks like the vintage mugs. It's just time for a change and the nose has it! Wendy |
|
H
hang10tiki
Posted
posted
on
Wed, Mar 27, 2019 3:49 PM
The elusive Bob SnP Yours look great You inspired me Cheers |
|
D
danlovestikis
Posted
posted
on
Thu, Mar 28, 2019 8:02 AM
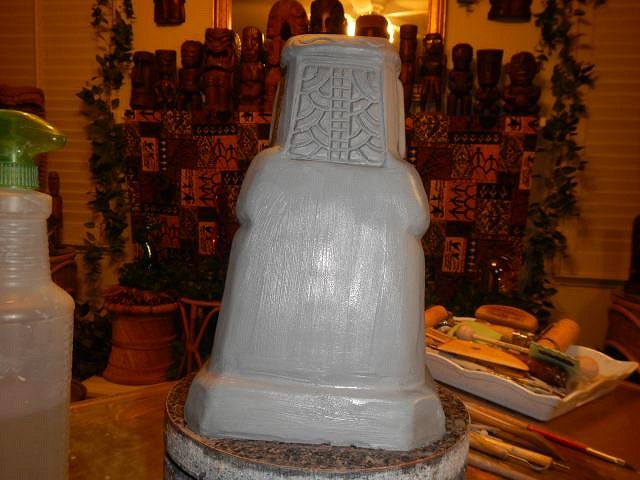
hang10tiki I sent you a secret message!!! ================================== Wishes sometimes do not come true. I made lunavideogames a set of mugs for his home tiki bar on the last Wish List #7 but I just couldn't bring myself to do the work again for some of his friends. I have too many tiki friends on my Wish List plus these took far too much time to make and glaze. He was a gentleman and let me erase his request. I had already cast all the pieces so I decided what to do with them and then for the tiki I broke the mold. Here's his last wish. This is the back of his mug. Here's one of the casts. I scraped off his logo and smoothed the mug. Then I started re-carving the back. When I made these mugs I had to re-carve every single line on every mug. What you see here just wasn't deep enough for glazing well. That is why I was ready to break the mold. After carving the one I decided that I would just smooth the rest of them and use a spotted glaze that doesn't work on carvings. So this mold is gone. Next I will work with all the mermaids that I cast. Wishing you all a fun day, Wendy |
|
H
hang10tiki
Posted
posted
on
Thu, Mar 28, 2019 3:30 PM
:) I saw Tregs mugs I hit several thrift stores today
Worst sound ever, slurp of an empty tiki mug through my straw!!! [ Edited by: hang10tiki 2019-03-28 15:37 ] |
|
L

lunavideogames
Posted
posted
on
Thu, Mar 28, 2019 6:22 PM
Wendy, The Tiki the Hut mugs you did make me are great! Now they are just more limited edition. Only 3 out there besides the one in my home bar. If you are lucky, you might own one! Cheers Wendy! Thanks for doing so many projects for me :) |
|
D
danlovestikis
Posted
posted
on
Fri, Mar 29, 2019 6:35 AM
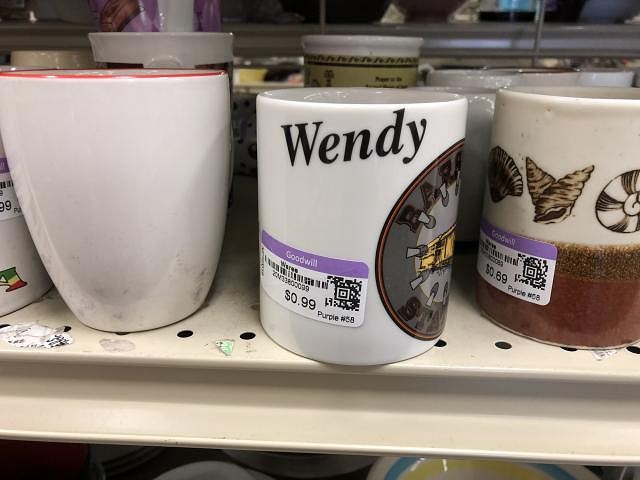
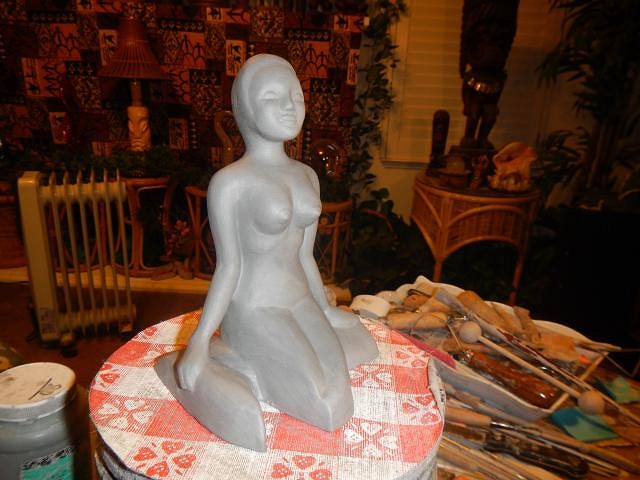
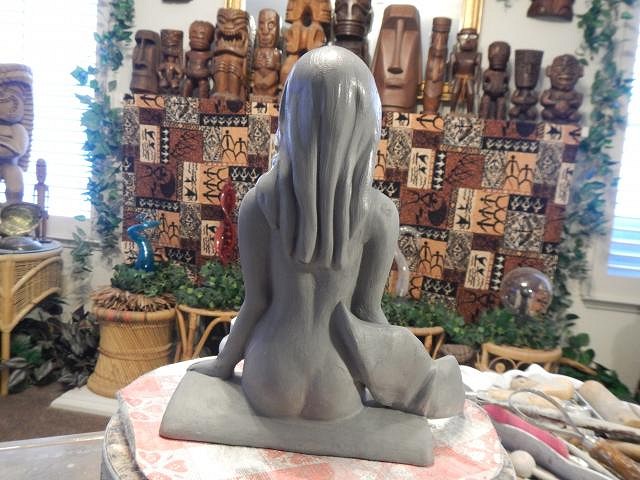
hang10tiki we went to some thrift stores too. Dan found 11 CD's he was very happy about. It's so nice to be thought of. Was that a weird spaceship on the coffee mug with my name? lunavideogames you are so welcome. I still remember the weirdest mug I ever made for you to give as a gift to a friend. A nightmare mug! ========================== Wish List #8 update. I cast mermaids to go with lunavideogames cancelled wish I had to come to a decision as to what I would do. Would I make mermaid bowls to fill other wishes on the list or would I also cancel those wishes and just finish off the mermaids in a more simple way to use them up. I guess I have more people to contact because mermaid bowls take up too much room in the kiln. I usually have to re-glaze and fire 1, 2, 3 and 4 times any projects that have skin. That's the Hot Tub Hula Girls and the mermaids. In a bowl form it's just not cost effective. So here's the start of what I did with the hula girls. Our of the mold there's no hair on her head and the tail is missing a section in the middle and there's no end to the tail. I made a mermaid number one for Anton Crone.
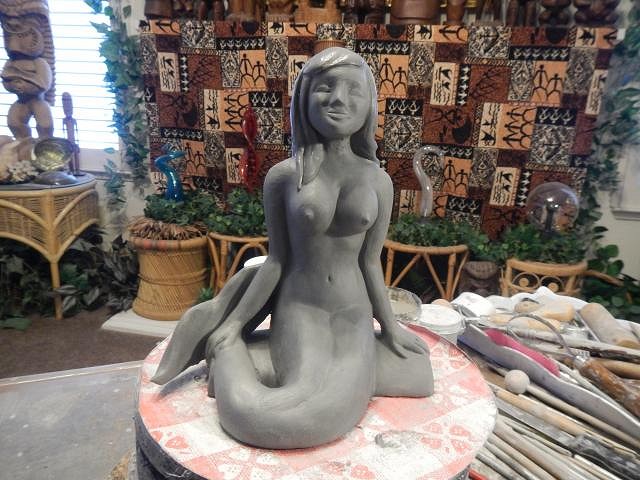
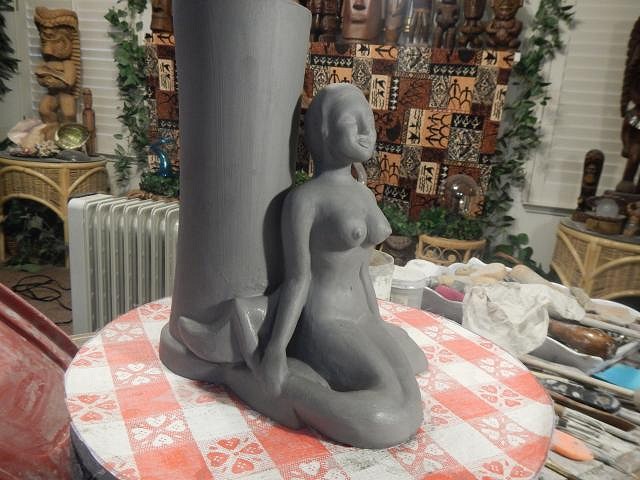
I made a mermaid number two is for my great-niece Michelle.
My niece Michelle has been begging for a mermaid so one will go to her. Wendy [ Edited by: danlovestikis 2019-03-30 08:31 ] |
|
H
hang10tiki
Posted
posted
on
Fri, Mar 29, 2019 5:03 PM
I think it was just a logo on the coffee cup |
|
H
hang10tiki
Posted
posted
on
Sat, Mar 30, 2019 7:46 AM
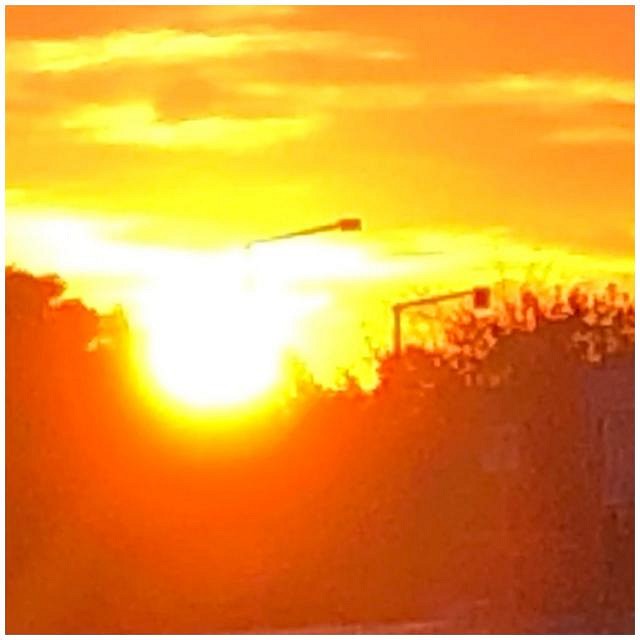
Morning walk sunrise
|
|
D
danlovestikis
Posted
posted
on
Sat, Mar 30, 2019 8:30 AM
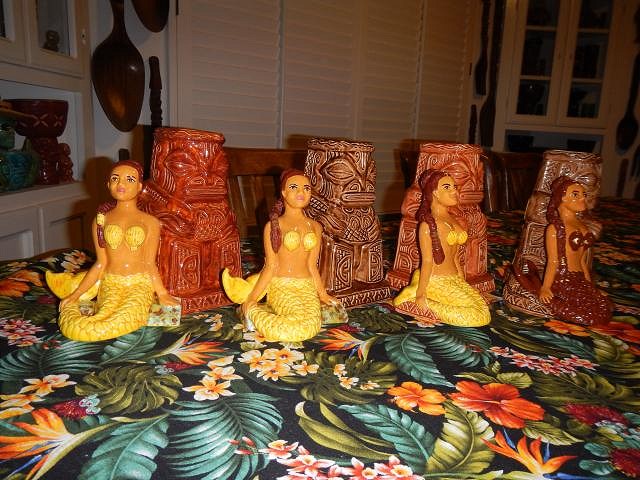
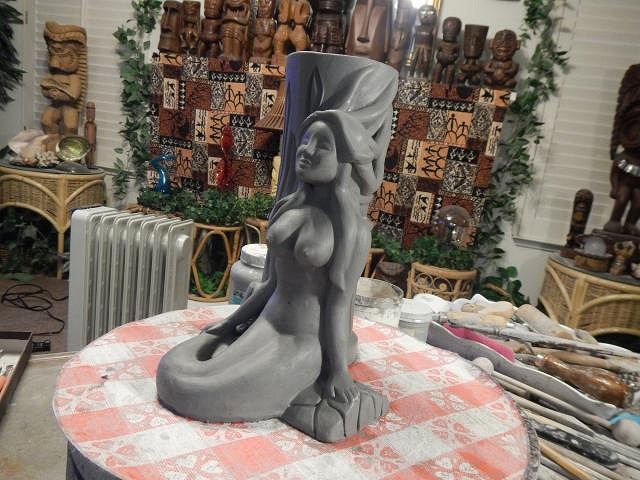
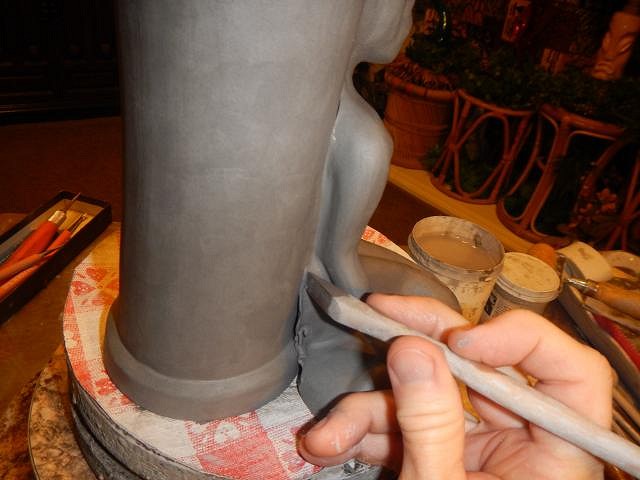
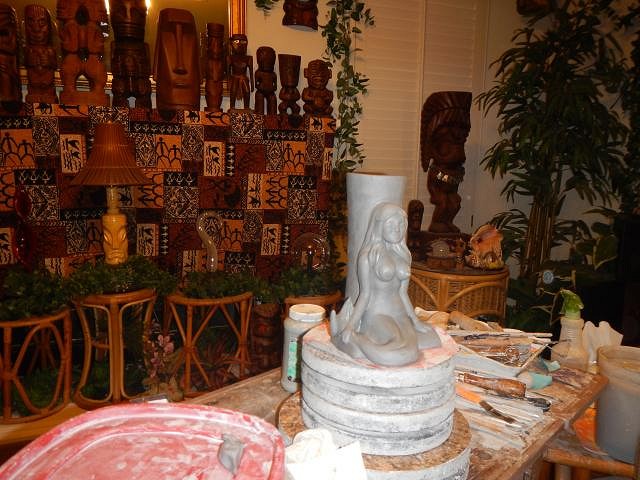
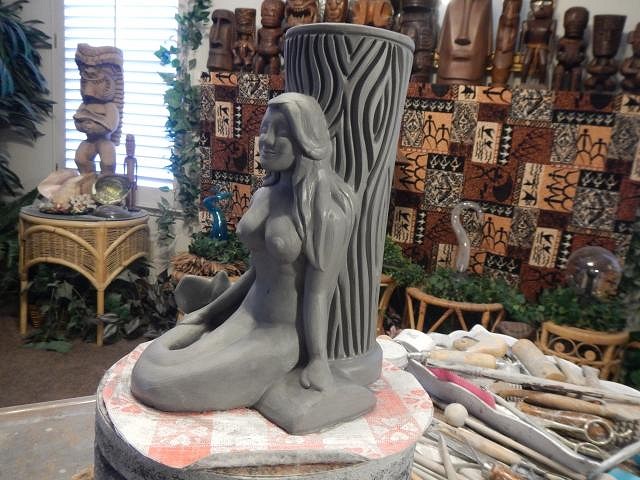
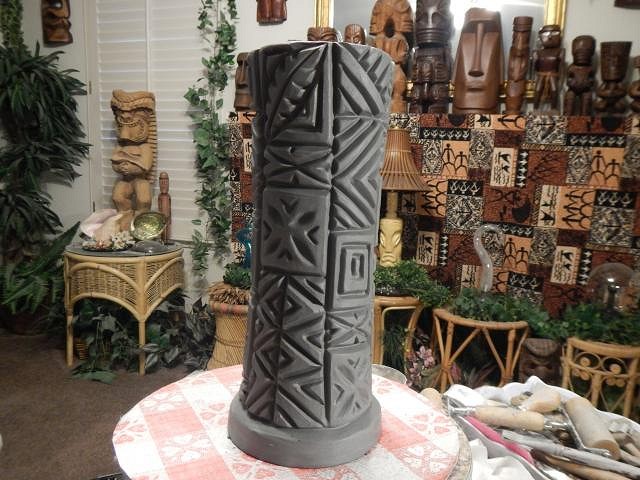
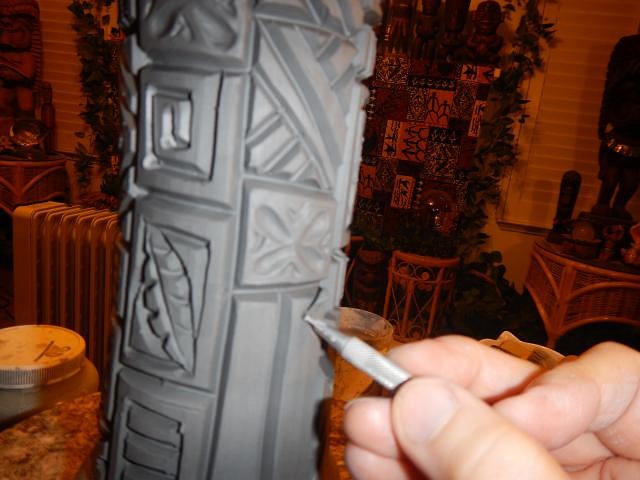
hang10tiki mermaids are so popular. No more mermaid bowls they are not work or cost effective. These statues and you'll see new mugs are OK. hang10tiki I see the solar powered light coming out of the sun, funny it didn't melt the pole. =================================== Continuing on with using up extra parts of a wish that never happened. I could have used these for bowls but I've discontinued making those so mugs it is. I think this is new for me. I can't recall having combined a mug with one of these mermaids. I start with cleaning the mermaids and fine tuning them. ============================= Mermaid number 1 is $200 plus shipping. Sold to Mary Ann Edwards. Glazing this is going to take a long time. I stared by attaching the seat she is on to the mug, then I did the same with her tail that I built in place. I secured the back of her head to the mug and then I formed her hair. The last that I did was too carve seaweed into the mug.
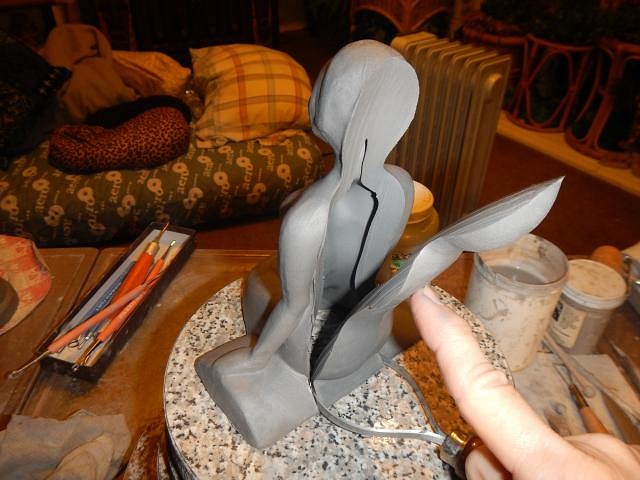
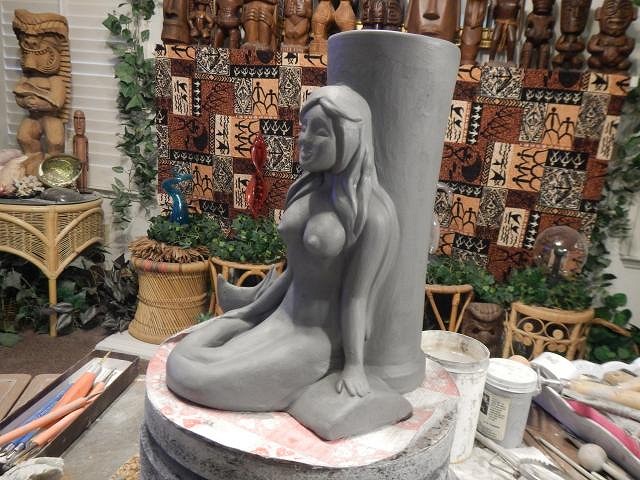
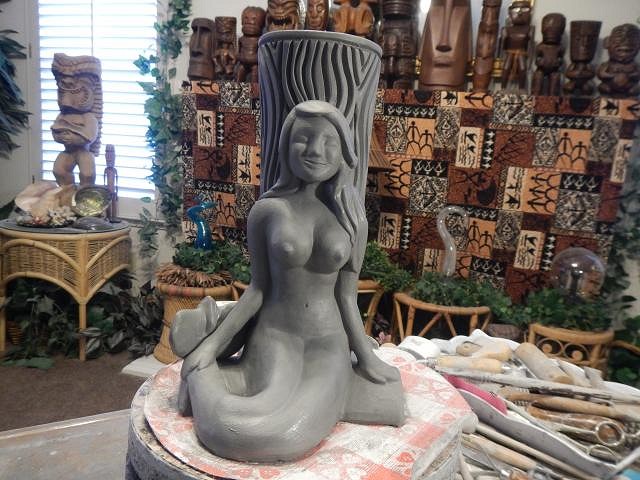
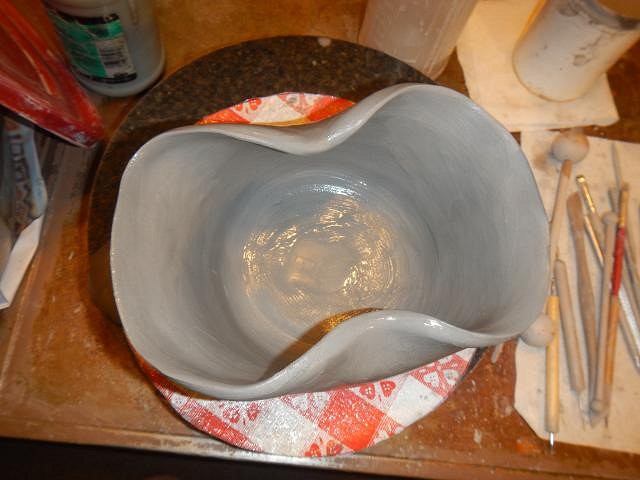
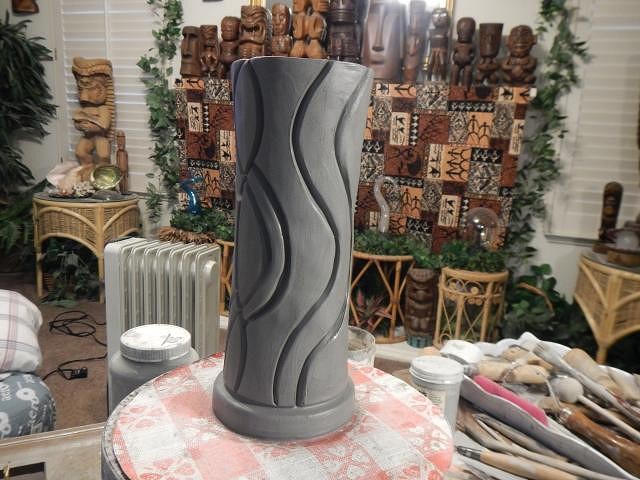
Mermaid number 2 is $175 plus shipping. SOLD This time to make glazing easier I removed the back of the mermaid. After removing some more clay inside of her I used sticky clay to glue her to the mug. I went around all the edges to ensure a tight fit. Then I built her tail. I then added her hair. For this mug I left it plain so I could use a watery glaze.
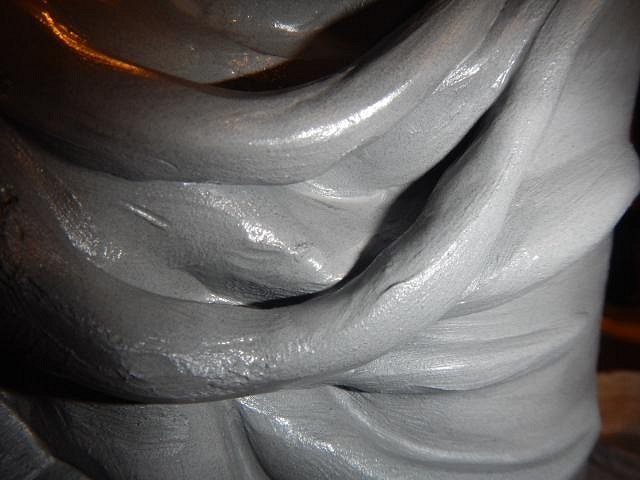
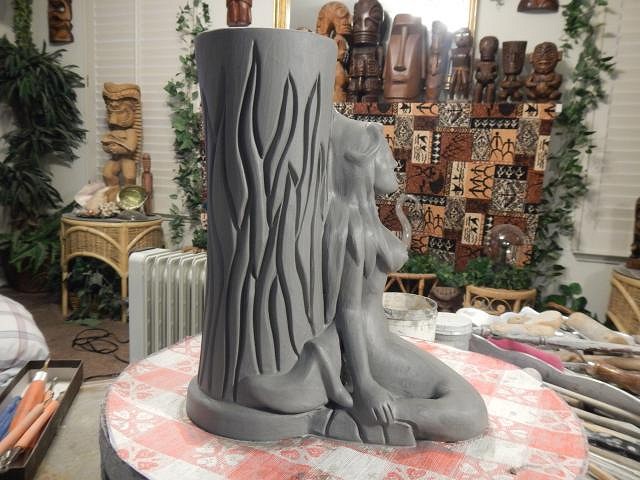
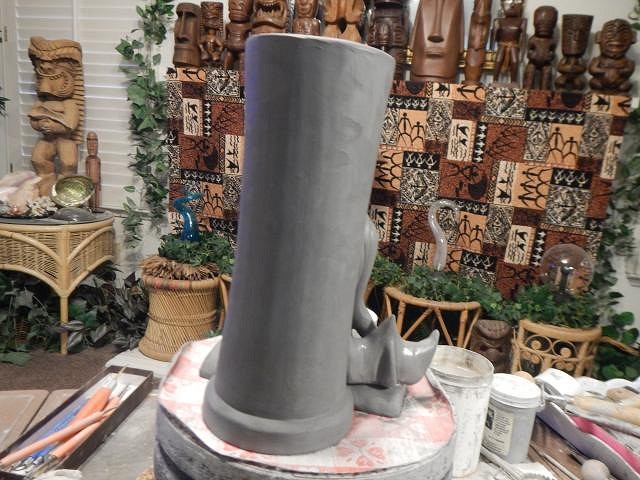
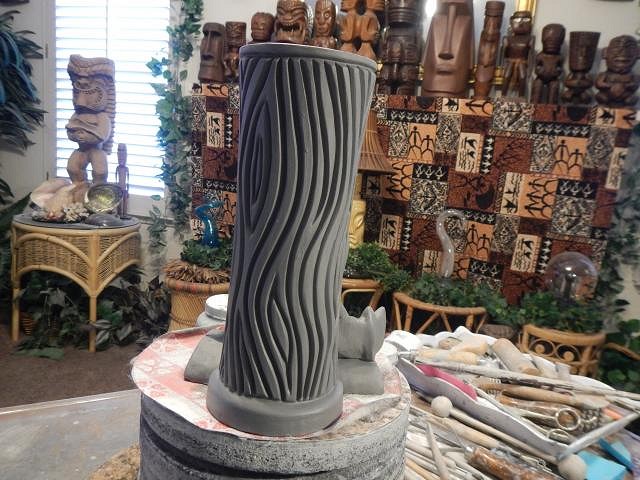
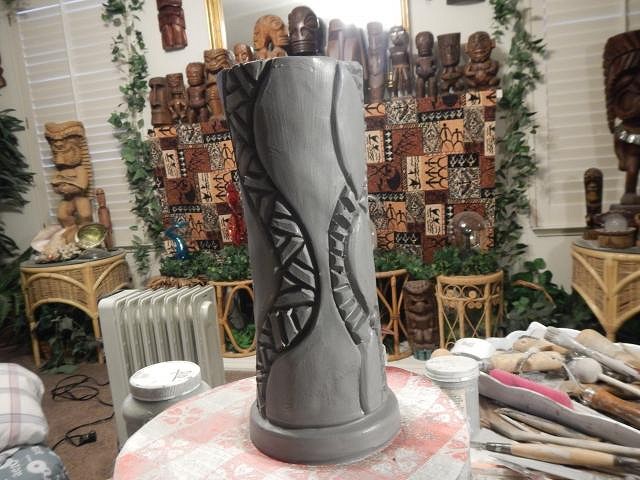
====================================== Mermaid mug number 3 is $175 plus shipping. SOLD For this one I did a woodgrain but I will still do it in a water color.
================================ Clay sculpting is fun but as GROG says glazing is hard work. Cheers, Wendy [ Edited by: danlovestikis 2019-03-30 19:46 ] |
|
H
hang10tiki
Posted
posted
on
Sat, Mar 30, 2019 8:24 PM
Great sculpture |
|
M
MaukaHale
Posted
posted
on
Sat, Mar 30, 2019 8:34 PM
Excellent work on detail! |
|
D
danlovestikis
Posted
posted
on
Sun, Mar 31, 2019 8:57 AM
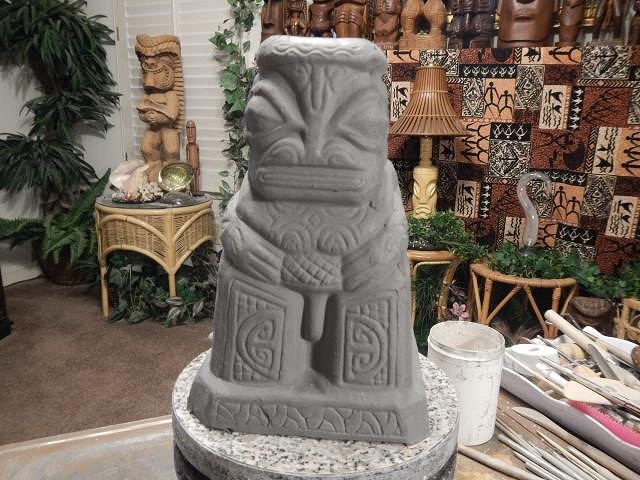
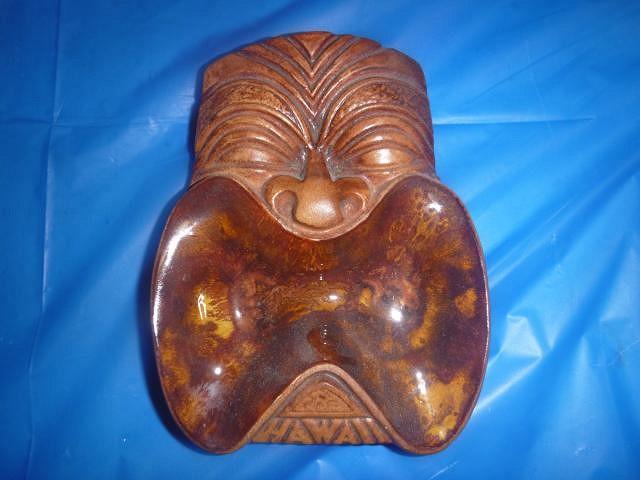
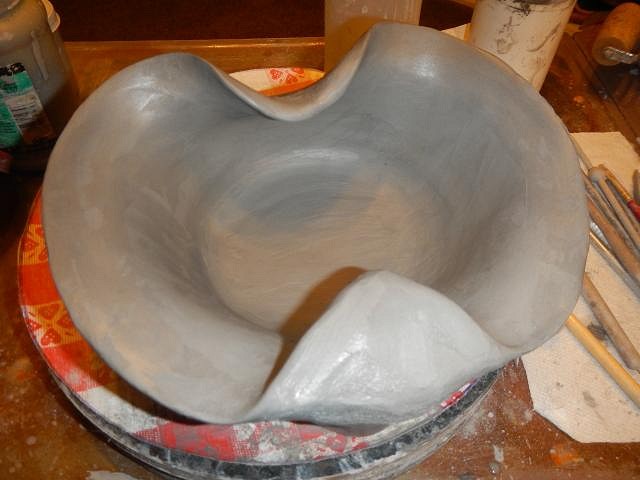
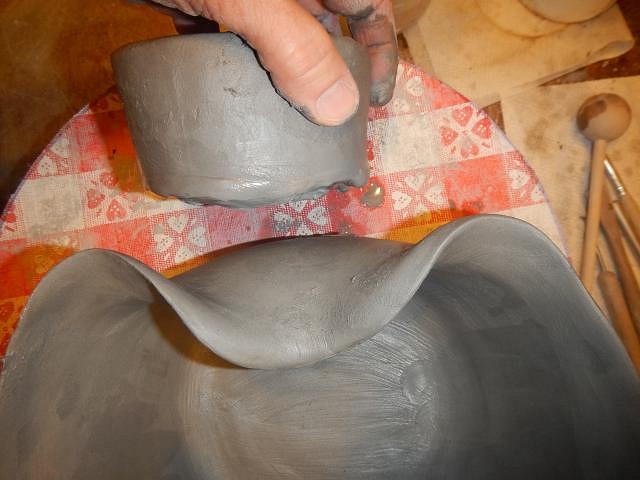
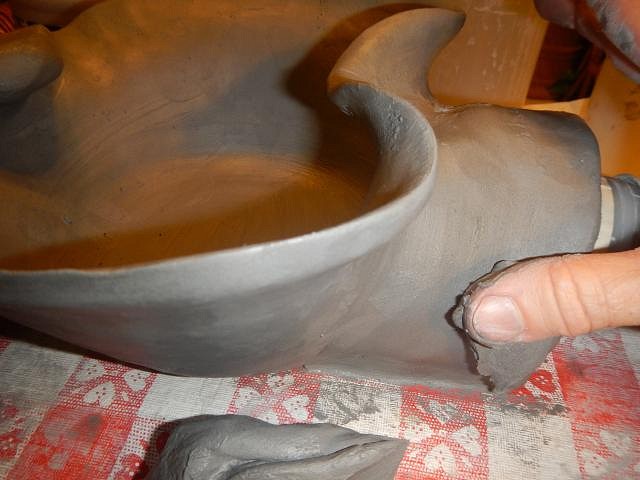
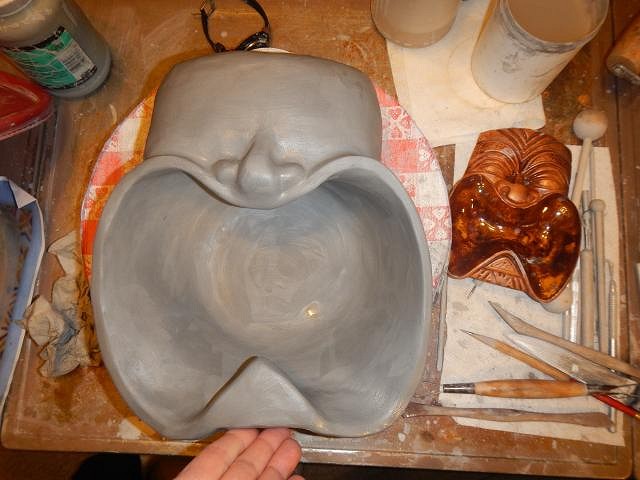
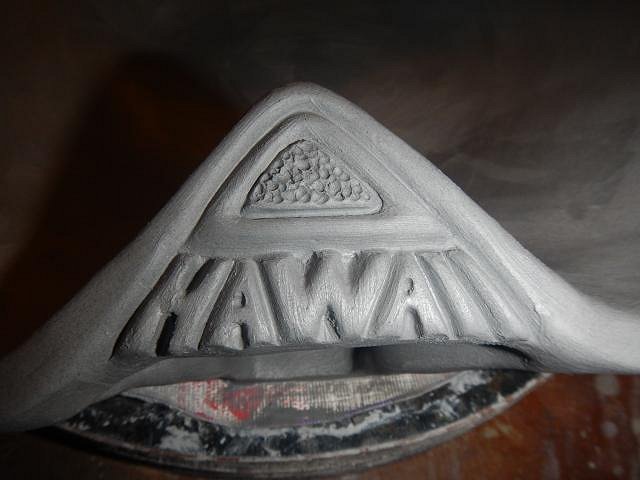
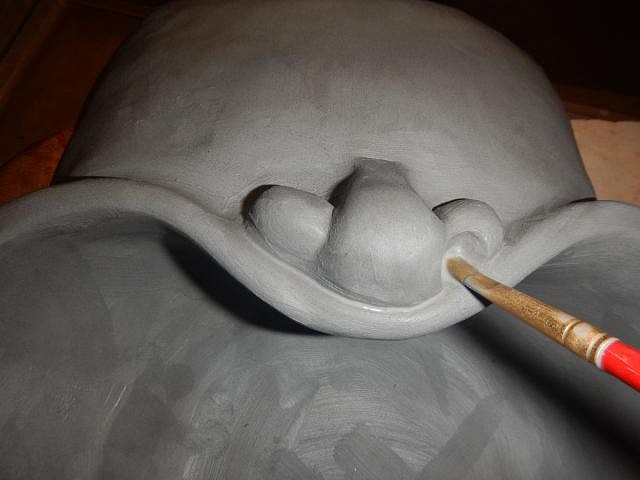
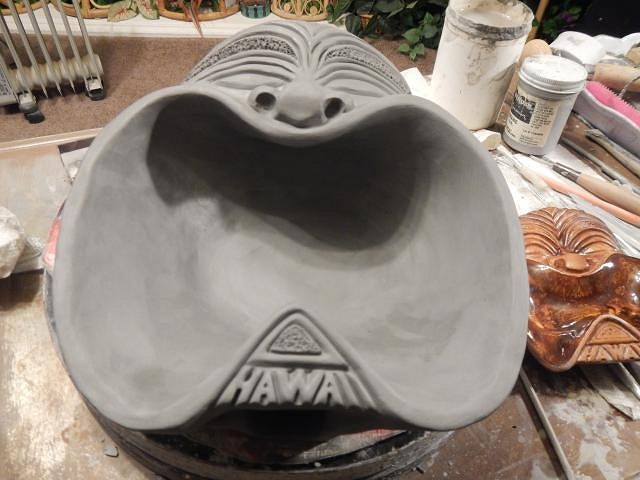
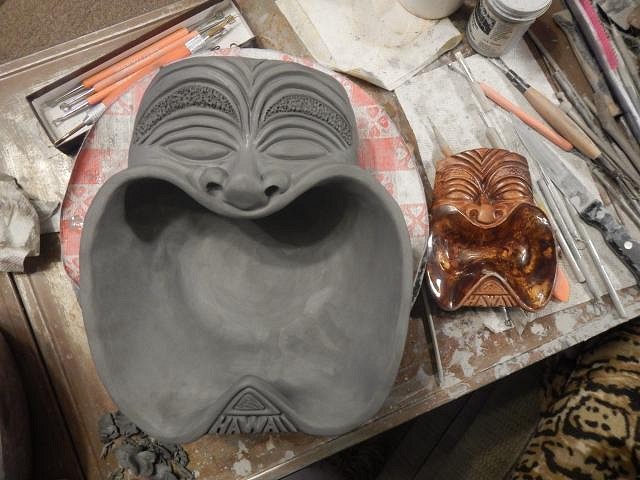
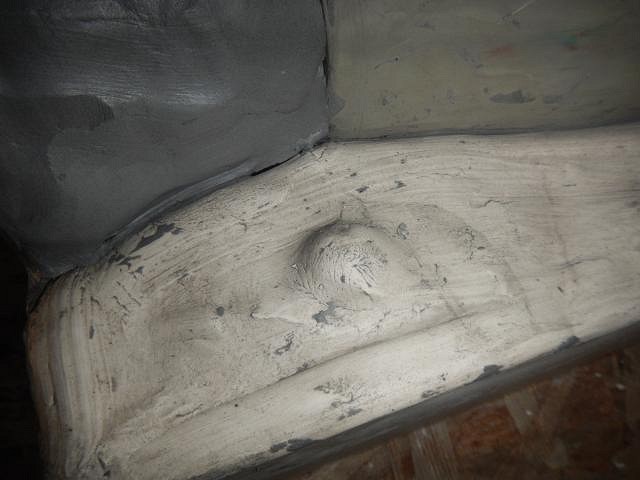
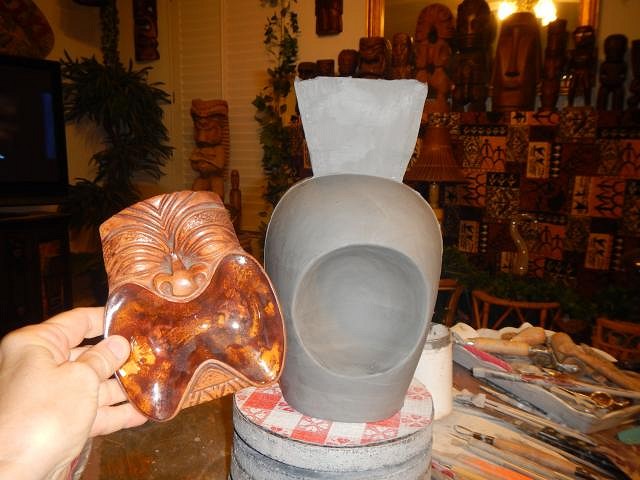
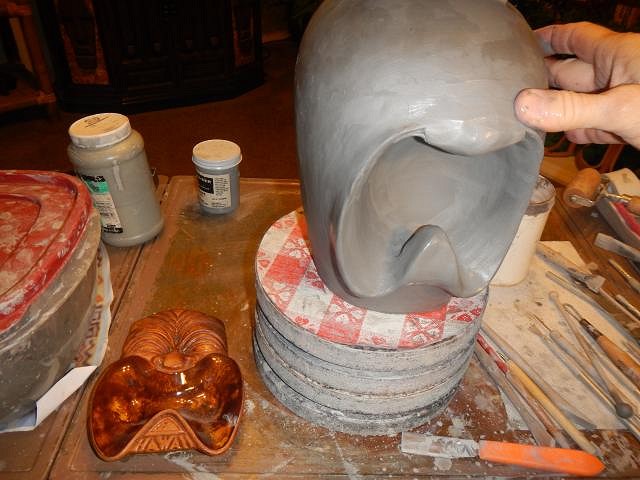
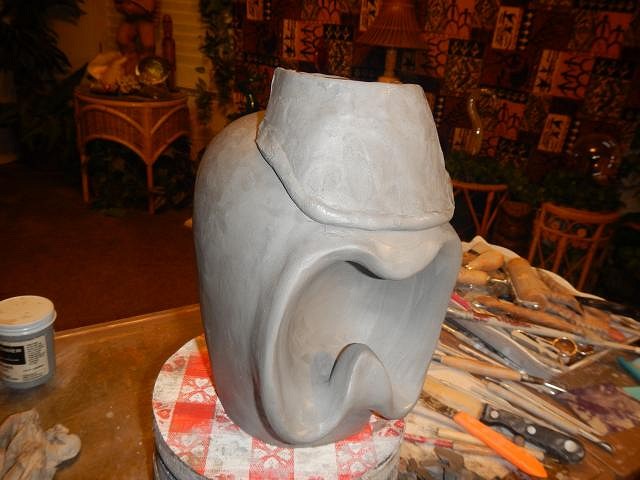
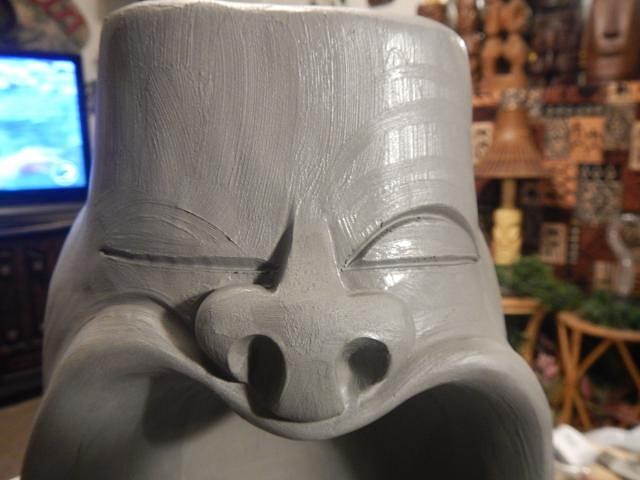
hang10tiki and MaukaHale if they survive firing and glazing I'll be really happy. Thank you for you comments. ================================ Wish List #8 phase four update. I have four projects that are being sculpted. When those are done and set to drying I will continue to sand and bisque fire until all are ready to glaze. Meanwhile we will be putting boxes together for the crawl mugs. The first glazing project will be the crawl mugs. Once they are done and sealed in the boxes I will then tackle glazing all the rest of phase four. This will be a marathon of glazing with over 100 items. I have no idea how many phases it will take to finish Wish List #8. It's almost a list with no end in site. At least I am down to the last two black velvet paintings and one is well underway. ================================= Wish List #8 phase for: this very large project is for Fred Ferrer. This is based on my husbands and my favorite tiki ashtray. I always planned to copy this face in some project and then Fred asked if I could just recreate it into a large bowl. Here are the steps. I started his project on 3/11/19 and finished the sculpture on 3/16/19. It has been drying slowly in and out of plastic since then and it's still not yet dry enough to fire. Not too bad considering I had surgery on the 14th. My post-op instructions were to sit up straight and not lean back and if in bed only to lie on my sides. I'm fine so I was only down for one day and then back to work. Here's an overview of the steps. This is the small ashtray I am turning into a bowl. First I cast and cleaned a bowl and then I added clay to round out the bottom. I smoothed it with a wet paper towel. Next I began to bend the sides into the right shape. I added clay to shape the chin. I kept checking the shape of the bowl against the ashtray. I will aim to get it as close as I can. Right now the sides are not right. The bowl is too limp to work with so I moved on to the head. I made a round piece of clay. I glued it into place and began to smooth it free of air pockets. It was still too small so I began to add more sheets of clay that I formed by hand. I always worry about trapping air. These are different days as I progress so now the bowl is firmer and I brought the sides into the right shape. The clay head is now firm enough to have the excess clay removed. Hint: you can wrap parts of a project with plastic while leaving some parts exposed so they can dry and firm up faster. I did that with the head. I use a cutting tool loop to remove excess clay. Just so you know I am sitting up straight. I also can't lift so Dan did this for me. Again, once I was sure the face would not smash in I had Dan put it in my lap so I could work on the bottom. I added clay carefully, no air being trapped, until all the seams were filled and smoothed. Finishing up I carved the chin and then the nose. On another day I carved all the detail. I'm never sure if I can pull off a wish but I was happy with this outcome. Tomorrow on April Fools day I can let the steri strips start to peel off. On May Day I get to drive again. My instructions were so easy to remember. I have so much to show because I worked even harder post surgery than I do when well. Cheers, Wendy |
|
H
hang10tiki
Posted
posted
on
Sun, Mar 31, 2019 6:13 PM
Great idea and execution |
|
D
danlovestikis
Posted
posted
on
Mon, Apr 1, 2019 9:24 AM
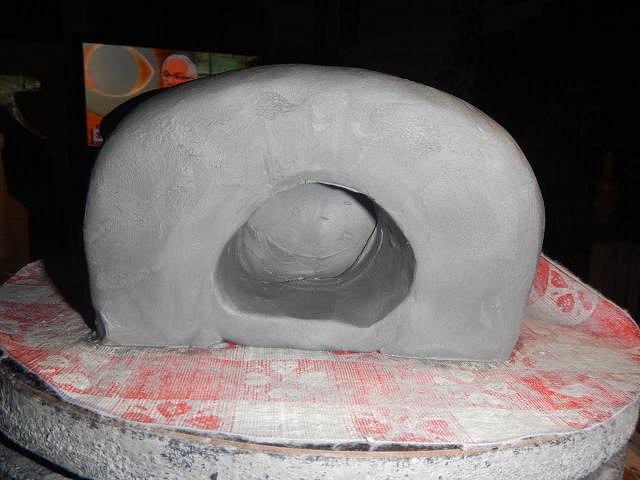
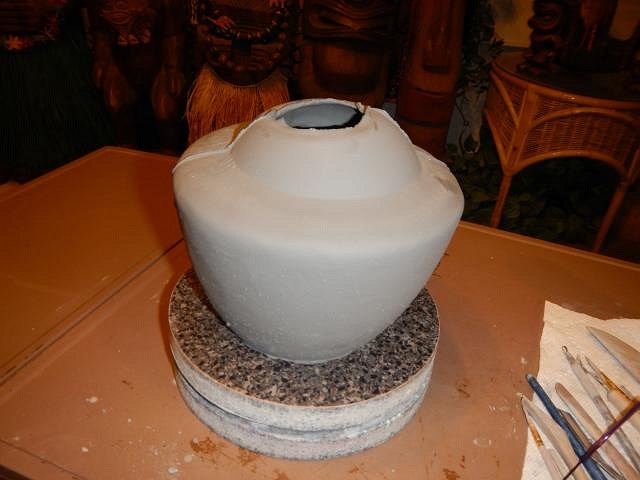
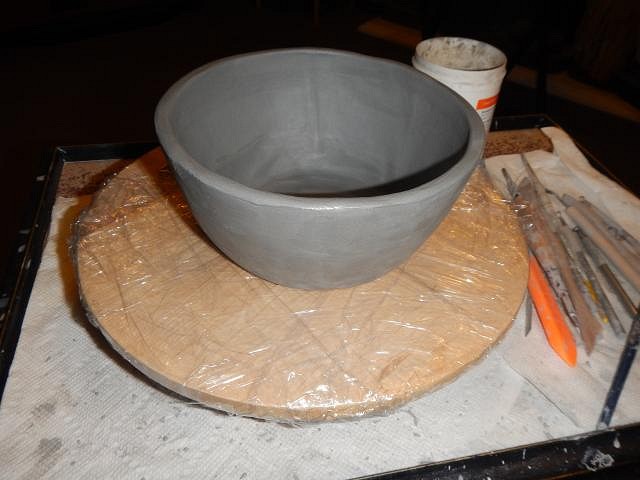
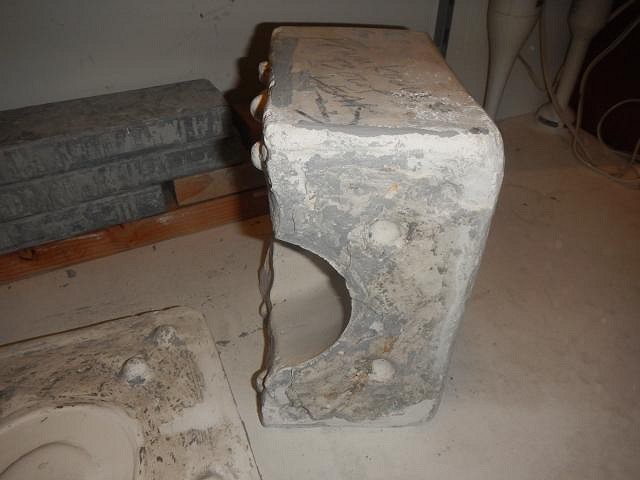
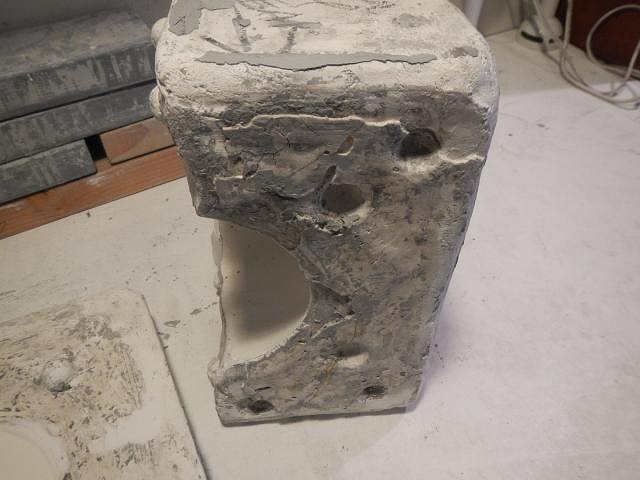
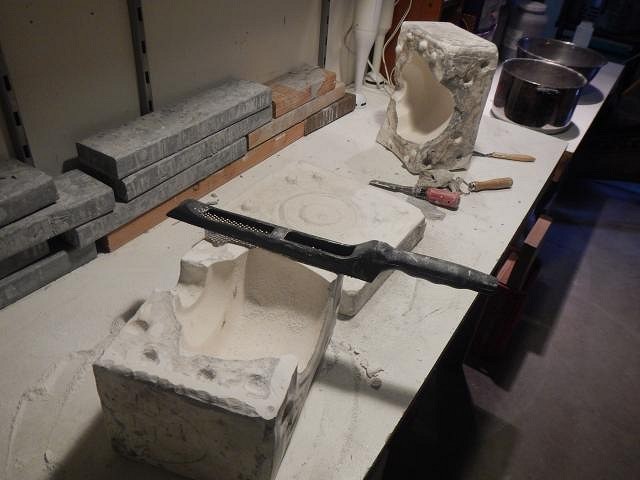
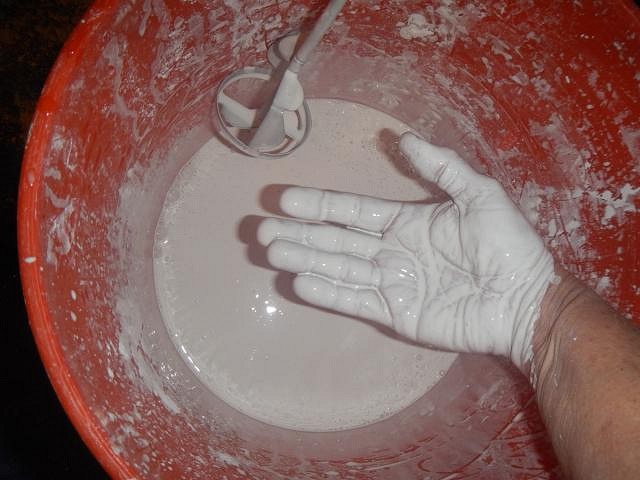
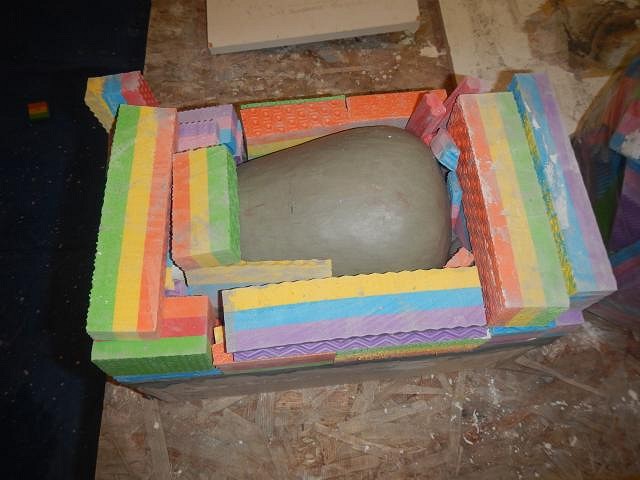
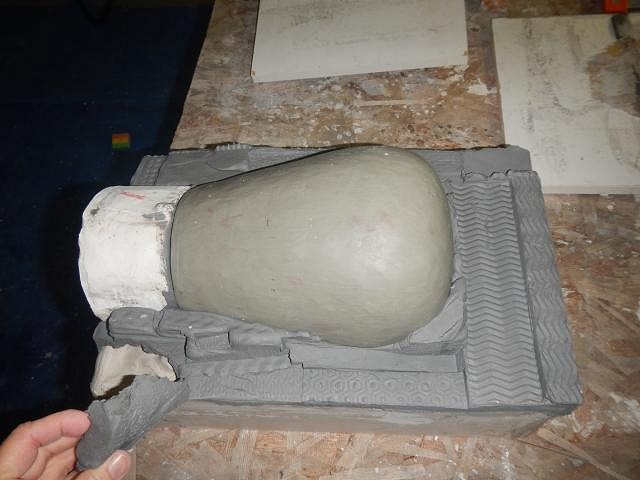
hang10tiki I like to create rather than copy but in the tiki world almost everything is a copy. Since I really love this face it was a fun one to do. You mug too was fun because of the great challenge it presented. ========================== This post is all about saving a mold. One of the very first we ever made was of a bowl I sculpted. Out of the mold it looks like this. I then cut off the top and it becomes the bowl I used for making the Frankoma little tiki bowls and many other projects. While still flexible I stretched one for the last project I posted. After so many years of use one side of the mold has deteriorated and the mold leaks badly. I have to plug all the seams to use it. This piece and the bottom are fine but this piece had sheets of plater coming off. The damaged piece was pushed aside and will be thrown out. So what I will do it fine tune the two piece I will keep and pour a new piece to replace the damaged one. Out came the rasp because I have some surfaces I can make even better. I knew one day I would need the sculpt for a new mold because I was using it so often. I saved it. Otherwise you can cast a bowl and keep it in place and then make the new part. I was just lucky I saved this sculpt. You can see where I rasped the mold piece. It is not flatter and the adjoining piece we make will work better. Next I pressed clay around the sculpt to make sure there are no leaks into the existing piece. I'm wearing a glove to protect a cut on a finger. But we are putting on our face masks since we are working with plaster. The dust will destroy your lungs. I made a little fellow to protect the opening into the mold. Three layers of mold soap before pouring the next piece or they will glue together permanently. We put on the mold box and I ran clay snakes along all the seams. We poured the plaster into the box. Now it will set up and then the mold will be taken apart to dry for weeks. I am looking forward to casting this bowl without first plugging all the leaks. It's worth the work. Wendy [ Edited by: danlovestikis 2019-04-01 09:28 ] |
|
T

TheBigT
Posted
posted
on
Mon, Apr 1, 2019 10:07 AM
Love your step-by-steps Wendy. I think it's amazing how you imagined the mouth of the ashtray was a bowl with the sides turned in. It may be obvious to someone who turns clay, but definitely would not be for me. :) |
|
H
hang10tiki
Posted
posted
on
Mon, Apr 1, 2019 10:17 PM
Carving for 5 hrs today How’s the back? Aloha to Dan-0 |
|
H
Hamo
Posted
posted
on
Mon, Apr 1, 2019 11:30 PM
Love those mermaid mugs, and the bowl is really great. |
|
H
hang10tiki
Posted
posted
on
Tue, Apr 2, 2019 5:28 AM
Forgot to show ya
|
|
D
danlovestikis
Posted
posted
on
Tue, Apr 2, 2019 9:47 AM
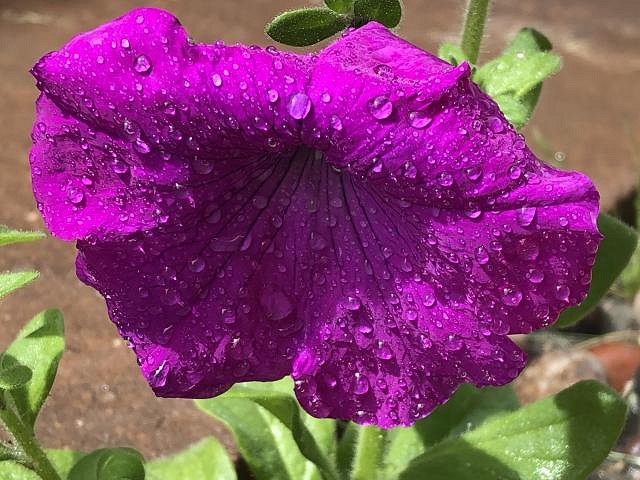
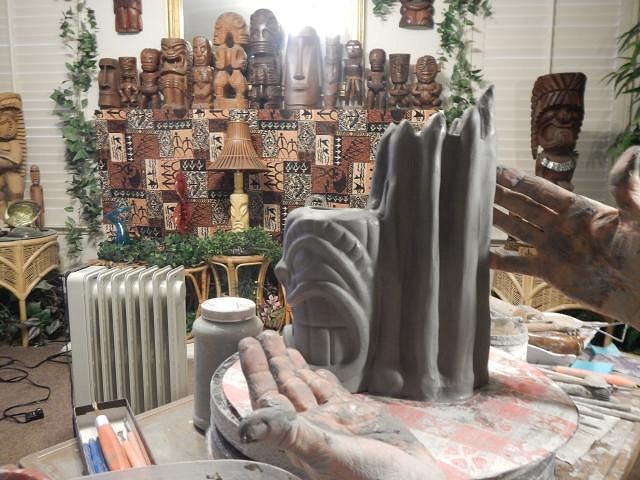
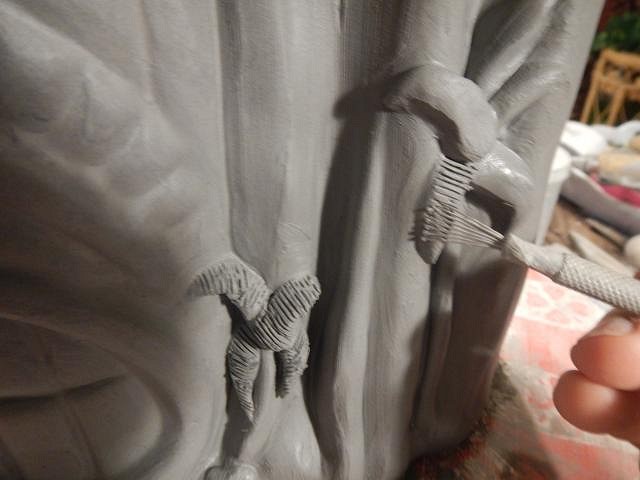
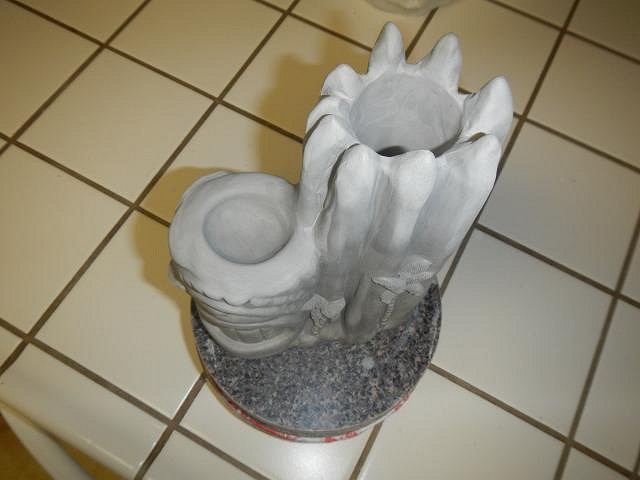
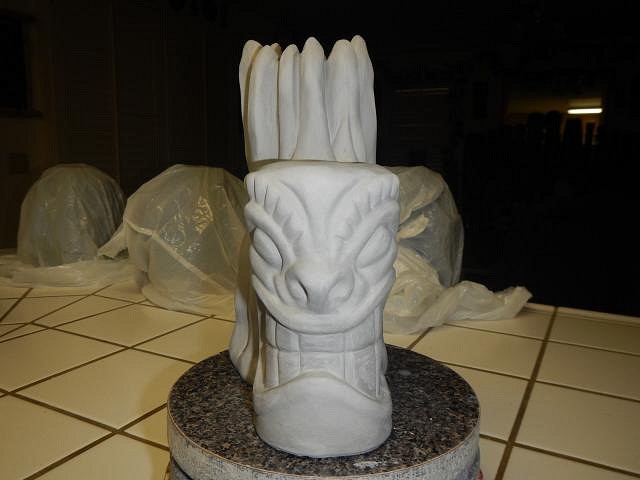
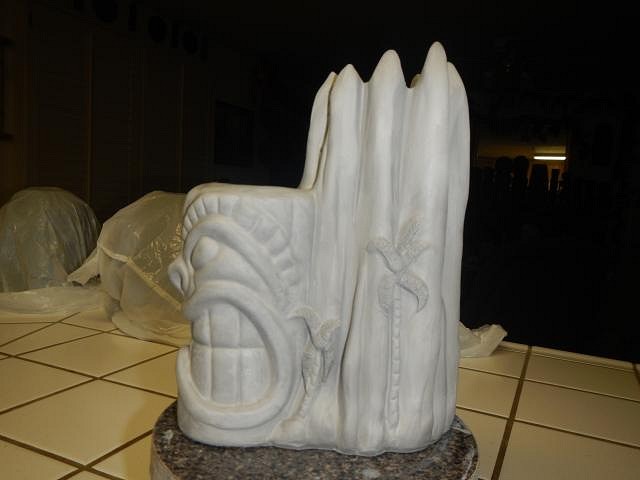
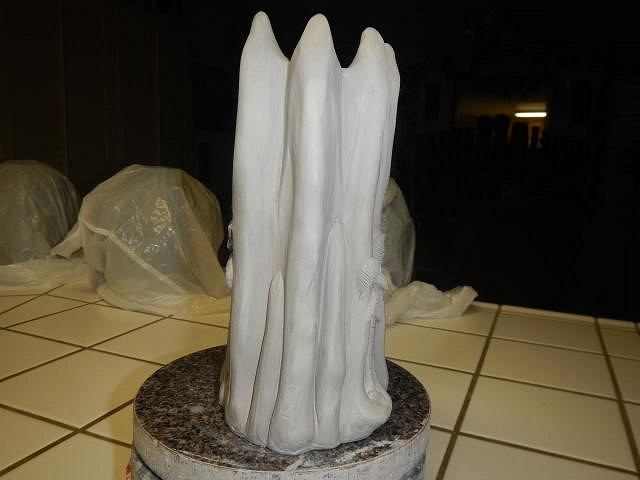
TheBigT when I started I couldn't find a book with all the answers. After reading 15 ceramic books I just set up and got to work. It's been so much fun to share what I've learned and comments like yours make it all worthwhile. hang10tiki no way. I've done wood and your can't always correct mistakes. Your work is harder. I admire wood carvers so much. In fact I buy wood craving tools to use with my SOFT clay. You rock your HARD wood projects. Hamo clay is so much fun but reading comments is even better! hang10tiki I love water drips on flowers and leaves. Is it rain or is it sprinklers? =============================== Wish List #8 phase four update. This is the wish of Eric Allred. War God Island. I start by casting a fogcutter mug and an original Frankoma War God that I molded to be a statue. I clean them up for use. Then I added a slab of clay to the top of the War God so that it would be thick enough to stretch into a flaming rum pocket. I also added some down the back so I could glue it to the mug. Now is the time to get messy. I use globs as soft sticky clay to build the volcano. I use wooden tools to shape the clay. I use a wire brush on the palm fronds. Today I realized I hadn't taken any finished photos. So I took the mug from where it sat drying and took these.
Now it's time to see if Eric even remembers his wish. I think I'm moving fast but for those waiting I'm a tortoise. Cheers, Wendy |
|
S
Sandbartender
Posted
posted
on
Tue, Apr 2, 2019 1:16 PM
Wow, Wendy! You never fail to amaze. And work like that is WELL worth the wait. |
|
H
Hamo
Posted
posted
on
Tue, Apr 2, 2019 7:04 PM
The extra wait for my wish just gives me plenty of time to save my pennies in my War God bank.... |
|
D
danlovestikis
Posted
posted
on
Wed, Apr 3, 2019 9:20 AM
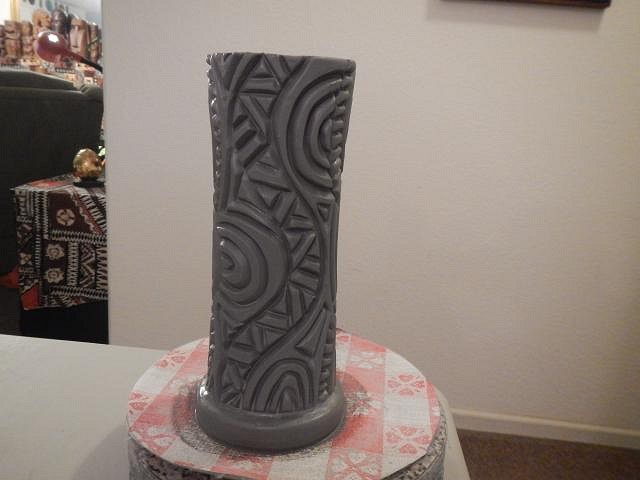
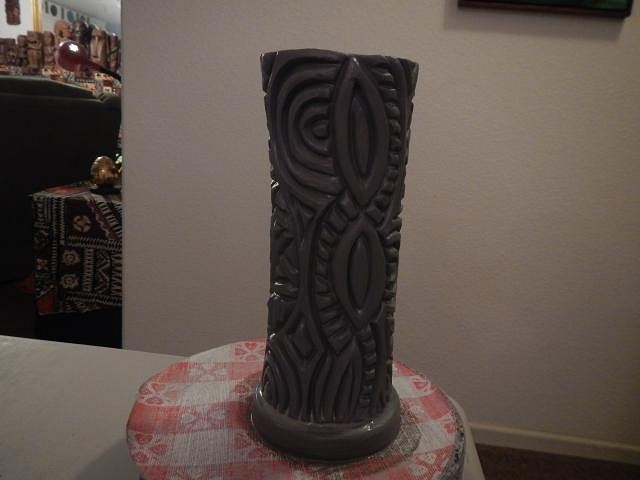
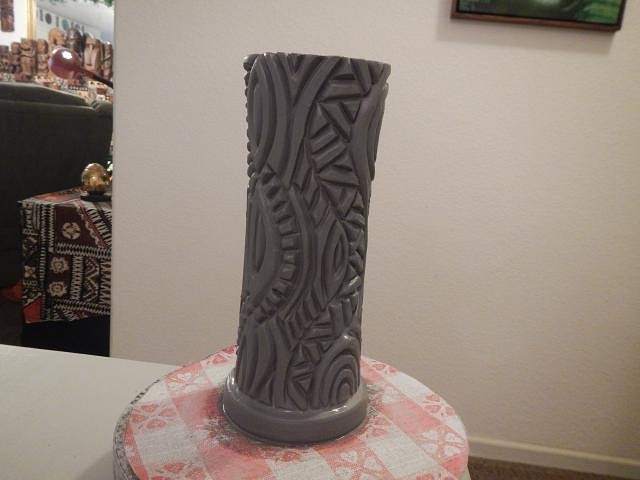
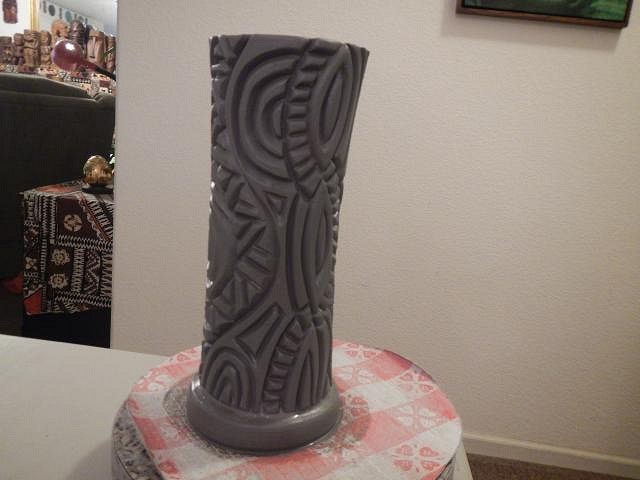
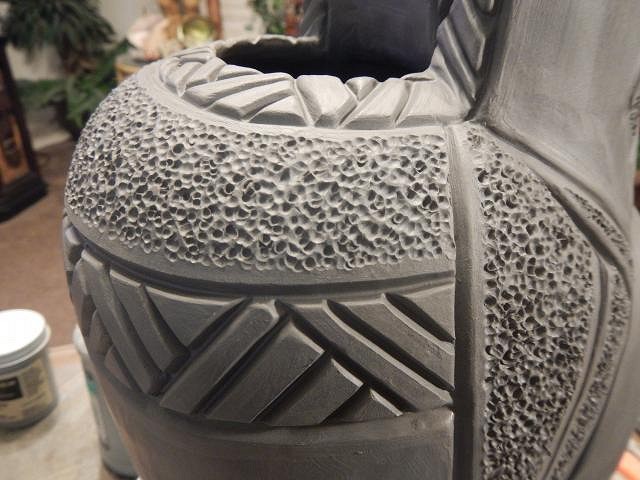
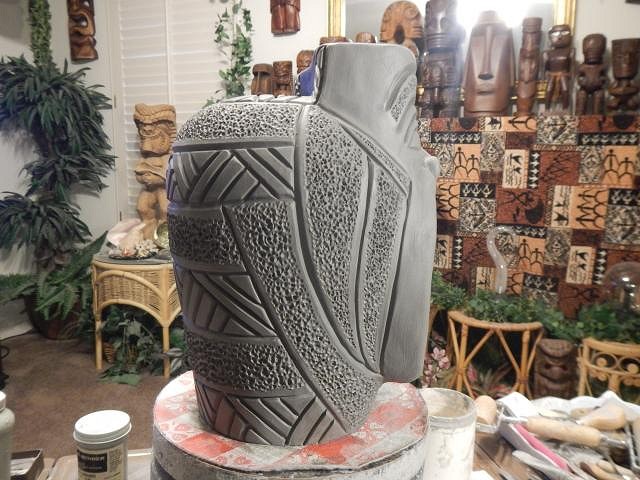
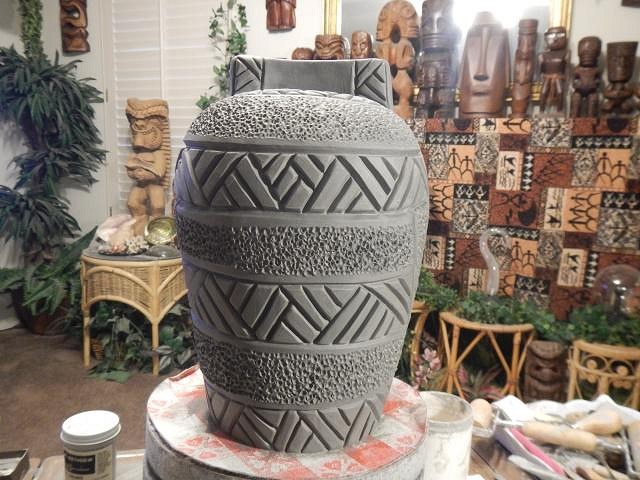
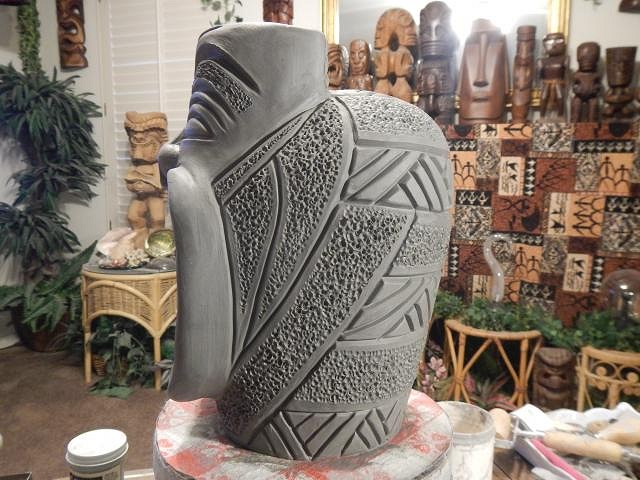
Sandbartender I'm having so much fun. I love to sculpt clay. Everyone should try it. I started with Sculpey Clay and it led me here. Hamo I can picture that action. I am on the last four projects and then I will start to glaze. ==================================== As I have said many times when I've put in my 8 hours I declare that the rest of the day I can do as I please. Play time for a week resulted in three fogcutter mugs.
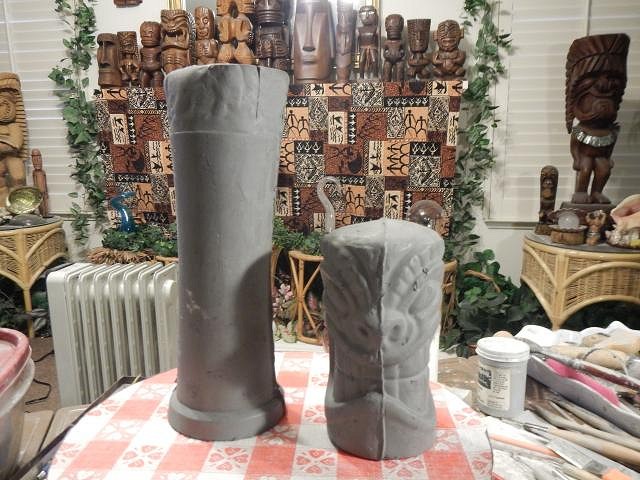
I had so much fun with the first fogcutter tapa that I made a fogcutter tapa number two. Not identical. I don't look at the first when I do the second. Here are the two mugs together. One has been drying for days so it has shrunk. This photo with a flash. This photo without a flash. Fogcutter number three. Just random designs.
I bet you all could do mugs like these if you decided to. Cheers to playing with clay, Wendy |
|
H

HopeChest
Posted
posted
on
Wed, Apr 3, 2019 1:26 PM
WOW...those fogcutter mugs are fantastic. I LOVE the texture of those tapa patterns! |
|
H
Hamo
Posted
posted
on
Wed, Apr 3, 2019 11:09 PM
More great super carves, Wendy. |
|
D
danlovestikis
Posted
posted
on
Thu, Apr 4, 2019 9:10 AM
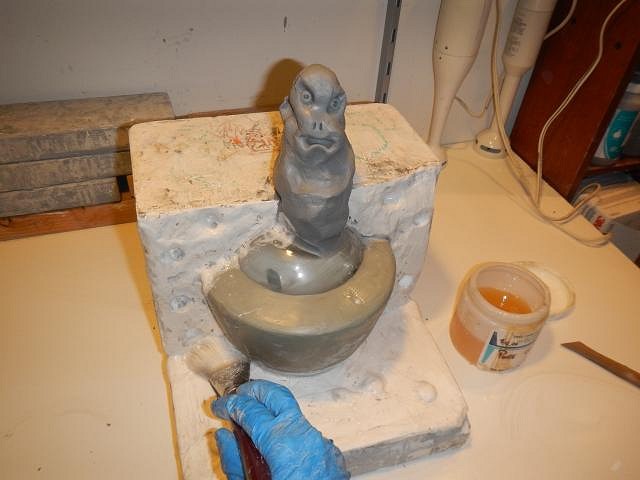
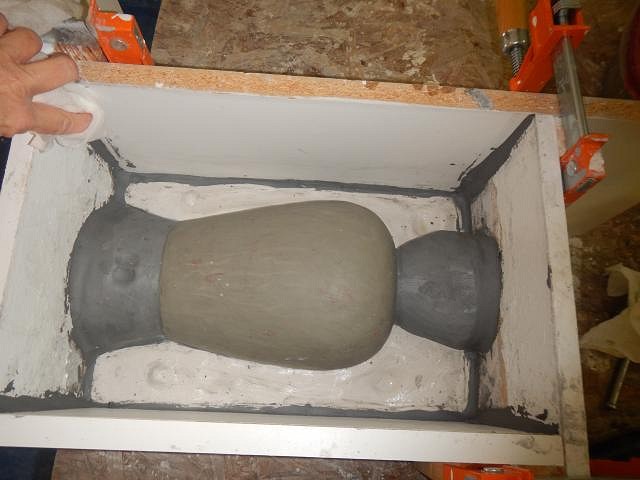
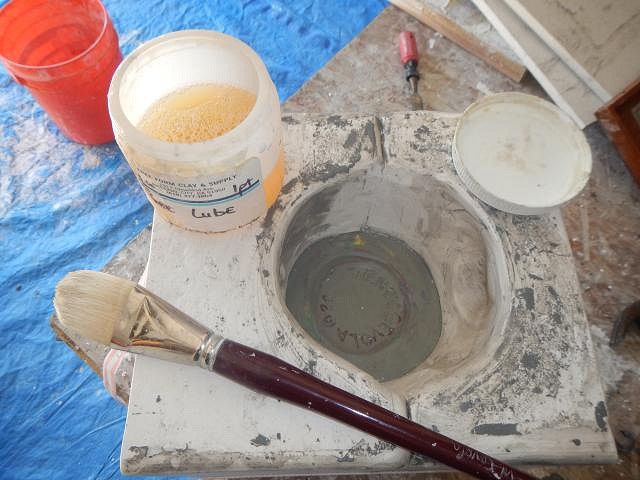
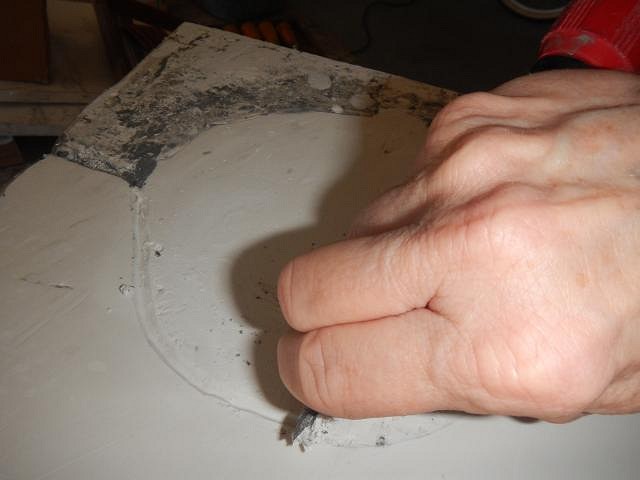
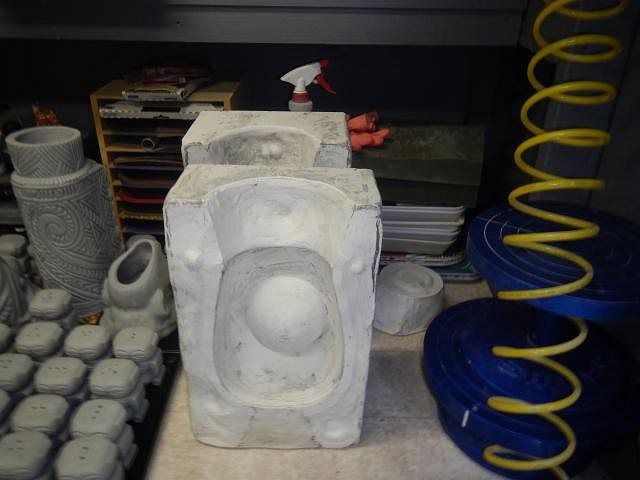
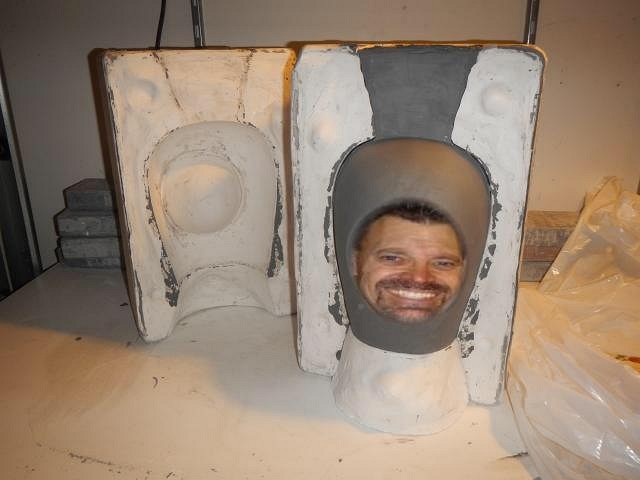
HopeChest I can't resist making something on my own from time to time. Thank you so much. Hamo Thank you so much too. I sure appreciate everyone who posts here. You all are responsible for keeping me working. =========================== If you have a Diver's Helmet from last year they are now rare because I will not be altering bowls into helmets any longer. It took far too much time and was risky. I have now made a blank sculpt to use and it can even be used for other designs which I will show in the future. Here starts the mold making steps for the blank helmet. We set up the garage and then we put the box together. With the blocks in place I start to make a layer of clay. I will cover the piece of plaster at the bottom with clay. I just used that to save time. This clay is how the mold piece will look after pouring so I make it smooth and with locks. You can now see the bottom piece covered with clay. I also add clay snakes up the box seams so that the liquid plaster will not leak out. We mix dry plaster powder into water until the consistency is that of buttermilk. Now it's time to pour it into the box. I want my mold to be at least two inches thick above the highest point of the sculpt. Once it is hard I use a knife to carve in the details of the mold so I can find it in the future. The box is removed. More steps on my next post. Wendy [ Edited by: danlovestikis 2019-04-05 08:14 ] |
|
H
hang10tiki
Posted
posted
on
Thu, Apr 4, 2019 4:58 PM
What Hope and Hamo said |
|
H
hang10tiki
Posted
posted
on
Thu, Apr 4, 2019 4:59 PM
New helmet |
|
D
danlovestikis
Posted
posted
on
Fri, Apr 5, 2019 8:12 AM
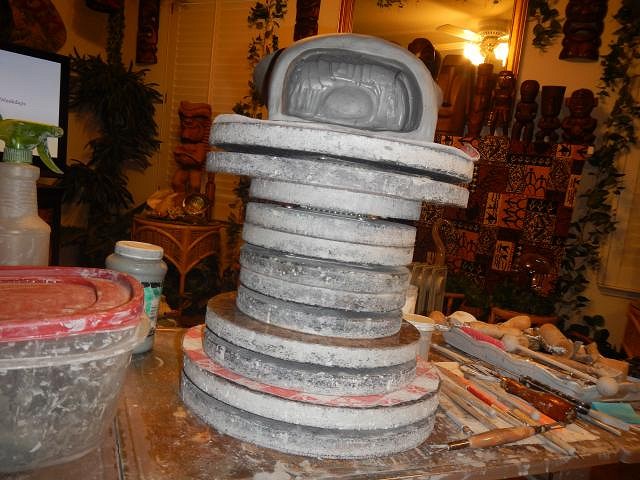
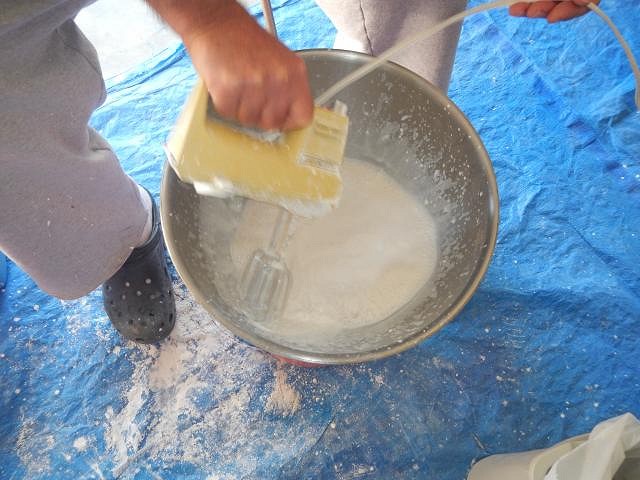
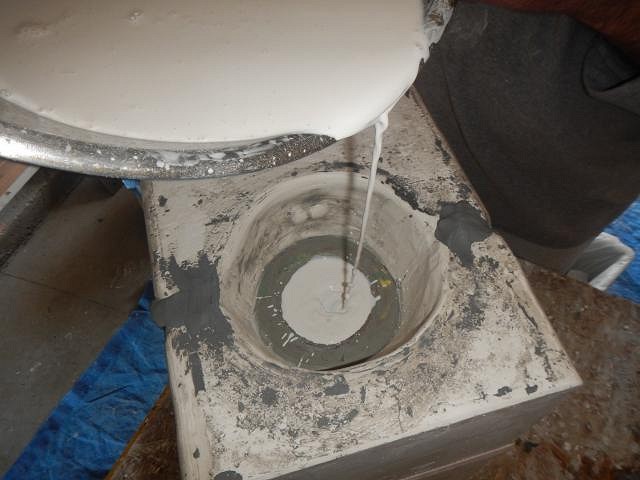
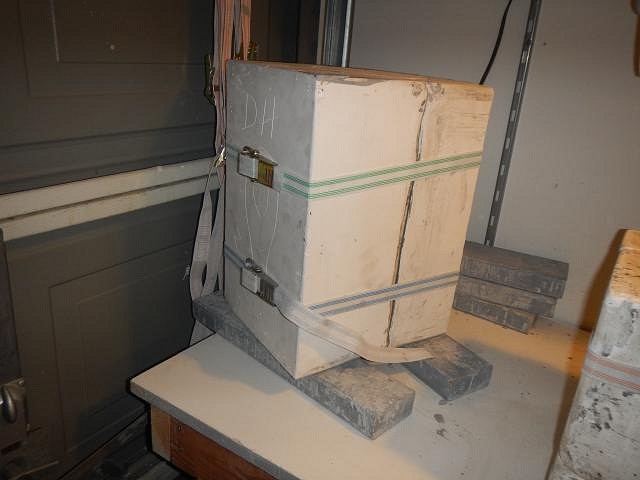
hang10tiki ha ha, what I said to Hope Chest and Hammo!!! hang10tiki on fb someone said it looked like Big Toe. =================================== More steps on making the helmet mold so I can fill some more wishes. We put belts around the pieces and flipped the mold. The belts held it all in place. Now I can remove the blocks and the layer of clay. Here's my tip. To make thin mold lines and a mold without sharp edges that can break off the rounded part of the mold needs to be carved off. See where it turns down as the plaster meets the sculpt that's the area. This shows how it looks after carving it flat. So the next piece poured will also be flat. The top piece of clay when removed will be the opening in which the slip is poured in and the excess is poured out. The bottom piece will be removed and the last mold piece will be made there. Next three layers of mold soap are applied. I let them almost dry each time and then I blot with a dry paper towel. Again, snakes are put up the box seams and any areas where the new mold piece joins the box. If you miss a place it will leak horribly. Next Dan and I mix the plaster. He runs the mixer and I gently tap in the plaster. WEAR A MASK THE ENTIRE DAY YOU WORK. The plaster dust that permanently sticks in your lungs floats for hours. Pour it into the box, watch for leaks. It set up in the winter in about 45 minutes. As it sets a layer of water appears at the top, leave that alone it will disappear as the plaster heats up. The mold box is removed. Only the round bottom piece is left to make. Friday is here. Today will be a sanding day for me. I have some dry projects ready to fine tune and to put into the kiln. Cheers, Wendy |
|
H
hang10tiki
Posted
posted
on
Fri, Apr 5, 2019 8:37 PM
Dats a big build |
|
D
danlovestikis
Posted
posted
on
Sat, Apr 6, 2019 9:14 AM
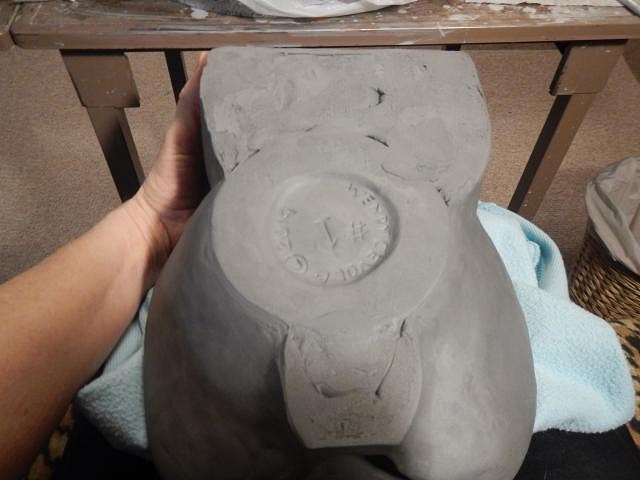
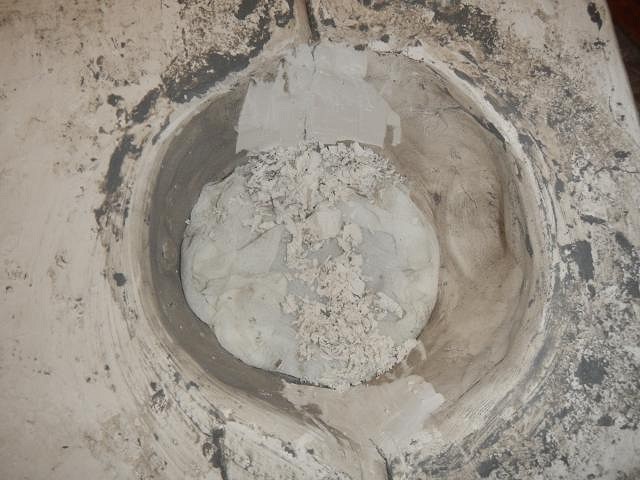
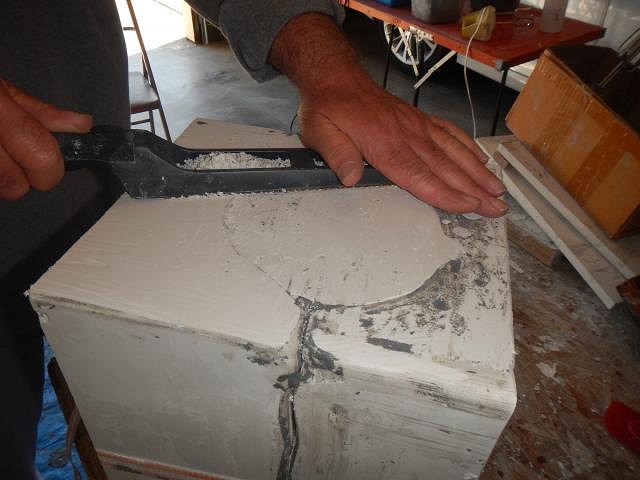
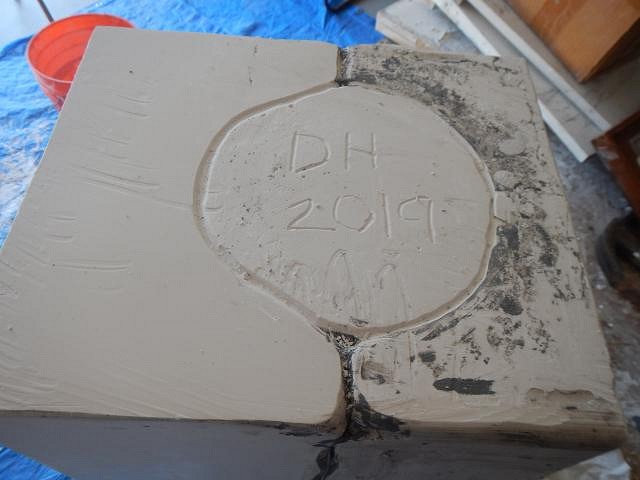
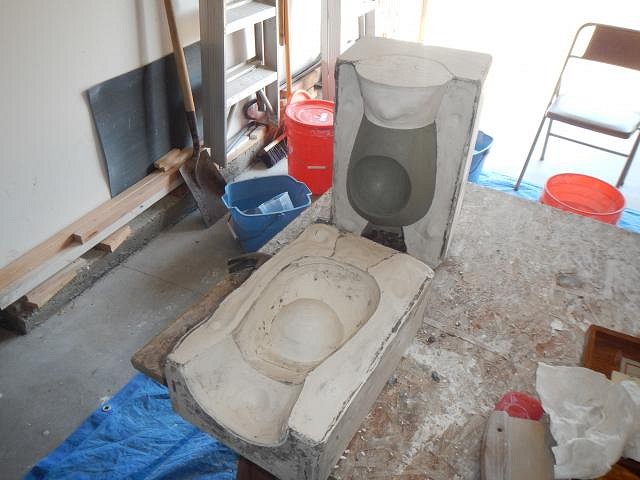
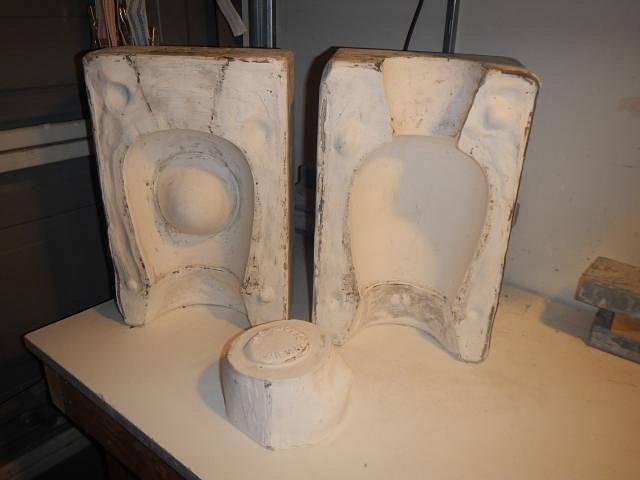
hang10tiki you'll see the results right in order because I'm far behind in posting. This is huge enough to make a lamp but I haven't done one of those during Phase Four of the Wish List #8. ==================================== The last mold piece for the versatile helmet. This photo shows where the last mold piece will be poured. No box needed. The rounding on the top will not matter because I make my mold pieces very thick. However the rounding in where the plaster will be poured needs to be fixed. I put down a piece of wet paper towel to catch the debris. I used a rounded chisel to carve the areas flat. Three layers of poisonous mold soap and then in a bowl we mix up a batch of plaster and slowly pour it into the area. This is the bottom of the mug where my name and date are located. Once it is hard Dan rasped the bottom flat and I carved around the piece so that the edge wouldn't be sharp. I carved the name and date of the mold. We opened the mold success is at hand. Only I hadn't quite divided the helmet in half so the clay sculpt stuck. I had to chisel it out of the mold. To prevent casts from being locked in I sanded around the helmet mold piece INSIDE edges to open it up a bit. I had fans blowing on it 24/7 unless I was firing a load. Then we moved it into the kiln shed where the temperature of the room rises to around 85 degrees even in the winter. This really speeds up the drying process. This mold will be so much fun to use. I will show you soon. Wendy [ Edited by: danlovestikis 2019-04-06 09:15 ] |
|
BB

Bam Bam
Posted
posted
on
Sat, Apr 6, 2019 5:29 PM
Always fascinating to watch your process - I feel like I learn more with each post! |
|
H
hang10tiki
Posted
posted
on
Sat, Apr 6, 2019 8:14 PM
Awesome job on that one
|
|
D
danlovestikis
Posted
posted
on
Sun, Apr 7, 2019 7:38 AM
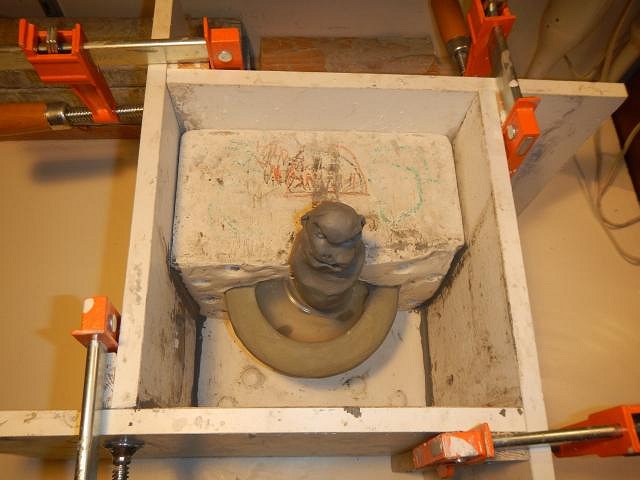
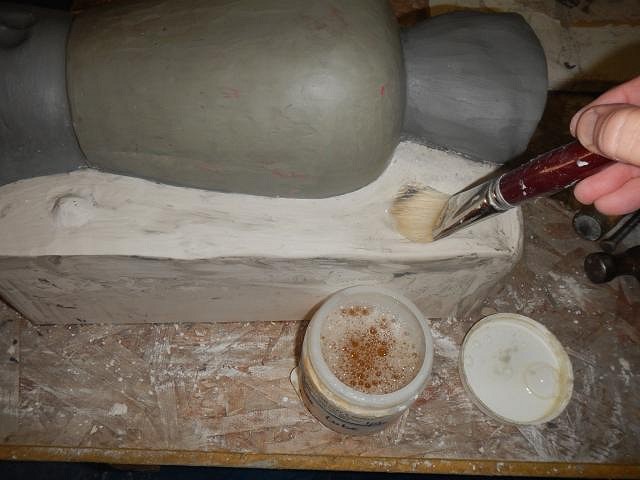
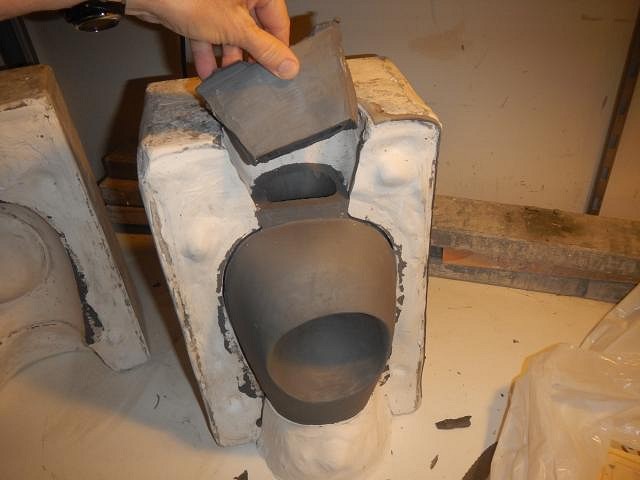
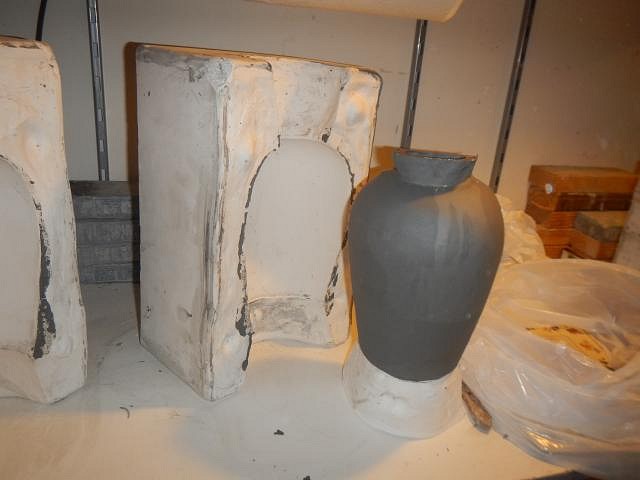
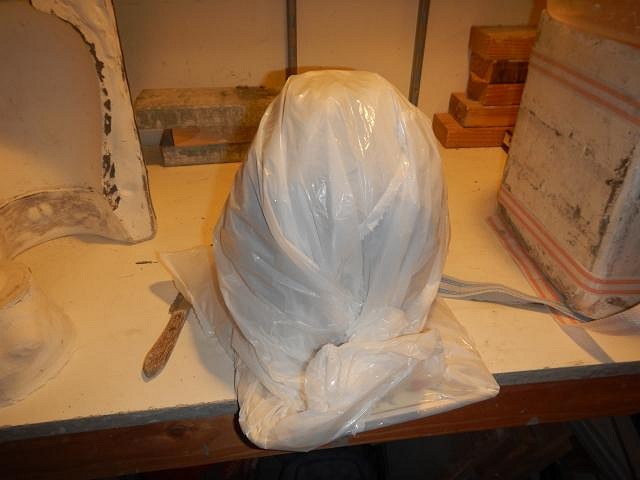
hang10tiki Dan appreciated you campaigning on his behalf but I think I have other plans. The Danny mug is just too scary. ============================ After a few weeks of fans and my hot kiln shed the mold was 100% dry and ready to use. We left the slip inside the mold for two hours before pouring it out. This insures thick walls which allow me to alter and carve the cast however I want. I also left the mold upside down overnight to let the cast firm up. It's so big and I didn't want it to slouch when it's out of the mold. I opened up the mold and so far so good. It didn't want to come out because the top was locked in. I will chisel and sand the mold opening so that will not be a problem next time. I just cut it off. Now it came out easily. I put it on a board in a plastic bag. I pulled the bag up and tucked it into the top. Then I put another bag over the top and under the board. This way it can sit and wait until I'm ready to do the work. For these helmet mugs/bowls I complete them and then I start with the first person on the Wish List. They will see them all and pick theirs and then I go to number two. So many projects and so few hours. At least it's getting warmer outside for sanding, dusting and washing. Today I continue to work on the crawl mugs. Wendy |
|
H
hang10tiki
Posted
posted
on
Sun, Apr 7, 2019 9:04 AM
What
|
|
T
TheBigT
Posted
posted
on
Mon, Apr 8, 2019 6:53 AM
Fogcutter mugs = AWESOME! |
|
D
danlovestikis
Posted
posted
on
Mon, Apr 8, 2019 8:16 PM
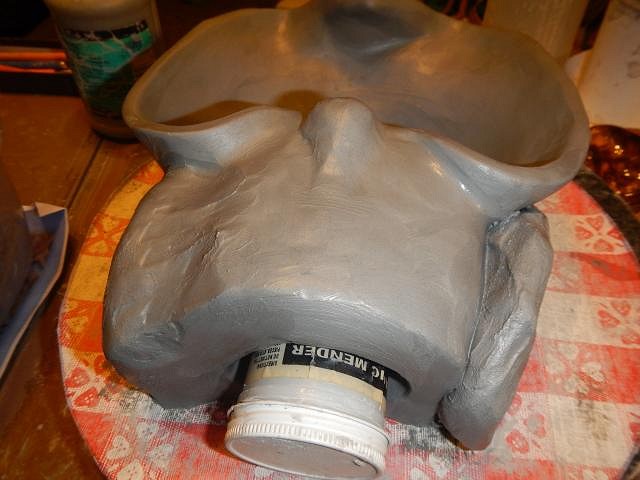
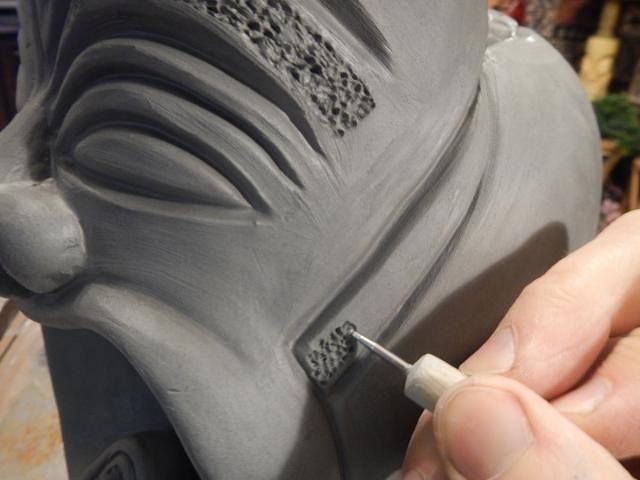
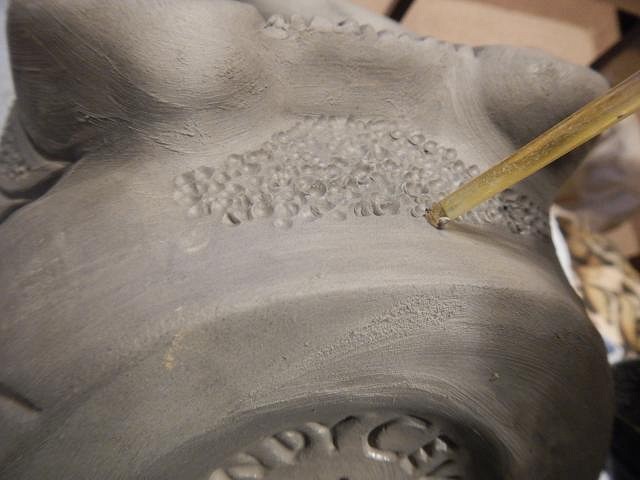
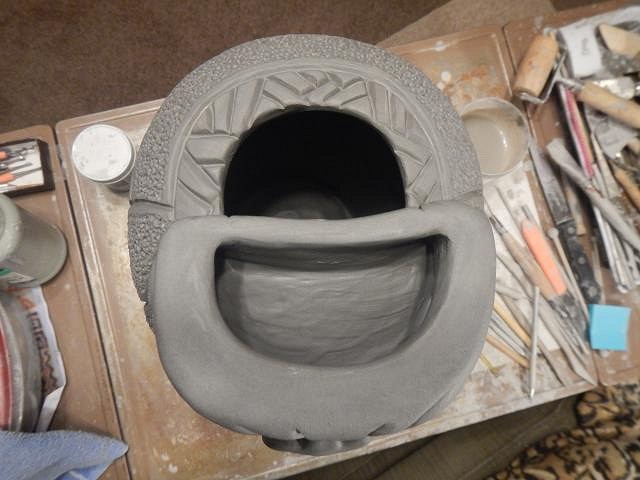
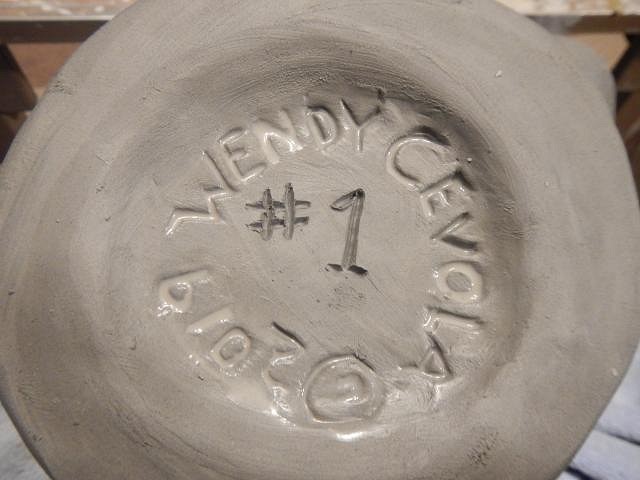
TheBigT thank you, they are really fun to carve when watching TV. I can't just sit there and stare at the screen. =============================== Wish List #8 Phase Four. I made a good mistake. I first made a mug for Fred Ferrer of a vintage ashtray. Then I re-read his request and it was for a bowl. So I finished the bowl and posted it and now I'm posting the mug (it's huge). He is taking both and is happy that I made this mistake. This is the bowl that I made which was his request. Here are some of the steps to using the helmet mold for the first time to make the ashtray mug. I started by adding clay all the way around the inverted area so I could make the mouth shaped like the ashtray. Then I began to build his nose. I cut off the top and used it to build the rest of his head. I first glued it with sticky clay to the front. I built up the clay until it was the right size. I sculpted his nose in place and then to double check I did a bit of carving. Then I stopped to let it firm up for a few days. Matching the texture of the ashtray I used a ballpoint tool to dent the clay. Then in larger areas I used the back end of a paint brush to do the same. Then I carved some designs. All done.
I left the top of the head open for dry ice or flaming rum soaked sugar cubes. He would be fun if jazzed up that way. I don't know if I would ever make this again. It took a week to sculpt and I still have to glaze it after the bisque fire. I just put number one on the bottom because it is #1. Back to work, Wendy |


Pages: 1 2 3 4 5 6 7 8 9 10 11 12 13 14 15 16 17 18 19 20 21 22 23 24 25 26 27 28 29 30 31 32 33 34 35 36 37 38 39 40 41 42 43 44 45 46 47 48 49 50 51 52 53 54 55 56 57 58 59 60 61 62 63 64 65 66 67 68 69 70 71 72 73 74 75 76 77 78 79 80 81 82 83 84 85 86 87 88 89 90 91 92 93 94 95 96 97 98 99 100 101 102 103 104 105 106 107 108 109 110 111 112 113 114 115 116 117 118 119 120 121 122 123 124 125 126 127 128 129 130 131 132 133 134 135 136 137 138 139 140 141 142 143 144 145 146 147 148 149 150 151 152 153 154 155 156 157 158 159 160 161 162 163 164 165 166 167 168 169 170 171 172 173 174 175 176 177 178 179 180 181 182 183 184 185 186 187 188 189 190 191 192 193 194 195 196 197 198 199 200 201 202 203 204 205 206 207 208 209 210 211 212 213 214 215 216 217 218 219 220 221 222 223 224 225 226 227 228 229 230 231 232 233 234 235 11239 replies