Pages: 1 2 3 4 5 6 7 8 9 10 11 12 13 14 15 16 17 18 19 20 21 22 23 24 25 26 27 28 29 30 31 32 33 34 35 36 37 38 39 40 41 42 43 44 45 46 47 48 49 50 51 52 53 54 55 56 57 58 59 60 61 62 63 64 65 66 67 68 69 70 71 72 73 74 75 76 77 78 79 80 81 82 83 84 85 86 87 88 89 90 91 92 93 94 95 96 97 98 99 100 101 102 103 104 105 106 107 108 109 110 111 112 113 114 115 116 117 118 119 120 121 122 123 124 125 126 127 128 129 130 131 132 133 134 135 136 137 138 139 140 141 142 143 144 145 146 147 148 149 150 151 152 153 154 155 156 157 158 159 160 161 162 163 164 165 166 167 168 169 170 171 172 173 174 175 176 177 178 179 180 181 182 183 184 185 186 187 188 189 190 191 192 193 194 195 196 197 198 199 200 201 202 203 204 205 206 207 208 209 210 211 212 213 214 215 216 217 218 219 220 221 222 223 224 225 226 227 228 229 230 231 232 233 11,163 replies
|
L

LoriLovesTiki
Posted
posted
on
Fri, Dec 12, 2014 3:11 PM
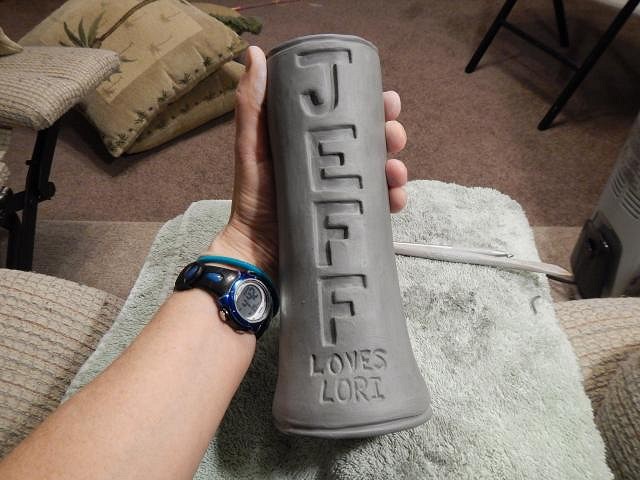
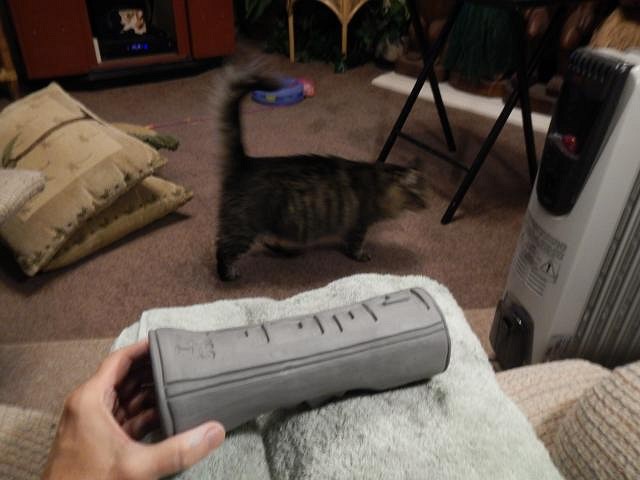
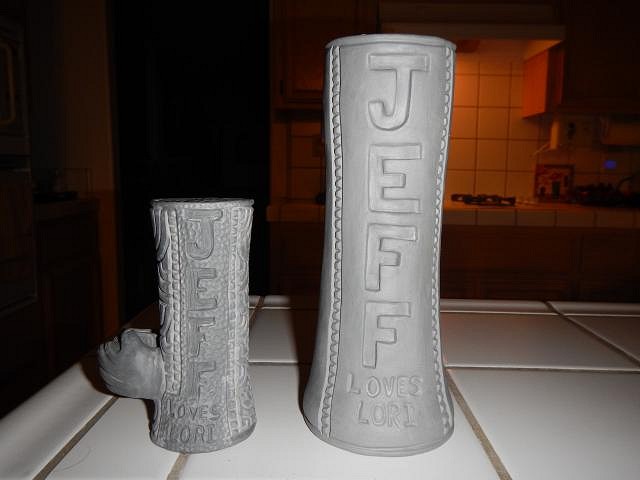
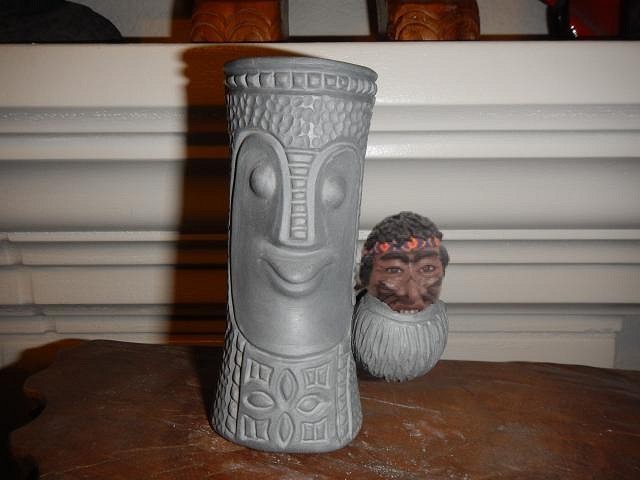
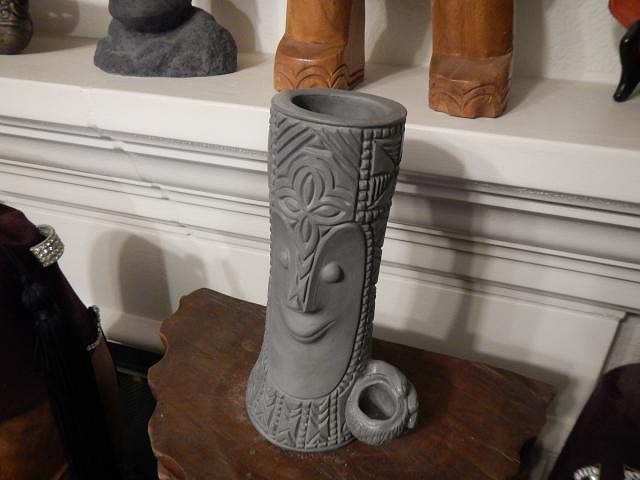
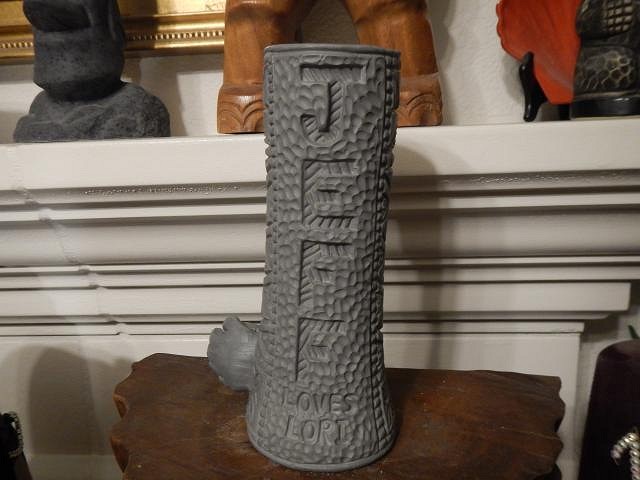
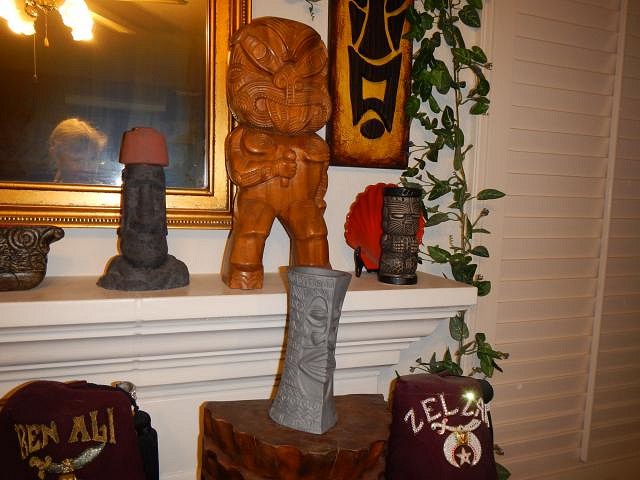
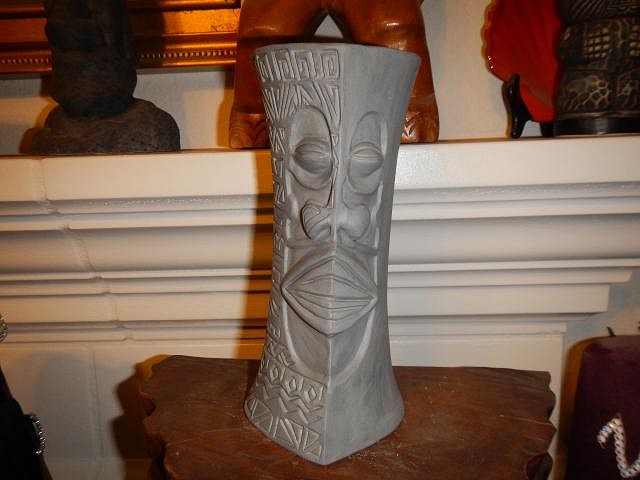
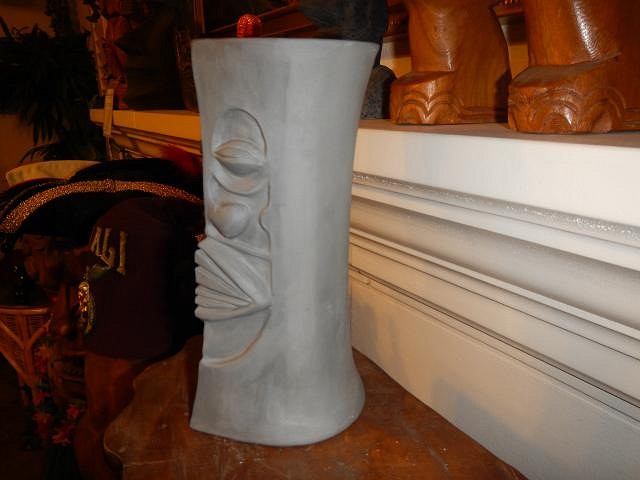
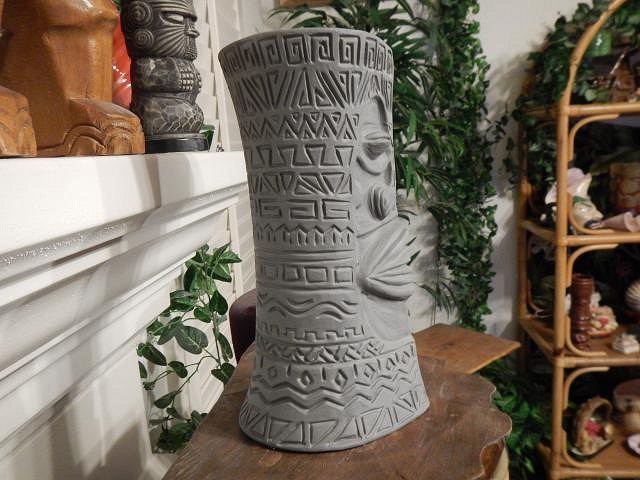
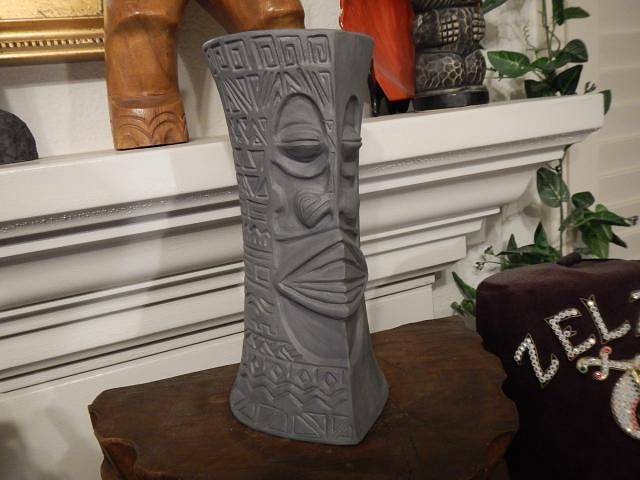
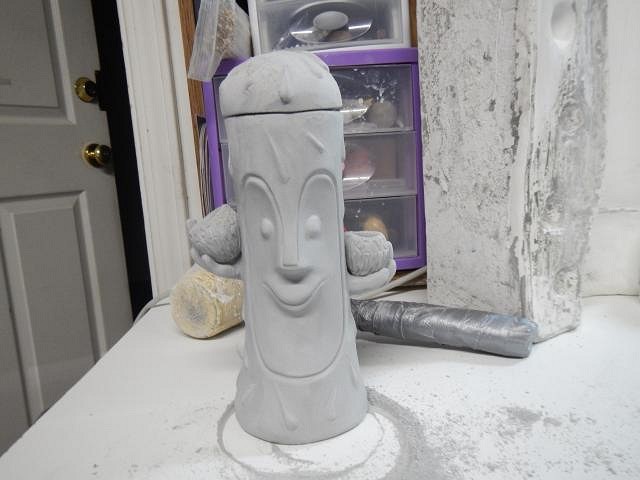
I love it Wendy but I wanted a mug, so we'd each have one. How the BLEEP did I mess that up that? I never realized you were saying statue, my mind was reading mug! Can we fix this? Drats! I really like the statue though but can you open the top? But then it must not have a bottom....... Ay-ya-yi! Please advise. I may have hit a new low for stupidity. Edited to add this: :) [ Edited by: LoriLovesTiki 2014-12-12 16:12 ] |
|
D
danlovestikis
Posted
posted
on
Fri, Dec 12, 2014 8:23 PM
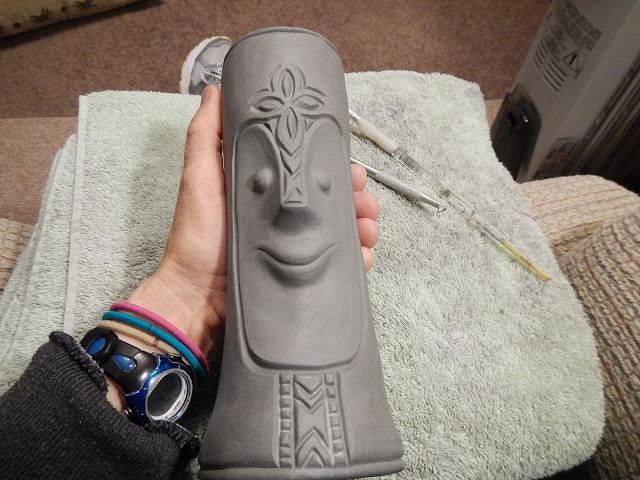
Hi Lori, this is not a problem. Clay is very easy to change before it dries. I will just fill in the part that says Jeff Loves Lori and super carve it. I'll then make you a mug just like this but full size. Did you like the way it was carved or was there any of it you would like to look differently? Mess ups can be fun to read about so this just made my thread more entertaining! Cheers, Wendy |
|
D
danlovestikis
Posted
posted
on
Sat, Dec 13, 2014 1:01 PM
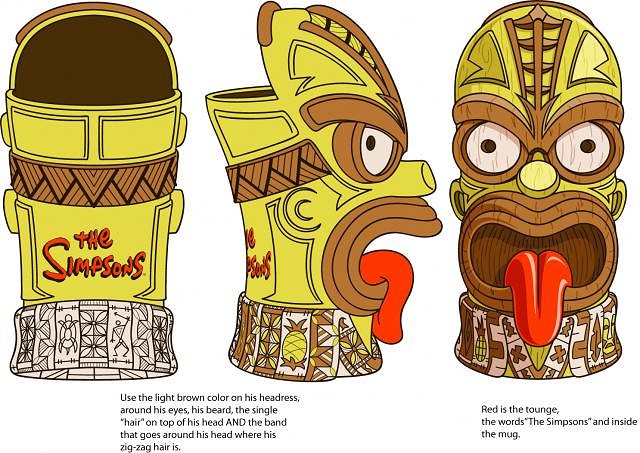
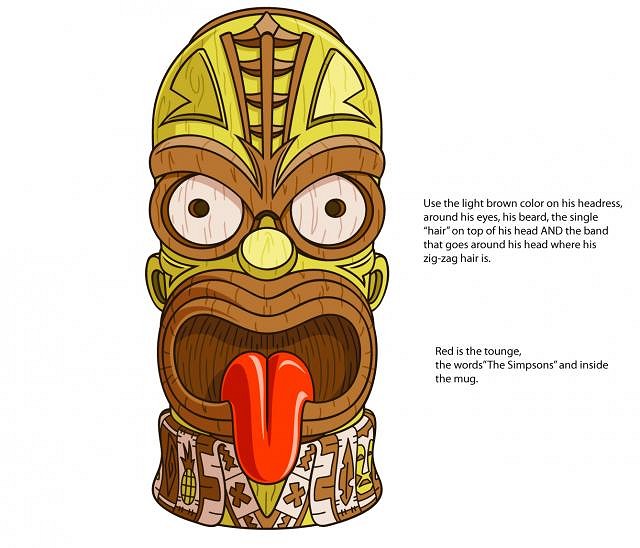
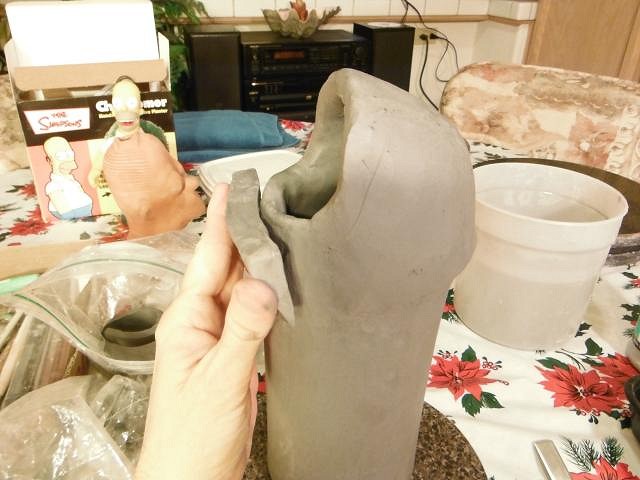
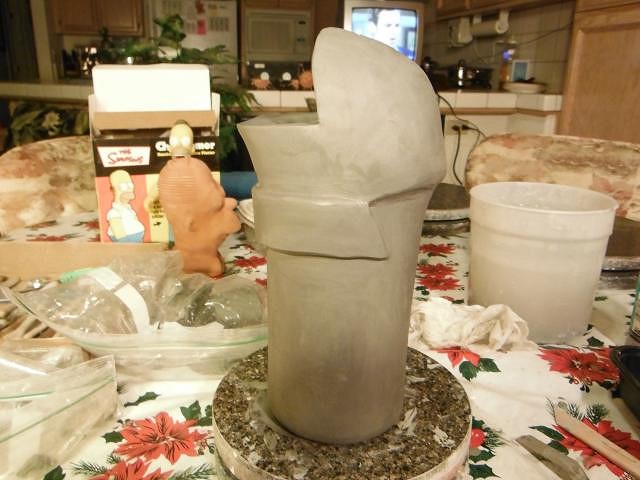
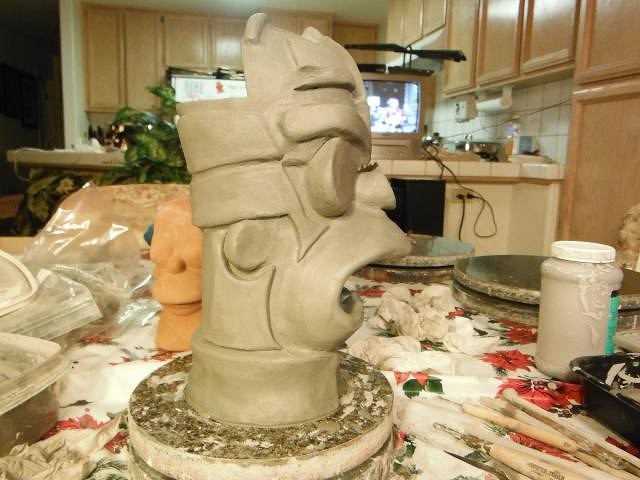
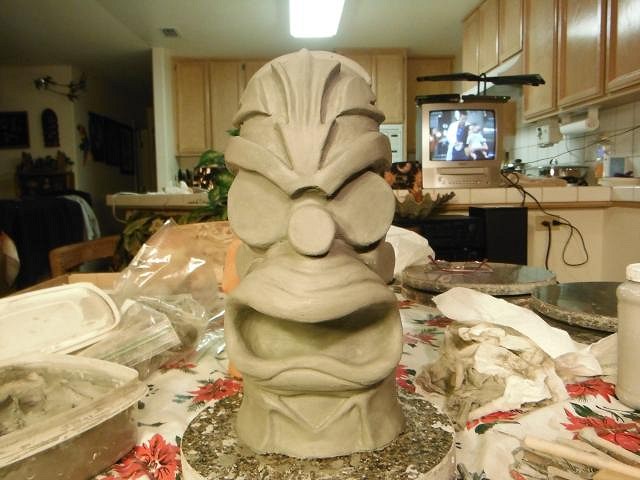
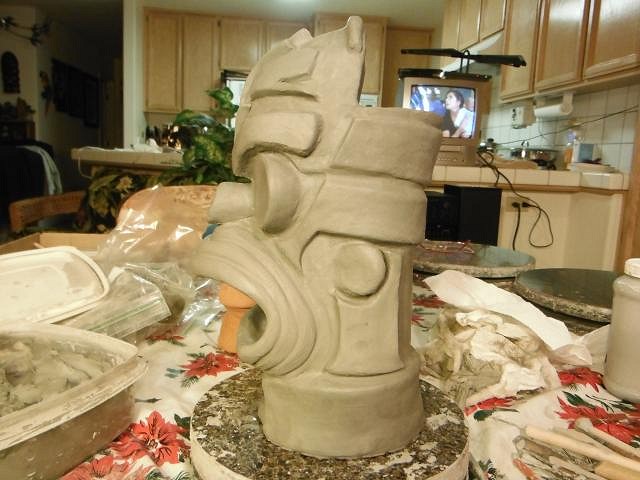
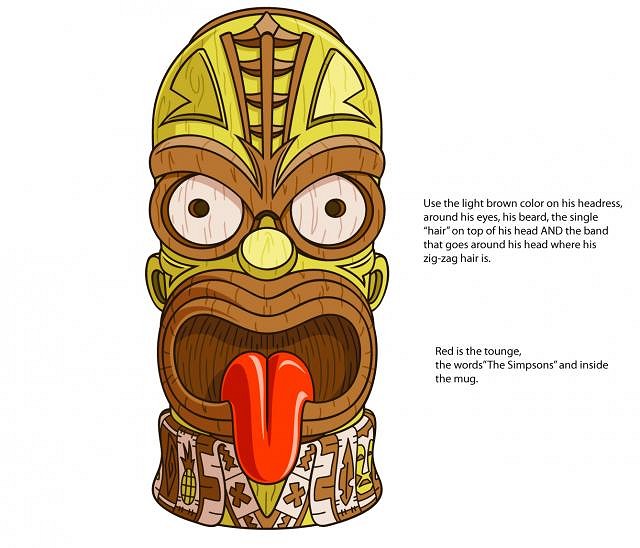
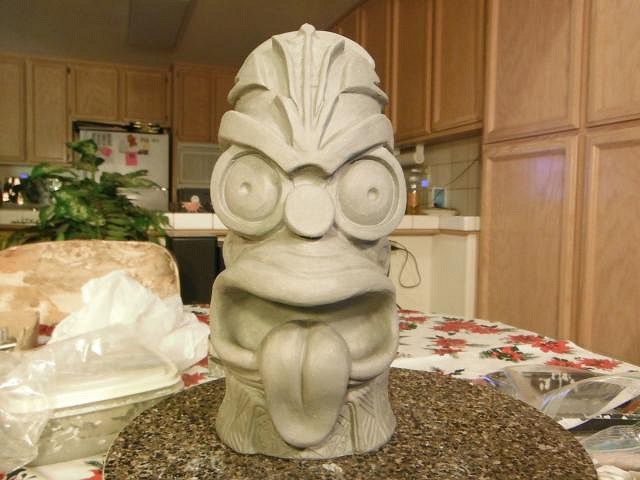
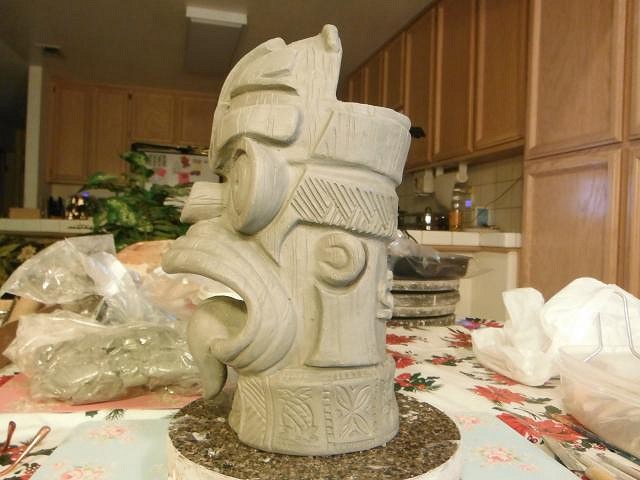
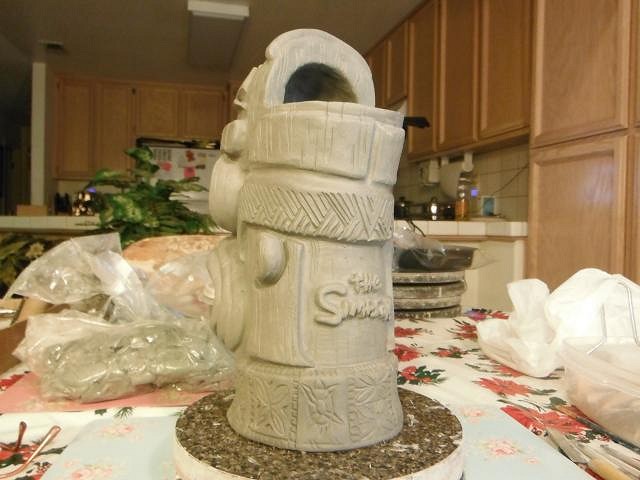
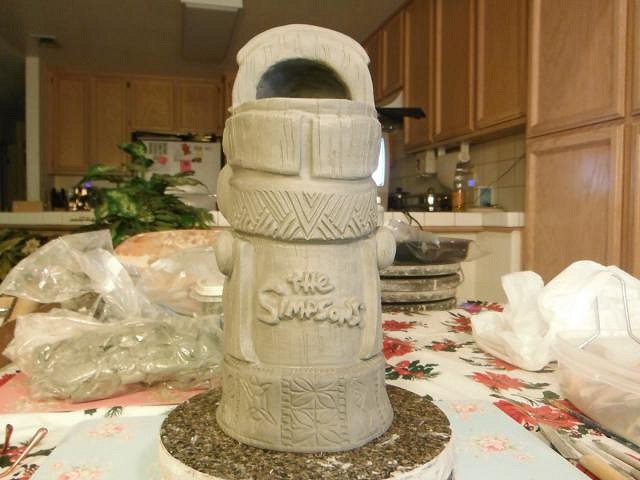
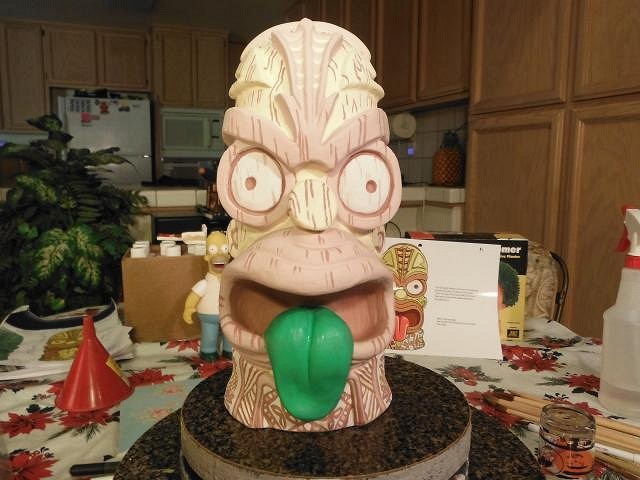
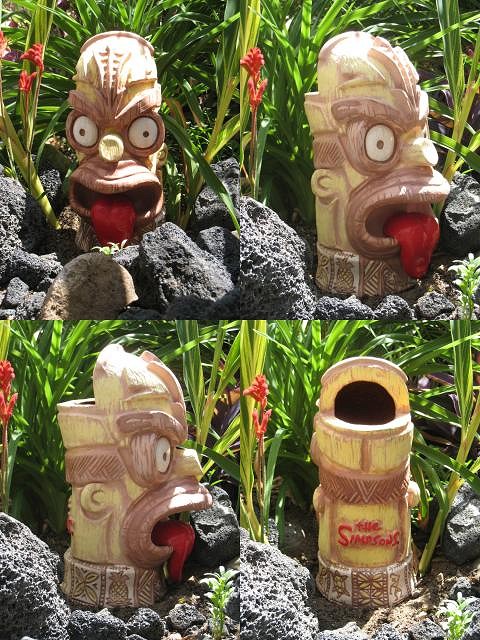
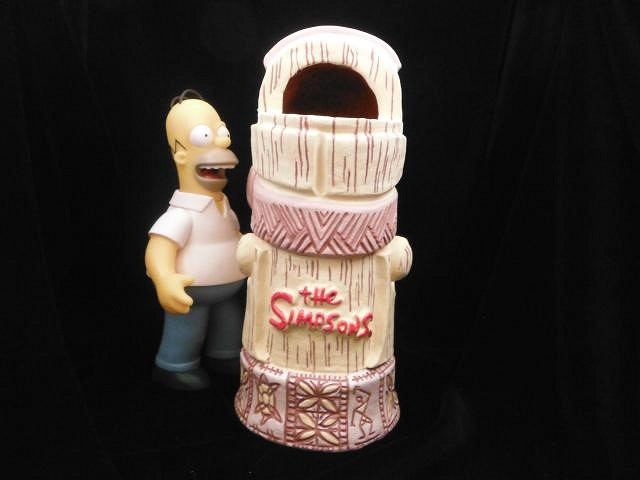
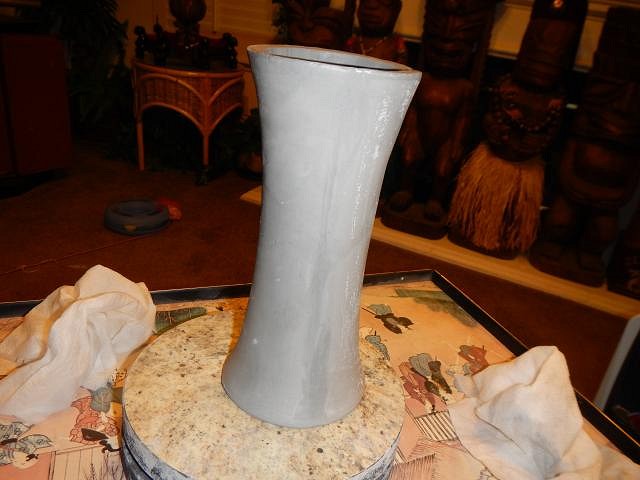
Hi Friends, this past Thursday I received a call that it was now time to release photos of a TOP SECRET mug project that was completed during a past WISH LIST. I'm going to share photos of the making of this mug from start to finish. I am also going to put it on facebook so that these photos can be shared. I hope to create some buzz that will eventually lead a manufacturer to my client. Only a few people have seen this mug so far now it's your turn. It is my pleasure to present you the tiki version of Homer Simpson. I will show you how it progressed from my clients drawings to the huge mug made in ceramic clay.
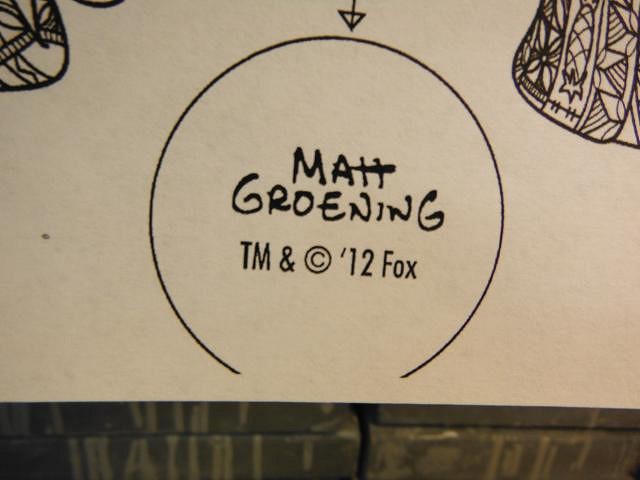
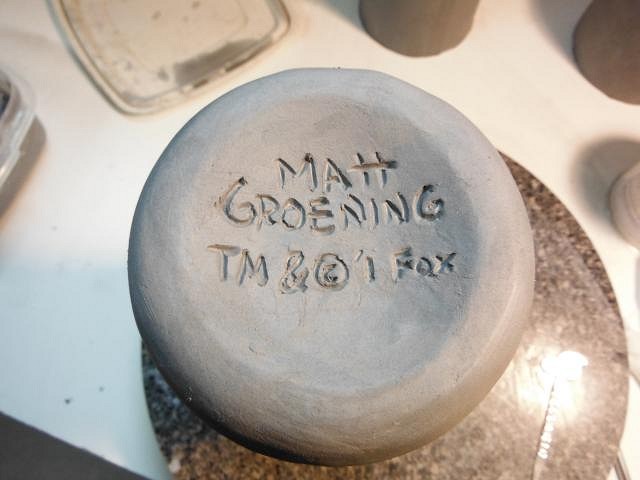
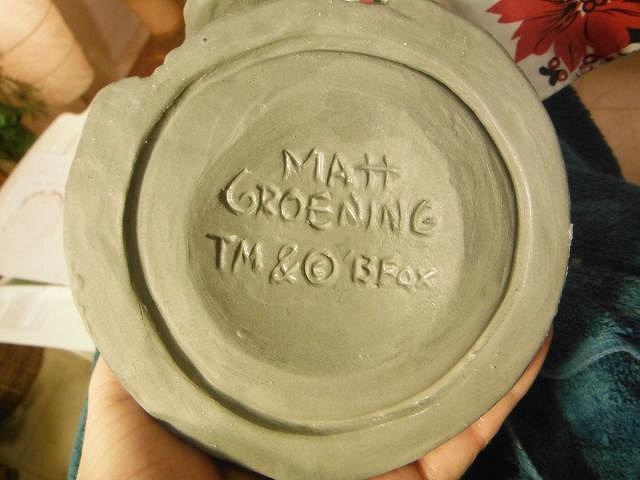
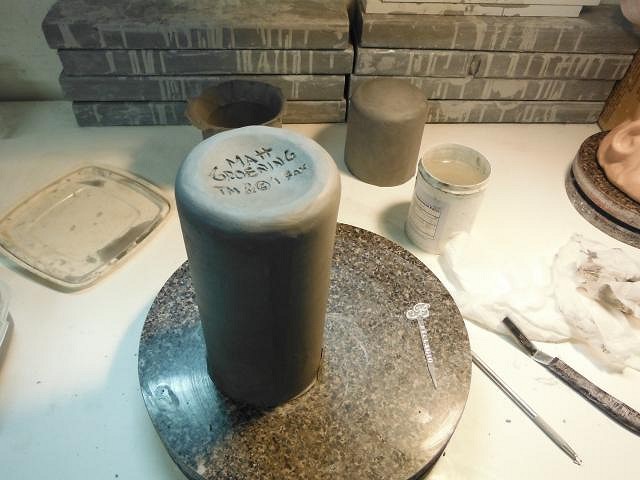
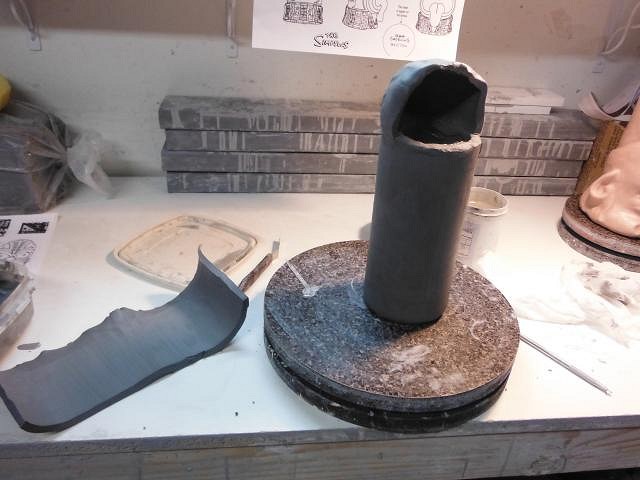
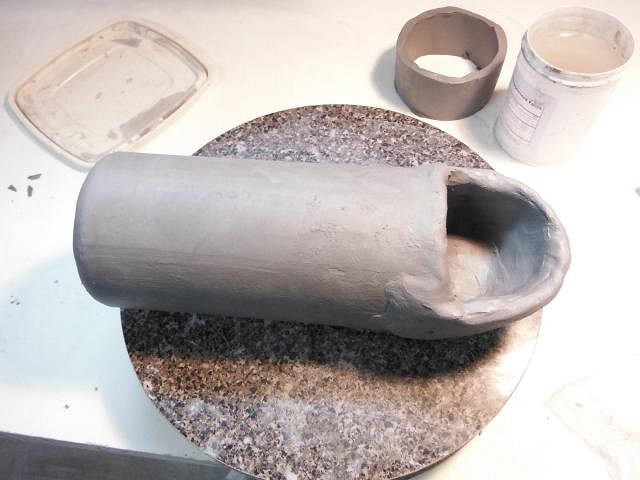
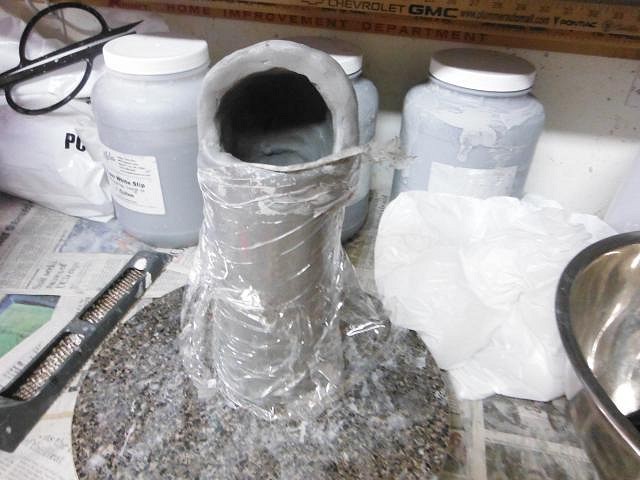
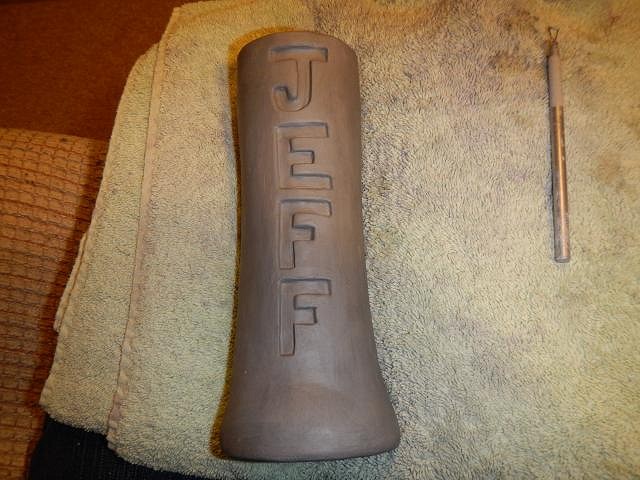
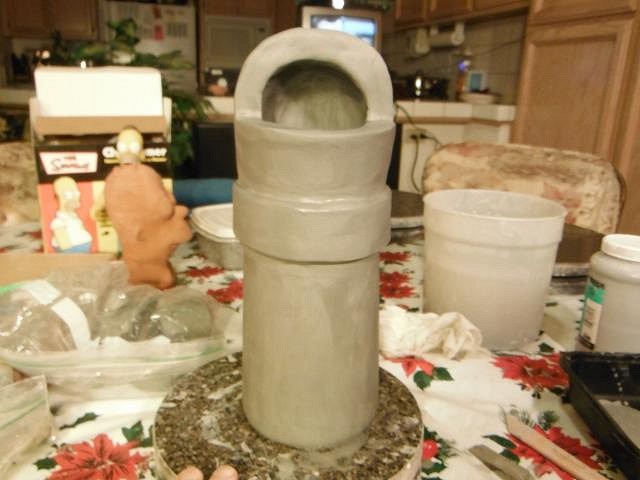
I started by casting a cylinder mug shape. I turned it over and carved in the name of the person responsible for Homer. Later down the line I took another photo of the bottom and had an optical illusion occur. The carving into the bottom had not changed. This shows the shape of the mug that I started with. I cut and added pieces of clay to shape the head. This is going to be a very big mug! Wrapped up so that part of it can dry a bit to firm it up. =================================================== Now I'm off to work on the Wish List #5 projects.
Wendy |
|
H

hang10tiki
Posted
posted
on
Sat, Dec 13, 2014 2:40 PM
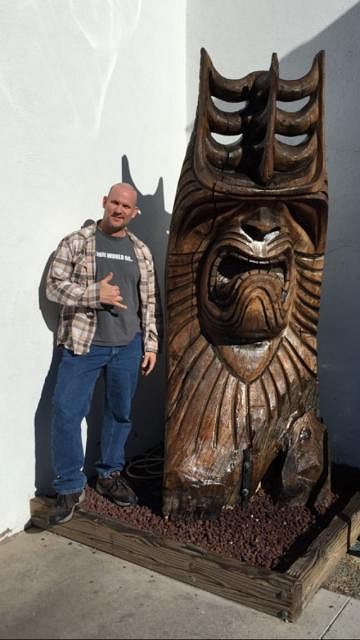
Homer..... Wish u guys were here
|
|
H

hang10tiki
Posted
posted
on
Sat, Dec 13, 2014 3:14 PM
New Doug Horne print up in Frankie's
|
|
H

hang10tiki
Posted
posted
on
Sat, Dec 13, 2014 3:16 PM
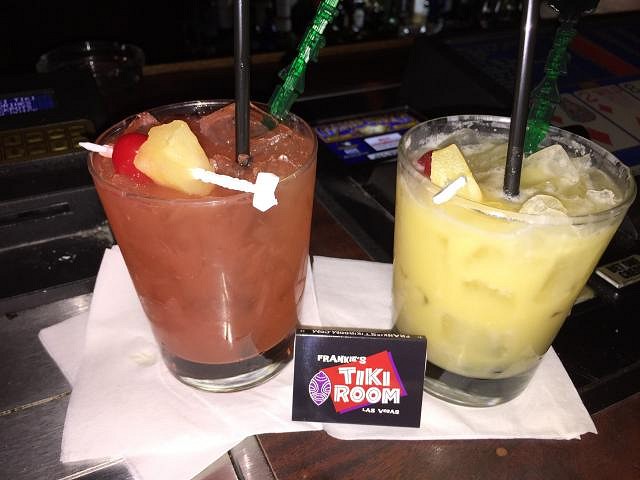
Me- Zombie
Then my lucky lady hit a royal flush
Worst sound ever, slurp of an empty tiki mug through my straw!!! [ Edited by: hang10tiki 2014-12-13 18:42 ] |
|
L

LoriLovesTiki
Posted
posted
on
Sat, Dec 13, 2014 5:44 PM
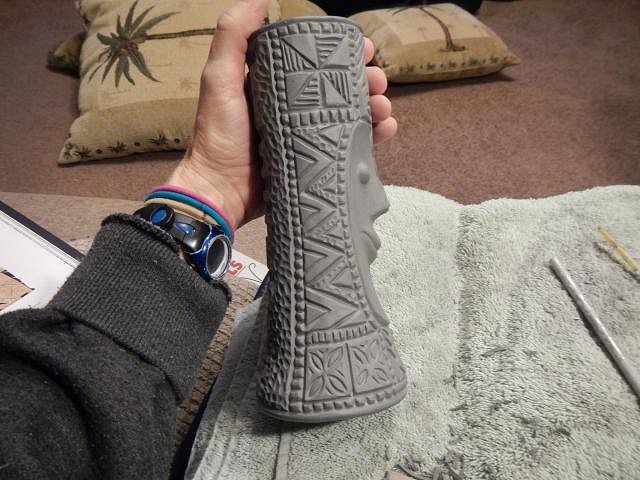
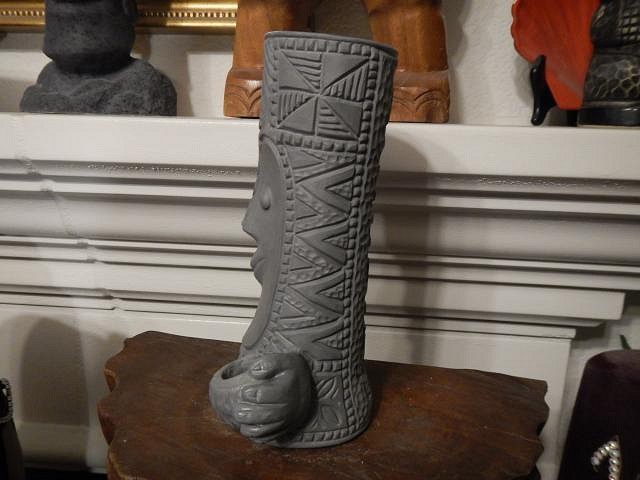
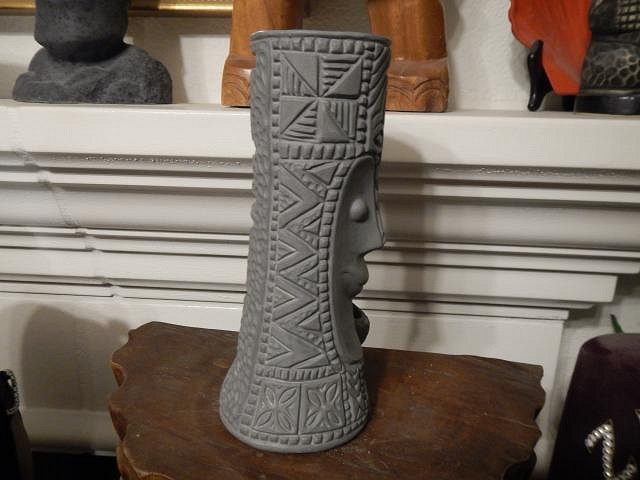
Wendy, you are the best! On the mug, if possible could you make the LOVES LORI a little thicker? And on the sides can you carve a more tapa-like pattern instead of the semi-circles? Mahalo! |
|
D
danlovestikis
Posted
posted
on
Sat, Dec 13, 2014 9:31 PM
hang10tiki I hope we can see you around March 2015 or will you be in Hawaii? hang10tiki excellent print. We all love Vincent and Doug. hang10tiki did you scream? LoriLovesTiki tapa it is. I started your big mug today.
When the clay is firmer I can make the LOVES LORI better. I can make it larger to fill the space under JEFF. ================================================ Twice in one day, how about that! Cheers, Wendy |
|
M
MadDogMike
Posted
posted
on
Sat, Dec 13, 2014 10:05 PM
Hey Wendy! Nice Homer mug! Were you working on that a year ago when I was up there? Excited to see how it turns out! |
|
D
danlovestikis
Posted
posted
on
Sun, Dec 14, 2014 8:48 AM
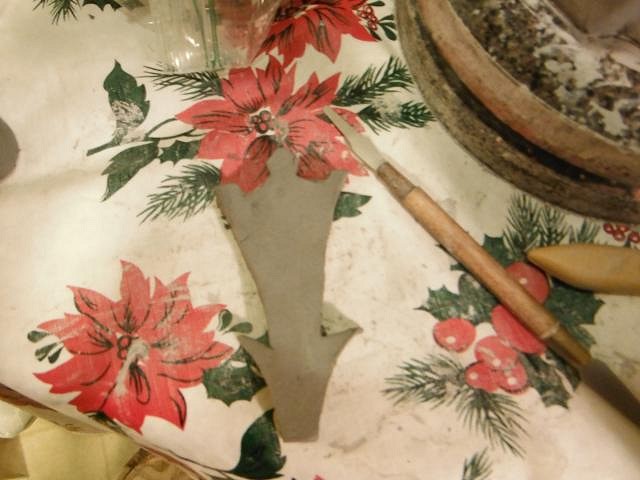
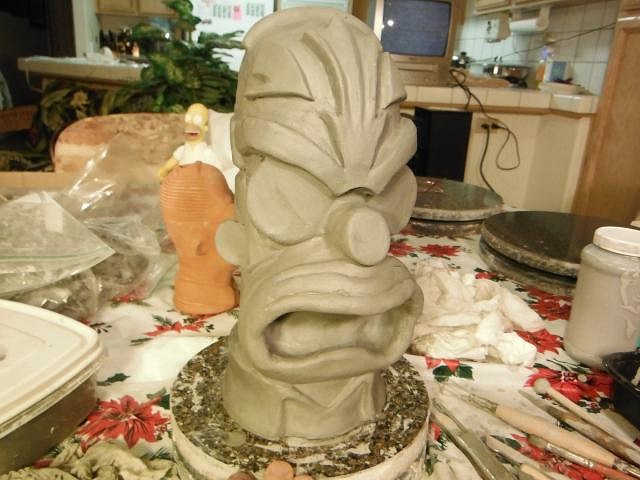
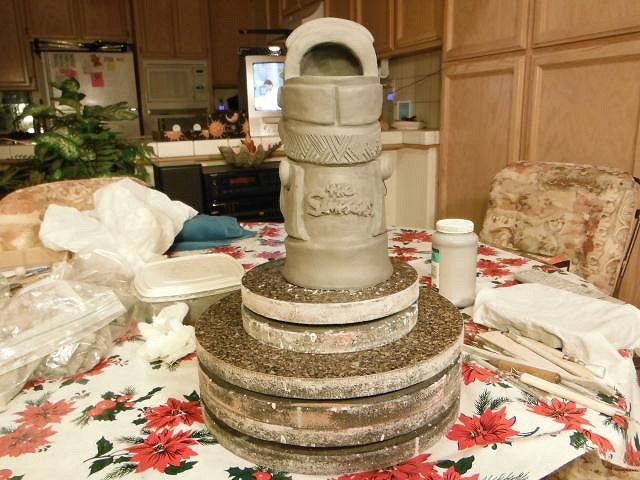
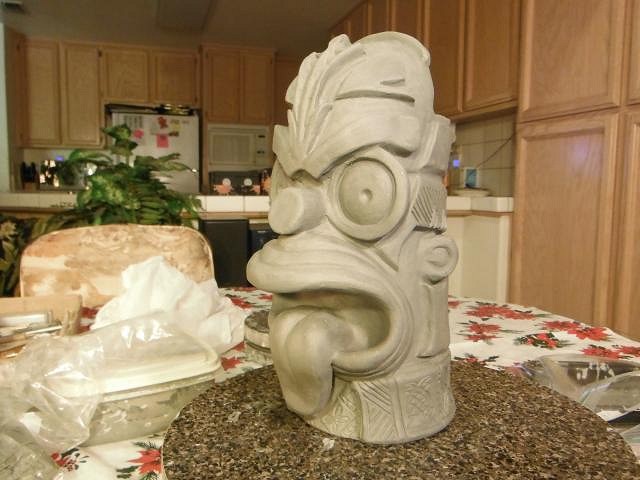
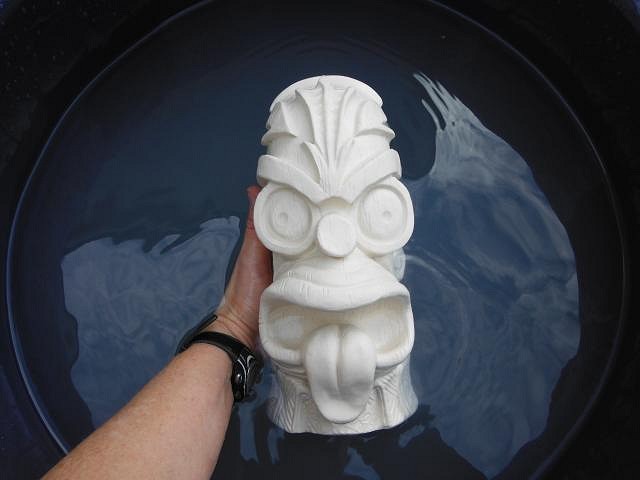
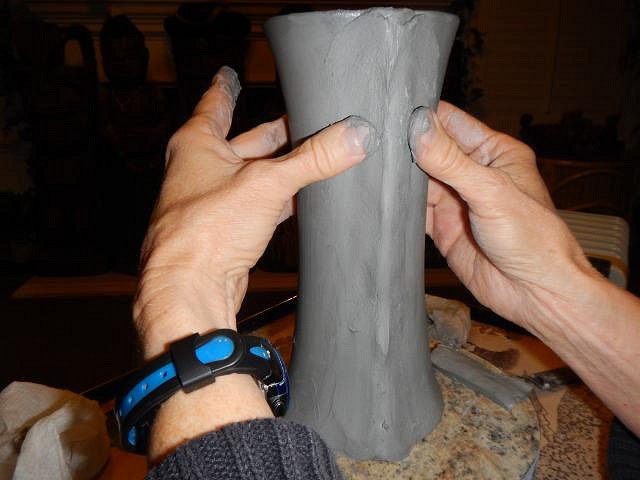
MadDogMike it was already in the clients hands by then. I'm looking forward to seeing what you do with your flower cookie cutter. Clay cutting? Very clever. =================================== I went to pick photos of the Homer Simpson mug as I progressed and found that 20 photos were the kind that turn sideways here. I posted those on facebook and I'm posting those that work on here. So a lot of steps are missing in this post. This mug took a long time and at the end weighed around 5 pounds! I would look at the mug and then at the photo and then I would add clay in sheets. With that accomplished I moved down to the next piece.
I cut a piece for the center of the forehead. This is where facebook has more photos of the work. Just go to Wendy Cevola if you need to be friended just request it. So many weeks later this is what has been accomplished.
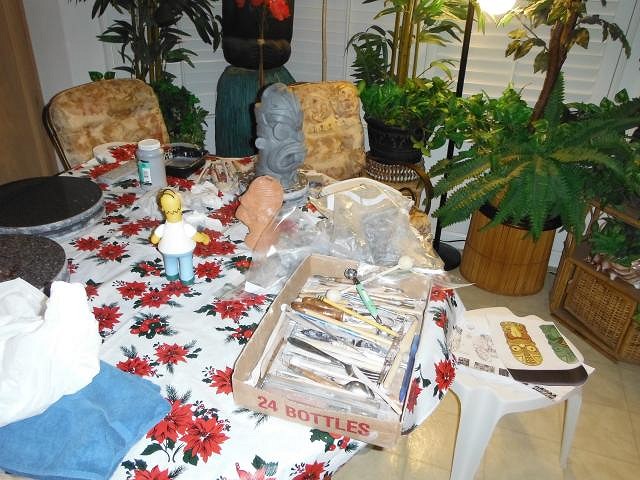
My client also sent me a Chi pet and a statue of Homer to work from. I continued to fine tune and to smooth all the parts that were added.
More tomorrow. ====================================== RVICTOR I've made a lot of progress on your design. When I finish off Homer I'll be posting your mug photos. Cheers and Happy Holidays, Wendy |
|
L
Loki-Tiki
Posted
posted
on
Sun, Dec 14, 2014 8:48 AM
Whoa, in my early-morning-just-woke-up-have-not-had-coffee-post-zombia-hangover state, I thought you were making these for me...lol :wink: Love them Wendy!!! |
|
D
danlovestikis
Posted
posted
on
Sun, Dec 14, 2014 8:57 AM
How funny is that, I didn't even think of the fact there are two Jeff's and Lori's in the tiki world. Well the small one is for sale. I sent you a PM. Wendy |
|
H

hang10tiki
Posted
posted
on
Sun, Dec 14, 2014 11:24 AM
5 pound mug
Worst sound ever, slurp of an empty tiki mug through my straw!!! [ Edited by: hang10tiki 2014-12-14 11:34 ] |
|
R
RVICTOR
Posted
posted
on
Sun, Dec 14, 2014 12:58 PM
Homer Simpson mug is looking good Wendy! |
|
V
VampiressRN
Posted
posted
on
Sun, Dec 14, 2014 2:18 PM
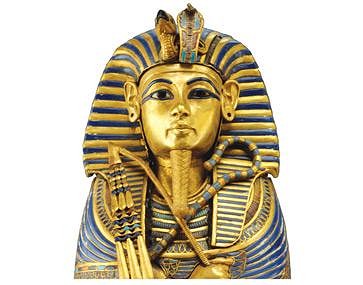
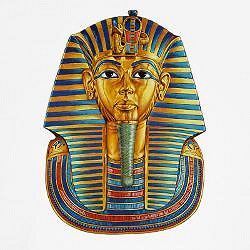
Obviously Wendy and Dan can accomplish any mug. I am thinking a King Tut mug would be fun!!!
Blue Nile (cocktail) |
|
L

LoriLovesTiki
Posted
posted
on
Sun, Dec 14, 2014 4:08 PM
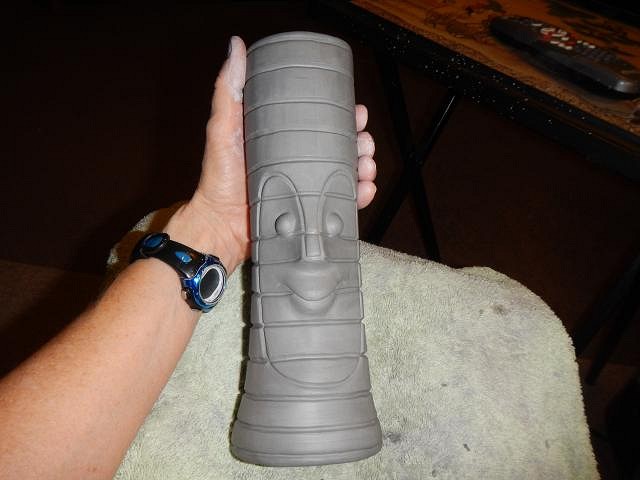
Wow, that picture makes the mug look HUGE! Not Homer HUGE but pretty big. Thanks so much for making the mug. And it's super funny that you might have a taker for the "Jeff loves Lori" statue as is!! |
|
L

LoriLovesTiki
Posted
posted
on
Sun, Dec 14, 2014 4:13 PM
Wow, that picture makes the mug look HUGE! Not Homer HUGE but pretty big. Thanks so much for making the mug. And it's super funny that you might have a taker for the "Jeff loves Lori" statue as is!! |
|
H

hang10tiki
Posted
posted
on
Sun, Dec 14, 2014 6:18 PM
Wendy- we should be around then Vamp- that would be cool |
|
D
danlovestikis
Posted
posted
on
Mon, Dec 15, 2014 7:58 AM
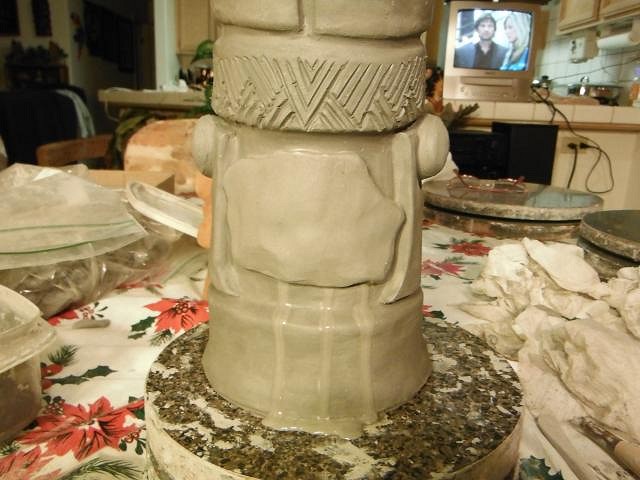
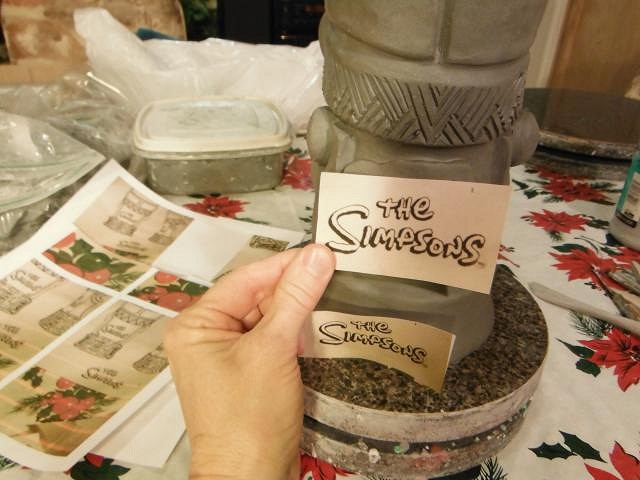
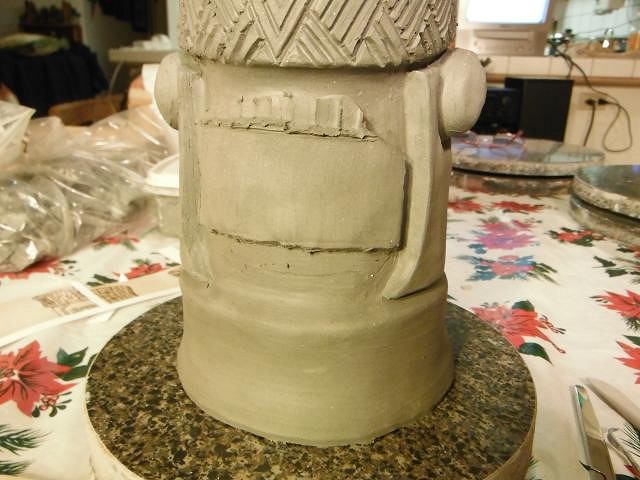
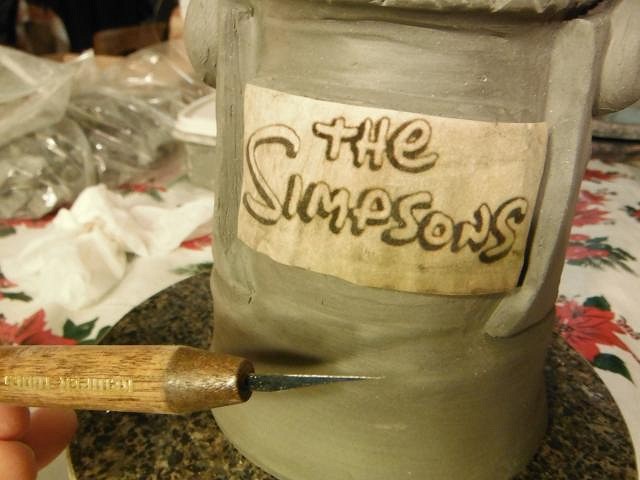
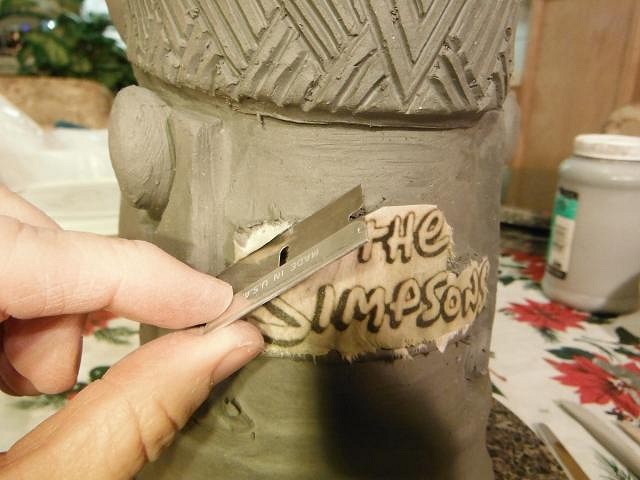
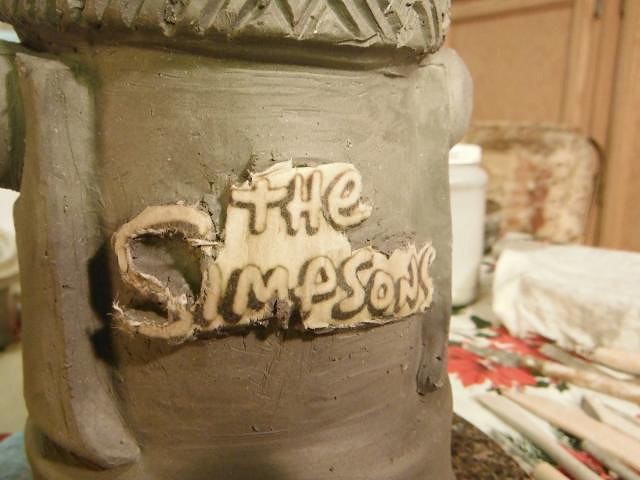
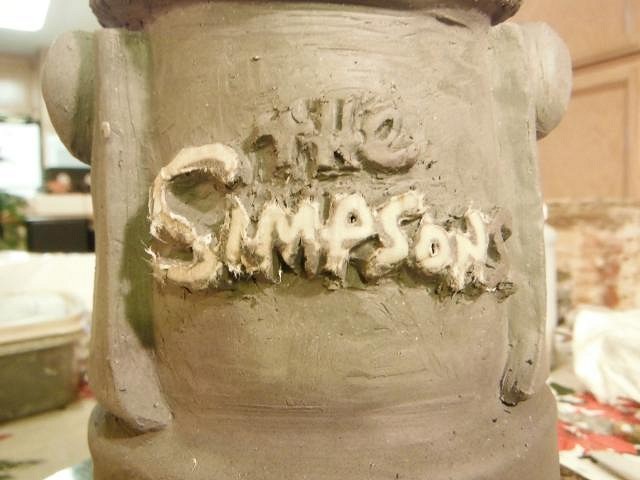
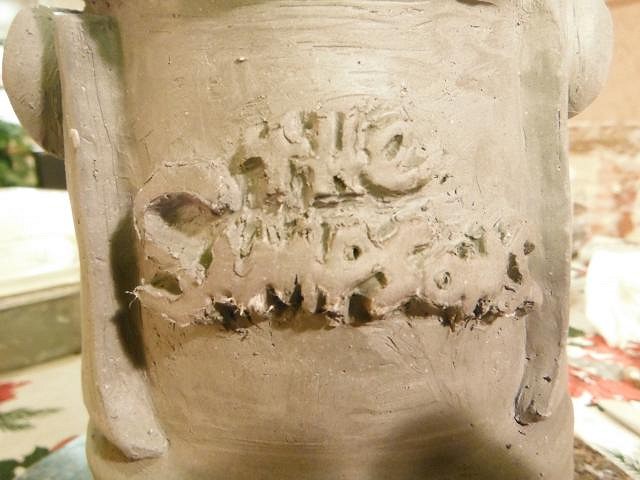
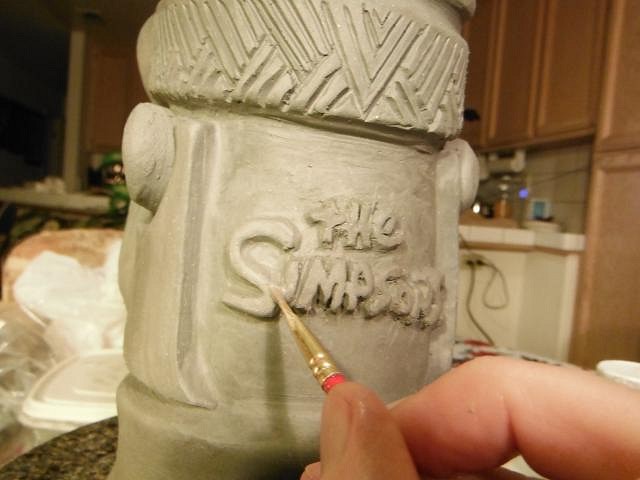
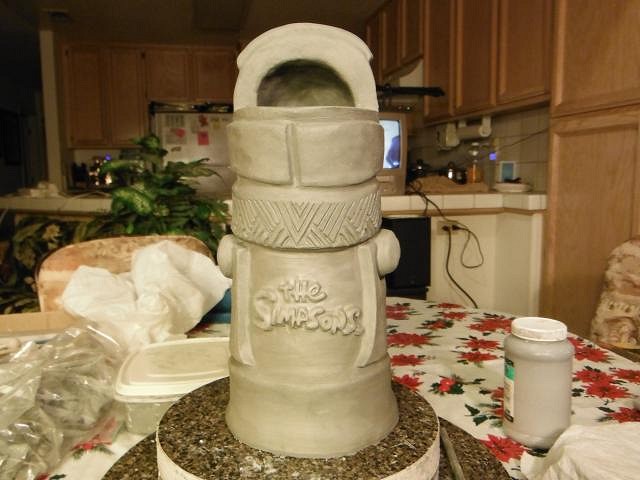
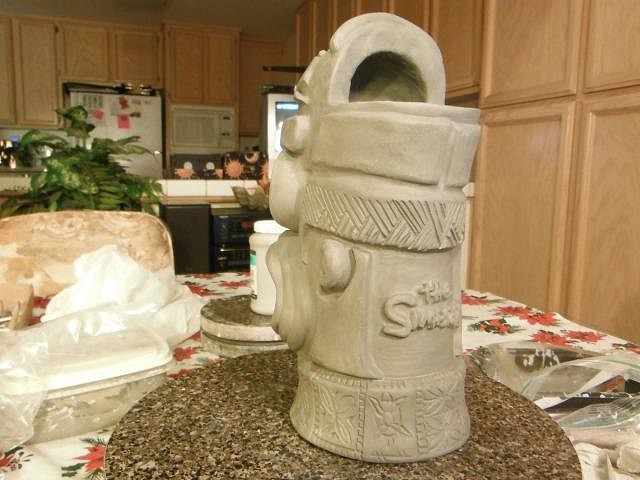
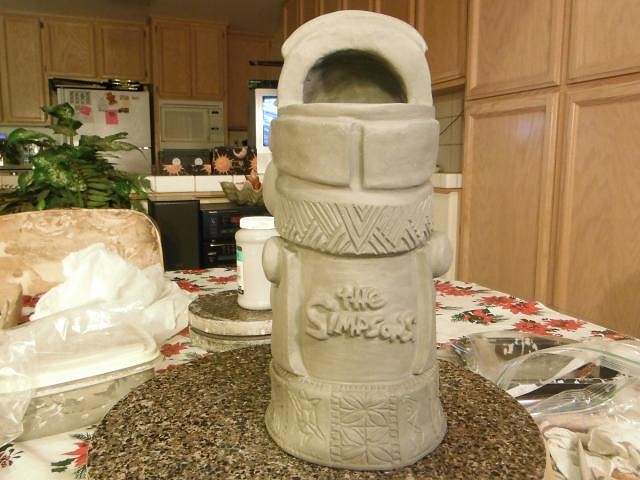
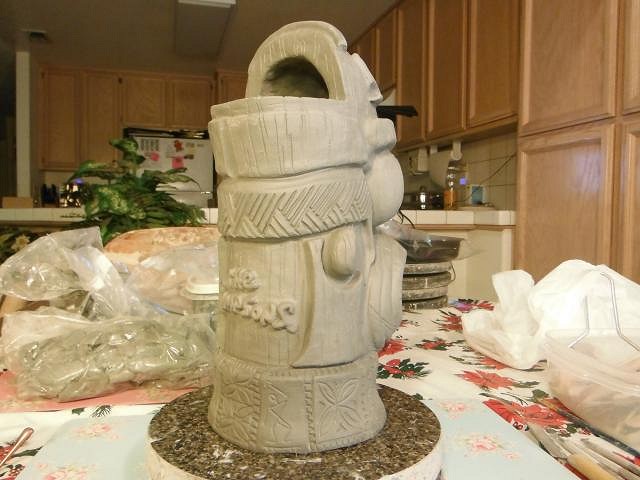
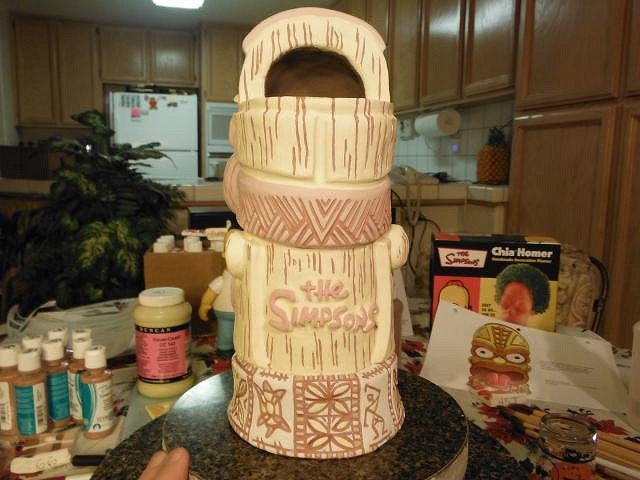
hang10tiki and that's with it empty. Drink and get a workout at the same time. RVICTOR thank you for your patience and comment. I want to keep these Homer photos close together. Yours will come up when I finish. VampiressRN I would love to make one of the boy king. LoriLovesTiki the mug was huge. I don't know what I was thinking. My client was very happy with the size so it worked out. hang10tiki Vamp has an Egyptian master bedroom and so do we. When we met for the first time it was a surprise to see that there were two homes that were tiki and Egyptian. We sure hope to see you two. =========================================== First I added a layer of clay. This time the letters needed to stand out. I printed the photo of the word until I had it in the right size for the back of the mug. I cut the added clay to the right size and then I pressed the paper in place. I used a razor blade and a lot of different tools to remove the excess clay. I had to go slow so that the paper didn't move skewing the letters into new shapes. Once I had the basic outline down I removed the paper. All the paper has been removed here. I sat back to see if it looked OK. Now I used wet paint brushes to smooth the letters. Now it's all done and that was a relief. ==================================== Thank you for watching the progress in the making of this 1/1 prototype. Wendy |
|
H

hang10tiki
Posted
posted
on
Mon, Dec 15, 2014 9:25 AM
The letters look great... |
|
T
TikiAno
Posted
posted
on
Mon, Dec 15, 2014 10:25 AM
All of the new Lori pieces and the Homer Simpson mug look great. So much patience- and such perfection in your carving of the letters- I've tried that once (on the "Rum DMC" mug way back) and decided to never want to copy text again. Ha! You, of course, are able to show off. I love learning by watching your carves (and seeing what tools you use, too). Hopefully we can see a photo with the (final) recipient, too. Since I hear you're traveling in early March, you might be interested in the San Diego Home Bar crawl on March 7th? en route to Vegas? http://www.tikicentral.com/viewtopic.php?topic=48560&forum=17&3 (Jon, that goes for you, too). Wendy, Tiki Ari might be there for one of the bar stops.... :) Lori, you better check your mug when it arrives- Wendy sent me a photo text that there was a little visitor trying to hitch a ride. Dan caught the visitor, and (as predicted), added it to his collection. That Dan....
[ Edited by: TikiAno 2014-12-15 10:27 ] |
|
L

LoriLovesTiki
Posted
posted
on
Mon, Dec 15, 2014 6:39 PM
TikiAno - is that a headhunter coconut mug???? LOL |
|
M
MauiTiki
Posted
posted
on
Mon, Dec 15, 2014 8:03 PM
I do the same thing for adding names to my mugs. But I wet the paper, and then poke pin holes around the letters to give me an outline of the shapes, then I peel off the paper before I begin to remove the excess clay. I find cutting through the paper slows me down and the paper doesn't always cooperate. The mug is looking amazing!! |
|
D
danlovestikis
Posted
posted
on
Tue, Dec 16, 2014 9:34 AM
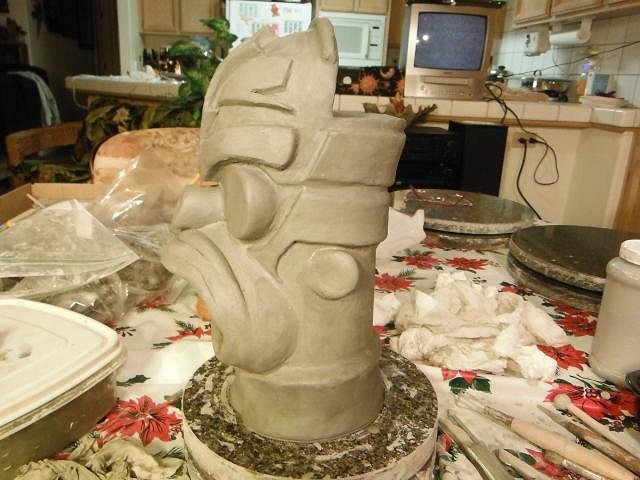
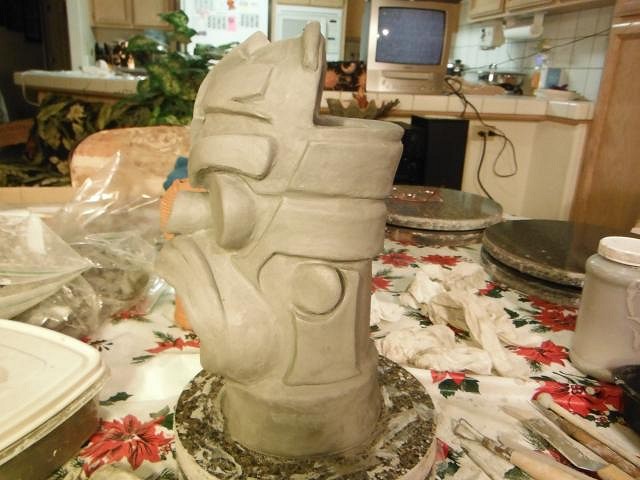
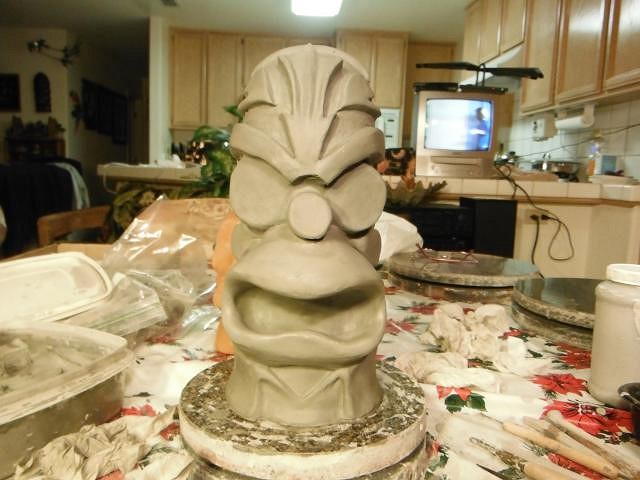
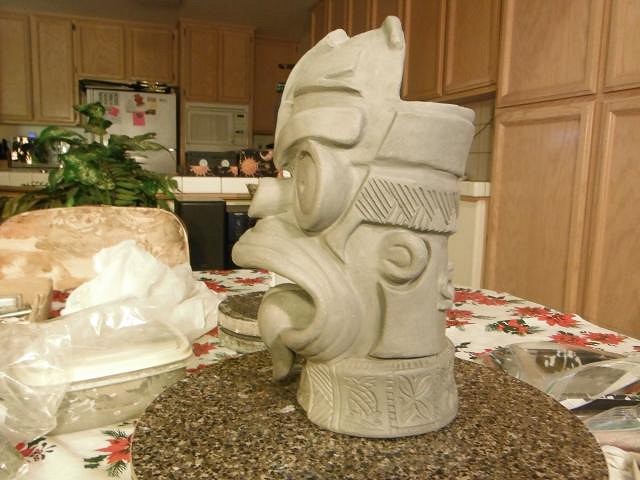
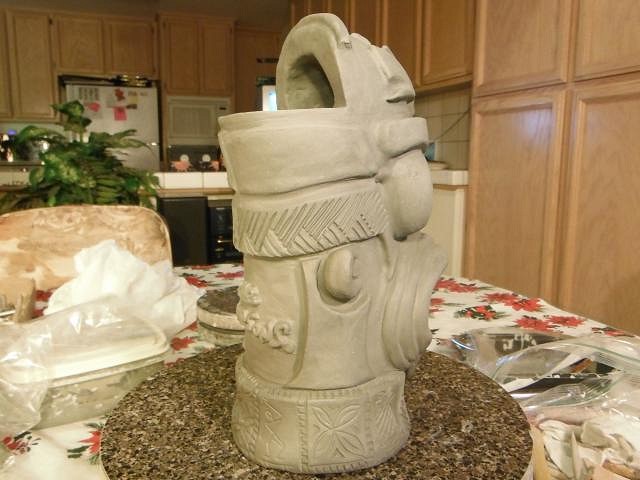
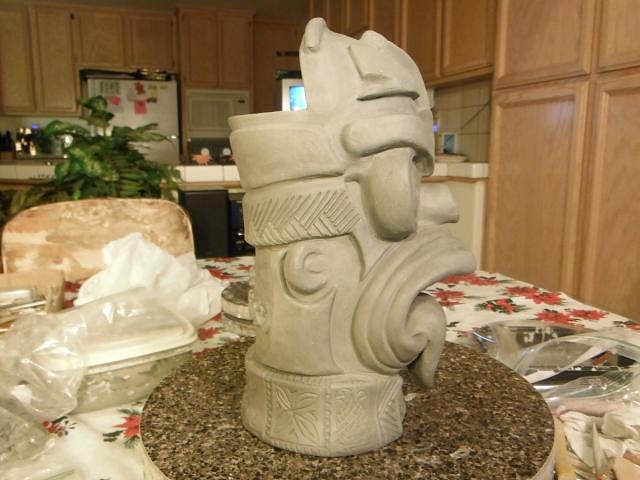
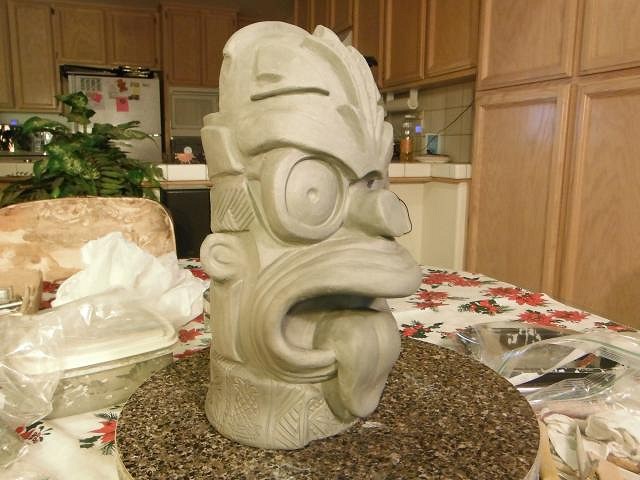
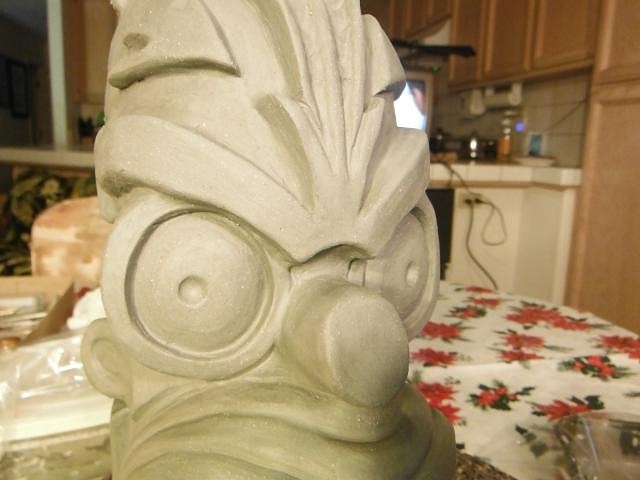
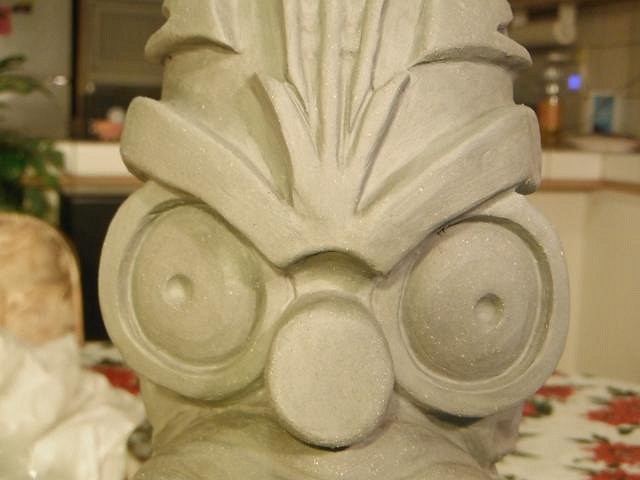
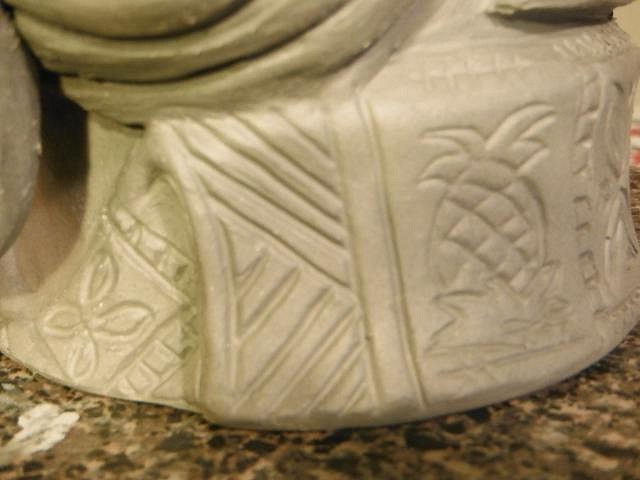
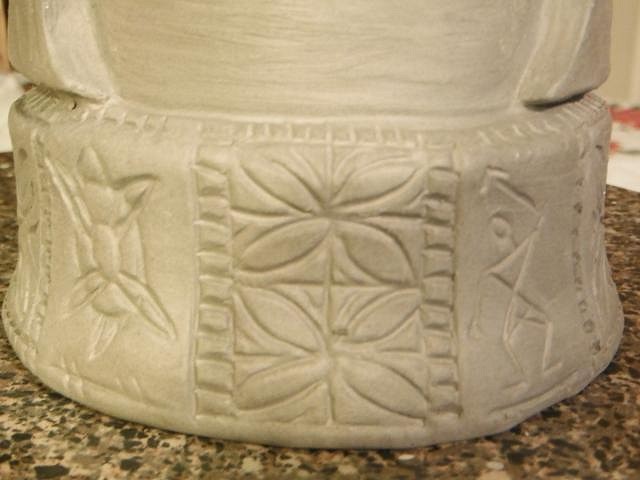
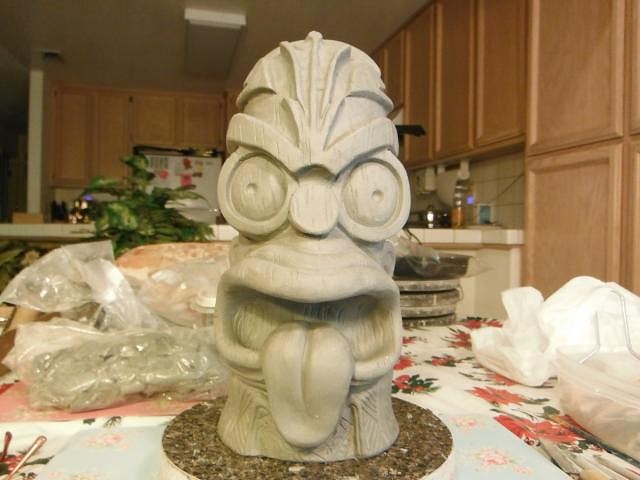
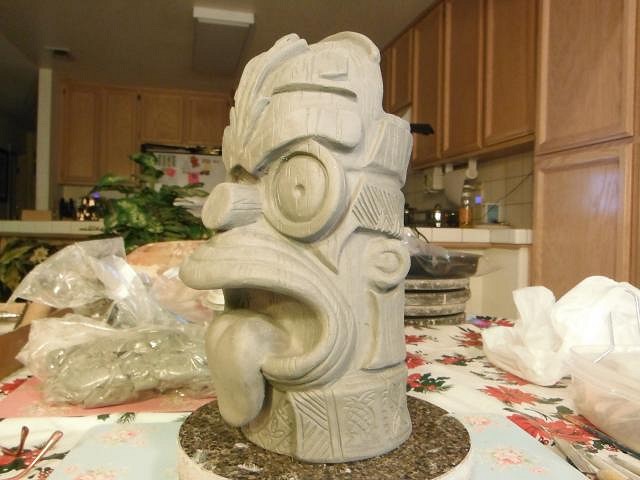
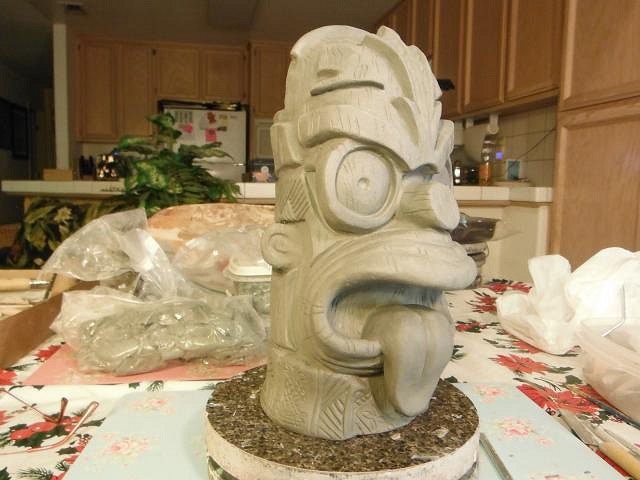
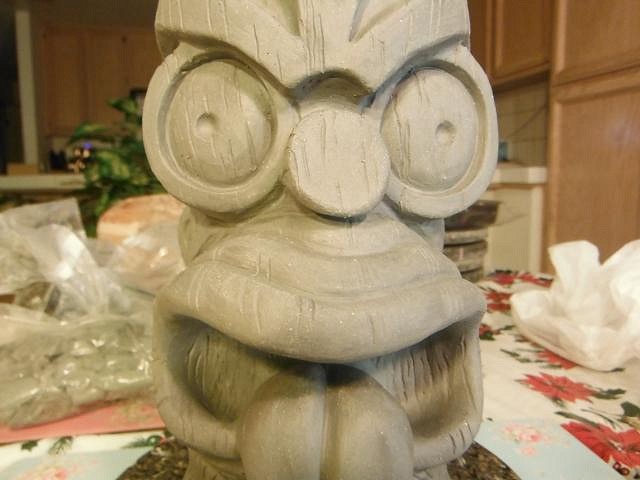
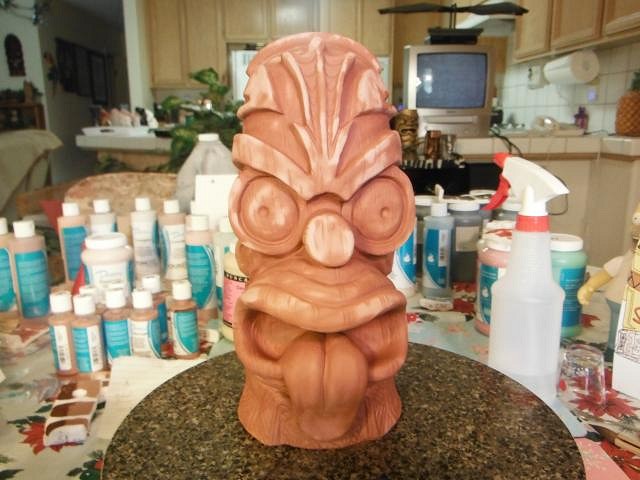
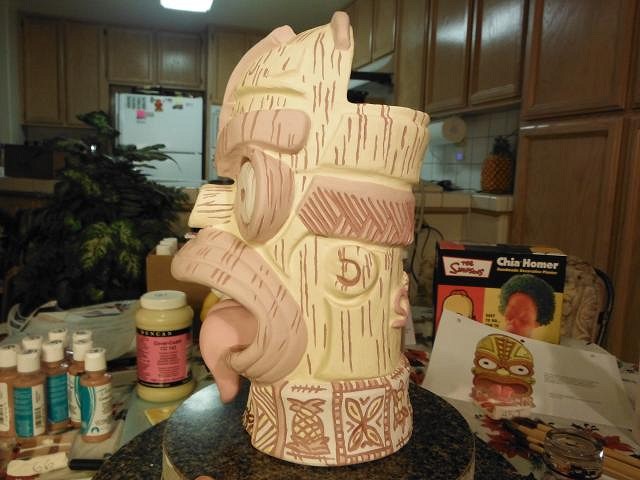
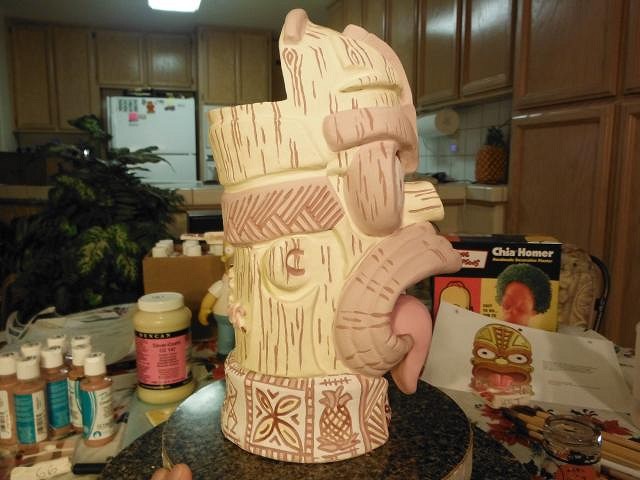
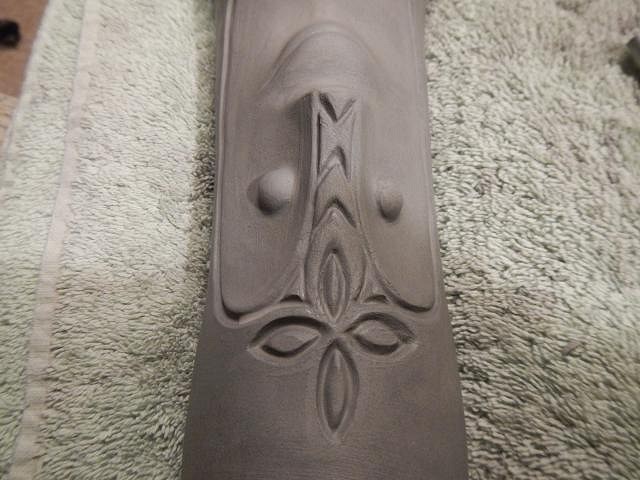
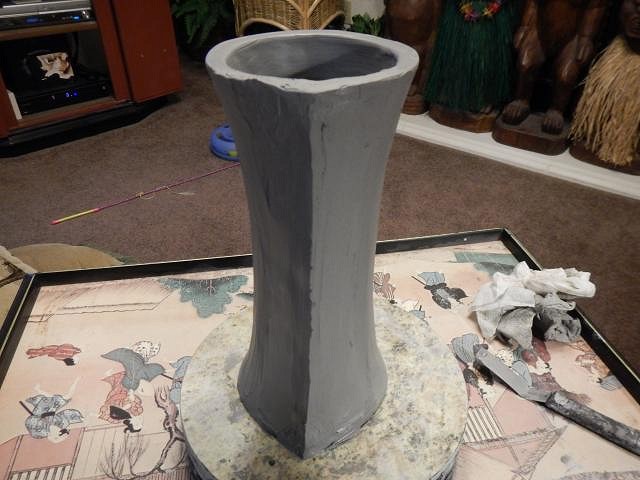
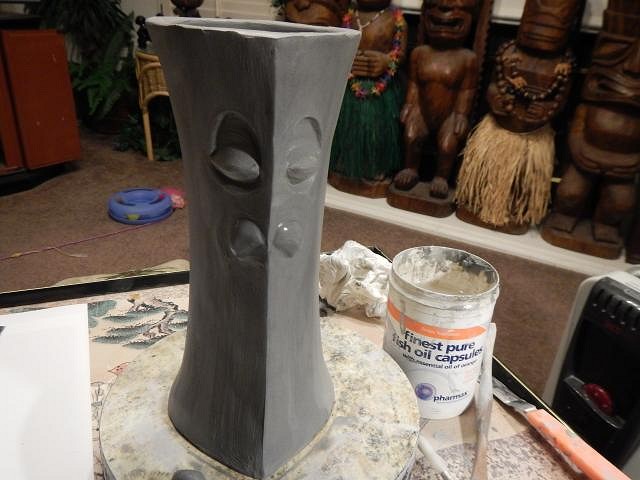
LoriLovesTiki sure looks like it. MauiTiki thanks for writing that up. I tried and there were so many dots I was connecting the wrong ones. Then I tried to just press in the outline and I couldn't get it deep enough to see. In the end I just used the razor blade first and dug it out after. Whew, copying is a bear. I love your new lava mug. ============================== More photos of the Homer Simpson Tiki mug in progress. It will be back to the Wish List #5 when I finish off Homer. The sculpting is almost done. I had to go back and enlarge his eyes then add the tongue and tapa designs to his head and shirt. Next I will turn him into wood which I'll show tomorrow. Here are the step by steps.
He's a big guy. Cheers, Wendy |
|
C
cy
Posted
posted
on
Tue, Dec 16, 2014 9:40 AM
Fantastic artistry Wendy, Homer looks great! |
|
H

hang10tiki
Posted
posted
on
Tue, Dec 16, 2014 8:04 PM
Wendy- u are amazing
|
|
T
tikilongbeach
Posted
posted
on
Wed, Dec 17, 2014 8:36 AM
Today marks the 25th anniversary of The Simpsons! I'm enjoying watching the progress of the mug. It's so cool that you were picked to honor such a milestone. 25 random facts about The Simpsons:
[ Edited by: tikilongbeach 2014-12-17 08:41 ] |
|
D
danlovestikis
Posted
posted
on
Wed, Dec 17, 2014 10:29 AM
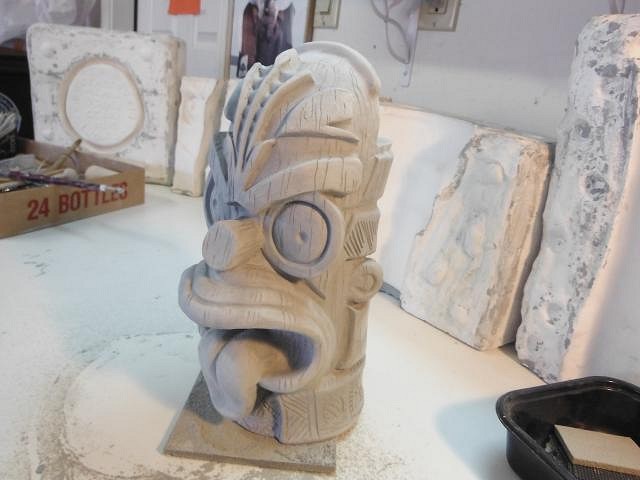
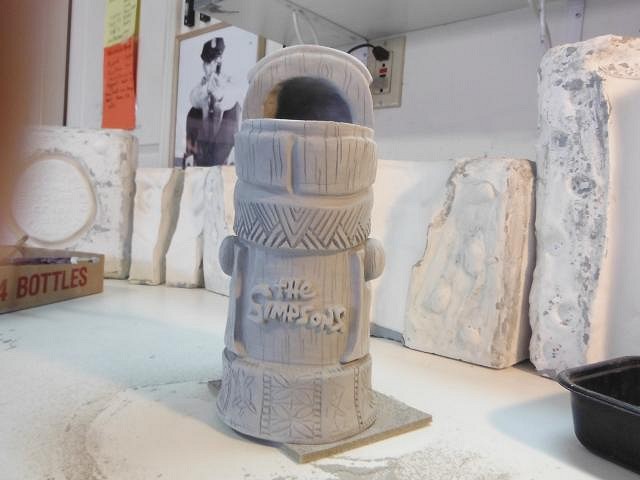
cy thank you. This is why I do the Wish Lists. You never know what someone will want made and its fun to give it may best shot. hang10tiki ahhh you all are so good to me. tikilongbeach you are so right. It was fun to be asked and to keep it secret has been hard. But now it's out and my client is waiting to see if there will be another step forward. Thank you for letting everyone know about the anniversary. I didn't know that or any of the facts you shared. Thank you. ====================================== I carefully added the wood grain to each part of Homer trying to match the clients drawing. I believe this finished off the sculpting part of the project.
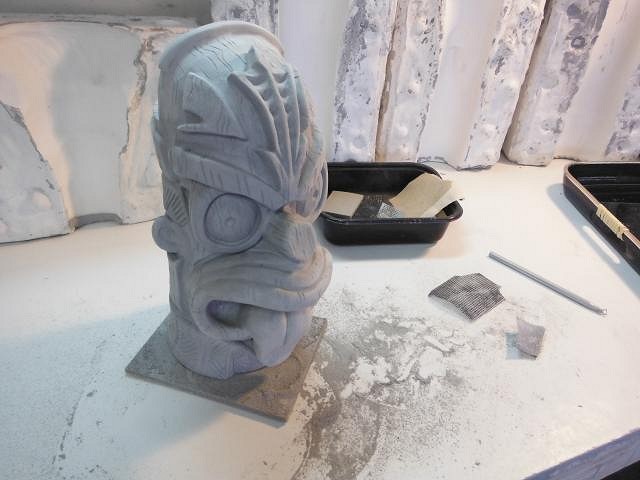
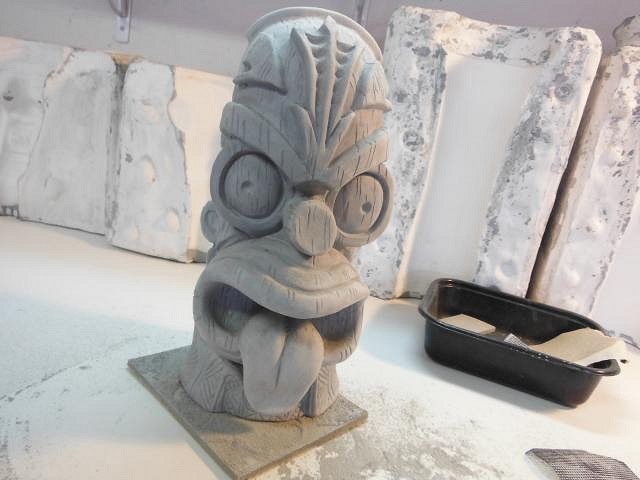
NOW HOMER HAD TO SIT FOR MORE THAN TWO MONTHS TO DRY. I WOULD TAKE HIM OUT OF THE PLASTIC FOR AN HOUR AND THEN PUT HIM BACK IN. THIS WENT ON EVERY DAY, DAY AFTER DAY. I WATCHED FOR CRACKS. I carefully sanded all of the mug. If that removed any of the wood grain I carved it back into the clay.
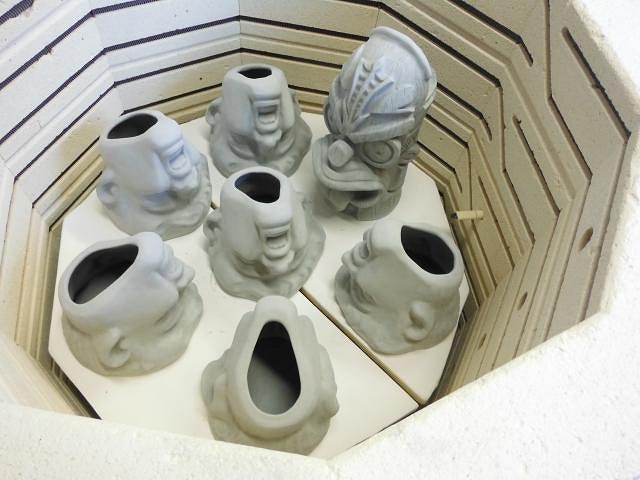
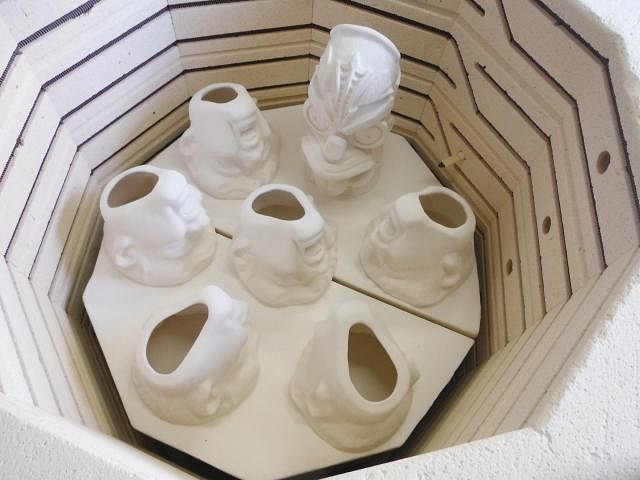
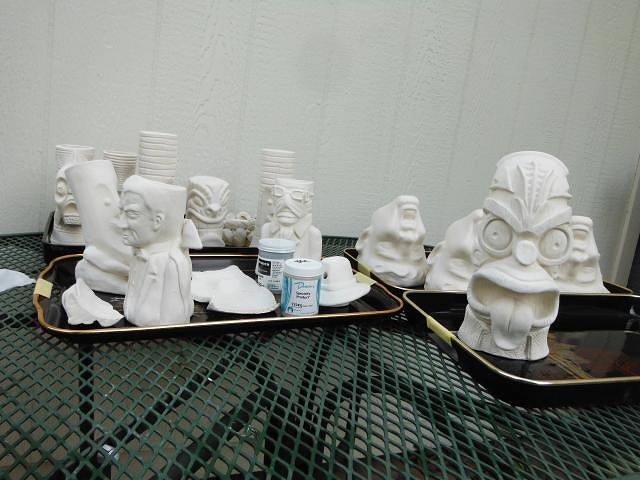
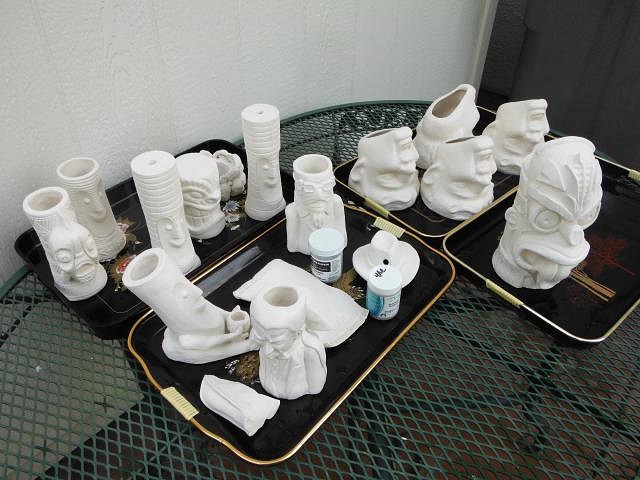
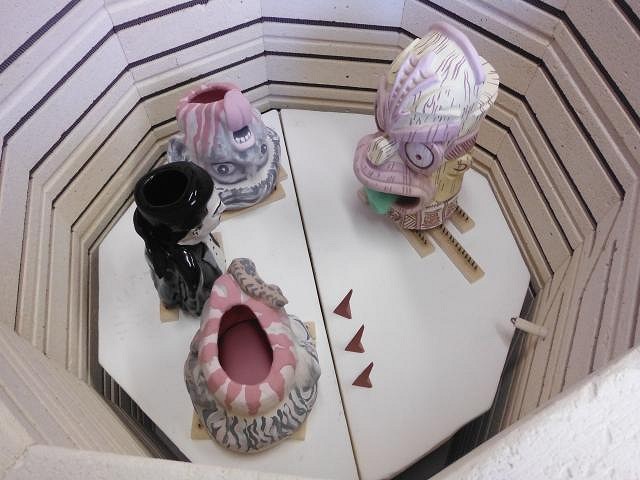
Into the kiln to fire. I had added so much clay. Would there be an air bubble that would blow him up like in the cartoon? As I lifted the lid I hope he was in one piece. Success he was in one piece! I scrubbed him really well and looked for cracks or missing pieces. So far so good. After scrubbing all the projects for the Wish List were left to dry out a bit. You can see the other projects I was working on at the same time.
========================================== Next up will be the glazing. Cheers, Wendy |
|
TSA
Tiki Shark Art
Posted
posted
on
Wed, Dec 17, 2014 4:33 PM
Wow, that is really awesome! I just LOVE when you can turn something2- |
|
R
RVICTOR
Posted
posted
on
Wed, Dec 17, 2014 4:52 PM
Wendy - Let me reiterate the sentiment that the Simpson mug is one of your finest to date. You are super talented and an inspiration to the rest of us. |
|
T
TikiAno
Posted
posted
on
Wed, Dec 17, 2014 4:56 PM
Ahhhh... you HAVE been keeping this secret for a while, Wendy.... I've finally came up with a good (for me) idea, so I am putting a reservation in for NEXT year's Wish List. Hopefully I remember this idea. Ha. Homer looks awesome. Has the final product been delivered yet? |
|
H

hang10tiki
Posted
posted
on
Thu, Dec 18, 2014 7:41 AM
Tikilongbeach- love the
Wendy- Homer came out great |
|
T
TikiPops
Posted
posted
on
Thu, Dec 18, 2014 8:34 AM
Great idea. great drawing & totally awesome sculpting. Wendy you really out did your self. |
|
L
lunavideogames
Posted
posted
on
Thu, Dec 18, 2014 10:49 AM
I have seen this Homer mug in all of its glory and splendor. I was lucky enough to see it in person, but after that I had to keep it a secret too. Wendy has been quiet on this project for quite some time. It is an amazing mug, but that's all I can say because I don't want to give anything away. Wendy is a great secret keeper! |
|
D
danlovestikis
Posted
posted
on
Thu, Dec 18, 2014 2:43 PM
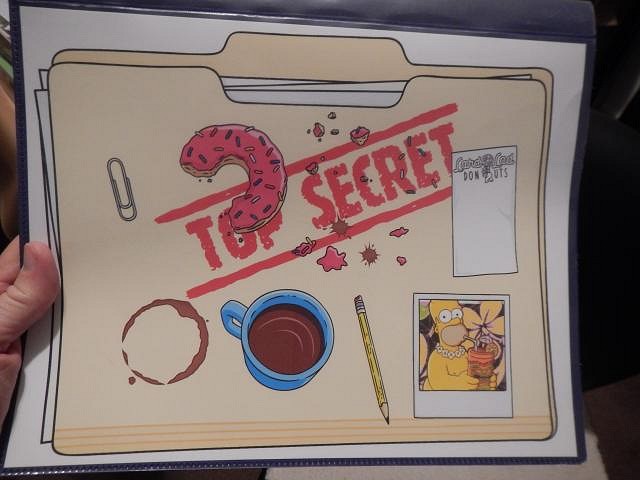
Tiki Shark Art my client really made a great Homer design. I was so relieved to be able to pull it off. Please keep posting the videos of you drawing on facebook. Those are such fun to watch. Thank you for the visit and kind words. RVICTOR thank you. I'm just the hands when it comes to Wish Lists. Unless my Homer client says to let his name out of the bag your tiki mug will be posted in a day or two. TikiAno by the time the next Wish List is up you may be able to make your idea without any help. If not I'm here for you and Tiki Ari. I've been keeping this secret since 2012. My client has had the mug for years! hang10tiki here is your wish, the finished Homer mug. TikiPops thank you. The drawing was by my client. I just did the sculpting from his drawings. Check out the table photo to see more of them. lunavideogames this may be the longest secret I've ever had to hold but it's so much fun to share it now. Holden of Tiki Farm saw it too but the photos of him seeing it have my client in the picture. So for now those are still hidden away. ===================================================== This is how my instructions were delivered! I was now an undercover secret agent.
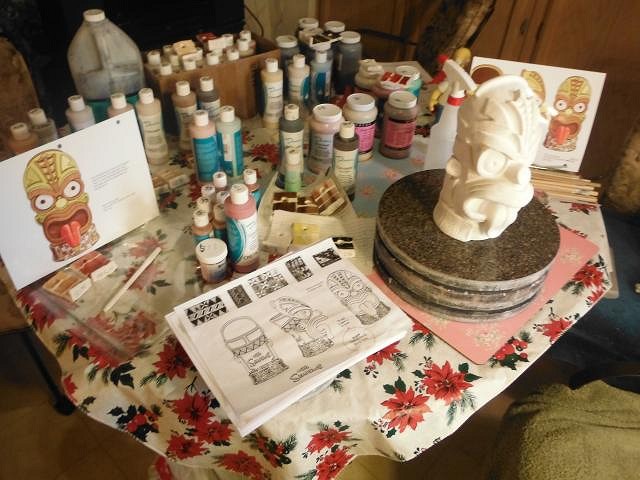
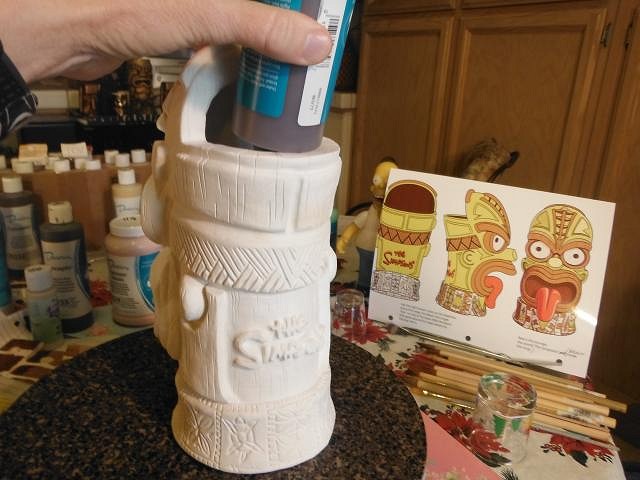
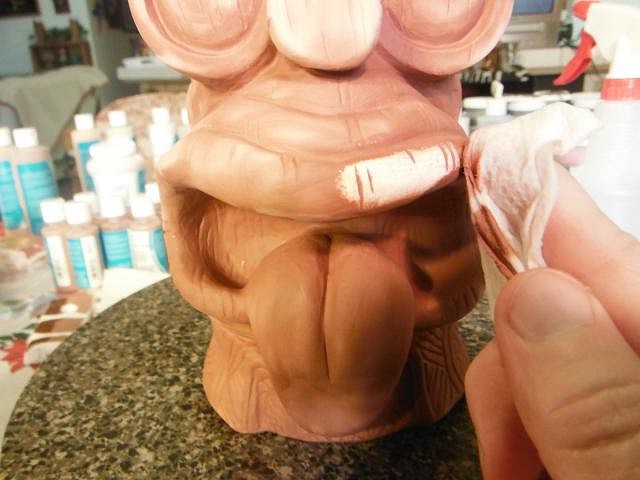
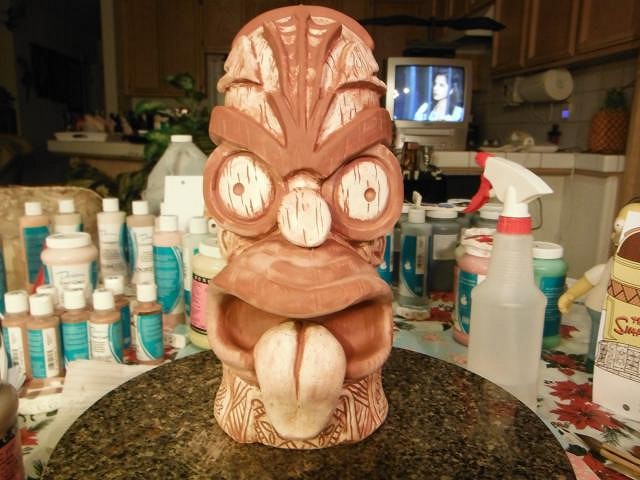
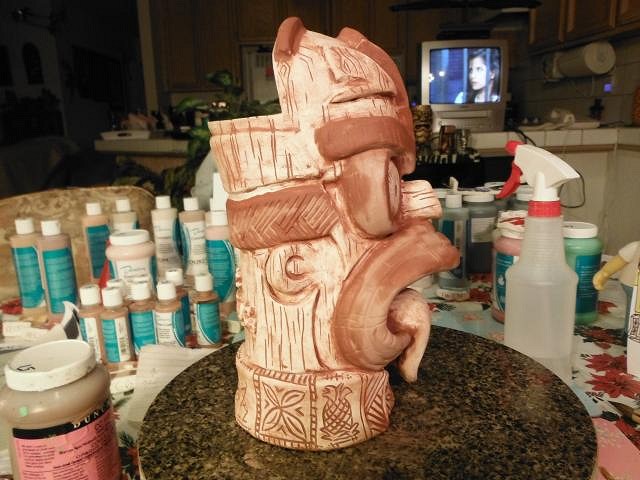
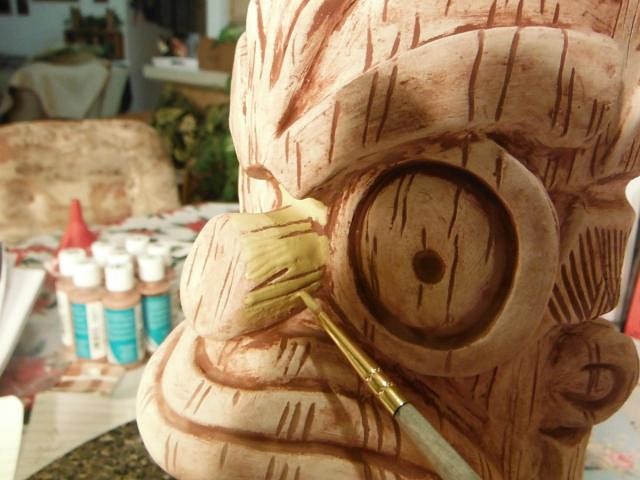
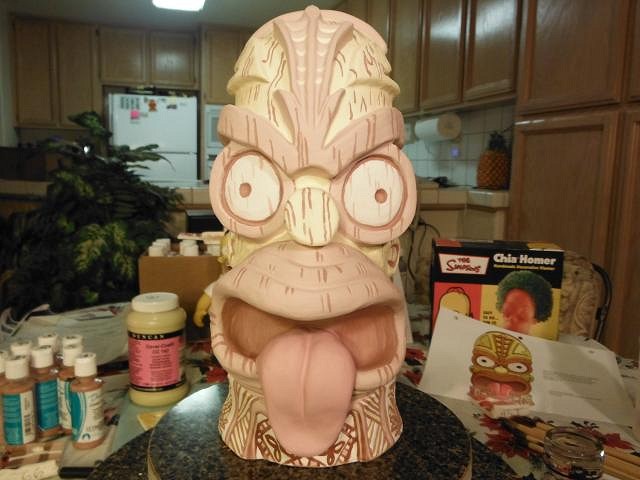
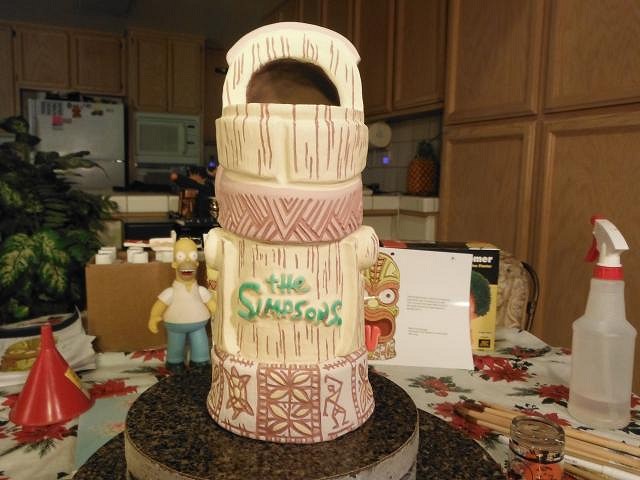
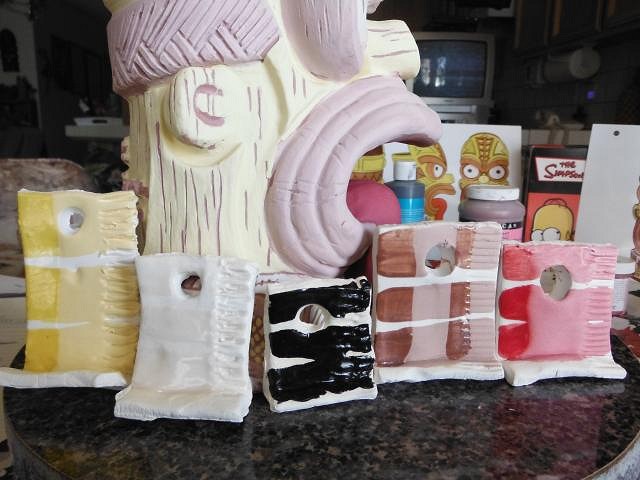
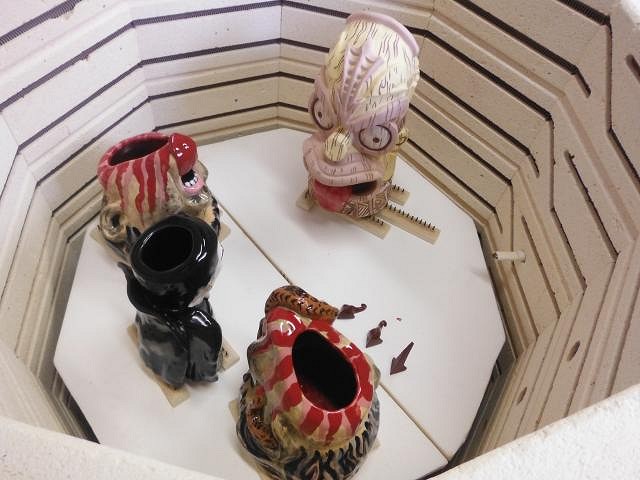
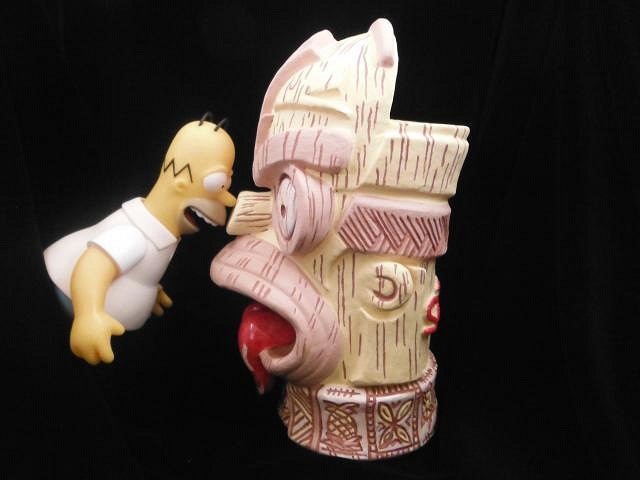
I'm all set up with glazes and detailed instructions. Most of the mug will be in pale flat buff glazes. Only the tongue, eye balls, the word Simpson's and some of the tapa will be shiny and bright. I started by doing the interior glaze in dark brown as instructed. Next a medium brown was placed to cover the mug. Remember every glaze is three layers deep. So you see very little of the actual work in these photos. Next I wiped off the areas where only the wood grain detail was to show up in this brown color. Wiped off and drying. Side view. Now I had to do 3 layers in the flat pale yellow without covering any of the brown wood grain. Under glazes do not allow color to bleed through. Once the yellow was completed a lighter brown was applied over the medium brown on the lips etc. Now Homer is just posing for you. Back and the other side. Next the under glaze was covered with a gloss glaze so that Simpson's and the tongue will be shiny. Here are most of the glazes used. Only the red will be as bright and shiny as the strip on the left side. Into the kiln to fire. After the firing. My client took these photos of the finished mug after it was hand delivered to him in Southern California. I took these photo of Homer inspecting his monument! He looks happy to me. Thank you all for watching the making of this mug. This is why I do the Wish Lists. I get challenged to make things that I never would have even thought of, this next one is the same. More challenges. Even a mug larger than this one! So tomorrow I'll be back to posting the progress of Wish List #5. Meanwhile your comments mean a lot to me and to my client as well. Your support of his idea just gives him the momentum to see this become a real project. Cheers, Wendy |
|
H

hang10tiki
Posted
posted
on
Thu, Dec 18, 2014 9:39 PM
Wow Outstanding Wendy |
|
T
TikiAno
Posted
posted
on
Thu, Dec 18, 2014 9:57 PM
Ditto what Jon said: Wow. Wowzers. Wendy, ha- well, sure, I can make Tiki Ari pieces, but would be more fun to have you create something for him. Will try to remember the idea when the next Wish List comes around... :) Look forward to seeing all the new projects.... |
|
D
danlovestikis
Posted
posted
on
Fri, Dec 19, 2014 3:33 PM
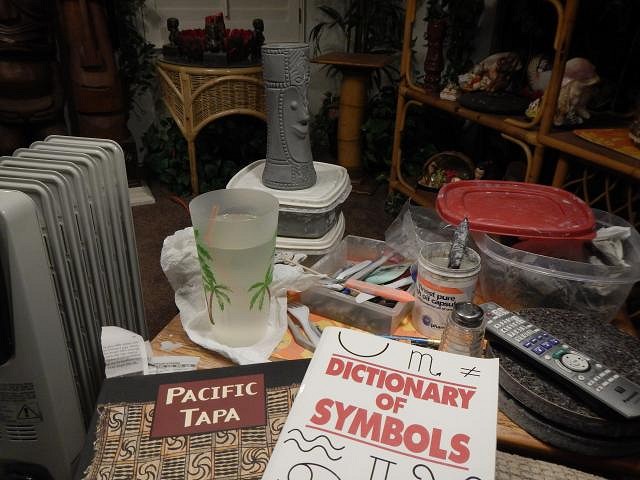
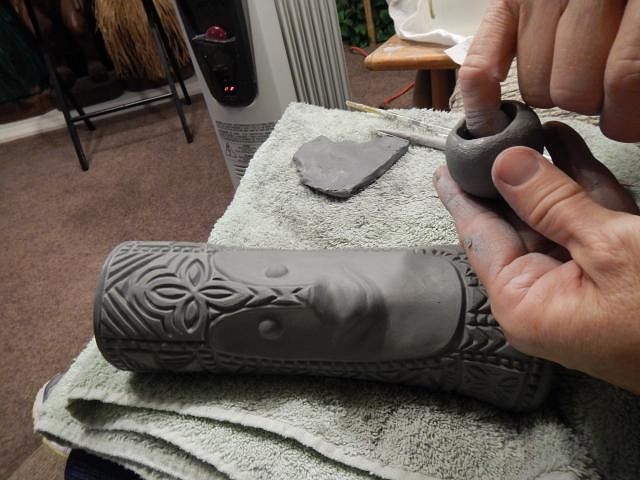
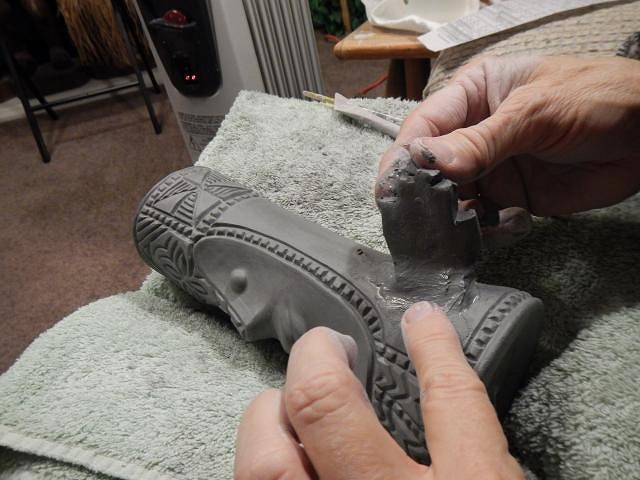
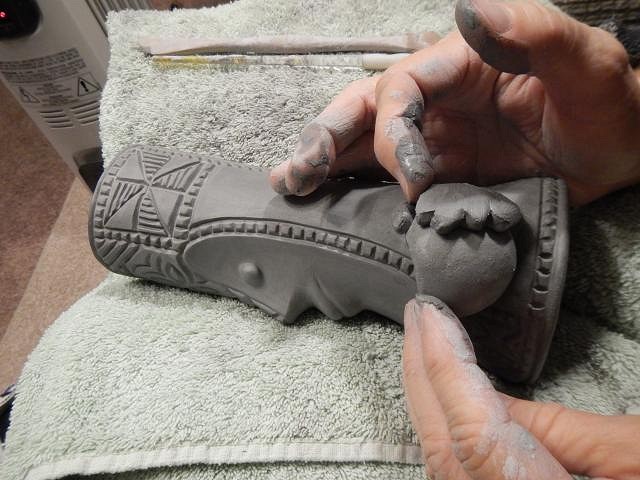
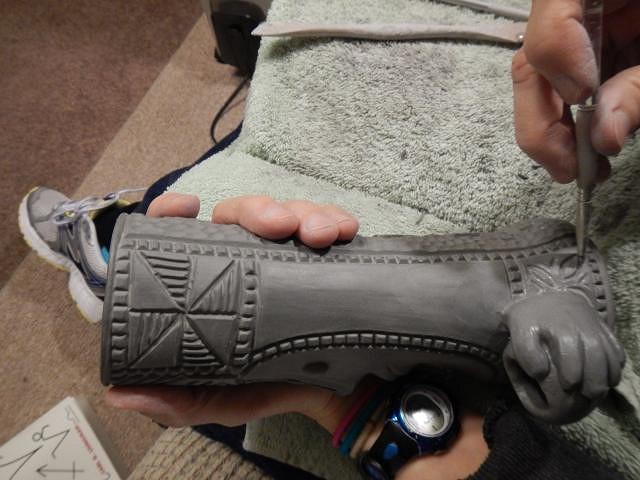
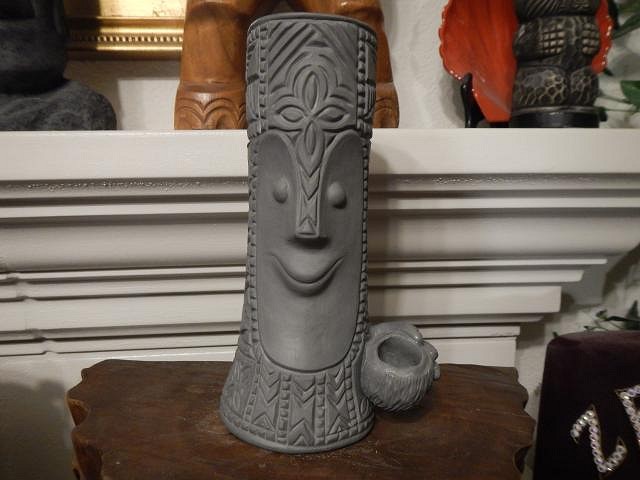
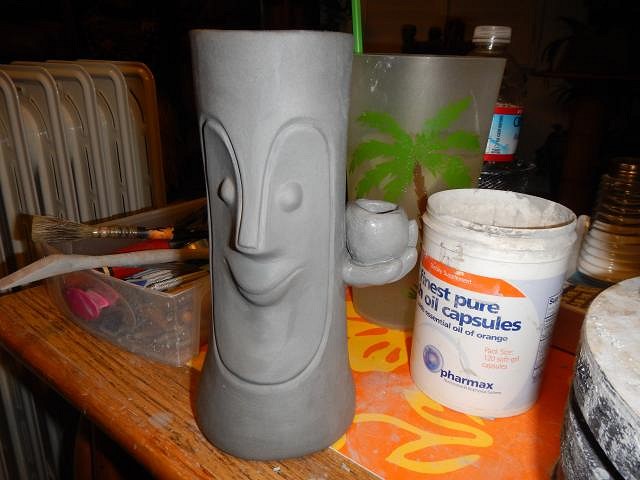
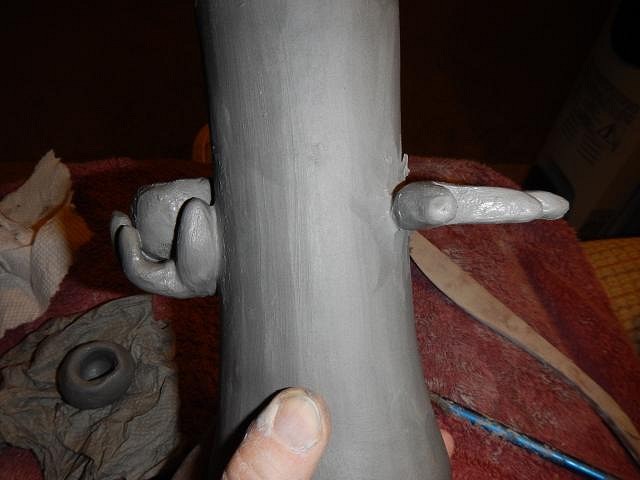
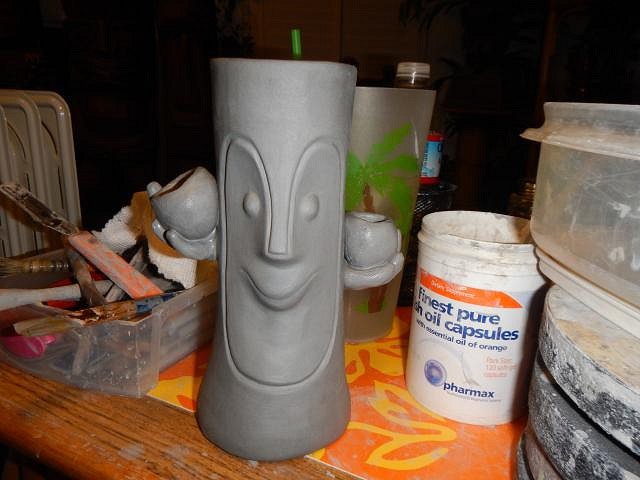
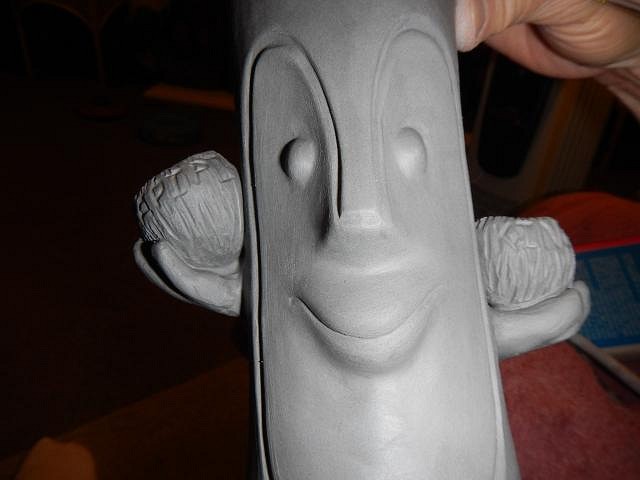
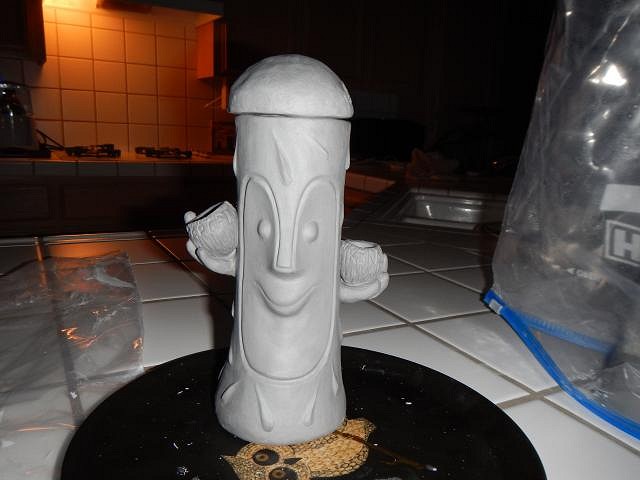
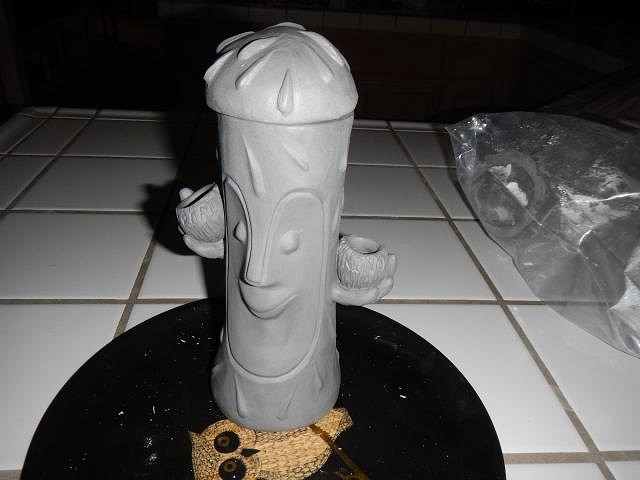
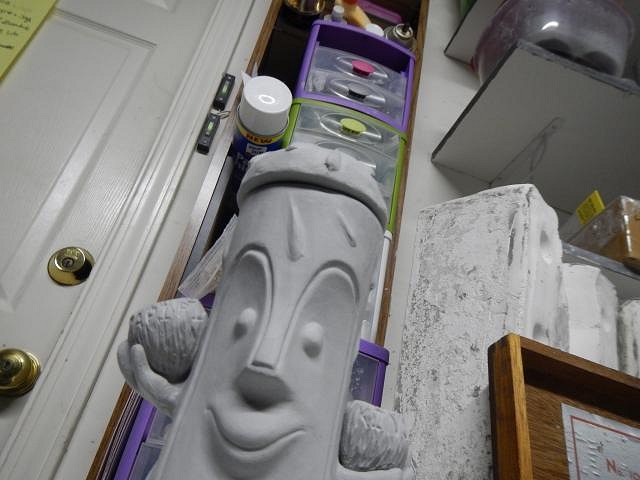
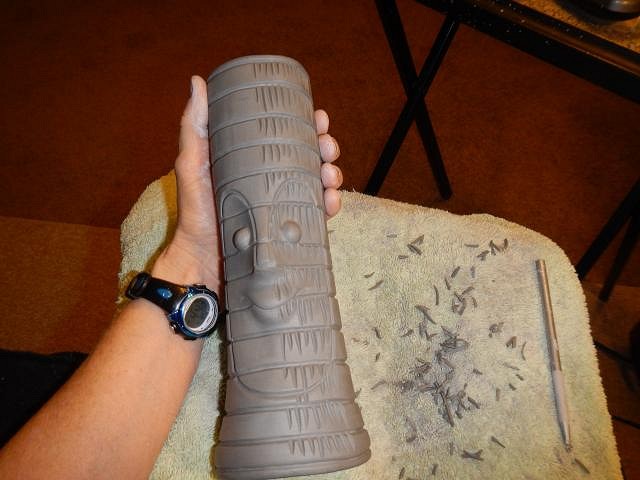
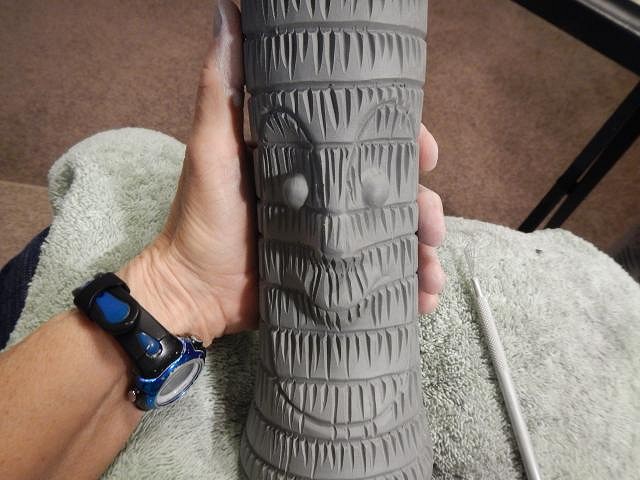
hang10tiki I love it when you talk tiki. TikiAno Tiki I bet Ari's daddy is going to teach him the love of clay. Don't start until he knows not to eat it! Thank you men for liking my clients idea and my rendition. =========================================================== Wish List #5 in Progress LoriLovesTiki did I fulfil your Wish? I started with the tapa on the nose. I matched it to the bottom of the mug. I searched for tapa designs in these books. I carved everywhere on the mug except where the hand and coconut mug would be attached. I first made the little coconut. Then I cut out a hand and attached it to the mug. I put the coconut in the hand. Once the hand was finished I carved the tapa designs around the hand and finished the mug. Tiki Bob is such a ham. Here he is posing again.
I look forward to my critiki's. Cheers, Wendy |
|
H

hang10tiki
Posted
posted
on
Sat, Dec 20, 2014 8:25 AM
I'm sure Lori will have the same reaction I did :o :o :o :o :o :o :o :o Wendy you are the Super Carved Tapa Queen |
|
D
danlovestikis
Posted
posted
on
Sat, Dec 20, 2014 9:23 AM
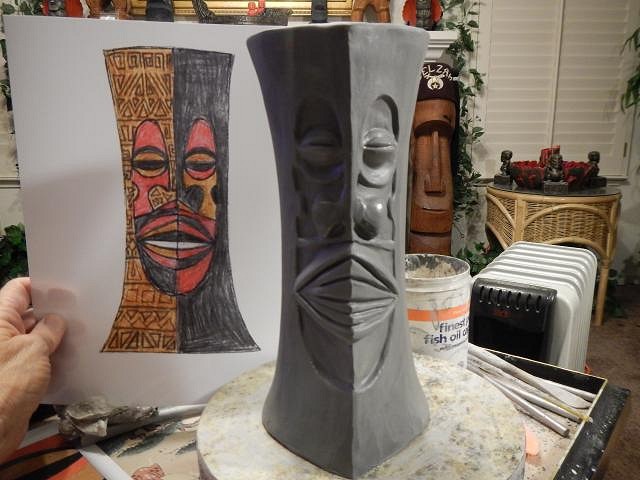
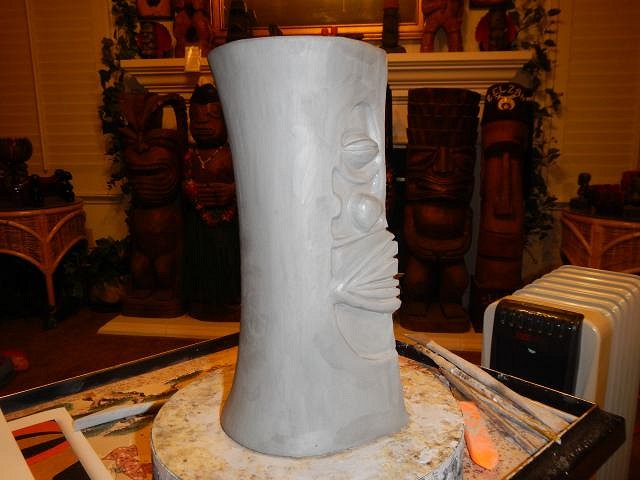
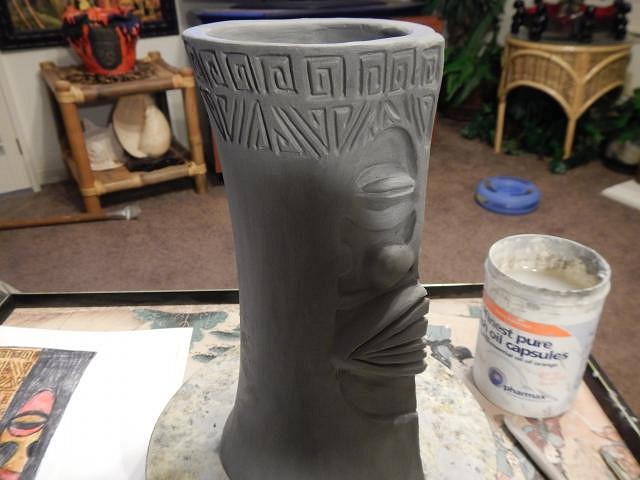
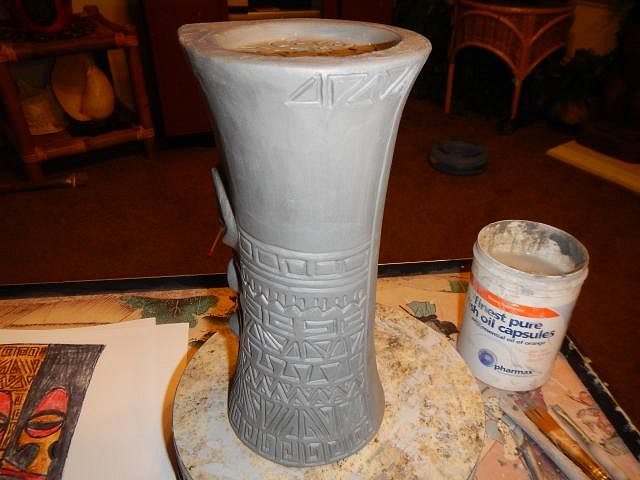
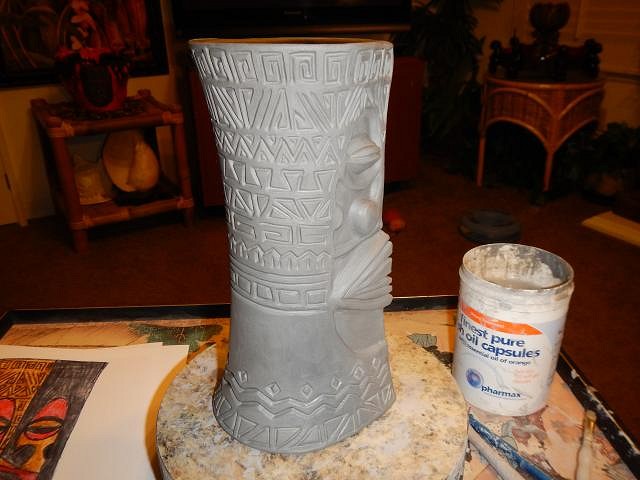
hang10tiki well thank you and what does that make Dan? I will continue to work to resemble that remark! ================================================== Another Wish List #5 progress report. RVICTOR requested a mug that looked similar to the Tiki Modern book cover. He drew a beautiful picture of the mug for me to use as a guide. Sven I hope you like it.
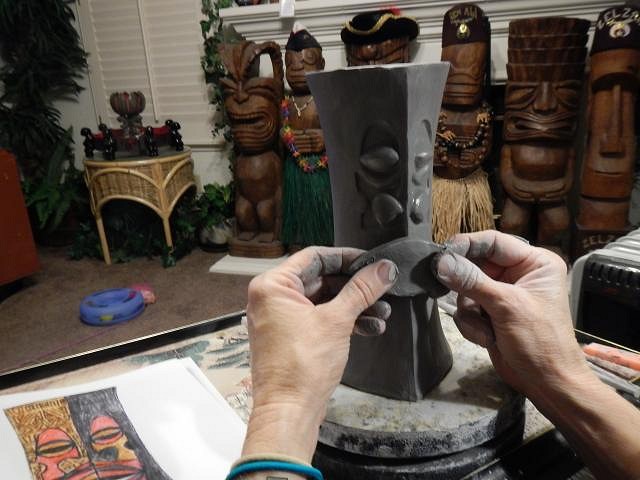
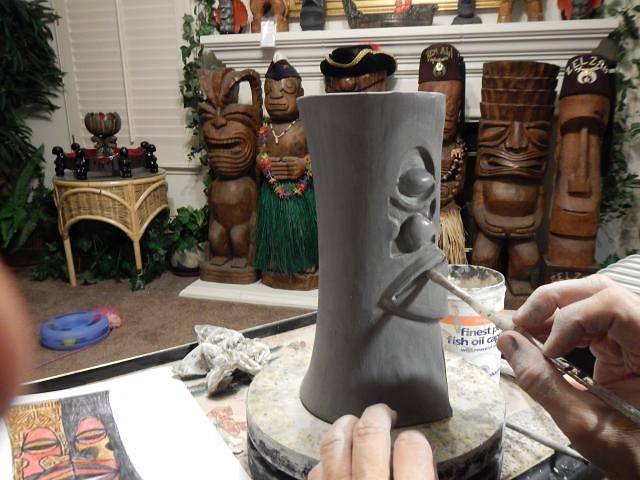
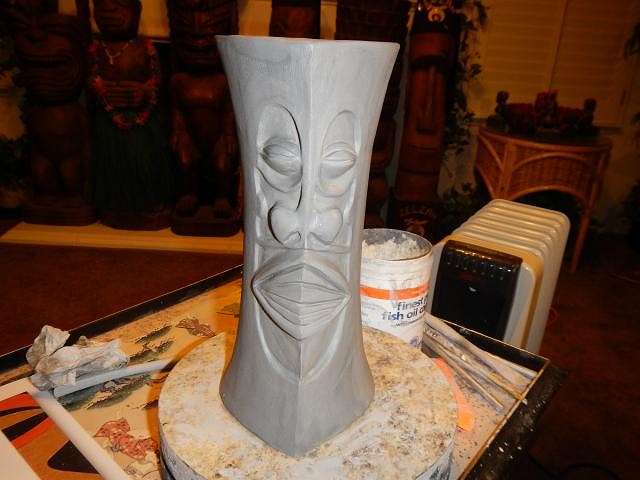
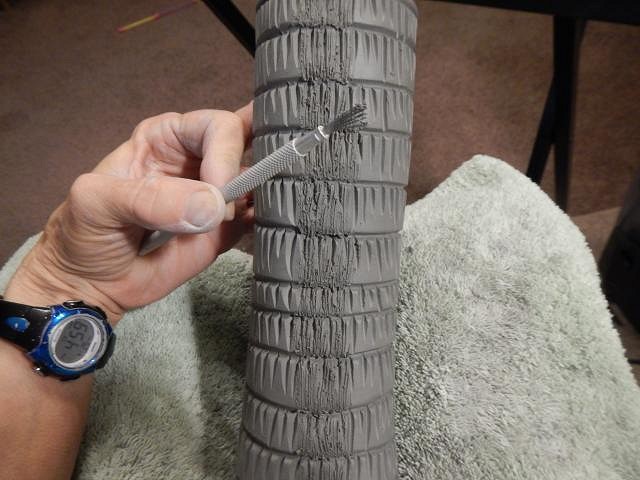
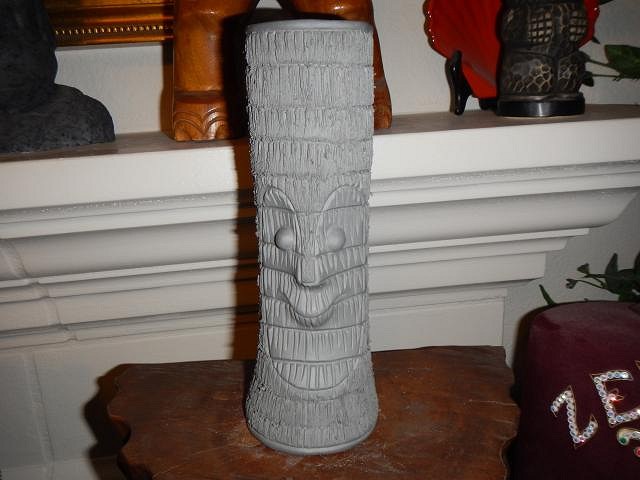
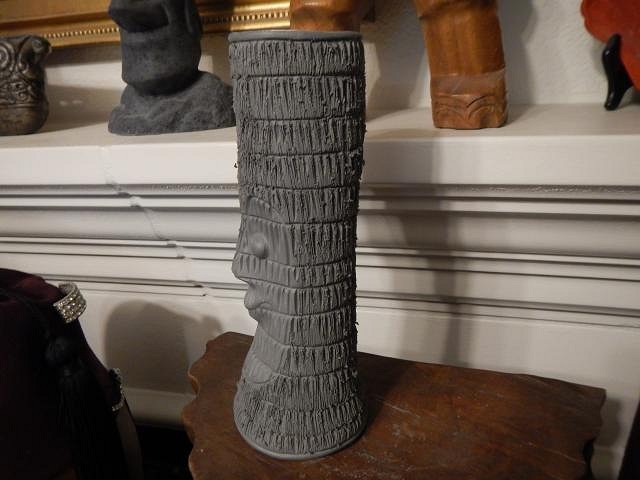
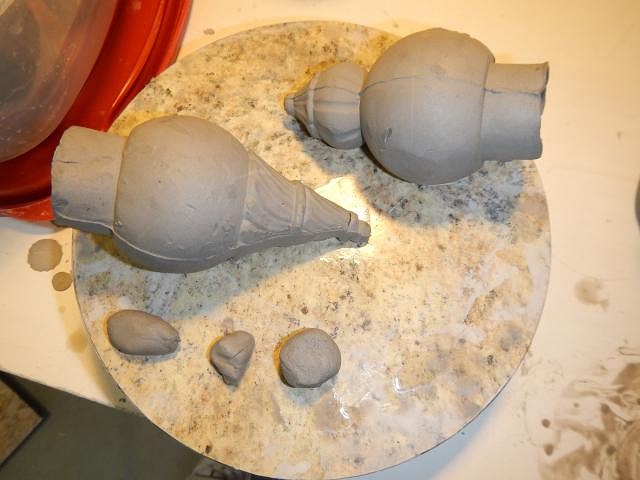
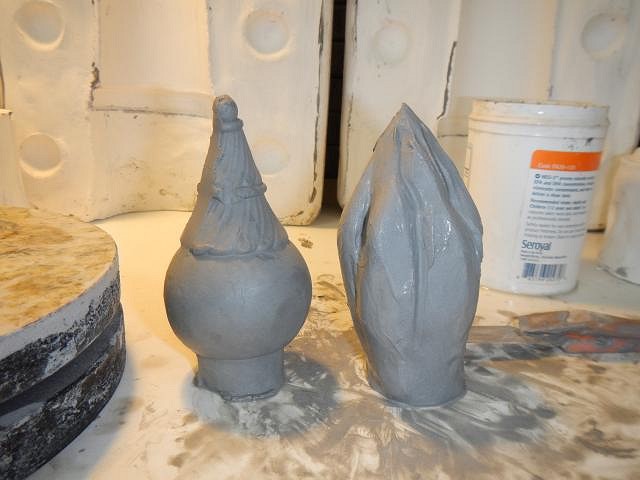
Earlier this summer I carved and molded three new fogcutter shapes. From these I can make a lot of requested designs. I started by adding clay where the face will be placed. I smoothed and sharpened it up. Next it sat in plastic to firm up for several days until I could carve it. Using the drawing I started with the eyes then the nostrils and then the mouth. Next I did the lip designs. I checked it against the RVICTOR drawing. Used a flash for this one and for the side view. Now I started carving the tapa. I did some of it while the mug was upside down. Getting closer. Done and Posing.
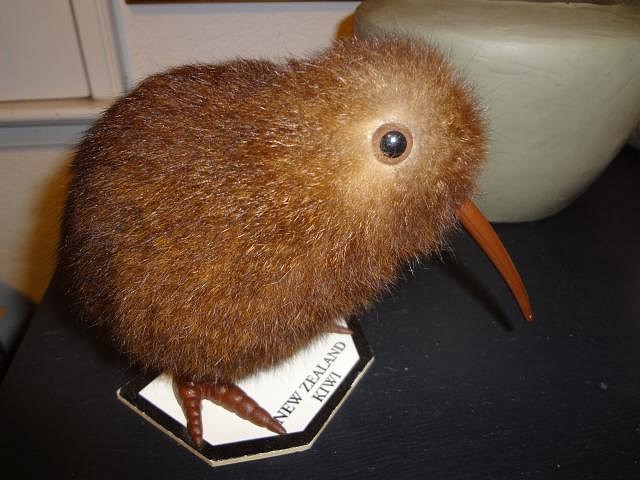
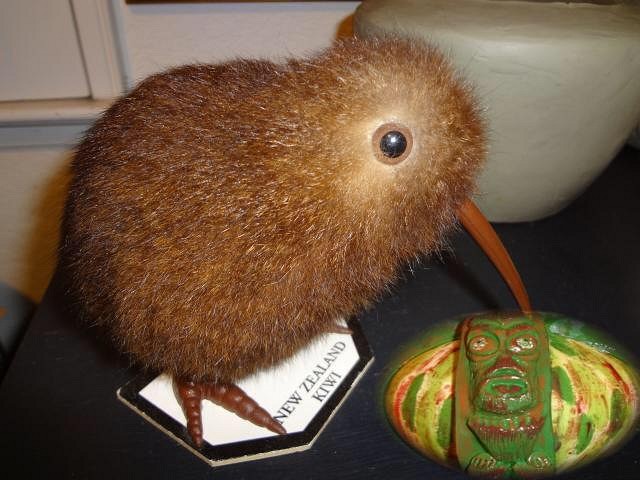
I told RVICTOR that the drawing could be done in a couple of ways. I told him that I would do one and if it didn't meet his expectations that Dan would be happy to take it and I would start again with his tweaks. RVICTOR please check it over and let me know if you had ideas that I missed or if this is the mug you want. ============================= Look what I found at Goodwill for $0.97. I love to pet him. My cat likes her back scratched with the beak.
============================= 5 days until Christmas. Cheers, Wendy [ Edited by: danlovestikis 2014-12-21 10:46 ] |
|
H

hang10tiki
Posted
posted
on
Sat, Dec 20, 2014 1:12 PM
Wow Dan-0 is the King of collecting |
|
H

hang10tiki
Posted
posted
on
Sat, Dec 20, 2014 8:47 PM
|
|
R
RVICTOR
Posted
posted
on
Sat, Dec 20, 2014 9:24 PM
Wendy - I really like the carve. Look forward to seeing you accomplish the glazing as there are so many alternating fields of color. |
|
D
danlovestikis
Posted
posted
on
Sun, Dec 21, 2014 11:20 AM
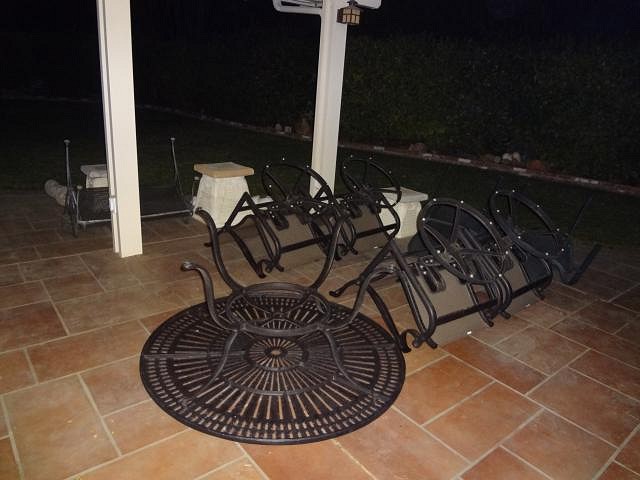
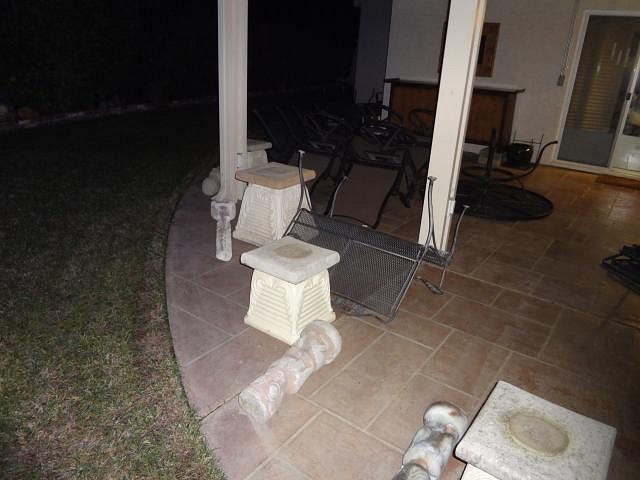
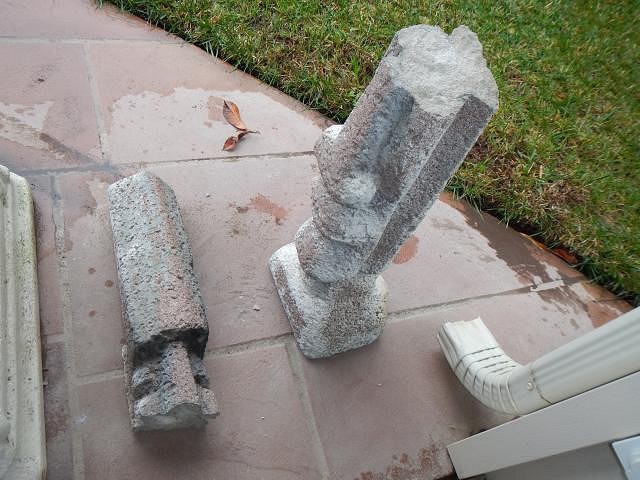
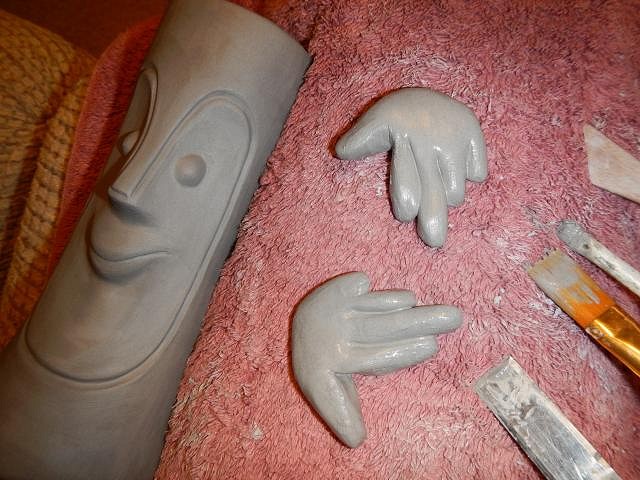
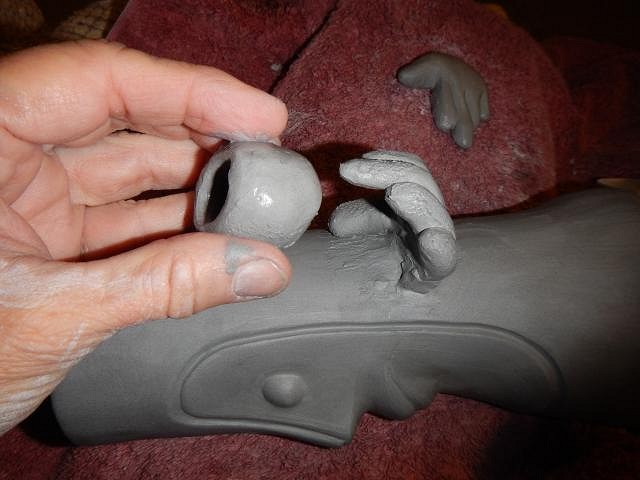
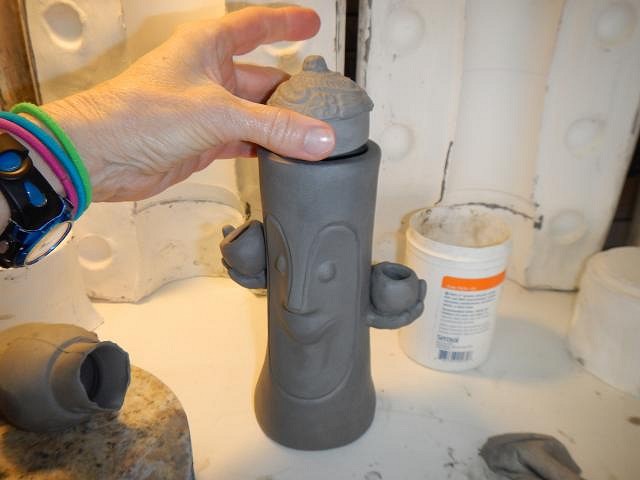
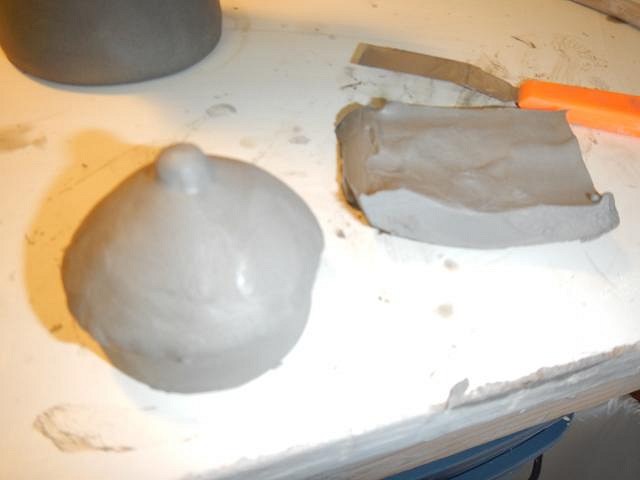
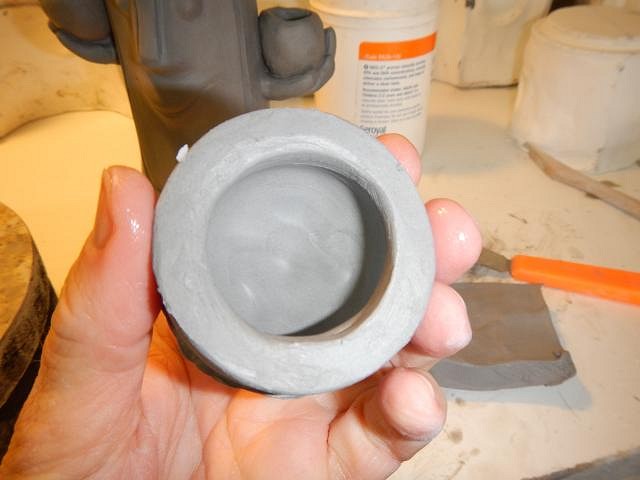
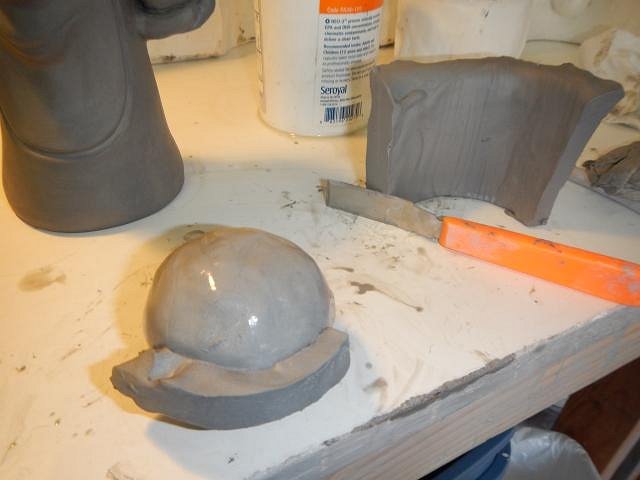
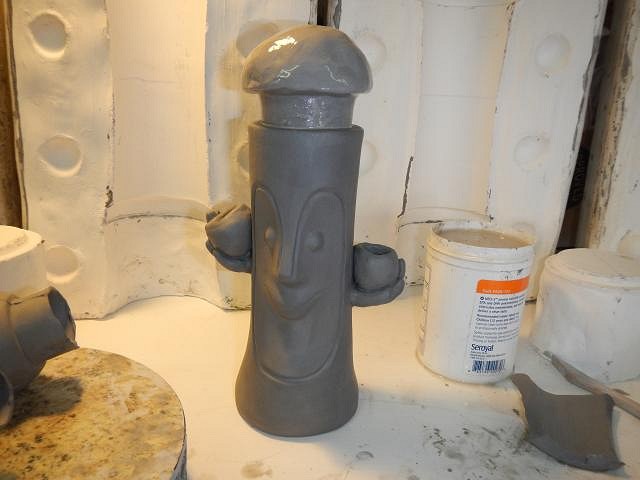
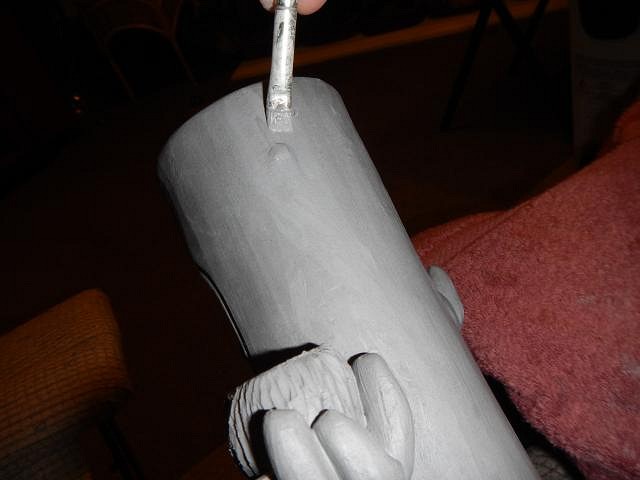
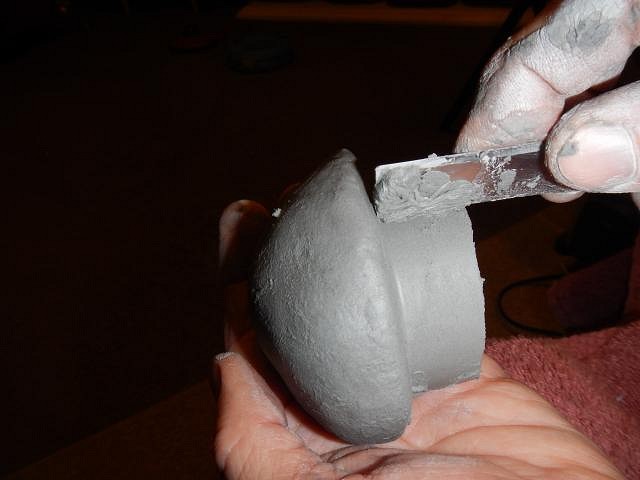
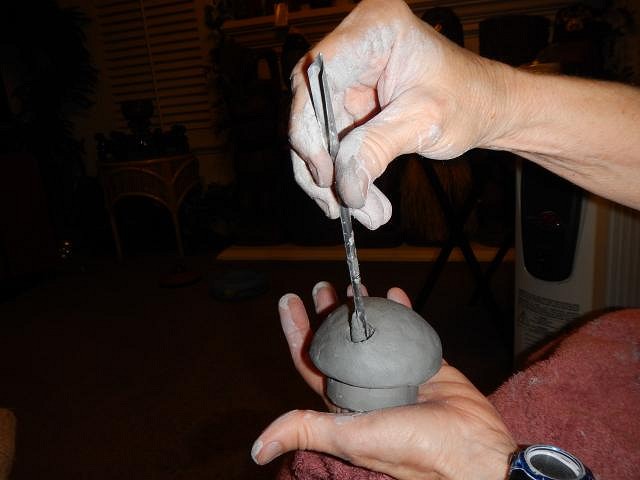
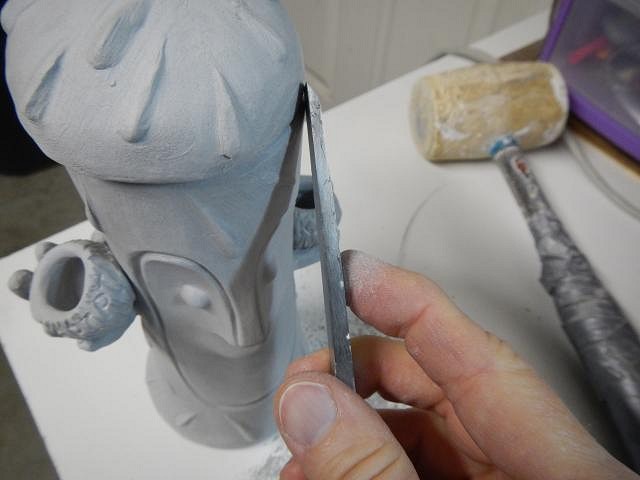
hang10tiki (: hang10tiki I'd forgotten I made that bowl. I like how the tikis eyes are looking up at the kiwi as it sips his nectar. I appreciate your additions to the "show". RVICTOR cool now I can start the carving on another Wish List mug while posting things I made a short while back. ===================================== When the big storm was due to hit our area on December 10th Dan and I prepared our yard so that nothing would blow over or away. We even took our concrete tikis and put them on their sides on the ground. After the storm we went to lift them all back in place and dang it, this one snapped in half. We'll try to repair it by first drilling a hole top and bottom and putting a dowel in place. Is there such a thing as cement glue? ===================================================== Hawaii is such a diverse landscape that there is even cactus. We've seen it. So in honor of Hawaii I've made a Cactus Body Bob. I started by cutting out the shapes for the hands. More detail. I attached a hand and gave him a little coconut mug to hold. Now like the classic cactus statues of the past I attached his other hand/limb higher up and gave that hand another little coconut mug to hole. Now he sat to firm up for a couple of days while in a plastic bag. A cactus has a rounded head so I cast an ornament to use because it is hollow and started to form the rounded lid. I smoothed the surface so I could add clay and not air bubbles. I made the inside thicker first and then I began to build up the clay on the top to the same thickness. I checked out the size keeping in mind this clay is not as dry as the mug so it must be larger to start out. Now I carved the little coconut mugs. In the Hawaiian language I carved Cactus on one and Body on the other. Here I'm trying to figure out how I want to make the cactus thorns. Now the lid/top of the head has firmed up and I'm carving to make it fit into the mug's body. I added a hole to the top. Bob not only has a lid he has thorns on his body. Next I added them to the lid. Now it is time to let him completely dry out so that I can fit the lid. A couple of weeks later Bob is dry and I can see just how much clay to remove from the lid. I used a sharp chisel and sand paper (I wore a mask) and carved it to fit. Hopefully they will shrink the same amount in the kiln. Side view. I'll show a few more Tiki Bob's over the next few days while I get some photos going on Tyber Tikis Wish List Project. Happy Holidays and Cheers, Wendy |
|
H

hang10tiki
Posted
posted
on
Mon, Dec 22, 2014 7:44 AM
Cactus Bob Worst sound ever, slurp of an empty tiki mug through my straw!!! [ Edited by: hang10tiki 2014-12-22 07:45 ] |
|
D
danlovestikis
Posted
posted
on
Mon, Dec 22, 2014 8:22 AM
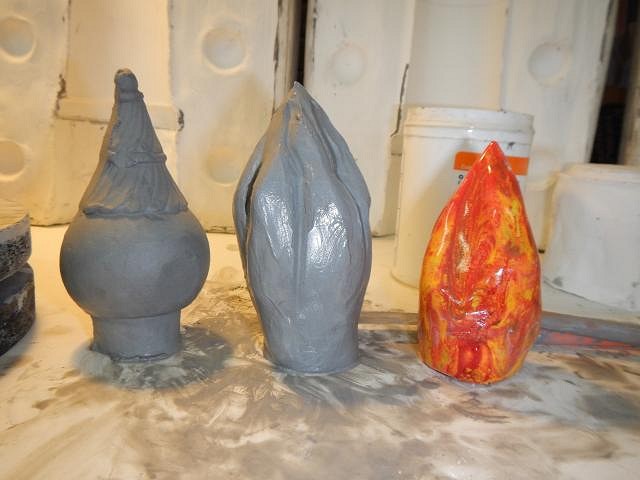
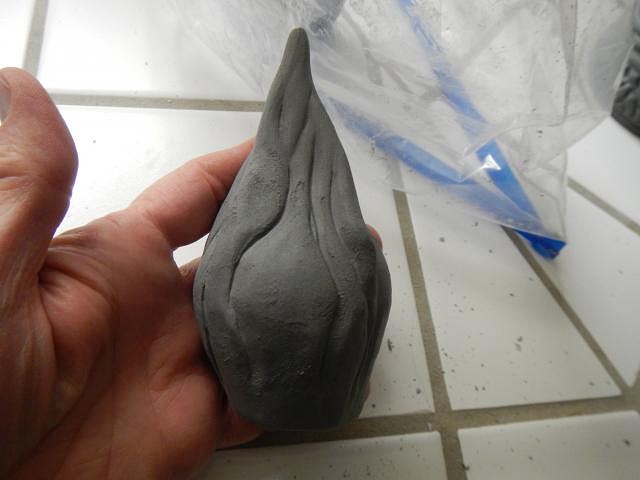
hang10tiki Cactus Bob A 2 fisted drinker is a better name. I've always needed help with that. Too bad it's already dry )o: ========================== Heeeeeeeeere's Bob. It occurred to me that I'd never seen a Tiki Bob where his rings went across his white face. Why not? So I started carving first with the tool with the V shape. All done with that one. Now I used the wire brush to add surface detail. His face will be white and smoother. His body a coconut tree color. ========================================== I needed to make a few more flames for mugs. I carefully cover them with clay. A picture to show the progression. Oops I missed the bisque fire step. Once the flame is leather hard I can go back and add more detail. ===================================== That's it for today. I'll be back tomorrow. Cheers, Wendy |
|
H

hang10tiki
Posted
posted
on
Mon, Dec 22, 2014 6:59 PM
Omg Cheers to you 2
|
|
D
danlovestikis
Posted
posted
on
Tue, Dec 23, 2014 3:06 PM
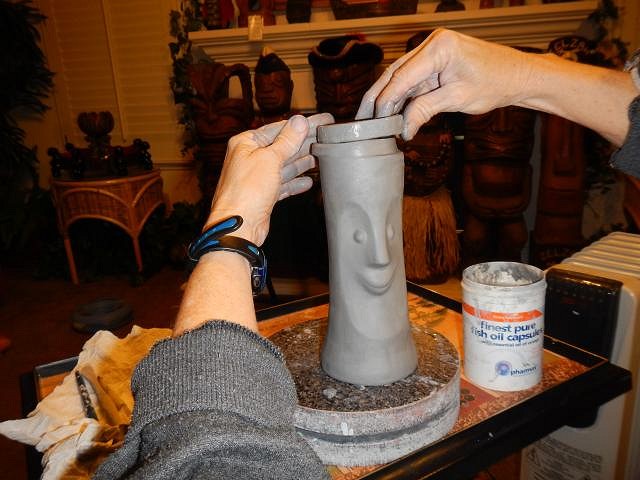
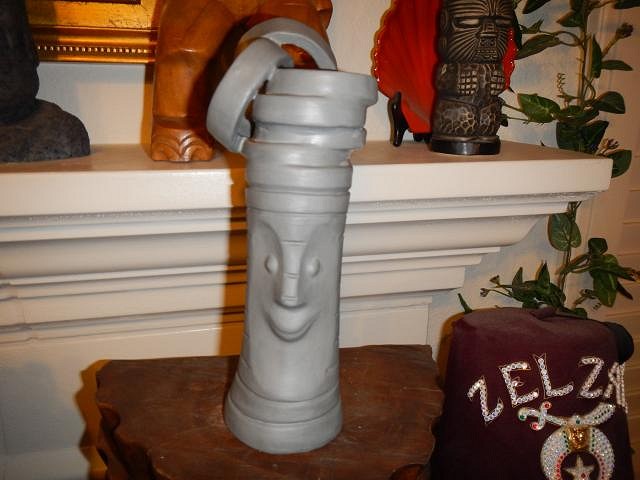
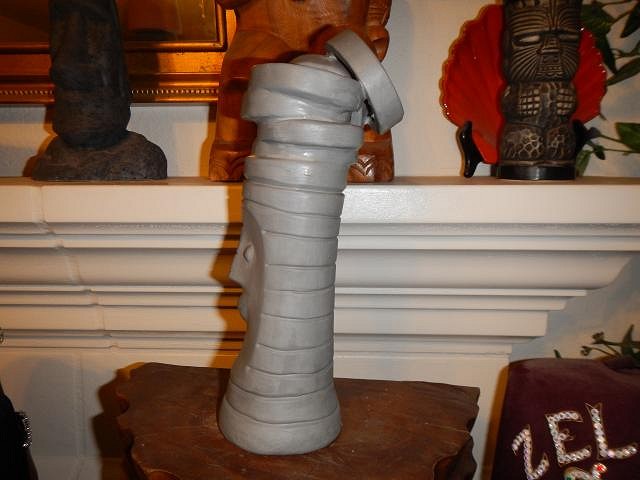
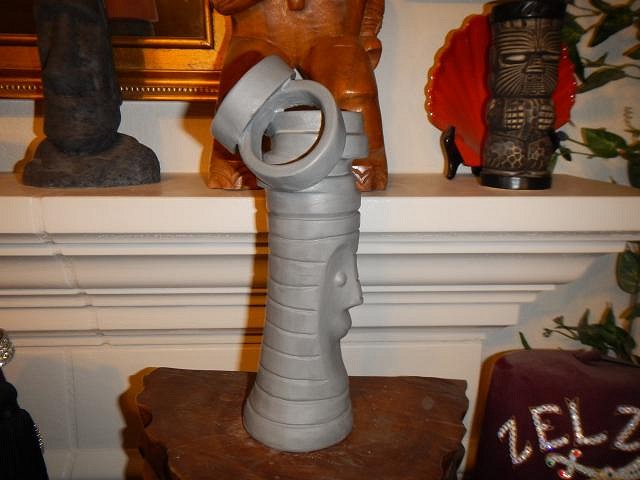
hang10tiki you sure do post fun photos. I also sneek a peek at the background to see how your collection is growing. =================================== I had a Tiki Bob in my hands and I wondered what it would look like if Tiki Bob lost his head. So let's see his body and head is made of rings. So if the rings began to slip and slide... I started by cutting a bunch of rings and then I began to offset them into the slip.
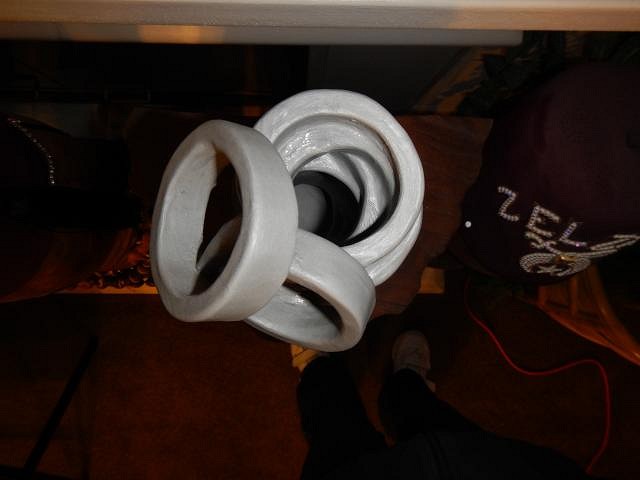
Next I had some slip off. All done.
The view into the mug. The challenge will be to glaze the inside of the mug and the inside of each ring. So either Tiki Bob's lost his head or he's just into modernism or??? Cheers, Wendy |
Pages: 1 2 3 4 5 6 7 8 9 10 11 12 13 14 15 16 17 18 19 20 21 22 23 24 25 26 27 28 29 30 31 32 33 34 35 36 37 38 39 40 41 42 43 44 45 46 47 48 49 50 51 52 53 54 55 56 57 58 59 60 61 62 63 64 65 66 67 68 69 70 71 72 73 74 75 76 77 78 79 80 81 82 83 84 85 86 87 88 89 90 91 92 93 94 95 96 97 98 99 100 101 102 103 104 105 106 107 108 109 110 111 112 113 114 115 116 117 118 119 120 121 122 123 124 125 126 127 128 129 130 131 132 133 134 135 136 137 138 139 140 141 142 143 144 145 146 147 148 149 150 151 152 153 154 155 156 157 158 159 160 161 162 163 164 165 166 167 168 169 170 171 172 173 174 175 176 177 178 179 180 181 182 183 184 185 186 187 188 189 190 191 192 193 194 195 196 197 198 199 200 201 202 203 204 205 206 207 208 209 210 211 212 213 214 215 216 217 218 219 220 221 222 223 224 225 226 227 228 229 230 231 232 233 11163 replies

