Pages: 1 2 3 4 5 6 7 8 9 10 11 12 13 14 15 16 17 18 19 20 21 22 23 24 25 26 27 28 29 30 31 32 33 34 35 36 37 38 39 40 41 42 43 44 45 46 47 48 49 50 51 52 53 54 55 56 57 58 59 60 61 62 63 64 65 66 67 68 69 70 71 72 73 74 75 76 77 78 79 80 81 82 83 84 85 86 87 88 89 90 91 92 93 94 95 96 97 98 99 100 101 102 103 104 105 106 107 108 109 110 111 112 113 114 115 116 117 118 119 120 121 122 123 124 125 126 127 128 129 130 131 132 133 134 135 136 137 138 139 140 141 142 143 144 145 146 147 148 149 150 151 152 153 154 155 156 157 158 159 160 161 162 163 164 165 166 167 168 169 170 171 172 173 174 175 176 177 178 179 180 181 182 183 184 185 186 187 188 189 190 191 192 193 194 195 196 197 198 199 200 201 202 203 204 205 206 207 208 209 210 211 212 213 214 215 216 217 218 219 220 221 222 223 224 225 226 227 228 229 230 231 232 233 11,141 replies
|
T

TikiTomD
Posted
posted
on
Sat, Dec 31, 2011 8:43 AM
It is an amazing thing to see pastels transmuted into brilliant and intricate colors by the firing process. Those torches are awesome! This process is clearly not for the faint hearted, given the variations and mishaps that may occur in the kiln. Wendy, you are an alchemist, making clay into gorgeous art! Happy New Year! -Tom |
|
TBK
The Blue Kahuna
Posted
posted
on
Sat, Dec 31, 2011 10:49 AM
I made the comment about enjoying the step-by-step unfolding here for each project, and I was prompted to say that because I went back and re read about the decanter. As you know I was thrilled about the decanter because when I actually held it in my hands the photos didn't really do the piece justice (or so I said at the time) and by that I mean, I was enthralled with the piece seeing the pictures . . . but when I got the decanter in my grubby little paws, ZOWIE! Being able to go back through what you did to make the decanter, really just made me appreciate the decanter even more (if that's possible - I guess it is), so I'm sure that I will have a similar reaction with the Zombie Torch . . . because I'm just as enthralled :) can't wait! [ Edited by: The Blue Kahuna 2011-12-31 11:58 ] |
|
D
danlovestikis
Posted
posted
on
Sat, Dec 31, 2011 10:50 AM
Hi MadDogMike, There is always so much work on mold days that an early start is important. Especially because Dan quits when the sun goes down. I had 10 of the 60 fuse. I may be able to fix 5 and 5 I tossed into the trash. I always make extras for cases like this. Thank you for wondering. I'm looking forward to your tiki magnet for your trailer to be posted. That's a first again and you have many of those. I was asked how many of these I will make. I think it will depend on the list. So when I know that the mold worked and that there will be a Zombie Torch I'll be closer to figuring it out. For a ceramicist there is a dilemma. If I made 10 there would be less work and I'd be paid more per Torch. If I make 30 or more I'll be working really hard but collectors will want to pay less. So do I work hard so there are more happy people? So far my answer has always been yes. I want anyone who wants one to have the opportunity to have one. TikiTomD you are such a sweetheart. I sure hope you (and Pat?) will come for a visit. We have poured the last piece of the mold, maybe. Yesterday the plaster set so fast that one side may need to be tossed. I couldn't bang the mold with the mallet to get the air bubbles out. I will check it tonight to see if it has to be re-poured. I also plan to make a second mold in case I drop a side. I have been clumsy in the past so a backup is a good idea. If you only have one mold you are sunk. Also it means I can pour 2 per day. Break time and lunch, cheers, Wendy |
|
D
danlovestikis
Posted
posted
on
Sun, Jan 1, 2012 2:10 AM
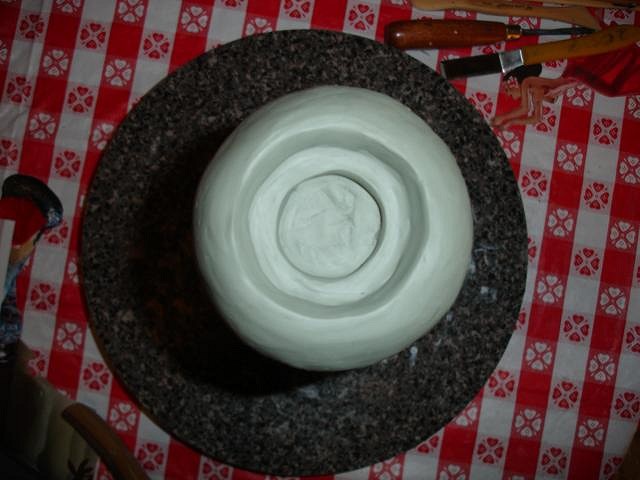
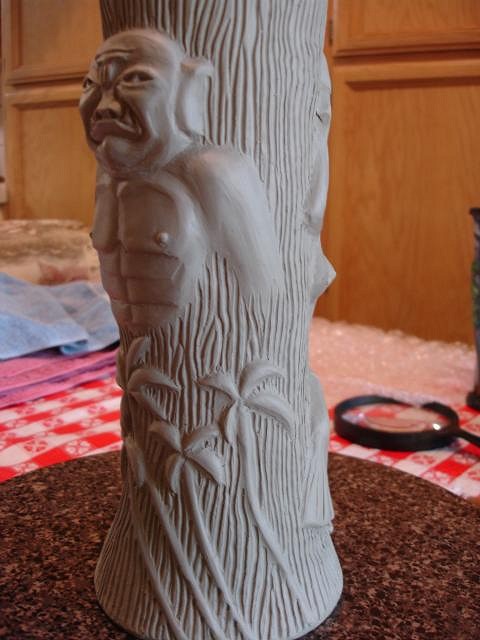
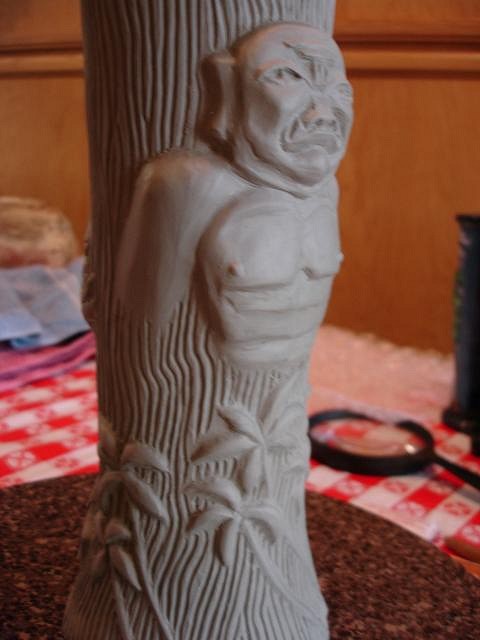
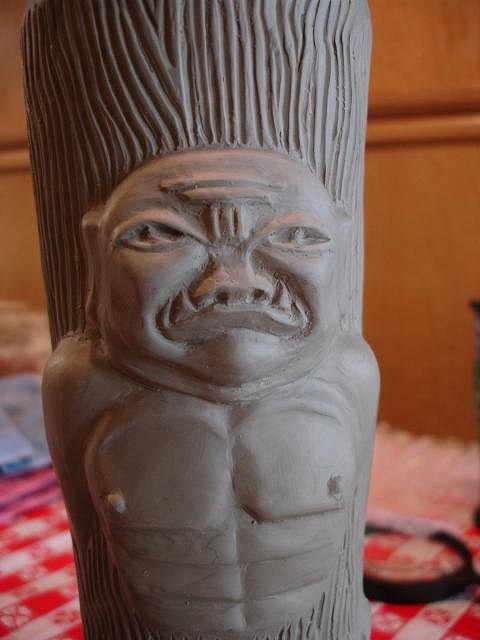
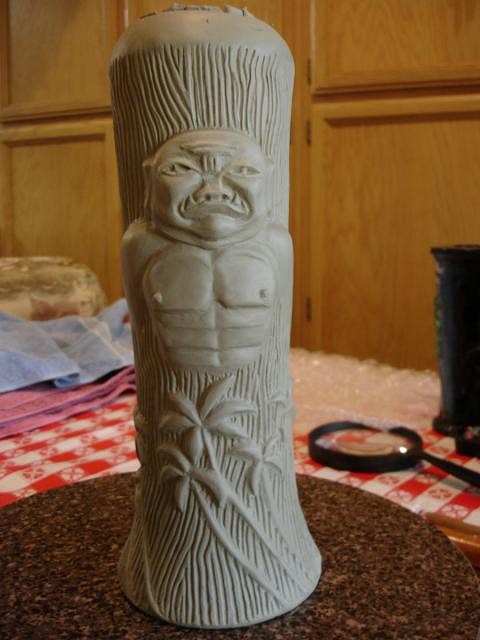
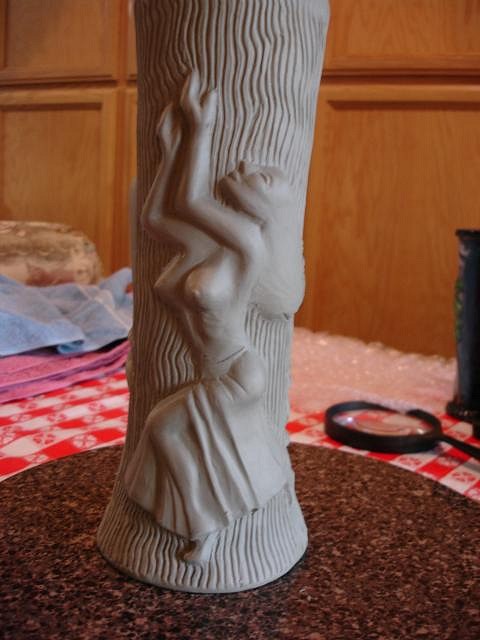
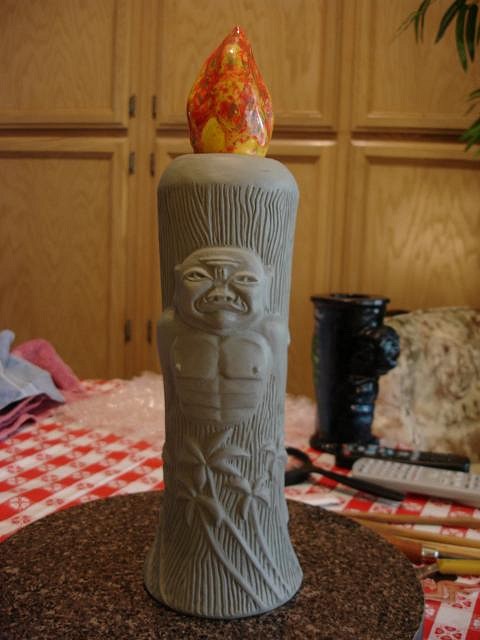
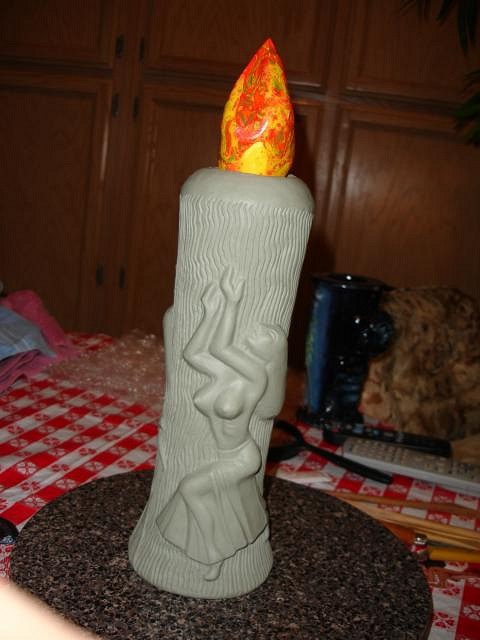
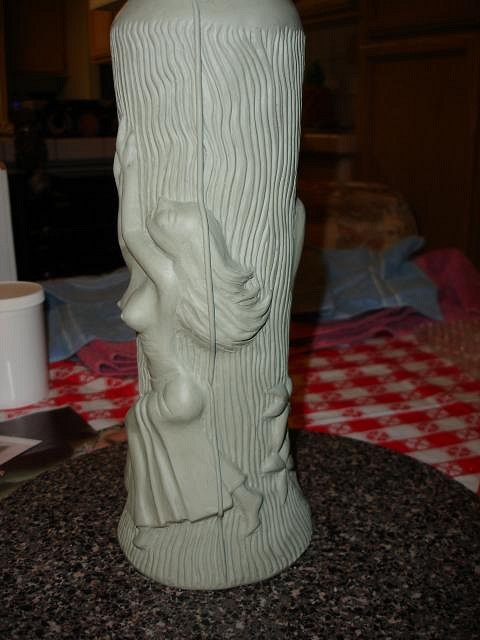
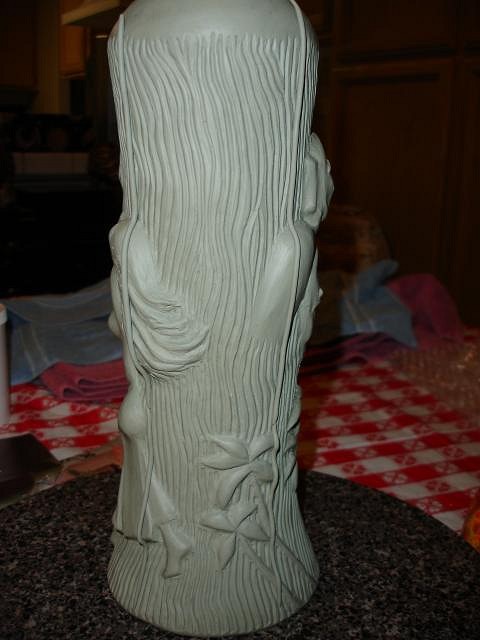
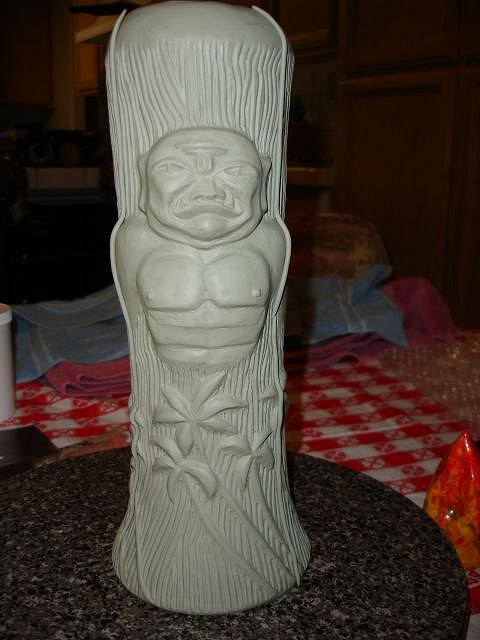
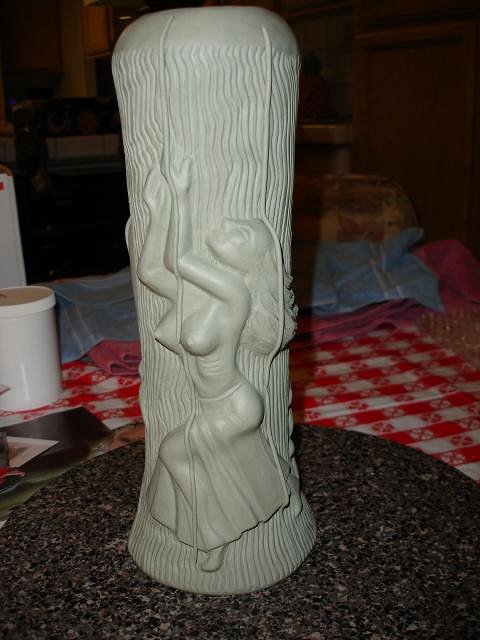
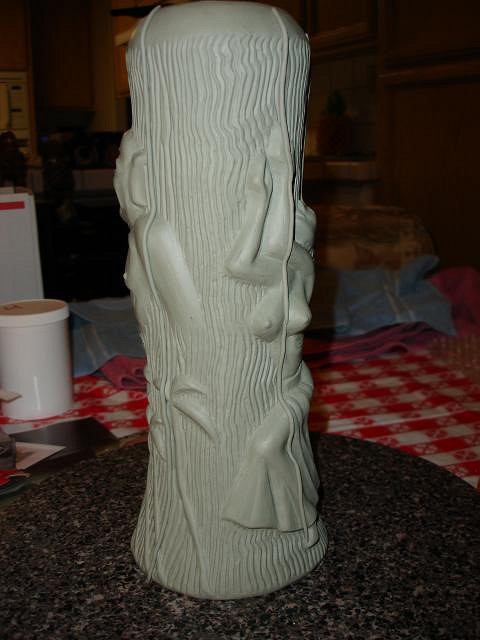
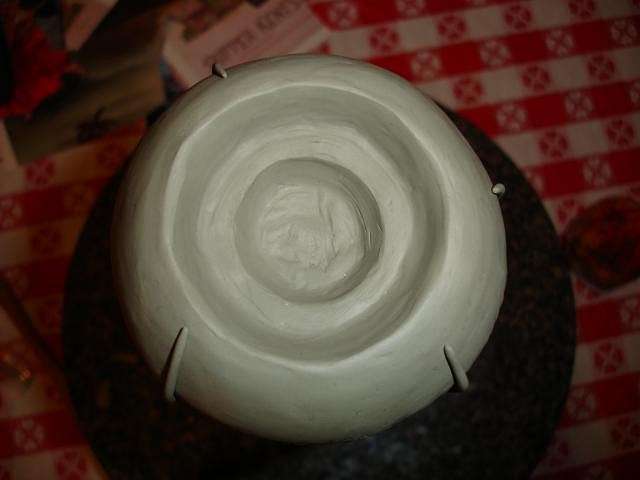
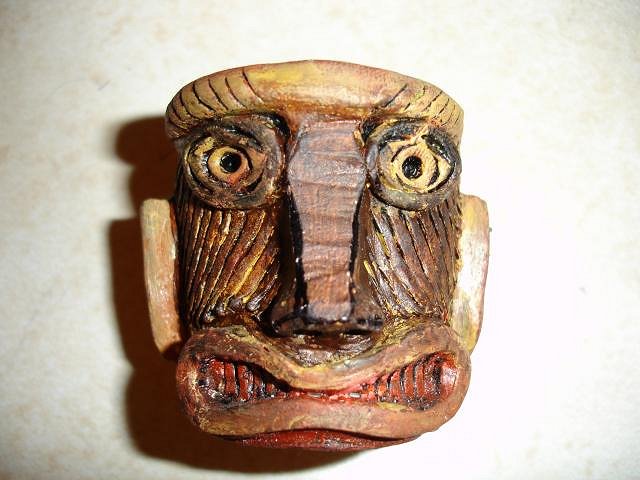
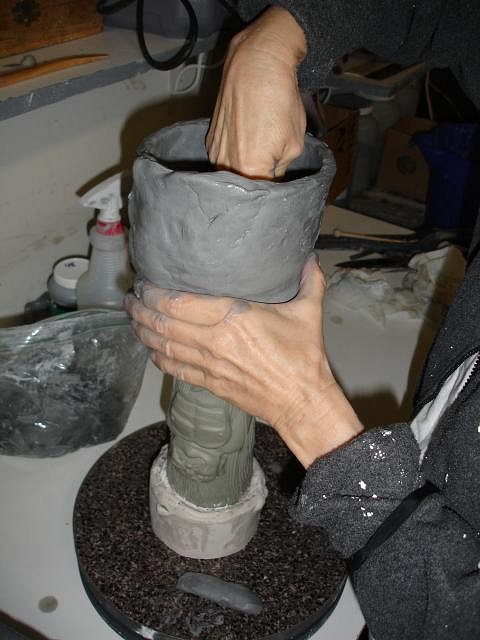
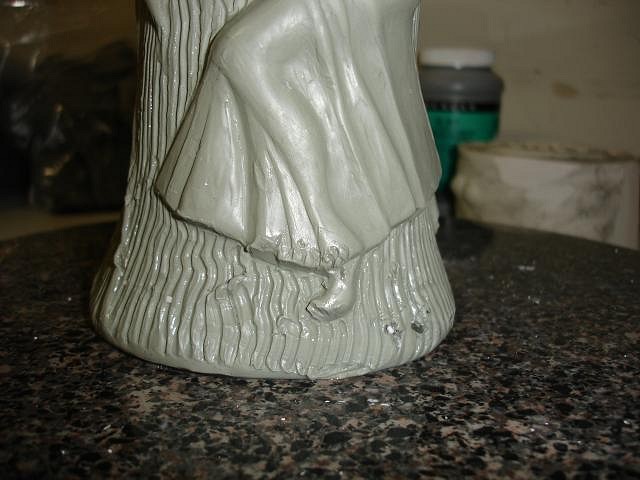
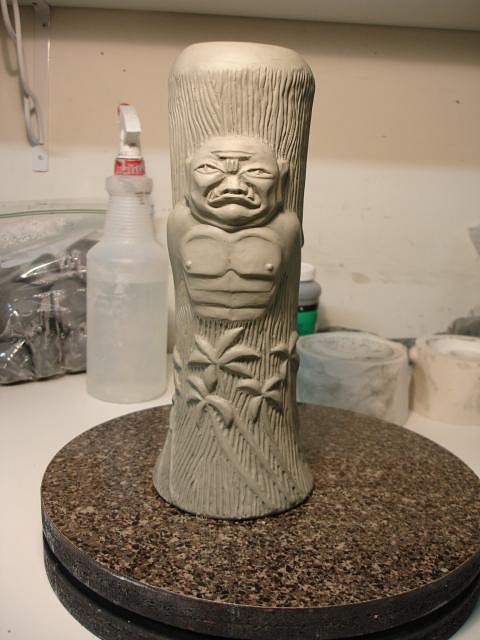
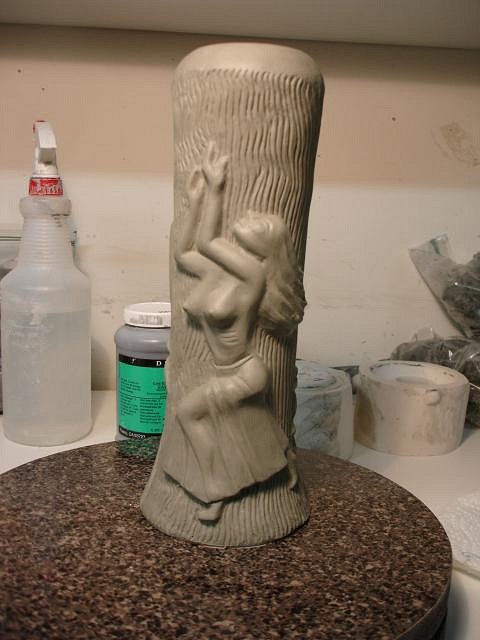
2012 how about that. We've all made it to another year. I hope you all had fun last night. Top of the mug where the flame will sit. It probably will need earthquake putty to hold it when you walk around drinking through the straw.
This is how the two pieces will look together.
After casting I will make and add her flower and his earring. Fingers crossed for the mold its been nothing but problems that's why I'm up in the middle of the night...worrying about making the mold work tomorrow. Wendy |
|
M
MadDogMike
Posted
posted
on
Sun, Jan 1, 2012 8:10 AM
Wendy you said you were going to bed early, not staying up 'til 2 am to post on TC! :lol: So awesome, love the finished sculpt! The palm trees from the pic are a great addition. So tall and elegant, the flame on top is perfect. Good luck with your molding effort :) |
|
H

hang10tiki
Posted
posted
on
Sun, Jan 1, 2012 10:59 AM
Lookin great |
|
V
VampiressRN
Posted
posted
on
Sun, Jan 1, 2012 11:04 AM
Simply awesome Wendy. |
|
D
danlovestikis
Posted
posted
on
Mon, Jan 2, 2012 10:34 AM
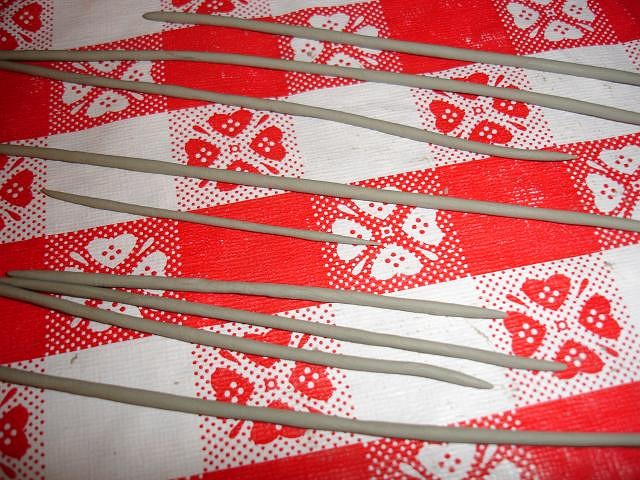
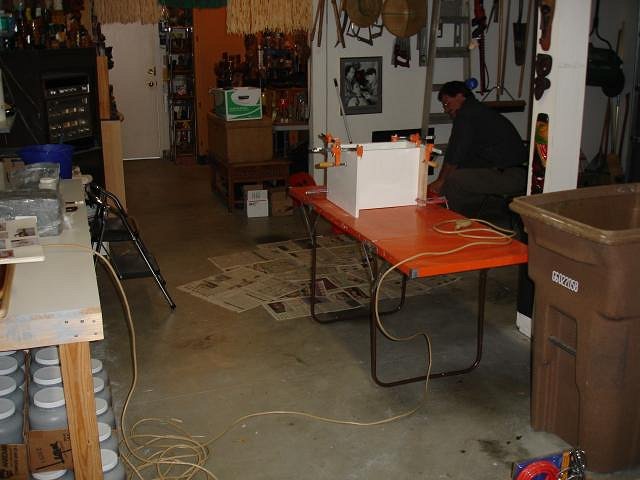
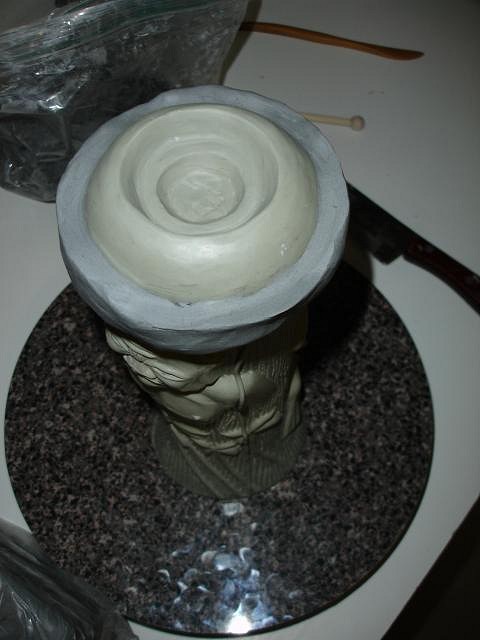
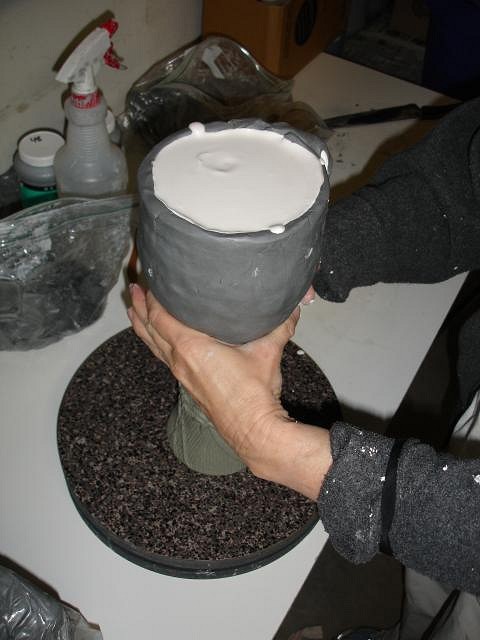
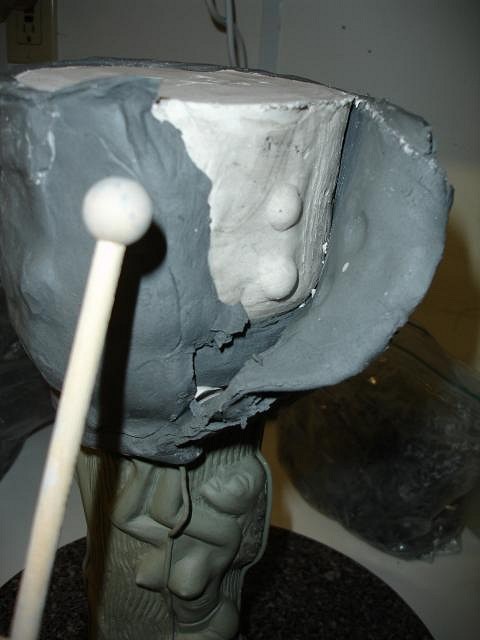
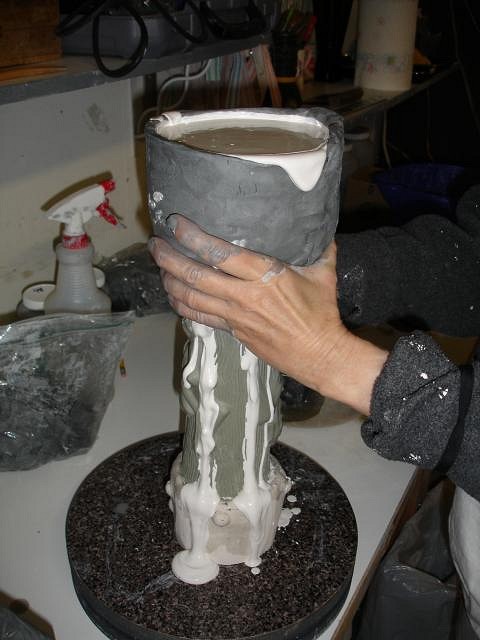
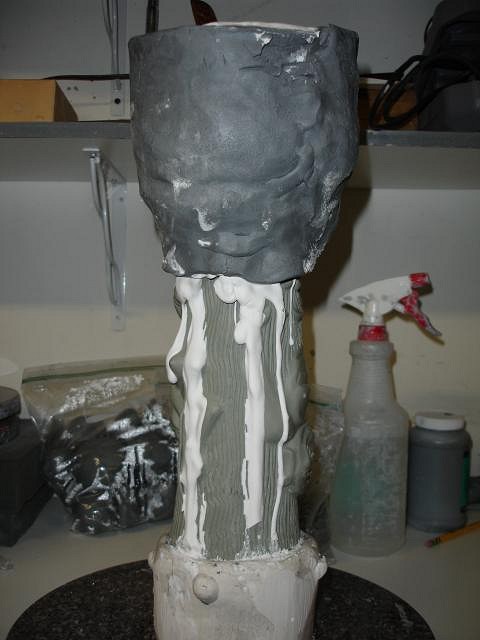
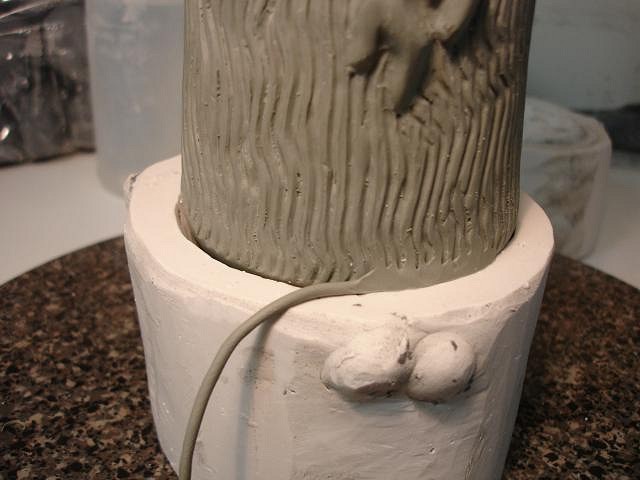
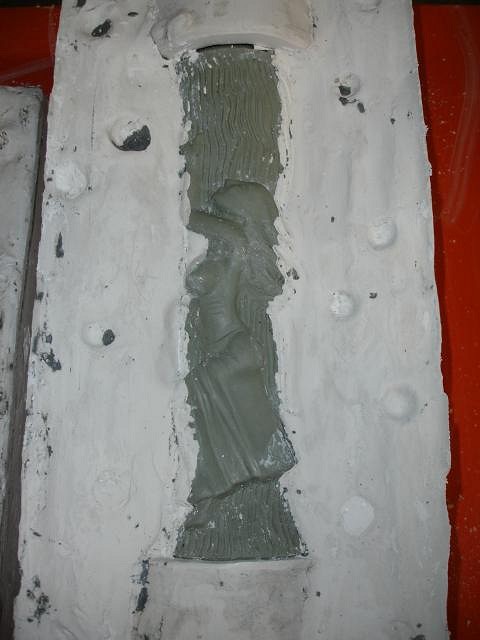
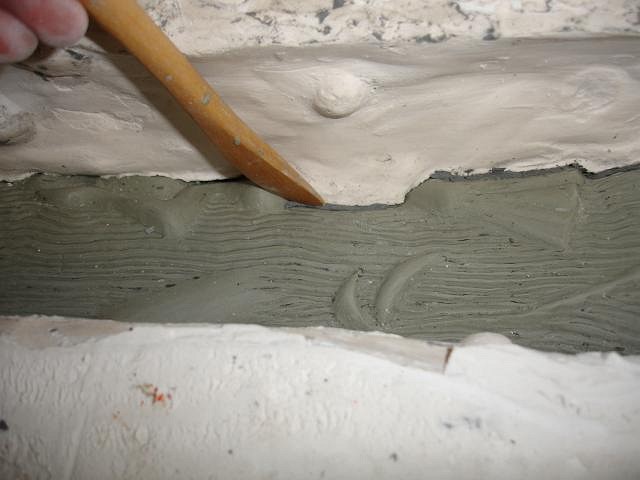
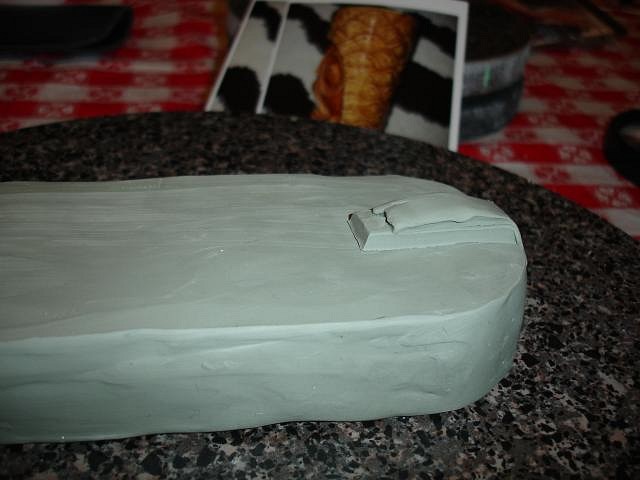
Thank you Vamp and hang10tiki. MDM I was in bed by 8 PM but woke up and decided to post a few photos. I know that there is great interest in learning how to make molds so once again I will show you all how I did it with the Zombie Torch. Believe me when I say this is very hard work and there are so many pitfalls. Did I say falls? Yesterday with only 1 piece left to mold I caught both feet in the cord to the shop vac and did a face first fall to the concrete floor. I hit my forehead so hard that my head bounced. We left for the after hours clinic. I wanted to make sure I wasn't going to have a sub-dural hematoma. I'm fine but I can't bend what was my good knee and my nose and forehead feel like I was in a boxing match. So be careful. Dan spends so much time going with me to doctors appointments. He's wonderful. Step One and more... To start off I roll out some clay that I will use to mark sections.
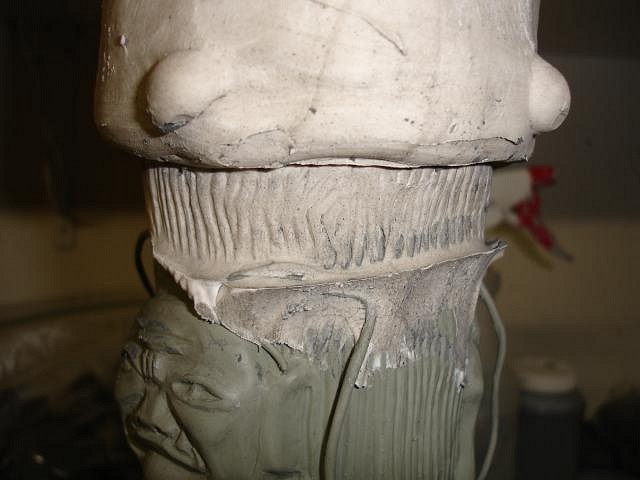
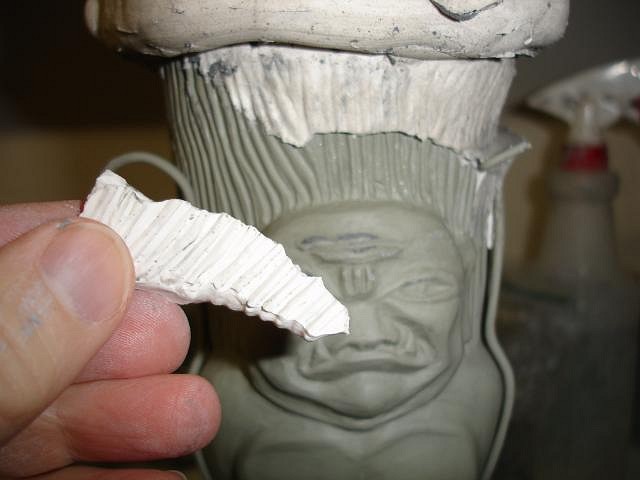
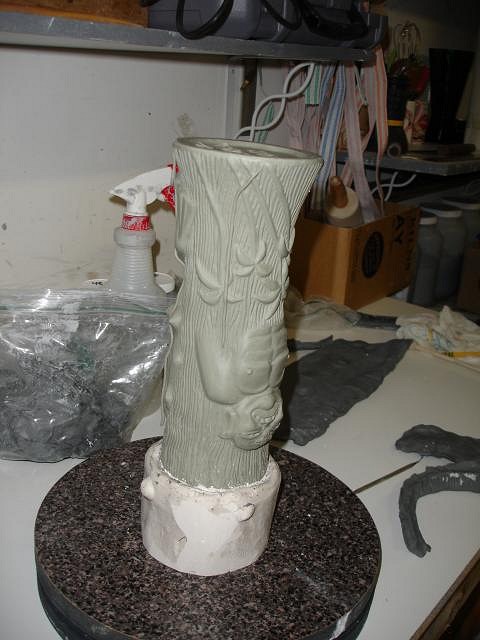
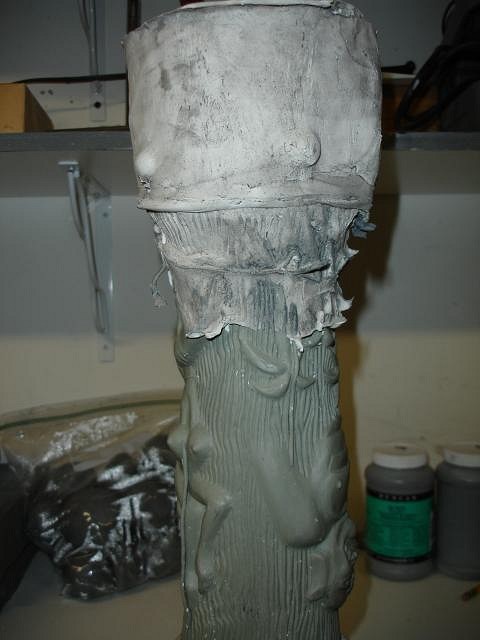
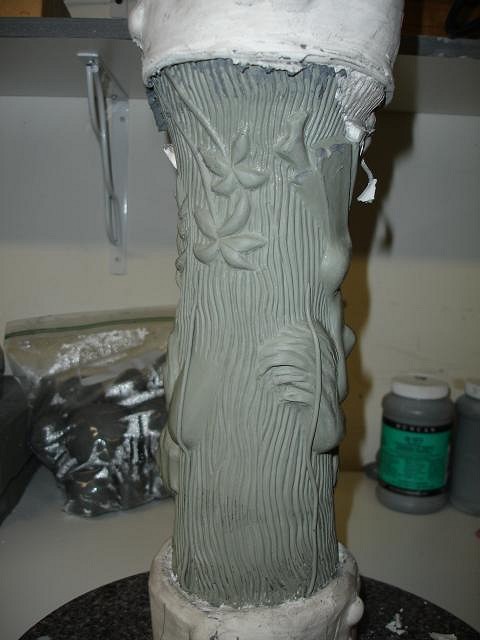
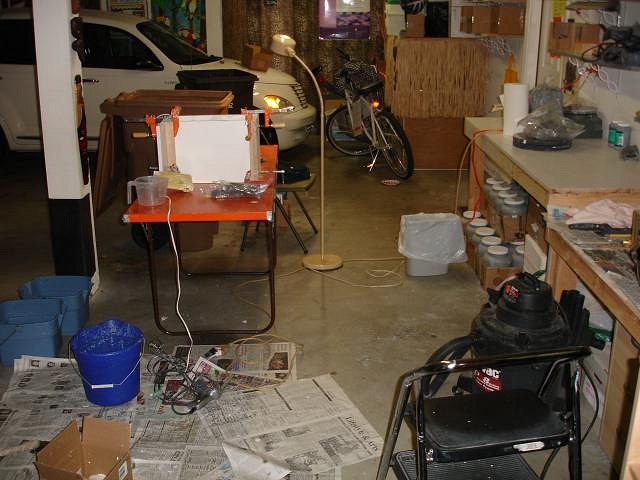
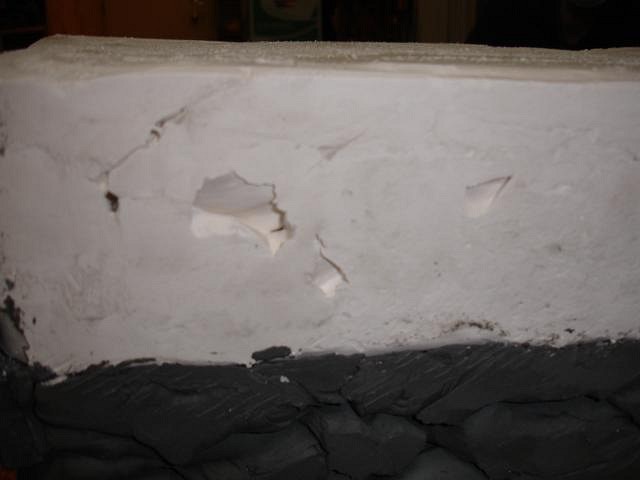
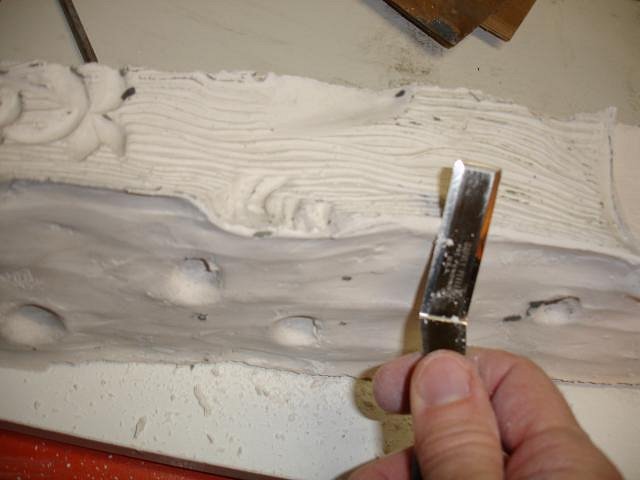
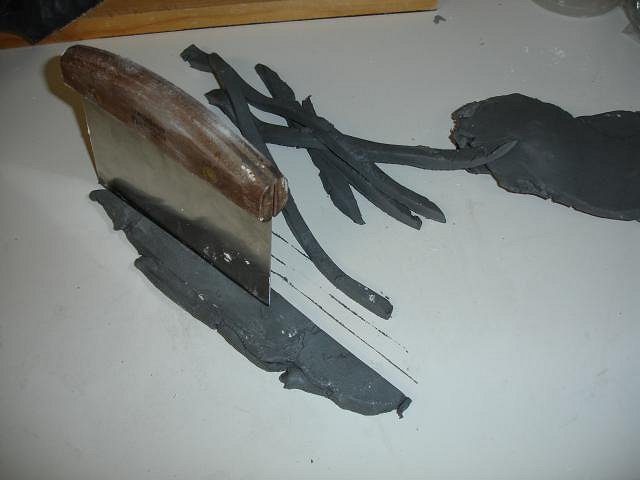
Next we get all the supplies out for molding and put down paper on the garage floor. We use a paint mixer attached to a drill and even a small blender for the plaster. The consistency should be like buttermilk. With so many wood-grain lines I started with a band around the top and pressed it into the clay. I then added a sheet of clay around that. This is a technique I learned from Beachbumz on TC. We mixed and poured in the plaster and held the clay together while it set up. When I had wrapped the clay I also pressed in a couple of dents to make locks with other mold pieces. Here is the tool I used and what it looked like as we peeled the clay away. As we peeled the clay we found that the plaster had leaked anyway. But that's not really a problem other that it takes time to remove it.
I checked the sculpt and made sure it was fine. More later. We have a tiki guest coming tomorrow and I need to put all the Christmas decorations away. Thank you for stopping by, Wendy |
|
M
MadDogMike
Posted
posted
on
Mon, Jan 2, 2012 11:03 AM
Wendy, I learn something everytime you post. |
|
B
bigbrotiki
Posted
posted
on
Mon, Jan 2, 2012 12:09 PM
Indeed! One thing I learn is that with every project, Wendy is getting one notch better in her artistry! Kudos, Ms. C ! |
|
Z
zerostreet
Posted
posted
on
Mon, Jan 2, 2012 12:20 PM
Impressive work and documentation! |
|
AS
Aquatic Safarinaut
Posted
posted
on
Mon, Jan 2, 2012 12:25 PM
Aloha Wendy |
|
L

LoriLovesTiki
Posted
posted
on
Mon, Jan 2, 2012 5:45 PM
Wendy - You are AAAHHHHHMAZING! I am awed by your work. Although I would love something made by you I'm pretty sure it would be cost prohibitive.... But I just wanted to say how talented I think you are. Those flames are amazing and the mug isn't even done!!! I hope one day to attempt making a mug but it will be a feeble attempt I'm sure. Thanks so much for the step-by-step photos! :) |
|
D
danlovestikis
Posted
posted
on
Mon, Jan 2, 2012 7:01 PM
Hi MadDogMike, it is awesome to teach you something, thank you. This was my first tiki. As bigbrotiki said I get better as I practice. You will too. So be sure to start a other crafts thread here and post your step by steps. You will have fun and make many friends along the way. Cheers, Wendy
|
|
H

hang10tiki
Posted
posted
on
Mon, Jan 2, 2012 7:24 PM
Love the play by play |
|
B
Beachbumz
Posted
posted
on
Tue, Jan 3, 2012 12:07 AM
Wendy, didn't I tell you no more falls!! :wink: I really hope your feeling better! |
|
D
danlovestikis
Posted
posted
on
Tue, Jan 3, 2012 8:38 AM
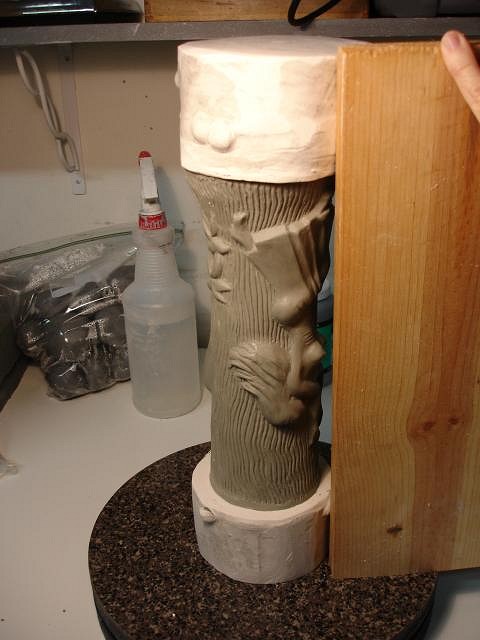
Hi hang10tiki last night I ran into a photo I have of you and I said hi. Time for revelations and more photos. The last set showed us pour the mold piece for the top. Here comes the bottom. We flipped the mug over keeping the top in place. Now it's time to get ready for our Pasadena guest. More photos tomorrow. Comments are always welcome. (: Wendy |
|
H

hang10tiki
Posted
posted
on
Tue, Jan 3, 2012 9:45 AM
Great to watch your progress |
|
D
danlovestikis
Posted
posted
on
Wed, Jan 4, 2012 8:16 AM
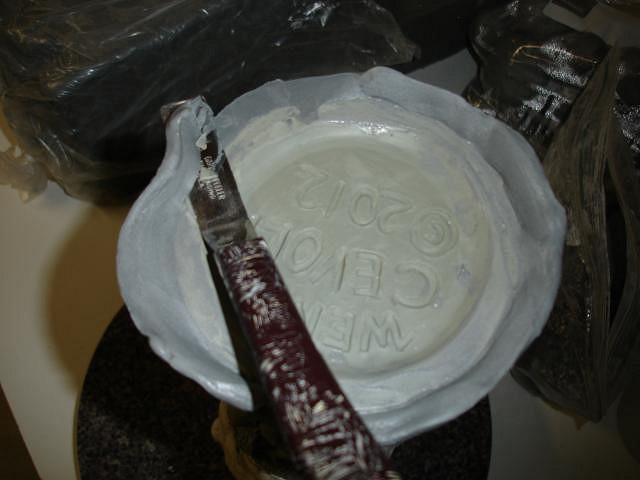
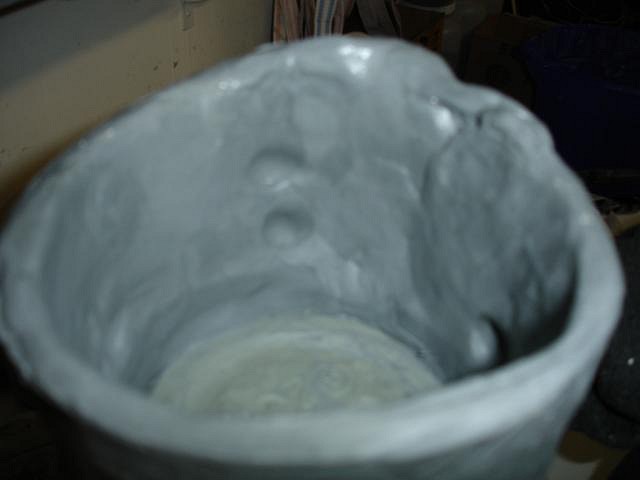
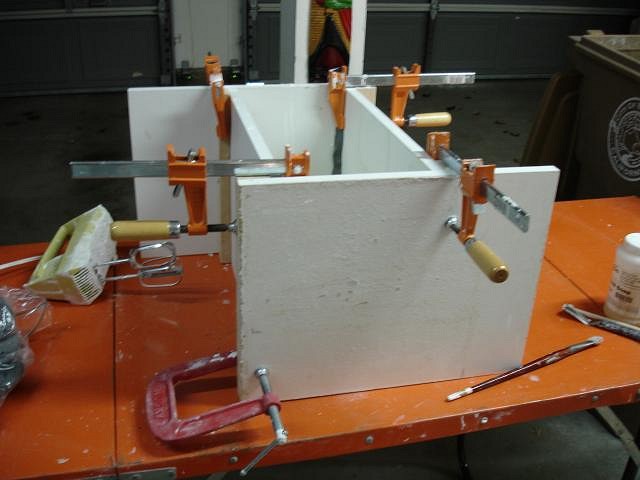
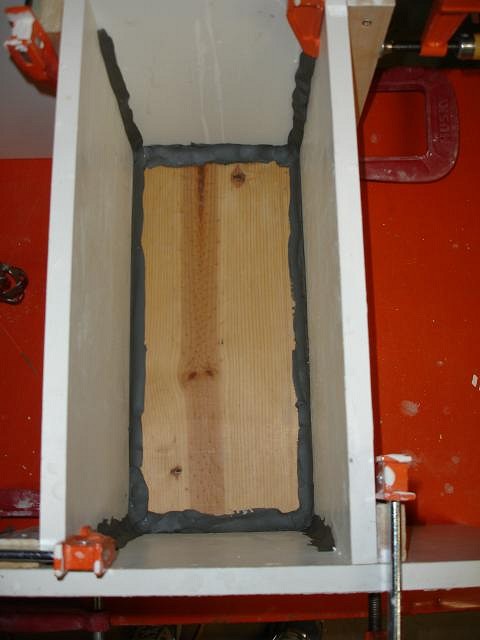
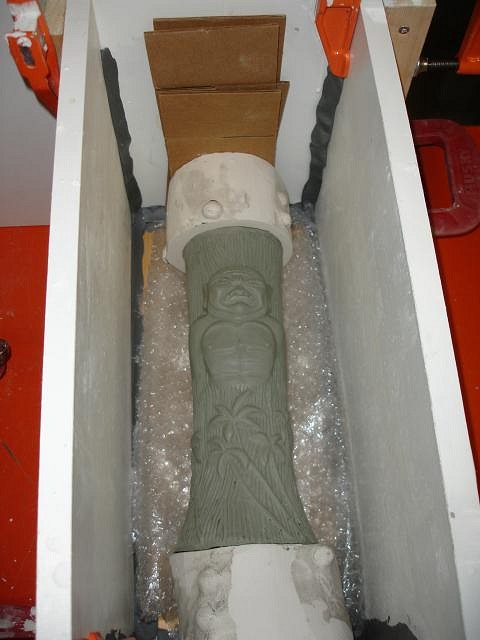
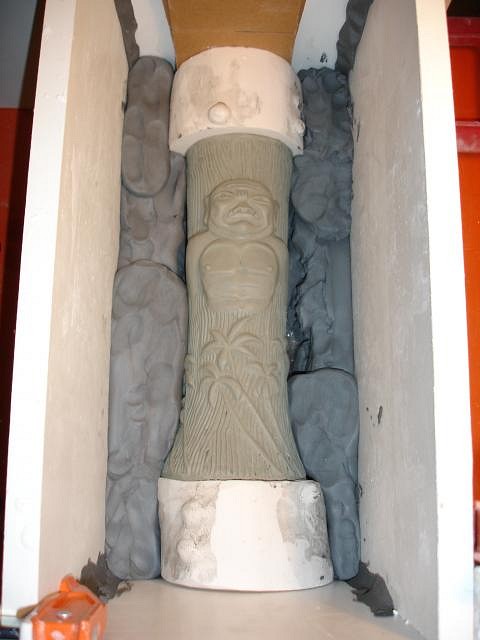
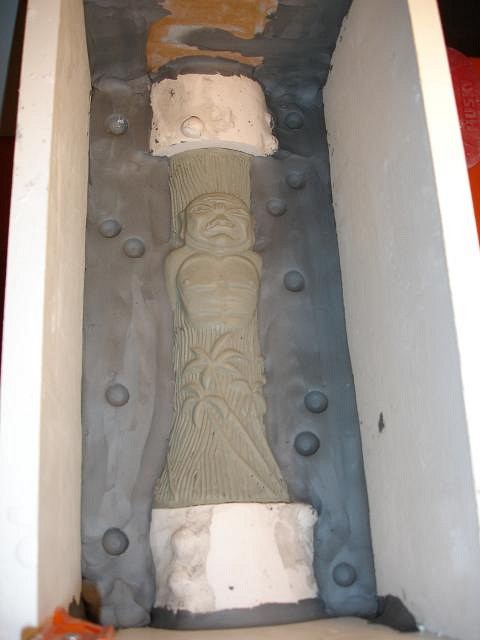
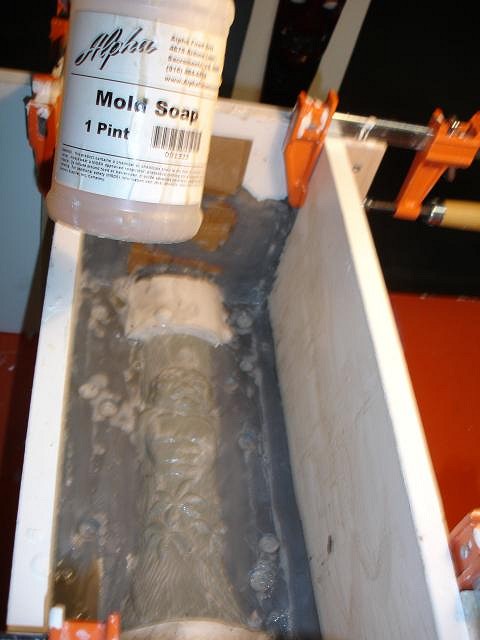
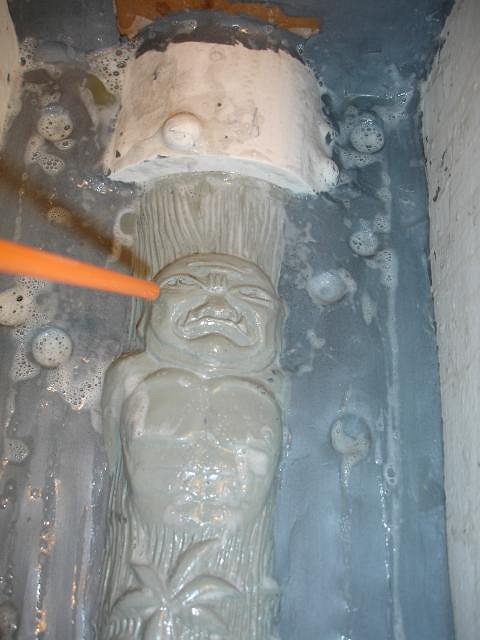
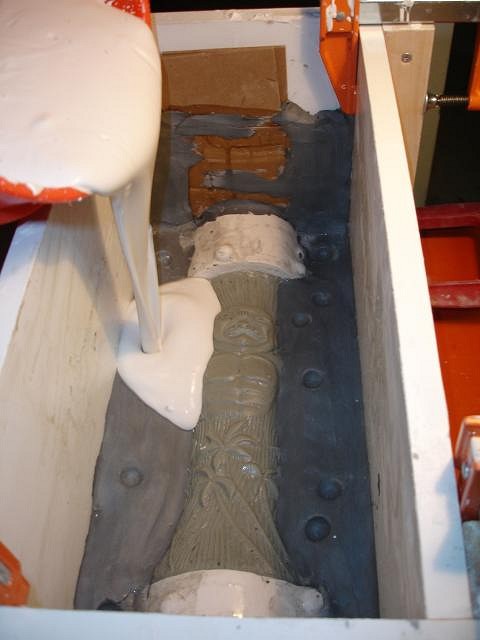
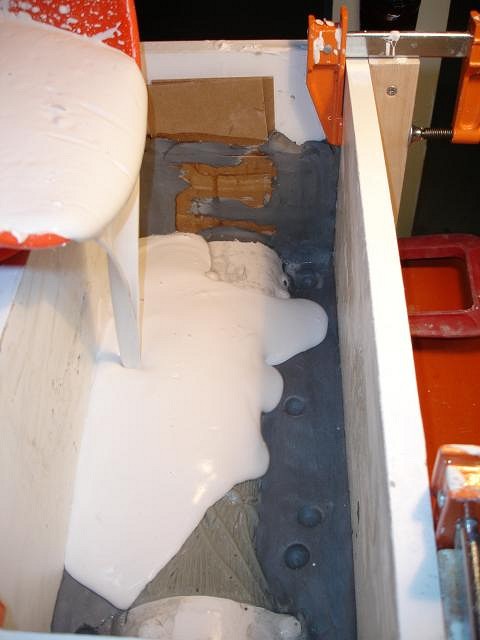
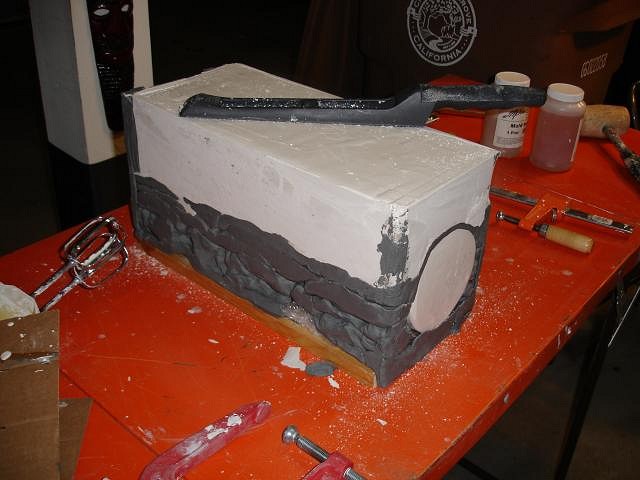
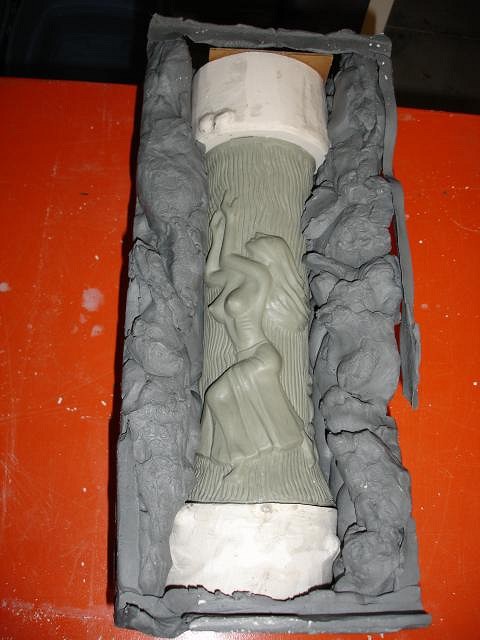
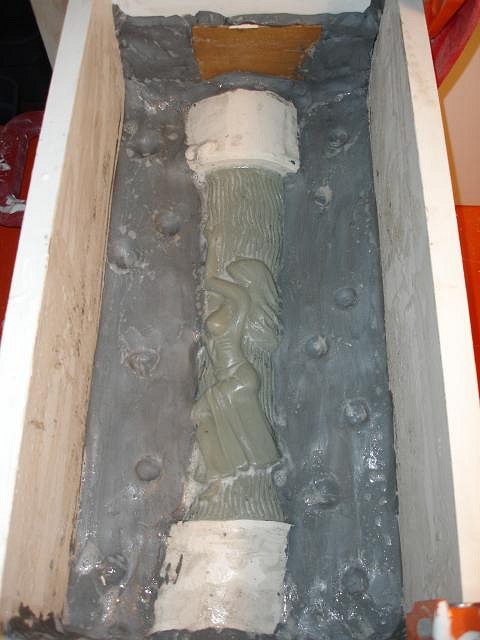
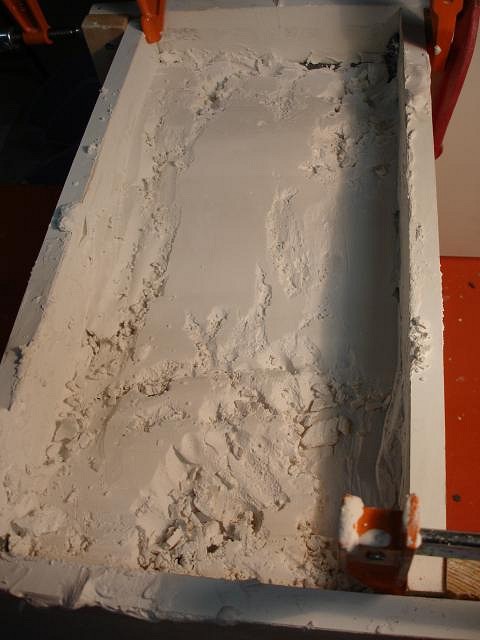
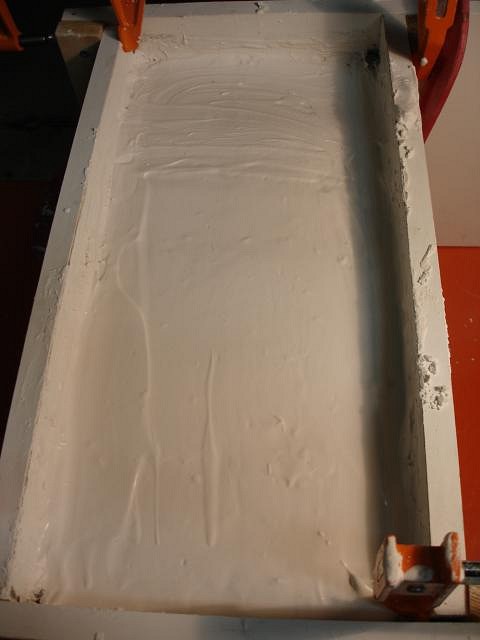
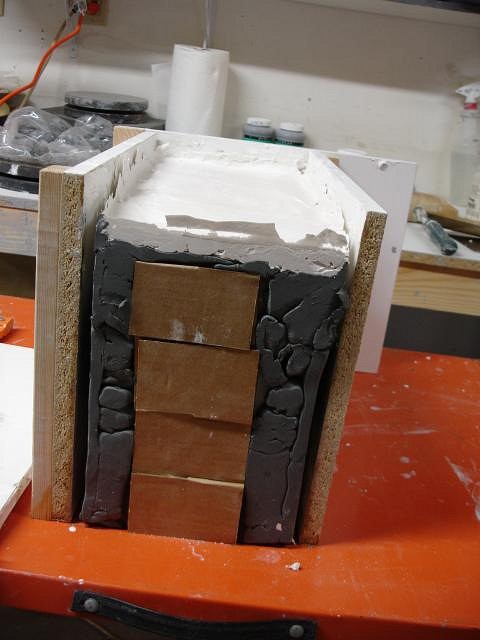
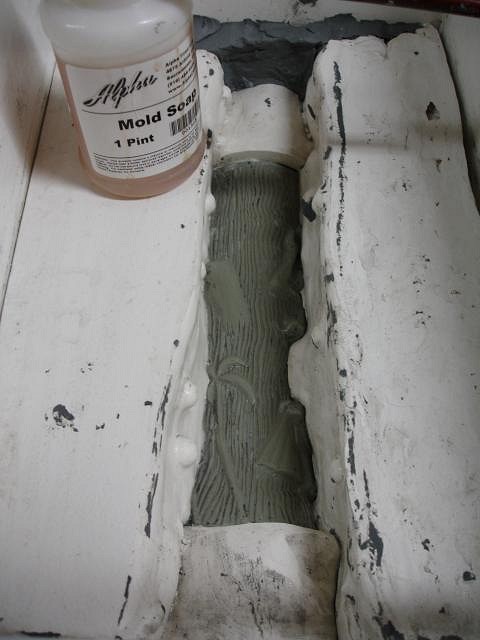
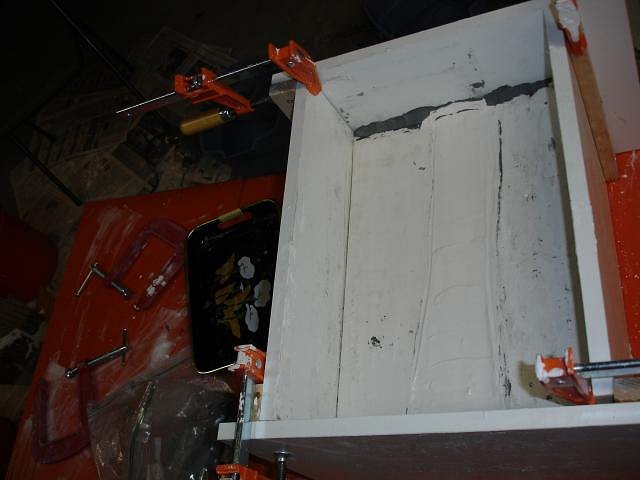
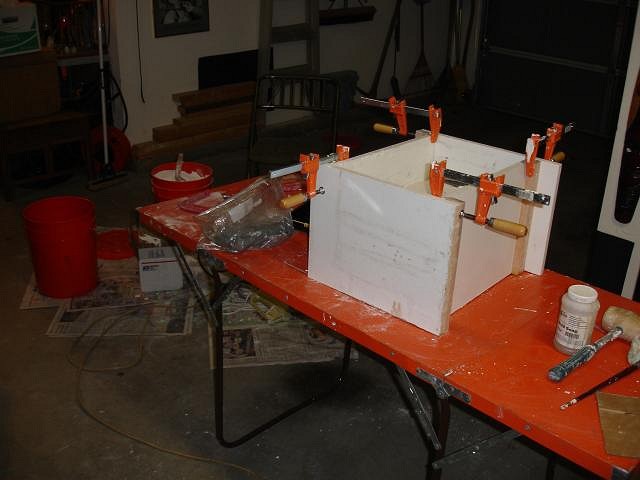
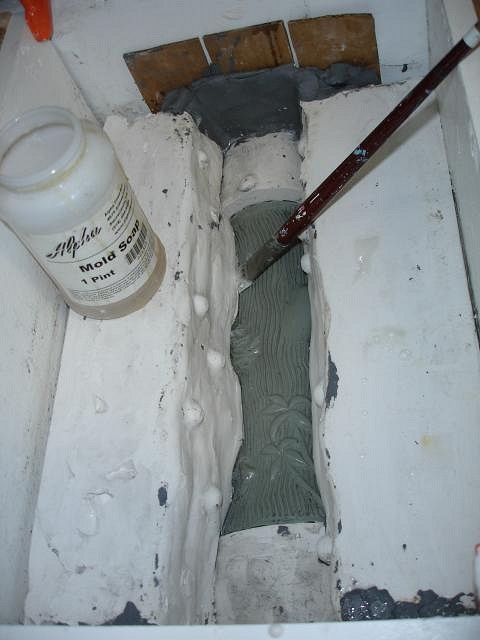
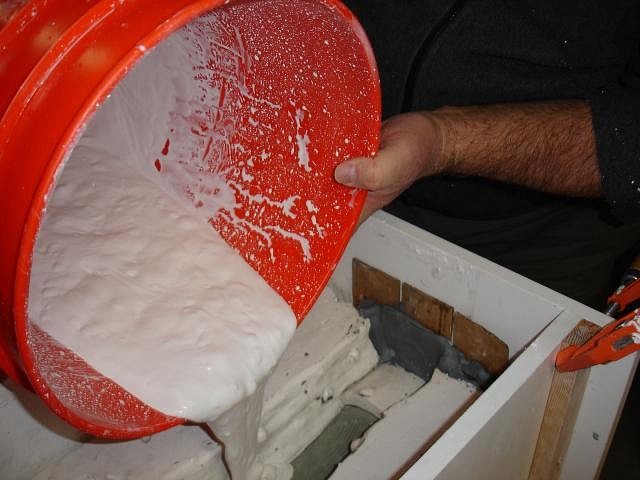
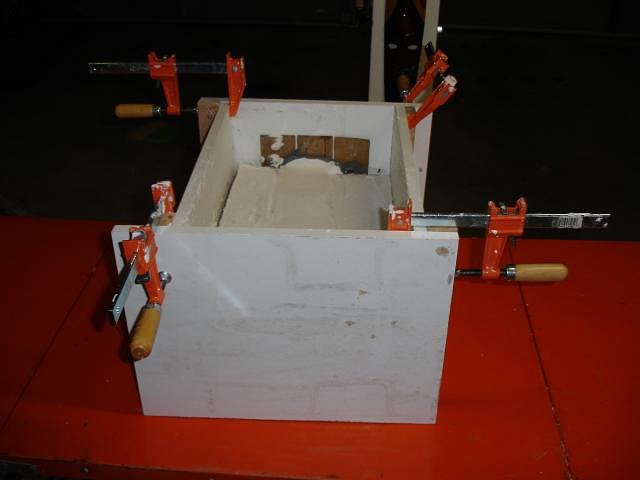
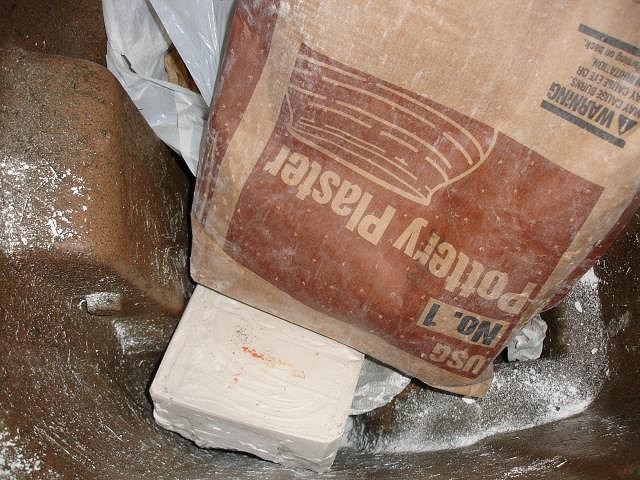
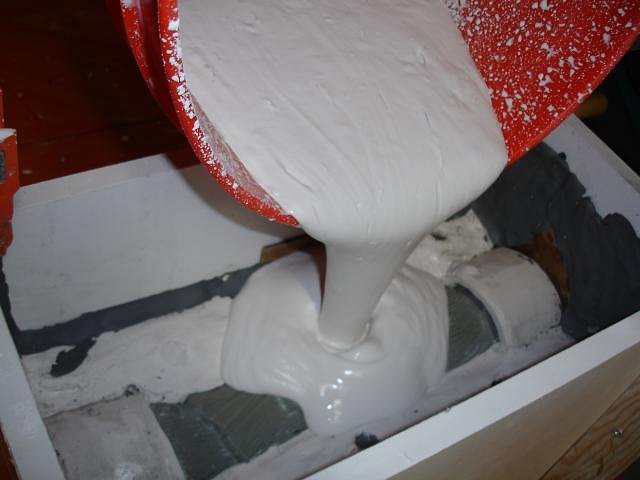
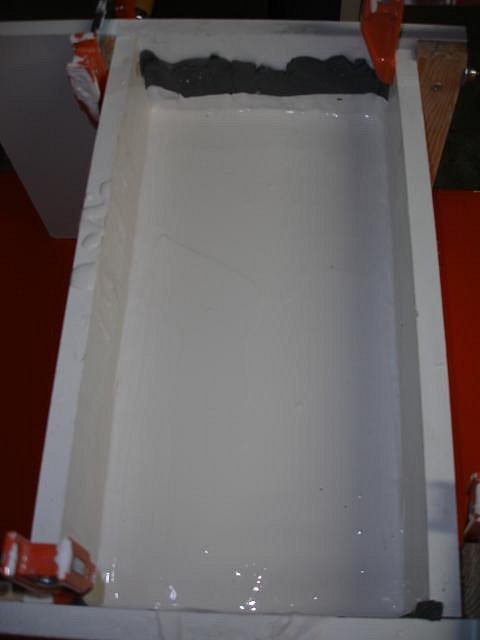
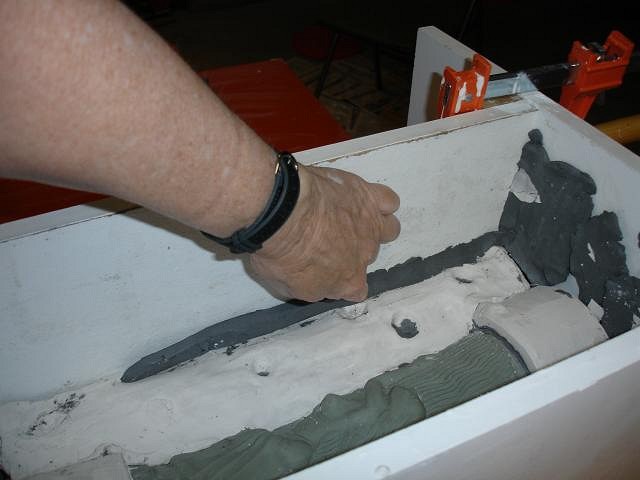
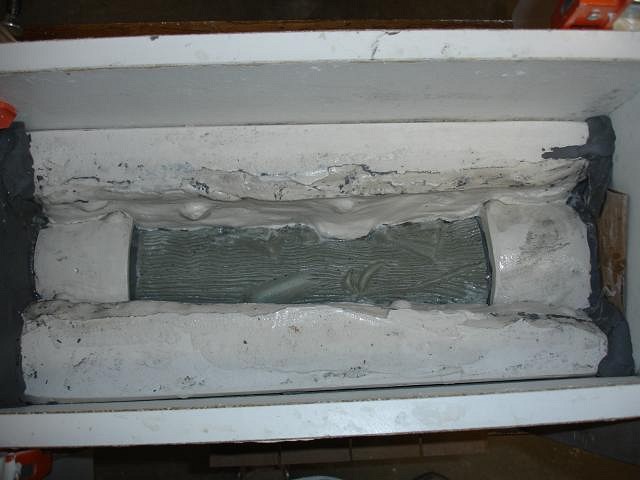
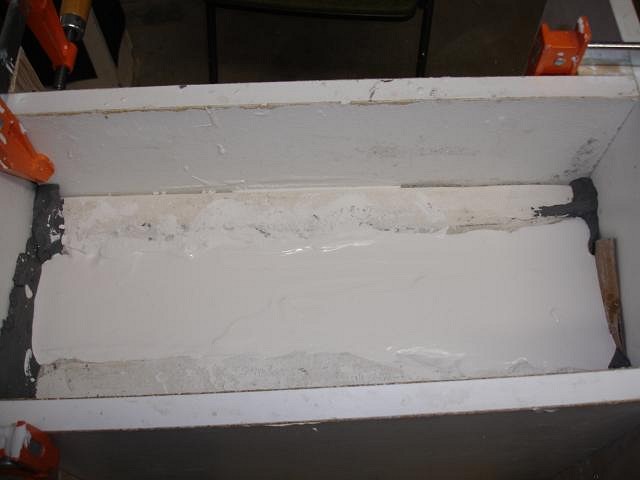
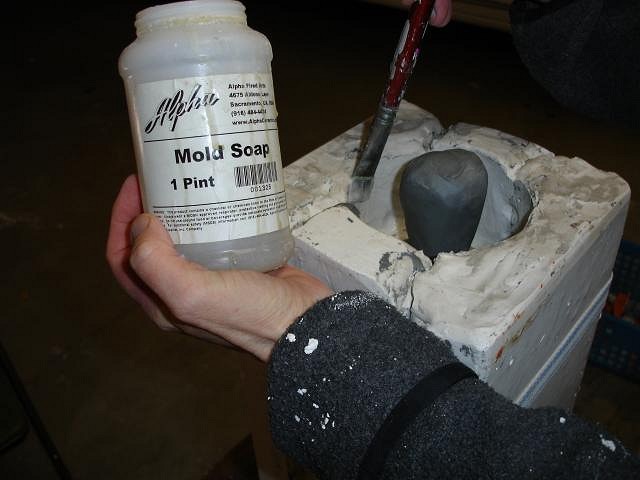
Hey hang10tiki here goes keepin on... First we put down the bottom board and find the right size sides. We get out all the clamps that we will need. Using soft clay I fill in all the cracks along the pieces. The two ends are not really holding the sculpt so I put down bubble wrap just in case the sculpt drops out. We carefully lower it in and then use pieces of cardboard to lock it in place firmly. I do not remove the bubble wrap I just start building soft clay around the sculpt until it has covered all the parts I do not want to mold in the first piece. I remembered where I had the clay lines at the tikis shoulders. Once I've got it built up I smooth it tight against the tiki and then press in the ball locks. Only press in about 1/3 of the ball. Too deep and they will break off. I brush on the mold soap and then soak up the excess with a few paper towels. I do this 2 or 3 times. Mold soap is poison so wear a mask and gloves or do not touch it. There is always soap left in the deeper portions so I use a straw to blow it out. I don't think it matters but just in case. Wear a mask or the plaster dust will harden in your lungs and never go away. Figure out how much plaster you will need to cover your sculpt and be around two inches thick. Put water in a deep bucket. Start your mixer and start adding your dry plaster. Keep adding and mixing until it is like buttermilk. Do this fast the plaster sets up quickly.
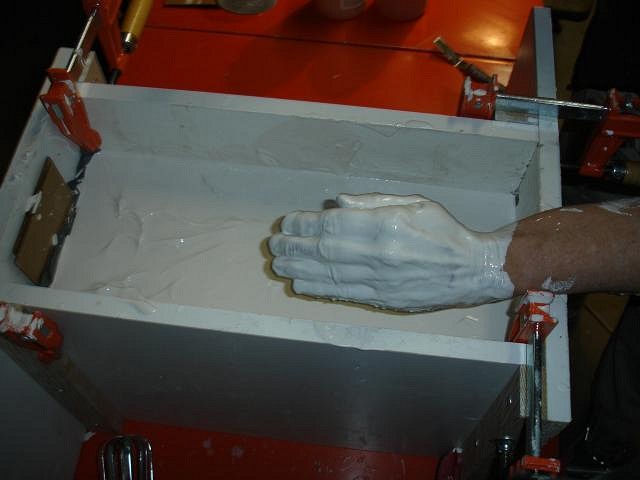
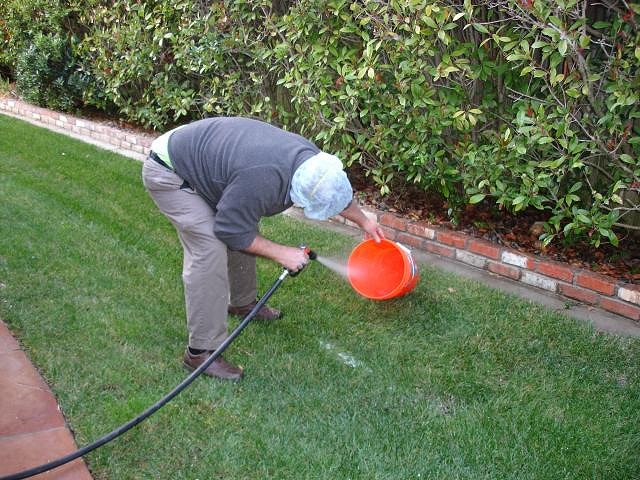
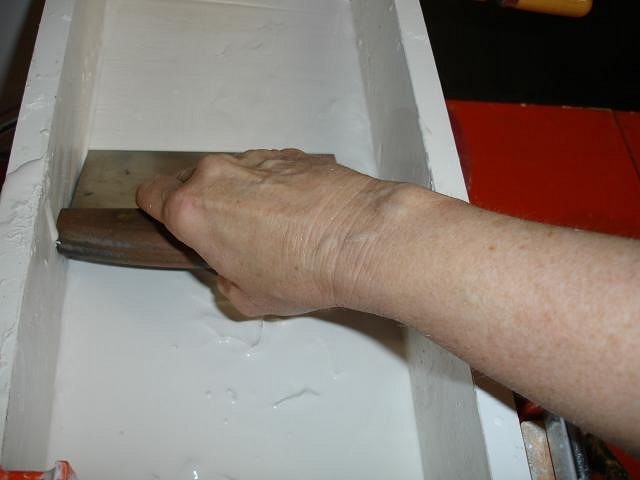
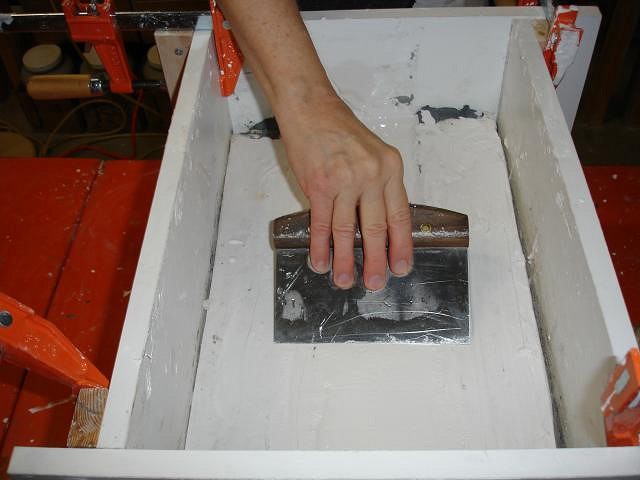
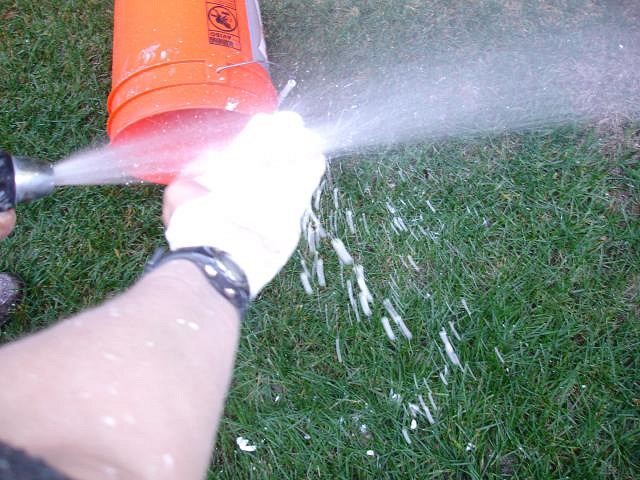
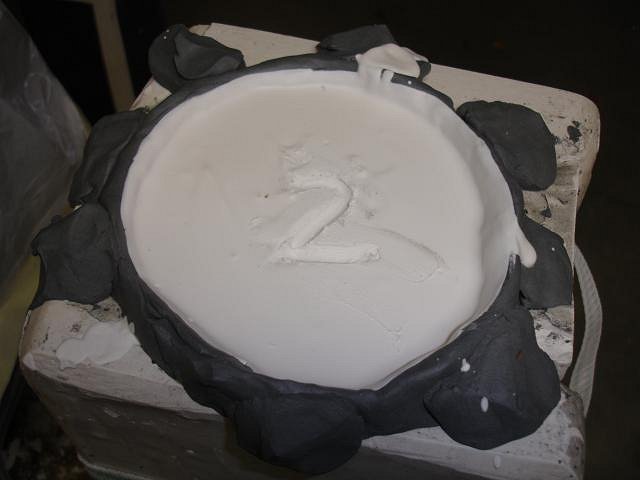
I like to stick my hand in and rub the plaster into my sculpt and to make sure there are no dry lumps. I can break them up if I feel them. This is hard on the skin so get it off as soon as possible. Dan goes out to wash off all the tools and I run out there to get hosed off. Then I run back in and smooth the top with my favorite kitchen tool. In a few minutes I will carve into the top a 1. This is not for the side its for mold number 1. The garage is a mess and will be until we finish. This is a mom day so off we go. See you tomorrow. Wendy |
|
LLT
little lost tiki
Posted
posted
on
Wed, Jan 4, 2012 8:34 AM
DANG! |
|
M
MadDogMike
Posted
posted
on
Wed, Jan 4, 2012 10:19 AM
Wendy, I missed yesterday's post! Thanks for the progress reports, looking forward to the next installment |
|
PG
Professor G
Posted
posted
on
Wed, Jan 4, 2012 1:15 PM
This is amazing to me. All florid prose and odd metaphors aside, I am absolutely fascinated by this whole process. |
|
T
tigertail777
Posted
posted
on
Wed, Jan 4, 2012 11:11 PM
Man Wendy I love seeing your in progress shots, and this zombie mug/torch looks like it is going to be a hit out of the ballpark. Makes me wish I had room for mugs in my little habitat. Thanks for posting all the great in progress pics it is always so fascinating to see other artist's techniques. I will look forwards to watching further progress. |
|
D
danlovestikis
Posted
posted
on
Thu, Jan 5, 2012 9:43 AM
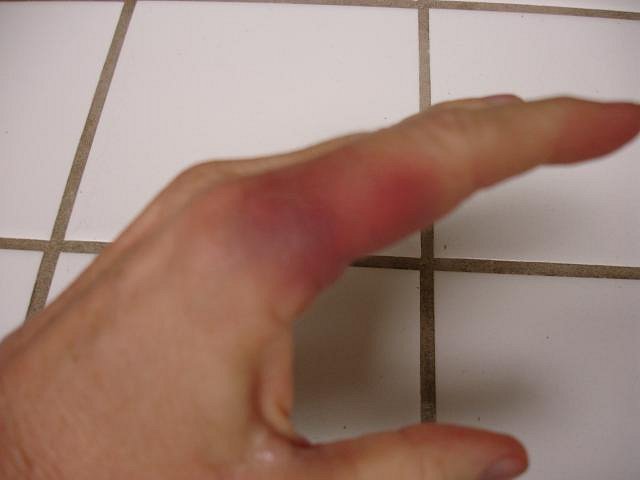
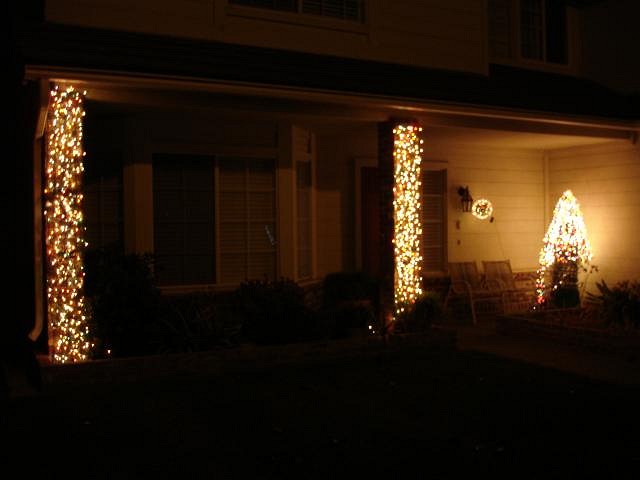
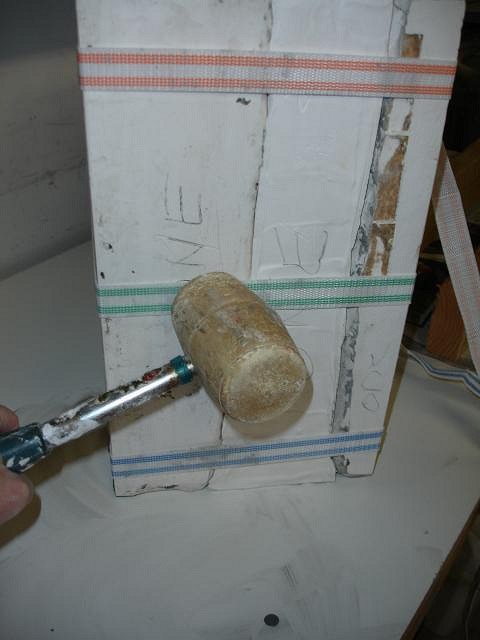
Hi Fellows, its such a joy to hear from you. Little Lost Tiki your brain is a national treasure, I am loving all your new paintings on gallery. It is super hard work but hopefully in the end it worked and I'll be able to make this mug. I'm so happy you like it. MadDogMike I need more photos on your thread. How's the axel coming? It's time for more beautiful clay work from you. Professor G I too am fascinated that this is possible. I hope that in showing all my errors that it will help someone be able to jump in and have perfect molds. tigertail777 looking back over this list of friends who cheer me on I am thankful for each new person I meet this way. You are one of them. I enjoy watching you make art too. More step by steps and another error. One step I left out yesterday involved the rubble mallet. When pouring the wet plaster into the box bang the sides so that all the air bubbles will rise to the top. I bang one side and then the other. I was moving fast and once during this process banged my finger. There are so many ways to get hurt during mold making so be careful. Now it's time to take down all the Christmas Decorations and store them for next year. I Made the tree and post covers out of chicken wire and string lights. They go up in 15 minutes and come down even faster.
Happy New Year, Wendy [ Edited by: danlovestikis 2012-01-05 09:46 ] |
|
H

hang10tiki
Posted
posted
on
Thu, Jan 5, 2012 10:03 AM
Wow |
|
W

WestADad
Posted
posted
on
Thu, Jan 5, 2012 10:12 AM
More amazing progress pictures! Sorry about your hand, I hope it heals without complications. Chris |
|
M
MadDogMike
Posted
posted
on
Thu, Jan 5, 2012 8:17 PM
Opening that new mold will be like opening a present - how will it turn out? Good I hope :) Hope that knee is doing OK? |
|
CTIT
Chuck Tatum is Tiki
Posted
posted
on
Thu, Jan 5, 2012 9:31 PM
That's a hell of alot of work, no wonder I avoided getting into Mug making |
|
D
danlovestikis
Posted
posted
on
Fri, Jan 6, 2012 8:34 AM
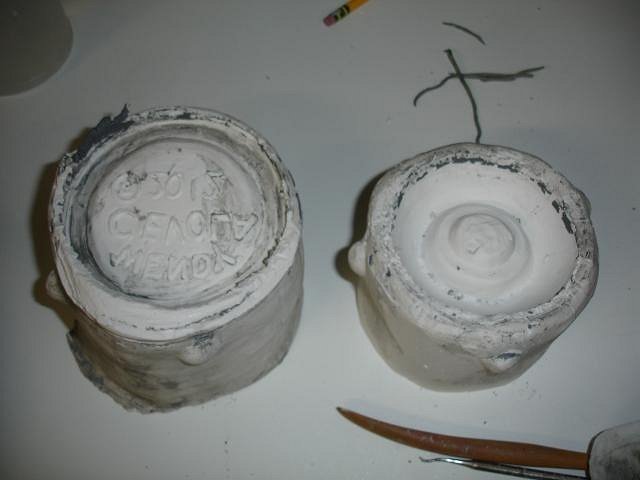
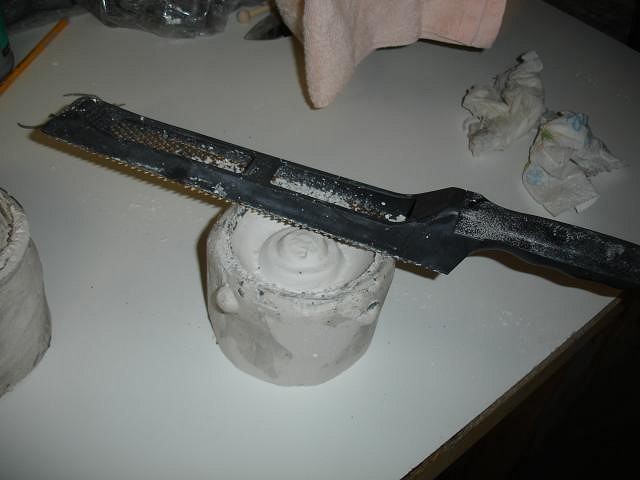
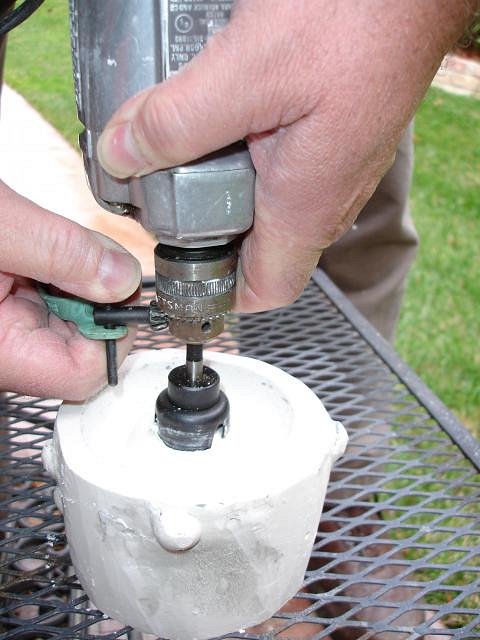
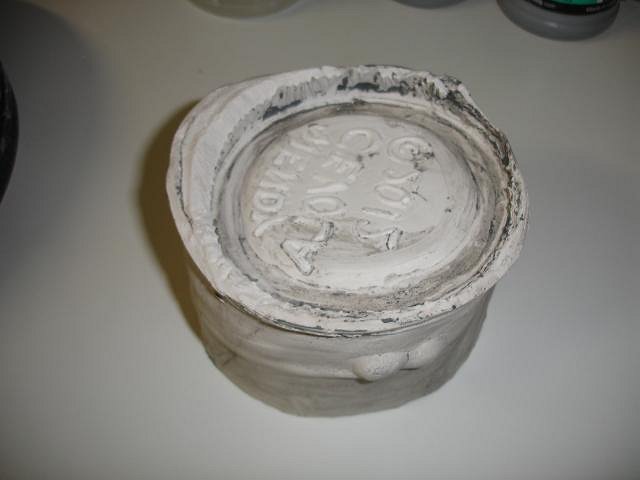
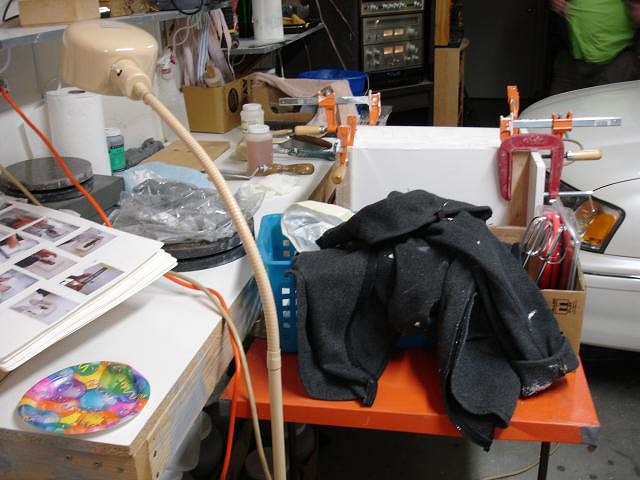
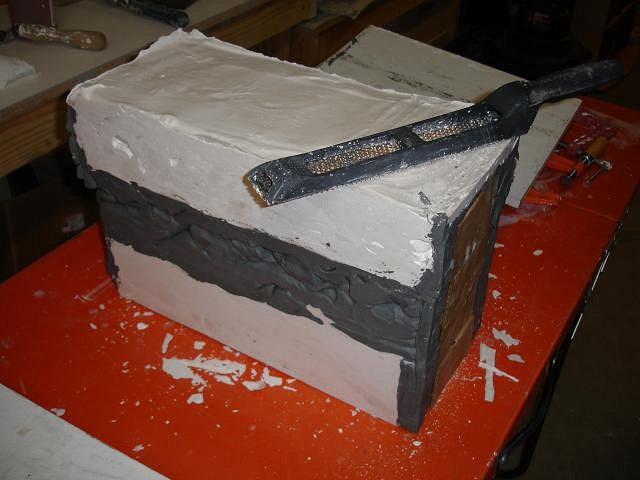
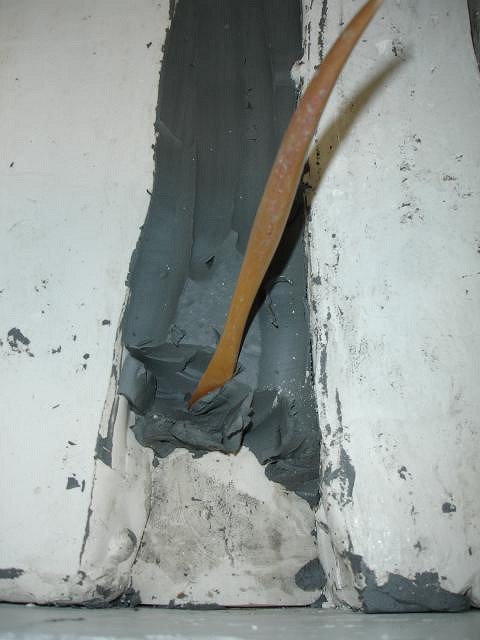
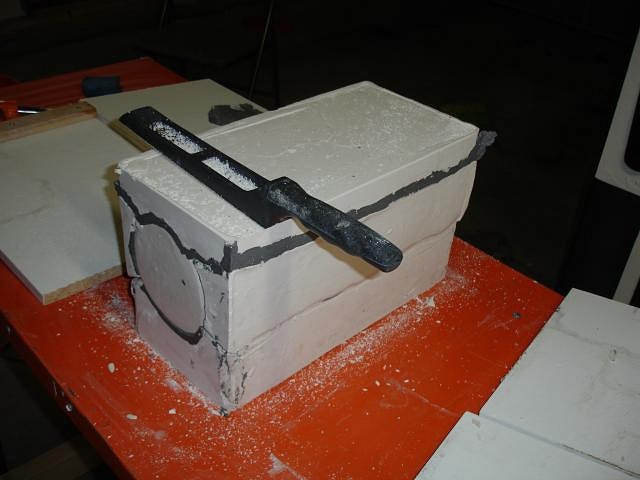
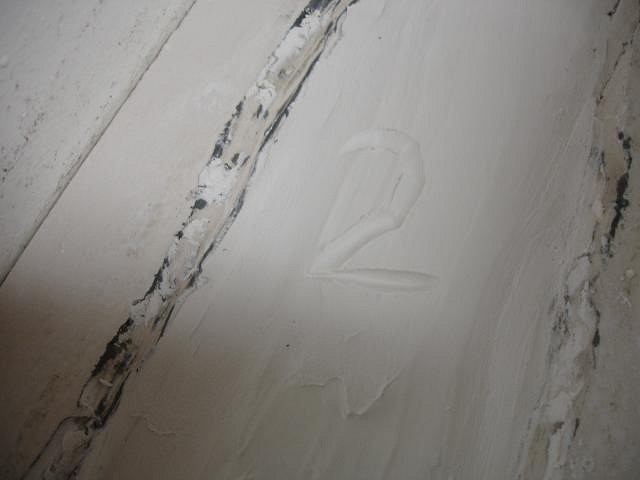
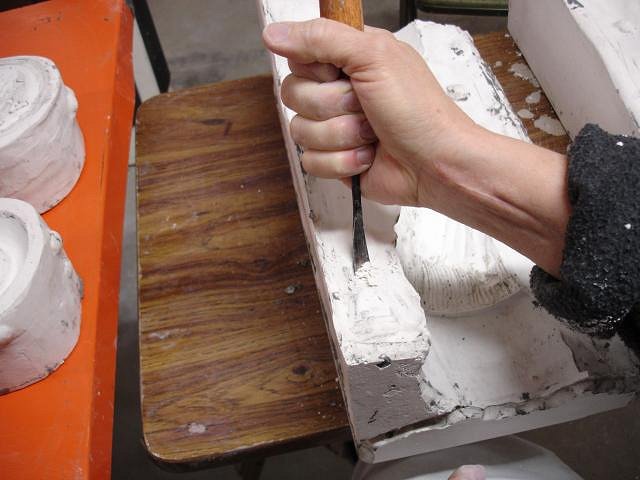
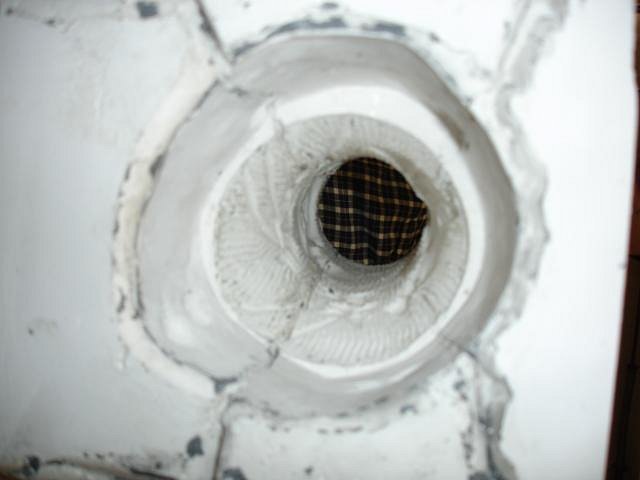
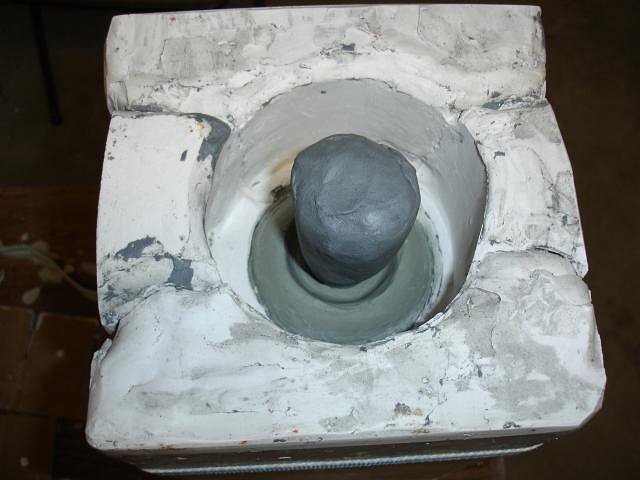
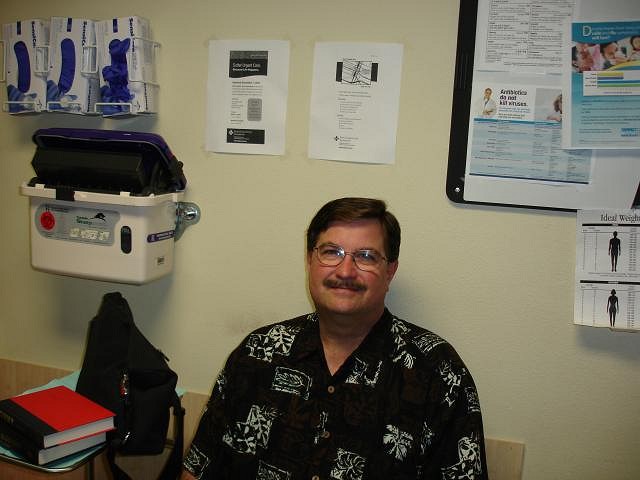
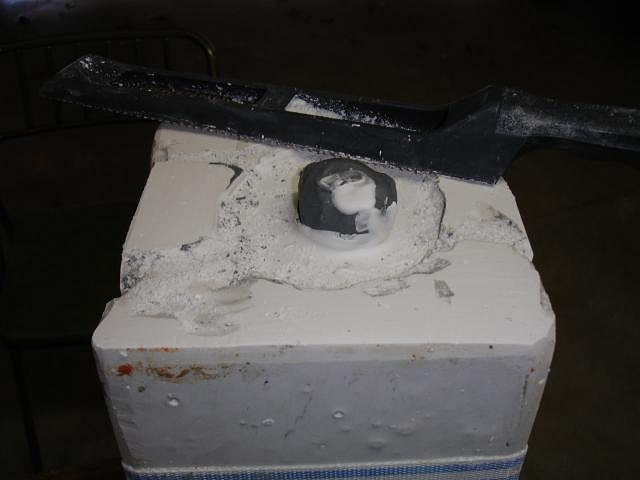
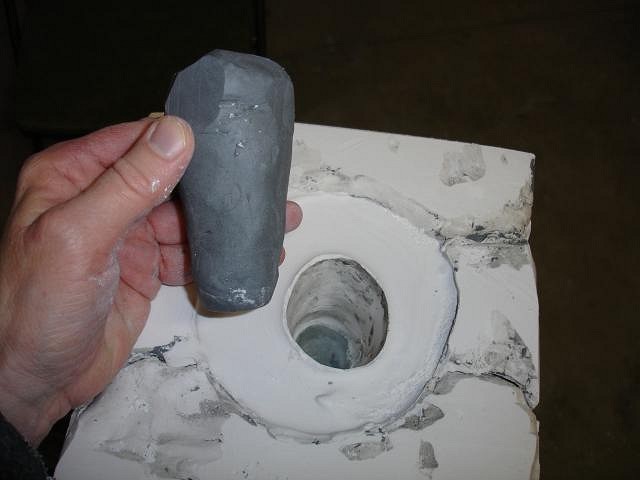
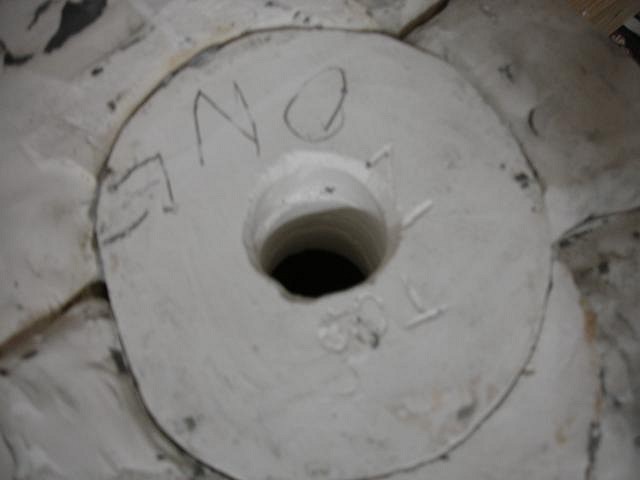
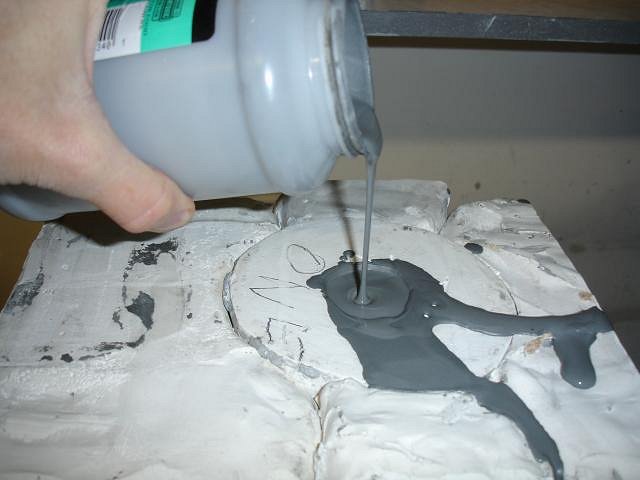
hang10tiki isn't there an athlete named the machine? I do know how to work hard and I'm very organized. Most of all I have the best partner in the world. Dan hates making molds but he does it because he loves me and my art. He works for tikis. I couldn't do all this work without his help. WestADad you are such a dear heart. The bruise is gone and so is most of the tenderness. We always get banged up making molds. MDM it is so scary and so much fun to open the mold and to see if the work you did was good or not. It's a ways off. Chuck my photos don't even show half the work. So many parts generate hazards. We are constantly cleaning the table tops and the floor to keep dust from entering our home. Breathing it now would give us lung disease in the future. I'm going to post all the photos for the second mold right now. Here goes the rest of the moldy story. Using my favorite kitchen tool to make lots of clay snakes to plug cracks. To make a second mold you just remove one piece and re-pour it. Then you go on to the next piece one by one until every piece is new. Once again I'm prepping with the snakes. Poured the side and when the plaster was semi hard I carved in a 2 for second mold. Oh no! I forgot the mold soap. I kept my fingers crossed that there was enough left over from the first time that it wasn't going to all fuse and ruin the first mold. I was very lucky. A few of the round locks broke off. So I just carved them out. If I didn't then the mold piece we removed would not fit because its locks still existed. I kept putting the mold together until it fit. Now it was time to make another piece and to use mold soap every time. Now I filled any gaps that existed between the mold and the sculpt. You hope you don't have these because more clean up of poured mugs will be needed but if there is a gap you have to go with it the best you can. Ready to pour. Remember to pound the sides of the box to get out the bubbles. Poured and waiting to have a 2 carved into it.. The first piece on the first mold I forgot to make a hole. We had to drill it out. It's much easier to make the hole out of clay. make the size and shape you want and put it in place. Paint with mold soap twice and blot. To celebrate New Years day I decided to break my resolution to not fall and hurt myself. Here's Dan in the room with me as I waited for the doctor to come in. I had plugged in a shop vac to suck up extra soap bubbles. I plugged it in then I turned and tripped over the cord. I came down like a log and hit my forehead on the concrete floor. Here's lookin at ya! So with banged up ankles, knee and head we went back to work. After the plaster set I used a rasp to level all the sides so that when we turn it over it would sit flat. When the plaster has set remove the plug. Don't let it stay in there and dry because it will become hard and difficult to remove.
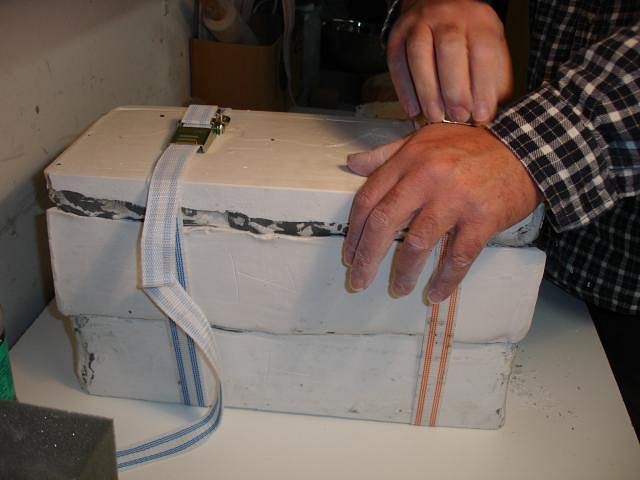
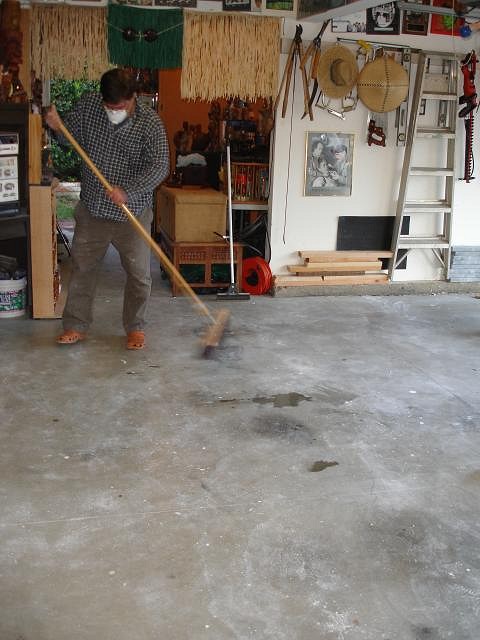
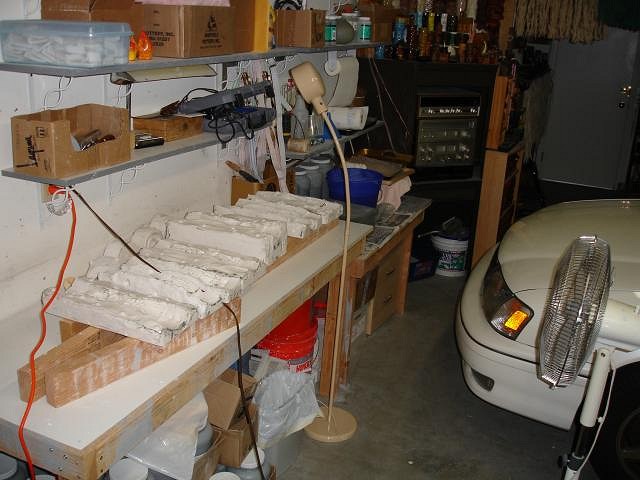
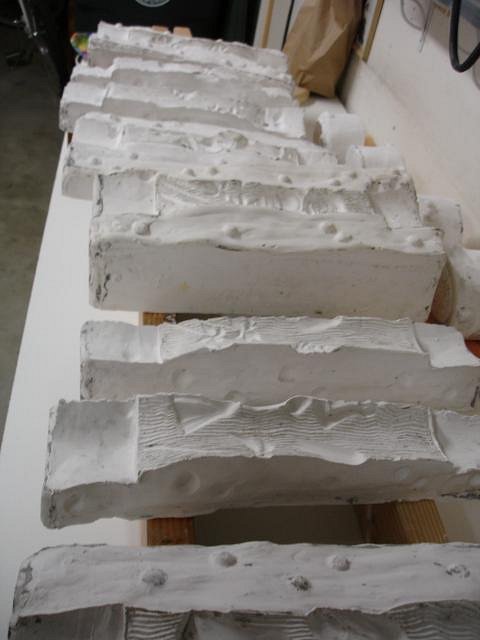
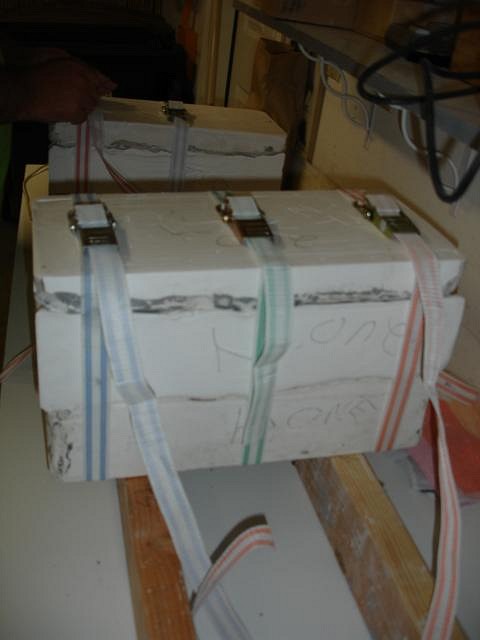
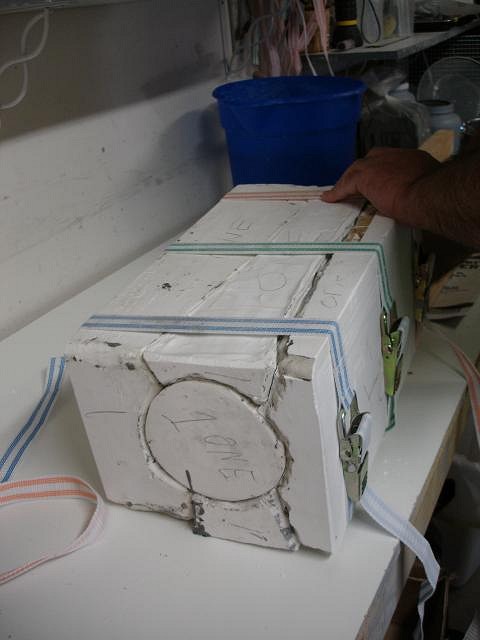
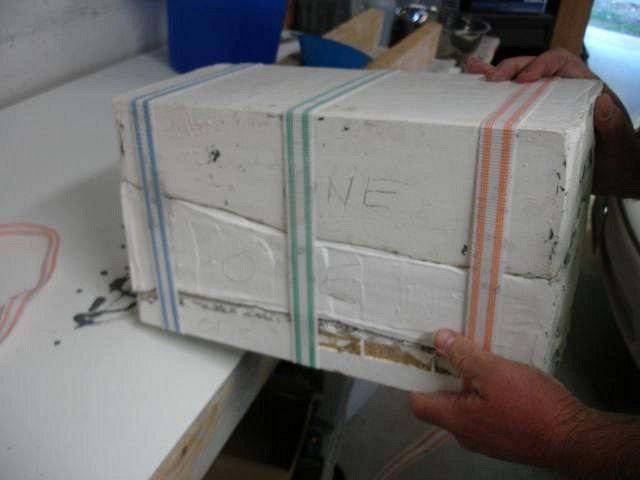
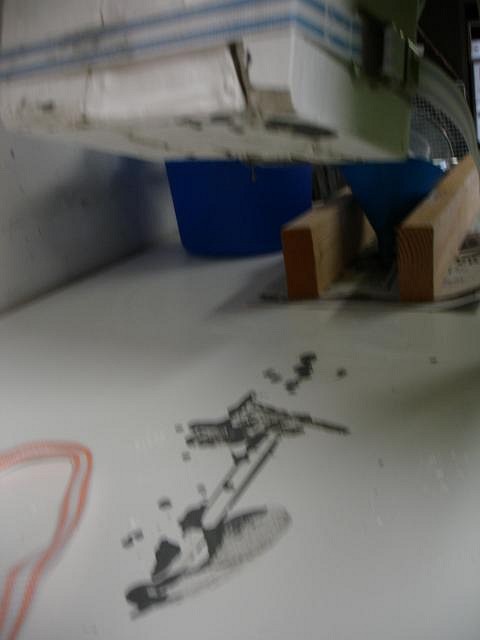
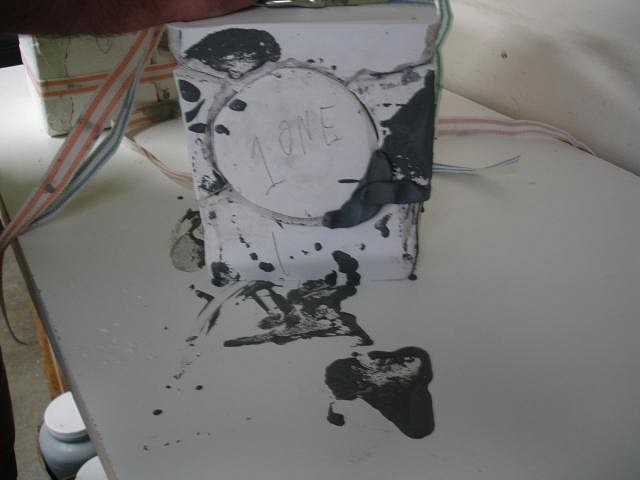
The last piece is poured. Hurray!! Using straps we checked to see if we could take the mold apart and put it back together again. Dan swept then mopped the floor while I went in to put my feet up. Later we took both molds apart and put each piece on top of boards and started a fan to blow on them. It takes a couple of weeks to dry them out. You must dry them completely the first time so that the plaster will retain its detail for your casts. After this it's ok to pour each day. Some artists who like their work thin will do more than one a day. I like thick mugs so I will do just one set per day. the mold needs to completely dry between casts so that it is able to pull water from the slip. So while these dry I'm going to start sculpting for new Resin Chunk Lamps for Roge. There's never a dull moment. I'll start posting those photos tomorrow. Thanks for sharing this part of the journey with me. The next leg of the trip will be when the molds are dry. Cheers, Wendy [ Edited by: danlovestikis 2012-01-06 16:34 ] |
|
M
MadDogMike
Posted
posted
on
Fri, Jan 6, 2012 8:40 AM
Hey Wendy. It's hard to judge scale in photographs, but did you make the top and bottom pieces of the mold thicker than 2 inches? |
|
D
danlovestikis
Posted
posted
on
Fri, Jan 6, 2012 9:46 AM
Hi Mike in the beginning we made too much or too little plaster. So on one mold we have a super thick piece. It wasn't intentional. I've had molds like that in the past. I worried that the thicker side would pull more water out of the slip and make that side of the mug thicker. It didn't happen. What is your experience? (: Wendy [ Edited by: danlovestikis 2012-01-06 09:49 ] |
|
M
MadDogMike
Posted
posted
on
Fri, Jan 6, 2012 7:32 PM
Here Wendy, looks like the top and bottom are thicker than 2 inches? I don't have enough experiance making molds to be of any help :) |
|
D
danlovestikis
Posted
posted
on
Fri, Jan 6, 2012 8:48 PM
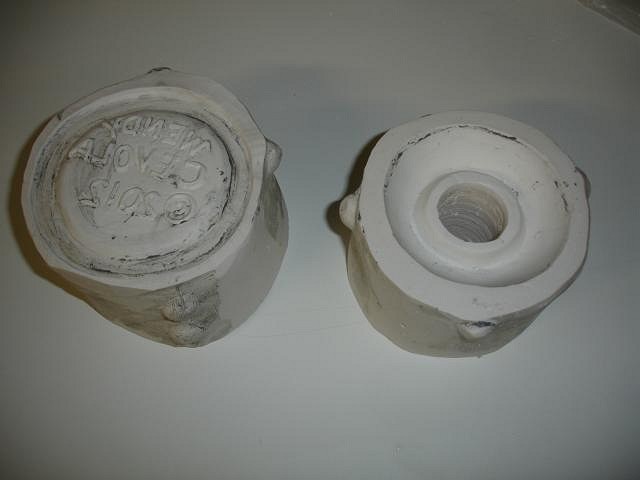
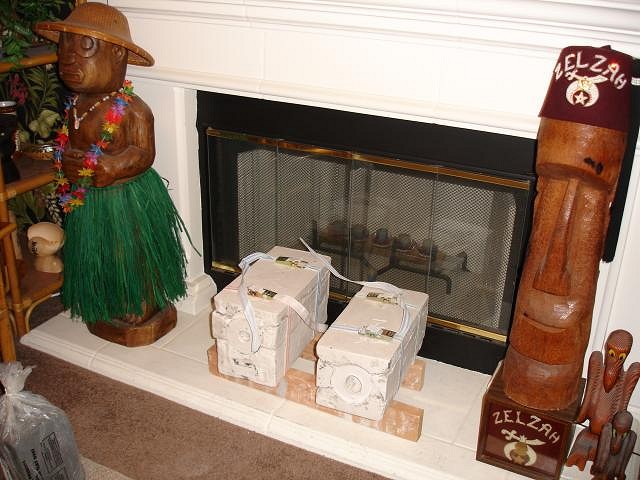
Hi Mike, two inches is ideal but I just don't worry too much. Many of my pieces look like one inch but they are triangular in shape and are 2 inches when close to the hole (sculpt). You can kind of see that on the top piece on the right. Look how thick the bottom piece is on the left. If we made them all that thick we would need a jack to lift them.
We were going to dry them like this in the house and then I thought maybe they would mold with the warmth so back out and apart with the fan. Cheers, Wendy |
|
D
danlovestikis
Posted
posted
on
Mon, Jan 9, 2012 7:38 AM
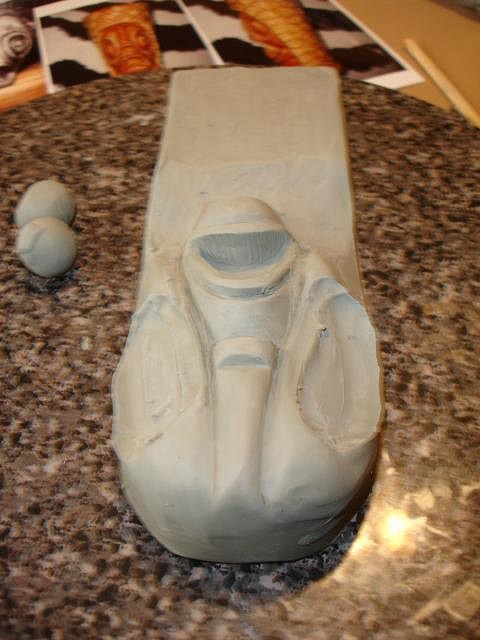
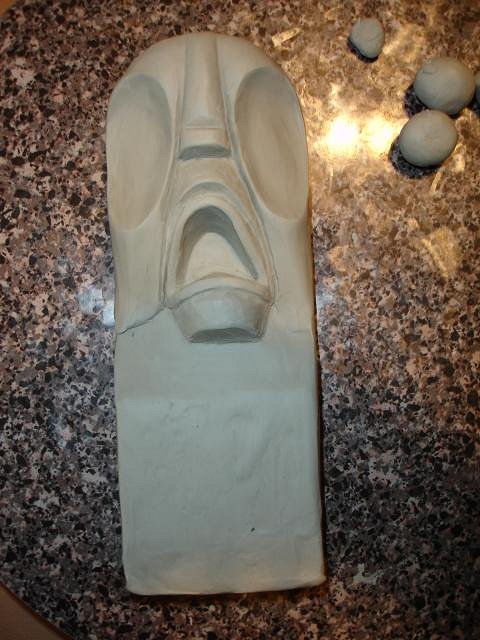
I've just begun to sculpt a Bumatay for casting for a new lamp by Roge. Copying an existing tiki with so many planes is a challenge. I'll go slow and see how I do. I'm following in the footsteps of Gecko and Tiki Al and so many others. Mine will have a flat back for the lamp and no pineapple around it because that's where the chunks will be. Cheers, Wendy
|
|
D
danlovestikis
Posted
posted
on
Tue, Jan 10, 2012 8:05 AM
http://www.specsspaces.com/Blogger/KastleWaserman/Article/DesignInspirationHowtoGoTiki.aspx Kastele Waserman is a blogger for a paint company. She has done three tiki blogs that are super fun and worth a look...Dan and I have a section at the end of the third blog. There are lots of photos and fun articles. We are thrilled to be a part of this tribute to tiki decor and art. Cheers, Wendy [ Edited by: danlovestikis 2012-01-10 08:12 ] [ Edited by: danlovestikis 2012-01-10 18:39 ] [ Edited by: danlovestikis 2012-01-10 18:39 ] |
|
M
MadDogMike
Posted
posted
on
Tue, Jan 10, 2012 11:24 AM
You gotta love a reporter who is willing to get down in the trenches and drink at the Rumpus Room! Wendy, your place looks fantastic as always - I got to make it up there on of these days to see it in person. My son is in Sebastapol right now, I should have hitched a ride with him :D The Bumatay is looking great, can't wait to see it in a lamp. Soon every tiki bar in the world with have a lamp with your tikis on it. |
|
E
ebtiki
Posted
posted
on
Tue, Jan 10, 2012 4:51 PM
I continue to be impressed with both your skills and your appetite for learning, Wendy! |
|
PG
Professor G
Posted
posted
on
Tue, Jan 10, 2012 5:58 PM
What a nice tribute to your domicile stylings, ma'am, and thanks for letting us get a glimpse of your home. Now I understand your drive to create new mugs: Chez Cevola contains at least one of every mug ever made. I think I saw the corner of the time machine you had Dan build to facilitate your mug procurement, although it may have been a shop-vac. |
|
D
danlovestikis
Posted
posted
on
Tue, Jan 10, 2012 8:26 PM
Hey Mike, you should have come with him. Sebastopol is only 2 hours from us. We could have had so much fun. ebtiki thanks for stopping by and for the kind words. Professor G, its fun to have people view Dan's collection, thanks for taking a look. I still have my bruised ankles and black eye from that shop vac. Horrors In The Garage a new series by danlovestikis. More photos tomorrow, Wendy |
|
D
danlovestikis
Posted
posted
on
Wed, Jan 11, 2012 8:27 AM
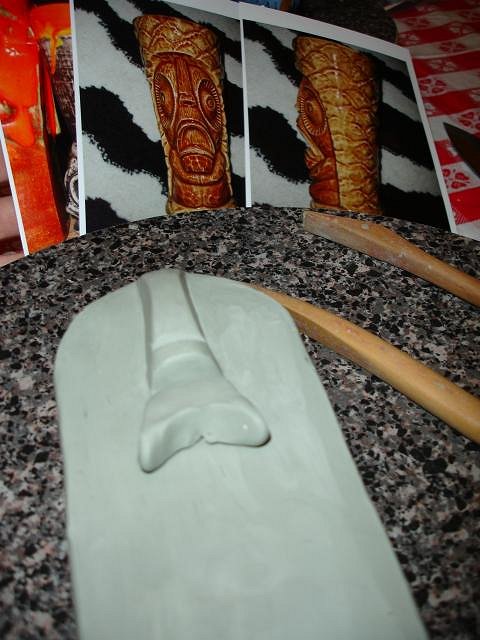
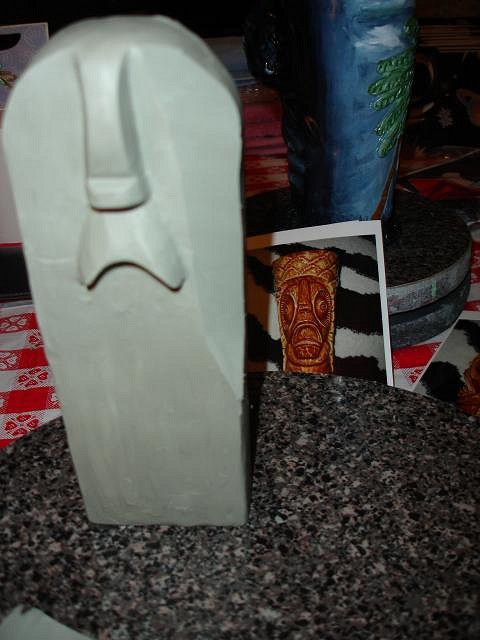
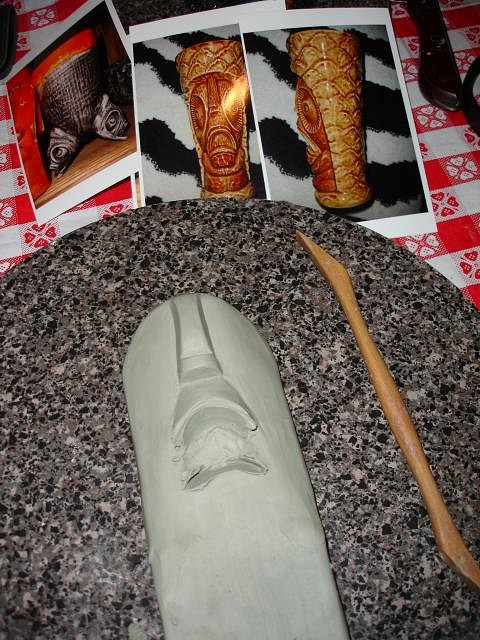
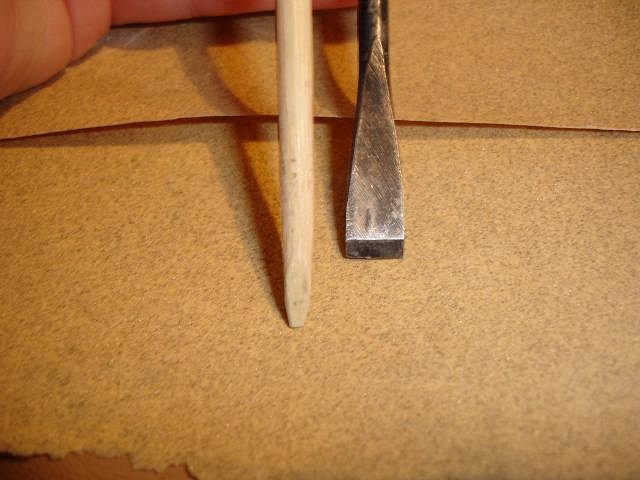
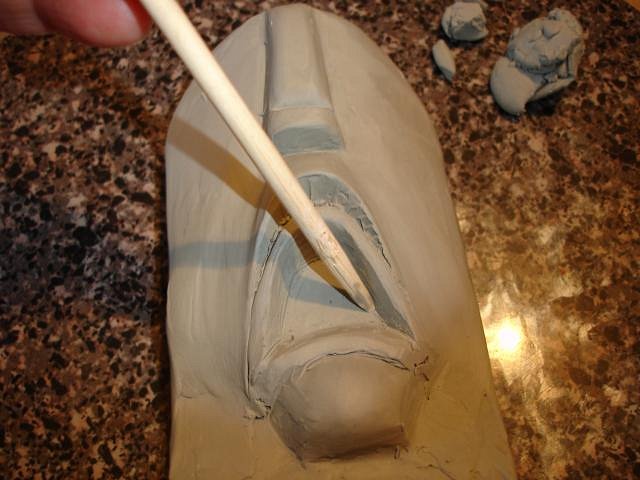
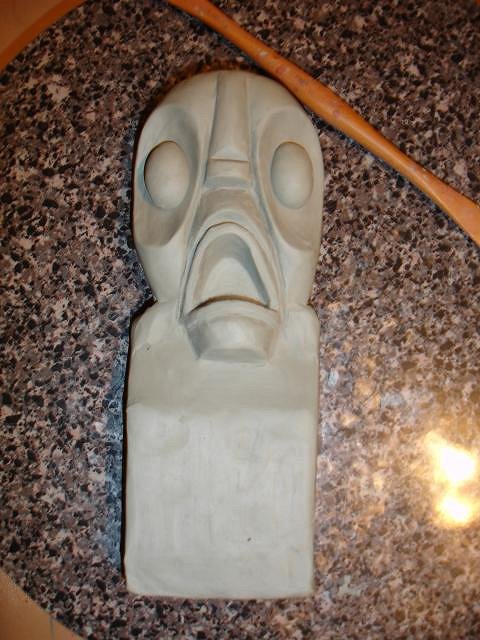
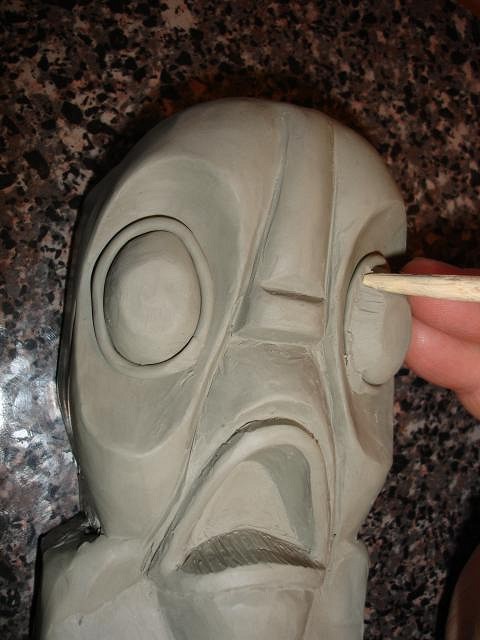
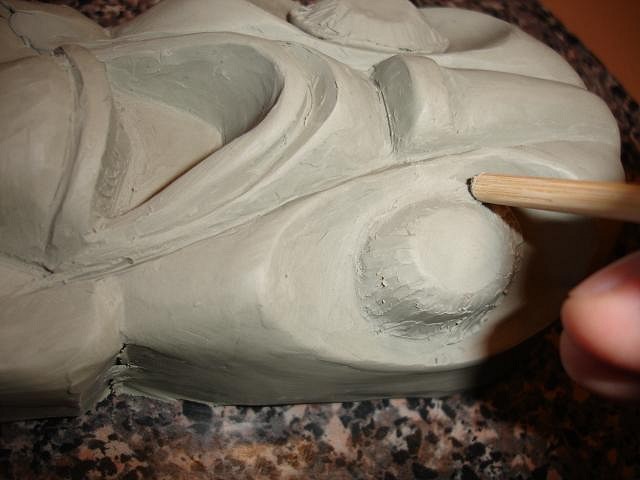
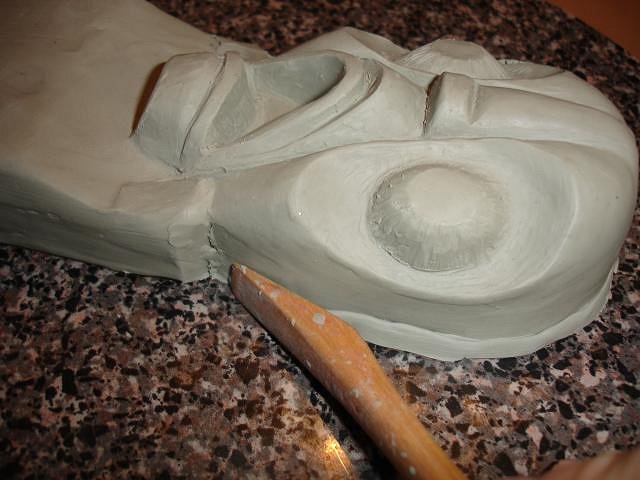
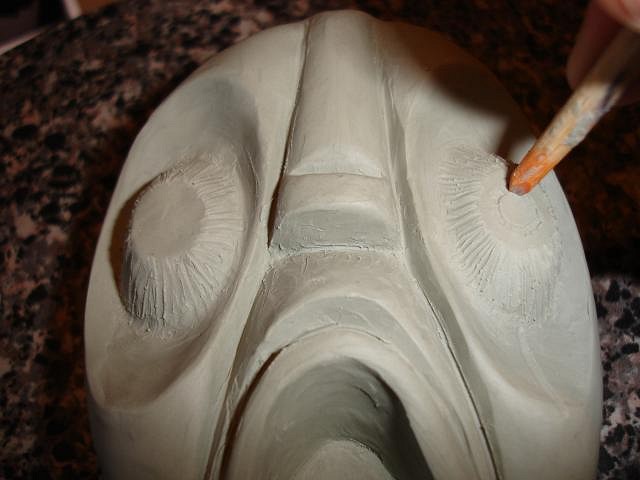
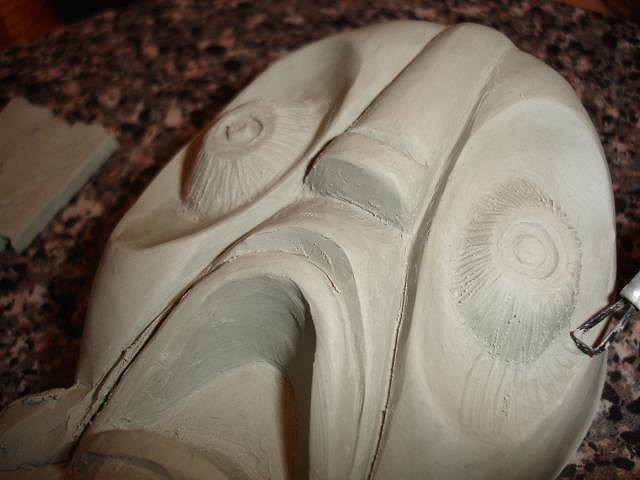
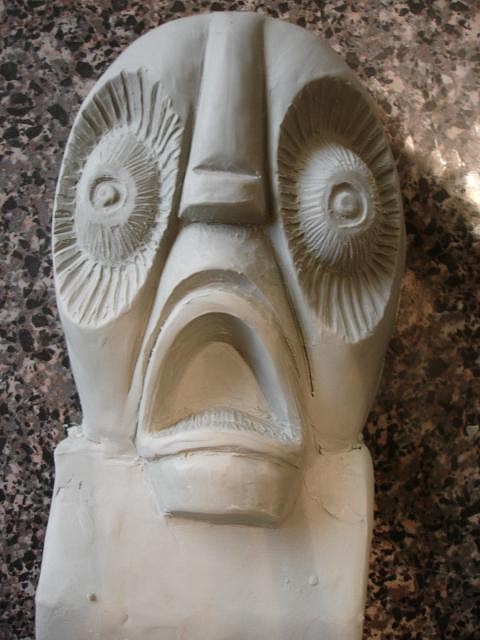
Step by step update on the Bumatay for the next Chunk Lamp. (: Wendy I always save and use chop sticks from restaurants.They are easy to carve into a tool to use with clay. They are strong and hold their shape. So I cut one by shaving off pieces. Next I sand it. The chop stick will fit into small places. I also use the opposite end to tamp down the clay and to smooth it in small places. I also sculpt upside down and from the sides. Next the eyes. Here's looking at you! The Zombie Torch molds are almost dry, its very hard to wait! |
|
R
rugbymatt
Posted
posted
on
Wed, Jan 11, 2012 12:33 PM
...and the hits just keep coming! Nice stuff Wendy. |
|
H

hang10tiki
Posted
posted
on
Wed, Jan 11, 2012 10:34 PM
lookin good.... |
|
D
danlovestikis
Posted
posted
on
Thu, Jan 12, 2012 8:58 AM
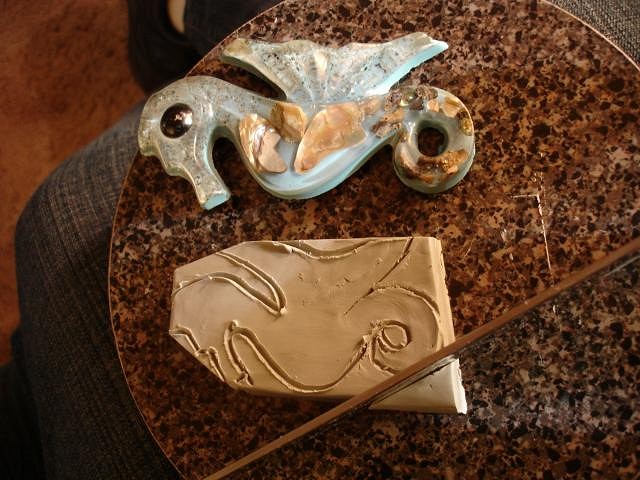
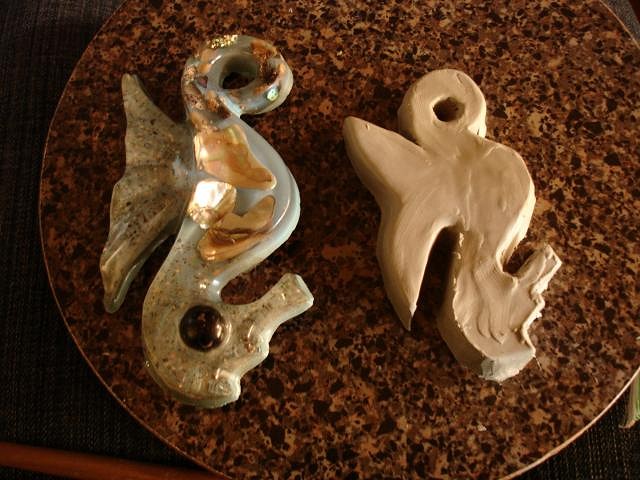
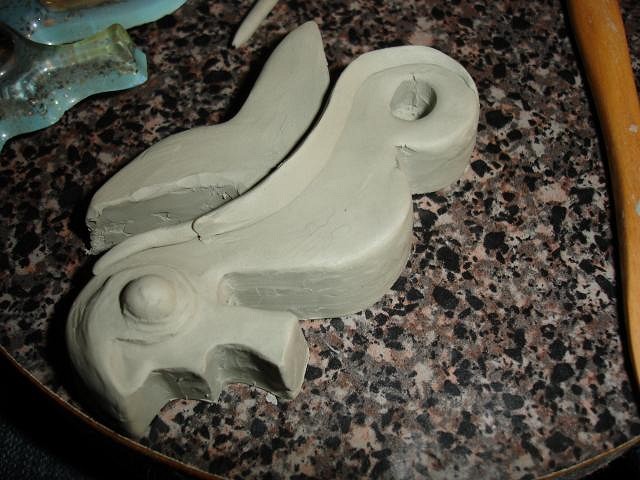
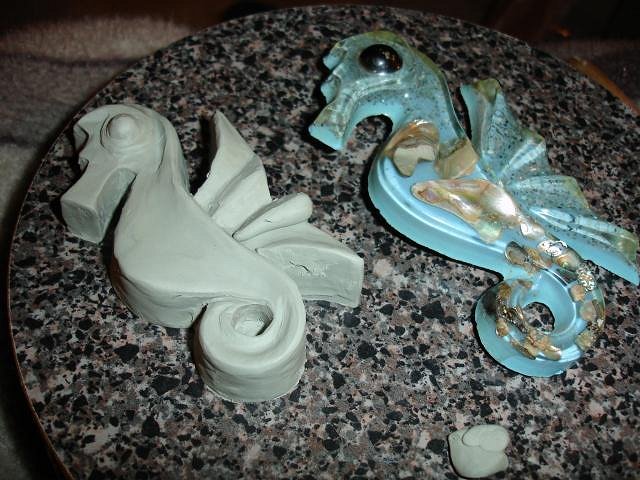
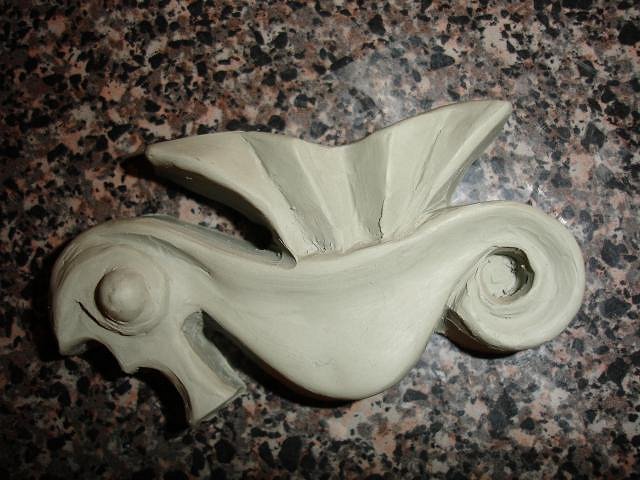
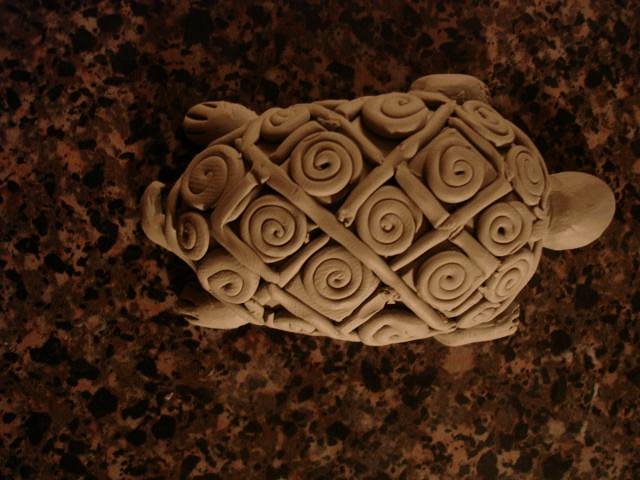
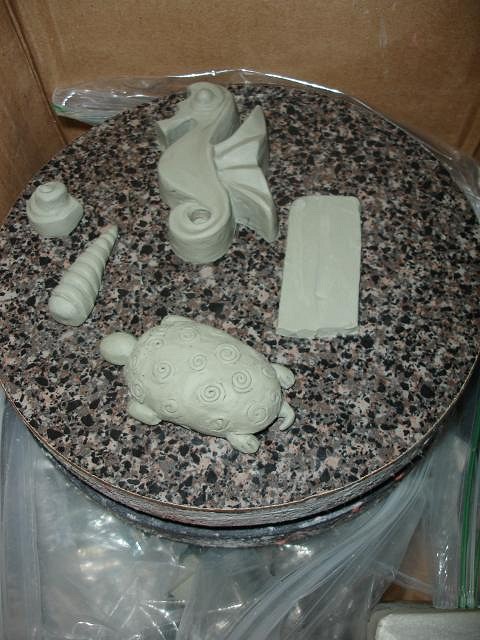
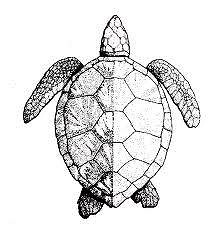
Thank you rugbymatt and hang10tiki We were with Dan's mom all day yesterday so I just worked a bit of clay for Roge's next lamp. The Bumatay will be the center piece and then there will be other sea creatures and shells. I used a 4.5 inch seahorse as a model for a 3.5 inch sculpt. Mom was so happy I was making something other than a tiki. She wishes I was making dolls which is what she collects. Sorry mom-in-law I love tikis! Sketched out the seahorse and cut off the excess with a huge knife. Smoothed it out with my fingers. Worked on the face and added the backbone. Added the detail to the back fin. This is as far as I could go, there is no light in the home. I'll finish it at ours. So I thought I knew what a turtle looked like because I had one when I was a child. So I played around with it the rest of the night. Today I went to google and scanned images under Hawaiian Turtle. Wow was I off. I didn't even have sea turtle in my mind at all. So I'll use this one as a base and fix it until it's like this drawing. I had fun anyway and mom loved it. There's always something fun to work on, cheers, Wendy |
|
M
MadDogMike
Posted
posted
on
Thu, Jan 12, 2012 8:42 PM
Did you have a hard time finding a seahorse for inspiration? :lol: (Wendy has a whole bathroom FULL of them!) Funny how the turtle wasn't the way you remembered it. |
|
T

TikiTomD
Posted
posted
on
Fri, Jan 13, 2012 5:43 AM
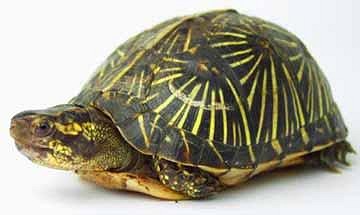
Wendy, Floyd here thinks your turtle was a fine likeness!
Floyd is a male Florida Box Turtle. For anyone who doubts that Floyd is a "he," just see Bill Tracey's web site. Floyd doesn't understand what you see in marine turtles, but he has a limited terrestrial background. -Tom |
|
D
danlovestikis
Posted
posted
on
Fri, Jan 13, 2012 8:27 AM
MadDogMike, TikiTomD (thank you for the photo) found the turtle of my childhood which I was thinking of when I did the first attempt. Because the next Chunk Lamp will be a sea life version with a Bumatay centerpiece I have to stick to an aquatic turtle. Sorry Floyd. Wendy Next Step by Steps I use a ring of clay to glue the eye mounds to the socket. I use a chop stick to smooth half the clay up and half down. A chop stick that has its large end sanded to a rounded shape is used to smooth the clay. During the sculpt I constantly check for undercuts. The body needed some additional clay to keep from being one. If I cast it like this then the cast wouldn't come out of the mold. I built strips of clay up the sides. Another square carved end of a chopstick makes the eye groove. Carving the eye groves was one of the fun parts. Once the body is done I'll do the surface texture. Cheers, Wendy |
|
B
bavtech
Posted
posted
on
Fri, Jan 13, 2012 9:12 PM
How do I get my name on the list for the next mug you make? |
|
D
danlovestikis
Posted
posted
on
Sat, Jan 14, 2012 8:31 AM
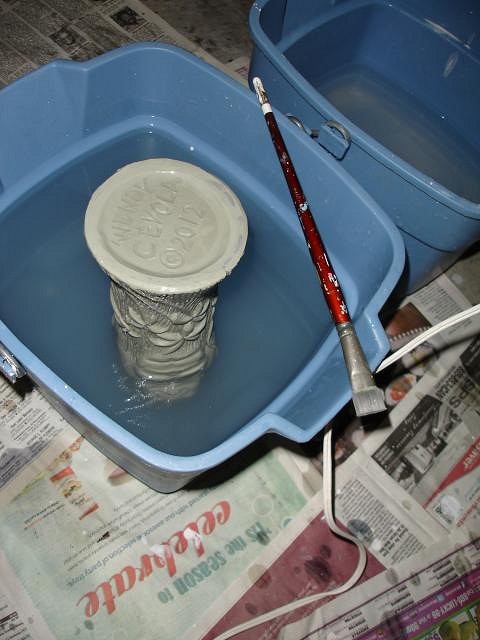
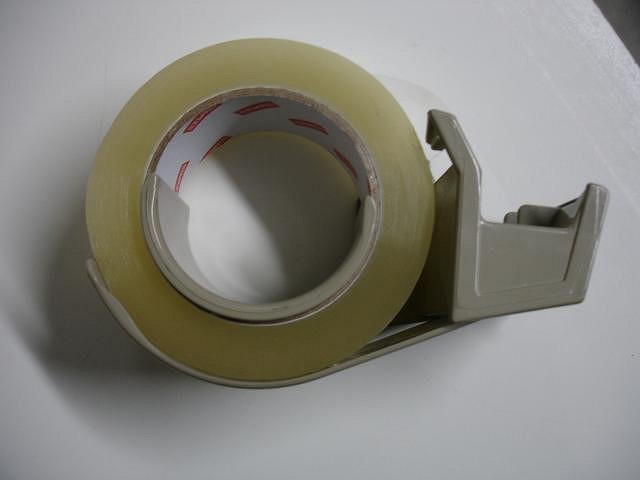
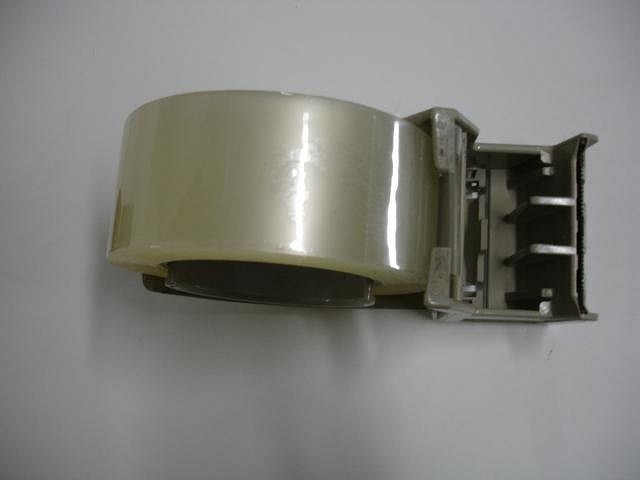
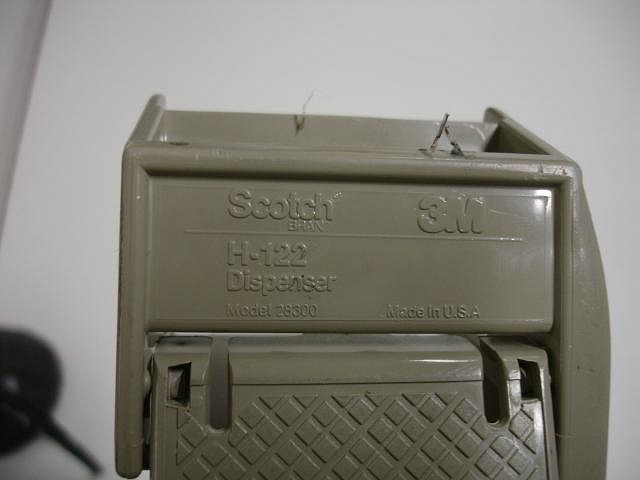
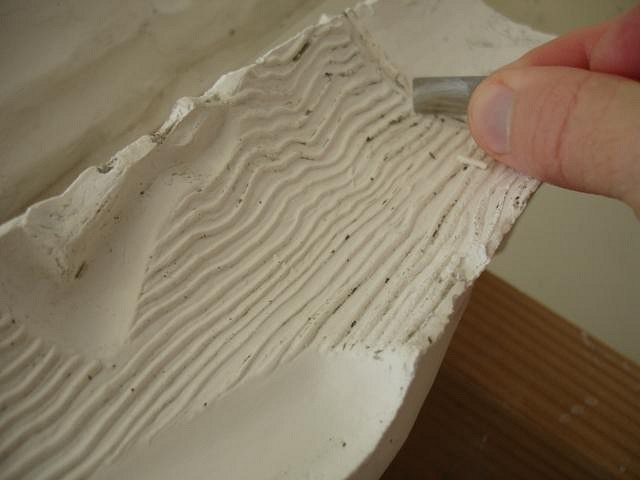
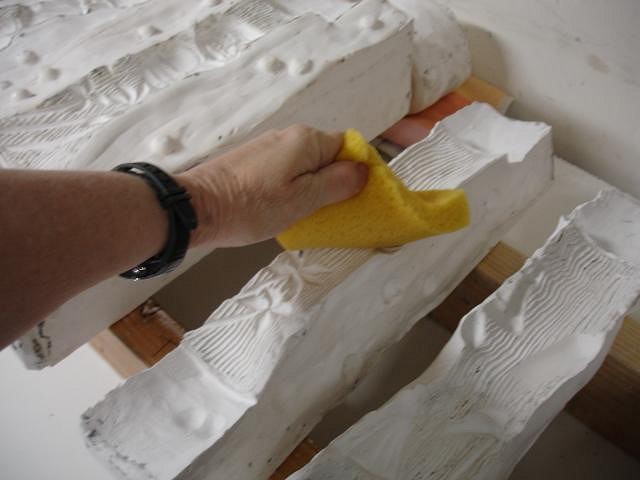
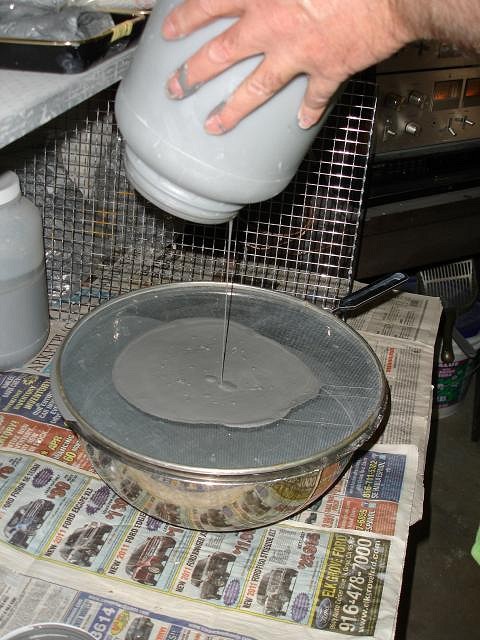
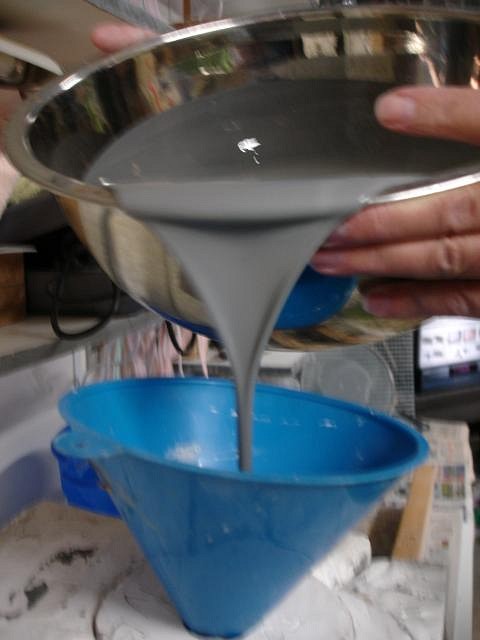
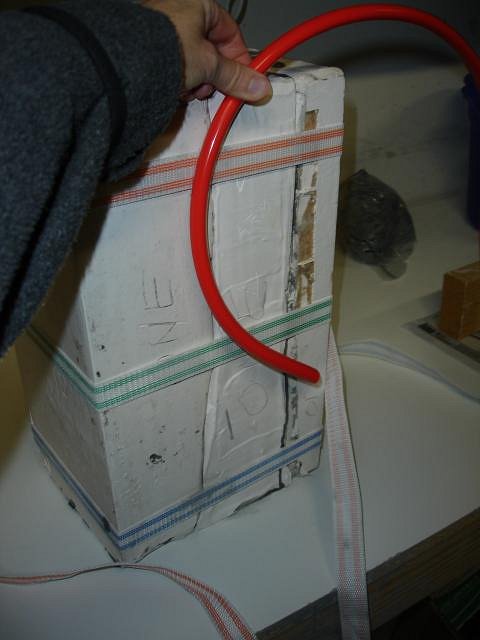
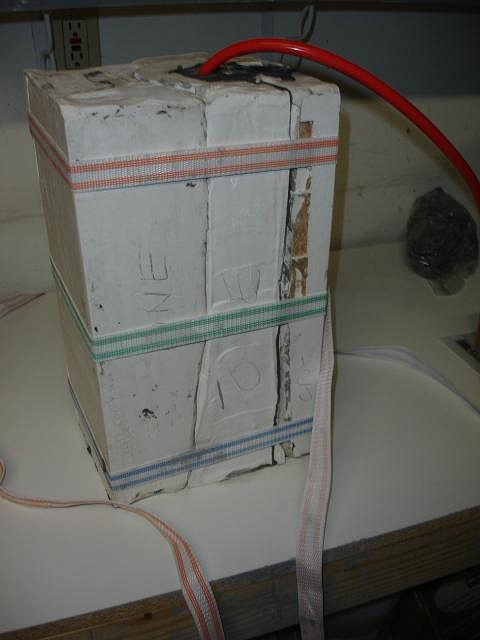
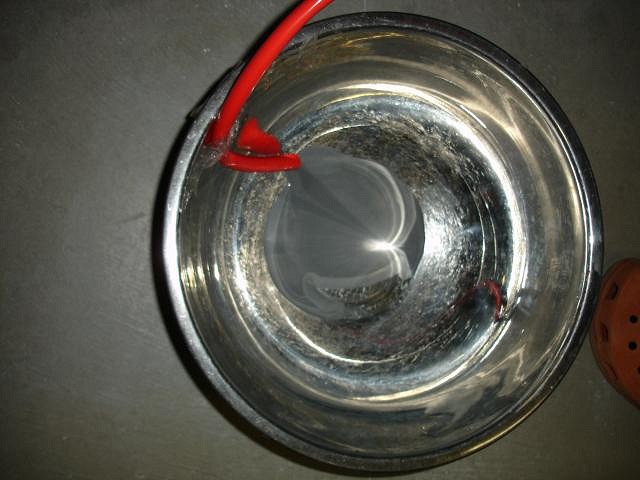
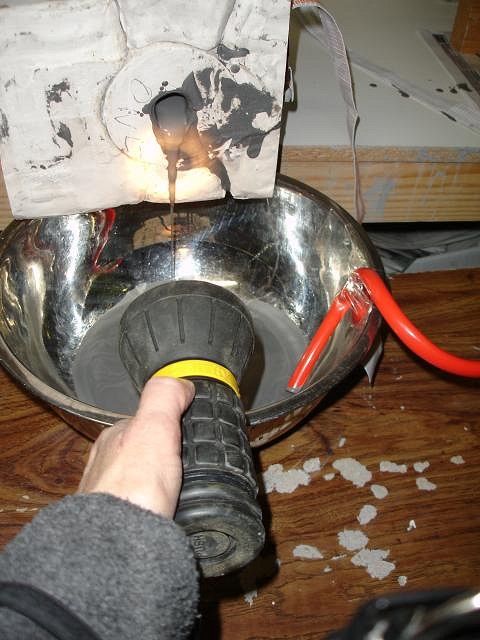
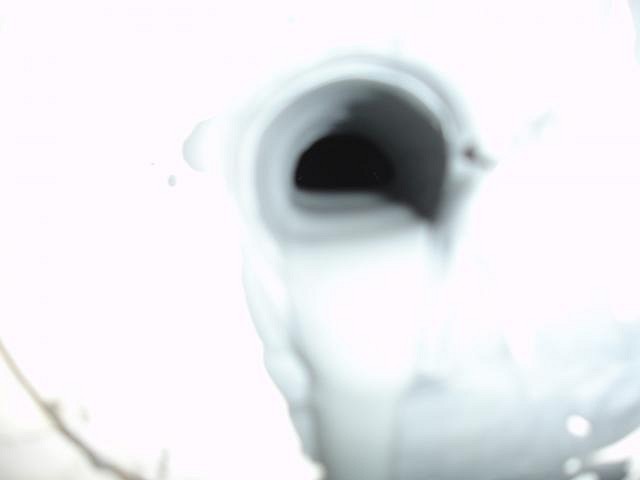
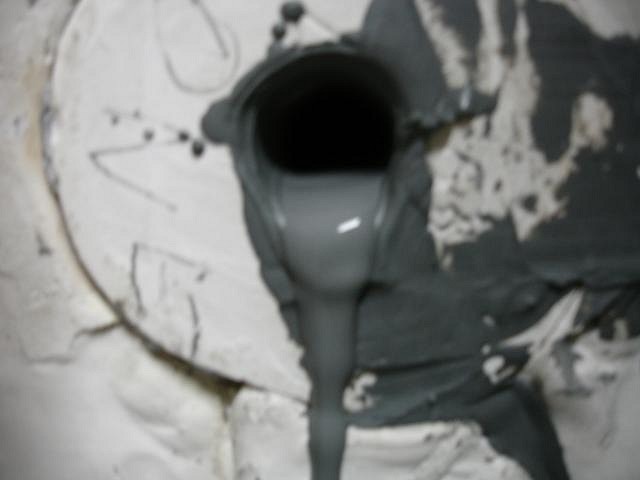
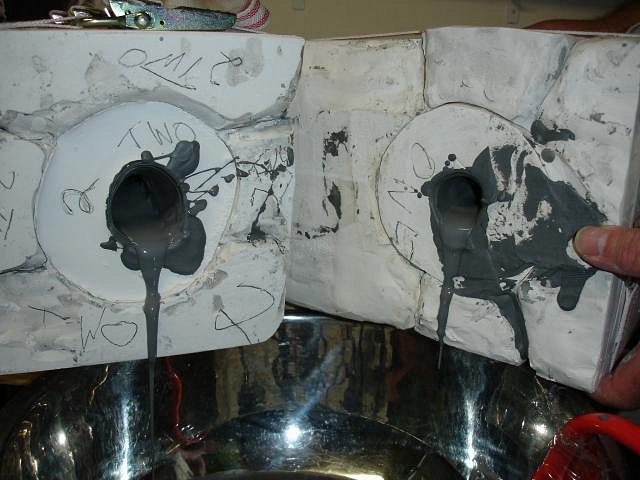
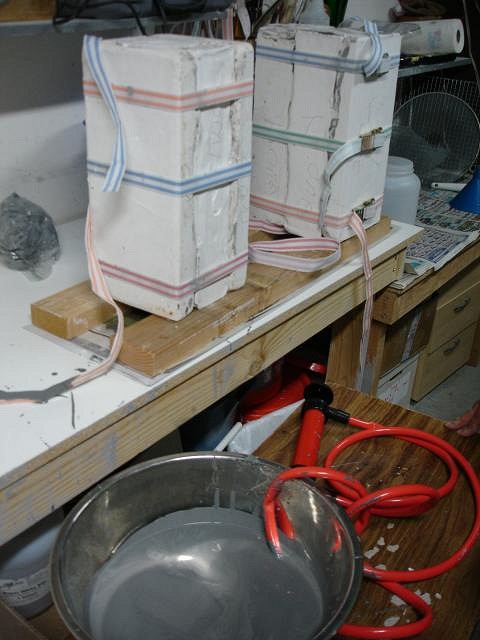
bavtech that's how just ask, I've added your name, thank you The first two mugs have been poured and here are all my step by steps with helpful hints. Tomorrow I should have photos of the outcome. Sold by ULINE this is the best tape dispenser I've ever found. I've tried those one handed metal versions from Staples and ended up swearing a lot. I just treated myself to one to keep with my mold equipment. I will be using it soon, photos to come. Finally dry it was time to get started. Then I remembered the most important step. The molds are new and still covered with mold soap. There are also a few defects that can also be removed prior to pouring. Now it is time to remove the slip and the opening is way too small to pour it out. On my last project I figured out that a gas siphon would work well with clay. We pump out the slip until most is gone but not all. We don't want to have the tube attach to the soft clay bottom. While I watch with a flash light Dan starts to lower the mold toward the bowl. This is my book for today. Please ignore any gramatical errors its time to go to work. Cheers, Wendy |
Pages: 1 2 3 4 5 6 7 8 9 10 11 12 13 14 15 16 17 18 19 20 21 22 23 24 25 26 27 28 29 30 31 32 33 34 35 36 37 38 39 40 41 42 43 44 45 46 47 48 49 50 51 52 53 54 55 56 57 58 59 60 61 62 63 64 65 66 67 68 69 70 71 72 73 74 75 76 77 78 79 80 81 82 83 84 85 86 87 88 89 90 91 92 93 94 95 96 97 98 99 100 101 102 103 104 105 106 107 108 109 110 111 112 113 114 115 116 117 118 119 120 121 122 123 124 125 126 127 128 129 130 131 132 133 134 135 136 137 138 139 140 141 142 143 144 145 146 147 148 149 150 151 152 153 154 155 156 157 158 159 160 161 162 163 164 165 166 167 168 169 170 171 172 173 174 175 176 177 178 179 180 181 182 183 184 185 186 187 188 189 190 191 192 193 194 195 196 197 198 199 200 201 202 203 204 205 206 207 208 209 210 211 212 213 214 215 216 217 218 219 220 221 222 223 224 225 226 227 228 229 230 231 232 233 11141 replies

